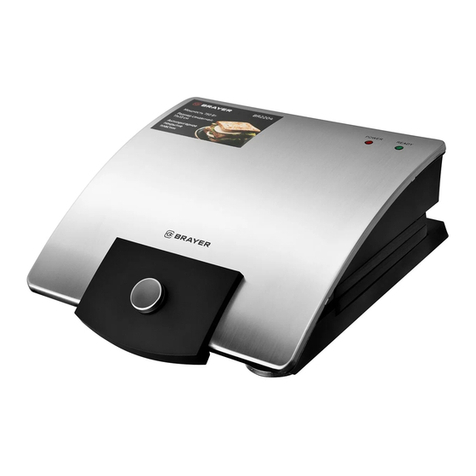
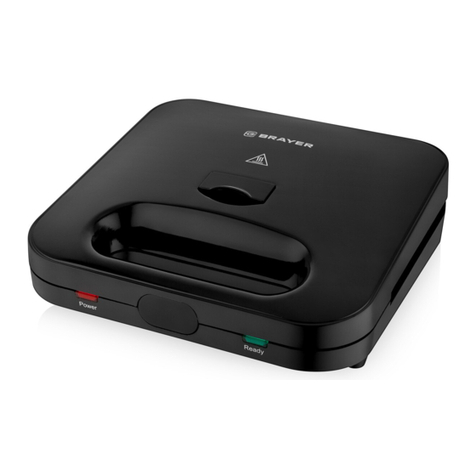
BRAYER BR2330 User manual

Instruction manual
Инструкция по эксплуатации
SANDWICH MAKER BR2330
СЭНДВИЧНИЦА BR2330
brayer.ru

СОДЕРЖАНИЕ
EN......................................................................................................................................3
DE....................................................................................................................................10
RU ...................................................................................................................................18
KZ....................................................................................................................................26

3
EN
NUT MAKER BR2330
Use the nut maker for baking nut waes.
DESCRIPTION
1. Handle
2. Frying plates lock
3. Light indicators
4. Lower frying plate locks
5. Upper frying plate locks
6.
EN
ATTENTION!
For additional protection it is reasonable to install a
residual current device (RCD) with nominal operation
current not exceeding 30 mA, to install RCD, contact
a specialist.
2
1
3
6
5
4

4
EN
SAFETY MEASURES AND OPERATION
RECOMMENDATIONS
Read the operation manual carefully before using
the nut maker; after reading, keep it for future
reference.
• Use the unit for its intended purpose only, as it is
stated in this manual.
• Mishandling the unit can lead to its breakage and
cause harm to the user or damage to the user’s
property, which is not covered by warranty.
• Make sure that the operating voltage of the unit
indicated on the label corresponds to your home
mains voltage.
• Connect the power plug to the socket with reliable
grounding contact. In case of short circuit the
grounding reduces the risk of electric shock.
• Contact an electrical technician, if you are not
sure that your sockets are installed properly and
grounded.
• Do not connect the unit to external timers or remote
control mains sockets.
•
w in.
•
and heat-resistant surface with free access to the
mains socket.
• Use the unit in a well-ventilated room, for normal
air circulation the free space around the nut maker
should be at least 10-15 cm on each side.
• During the nut maker operation do not allow the unit
body to come in contact with curtains, wall coverings,
• Do not use the unit outdoors.
• It is recommended not to use the unit during lightning
storms.
• Protect the nut maker from impacts, falling, vibrations
and other mechanical stress.
• Never leave the unit connected to the mains
unattended.
• Do not use the unit near heating appliances, heat
• Do not use the nut maker in places where aerosols
liquids.
• Do not use the nut maker in proximity to the kitchen
sink, in bathrooms, near swimming pools or other
• If the nut maker is dropped into water, unplug it
immediately, and only then you can take the unit
out of water. The unit body heats up strongly during
operation, be careful and do not touch its hot
surfaces.
• Do not let the power cord touch hot surfaces and
sharp edges of furniture.
• Do not move the nut maker when it is hot; wait until it
cools down completely.

5
EN
• Do not switch the nut maker on without products.
• Do not use the for nut maker cooking frozen food,
defrost frozen food before cooking.
• Beware of steam output from the gaps between the
operating surfaces, do not touch and do not place
open parts of your body near the gaps between the
frying plates.
• Take products out right after cooking; keeping
products in the operating unit for a long time can
cause their ignition.
• Never use metal objects to take the cooked food
out, as they can damage the non-stick coating of the
frying plates; use the kitchen tools intended for non-
stick surfaces.
• Unplug the unit after usage or before cleaning. When
unplugging the nut maker, hold the power plug and
carefully remove it from the mains socket, do not pull
the power cord, as this can lead to its damage and
cause a short circuit.
• Do not touch the unit body, the power cord and the
power plug with wet hands.
• For child safety reasons do not leave polyethylene
bags used as packaging unattended.
• Do not leave children unattended to prevent using
the unit as a toy.
• Do not allow children to touch the operating surface,
the unit body, the power cord or the power plug
during operation of the unit.
• Be especially careful if children or disabled persons
are near the operating unit.
• During the unit operation and breaks between
operation cycles, place the unit out of reach of
children.
• The unit is not intended for usage by physically or
mentally disabled persons (including children) or by
persons lacking experience or knowledge if they are
not under supervision of a person who is responsible
for their safety or if they are not instructed by this
person on the usage of the unit.
• From time to time check the power cord integrity.
• If the power cord is damaged, it should be replaced
by the manufacturer, a maintenance service or
• Do not repair the unit by yourself. Do not
disassemble the unit by yourself, if any malfunction
is detected, and after the unit was dropped, unplug it
and apply to the authorized service center.
• To avoid damages, transport the unit in the original
package.
• Keep the unit in a dry cool place out of reach of
children and disabled persons.
ATTENTION! Do not allow children to play with
Danger of
suocation!
• The unit is not intended for usage by children.
6
EN
THE UNIT IS INTENDED FOR HOUSEHOLD USE
ONLY, DO NOT USE THE UNIT FOR COMMERCIAL
OR LABORATORY PURPOSES.
BEFORE THE FIRST USE
After unit transportation or storage at negative
temperature, unpack it and wait for 3 hours before
using.
• Unpack the unit and remove all the packaging
materials.
• Keep the original package.
• Read the safety measures and operating
recommendations.
• Check the delivery set.
• Examine the unit for damages, in case of damage do
not plug it into the mains.
•
supply voltage of the unit correspond to the
the mains with 60 Hz frequency, it does not need any
additional settings.
• Clean the unit body surface and the frying plates (5)
with a soft, slightly damp cloth, and then wipe it dry.
•
heat-resistant surface with free access to the mains
socket.
• Use the unit in a well-ventilated room, for normal
air circulation the free space around the nut maker
should be at least 10-15 cm on each side.
• Take the handle (1), lift the lock (2) and open the nut
maker.
• Simultaneously press the locks (4) and remove the
in the similar manner by pressing the locks (5).
• Wash all the frying plates (6) with warm water and
neutral detergent, rinse them and wipe dry.
• Install the required frying plates (6), to do this insert
the upper part of the plate until the lock (4 and 5)
properly.
•
vegetable oil over the frying plates (6).
• Close the nut maker and insert the power cord plug
into the mains socket, the indicator (3) will light up
orange.
• When the indicator (3) lights up green, unplug the nut
maker and wait until it cools down completely.
• Take the handle (1), lift the lock (2) and open the
nut maker. Remove the remaining oil from the frying
plates (6) with a paper towel or a clean cloth.
Notes:
-
smoke or foreign odor may appear. It is normal
and not covered by warranty.

7
EN
- the foreign odor can change the taste of the
recommended to eat them.
BAKING NUT WAFFLES
• Make the batter.
• Install the nut maker correctly.
• Install the frying plates for making nut (6).
• Insert the power cord plug into the mains socket, the
indicators (3) will light up orange.
Notes:
- the indicator (3) light up orange will be glowing all
the time while the unit is plugged in;
- the indicator (3) light up green will periodically
operation indicating the thermostat operation.
• When the indicator (3) lights up green, take the
handle (1), lift the lock (2), open the nut maker and
pour some batter on the lower frying plate (6).
Note: - choose the amount of batter experimentally. Do
sockets in the lower form (6). In this case remove the
• Press the frying plates (6) together until the lock (2)
clicking.
•
time depends on the dough recipe, select it
experimentally). During baking you can open the nut
If they are not ready, close the unit and continue
baking.
•
the handle (1), lift the lock (2) and remove the nut
metal objects, such as knives, forks etc., to avoid
damaging the coating of the frying plates (6).
•
next portion of dough on the frying plates (6).
ATTENTION!
Beware of steam output from the gaps between
the operating surfaces (6), do not touch and do
not place open parts of your body near the gaps
between the frying plates. Do not touch the unit
body during its operation, to open the wae
maker take the handle (1).
•
and leave it open to cool down.
• When the nut maker has completely cooled down,
wipe the frying plates (6) with a damp cloth, and
then wipe dry.
EXEMPLARY RECIPESSWEET WAFFLES
CLASSIC NUT WAFFLES
Ingredients:

8
EN
CLEANING AND CARE
• Before cleaning unplug the unit and leave it open to
cool down.
• Clean the frying plates (6) from the remaining dough,
wipe the frying plates (6) with a damp cloth. Oil the
burnt dough and leave for 5 minutes, then clean it
with a damp cloth.
• Regularly remove and wash all the frying plates (6)
with warm water and neutral detergent, rinse them
and wipe dry.
• Wipe the nut maker body with a slightly damp cloth,
and then wipe it dry.
• Do not use metal brushes, abrasives, or solvents to
clean the nut maker, as they may damage the frying
plates (5) or the outer surface of the nut maker body.
Attention! To avoid electric shock do not immerse
the nut maker, the power cord or the plug into
water or other liquids.
STORAGE
• Clean the nut maker before taking it away for long
storage.
• Keep the unit closed if you are not using it.
• Keep the unit in a dry cool place out of reach of
children and disabled persons.
DELIVERY SET
• 3 eggs
• 200 g butter of room temperature
• 150 g granulated sugar
•
• pinch salt
• 0,5 tea spoon leaven
•
COOKIE DOUGH NUT WAFFLES
Ingredients:
•
• 200 g butter of room temperature
• 100 g granulated sugar
• 1 egg
• pinch salt
•
- Whisk the butter to whiteness.
- Add granulated sugar and whisk again.
- Add other ingredients and stir carefully.
edges with a sharp knife.
fridge for some time.

9
EN
TECHNICAL SPECIFICATIONS
•
•
RECYCLING
To prevent possible damage to the
environment or harm to the health of people
by uncontrolled waste disposal, after
expiration of the service life of the unit or
the batteries (if included), do not discard
them with usual household waste, take the
unit and the batteries to specialized stations for further
recycling.
The waste generated during the disposal of products
is subject to mandatory collection and consequent
disposal in the prescribed manner.
For further information about recycling of this product
apply to a local municipal administration, a household
waste disposal service or to the shop where you
purchased this product.
The manufacturer reserves the right to change the
general operation principles of the unit, without prior
notice.
The unit operating life is 3 years
number.
In case of any malfunctions, it is necessary to apply
promptly to the authorized service center.

10
DE
NUSSBÄCKER BR2330
Verwenden Sie den Nussbäcker, um Zaubernüsse
zu backen.
BESCHREIBUNG
1.
2.
3. Kontrolleuchten
4.
5.
6.
ACHTUNG!
FI-Schalter mit Nennstrom maximal bis 30 mA im
Stromversorgungskreis aufzustellen; wenden Sie sich
DE
2
1
3
6
5
4

11
DE
SICHERHEITSHINWEISE UND
GEBRAUCHSANLEITUNG
Bevor Sie das Nussbäcker benutzen, lesen Sie
zuerst die Bedienungsanleitung aufmerksam durch
und bewahren Sie sie zum späteren Gebrauch auf.
•
laut dieser Bedienungsanleitung.
•
•
Bezeichnungszettel angegebene Betriebsspannung
• Stecken Sie den Netzstecker in eine Steckdose
einem Kurzschluss verringert die Erdung das
Stromschlagrisiko.
• Wenden Sie sich an einen Elektriker, wenn Sie sich
nicht sicher sind, ob Ihre Steckdosen richtig installiert
und geerdet sind.
•
Brandrisiko zu vermeiden.
•
Schaltuhren oder elektrischen Steckdosen mit
Fernbedienung an.
•
auf einer ebenen, trockenen, standfesten und
Zugang zur Steckdose auf.
•
mindestens 10-15 cm betragen.
•
kommen.
•
benutzen.
•
benutzen.
•
Einwirkungen.
• Lassen Sie das ans Stromnetz angeschlossene
•
nicht.
•
•

12
DE
•
ziehen Sie den Netzstecker aus der Steckdose
dem Wasser heraus. Wenden Sie sich an einen
zu lassen.
•
•
•
nicht ein.
•
•
• Nehmen Lebensmittel nach der Zubereitung sofort
• Es ist verboten, die zubereiteten Lebensmittel mit
herauszunehmen; verwenden Sie das
•
der Reinigung vom Stromnetz unbedingt ab. Wenn
halten Sie den Netzstecker fest und ziehen Sie ihn
aus der Steckdose vorsichtig heraus; ziehen Sie das
•
•
nie ohne Aufsicht.
ACHTUNG!
Erstickungsgefahr!
•
•
Spielzeug nicht benutzen.
•
•
aufhalten.
•

13
DE
•
oder Personen ohne ausreichende Erfahrung
und Kenntnisse nicht geeignet, wenn sie sich
bekommen haben.
•
Zeit zu Zeit.
•
zu vermeiden.
•
Sturzfall, trennen Sie es vom Stromnetz ab und
wenden Sie sich an einen Kundendienst.
•
•
DAS GERÄT IST NUR FÜR DEN GEBRAUCH IM
HAUSHALT GEEIGNET, ES IST VERBOTEN, DAS
GERÄT ZU HANDELS- ODER LABORZWECKEN ZU
BENUTZEN.
VOR DER ERSTEN NUTZUNG
Packen Sie das Gerät aus und warten Sie 3 Stunden,
bevor Sie es bei einer negativen Temperatur
transportieren oder bewahren.
•
•
•
•
•
nicht an.
•
•
ab, danach wischen Sie sie trocknen.
•
einer ebenen, trockenen, standfesten und
Zugang zu einer Steckdose.
•

14
DE
jeder Seite betragen.
•
auf.
•
•
trocken Sie sie ab.
•
•
einzuschmieren.
•
Netzstecker in eine Steckdose ein, dabei leuchtet die
Kontrolleuchte (3) orange.
•
Sie den Netzstecker aus der Steckdose heraus
•
einem sauberen Tuch.
Anmerkungen:
-
ist eine geringe Menge Rauch und Fremdgeruch
- ein Fremdgeruch kann den Geschmack der ersten
die ersten zubereiteten Produkte zu keinem
BACKEN VON ZAUBERNÜSSEN
• Bereiten Sie den Teig vor.
•
•
• Stecken Sie den Netzstecker in die Steckdose ein,
dabei leuchten die Anzeigen (3) orange.
Anmerkungen:
- die Leuchte (3) orange leuchtet konstant, solang
der Netzstecker in der Steckdose bleibt;
-
signalisiert den Thermostatbetrieb.
•

15
DE
Anmerkung: - Es ist empfohlen, die Teigmenge
in der unteren Form (6) aus; in diesem Fall entfernen
•
• Backen Zaubernussen 3-5 Minuten (die
Sie weiter.
•
•
auf.
•
•
danach trocken Sie sie ab.
BEISPIELREZEPTE
Klassische «Nüsse»
• 3 Eier
• 200 g Butter von Raumtemperatur
• 150 g Sandzucker
• 3 Tassen Weizenmehl (Glasvolumen 200 ml)
• eine Messerspitze Salz
Zaubernüsse aus Sandmasse
ACHTUNG! Hüten Sie sich vor dem Dampfaustritt
aus dem Zwischenraum der Arbeitsächen
(6), halten Sie Ihre Hände und andere oene
Körperteile vom Arbeitsächenzwischenraum
fern. Berühren Sie das Gerätegehäuse während
des Betriebs nicht, fassen Sie den Gri (1) an, um
das Zaubernussen aufzumachen.

16
DE
• 300 g Weizenmehl
• 200 g Butter von Raumtemperatur
• 100 g Sandzucker
• 1 Ei
• eine Messerspitze Salz
einem scharfen Messer abschneiden.
stellen.
REINIGUNG UND PFLEGE
• Ziehen Sie den Netzstecker aus der Steckdose vor
•
feuchten Tuch ab. Den verbrannten Teig schmieren
nach 5 Minuten mit einem feuchten Tuch.
•
•
leicht angefeuchteten Tuch, danach wischen Sie es
trocken.
•
AUFBEWAHRUNG
•
•
geschlossen.
•
LIEFERUMFANG
Achtung! Tauchen Sie das Nussbäcker, das
Netzkabel und den Netzstecker in Wasser oder
jegliche andere Flüssigkeiten nicht ein, um einen
Stromschlag zu vermeiden.

17
DE
TECHNISCHE EIGENSCHAFTEN
•
•
ENTSORGUNG
oder die menschliche Gesundheit durch
unkontrollierte Abfallentsorgung zu
und die Batterien (falls mitgeliefert)
nach Beendigung ihrer Nutzungsdauer
Die bei der Entsorgung der Erzeugnisse entstehenden
Mehrere Informationen zur Entsorgung dieses Produkts
erhalten Sie bei Ihrer lokalen Stadtverwaltung, einem
dieses Produkt gekauft haben.
Design, die Konstruktion und die das gemeine
Die Gerätenutzungsdauer beträgt 3 Jahre
Das Herstellungsdatum ist in der Fabrikationsnummer
angegeben.
einen autorisierten Kundendienst.

18
RU
ОРЕШНИЦА BR2330
Используйте орешницу для выпечки пирожных
«орешек».
ОПИСАНИЕ
1.
2.
3.
4.
5.
6.
ВНИМАНИЕ!
-
RU
2
1
3
6
5
4

19
RU
МЕРЫ БЕЗОПАСНОСТИ И РЕКОМЕНДА-
ЦИИ ПО ЭКСПЛУАТАЦИИ
Перед использованием орешницы внимательно
ознакомьтесь с руководством по эксплуатации,
после прочтения сохраните его для использова-
ния в будущем.
•
•
•
•
•
•
•
-
•
-
• -
-
• -
-
-
•
•
• -
•
•
•

20
RU
•
•
• -
•
• -
• -
-
•
-
• -
•
-
•
-
•
• -
ВНИМАНИЕ! -
Опасность удушья!
•
•
•
-
Table of contents
Languages:
Other BRAYER Kitchen Appliance manuals

BRAYER
BRAYER BR2400 User manual

BRAYER
BRAYER BR2200 User manual

BRAYER
BRAYER BR2404 User manual

BRAYER
BRAYER BR1090 User manual

BRAYER
BRAYER BR1904 User manual

BRAYER
BRAYER BR1092 User manual

BRAYER
BRAYER BR2402 User manual

BRAYER
BRAYER BR1095 User manual

BRAYER
BRAYER BR1098 User manual

BRAYER
BRAYER BR1906 User manual

BRAYER
BRAYER BR1097 User manual

BRAYER
BRAYER BR1903 User manual

BRAYER
BRAYER BR1902 User manual

BRAYER
BRAYER BR1093RD User manual

BRAYER
BRAYER BR2204 User manual

BRAYER
BRAYER BR2202 User manual

BRAYER
BRAYER BR2401 User manual

BRAYER
BRAYER BR1905 User manual

BRAYER
BRAYER BR1091 User manual

BRAYER
BRAYER BR1901 User manual