9
indicator (15) will light up, the digital symbols (26) on
the display (16) will show maintenance temperature
«85». The water temperature 85°С is set by default.
Notes: the thermopxnd boiling of water, the time
depends on the place where the thermopot is used,
relative to the height above sea level.
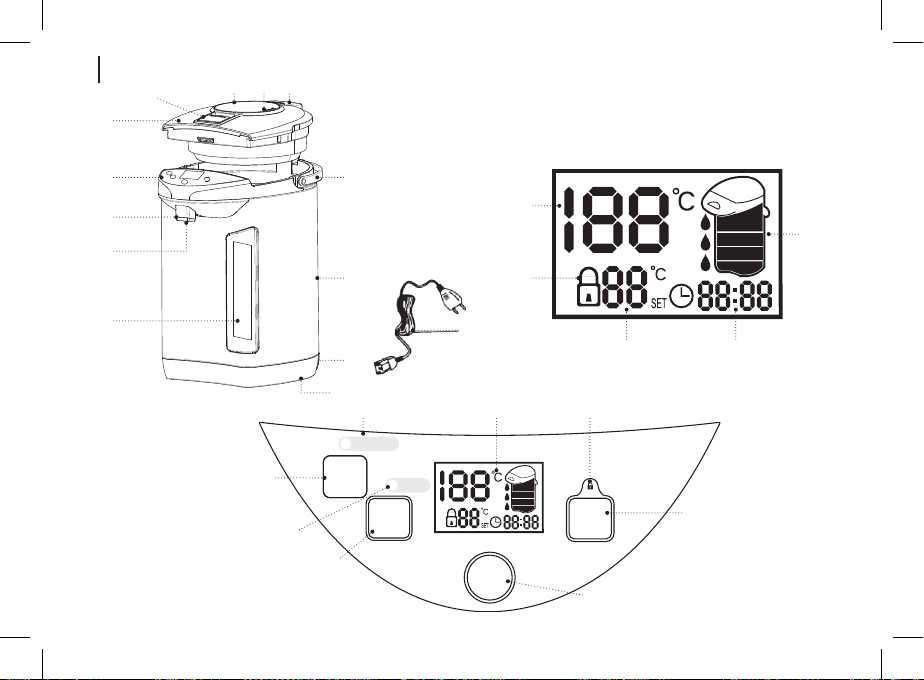
• To avoid burns by hot steam, do not bend over the
steam release openings (9) in the thermopot lid (5).
Do not block the steam release openings (9) with any
objects.
• Drain the water after the rst boiling. Hot water
resulting from the rst boiling is not recommended to
consume, you may use it for domestic needs.
ATTENTION! Be careful when pouring out water to
avoid burns by hot water.
• Unblock the water pump by pressing and holding
the «Lock» button (18) for 5 seconds, the indicator
(17) will go out and the symbol (27) will go out on the
display (16).
• To drain the water you can do the following:
First option: place a suitable bowl, for instance, a cup
under the spout for pouring water (3) and press the
water (2) dispense button with a rim of the cup (pic. 3).
Second option: place a suitable dish under the water
spout (3), press and hold the water supply button (19)
«Water supply», after lling the cup, release the button
(19) (pic. 4).
Option 3: set the manual pump lock (8) to the position
«» and press on the manual pump (7). After using the
manual pump (7) lock it by setting the lock (8) to the
position « ».
Notes:
- water is supplied only when the indicator (17) is
o, if you have pressed the «Lock» button (18)
and have not performed any actions, the indicator
(17) will light up after 10 seconds;
- if you haven’t used the thermopot for a long time,
the water dispense may malfunction. In this case it
is recommended to open and close the lid (5) and
to switch the water dispense on again.
• To switch the thermopot o disconnect the power
cord (14) plug from the mains socket.
• Open the thermopot lid (5) and wait until it cools
down completely.
• Always drain the remaining water from the thermopot
ask, to do this remove the lid (5).
• Before removing the lid (5) slightly open it at the
angle of approximately 45°, and pull the lid (5)
towards the control panel (4).
• Carefully tilt the thermopot to drain the remaining
water.
• Install the lid (5) to its place; to do this, set the lid
(5) at the angle of approximately 45° and insert
the lid (5) to its installation place; before using the
thermopot make sure that the lid (5) is xed properly.