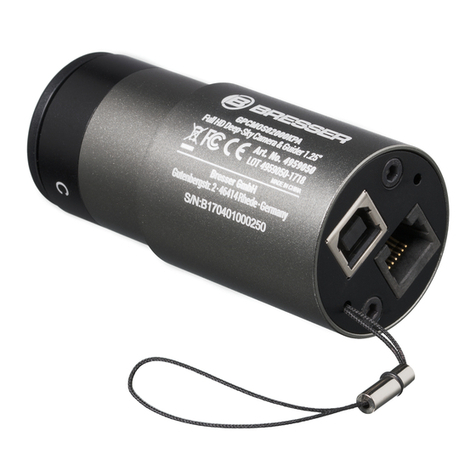
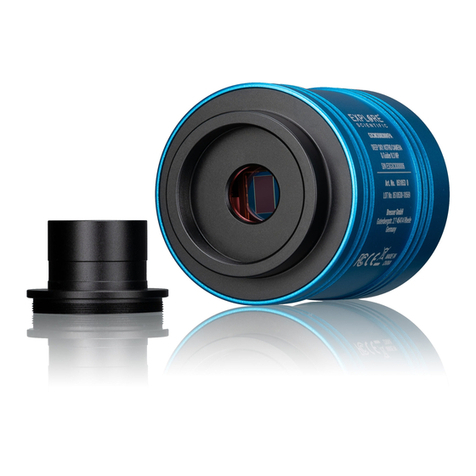
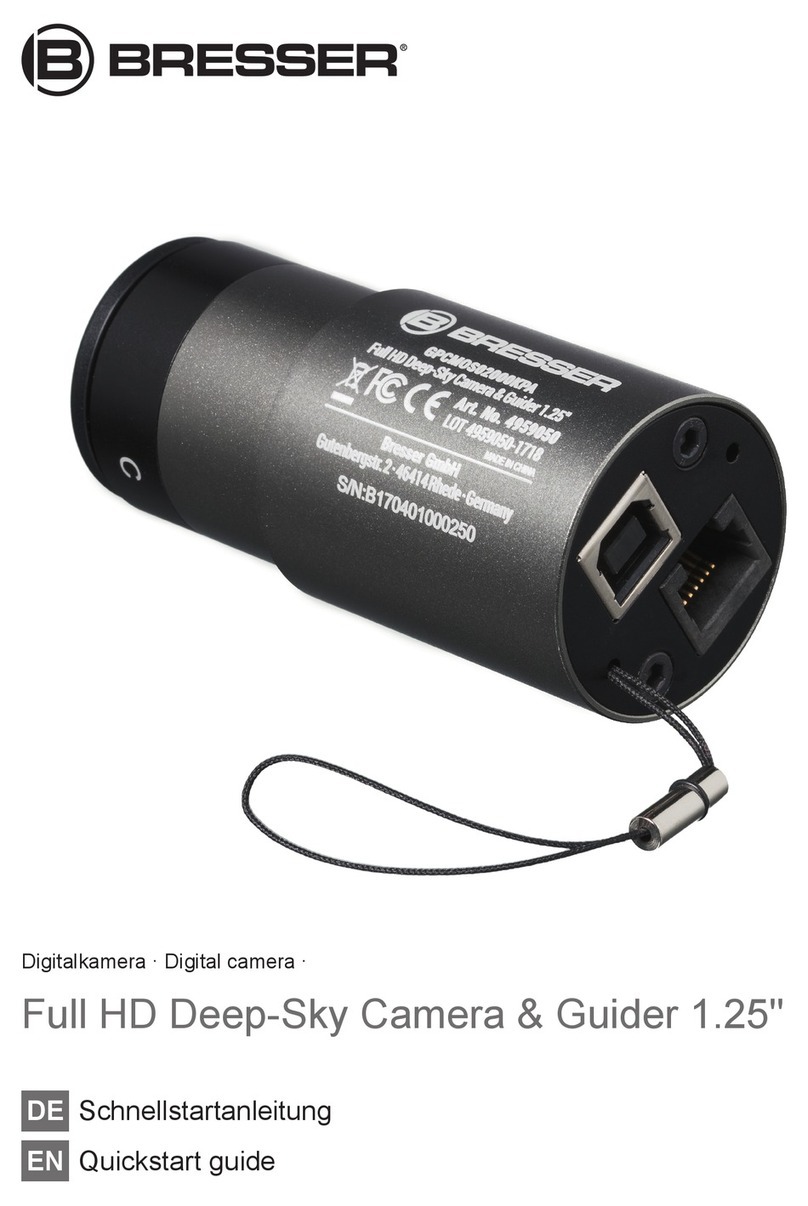
Bresser DeepSky Astro User manual

Digital camera · Digitalkamera ·
DeepSky Astro-Kamera 26MP
EN Instruction manual
DE Bedienungsanleitung

DE
Besuchen Sie unsere Website über den folgenden QR Code oder Weblink um weitere
Informationen zu diesem Produkt oder die verfügbaren Übersetzungen dieser Anleitung
zu nden.
EN
Visit our website via the following QR Code or web link to nd further information on this
product or the available translations of these instructions.
FR
Si vous souhaitez obtenir plus d’informations concernant ce produit ou rechercher ce
mode d’emploi en d’autres langues, rendez-vous sur notre site Internet en utilisant le
code QR ou le lien correspondant.
NL
Bezoek onze internetpagina via de volgende QR-code of weblink, voor meer informatie
over dit product of de beschikbare vertalingen van deze gebruiksaanwijzing.
ES
¿Desearía recibir unas instrucciones de uso completas sobre este producto en un idioma
determinado? Entonces visite nuestra página web utilizando el siguiente enlace (código
QR) para ver las versiones disponibles.
IT
Desidera ricevere informazioni esaustive su questo prodotto in una lingua specica?
Venga a visitare il nostro sito Web al seguente link (codice QR Code) per conoscere le
versioni disponibili.
www.bresser.de/P0510540
www.bresser.de/warranty_terms
GARANTIE · WARRANTY · GARANTÍA · GARANZIA
RECYCLAGE (TRIMAN/FRANCE)

4
Contents
1 Imprint .............................................................................................................................................................5
2 Validity note ....................................................................................................................................................5
3 About this Instruction Manual.......................................................................................................................5
4 Intended use ................................................................................................................................................... 5
5 General safety instructions ...........................................................................................................................6
6 Parts overview and scope of delivery .......................................................................................................... 8
7 Installing the software and drivers ...............................................................................................................9
8 Camera mounting on telescope....................................................................................................................9
9 Using the internal USB HUB (USB 2.0).......................................................................................................10
10 Camera mounting with optional autoguider .............................................................................................. 10
11 Cleaning and maintenance..........................................................................................................................11
12 Disposal ........................................................................................................................................................11
13 EC declaration of conformity ...................................................................................................................... 11
14 UKCA declaration of conformity.................................................................................................................11
15 Warranty........................................................................................................................................................11
16 Technical data .............................................................................................................................................. 12

5 / 28
1 Imprint
Bresser GmbH
Gutenbergstr. 2
46414 Rhede
Germany
www.explorescientific.de
For any warranty claims or service inquiries, please refer to the information on "Warranty" and "Ser-
vice" in this documentation. We ask for your understanding that unsolicited returns cannot be pro-
cessed.
Errors and technical changes excepted.
© 2022 Bresser GmbH
All rights reserved.
The reproduction of this documentation - even in extracts - in any form (e.g. photocopy, print, etc.) as
well as the use and distribution by means of electronic systems (e.g. image file, website, etc.) without
the prior written permission of the manufacturer is prohibited.
The designations and brand names of the respective companies used in this documentation are gen-
erally protected by trade, trademark and/or patent law in Germany, the European Union and/or other
countries.
2 Validity note
This documentation is valid for the products with the following article numbers:
0510540
Manual version: 1022
Manual designation:
Manual_0510540_DeepSky-Astro-Kamera-26MP_en-de_EXPSC_v102022a
Always provide information when requesting service.
3 About this Instruction Manual
NOTICE
These operating instructions are to be considered a component of the device.
Read the safety instructions and the instruction manual carefully before using this device.
Keep these instruction manual in a safe place for future reference. If the device is sold or passed on,
the instruction manual must be passed on to any subsequent owner/user of the product.
4 Intended use
• This device is not intended for use by persons (including children) with impaired physical, sensory
or mental abilities, or for lack of experience and/or knowledge, unless they are supervised by or
have received instructions from a person responsible for their safety on how to use this device.
• This device is for personal use only.
• The device was developed as an electronic accessory and may only be used to connect and oper-
ate the devices for private use described in this manual.

6 / 28
5 General safety instructions
DANGER
Risk of an electric shock!
This device contains electronic parts that are powered by a power source (AC adapter and/or batter-
ies). Improper use of this product may result in electric shock. Electric shock can cause serious or fatal
injuries. It is therefore imperative that you observe the following safety information.
• Check this device, cables and connections for damage before use.
• Never use the device with defective or damaged components (e.g. housing, cable, lamp, etc.).
• Do not expose the device to high temperatures. Use only the supplied AC adapter. Do not short-
circuit the device or batteries or dispose of in fire! Excessive heat and improper handling can
cause short circuits, fires and even explosions!
• Operate the device only in a completely dry environment and do not touch the device with wet or
damp body parts.
• Place your device so that it can be disconnected from the power supply at any time. The power
outlet should always be near your appliance and should be easily accessible, as the plug of the
power cord serves as a disconnect device from the mains supply.
• To disconnect the unit from the mains, always pull the mains plug and never pull the cable!
• Disconnect the power supply by pulling the mains plug when the appliance is not in use, in case of
a longer interruption of operation and before any maintenance and cleaning work.
DANGER
Risk of blindness!
Never use this device to look directly at the sun or in the direct proximity of the sun. There is a risk of
BLINDNESS!
NOTICE
Danger of material damage!
Improper handling may result in damage to the unit and/or accessories. Therefore, use the device only
in accordance with the following safety information.
• Do not disassemble the device! In the event of a defect, please contact your dealer. They will con-
tact the Service Center and can arrange the return of this device for repair if necessary.
• For the normal operation as intended, only use the supplied cables and connect them as de-
scribed in the manual.
NOTICE
Risk of voltage damage!
Only use the included power adapter for power supply! The use of other unsuitable power sources or
those not authorized by the manufacturer may result in damage to the camera and will void the war-
ranty.
7 / 28
NOTICE
Risk of overheating!
Always keep the ventilation slits of the thermoelectric cooling system free! Covering these slits will re-
duce cooling performance and may cause overheating and damage to the camera.
NOTICE
Risk of material damage due to solar radiation!
Do not expose the camera sensor to direct sunlight. When photographing the sun, always use sun fil-
ters specially designed for this purpose. Unfiltered sunlight will cause damage to the camera within a
very short time.
NOTICE
Danger of data loss!
Do not interrupt an on-going data connection to a computer before all data has been transferred. This
could lead to data loss for which the manufacturer is not liable.
NOTICE
Privacy Protection
Respect the privacy of your fellow human beings - do not look into flats with this device, for example!
NOTICE
Use of the maximum transmission speed rate
To use the full transmission speed rate, please use the included USB 3.0 connection cable and a cor-
responding computer interface.

8 / 28
6 Parts overview and scope of delivery
1
3
45
67
8
9
10
14
13
11
A
2
B
C
F
16
12
D
E
15
Illustration1: All parts of the Astro camera with rear view (connection area)
1 Camera housing 2 Ventilation slits
3 Holding thread 4 USB 2.0 socket (2x USB HUB)
5 USB 3.0 socket (1x) 6 Connection socket for DC barrel con-
nector
7 PWR function light (power supply of the
camera established)
8 SYS function light (USB connection estab-
lished)
9 TEC function light (cooling system en-
abled)
10 FAN function light (fan enabled)
11 T2 adapter (50,8mm/2" plug diameter) 12 Connection thread
13 Mains power cable with Euro plug and
C13 coupling
14 Mains power adapter 12V/3A with power
cable, DC barrel connector and C13 con-
nection socket
15 Power cable extension with barrel con-
nector coupling and DC barrel connector
16 USB 3.0 connection cable (connection to
computer)

9 / 28
Scope of delivery:
Camera (A); ); T2 adapter (B); power adapter (C); power cable (D); power cable extension (E); USB
3.0 connection cable (F); software CD; hardcase
Also required (not included):
Computer running Windows 8/10
NOTICE!This is not a stand-alone camera. A computer with Windows operating system and free
USB 3.0 interface is required for operation.
7 Installing the software and drivers
1. Insert the supplied CD-ROM into the CD drive of your computer. Alternatively, you can download
the software package from the product page and start the installation directly. The files are stored
under the category 'Software'. The link/QR code to the product page can be found on the second
page of this manual.
2. Install the 'EXPLORE Capture' software. This will also install the camera drivers automatically.
3. Remove the rubber cover of the CMOS sensor on the camera and connect it to your telescope.
The connection can be made directly via T2 thread (M42x0.75mm) or via 2" (50.8mm) plug-in ad-
apter. Always ensure that the camera is securely attached.
4. Connect the supplied AC adapter to the camera.
5. Connect the camera to the computer. Use the USB 3.0 connection cable and a corresponding free
USB 3.0 interface on the computer for this purpose.
6. Start the EXPLORE Capture software after successful installation.
7. Select the connected camera in the EXPLORE Capture software menu.
Illustration2: EXPLORE Capture: Select camera
8. The camera now continuously sends live images to the computer at the current exposure time.
9. Use the telescope viewfinder to adjust and focus on a bright star in the field of view of the camera.
To obtain a faster frame rate and a higher camera sensitivity during focusing, switch to binning
mode if necessary (see software menu "Digital Binning").
10. After successful focusing, you can start recording images or video sequences.
8 Camera mounting on telescope
1
2
35
6
4
Illustration3: Mounting the camera on a telescope

10 / 28
1 Camera housing 2 Holding thread
3 Connection thread 4 50.8mm (2") T2 adapter
5 50.8mm (2") eyepiece holder 6 Eyepiece extension
9 Using the internal USB HUB (USB 2.0)
The camera is equipped with an built-in USB HUB with 2x USB 2.0 sockets at the rear. This can be
used to connect additional components (e.g. autoguider camera, motor focus etc.). Separate cable
connections of the accessories to the computer are omitted.
NOTICE!The use of short cable connections is recommended to reduce the risk of 'cable spa-
ghetti' and cable breakage.
10 Camera mounting with optional autoguider
4
6
9
5
7
3
2
8
10
1
A
B
11
C
13
12
Illustration4: Mounting the Deep Sky Astro Camera with optional autoguider camera1
1 Autoguider camera12 ST4 connecting cable
3 USB 3.0 connecting cable 4 Guiding scope1

11 / 28
5 Telescope16 ST4-capable mount1
7 Control panel of the mount18 ST4 socket on control panel1
9 Deep Sky Astro Camera 10 Computer1
11 USB 3.0 socket on the camera 12 USB 2.0 socket on the camera
13 USB 2.0 connecting cable1
1optional accessories; not included
NOTICE!This is not a stand-alone camera. A computer with Windows operating system is re-
quired for both, photography and autoguiding.
11 Cleaning and maintenance
• Before cleaning the device, disconnect it from the power supply (remove plug or remove batteries)!
• Only clean the device externally using a dry cloth. Do not use cleaning solution to prevent damage
to the electronic parts.
12 Disposal
Dispose of the packaging materials according to its type. Information on proper disposal can
be obtained from the municipal waste disposal service provider or environmental agency.
Do not dispose of electronic devices in the household garbage!
According to the European Directive 2012/19/EU on Waste Electrical and Electronic Equip-
ment and its transposition into national law, used electrical equipment must be collected sep-
arately and recycled in an environmentally sound manner.
13 EC declaration of conformity
A "Declaration of conformity" in accordance with the applicable directives and correspond-
ing standards has been prepared by Bresser GmbH. The full text of the EC declaration of
conformity is available at the following Internet address: www.bresser.de/down-
load/0510540/CE/0510540_CE.pdf
14 UKCA declaration of conformity
A "Declaration of Conformity" in accordance with the applicable directives and relevant
standards has been issued by Bresser GmbH The full text of the UKCA Declaration of
Conformity is available at the following web address: www.bresser.de/download/0510540/
UKCA/0510540_UKCA.pdf
Bresser UK Ltd. • Suite 3G, Eden House, Enterprise Way, Edenbridge, Kent TN8 6HF,
Great Britain
15 Warranty
The regular warranty period is 2 years and starts on the day of purchase. For full warranty terms and
services, please visit www.bresser.de/warranty_terms.

12 / 28
16 Technical data
Art.No.: 0510540
Camera type/model: ASTRO camera 26.0MP/ATR3CMOS26000KPA
Data output: Images and videos
Image sensor: Sony IMX571 CMOS color sensor
Adjustable resolution
in pixels:
5224x4168 / 3104x2084 /1064x1386
Adjustable binning: 1x1 / 2x2 / 3x3
Frame rate per second (FPS): 110 / 37.1 / 14.2 / 6.8
Physical sensor size in pixels: 6224 x 4168
Megapixels: 26 MP
Sensor size: 23.48 x 15.67 mm (1/8 inch)
Pixel size: 3.76 µm x 3.76 µm
Bit depth: 8 / 16 bit
Flange focal length: 17.5 mm
Shutter type: Global Shutter
Internal camera memory: DDR 3 RAM
Thermoelectric cooling with fan: Yes, up to 40°C below ambient temperature
Adjustable exposure times: 150 µs to 60 min
Operating temperature: -10 to +50°C (30 to 80% rH)
Cable length USB 3.0: 150 cm
DC power cable length: 200 cm
Housing CNC machined aluminium housing
Camera size: Diam.: 80 mm; length: 102 mm
Camera weight: approx. 530 g
Camera port diameter: 2.0 inch ( 50.8 mm)
Camera connection thread: T2 (M42x0,75mm)
Filter thread: Yes, 2 inch in receptacle
Camera connection to PC: USB 3.0
Built-in USB hub: Yes, with 2 x USB 2.0 ports
Power supply: Power adapter 12V/3.0A (incl.)
Software: EXPLORE Capture (incl.)
Driver: for camera and ASCOM (incl.)
Operating system: WINDOWS 10 and 11
PC requirements: Processor with Intel Core2 2.8 GHz or higher / 2
GB RAM / free USB 3.0 interface
Field of view for different focal lengths in arc minutes and degrees:
400 mm 201' x 135' (3.4 x 2.3 degrees)
500 mm 161' x 108' (2.7 x 1.8 degrees)
600 mm 134' x 90' (2.2 x 1.5 degrees)
700 mm 115' x 77' (1.9 x 1.3 degrees)
800 mm 100' x 67' (1.7 x 1.1 degrees)
900 mm 89' x 60' (1.5 x 1.0 degrees)
1000 mm 80' x 54' (1.3 x 0.9 degrees)
1250 mm 64' x 43' (1.1 x 0.7 degrees)
1500 mm 53' x 36' (0.9 x 0.6 degrees)

13 / 28
1750 mm 46' x 31' (0.8 x 0.5 degrees)
2000 mm 40' x 27' (0.7 x 0.4 degrees)

14
Inhaltsverzeichnis
1 Impressum ....................................................................................................................................................15
2 Gültigkeitshinweis........................................................................................................................................15
3 Zu dieser Anleitung......................................................................................................................................15
4 Verwendungszweck .....................................................................................................................................15
5 Allgemeine Sicherheitshinweise................................................................................................................. 16
6 Teileübersicht und Lieferumfang................................................................................................................18
7 Software und Treiber installieren ............................................................................................................... 19
8 Kamera-Montage am Fernrohr .................................................................................................................... 20
9 Nutzung des internen USB-HUB (USB 2.0) ................................................................................................ 20
10 Kamera-Montage mit optionalem Autoguider ...........................................................................................21
11 Reinigung und Wartung...............................................................................................................................22
12 Entsorgung ...................................................................................................................................................22
13 EG-Konformitätserklärung ..........................................................................................................................22
14 Garantie.........................................................................................................................................................22
15 Technische Daten.........................................................................................................................................22

15 / 28
1 Impressum
Bresser GmbH
Gutenbergstr. 2
46414 Rhede
Germany
www.explorescientific.de
Für etwaige Gewährleistungsansprüche oder Serviceanfragen verweisen wir auf die Informationen zu
„Garantie“ und „Service“ in dieser Dokumentation. Wir bitten um Verständnis, dass unaufgeforderte
Rücksendungen nicht bearbeitet werden können.
Irrtümer und technische Änderungen vorbehalten.
© 2022 Bresser GmbH
Alle Rechte vorbehalten.
Die Reproduktion dieser Dokumentation – auch auszugsweise – in irgendeiner Form (z.B. Fotokopie,
Druck, etc.) sowie die Verwendung und Verbreitung mittels elektronischer Systeme (z.B. Bilddatei,
Website, etc.) ohne eine vorherige schriftliche Genehmigung des Herstellers ist nicht gestattet.
Die in dieser Dokumentation verwendeten Bezeichnungen und Markennamen der jeweiligen Firmen
sind im Allgemeinen in Deutschland, der Europäischen Union und/oder weiteren Ländern waren-, mar-
ken- und/oder patentrechtlich geschützt.
2 Gültigkeitshinweis
Diese Dokumentation ist gültig für die Produkte mit den nachfolgend aufgeführten Artikelnummern:
0510540
Anleitungsversion: 1022
Bezeichnung dieser Anleitung:
Manual_0510540_DeepSky-Astro-Kamera-26MP_en-de_EXPSC_v102022a
Informationen bei Serviceanfragen stets angeben.
3 Zu dieser Anleitung
HINWEIS
Diese Bedienungsanleitung ist als Teil des Gerätes zu betrachten!
Lesen Sie vor der Benutzung des Geräts aufmerksam die Sicherheitshinweise und die Bedienungsan-
leitung.
Bewahren Sie diese Bedienungsanleitung für die erneute Verwendung zu einem späteren Zeitpunkt
auf. Bei Verkauf oder Weitergabe des Gerätes ist die Bedienungsanleitung an jeden nachfolgenden
Besitzer/Benutzer des Produkts weiterzugeben.
4 Verwendungszweck
• Dieses Gerät ist nicht dafür bestimmt, durch Personen (einschließlich Kinder) mit eingeschränkten
physischen, sensorischen oder geistigen Fähigkeiten oder mangels Erfahrung und/oder mangels
Wissen benutzt zu werden, es sei denn, sie werden durch eine für ihre Sicherheit zuständige Per-
son beaufsichtigt oder erhielten von ihr Anweisungen, wie das Gerät zu benutzen ist.
• Dieses Gerät dient ausschließlich der privaten Nutzung.

16 / 28
• Es wurde entwickelt als elektronisches Zubehörteil zum ausschließlichen Anschluss und Betrieb
an in dieser Anleitung beschriebenen privat genutzten Geräten.
5 Allgemeine Sicherheitshinweise
GEFAHR
Gefahr eines Stromschlags!
Dieses Gerät beinhaltet Elektronikteile, die über eine Stromquelle (Netzteil und/oder Batterien) betrie-
ben werden. Bei unsachgemäßer Verwendung dieses Produkts besteht die Gefahr eines Strom-
schlags. Ein Stromschlag kann zu schweren bis tödlichen Verletzungen führen. Beachten Sie daher
unbedingt die nachfolgenden Sicherheitsinformationen.
• Überprüfen Sie das Gerät, die Kabel und Anschlüsse vor Inbetriebnahme auf Beschädigungen.
• Betreiben Sie das Gerät niemals mit defekten oder beschädigten Bauteilen (z.B. Gehäuse, Kabel,
Lampe o.ä.).
• Setzen Sie das Gerät keinen hohen Temperaturen aus. Benutzen Sie nur das mitgelieferte Netz-
teil. Gerät nicht kurzschließen oder ins Feuer werfen! Durch übermäßige Hitze und unsachgemä-
ße Handhabung können Kurzschlüsse, Brände und sogar Explosionen ausgelöst werden!
• Betreiben Sie das Gerät nur in vollkommen trockener Umgebung und berühren Sie das Gerät
nicht mit nassen oder feuchten Körperteilen.
• Platzieren Sie Ihr Gerät so, dass es jederzeit vom Stromnetz getrennt werden kann. Die Netz-
steckdose sollte sich immer in der Nähe Ihres Geräts befinden und gut zugänglich sein, da der
Stecker des Netzkabels als Trennvorrichtung zum Stromnetz dient.
• Um das Gerät vom Stromnetz zu trennen, ziehen Sie immer am Netzstecker und niemals am Ka-
bel!
• Unterbrechen Sie die Stromzufuhr, wenn Sie das Gerät nicht benutzen, im Falle einer längeren
Betriebsunterbrechung sowie vor allen Wartungs- und Reinigungsarbeiten, indem Sie den Netz-
stecker ziehen.
GEFAHR
Erblindungsgefahr!
Schauen Sie niemals direkt in die Sonne oder in die Nähe der Sonne. Es besteht akute ERBLIN-
DUNGSGEFAHR!
HINWEIS
Gefahr von Sachschäden!
Bei unsachgemäßer Handhabung können das Gerät und/oder die Zubehörteile beschädigt werden.
Verwenden Sie das Gerät deshalb nur entsprechend den nachfolgenden Sicherheitsinformationen.
• Bauen Sie das Gerät nicht auseinander! Wenden Sie sich im Falle eines Defekts an Ihren Fach-
händler. Er nimmt mit dem Service-Center Kontakt auf und kann das Gerät ggf. zwecks Reparatur
einschicken.
• Für den bestimmungsgemäßen Betrieb nur die mitgelieferten Kabel verwenden und wie in der An-
leitung beschrieben anschließen.

17 / 28
HINWEIS
Gefahr eines Spannungschadens!
Benutzen Sie zur Spannungsversorgung ausschließlich das im Lieferumfang enthaltene Netzteil! Die
Verwendung anderer nicht geeigneter oder vom Hersteller nicht autorisierter Spannungsquellen kann
zu einer Beschädigung der Kamera und zum Verlust der Garantie führen.
HINWEIS
Überhitzungsgefahr!
Die Lüftungsöffnungen der thermoelektrischen Kühlungssystems stets freihalten! Eine Abdeckung die-
ser Öffnungen führt zu einer verminderten Kühlleistung und kann zu einer Überhitzung und Beschädi-
gung der Kamera führen.
HINWEIS
Gefahr von Sachschäden durch Sonneneinstrahlung!
Den Sensor der Kamera keiner direkten Sonnenstrahlung aussetzen. Bei Fotografie der Sonne immer
speziell dafür geeignete Sonnenfilter einsetzen. Ungefiltertes Sonnenlicht führt innerhalb kürzester
Zeit zu Schäden an der Kamera.
HINWEIS
Gefahr eines Datenverlustes!
Unterbrechen Sie niemals eine bestehende Datenverbindung zum Computer bevor Sie alle Daten
übertragen haben. Durch eine Unterbrechung kann es zu Datenverlusten kommen, für die der Herstel-
ler keine Haftung übernimmt!
HINWEIS
Schutz der Privatsphäre
Achten Sie die Privatsphäre Ihrer Mitmenschen – schauen Sie mit diesem Gerät zum Beispiel nicht in
Wohnungen!
HINWEIS
Nutzung der maximalen Übertragungsgeschwindigkeit
Zur Nutzung der vollen Übertragungsgeschwindigkeit benutzen Sie bitte das beiliegende USB 3.0 Ver-
bindungskabel und eine entsprechende Computerschnittstelle.

18 / 28
6 Teileübersicht und Lieferumfang
1
3
45
67
8
9
10
14
13
11
A
2
B
C
F
16
12
D
E
15
Abb.1: Alle Teile der Astro-Kamera mit Rückansicht (Anschlussbereich)
1 Kamera-Gehäuse 2 Lüftungsschlitze
3 Aufnahmegewinde 4 USB 2.0-Anschluss (2x USB-HUB)
5 USB 3.0-Anschluss (1x) 6 Anschlussbuchse für DC-Hohlstecker
7 PWR-Funktionsleuchte (Spannungsver-
sorgung der Kamera hergestellt)
8 SYS-Funktionsleuchte (USB-Verbindung
hergestellt)
9 TEC-Funktionsleuchte (Kühlung aktiv) 10 FAN-Funktionsleuchte (Lüfter aktiv)
11 T2-Adapter (50,8mm/2“ Steckdurchmes-
ser)
12 Anschlussgewinde
13 Netzkabel mit Euro-Stecker und C13-
Kupplung
14 Netzadapter 12V/3A mit Spannungskabel,
DC-Hohlstecker und C13-Anschlussbuch-
se
15 Spannungskabel-Verlängerung mit Hohl-
stecker-Kupplung und DC-Hohlstecker
16 USB 3.0-Verbindungskabel (Anschluss an
Computer)
Lieferumfang:

19 / 28
Kamera (A); ); T2-Adapter (B); Netzadapter (C); Spannungskabel (D); Spannungskabel-Verlängerung
(E); USB 3.0-Verbindungskabel (F) Software-CD; Hardcase
Außerdem erforderlich (nicht im Lieferumfang enthalten):
Computer mit Windows 8/10
HINWEIS!Dies ist keine Stand-alone-Kamera. Für den Betrieb ist ein Computer mit Windows-
Betriebssystem und freier USB 3.0 Schnittstelle erforderlich.
7 Software und Treiber installieren
1. Legen Sie die im Lieferumfang enthaltene CD-ROM in das CD-Laufwerk Ihres Computers ein. Al-
ternativ können Sie das Software-Paket auch von der Produktseite herunterladen und die Installa-
tion direkt starten. Die Dateien sind unter der Rubrik ‚Software‘ hinterlegt. Den Link/QR-Code zur
Produktseite finden auf der zweiten Seite dieser Bedienungsanleitung.
2. Installieren Sie die Software ‚EXPLORE Capture‘. Hiermit werden auch die Kamera-Treiber auto-
matisch installiert.
3. Entfernen Sie die Gummi-Abdeckung des CMOS-Sensors an der Kamera und verbinden diese mit
Ihrem Teleskop. Die Verbindung kann direkt per T2-Gewinde (M42x0.75mm) oder per 2“
(50.8mm) Steckadapter erfolgen. Achten Sie stets auf eine sichere Befestigung der Kamera.
4. Das im Lieferumfang enthaltene Netzteil an die Kamera anschließen.
5. Die Kamera mit dem Computer verbinden. Hierfür das im Lieferumfang enthaltene USB 3.0 Ver-
bindungskabel und eine entsprechende freie USB 3.0 Schnittstelle am Computer verwenden.
6. Die EXPLORE Capture Software nach erfolgreicher Installation starten.
7. Im Menü der EXPLORE Capture Software die angeschlossene Kamera wählen.
Abb.2: EXPLORE Capture: Kamera wählen
8. Die Kamera sendet nun kontinuierlich Live-Bilder mit der aktuell eingestellten Belichtungszeit an
den Computer.
9. Per Sucherfernrohr des Teleskops einen hellen Stern im Bildfeld der Kamera einstellen und
scharfstellen. Um eine schnellere Bildfolge und eine höhere Kameraempfindlichkeit währen der
Fokussierung zu erhalten, ggf. in den Binning-Modus wechseln (siehe Software-Menü „Digital Bin-
ning“).
10. Nach erfolgreicher Fokussierung kann mit der Aufnahme von Einzelbildern oder Videosequenzen
begonnen werden.

20 / 28
8 Kamera-Montage am Fernrohr
1
2
35
6
4
Abb.3: Montage der Kamera am Fernrohr
1 Kamera-Gehäuse 2 Aufnahmegewinde
3 Anschlussgewinde 4 50,8mm (2“) T2-Adapter
5 50,8mm (2“) Okularaufnahme 6 Okularauszug
9 Nutzung des internen USB-HUB (USB 2.0)
Die Kamera besitzt an der Rückseite einen eingebauten USB-HUB mit 2x USB 2.0-Anschlüssen. Hier-
über können eine zusätzliche Komponenten (z.B. Autoguider-Kamera, Motor-Fokussier etc.) per ange-
schlossen werden. Separate Kabelverbindungen der Zubehörteile zum Computer entfallen.
HINWEIS!Die Verwendung kurzer Kabelverbindungen wird empfohlen, um die Gefahr von 'Ka-
belsalat' und Kabelbrüchen zu verringern.
This manual suits for next models
1
Table of contents
Languages:
Other Bresser Digital Camera manuals

Bresser
Bresser DL-30MP User manual

Bresser
Bresser 33-40000 User manual

Bresser
Bresser 4959050 User manual

Bresser
Bresser EXPLORE SCIENTIFIC User manual

Bresser
Bresser 33-10001 User manual

Bresser
Bresser lcd micro 5mp User manual

Bresser
Bresser 4959050 User manual

Bresser
Bresser 9630202 User manual

Bresser
Bresser 9630200 User manual

Bresser
Bresser MSP0310 User manual