Brightlink BL-VW37-4K User manual

BRIGHTLINK 24 Port Large Scale 4K UDH Video
Wall Controller in 3x6/3x7/4x4/4x5/4x6
configurations – 2U case size.
MODEL: BL-VW36-4K / BL-VW37-4K / BL-VW44-4K / BL-VW45-4K /
BL-VW46-4K
***This manual covers 5 different configurations (3X6, 3X7, 4X4,
4X5, 4X6) for the same product. Please refer to the product page
description for the configuration you purchased.
Operating Instructions
BRIGHTLINKAV.COM

Dear Customer
Thank you for purchasing this product. For optimum performance and safety,
please read these instructions carefully before connecting, operating or
adjusting this product. Please keep this manual for future reference.
Introduction:
Product Brief
Introducing Brightlink’s 24 Port 4K UDH Video Wall Controller series in our
customizable configurations of 3x6 / 3x7 / 4x4 / 4x5 / 4x6 all with input
resolutions of up to 4K HDMI 2.0 Ultra UHD 3840x2160@60HZ with HDMI 2.0,
MHL, and DisplayPort inputs.
The main function of this 4K Video Wall Controller is to display a 3840*2160
60Hz 4K Ultra HD image spread across 12-24 Displays in various
configurations such as 3X6, 3x7, 4x4, 4x5, 4x6, to create a gigantic eye
catching
The 4K Video Wall Controller uses the DSP+FPGE advanced image
processing technology and along with the Max HDMI input signal of HDMI 2.0
(HDCP2.2) 3840x2160@60HZ, you are able to view fast motion dynamic
pictures with no delay or frame lost giving you a crisp clear image that is sure
to impress.

This 4K Video Wall Controller is ideal for environments where superior
performance and crisp clear high resolutions are required to display your video
content / digital signage over many displays in large format.
Common application includes exhibition halls, trade shows, map display
system, GPS positioning system, oil monitoring, satellite positioning,
conference rooms, Show rooms, Education and tanning, Casinos, hotels, and
many other environments where large format multi-screen displays are required
while at the same time having a clear detailed image in order to show your
content and information easily to any viewer at various distances.
FEATURES:
• Input signals Support 1 channel HDMI, 1 channel MHL/HDMI (Mobile
High-Definition Link) and 1 channel DP (Display Port) signal input.
• * HDMI ports can support maximum 3840x2160@60Hz signal input;
• * MHL is compatible with 3840x2160@30Hz HDMI input and compatible
with MHL signal input;
• * supports both 1 channel DP signal inputs with a maximum resolution
of up to 3840x2160@60Hz.
• Output signal Supports 12-24 channel HDMI signal output, output
resolution varies depending on number of outputs.
• Signal switching function Supports 1 channel HDMI, 1 channel MHL and
1 channel DP signal input. The Video Wall Controller will automatically
identify if just one input is connected, or you can switch by the remote
control or front panel keys.
• When the device is set to automatic identification signal and only 1 input
port is connected the devices will automatically display that 1 connected
to devices to the default video wall configuration
• With Mosaic function & Modular design, this single machine can be
customized from 12 to 24 screen splicing, such as 3x6, 3x7, 3x8, 4x4,
4x5, 4x6, etc…
• The image rotation function allows you to flip the image on any of your
displays by 180 degrees. This allows users who have LCD screens with
smaller bezel on the top of their display to flip the top row of the video
wall in order to have the smallest possible bezel between your screen
gaps
• All inputs / outputs support Audio as well as Analog 3.5m L/R Stereo
output.
.
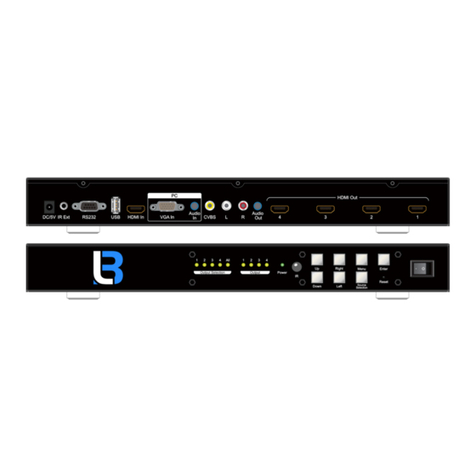
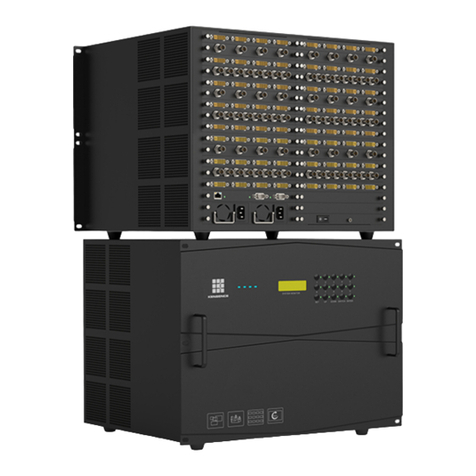
Introduction Technical parameters:
Name
Specification
Signal Input
Interface
1 channel HDMI2.0(HDCP2.2)、1 channel DP1.2、1
channel MHL support HDMI1.4(HDCP2.0)
Resolution
HDMI supports maximum resolution 3840*2160@60Hz,
and downward compatibility;
DP supports maximum resolution 3840*2160@60Hz,
and downward compatibility;
MHL supports maximum resolution 3840*2160@30Hz,
and downward compatibility.
Output
Interface
X channel HDMI1.3
1 channel 3.5mm stereo audio。
Output Resolution
Varies depending on amount of displays
Color depth
30bit, 1000M color
Control
IR/Button
Voltage
AC100-240V
Mosaic mode
3x6, 3x7, 3x8, 4x4, 4x5, 4x6, etc…
Size
Standard 19 inches 2U 525mm x 400mm x 180mm
Weight
3 Kg
power
50W Max.
Devices Installation
1.Open the package
Check the all included attachments are included. The main video wall device,
power cord, remote control, mounting ear, warranty card and instructions.
2. Installation
2.1. TV sets:
LCD TV or other display device should be set to you HDMI input signal. Most
display units have multiple HDMI input ports, please make sure that
connected HDMI cables are corresponding to the selected HDMI port.

2.2. Connection between video wall controller and TV.
When connecting your HDTV’s to the video wall controller the default
configuration will be HDMI output 1 to Top Left TV, then continue across from
left to right to end of row, and then continue this order from Top to Bottom
row. Start with HDMI Output 1 and go from lowest number (HDMI output 1) to
highest number. In certain configuration HDMI ports might be skipped to
ensure better performance. For example, it might go HDMI output 1, 2, 3, 5,
leaving out output 4. In this case still continue your order from lowest Output
number to highest.
TYPICAL CONFIGURATION
Note: If you use the 180 Flip feature on either the top or bottom row you will
have to reverse the order as well as possibly make some other configuration
adjustments.
2.3. Input signal connections types.
This video wall controller supports 1 HDMI input,1 MHL input, and 1
DisplayPort Input. All inputs embed audio into the input, users can access all
the signals on demand from the 3.5mm audio output port, or HDMI output
ports.
MHL(HDMI-2) : Support HDMI1.4 Signal input, maximum support
3840x2160@30HZ HDMI Signal input can be backwards compatible; through
a MHL to HDMI adapter it can also be compatible with MHL Output image
output device, such as MHL Enabled mobile phones or Tablet;

HDMI(HDMI-1) : Support HDMI2.0 Signal input, maximum resolution
supported 3840x2160@60HZ;
DP Support maximum resolution support 3840x2160@60HZ;
2.4. Audio connection
A-OUT audio extraction output (3.5mm analog) works with any off the shelve
A-OUT / 3.5mm audio Connections.
2.5、Power on boot
After all the above cable connections are securely connected, connect
the power adapter to the device input 12V DC power supply, if the power led
lights show red, the equipment in good working correctly.

Remote control settings
Once the LCD TV’s and Video Wall Controllers are properly connected,
connect the power supply to your power source and if the LED red light is on
the device is now ready to operate. Operation by remote control or front panel
keys make it easy to set up your equipment.
1. Remote control settings:
1.1: Call menu
Press the remote control MENU Key to bring up the following pop-up
menu;
1.2: Select the submenu
Continuously pressing the MENU Key moves the cursor to different
submenus. When submenus are in red text, press the OK Key to select the
menu entries, when it becomes green text on the selected menu it allow
slection of that submenu.
1.3: Change the product settings
After menu changes to green, with remote control keys to change
product parameters or properties, press the return key to save the setting and
exit the menu.
Input Source Auto Select
Split Row 2
Split Column 2
Board ID 1
Flip off
Language English

2. Signal source selection
This Video Wall Controller has 4 Signal source menu options: Auto-
select, D0: DP, D1:HDMI, D2:MHL.
2.1: Automatic selection:
Through the remote control menu "signal source" set to "automatic
selection", in the case that the equipment has only one connected input, you
can automatically insert the signal source and the signal source identification
automatically will display that input.
2.2: Manual selection:
Can be used for a single source or multiple sources that are connect at
the same time to the device. By manually switching the signal source on the
remote control the display screens will displays an image from that source.
3. Split mode
Through the submenu you can choose many kinds of stitching patterns,
such as, row 2 & Column 2, row 1 & Column 2, or row 1 & Column 3, or row 1
& Column 4, as follows:
4. Board, card ID-Flip
1
2
3
4
1
2
1
2
3
1
2
3
4

By selecting "card ID"Number, in the menu" flip "setting the ID Whether
an image needs to be rotated,180 Four image mosaic 2x2 Splicing mode
rotation board ID 1, you need to output HDMI1 and HDMI2 Swap.
5. Language selection
Menu can be selected by remote control, English, Simplified Chinese,
traditional Chinese, three different menu display language.
5th Keyboard controller
Through the device keyboard control functions with the remote control
button function control, this section explains the function of each button, as
follows:
MenuKey: The following pop-up menu, repeatedly pressing the Menu
Button makes the cursor stays in the different submenus;
Select/:The Red menu parameters are modified;
Save/exit:To save the modified parameters and exit the menu;
HDMI-1:Key to change to the device HDMI Input signal source port;
HDMI-2:Key to change to device MHL port input signal source;
DP:Key to change to device DP ports input signal source;
This manual suits for next models
4
Table of contents
Other Brightlink Controllers manuals

Brightlink
Brightlink BL-VW22-4K60 User manual

Brightlink
Brightlink BL-VW33-4K60-GUI User manual

Brightlink
Brightlink BL-VW22-4K60-GUI User manual

Brightlink
Brightlink 4U User manual

Brightlink
Brightlink BL-VW22 User manual

Brightlink
Brightlink BL-VW33-4K User manual

Brightlink
Brightlink BL-VW22-4K30 User manual
Popular Controllers manuals by other brands

CYP
CYP IP-CS7 Operation manual

Morningstar
Morningstar SunLight-10 quick start guide

V2 ELETTRONICA
V2 ELETTRONICA VEGA manual

DHK Hobby
DHK Hobby H101 User instruction manual

Synapse
Synapse DIM10-281-21 installation instructions

Hardy Process Solutions
Hardy Process Solutions HI 2160RC PLUS Operation and installation manual