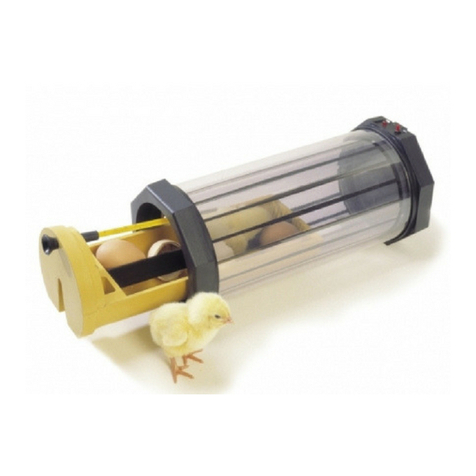
Brinsea CONTAQ Z6 User manual

1
Operating Instructions

2
Contents
Contents....................................................................................................................................................2
1Introduction......................................................................................................................................3
2Unpacking........................................................................................................................................5
3Storage of Eggs................................................................................................................................5
4Modes of Operation .........................................................................................................................6
5Setting Up Your Contaq Z6.............................................................................................................6
5.1 Location ..................................................................................................................................6
5.2 Humidity Sensor .....................................................................................................................7
5.3 Contact Mode..........................................................................................................................7
5.4 Forced Draft Mode..................................................................................................................8
5.5 Conveyor Assembly................................................................................................................9
5.6 Setting Eggs ..........................................................................................................................11
5.7 Rear Panel Connections ........................................................................................................13
5.8 Incubation Settings................................................................................................................13
6Temperature...................................................................................................................................15
7Humidity........................................................................................................................................16
8Turning ..........................................................................................................................................18
9Cooling ..........................................................................................................................................20
10 Hatching.........................................................................................................................................20
11 Servicing and Cleaning..................................................................................................................21
11.1Humidity Pump Tube............................................................................................................21
12 Troubleshooting.............................................................................................................................22
12.1 Poor Hatching Results...........................................................................................................22
13 Technical Fault Finding.................................................................................................................23
13.1 Engineering (ENG) Mode: -..................................................................................................23
13.2 System Values.......................................................................................................................25
13.3 Temperature Calibration .......................................................................................................26
14 Specification ..................................................................................................................................28

3
1Introduction
Congratulations on your purchase of the most advanced egg incubator available. The
Contaq Z6 has been designed to allow the best possible environment for your eggs to
incubate and hatch. These instructions detail the operation of your new Contaq
incubator, incorporating Contact Incubation Technology (CIT). Please read them
carefully before setting up the incubator in order to achieve best results.
A background into CIT
The method of contact incubation technology is actually as old as the birds themselves
–but what is new is the unique way the method is applied to this Contaq machine.
The Theory Behind the Product
Contact incubation is based on the natural incubation process. The most striking
difference between natural and artificial incubation is the fact that the natural parent
provides warmth by contact rather than surrounding the egg with warm air. This may
not at first sight seem significant but important research studies carried out by J. Scott
Turner at New York State University and the University of Cape Town has revealed
major unsuspected differences in thermal behaviour of eggs incubated by contact
rather than convection. Crucially, eggs in a forced draft incubator have near uniform
temperature throughout incubation; there will be some increase in embryonic
temperature towards the end of incubation as a result of increased metabolism but
otherwise the whole egg will remain near incubator air temperature. By contrast, eggs
incubated naturally or by contact, have significant temperature differences. Heat is
entering the egg over a relatively small brood patch, which is therefore warmer than
other regions of the egg, and is being lost from most of the remaining shell area which
is cooler.
In contact incubation, the embryo temperature tends to fall at later stages of
incubation as a result of the embryo’s own blood circulation which becomes
significantly more important than embryonic metabolism in determining temperature
distribution and heat flow within the egg, quite contrary to previous understanding
which assumed metabolism to be dominant and cause egg temperature to rise. The
inevitable fact that the embryo grows larger and must move from its original position
on top of the yolk sack downwards in the egg to cooler regions also tends to reduce
embryonic temperature as incubation progresses. These important findings emphasise
surprising differences between natural and artificial incubation, but there are others.

4
Eggs in nature are certainly subjected to a cycle of warming and cooling coupled with
ventilation as the parent bird leaves the nest to feed and defend territory, etc.
The Contaq incubator should be viewed as replacing the natural Bird and Nest
combination. The pressurised ‘skin’ mimics the functions of an incubating parent;
providing warmth by contact with the tops of eggs, but also the facility to lift from the
eggs periodically and in doing so, causes a substantial influx of fresh air in the manner
of a bird standing or leaving the nest.
The egg chamber substitutes for the ‘nest’ in providing a safe, protected environment
for the eggs, with provision for air to be induced through the nest material which
enables the operator to exercise control over the degree of ventilation of eggs. Nests
of different species have very different characteristics, particularly with respect to gas
permeability. This in turn affects water loss from eggs, so it is necessary to adjust the
amount of nest material accordingly. Where required, additional humidity is
introduced to the egg chamber automatically. The ideal combination of nest material
and humidity setting is best determined by weighing eggs and monitoring water loss.
The Contaq egg chamber also provides sophisticated provision for automatic turning
of eggs of different sizes. Egg turning coincides with lifting of the skin and enables
programmable fixed or random turns.
2

5
Unpacking
Your Contaq incubator had been supplied in protective packaging. Please remove all
tape, strapping and packing material. Retain the carton and packing materials to
enable the unit to be repacked if need be.
The Contaq Z6 includes:
Item
Quantity
Item
Quantity
Contaq Incubator
1
Contaq Skin Panel
1
Conveyor Chassis
1
Air Filter Panel
1
Conveyor End Cover
1
Base Insulation Panel
1
Conveyor End Rollers
2
Hatching Tray / Lid
2
Conveyor Belts
3
Hatching Tray Lid Posts
4
Egg Rollers
12
Water Tube
1
Egg Dividers
7
Evaporation Material
2
Bag of Small O-Rings
1
Humidity Sensor
1
Large O-Rings
24
Spot-Check Thermometer
1
Mains Lead
1
Please identify each part and check that they are all present and undamaged. If there
are any parts damaged or missing please contact your retailer or Brinsea Products (at
the address at the end of this document). To register your new Brinsea product please
visit www.brinsea.co.uk and follow the link on the right hand side of the home page
to qualify for your free 2 year guarantee.
3Storage of Eggs
Always store eggs in cool, damp conditions. Most species may be safely stored for up
to 14 days before serious reductions in hatch rates are likely. Daily turning of stored
eggs also helps maintain hatchability.
Discard cracked, misshapen and heavily soiled eggs (if possible). Wash eggs using a
100:1 solution of Brinsea Incubation Disinfectant. Follow the instructions supplied. It
is essential to wash eggs in solution that is significantly warmer than the egg. Bear in
mind that all solutions will remove the outer cuticle from the egg as well as the dirt
and care must be taken to avoid re-contaminating the eggs during later inspection etc.
Table of contents
Other Brinsea Accessories manuals

Brinsea
Brinsea Octagon 20 Eco User manual

Brinsea
Brinsea OCTAGON 10 User manual

Brinsea
Brinsea Ova-Easy Advance Series II User manual

Brinsea
Brinsea Ovation 28 EX User manual

Brinsea
Brinsea Maxi II eco User manual

Brinsea
Brinsea Ovation 56 ECO User manual

Brinsea
Brinsea Ovation 28 Advance User manual

Brinsea
Brinsea TLC-40 Eco User manual

Brinsea
Brinsea Mini EX User manual

Brinsea
Brinsea Mini Eco User manual