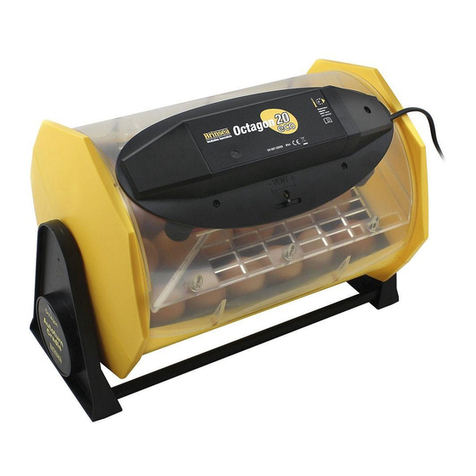
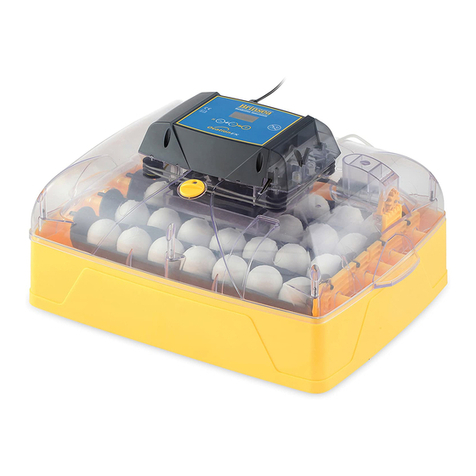
Brinsea Octagon 20 Eco User manual

Oct 2040 Eco_v02_GB_NL
1
Octagon 20 Eco and Octagon 40 Eco
egg incubators
User instructions
Contents
Section Subject Page
1 Introduction 2
2 Unpacking 2
3 Location, Installation and Temperature 3
4 Storage of eggs 5
5 Humidity and Ventilation 5
6 Egg setting 8
7 Egg turning 8
8 Hatching 8
9 Cleaning up 9
10 Servicing 9
11 Troubleshooting 10
12 Specifications 11

Oct 2040 Eco_v02_GB_NL
2
1 Introduction
Read the instructions before use.
These instructions detail the operation of your new Octagon 20 Eco or Octagon 40 Eco incubator and optional
Autoturn Cradle. Please read these instructions carefully before setting up your machine to achieve best results
and keep these instructions safe for future reference. This document includes recommended procedures for
successful hatching but incubation involves the control and manipulation of a large number of factors and in
certain circumstances different procedures may be necessary. Your incubator is designed to allow the user to
vary the incubation conditions to suit a wide range of species in different ambient conditions and the specific set-
up for every situation is beyond the scope of these instructions.
There is a range of books available covering incubation techniques, for more information or to request a book list
please don’t hesitate to contact us.
DO NOT COVER THE INCUBATOR. FOR INDOOR USE ONLY. THE INCUBATOR MUST BE PLACED
IN AN AREA NOT SUBJECT TO SPLASHES OF WATER OR WET CONDITIONS AND OUT OF REACH
OF ANIMALS AND CHILDREN.
Fig. 1 Functional features of the Octagon 20 Eco (Octagon 40 Eco functionally similar)
2 Unpacking
Your incubator has been supplied in protective packaging. Please remove all tape, strapping and packing from
the incubator and parts. Retain the carton and packing materials to enable the unit to be repacked.
Your incubator will include as standard:
Quantity (Octagon 20 Eco) Quantity (Octagon 40 Eco) Item
1 1 Incubator (including removable lid)
1 2 Egg tray
1 1 Cable cover and screw
1 1 Mains cable
6 12 Wire egg dividers
Autoturn Cradle
Temperature Control
Housing
Heater Indicator LED
Adjustable Air Vent
Turning Motor
Housing
Cable / Adjustment
Spindle Cover
(remove to access
tamper-proof
temperature adjuster)
Liquid-in-glass
Thermometer

Oct 2040 Eco_v02_GB_NL
3
Optional Autoturn Cradle:-
2 Base bars
1 Motorised cradle end
1 Plain cradle end
1 Set of four bolts
2.1 Please identify each part and check that they are all present and undamaged. If there are any parts
damaged or missing please contact your retailer or Brinsea Products (at the address at the end of the
document). Damaged appliances shall not be used.
2.2 Check also that the electrical supply matches the machine’s requirements (marked on the technical label
on the inside of the lid of the incubator and on the inside of the blank Autoturn cradle end). The power
cord set must be an appropriately rated and approved cord-set in accordance with the regulations of the
country it is used in.
2.3 To register your new Brinsea product please visit www.brinsea.co.uk and follow the link on the right
hand side of the home page to qualify for your free 2 year guarantee.
2.4 Go to www.Brinsea.co.uk and register as a free member of the Brinsea Email Group to receive the latest
news and information such as advance notice about new products, special offers, exclusive competitions
and much more.
3 Location, Installation and Temperature
3.1 Your incubator will give best results in a room free from wide temperature variations and with generous
ventilation –particularly if several incubators are running at the same time. Ensure that the room
temperature cannot drop on a cold night. Ideally thermostatically control the room at between 20 and
25°C (68 and 77°F). Never allow the room temperature to drop below 15°C (59°F) and ensure that the
incubator cannot be exposed to direct sunlight. Do not use your incubator on the floor.
3.2 If using the Autoturn cradle: Assemble the Autoturn cradle in accordance with the diagram below (Fig. 2)
and place on a flat, level surface (workbench height is ideal). Place the incubator into the Autoturn cradle
as illustrated (Fig. 1). The cabinet is designed to locate onto the lugs at either end of the Autoturn cradle.
Take care to offer the incubator at the angle which matches that of the drive lug to avoid damage to the
mechanism. Ensure full engagement in the slots in the ends of the incubator so that the incubator is level
end to end.
FIG. 2
3.3 If using without the Autoturn cradle place the incubator upright on a flat level surface.
3.4 Remove the lid and place it where it can not be splashed by water. Lift out the egg tray and fill one of the
two water channels (Octagon 20) or two of the four water channels (Octagon 40) with water or 100:1
Brinsea Incubation Disinfectant Solution leaving the top of the liquid 3/4” (20mm) from the top of the
channel. Replace the tray and replace the lid. Slide the ventilation control to the centre of its range.

Oct 2040 Eco_v02_GB_NL
4
3.5 Connect the mains cable to the incubator lid. Ensure the connector is pushed fully home in its socket; it
may be quite a tight fit.
3.6 Plug the incubator mains supply cable into a suitable outlet ensuring that the cable is not pulled tight. The
incubator fan will start and the red LED in the temperature control housing will light continuously. Allow
the incubator to run for at least an hour to stabilise the temperature before making adjustments or setting
eggs.
Stable and correct temperature is essential for good results. Adjust with care.
Please note: your incubator may not be set to the correct temperature from the factory and the
following procedure must be followed before setting eggs.
3.7 As the incubator warms up and approaches its control setting the red heater indicator LED will change
from continuously on to flashing. Allow the incubator to stabilise for at least an hour before adjusting the
temperature.
3.8 Rotate the red adjustment spindle located in the cable connector housing with a small screwdriver –
clockwise to increase temperature, anticlockwise to reduce it. 1°C (2°F) is about ¼ turn of the spindle.
Refer to the thermometer to check temperature. Adjust temperature with care –small differences have
large effects on hatching performance.
When reducing temperature the red LED may go out while the incubator cools –this is normal.
3.9 Recommended temperatures: Typical incubation period:
Hens 37.4 –37.6°C 99.3 –99.6°F 21 days
Pheasant 37.6 –37.8°C 99.6 - 100°F 23-27 days
Quail 37.6 –37.8°C 99.6 - 100°F 16-23 days
Ducks 37.4 –37.6°C 99.3 –99.6°F 28 days
Geese 37.4 –37.6°C 99.3 –99.6°F 28-32 days
Parrots:
Amazons 36.8 –37.0°C 98.3 –98.6ºF 24-29 days
Macaws 36.8 –37.0°C 98.3 –98.6ºF 26-28 days
Love birds 36.8 –37.0°C 98.3 –98.6ºF 22-24 days
African Grey 36.8 –37.0°C 98.3 –98.6ºF 28 days
Eclectus 36.8 –37.0°C 98.3 –98.6ºF 28 days
Red Adjustment Spindle
Octagon 40
only

Oct 2040 Eco_v02_GB_NL
5
3.10 Developing embryos are fairly tolerant of short term temperature drops and the user need not be
concerned about cooling that occurs when inspecting eggs. Temperatures above ideal can quickly have a
serious detrimental effect on hatch rates and must be avoided.
3.11 Once the correct temperature has been achieved the cable cover must be fitted to ensure the cable is
correctly clamped and the connections are fully protected from splashes of water. Fit the Cable Cover and
gently tighten the screw.
DO NOT ROUTINELY OPERATE THE INCUBATOR WITHOUT THE CABLE COVER IN PLACE.
ENSURE THE CABLE IS NOT CRUSHED OR PINCHED WHEN THE COVER IS FITTED.
The cover is designed to prevent splashes of water reaching the electrical socket and it clamps the cable to
prevent the connector coming loose.
3.12 Plug the cradle mains supply cable into a suitable outlet ensuring that the cable is not pulled tight. The
cradle motor will start and the incubator will begin to turn. Please note:- The turning is very slow –
taking about half an hour to turn each way.
4 Storage of Eggs
4.1 Store eggs in cool, damp conditions. Most species may be safely stored for up to 14 days before serious
reductions in hatch rates are likely. Daily turning of stored eggs also helps maintain hatchability.
4.2 Discard cracked, mis-shaped and heavily soiled eggs (if possible). Only wash soiled eggs using a brand
egg wash solution such as Brinsea Incubation Disinfectant Concentrate following the manufacturer’s
instructions. It is essential to wash eggs in solution which is significantly warmer than the egg. Bear in
mind that all solutions will remove the outer cuticle from the egg as well as the dirt and may leave the egg
at greater risk from bacterial contamination in the future.
5 Humidity and Ventilation
Short term variations in humidity are not important. The average humidity over the incubation period needs to
be near optimum to achieve the ideal weight loss. High humidity for the day or two of hatching is also important.
Beware chronic, excessive humidity.
5.1 Two factors affect incubation humidity: water evaporation within the cabinet (from eggs as well as from
additional water) and levels of ventilation. The water content of the air being drawn through the incubator
will also have an effect.

Oct 2040 Eco_v02_GB_NL
6
5.2 There are three methods available to bird breeders to achieve correct humidity levels:
a) Follow the manufacturer’s guidelines for water and ventilation levels (see below).
b) Measure humidity levels and adjust to match published guidelines for different species (see below).
c) Monitor egg weight loss which varies as a direct result of humidity and correct against published weight
loss figures for the species.
a) As a general guide for poultry set the ventilation control to about half open and maintain water
in one of the water channels. If the incubator is not full reduce the ventilation level
accordingly. If the incubator is full of parrot (and parrot like species) eggs the ventilation
control should be about 2/3rds open. If fewer eggs are incubated reduce the ventilation level
accordingly.
For all species ensure there is water in all channels for the last two days of incubation. Higher
humidity levels are needed for hatching to prevent membranes drying too quickly. Do not
close the vent below 1/3rd when hatching.
The above guidelines make no provision for different ambient conditions and are necessarily
rather generalised but they are simple and often effective.
b) If measuring humidity levels directly be cautious of readings from low cost analogue or digital
hygrometers.
Generally accepted incubation RH levels for species groups:
During incubation Poultry 40-50% RH
Waterfowl 45-55% RH
Parrots 35-45% RH
Hatching All species 65% RH or more
For more specific information on particular species’ requirements check the relevant literature.
c) Eggs lose moisture through their shells and the rate of evaporation depends on the humidity
levels around the eggs and the shell porosity. During incubation eggs need to lose a fixed
amount of water which corresponds to a loss in weight of around 13-16% depending on
species. By weighing eggs periodically during incubation it is possible to monitor and, if
necessary, correct humidity levels to achieve the correct weight loss.
Weigh the eggs on the day they are set in the incubator, take the average weight and plot this
on a graph (see example below). The ideal weight loss line can be plotted by joining the point
representing initial average weight with the ideal hatch weight (13-16% less depending on
species) with the x-axis representing the incubation period (in days).
By measuring actual average weights every few days the actual weight loss can be plotted and
compared to the ideal weight loss line and corrections can be made. For example if the actual
weight loss was greater than ideal (see graph below) then the air has been too dry and humidity
levels need to be increased to compensate.
Typical ideal weight losses for species groups:
Poultry 13%
Parrots 16%
Waterfowl 14%

Oct 2040 Eco_v02_GB_NL
7
5.3 Of the three methods given above the most reliable is egg weight method and is recommended –
particularly where poor hatch rates are experienced or if eggs of high value are being incubated.
5.4 Alter the setting of the ventilation control (reduce ventilation to increase humidity) and have water in
neither, one or more of the water channels to change the humidity level. Humidity levels may be further
increased by placing strips of evaporating card or cloth into one or more of the water channels.
Evaporating card is available from Brinsea Products.
5.5 In all cases the humidity for hatching needs to be high. Because of the short duration involved
water/weight loss will not be significantly affected. High humidity is necessary to prevent membranes
drying and hardening before the hatch fully emerges. Humidity will naturally increase as the first eggs
begin to hatch and internal membranes begin to dry. This effect is in addition to the increased area of
water evaporation from the water channels.
5.6 During hatching the high humidity levels will fall dramatically when the lid is opened and will take some
time to build up. Resist the temptation to lift the lid frequently –leave for at least 6 hours between
inspections.
54
56
58
60
62
64
66
68
Average egg weight (grams)
Incubation period (days)
Egg weight loss chart
Ideal weight (grams)
Measured weight
(grams)
Folded evaporating card

Oct 2040 Eco_v02_GB_NL
8
6 Egg Setting
6.1 The Octagon 20 Eco and Octagon 40 Eco are designed to be as flexible as possible, accommodating eggs
of different sizes up to (and including) goose eggs and in different orientations. Some experimentation
may be necessary to maximise capacity.
6.2 Before setting eggs ensure that the incubator has been run for several hours and has stabilised at the
correct temperature.
6.3 Set the eggs in rows between the wire loop dividers. The dividers must be positioned such that the eggs
rest on the tray bottom and are not pressured by the bar. The dividers prevent the eggs rolling. Eggs may
be set on end (or at an angle) provided the large end of the egg is upwards. Eggs rolling through a few
degrees between the dividers as the incubator turns are not in danger.
6.4 Once the eggs have been set the temperature must not be adjusted for 24 hours to allow the eggs to warm.
Check the water level every 3 days or so and temperature daily. Candle the eggs after 1/3rd of the
incubation period has elapsed to reject clear, infertile eggs (see section 12).
7 Egg Turning
Warning: NEVER MANUALLY TURN THE INCUBATOR WHILE IT IS ON THE CRADLE, this will damage the
turning mechanism and invalidate the guarantee.
THE AUTOTURN CRADLE ASSEMBLY IS FITTED WITH A CLUTCH. IF A CLICKING SOUND IS
HEARD THIS INDICATES OVERLOAD OF THE TURNING MECHANISM. The cause of this may be
overloading of eggs or other objects impeding the turning of the incubator. Ensure the incubator is not
overloaded and that nothing can restrict the movement of the incubator (such as a mains cable or having the
incubator too close to a wall). This may damage the turning mechanism and invalidate the guarantee.
7.1 The Autoturn cradle will continuously turn the incubator and eggs on an hourly cycle (through 90° and
back) while plugged into the mains supply. Some small intermittent movement due to play in the gears is
normal and does not cause harm. Lubrication of the plastic linkage with WD40 helps to ensure smooth,
silent movement.
7.2 Ensure that nothing can impede the movement of the incubator on the cradle (such as a mains cable or
having the incubator too close to a wall).
7.3 Altricial species such as parrots or birds of prey may benefit from additional manual turning through a
full 180° once or twice a day.
8 Hatching
8.1 If hatching in the Octagon 20 Eco or Octagon 40 Eco unplug the Autoturn cradle, remove the incubator
from the cradle, place on the work surface in the upright position and remove the egg dividers two days
before the hatch is due.
8.2 For maximum setting capacity, cleanliness, flexibility and performance a separate hatcher may be used. A
second Brinsea Octagon 20 or 40 is recommended. Contact your dealer for details.
8.3 Eggs nearing hatch are slightly less sensitive to temperature variation and the hatching temperature can be
reduced by up to 1°C (2°F) but this is not essential.
8.4 Hatching humidity levels need to be high (see section 5 above) but note that the ventilation control must
be at least 1/3rd open during hatching.
Oct 2040 Eco_v02_GB_NL
9
8.5 When most eggs have hatched (12 to 48 hours) remove the hatchlings to a brooder. The Brinsea EcoGlow
is ideal for poultry and waterfowl etc. The Brinsea TLC-40 or TLC-50 Brooder is recommended for
exotics.
8.6 During hatching the high humidity levels will fall dramatically when the lid is lifted and will take some
time to build up. Resist the temptation to open the incubator frequently –leave for at least 6 hours
between inspections.
9 Cleaning Up
IMPORTANT:
DISCONNECT THE INCUBATOR AND CRADLE FROM THE MAINS POWER SUPPLY DURING
CLEANING. RISK OF ELECTRIC SHOCK!
ENSURE THAT ALL ELECTRICAL PARTS ARE KEPT DRY. DO NOT IMMERSE THE YELLOW BASE.
9.1 NEVER WASH THE TRAYS, COVERS OR CABINET PARTS IN LIQUIDS OVER 50°C (120°F). DO
NOT USE A DISHWASHER TO CLEAN TRAYS, INCUBATOR BASE OR LID. Following each hatch
remove and wash the egg trays and dividers in Brinsea Incubation Disinfectant Solution. Wipe all other
internal surfaces with a soft cloth soaked in the solution. Do not immerse the hollow yellow base as fluid
may become trapped inside. Ensure that the instructions supplied with the fluid are followed.
9.2 Periodically unscrew the screws retaining the fan cover, remove the cover and soak. Dust and fluff may
be removed from the fan(s) and heater cord with a soft brush. USE NO LIQUIDS.
THE INCUBATOR MUST NOT BE USED WITHOUT THE FAN COVER FITTED. RISK OF
ELECTRIC SHOCK!
WARM AIR DISTRIBUTION WILL BE ADVERSELY AFFECTED IF THE FAN COVER IS NOT IN PLACE.
9.3 If a separate hatcher is used the procedure above should still be followed every two months.
9.4 The exterior of the incubator and Autoturn cradle may be cleaned with a damp cloth. Avoid allowing any
moisture to get inside mechanical housings.
9.5 Always clean the incubator before storage and ensure that the unit is totally dry inside and out. Run the
incubator with no water inside for 24 hours prior to storage to ensure it is completely dry.
10 Servicing
IMPORTANT: THE HEATER CORD AND CONNECTIONS ARE AT MAINS VOLTAGE. NEVER
OPERATE THE INCUBATOR WITH THE FAN COVER REMOVED. RISK OF ELECTRIC SHOCK!
10.1 In case of failure first check that the mains power supply is working and that the mains cable connector is
fully engaged in the socket beneath the cable cover. If the problem persists contact your distributor or
Brinsea Products Service Dept.
10.2 No lubrication or further servicing is required beyond the instructions above.

Oct 2040 Eco_v02_GB_NL
10
11 Troubleshooting
11.1 Poor hatching results are frustrating and can be caused by a large number of factors. The most common
are given below. Brinsea Products will not be held responsible for loss of eggs or chicks under any
circumstances. However we will try to advise on incubation technique to improve results where
necessary.
11.2 Gather as much information from the hatching results as possible to enable the problem to be analysed in
detail. Record dates that eggs are set, incubator settings, dates of hatches, weight losses and the number
and condition of hatchlings. Candle or break open unhatched eggs to estimate the extent of embryo
development. The Brinsea OvaView and High Intensity OvaView candling lamps are available from your
dealer.
1) Clear when candled - probably infertile (or very early death)
when candled at 8 days
2) Fertile with red blood vessels - after 8 days
3) Red or black staining - early death when candled at 8 days
4) Embryo with red blood ‘ring’ - early death when candled at 8 days
5) Dark outline with ill defined detail - late death (10-16 days)
6) Live embryo with bill in air sack - due to hatch in 24-48 hours
7) Normal development of the air pocket according to number of days
General guides:
Observation
Likely Cause(s)
Solution(s)
No chicks hatch
Infertility, infection, drastically
incorrect incubation settings,
parent ill health.
Check egg viability –are similar eggs
hatching naturally. Disinfect the
incubator. Check incubator settings and
procedures –particularly temperature.
Chicks hatch earlier than
expected, deformities.
Incubation temperature too high
Reduce incubation temperature slightly
0.5°C (1°F)
Chicks hatch later than
expected
Incubation temperature too low
Raise incubation temperature slightly
0.5°C (1°F)
Hatch dates widely spread
Different rates of development
due to different storage times,
incubation temperature
variation.
Limit egg storage times. Check for
incubation temperature variation –
sunlight, large room variation etc.
Late stage ‘death in shell’
Incorrect humidity, probably
too high.
Try reducing average humidity levels
(but see section 8 above)
Generally poor results
Incorrect incubation settings,
poor parent bird health,
inadequate egg turning,
Improve parent bird health, check all
incubation settings, analyse egg weight
loss to confirm humidity correct, check
turning working correctly.
1
10
20
1 2 3
4 5 6
7

Oct 2040 Eco_v02_GB_NL
11
12 Specification
Maximum Setting Capacities:
Octagon 20 Advance Octagon 40 Advance
Egg size Typical capacity Typical capacity
Quail 60 120
Pheasant 40 80
Amazon/Macaw 36 72
Hen 24 48
Duck 20 40
Goose 9-12 18-24
Dimensions:
Incubator only 35cm x 26cm x 26cm high 65cm x 26cm x 26cm high
Including Autoturn Cradle 43cm x 26cm x 30cm high 73cm x 26cm x 30cm high
Weight:
Incubator only 2.70 Kg 4.20 Kg
Including Autoturn Cradle 3.25 Kg 4.80 Kg
Power Consumption:
Maximum 45 Watts 90 Watts
(typical average) 25 Watts 40 Watts
Autoturn cradle 4 Watts 4 Watts
Electrical Supply: 230v 50Hz 230v 50Hz
Brinsea Products Ltd, Station Road, Sandford, N. Somerset, BS25 5RA
Tel: 0845 226 0120 Fax: 01934 820250

Oct 2040 Eco_v02_GB_NL
12
Octagon 20 Eco en Octagon 40 Eco
Broedmachines
Handleiding
Inhoud
Paragraaf Onderwerp Pagina
1 Introductie 2
2 Uitpakken 2
3 Ingebruikname en temperatuursinstelling 3
4 Bewaren van eieren 5
5 Luchtvochtigheid en ventilatie 5
6 Plaatsten van de eieren 8
7 Keren van eieren 8
8 Uitkomen van eieren 8
9 Schoonmaak 9
10 Service 9
11 Probleemoplossingen 10
12 Technische specificaties 11

Oct 2040 Eco_v02_GB_NL
13
1 Introductie
Lees deze instructies vóór het gebruik.
Deze instructies omschrijven de werkwijze van uw nieuwe Octagon 20 Eco of Octagon 40 Eco broedmachine en
het optionele Autoturn keersysteem. We verzoeken u deze instructies aandachtig door te nemen vóór het in
gebruik menen van uw product om zo optimale resultaten ermee te kunnen bereiken. Tevens adviseren we u deze
instructies voor later naslagwerk zorgvuldig te bewaren. Dit document bevat een aantal aanbevolen procedures
voor het succesvol uitkomen van de eieren. Echter dienen er tijdens de broedperiode meerdere factoren te
worden gecontroleerd en gemanipuleerd. Daarvoor zouden er in bepaalde omstandigheden andere procedures
nodig kunnen zijn. Het ontwerp van de broedmachine maakt het de gebruiker mogelijk om de broedcondities aan
de eisen van een brede scala diersoorten, verschillende omgevingen en specifieke structuren aan te passen.
Echter zouden er situaties kunnen zijn die buiten het bereik van deze instructies vallen.
Er bestaat een scala van boeken die de verschillende technieken betreffende het uitbroeden van eieren
behandelen. For nadere informatie hierover of om de boekenlijst aan te vragen kunt u contact met ons opnemen.
DE BROEDMACHINE MAG IN GEEN GEVAL WORDEN BEDEKT. EN IS ALLEEN GESCHIKT VOOR
GEBRUIK BINNENSHUIS. DE BROEDMACHINE DIENT OP EEN VOCHT- EN SPATVRIJE PLEK TE
WORDEN GEPLAATST, BUITEN BEREIK VAN HUISDIEREN EN KINDEREN.
Fig. Functionele eigenschappen van de Octagon 20 Eco (de Octagon 40 Eco is functioneel vergelijkbaar)
2 Uitpakken
Deze broedmachine wordt in een beschermende verpakking geleverd. Verwijder alle strips, tape en
verpakkingsmaterialen van de broedmachine en onderdelen, maar bewaar deze en de doos wel in geval u het
product moet retourneren.
Autoturn
keersysteem
Behuizing
temperatuurcontrole
LED indicatielampje
verwarmer
Verstelbaar
ventilatierooster
Behuizing
keermotor
Deksel
snoer/instelschroef
(verwijderen voor
toegang tot de
fraudebestendige
temperatuurregelaar)
Glazen
thermometer
op vloeistof

Oct 2040 Eco_v02_GB_NL
14
De verpakking dient het volgende te bevatten:
Aantal (Octagon 20 Eco) Aantal (Octagon 40 Eco) Voorwerp
1 1 Broedmachine (inclusief verwijderbaar
deksel)
1 2 Eierrekje
1 1 Snoerbehuizing en schroef
1 1 Aansluitkabel
6 12 Tussenschotjes van metaaldraad
Optioneel Autoturn keersysteem:
2 Zijbalkjes
1 Gemotoriseerd uiteinde keersysteem
1 Gewoon uiteinde keersysteem
1 Set van 4 bouten
2.1 We verzoeken u te controleren of alle onderdelen aanwezig of beschadigd zijn. Indien u onderdelen mist
of beschadigd zijn, neem dan contact op met uw leverancier of met Brinsea Products (contactgegevens
pagina12 en 13 ). Beschadigde onderdelen mogen niet worden gebruikt.
2.2 Verifieer dat het elektriciteitsnet voldoet aan de eisen van het apparaat (aangegeven op een sticker aan de
binnenkanten van het broedmachinedeksel en van een van de uiteinden van het lege Autoturn
keersysteem). De snoer dient voor de correcte spanning goedgekeurd te zijn en te voldoen aan de
wetgeving van het land van gebruik.
2.3 Om uw nieuw Brinsea product te registreren kunt u onze website www.brinsea.co.uk bezoeken en u daar,
via de link op de rechter kant van de homepage, aanmelden om in aanmerking te komen voor 2 jaar
kostenloze garantie op uw product.
3 Ingebruikname en temperatuursinstelling
3.1 Uw broedmachine zal de beste resultaten geven als hij in een ruimte wordt geplaatst, die vrij is van grote
temperatuurschommelingen en voorzien van goede ventilatie –in het bijzonder als er meerdere
broedmachines tegelijk lopen. Zorg ervoor dat de kamertemperatuur tijdens koude nachten niet plotseling
kan dalen. De ideale kamertemperatuur is tussen de 20 and 25°C (68 and 77°F). Laat nooit toe dat de
kamertemperatuur onder de 15°C (59°F) komt en zorg ervoor dat de broedmachine niet aan het directe
zonlicht is blootgesteld. Plaats de broedmachine nooit op de grond.
3.2 Als u het Autoturn keersysteem gebruikt: zet het keersysteem in elkaar volgens onderstaande afbeelding
(Fig. 2) en plaats het op een vlak en waterpas oppervlak (de hoogte van een werkbank is ideaal). Plaats
daarna de broedmachine in het keersysteem zoals afgebeeld in Fig. 1. De broedmachine is zo ontworpen
dat hij precies op de pinnen aan de weerzijden van het Autoturn keersysteem geplaatst kan worden. Zorg
ervoor dat u tijdens het plaatsen het apparaat deze zo kantelt dat u het mechanisme van de werkende pin
niet beschadigd. Verzekert u dat de pinnen van de keermachine goed in de gleuven van de broedmachine
zitten en het apparaat waterpas hangt.
FIG. 2

Oct 2040 Eco_v02_GB_NL
15
3.3 Bij gebruik zonder het Autoturn rekje plaats de broedmachine plat op een vlak en even oppervlak.
3.4 Verwijder het deksel en plaats het op een droge spatvrije plek. Haal het eierrekje uit de broedmachine en
vul een van de twee gootjes (Octagon 20 Eco) of twee van de vier gootjes (Octagon 40 Eco) met water of
met een 100:1 oplossing van het Brinsea Desinfecteermiddel. De afstand tussen de bovenkant van het
gootje en de vloeistof dient 3/4” (20mm) te zijn. Plaats het eierrekje en het deksel terug. Verstel de
ventilatieopening totdat deze in het midden staat.
3.5 Sluit de netsnoer aan op het deksel van de broedmachine. Zorg ervoor dat het stekkertje goed in het
stopgat en de houder zit.
3.6 Sluit nu de adapter op een geschikt stopcontact aan en zorg ervoor dat de snoer niet te strak gespannen
staat. De ventilator van de broedmachine zal starten en het LED indicatielampje zal continu branden.
Geef de broedmachine op zijn minst een uur de tijd om een stabiele temperatuur te bereiken voordat u
temperatuuraanpassingen gaat uitvoeren of er eieren in legt.
Een stabiele en correcte temperatuur is essentieel voor goede resultaten. Pas de temperatuur dus met zorg
aan.
Let op: uw broedmachine zou niet de juiste temperatuurinstellingen kunnen hebben af fabriek.
Daarom dient u de volgende procedure te volgen voordat u er eieren in plaatst.
3.7 Zodra tijdens het opwarmen de broedmachine de juiste temperatuur nadert zal het LED indicatielampje
niet meer constant branden, maar knipperen. Laat daarna de broedmachine op zijn minst een uur
stabiliseren en pas daarna pas de temperatuur aan.
3.8 Draai met een kleine schroevendraaier voorzichtig aan de kleine rode spil, die zich in de stekkerbehuizing
–met de klok mee om de temperatuur te verhogen, tegen de klok in om de temperatuur te verlagen. Een
¼ slag bedraagt ongeveer 1°C (2°F). Raadpleeg de thermometer om de temperatuur te controleren. Pas de
temperatuur met zorg aan –kleine verschillen hebben grote invloed op het uitkomen van de eieren.
Bij het verlagen van de temperatuur en het afkoelen van de broedmachine gaat het LED indicatielampje
uit –dit is normaal.
Rode temperatuuregelingsspil
Alleen bij
Octagon 40

Oct 2040 Eco_v02_GB_NL
16
3.9 Algemene richtlijnen temperatuursinstellingen
Soort
Aanbevolen temperatuur
Kenmerkende broedperiode
Kip
37.4 –37.6°C / 99.3 –99.6°F
21 dagen
Fazant
37.6 –37.8°C / 99.6 - 100°F
23-27 dagen
Kwartel
37.6 –37.8°C / 99.6 - 100°F
16-23 dagen
Eend
37.4 –37.6°C / 99.3 –99.6°F
28 dagen
Gans
37.4 –37.6°C / 99.3 –99.6°F
28-32 dagen
Papegaaiachtige:
Amazonepapegaai
36.8 –37.0°C / 98.3 –98.6ºF
24-29 dagen
Ara
36.8 –37.0°C / 98.3 –98.6ºF
26-28 dagen
Parkiet
36.8 –37.0°C / 98.3 –98.6ºF
22-24 dagen
Grijze roodstaart
36.8 –37.0°C / 98.3 –98.6ºF
28 dagen
Edelpapegaai
36.8 –37.0°C / 98.3 –98.6ºF
28 dagen
3.10 De ontwikkeling van een embryo kan redelijk goed korte temperatuursdalingen verdragen. Gebruikers
dienen zich dus niet al te veel zorgen te maken over het afkoelen van de eieren tijdens een inspectie.
Echter kunnen temperaturen boven de ideale vrij snel ernstige nadelige schade aan de eieren en het
uitkomen berokkenen en dienen dus absoluut te worden voorkomen.
3.11 Zodra de correcte temperatuur is bereikt kunt u de snoerbehuizing vastzetten om ervoor te zorgen dat de
snoer goed blijft zitten en dat stekkertje tegen spatwater beschermd is. Plaats het deksel van de
snoerbehuizing over de snoer en schroef het voorzichtig vast.
GEBRUIK DE BROEDMACHINE ALLEEN ALS HET SNOERDEKSEL IS VASTGEZET.
ZORG ERVOOR DAT DE SNOER NIET IS BESCHADIGD OF BEKNELD RAAKT TIJDENS
HET VASTZETTEN VAN HET DEKSEL VAN DE SNOERBEHUIZING.
Het deksel is zodanig ontworpen om te voorkomen dat spatten tot aan het stopgat kunnen komen en het
houdt tevens de snoer op zijn plek zodat het stekkertje niet los kan komen te zitten.
3.12 Sluit nu de adapter van het keersysteem op een geschikt stopcontact aan en zorg ervoor dat de snoer niet
te strak gespannen staat. De motor van het keersysteem zal beginnen te lopen en de broedmachine zal
beginnen met keren. Let op: het keren gaat heel traag - het duurt ongeveer een half uur per enkele
richting.
4 Bewaren van eieren
4.1 Bewaar eieren op een koele en vochtige plek. De eieren van veel diersoorten kunnen tot wel 14 dagen
voor het uitbroeden probleemloos worden bewaard. Ook het dagelijks keren van de eieren helpt het
succespercentage van het uitkomen te behouden.
4.2 Beschadigde, misvormde en sterk vervuilde eieren dienen () te worden verwijderd. Was eieren alleen met
een daarvoor bestemd product zoals Brinsea Desinfecteermiddel Concentraat en volg hierbij de
instructies op. Het is belangrijk dat de eieren in een oplossing worden gewassen, die warmer is dan het ei
zelf. Houd in gedachten dat alle oplossingen niet alleen maar het vuil, maar ook het beschermende laagje
aan de buitenkant van het ei verwijderen, en het ei daardoor vatbaarder voor bederf en bacteriële
besmetting kan worden.

Oct 2040 Eco_v02_GB_NL
17
5 Luchtvochtigheid en ventilatie
Korte luchtvochtigheidschommelingen zijn niet schadelijk. De gemiddelde luchtvochtigheidsgraad gedurende de
broedperiode is van levensbelang. Deze dient zo dicht mogelijk bij het optimale gemiddelde te liggen, zodat het
gewichtsverlies van de eieren tot een minimum wordt beperkt.
Een hoge luchtvochtigheidsgraad gedurende de eerste en tweede dag van het uitkomen van de eieren is eveneens
cruciaal. Vermijd in alle gevallen chronische overmatige luchtvochtigheid.
5.1 Er zijn twee factoren, die de luchtvochtigheidgraad beïnvloeden: het verdampen van water in de
broedmachine (van de eieren maar ook van het toegevoegde water) en de mate van ventilatie. Tevens
speelt het vochtgehalte van buitenaf de door de ventilatie ingezogen lucht een rol.
5.2 Er zijn drie methodes om een correcte luchtvochtigheidsgraad tijdens het uitbroeden van eieren te
verkrijgen:
a) Volg de instructies van de producent m.b.t. water- en ventilatie niveaus (zie hieronder).
b) Meet de luchtvochtigheidsgraad en pas hem aan volgens de gepubliceerde richtlijnen voor de
verscheidene vogelsoorten (zie hieronder).
d) Monitor het gewichtsverlies van de eieren als direct gevolg van de luchtvochtigheidsgraad en vergelijk
de gegevens met de gepubliceerde gewichtsverliescijfers voor de verschillende species.
A) Als algemene regel voor eieren van pluimvee geldt dat de ventilatierooster half open dient te
zijn en dat er in een van de gootjes water staat. Indien de broedmachine niet helemaal vol is,
verminder de ventilatie naar verhouding. Indien de broedmachine wordt gebruikt voor
papegaaieneieren (of papegaaiachtige) dient het ventilatierooster tot 2/3 open te zijn. Mocht de
broedmachine niet vol zijn, verminder dan ook in dit geval de ventilatie naar verhouding.
Zorg ervoor dat gedurende de laatste twee dagen van broeding water in alle gootjes zit. Een
hogere luchtvochtigheidsgraad is nodig voor het uitkomen van de eieren en om te voorkomen
dat het membraan te snel uitdroogt. Sluit de ventilatierooster niet meer dan tot 1/3 tijdens
het uitkomen van de eieren.
Bovenvermelde richtlijnen houden geen rekening met alle verschillende
omgevingsomstandigheden en zijn noodgedwongen vereenvoudigd, maar wel simpel in uitvoer
en vaak doeltreffend.
B) Indien u de luchtvochtigheidsgraad direct meet met een goedkope analoge of digitale
thermometer adviseren wij u de metingen niet al te nauw te nemen.
Algemene richtlijnen m.b.t. RH niveaus per soortgroep:
Gedurende de broedperiode
Pluimvee
40-50%RH
Watervogels
45-55%RH
Papegaai
35-45%RH
Gedurende het uitkomen
Alle soorten
65%RH of meer
Voor meer informatie over de eisen van specifieke soorten kunt u de vakliteratuur raadplegen.
C) Eieren verliezen vocht via de schaal en de hoeveelheid vochtverlies is afhankelijk van de
luchtvochtigheidsgraad van de ruimte waarin zich de eieren bevinden en van de porositeit van
hun schaal. Tijdens de broedperiode verliezen eieren een vaste hoeveelheid water. Deze
hoeveelheid komt overeen met 13-16% gewichtsverlies, afhankelijk van de soort. Door de
eieren tijdens de broedperiode regelmatig te wegen kunt u de luchtvochtigheidsgraad
monitoren en, indien nodig, corrigeren om het correcte gewichtsverlies te bereiken.

Oct 2040 Eco_v02_GB_NL
18
Weeg de eieren op de dag dat u ze in de broedmachine zet, reken het gemiddelde gewicht per
ei uit en zet deze uit in een grafiek (zie voorbeeld hieronder). De ideale gewichtsverlieslijn kan
worden uitgezet door het gemiddelde initiële gewicht met het ideale uitkomstgewicht te
verbinden. (13-16% minder afhankelijk van de soort). De x-as geeft de broedperiode in dagen
weer.
Door elke paar dagen het gemiddelde gewicht te meten kan het daadwerkelijke vochtverlies
worden uitgezet worden en worden vergeleken met de ideale gewichtsverlieslijn. Aan de hand
van dit vergelijk kunnen dan ook correcties worden doorgevoerd. Indien bij voorbeeld het
werkelijke vochtverlies groter is dan het ideale, betekent dit dat de luchtvochtigheidsgraad te
laag is geweest en moet het niveau worden verhoogd om het vochtverlies te compenseren.
Ideaal gewichtsverlies per soortgroep:
Pluimvee 13%
Papegaaien 16%
Watervogels 14%
5.3 Van de drie bovenvermelde methoden is de meest geadviseerde de methode van het wegen van de eieren
–in het bijzonder als de uitkomstresultaten heel lag zijn of er eieren van grote waarde worden uitgebroed.
5.4 Pas de ventilatie-instellingen aan doormiddel van het verschuiven van de ventilatierooster (verlaag de
ventilatie om luchtvochtigheid te verhogen) en voeg water in een of meerdere van de gootjes toe om de
luchtvochtigheidsgraad te veranderen. Het luchtvochtigheidniveau kan ook worden verhoogd doormiddel
van het plaatsen van stroken verdampingsvellen in een of meerdere gootjes. U kunt de verdampingsvellen
verkrijgen bij uw leverancier.
54
56
58
60
62
64
66
68
Gemiddelde gewicht eieren
(gram)
Broedperiode (dagen)
Grafiek gewichtsverlies eieren
Ideaal gewicht (gram)
Gemeten gewicht
(gram)

Oct 2040 Eco_v02_GB_NL
19
5.5 In alle gevallen dient de luchtvochtigheidgraad tijdens het uitkomen van de eieren hoog te zijn. Het
verlies van water/gewicht zal dan ook minimaal worden beïnvloed gezien de korte duur van dit proces.
Een hoge luchtvochtigheid is nodig om te voorkomen dat het membraan uitdroogt en verhardt vóór het
proces van het uitkomen begint. De luchtvochtigheid zal op natuurlijke wijze dan ook toenemen, zodra de
uitkomst van de eieren begint en het membraan begint te drogen. Dit fenomeen staat los van de toename
aan waterverdamping via de watergootjes van het apparaat.
5.6 Tijdens het uitkomen van de eieren zal de luchtvochtigheid, iedere keer als het deksel van de
broedmachine wordt geopend, drastisch afnemen en het zal enige tijd duren voordat het
luchtvochtigheidniveau weer zal zijn hersteld. Weersta dus de verleiding om het deksel vaak te
openen en laat tussen de inspecties minimal 6 uur verstrijken.
6 Plaatsen van eieren
6.1 De Octagon 20 Eco en de Octagon 40 Eco zijn ontworpen om zo flexibel mogelijk te zijn en geschikte te
zijn voor eieren van verschillende groottes en nature tot en met een ganzenei. Het optimaliseren van de
capaciteit van uw broedmachine zal echter enige experimenten vergen.
6.2 Zorg ervoor dat de broedmachine al meerdere uren heeft aangestaan en de temperatuur is gestabiliseerd,
voordat u de eieren er in gaat leggen.
6.3 Plaats de eieren in rijen tussen de tussenschotjes (ijzerdraadlussen). Plaats de tussenschotten zo dat de
eieren op de grond van het eierrekje rusten en door de verstevigingstaafjes geen druk op de eieren
uitoefenen. De tussenschotjes zorgen ervoor dat de eieren niet kunnen gaan rollen. Aan de uiteinden van
de schotjes en in de hoeken van het apparaat kunt u de eieren iets schuin neerzetten, met het bredere
gedeelte naar boven gericht. Tijdens het keren van de broedmachine kunnen de eieren zich om enkele
millimeter tussen de schotjes gaan bewegen, maar dit is niet gevaarlijk voor ze.
6.4 Na het plaatsen van de eieren mag de temperatuur voor 24 uur lang niet worden aangepast, zodat de
eieren warm kunnen worden. Controleer het waterniveau ongeveer elke 3 dagen en de temperatuur
dagelijks. Inspecteer na 1/3 van de broedtijdperiode de eieren met een shouwlamp en verwijder lege en
onbevruchte eieren (zie paragraaf 12).
7 Keren van eieren
WAARSCHUWING: KEER NOOIT HANDMATIG DE BROEDMACHINE ALS DEZE ZICH NOG IN HET
KEERSYSTEEM BEVINDT, WANT U ZOU HET KEERMECHANISME KUNNEN BESCHADIGEN EN U
GARANTIE LATEN KOMEN TE VERVALLEN.
Gevouwen
verdampingsvel

Oct 2040 Eco_v02_GB_NL
20
DE SAMENSTELLING VAN HET AUTOTURN KEERSYSTEEM IS UITGERUST MET EEN
KOPPELING. INDIEN TIJDENS HET GEBRUIK EEN CLICKEND GELUID TE HOREN IS,
BETEKENT DIT DAT HET MECHANISME VAN HET KEERSYSTEEM OVERBELAST IS.
De reden hiervoor zou een overgewicht aan eieren of een obstakel kunnen zijn die het normale keren van de
broedmachine belemmert. Zorg ervoor dat de broedmachine niet al te zwaar beladen is en dat niets het normale
functioneren van het keersysteem in de weg staat, bijvoorbeeld een netkabel of de te dichte nabijheid van een
muur. Dit zou het keermechanisme kunnen beschadigen en u garantie zou komen te vervallen.
7.1 Een keer aan de netstroom aangesloten zal het Autoturn keersysteem zal continu de broedmachine en de
eieren elk uur keren (naar 90° en terug). Periodieke bewegingen als gevolg van de speling tussen de
tandwielen van het schakelmechanisme kunnen als normaal worden beschouwd en zijn niet schadelijk.
Om ervoor te zorgen dat het keersysteem soepel en stil beweegt, adviseren we u de plastickoppeling met
WD40 regelmatig te smeren.
7.2 Zorg ervoor dat de broedmachine vrij en zonder belemmeringen of obstakels (bijvoorbeeld een netkabel
of de te dichte nabijheid van een muur) in het keersysteem kan bewegen.
7.3 Steun behoeftige soorten, zoals papegaaien of roofvogels hebben er baat bij indien hun eieren op
dagelijkse basis ook nog eens twee keer om 180° worden gekeerd.
8 Uitkomen van eieren
8.1 Indien voor het broeden van eieren de Octagon 20 Eco of Octagon 40 Eco worden gebruikt, trek twee
dagen voor het geplande uitkomen de stekker van het Autoturn keersysteem uit, haal de broedmachine er
uit en plaats deze op een plat, waterpas oppervlak, verwijder de tussenschotjes.
8.2 Indien u de broedcapaciteit, de hygiëne en de flexibiliteit in het uitkomen van eieren wilt verhogen, kunt
u ook gebruik maken ven een tweede broedmachine. Wij adviseren u in dit geval om een tweede Octagon
20 of Octagon 40 aan te schaffen. Neem hiervoor contact met uw leverancier op.
8.3 Eieren, die kort voor het uitkomen zijn, zijn minder gevoelig voor temperatuurschommelingen. U kunt de
temperatuur gerust om 1°C (2°F) verlangen, maar dit is niet verplicht.
8.4 Een hogere luchtvochtigheidsgraad is nodig voor het uitkomen van de eieren en om te voorkomen dat het
membraan te snel uitdroogt. Sluit de ventilatierooster niet meer dan tot 1/3 tijdens het uitkomen van de
eieren.
8.5 Op het moment dat het grotendeel van de eieren is uitgekomen (12 tot 48 uur na het eerste ei) verplaats de
jongen naar een andere broedeenheid. De Brinsea Eco Glow is ideaal voor gevogelte, watervogels e.d.
Voor de exoten adviseren we de Brinsea TLC-40 of de TLC-50 broedmachines te gebruiken.
8.6 Tijdens het uitkomen van de eieren zal de luchtvochtigheid, iedere keer als het deksel van de
broedmachine wordt geopend, drastisch afnemen en het zal enige tijd duren voordat het
luchtvochtigheidniveau weer zal zijn hersteld. Weersta dus de verleiding om het deksel vaak te
openen en laat tussen de inspecties minimal 6 uur verstrijken.
9 Schoonmaak
BELANGRIJK:
HAAL DE BROEDMACHINE EN HET AUTOTURN KEERSYSTEEM ALTIJD VAN DE NETVOEDING
VOORDAT U AAN DE SCHOONMAAK BEGINT.
ZORG ERVOOR DAT ALLE ELECTRISCHE ONDERDELEN DROOG BLIJVEN. DOMPEL DE GELE
ONDERKANT VAN DE BROEDMACHINE NIET ONDER.
U RISKEERT ANDERS EEN ELEKTRISCHE SHOCK!
This manual suits for next models
1
Table of contents
Languages:
Other Brinsea Accessories manuals

Brinsea
Brinsea Ova-Easy Advance Series II User manual

Brinsea
Brinsea OCTAGON 10 User manual

Brinsea
Brinsea Mini II Advance User manual

Brinsea
Brinsea Ovation 56 ECO User manual

Brinsea
Brinsea TLC-40 Eco User manual

Brinsea
Brinsea Mini Eco User manual

Brinsea
Brinsea CONTAQ Z6 User manual

Brinsea
Brinsea Mini EX User manual

Brinsea
Brinsea Ova-Easy Advance Series II User manual

Brinsea
Brinsea OvaView User manual