© BriskHeat®Corporation. Todos los derechos reservados.
19
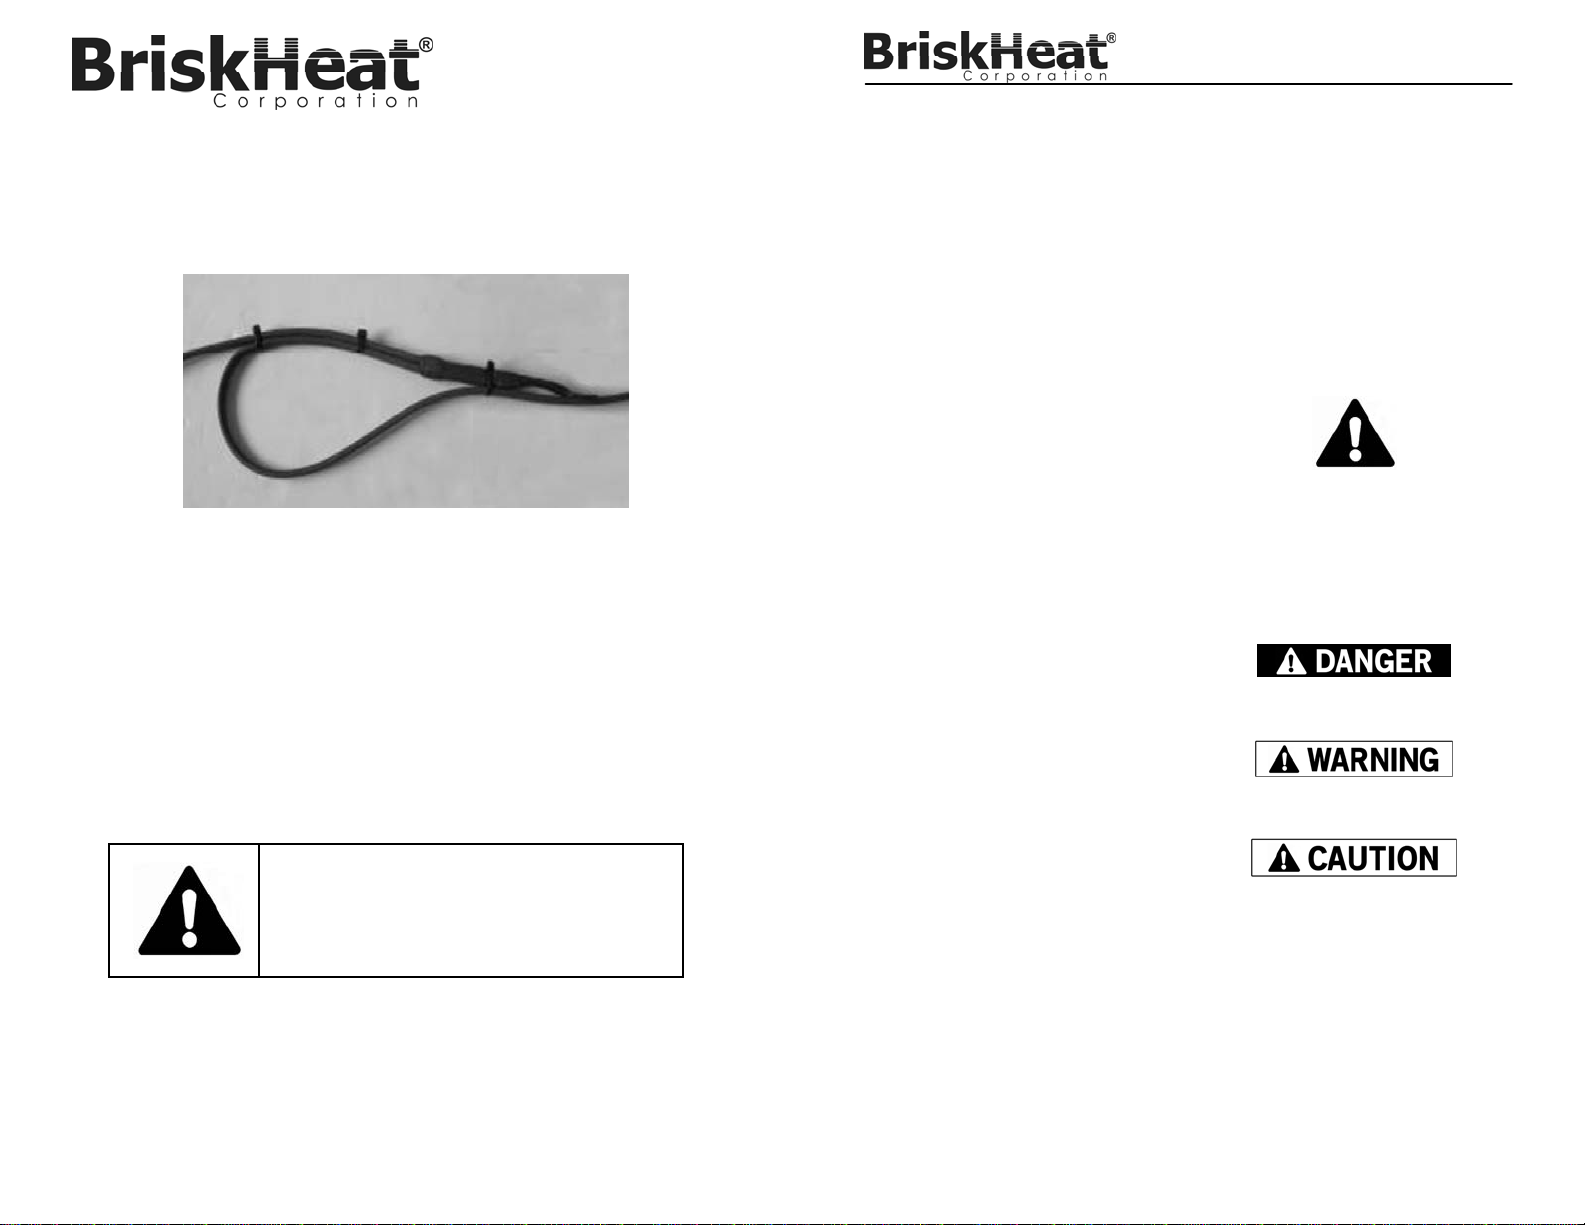
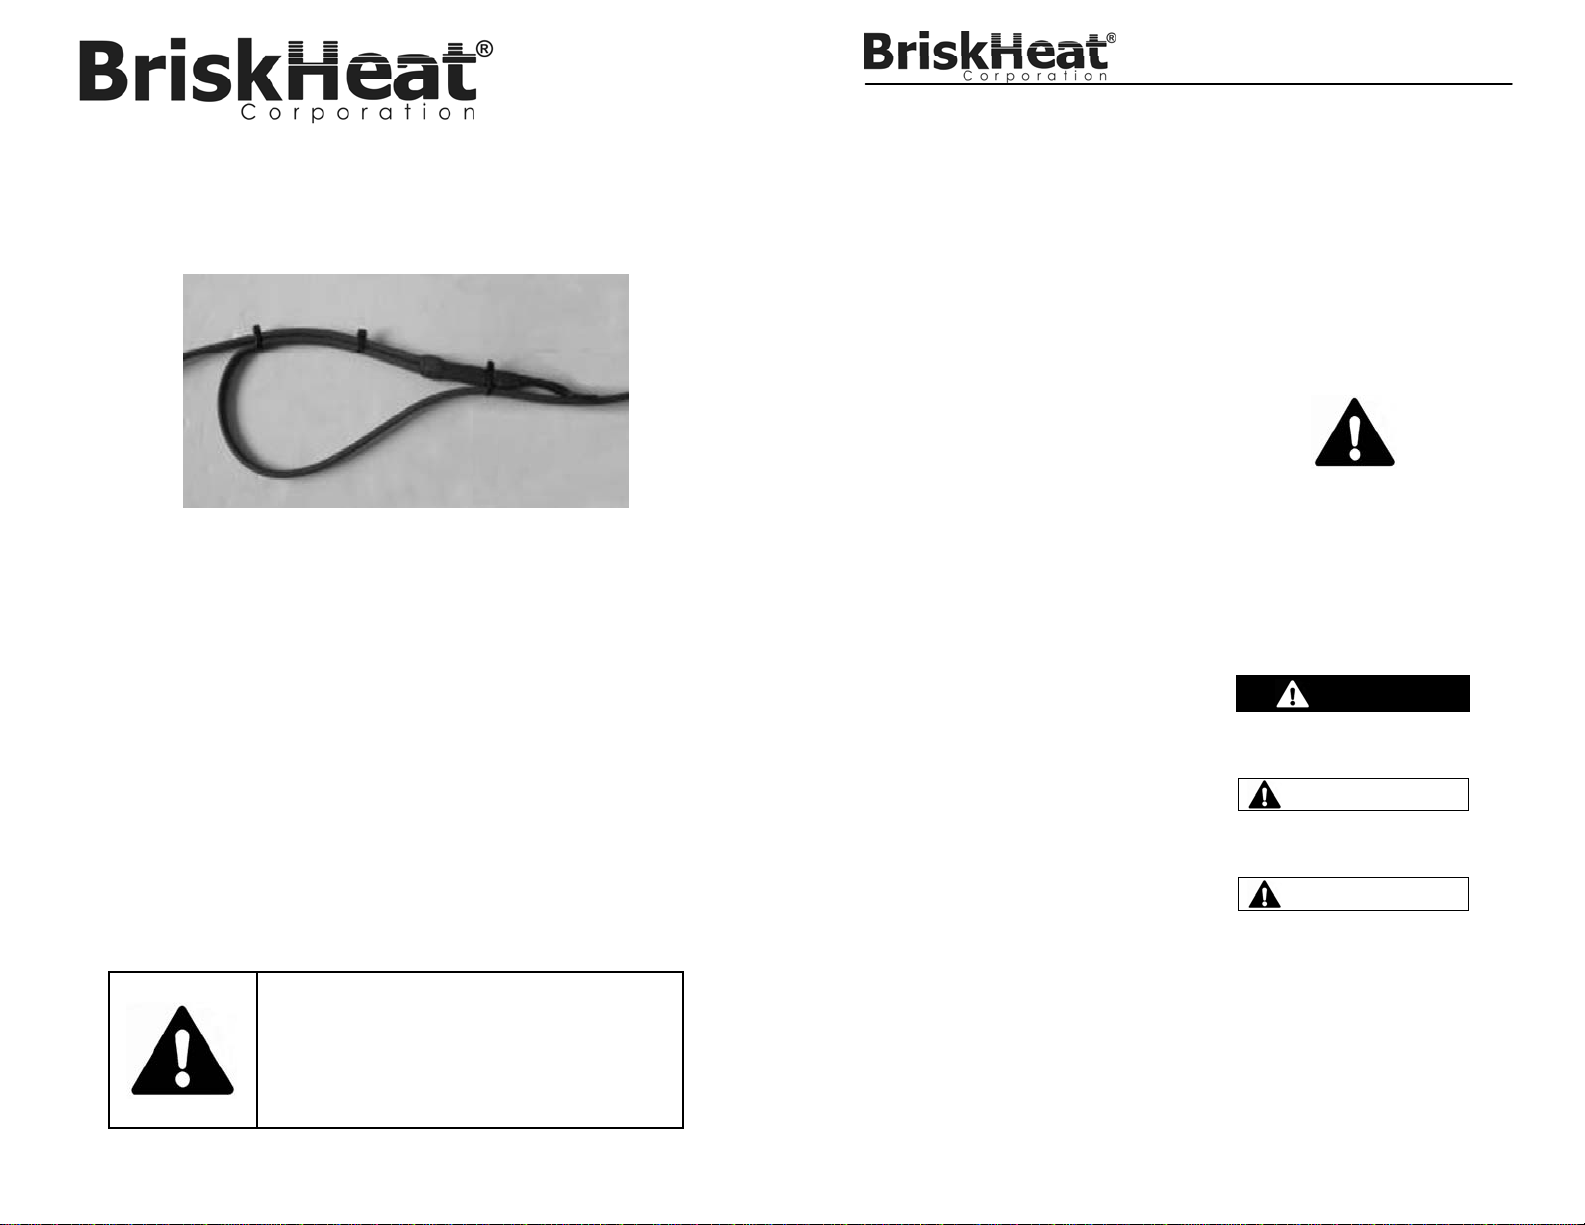
Instrucciones de instalación del kit de T y empalme
SLCBLSK Instrucciones de instalación
No sumerja la conexión de empalme en
líquido.
Mantenga el material volátil o inflamable lejos
de la conexión de empalme durante su uso.
Use la conexión de empalme solo en lugares
aprobados.
Mantenga los objetos metálicos afilados lejos
de la conexión de empalme.
No respetar estas advertencias puede resultar en
descarga eléctrica, riesgo de incendio y lesiones
personales.
El usuario final debe cumplir lo siguiente:
Solo personal cualificado tiene permitido
conectar el cableado eléctrico.
Desconecte todo el suministro eléctrico desde
la fuente antes de realizar conexiones
eléctricas.
Todo el cableado eléctrico debe cumplir con
los códigos de electricidad locales y se
recomienda encarecidamente seguir el
Artículo 427 del NEC.
La persona que realiza la instalación o
cableado final debe estar cualificada para este
trabajo.
El usuario final es responsable de
proporcionar un dispositivo de desconexión
adecuado.
El usuario final es responsable de
proporcionar un dispositivo de protección
eléctrica adecuado. Se recomienda
encarecidamente el uso de un disyuntor de
tierra accidental.
No prestar atención a estas advertencias puede
resultar en lesiones personales o daños al
calentador.
INSTRUCCIONES IMPORTANTES DE SEGURIDAD
Aprobaciones de agencias
Las probaciones son solo válidas cuando la
instalación se ha realizado conforme a todas las
instrucciones, normativas y regulaciones pertinentes.
Inspeccione todos los componentes antes de
su uso.
No use la conexión de empalme si alguno de
los componentes está dañado.
No repare los componentes dañados o
defectuosos.
No aplaste ni aplique tensión física fuerte
sobre ningún componente del sistema.
La unidad debe montarse lejos de vibraciones,
impactos, agua o gases corrosivos.
No opere por encima del valor nominal de
temperatura.
Fije la conexión de empalme solo con los
métodos aprobados.
No prestar atención a estas advertencias puede
resultar en lesiones personales o daños al
calentador.
Una persona que no haya leído
y comprendido todas las
instrucciones de instalación no
está cualificada para instalar el
producto.
PELIGRO
ADVERTENCIA
PRECAUCIÓN
PELIGRO
© BriskHeat®Corporation. Todos los derechos reservados.
20
Instrucciones de instalación del kit de T y empalme
SLCBLSK Instrucciones de instalación
DESCRIPCIÓN GENERAL DEL PRODUCTO
Descripción
El kit de T y empalme SLCBLSK es adecuado para usarlo únicamente con el cable de calefacción autorregulador de la
serie SLCBL. El kit contiene materiales para hacer una conexión de empalme o en T y una conexión de obturación de
extremo. Este kit no proporciona una conexión eléctrica: use un kit de conexión eléctrica SLCBLUC o SLCBLUC-GF para
obtener una instalación completa.
Aplicaciones
Use el kit SLCBLSK con los siguientes cables de calefacción: SLCBL-B, SLCBL-BP y SLCBL-BF. El cable SLCBL-B está
diseñado para entregar protección contra congelación de tuberías en lugares secos. El cable SLCBL-BP está diseñado
para lugares húmedos y secos, así como para deshelar tejados y canalones. El cable SLCBL-BF está diseñado para
lugares húmedos y secos, así como para entornos con sustancias químicas fuertes. El tipo de cable está impreso en la
funda exterior del cable.
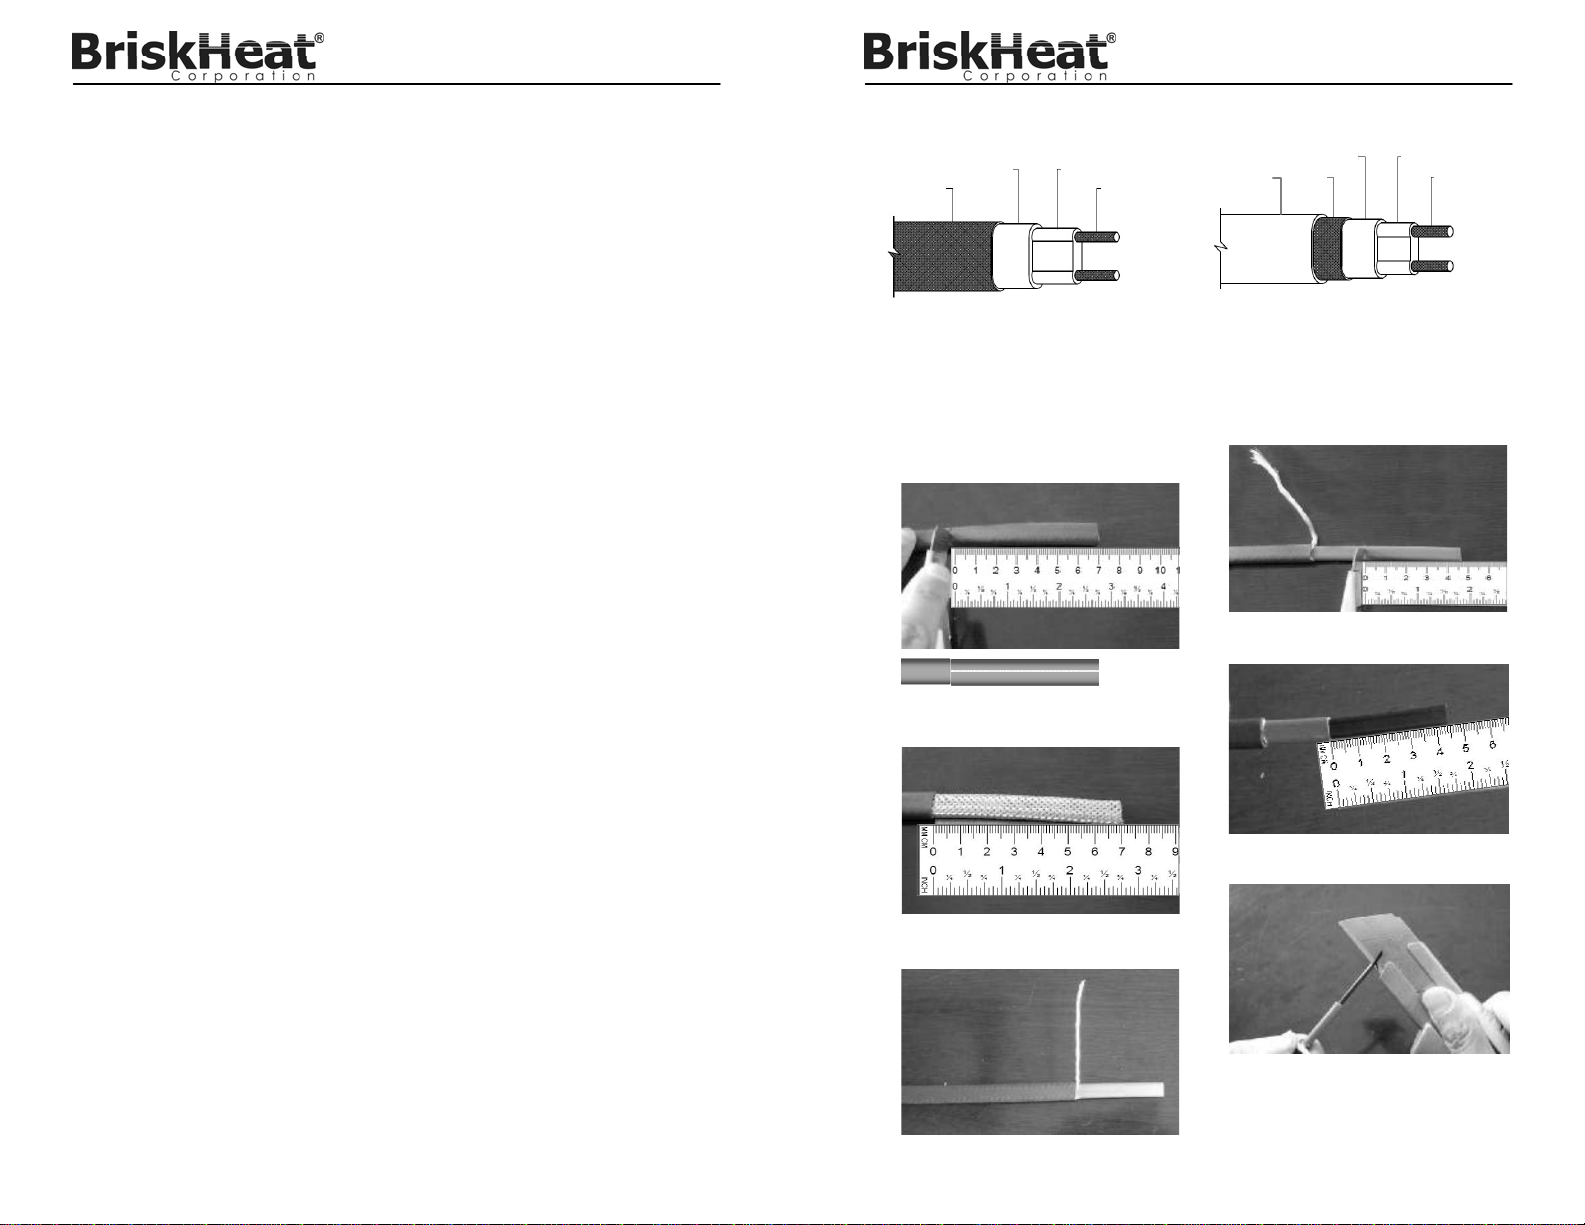
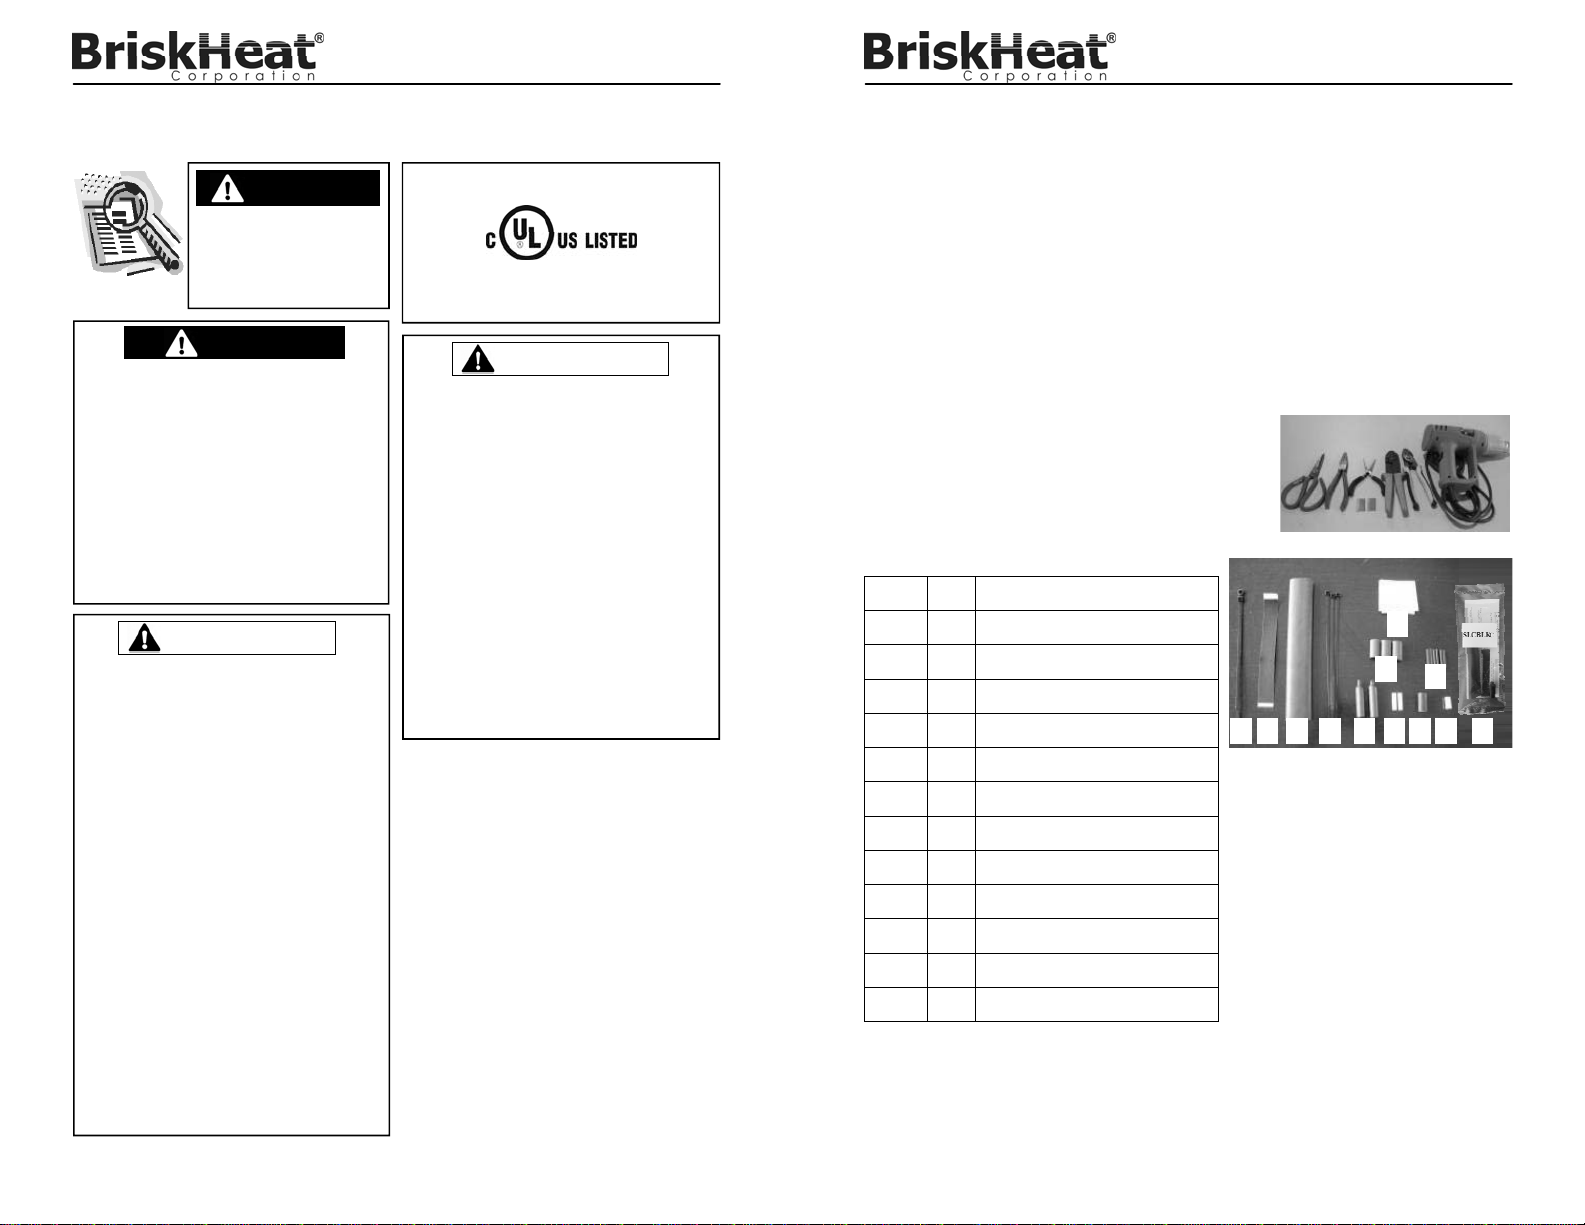
Herramientas necesarias
Tijeras, alicates planos, pinzas de punta de aguja, cuchillo para uso general,
herramientas para plegar, alicates de cortar, pistola de calor
Contenido del kit
Elemento Cant. Descripción
A 1 Amarra de abrazadera
B 1 Cinta de tela negra de 15,2 cm L (6 ”L)
C 1
Tubo termocontraíble de
2,5 cm Diám. x 20,3 cm L (1” Diám. x 8” L)
D 3 Amarras para cables
E 5
Tiras de cinta Mastic de
3,8 cm L x 2,5 cm A (1-1/2” L x 1” A)
F 3
Tubo termocontraíble de
2,5 cm L x 1,3 cm Diám. (1” L x 1/2” Diám.)
G 6
Tubo termocontraíble de
2,5 cm L x 0,3 cm Diám. (1” L x 1/8” Diám.)
H 2 Tapa termocontraíble
I 2
Pliegues de cable de barra colectora con
aislamiento
J 1
Tubo termocontraíble para conexión a
tierra
K 1 Pliegue de trenza sin aislamiento
Importante: Es posible que se necesiten accesorios adicionales.
L 1 Kit de obturaciones de extremo
A B C D
E
F G
H I J K L