............
DMX512
CONTROLLER
DMX Addr.1
ID Addr.1
DMX Addr.1
ID Addr.2
DMX Addr.1
ID Addr.3
DMX Addr.13
ID Addr.1
DMX Addr.13
ID Addr.2
DMX Addr.13
ID Addr.3
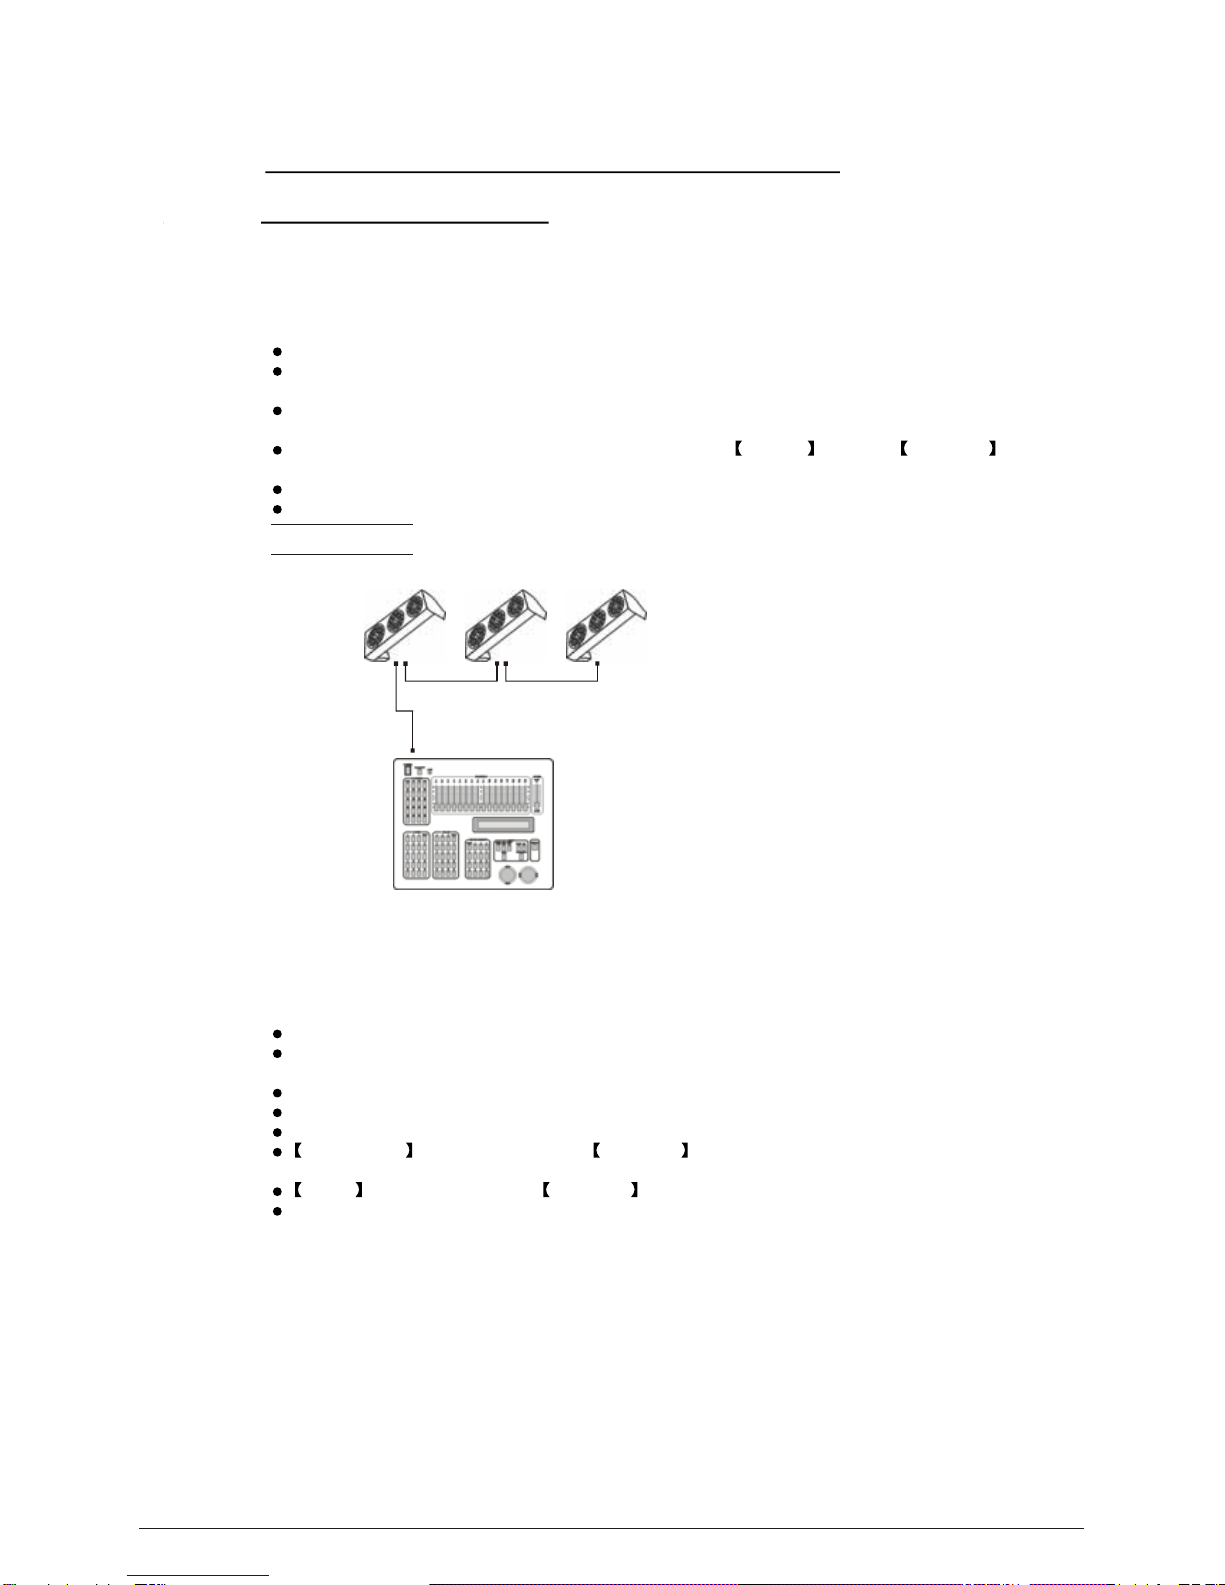
Example:
The figure above shows a simple DMX layout
which has usedthree units ateach DMX address.
The three unitshave different ID addresses which
allows the user to collectively control the whole
group of units at that DMX address by setting
CH10 to 0, or to control each unit independently by
first selecting the DMX address and then by using
CH10 to locate the target ID address. (Note that
when using IDaddresses it is also possible to
activate ADAS which allows for even more options
with DMX addressingand control see ADAS
Addressing section 2.2-3)
2.4-3 ADAS WITH ID ADDRESS(STAGE 1 MODE)
Connect the DMX512 controller to the units in series
Select ADAS ON from the Settings menu
ID Address should be set in the Settings menu on each unit
in ascending values(i.e. 1,2,3...)
ADAS addressingis based onthe ID addressas follows:
ADAS DMX Address = { ADAS fader * (ID Address -1)}+1
ADAS addressing is activated by moving CH8 + CH10 faders to the 255 value (CH8 = 255 &
CH10 = 255)
ADAS addressing is deactivated by moving CH8 + CH10 + CH11 to the 255 value
(CH8 = 255, CH10 = 255 & CH11 = 255)
When ADASis deactivated, allDMX addresses willreturn to theiroriginal DMXAddress.
To permanently store ADAS DMX addresses, select ADAS copy from the Settings
menu,on the target fixtures to store the new DMX Address.
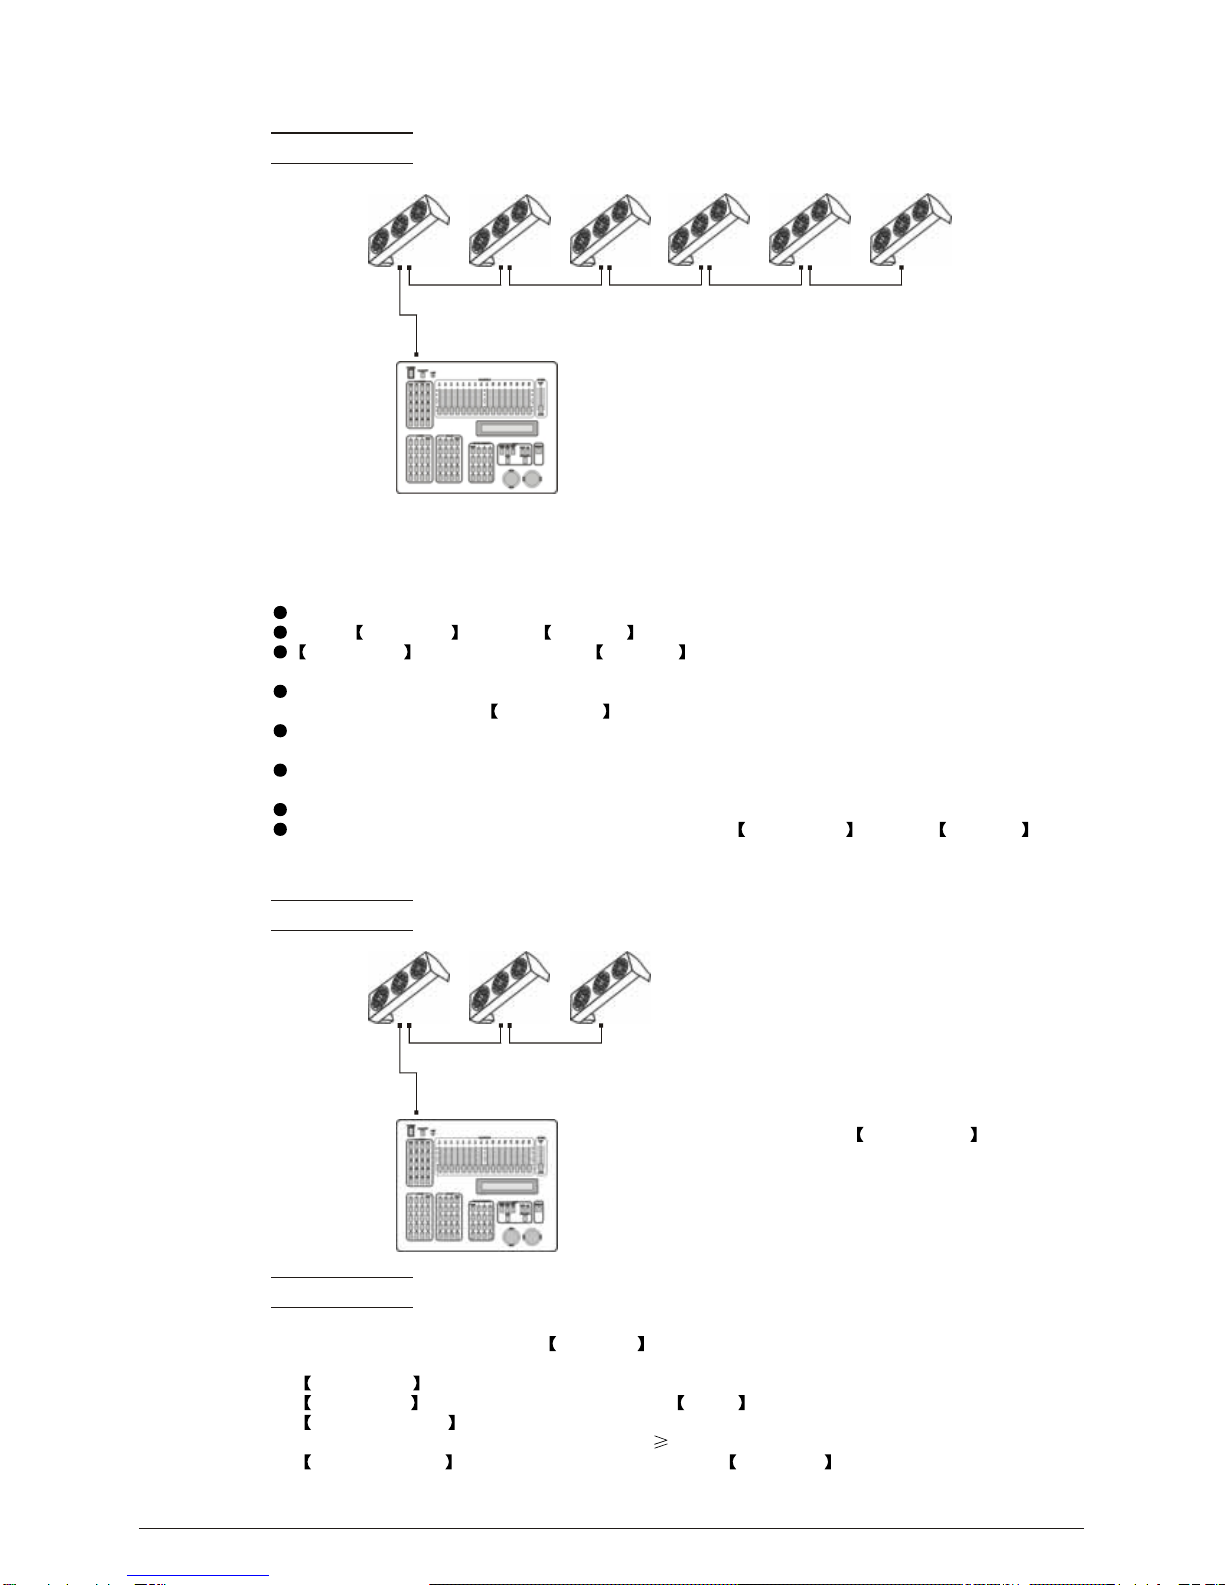
Example:
............
DMX512
CONTROLLER
ID Addr.1 ID Addr.2 ID Addr.3
The figure aboveshows a simpleID address
layout using one DMX address. Each of the
units has a different ID address which will
receive a new temporary DMX address when
ADAS is activated(unless ADAS copy
is selected). The user is able to activate and
deactivate ADASat will givingthe possibility
of creating many different fixture grouping
possibilities using theID address, realDMX
address and theADAS temporaryDMX address.
2 INSTALLATION 2008.8.13
When using ADAS, all fixtures must have the
following settings from the Settings menu set correctly;
ID address Each unit should have the target ID address set in ascending order
ID ON/OFF Each unit should set ID On
ADAS fader no Each unit shouldbe set tothe same number of faders as your
controller(must be 12)
ADAS ON/OFF Each unit should be set as ADAS On
Note:
8