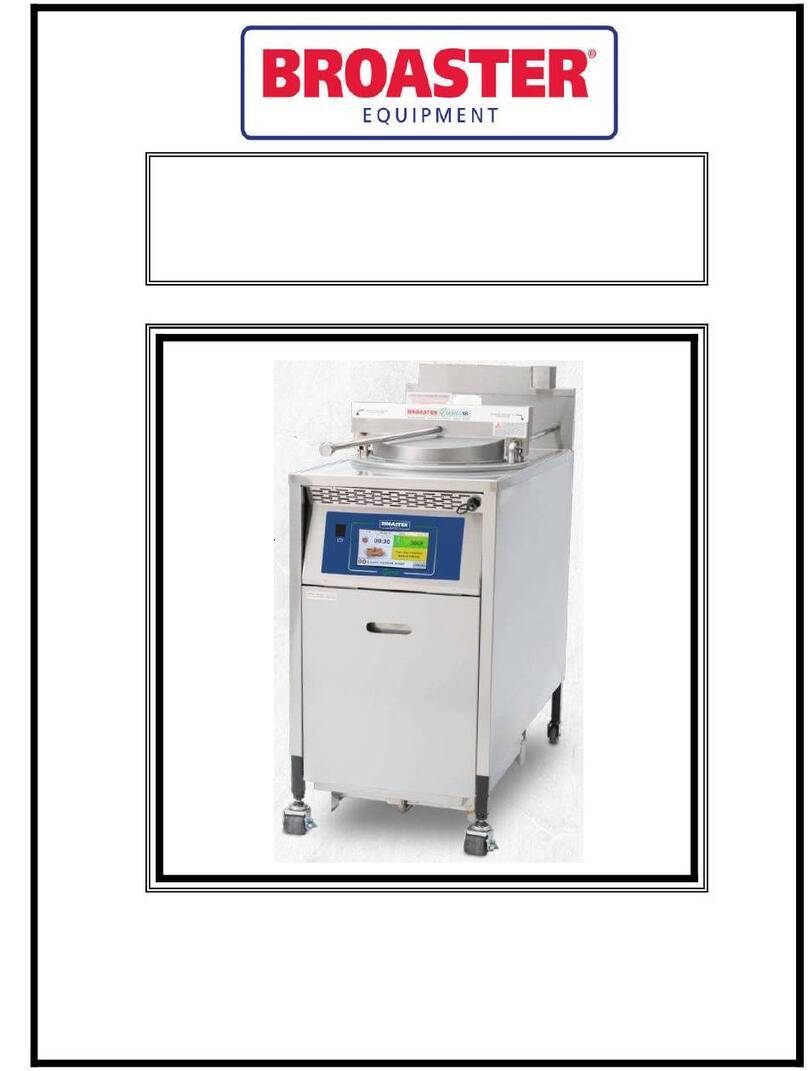
Broaster VF-2 User manual

Broaster Company
2855 Cranston Road, Beloit, WI 53511-3991
608/365-0193 broaster.com
Genuine Broaster Chicken®, Broasted®, Broaster Chicken®, Broaster Foods®. and Broasterie® are registered
trademarks. Usage is available only to licensed operators with written authorization from the Broaster Company.
© 2006 Broaster Company
Printed In U.S.A.
Design Certified By:
ETL (US & CAN), ETL Sanitation Manual #16421 9/19 Rev 09/23
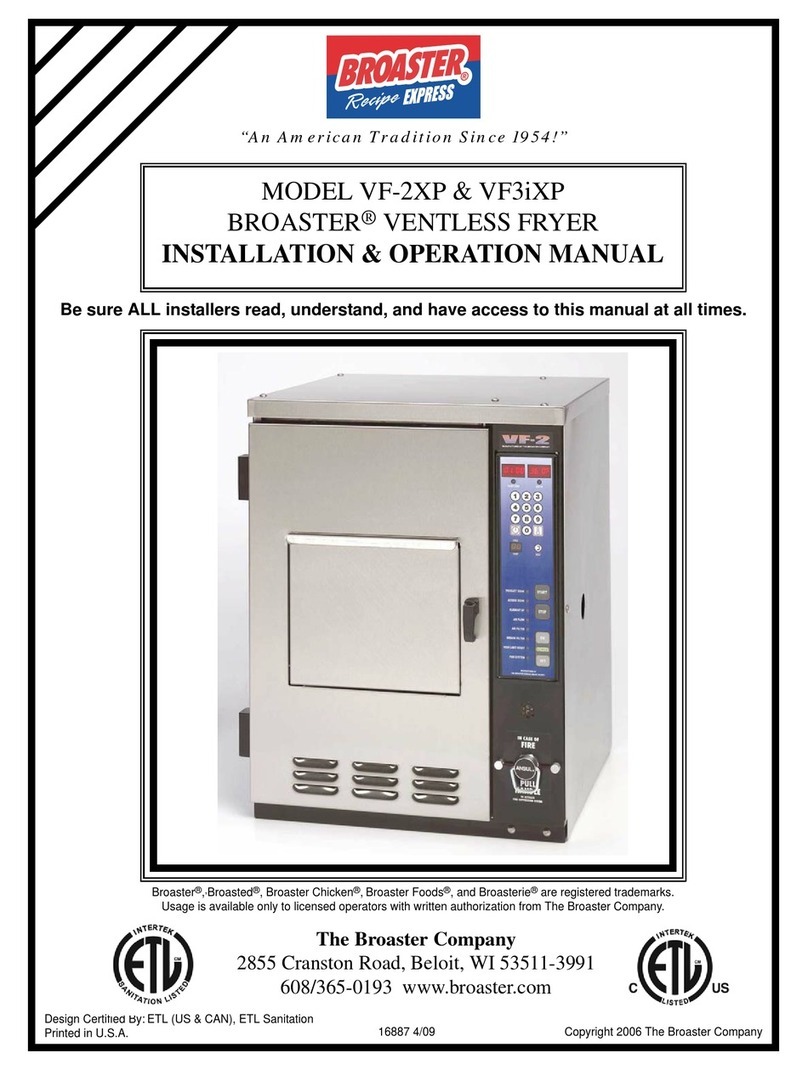
INSTALLATION & OPERATION
MANUAL
BROASTER® VF-2 & VF3i
VENTLESS FRYER


w-1
All adjustments and repairs shall be made
by an authorized Broaster Company repre-
sentative.
If there is a power failure, turn cook/filter
switch OFF. On the Model 2400GH, also
slide switch on gas valve OFF. DO NOT
attempt to operate unit during a power fail-
ure.
Failure to read and
understand this manual
completely could result in serious injury
or death. Be sure ALL operators read,
understand and have access to this
manual at all times.
Rags or paper containing
cooking oil can catch fire
if exposed to heat. Laundering will not
remove the oil. Dispose of all oil-soiled
papers and rags in a trash container that
is in a ventilated area away from all
cooking equipment or other heat
sources such as direct sunlight.
DO NOT clean this fryer
with a water jet. Use of
this cleaning method could result in
serious injury or death.
FOR YOUR SAFETY
Do not use or store gasoline or other flammable vapors
or liquids in the vicinity of this or any other appliance.
Improper installation, adjustments, alteration, service or maintenance can cause
property damage, injury or death. Read the installation, operating and mainte-
nance instructions thoroughly before installing or servicing this equipment.
For the sake of safety and clarity, the following words used in this manual are defined as follows:
Indicates an imminently hazardous situation which, if not avoided, could
result in serious injury or death.
Indicates a potentially hazardous situation which, if not avoided, could
result in serious injury or death.
Indicates a potentially hazardous situation which, if not avoided, could
result in minor injury, property damage or both.
broaster.com Manual #16421 5/16 Rev: 4/14


i
TABLE OF CONTENTS
1 - WARRANTY ..................................................................................................................1 - 1
2 - OWNER RESPONSIBILITY ..........................................................................................2 - 1
3 - INSTALLATION .............................................................................................................3 - 1
LOCATION...................................................................................................................3 - 1
GENERAL REQUIREMENTS.......................................................................................3 - 1
UNPACKAGING ..........................................................................................................3 - 2
FIRE SUPPRESSION ACTIVATION .............................................................................3 - 2
ELECTRICAL CHARACTERISTICS .............................................................................3 - 3
ELECTRICAL CONNECTIONS....................................................................................3 - 3
CORD/PLUG SPECS ..................................................................................................3 - 3
WIRING DIAGRAM......................................................................................................3 - 4
VF-2 ....................................................................................................................3 - 4
VF-3i....................................................................................................................3 - 7
VF-2 EXPORT......................................................................................................3 - 9
VF-3i EXPORT...................................................................................................3 - 11
INITIAL START-UP......................................................................................................3 -13
4 - GETTING TO KNOW YOUR BROASTER®VF-2 or VF-3i FRYER...............................4 - 1
5 - PRE-COOKING PREPARATION ..................................................................................5 - 1
START-UP ...................................................................................................................5 - 1
COOKING OIL.............................................................................................................5 - 1
FOOD AND CONDIMENTS .........................................................................................5 - 1
6 - CONTROL PANEL ........................................................................................................6 - 1
DUAL DISPLAY FAMILIARIZATION.............................................................................6 - 1
OPERATIONAL LOCKOUT..........................................................................................6 - 2
CONTROLLER BASIC PROGRAMMING ....................................................................6 - 2
Normal Operating Mode .....................................................................................6 - 2
Preset Cook Mode ..............................................................................................6 - 3
Programming Procedure.....................................................................................6 - 3
7 - FIRE SUPPRESSION SYSTEMS..................................................................................7 - 1
GENERAL DESCRIPTION ...........................................................................................7 - 1
AUTOMATIC OPERATION...........................................................................................7 - 1
MANUAL OPERATION ................................................................................................7 - 1
INSPECTION & MAINTENANCE .................................................................................7 - 1
Gaining Access ...................................................................................................7 - 1
Monthly Inspection .............................................................................................7 - 2
Semi-Annually .....................................................................................................7 - 2
Twelve Year .........................................................................................................7 - 3
SEMI-ANNUAL INSPECTION & MAINTENANCE LOG .......................................7 - 3
broaster.com Manual #16421 5/06 Rev: 4/14

ii
8 - VENTILATION SYSTEM ..............................................................................................8 - 1
Air Filter Replacement ...............................................................................................8 - 1
9 - COOKING WEIGHT, TEMPERATURE AND TIME.......................................................9 - 1
VF-2 PRODUCT COOKING CHART............................................................................9 - 1
10 - COOKING OIL CARE ...............................................................................................10 - 1
11 - CLEANING ................................................................................................................11 - 1
COOKING UTENSILS ...............................................................................................11 - 1
HAND CLEANING METHOD.....................................................................................11 - 1
DISHWASHER METHOD ..........................................................................................11 - 1
CLEANER NEUTRALIZATION ...................................................................................11 - 1
UNIT SURFACES ......................................................................................................11 - 2
DISHWASHER SAFE COMPONENTS ......................................................................11 - 2
MINIMUM PREVENTATIVE MAINTENANCE REQUIREMENTS ................................11 - 2
12 - NIGHTLY SHUTDOWN/SEASON SHUTDOWN ......................................................12 - 1
NIGHTLY SHUTDOWN..............................................................................................12 - 1
SEASON SHUTDOWN..............................................................................................12 - 1
13 - TROUBLESHOOTING ..............................................................................................13 - 1
ELECTRICAL TIPS ....................................................................................................13 - 1
INDICATOR LIGHTS..................................................................................................13 - 2
SOLID STATE CONTROLLER TIPS...........................................................................13 - 3
FROZEN IQF PRODUCT...................................................................................13 - 3
broaster.com Manual #16421 5/06 Rev: 4/14

1 - LIMITED WARRANTY - Parts and Labor
FOR VF-2 & VF-3i FRYER
1-1
Subject to the terms and conditions of this warranty, The Broaster Company (Company) warrants that all
equipment and parts manufactured or sold by the Company and purchased new from an authorized
Company distributor are free from defects in material and workmanship. The warranty period begins on
the date of installation, or one year from the date of manufacture, whichever occurs earlier. The term of
the warranty is one year for all non-wearable parts, or two years for the solid-state control panel
from the date of installation. To qualify for warranty coverage, the units must be installed by a qualified
installer under supervision by an authorized distributor in accordance with applicable laws and
regulations. Warranty coverage is extended to the original purchaser only and is void if the equipment is
resold or relocated. If an authorized Company distributor is notified of a warranty claim during the
warranty period, the Company will at its option replace, recondition or repair at its factory any part or
parts of the equipment which the Company judges defective, provided the equipment has been
subjected to normal usage, properly installed, operated and serviced in accordance with Company
operating instructions, and there is no evidence of accident, alteration or abuse of the equipment or the
use of unauthorized repair methods. All parts replaced under this warranty carry only the unexpired term
of the warranty.
Service under this warranty shall be furnished only by an authorized Company distributor. The
Company does not send service representatives to furnish warranty service. Your authorized Company
distributor should be contacted for warranty service.
This warranty covers on-site labor charges only, at a fixed rate, for one year, on new equipment only.
The warranty period begins on the date of installation or one year from the date on manufacture,
whichever occurs earlier. Transportation charges, trip charges, zone fees, or other expenses in
connection with warranty service are the obligation of the owner.
This warranty shall be void unless the ventless fryer air filter supplied by The Broaster Company is used
in conjunction with the equipment.
This warranty does not apply to consumable items and supplies such as food baskets, filters, and
gaskets.
The foregoing warranty is made in lieu of all other warranties, express or implied, and the
Company specifically disclaims any implied warranties of merchantability or fitness for a
particular purpose. The Company’s full obligation under this warranty and the purchaser’s sole
remedy shall be limited to replacement, reconditioning, or repair as specified above.
IN NO EVENT SHALL THE COMPANY BE LIABLE TO THE ORIGINAL OWNER OR ANY OTHER
PERSON FOR ANY INCIDENTAL, CONSEQUENTIAL OR SPECIAL DAMAGES RESULTING FROM
THE USE OR INABILITY TO USE THE EQUIPMENT COVERED HEREBY, WHETHER ARISING
FROM BREACH OF WARRANTY, STRICT LIABILITY OR OTHERWISE.
The Company reserves the right to change or improve its products in any way without obligation to alter
products previously manufactured.
Used Company equipment or Company equipment not purchased from an authorized distributor carries
no warranty express or implied.
broaster.com Manual #16421 9/19 Rev 9/23

2 - OWNERS RESPONSIBILITY
2-1
It is the owner’s responsibility to:
• Insure the Broaster®VF-2, VF-3i Fryer
is properly maintained.
• Allow only properly trained personnel to
operate, clean and maintain a
Broaster®VF-2, VF-3i Fryer.
• Schedule and maintain documentation
that the appropriate inspection and
maintenance of the Fire Suppression
system has been completed.
• Retain this manual for future reference.
• Insure main power supply is discon-
nected before the unit is serviced.
• Ensure that all safety devices are intact
and the operation manual is included
with the unit when you sell, trade, dis-
pose of, or give away your Broaster®
VF-2, VF-3i Fryer.
• Insure a proper surface is provided for
the Broaster®VF-2, VF-3i Fryer to sit
on.
• Keep the louvres in both the front and
the rear of unit free from obstructions.
• Ensure that access is not obstructed to
the fire suppression system. Fire sup-
pression status can be monitored by
viewing through the right side panel
access hole.
If you need replacement manuals, contact
an authorized Broaster Company represen-
tative or the Broaster Company at 608/365-
0193.
The Customer Service Department at the
Broaster Company should be contacted at
the time of sale or disposal of the
Broaster®VF-2, VF-3i Fryer so records
may be updated.
broaster.com Manual #16421 5/06 Rev 4/14


3 - INSTALLATION
3-1
LOCATION
For convenience and speed, location of the
unit should be given careful consideration.
If possible, locate the unit so the flow of
cooked product is in a straight line from
storage, in and out of the unit and to the
customer. Landing tables should be pro-
vided on at least one side of the unit.
• A flat, level, stable surface capable of
supporting an additional weight of 200
lbs is required for the safe operation of
this unit.
• To avoid splashing of hot liquid, unit
must be restrained to prevent tipping.
• Provision must be made to eliminate
movement of the unit which might cause
strain on electrical connections.
• DO NOT install unit where traffic areas
are on either side or in back of unit.
• DO NOT install unit where the louvres in
either the front or the rear are blocked or
void of ventilation.
• DO NOT install unit where access to fire
suppression system is blocked. Fire
suppression activation is located on
front panel. Fire suppression status can
be monitored by viewing through the
right side panel access hole.
CLEARANCES
Recommended clearances are:
Left Side: 0”
Rear: 2”
Right Side: 0”
You must be able to access
the right side panel periodi-
cally for inspection and service.
GENERAL REQUIREMENTS
• When installing or servicing the unit,
always check the dataplates, located
toward the rear of the unit. This will
make certain proper parts are used and
the correct service rendered. DO NOT
apply a voltage to this unit other than
that shown on the dataplate. If in doubt,
consult your local power company.
• A remote circuit breaker or fuse should
be installed in main power supply
located in a path of exit and clearly iden-
tified.
• The VF-2 is 19 in. wide by 24.25 in. tall
by 20.12 in. deep.
• The VF-3i is 23 in. wide by 27 in. tall by
24.5 in. deep.
• Installation must conform to local codes
or in their absence with National codes
UL 197, UL 197SB, NFPA 70 for electri-
cal, NFPA 96 for ventilation, NFPA 17A
for Wet Chemical Extinguishing Sys-
tems, also Canadian Electrical CSA
22.2.
• Unit to be sealed to countertop (ie. sili-
cone) or elevate on legs with optional
platform.
broaster.com Manual #16421 5/06 Rev 4/14
As you progress through the set-up of your VF-2, VF-3i fryer, refer to Chapter 4, GETTING TO
KNOW YOUR BROASTER®VF-2, VF-3i FRYER for part descriptions and locations.

3-2
UNPACKING
1. Remove external cardboard packag-
ing.
DO NOT cut cardboard
with utility knife. Damage to
unit could result.
2. Open Access Door by lifting Access
Door Latch and turning counter-clock-
wise. Remove Cooking Pot cardboard
retainer.
3. Remove Cooking Basket, Basket Plat-
form, and cardboard/styrofoam sepa-
rator from Cooking Pot.
4. Remove tape from Air and Grease Fil-
ters.
5. Raise the Element by placing Element
Arm above Element Retainer and
remove the Cooking Pot.
6. Follow cleaning instructions as out-
lined in CLEANING, Section 11 of this
manual.
FIRE SUPPRESSION ACTIVATION
DO NOT apply power to
unit until completing this
procedure. Failure to do so would leave the
unit without Fire Suppression capability.
7. To gain access to the Fire Suppression
system remove Electrical Control
Access Panel. Remove retaining
screw, slide the panel up, then pull the
bottom toward the outside of the unit.
8. Inside the cooking area, verify that
there is tension on the cable con-
nected to the Fusible Link.
If there is no tension on the
link, removing the Fire Sup-
pression Arming Pin will activate the Fire
Suppression System. Contact authorized
Broaster Company representative.
9. Verify the Fire Extinguisher gauge reg-
isters in the green.
If the gauge does not reg-
ister green, DO NOT
operate the unit. The Fire Suppression
System will not function to a satisfactory
level. Contact authorized Broaster Com-
pany representative.
10. Inside the Electrical Control area,
locate strap securing Fire Suppression
Arming Pin. Cut and remove the strap.
11. Remove Fire Suppression Arming Pin
and let hang from connected chain.
The Fire Suppression System is now
active.
12. Replace the Electrical Control Access
Panel and retaining screw.
broaster.com Manual #16421 5/06 Rev 4/14

3-3
ELECTRICAL CHARACTERISTICS
The unit is available for 120/240 VAC or
120/208 VAC applied voltage, 30 amp,
60Hz, 1 phase electrical connection in the
USA and Canada. (4 wire with neutral and
ground)
• When installed, the unit is to be field
wired and must be electrically grounded
in accordance with local codes, or in the
absence of local codes, with the
National Electrical Code, ANSI/NFPA 70,
or the Canadian Electrical Code, CSA
C22.2, as applicable.
ELECTRICAL CONNECTIONS
Applied voltage should match dataplate
listed voltage.
The electrical schematics can be found on
pages 4 thru 7 of this section.
ELECTRICAL AMPERAGE RATING
Input
Voltage
VF2
Domestic
VF3i
Domestic
VF2
Export
VF3i
Export
120/240 23 23 --- ---
120/208 27 27 --- ---
220 --- --- 21 28
230 --- --- --- ---
broaster.com Manual #16421 5/06 Rev 4/14

3-4
WIRING DIAGRAM - VF-2
NO
NC
C
PRESSU RE SENS OR
P
MPL
broaster.com Manual #16421 5/06 Rev 4/14

3-5
WIRING DIAGRAM - VF-2 effective S/N VF2F70041x
NO
NC
C
PRESSUR E SENSO R
P
MPL
broaster.com Manual #16421 5/06 Rev 4/14

3-6
WIRING DIAGRAM - VF-2 effective S/N VF2F90xxxx
NO
NC
C
PRESSU RE SENS OR
P
MPL
broaster.com Manual #16421 5/06 Rev 4/14

3-7
NO
NC
C
WIRING DIAGRAM - VF-2 effective S/N VF2L90xxxx
broaster.com Manual #16421 5/06 Rev 4/14

3-8
WIRING DIAGRAM - VF-3i
NO
NC
C
PRESS URE SE NSOR
P
MPL
broaster.com Manual #16421 5/06 Rev 4/14

3-9
WIRING DIAGRAM - VF-3i effective S/N VF3G90xxxx
NO
NC
C
PRES SUR E SENS OR
P
MPL
broaster.com Manual #16421 5/06 Rev 4/14

3-10
WIRING DIAGRAM - VF-3i effective S/N VF3H90xxxx
NO
NC
C
broaster.com Manual #16421 5/06 Rev 4/14
Other manuals for VF-2
2
This manual suits for next models
1
Table of contents
Other Broaster Fryer manuals

Broaster
Broaster 1600 User manual

Broaster
Broaster 1600 User manual

Broaster
Broaster 1800 User manual

Broaster
Broaster VF3i User manual

Broaster
Broaster 2400XP User manual

Broaster
Broaster 2400 Series User manual

Broaster
Broaster 1600 User manual

Broaster
Broaster 1600 User manual

Broaster
Broaster E Series User manual

Broaster
Broaster 2400 Series User manual