Getting started
Location . . . . . . . . . . . . . . . . . . . . . . .5
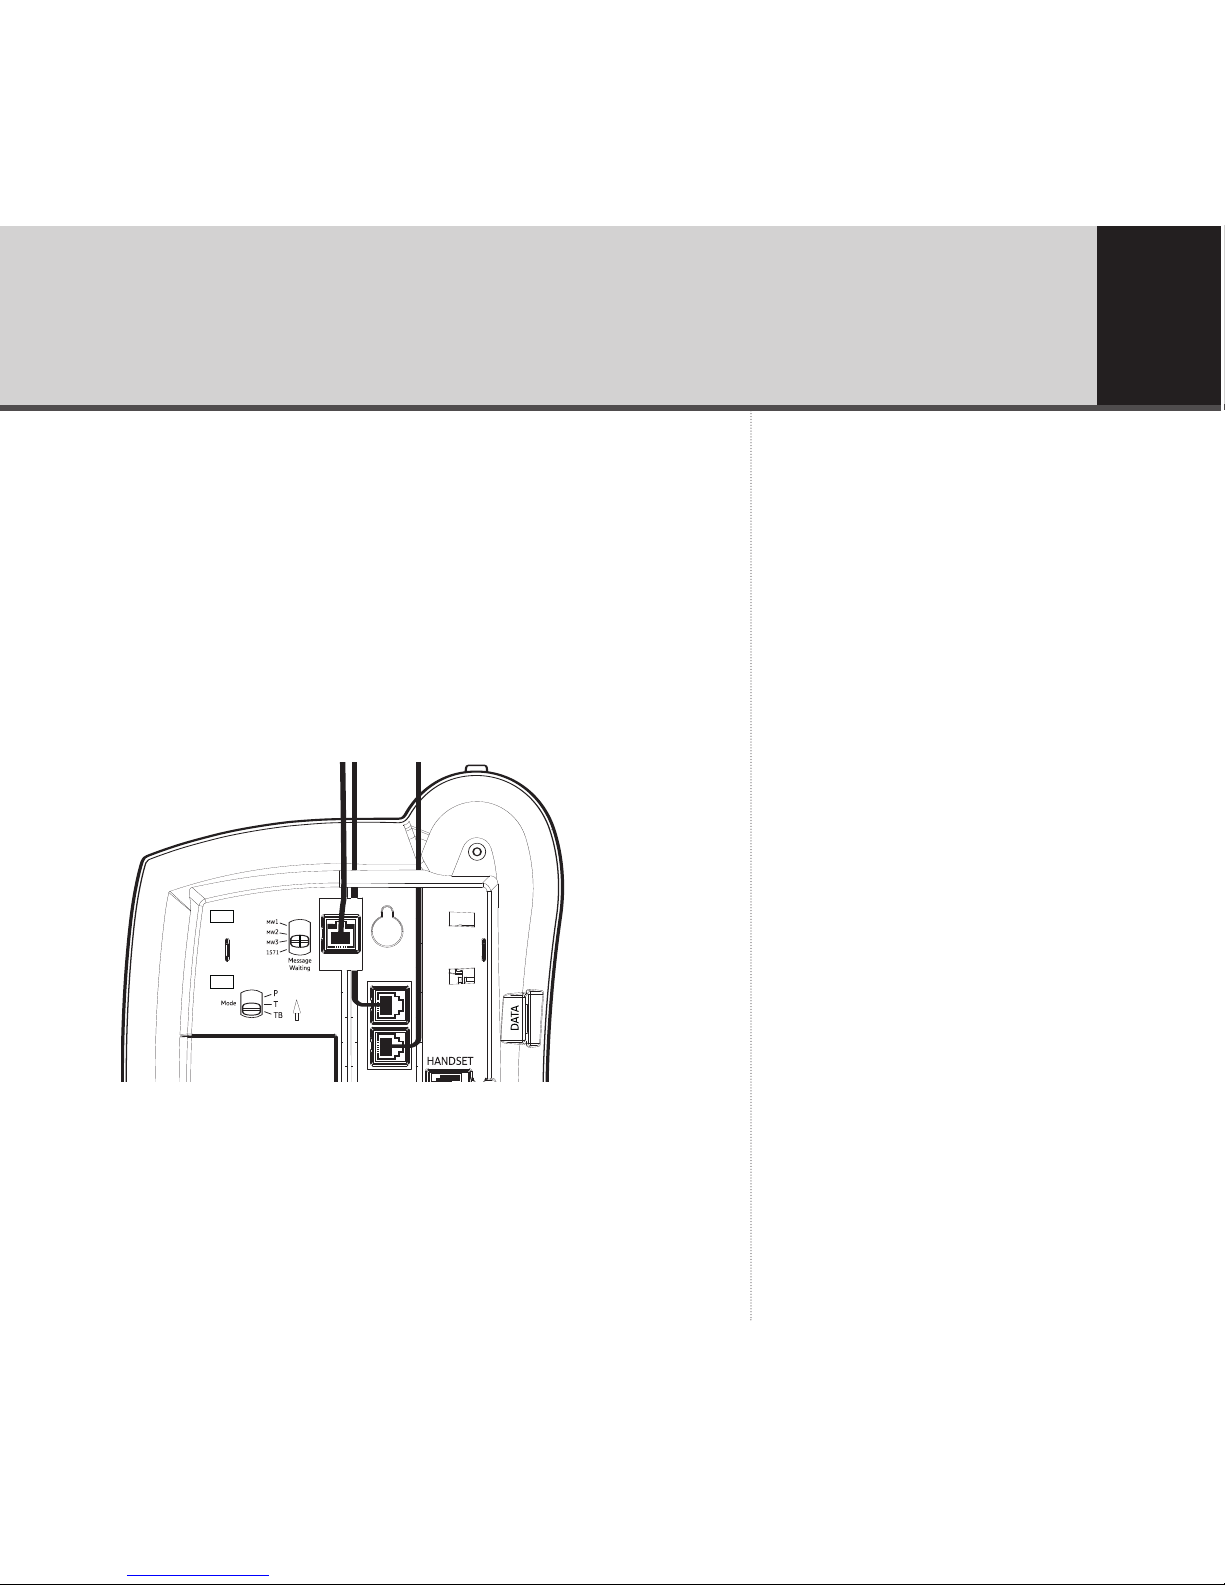
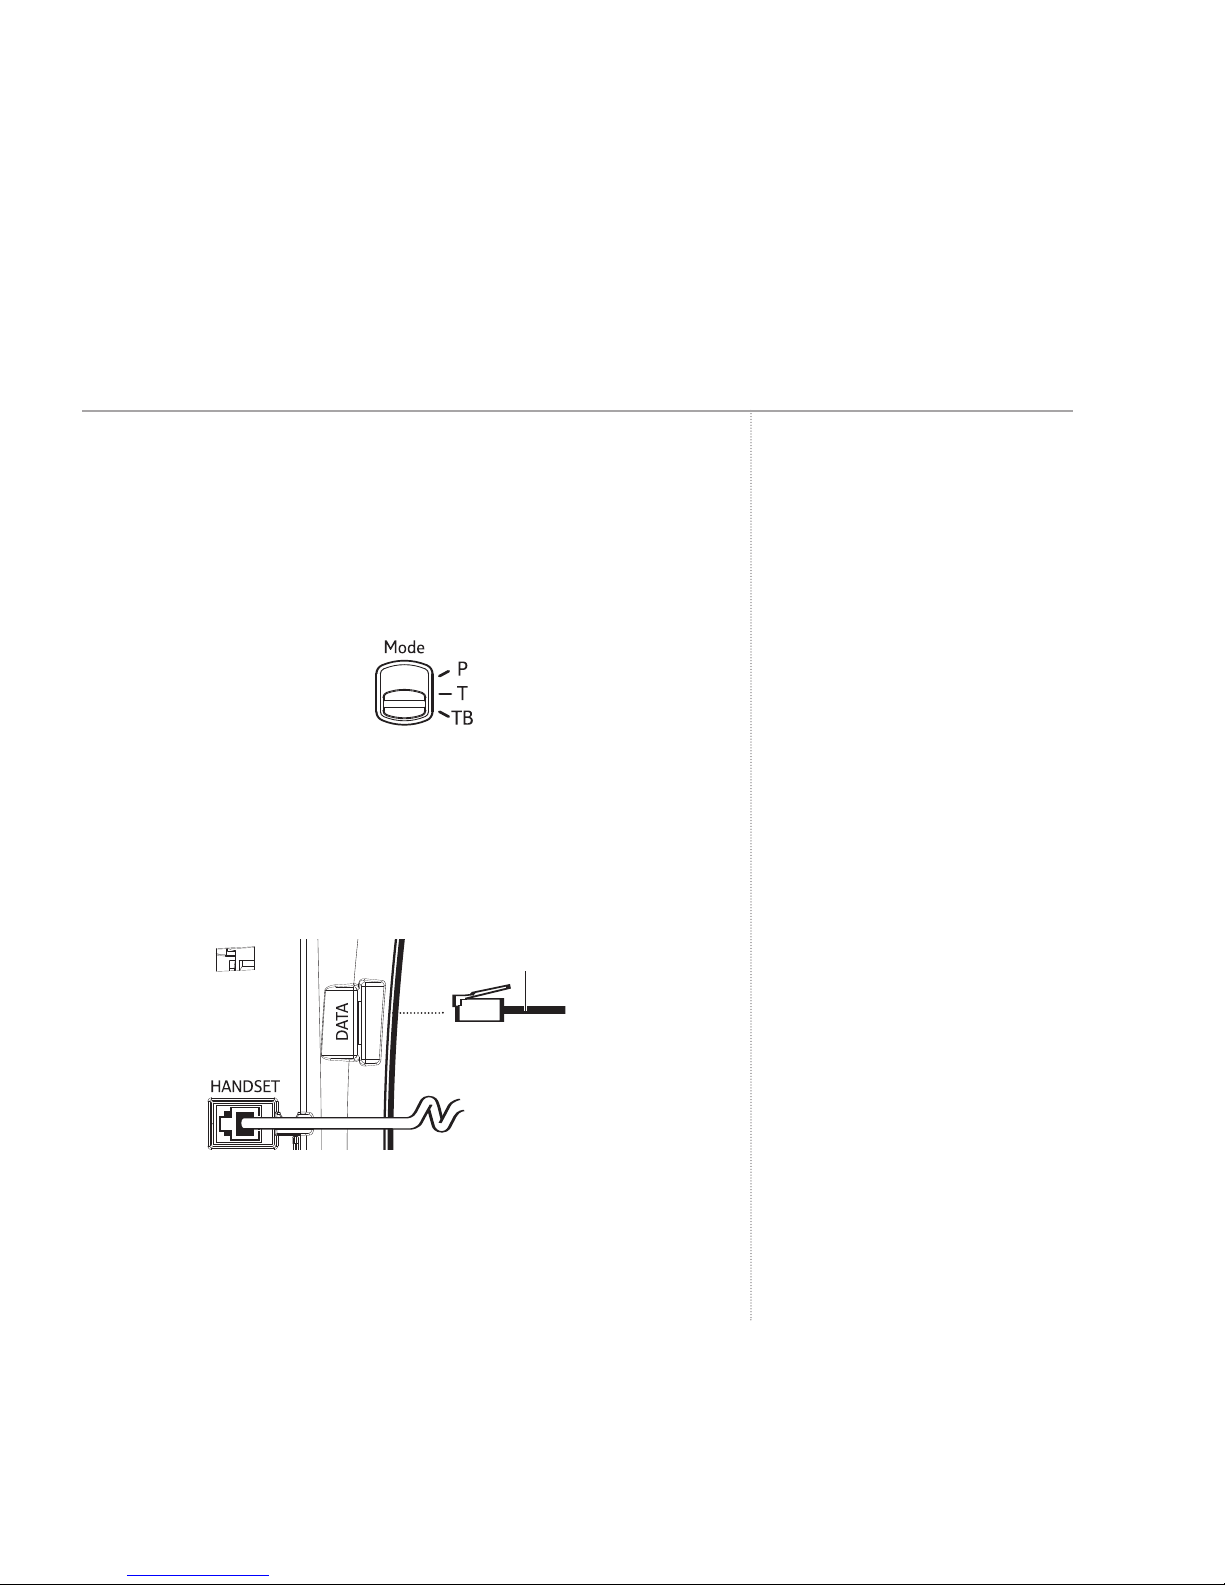
Setting up . . . . . . . . . . . . . . . . . . . . . .5
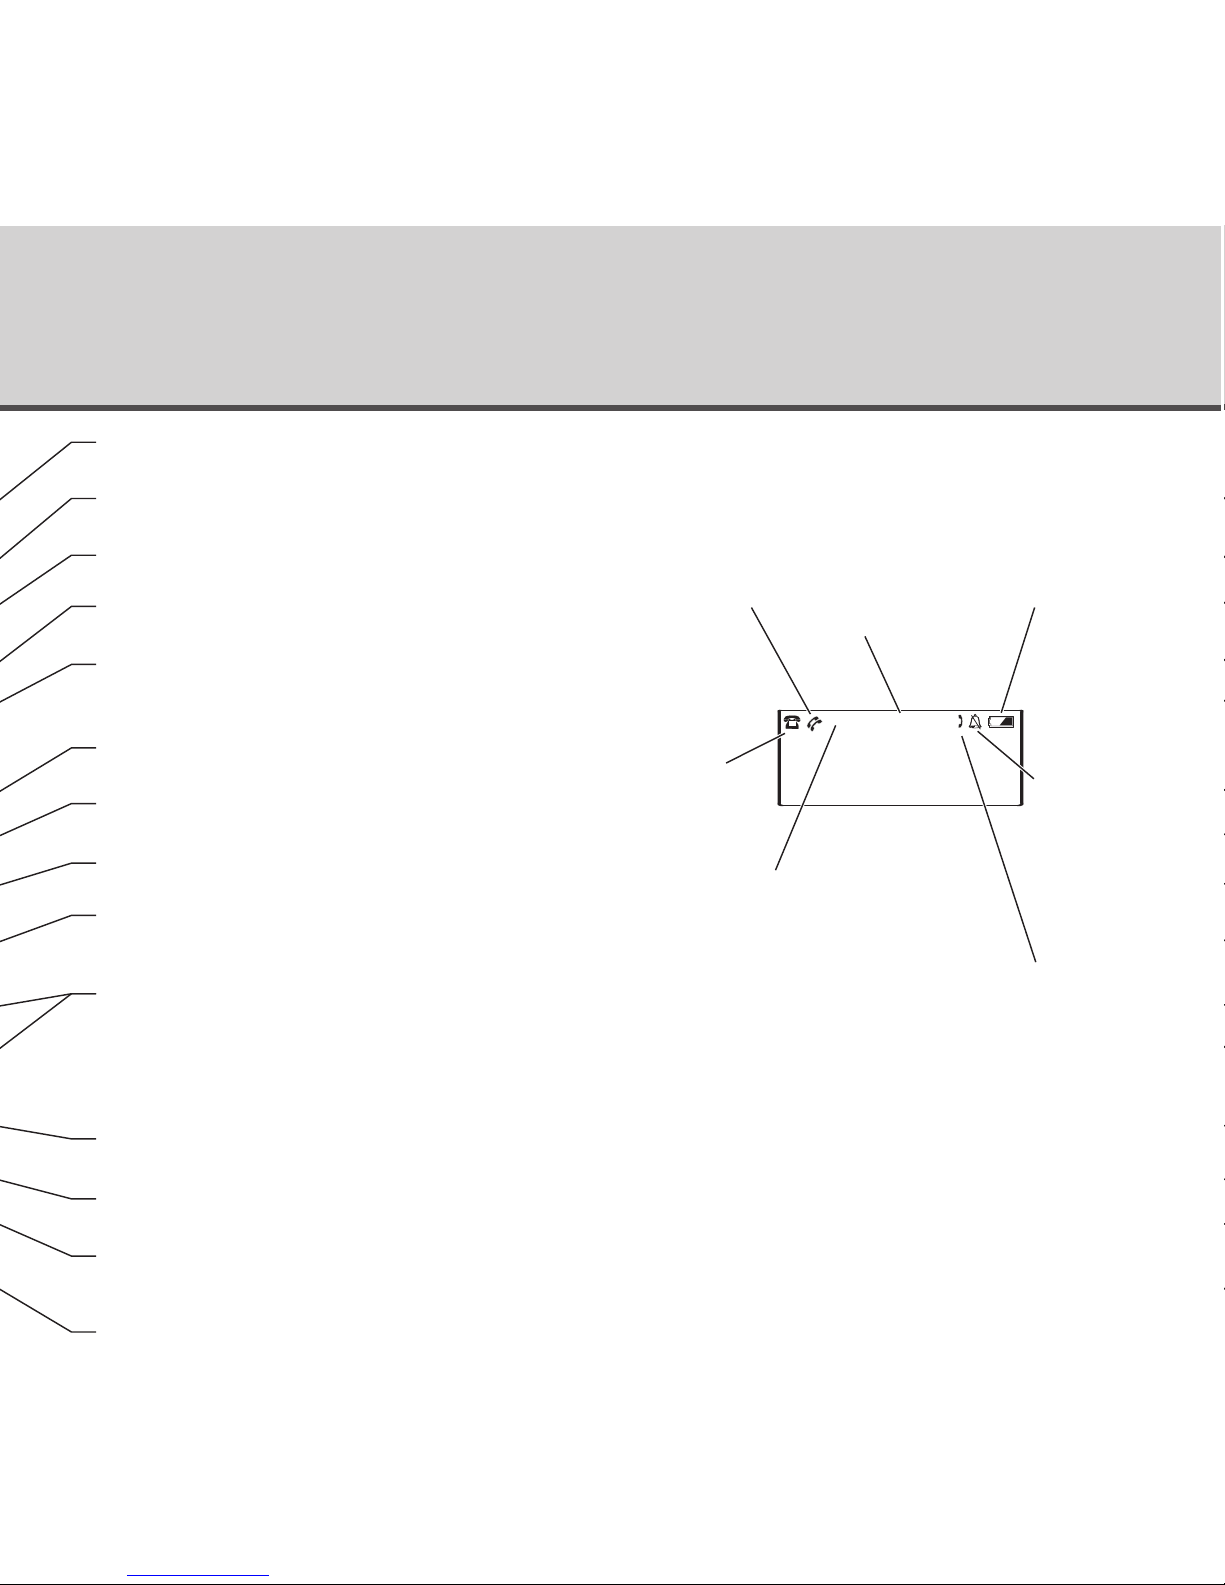
Getting to know your phone
Buttons . . . . . . . . . . . . . . . . . . . . . . . .8
Using the phone
Making and ending calls . . . . . . . . . . .10
Receiving a call . . . . . . . . . . . . . . . . . .10
Headset . . . . . . . . . . . . . . . . . . . . . . .10
Handsfree . . . . . . . . . . . . . . . . . . . . . .11
Volume . . . . . . . . . . . . . . . . . . . . . . . .12
Redial . . . . . . . . . . . . . . . . . . . . . . . . .12
Secrecy . . . . . . . . . . . . . . . . . . . . . . . .13
Holding calls . . . . . . . . . . . . . . . . . . . .14
Three-way conference call . . . . . . . . . .14
Message Waiting . . . . . . . . . . . . . . . . .16
Recall . . . . . . . . . . . . . . . . . . . . . . . . .16
Directory
Store a number in the directory . . . . . .17
Dial a number in the directory . . . . . . .17
Edit a directory entry . . . . . . . . . . . . . .18
Delete a directory entry . . . . . . . . . . .18
Delete all directory entries . . . . . . . . .18
Menu
Ringer volume . . . . . . . . . . . . . . . . . . .19
Ringer tone . . . . . . . . . . . . . . . . . . . . .19
Time & date . . . . . . . . . . . . . . . . . . . .20
Contrast . . . . . . . . . . . . . . . . . . . . . . .20
BT Calling Features
Caller Display . . . . . . . . . . . . . . . . . . .21
Calls list . . . . . . . . . . . . . . . . . . . . . . .22
View an entry in the Calls list . . . . . . . .22
Dial an entry in the Calls list . . . . . . . .22
Save an entry from the Calls list
to the directory . . . . . . . . . . . . . . . . . .23
Delete an entry in the Calls list . . . . . .23
Delete all entries in the Calls list . . . . .24
Menu options . . . . . . . . . . . . . . . . . . .25
BT Answer 1571 . . . . . . . . . . . . . . . . .25
118 500/118 707 . . . . . . . . . . . . . . . .25
Call Divert . . . . . . . . . . . . . . . . . . . . . .26
Reset your phone . . . . . . . . . . . . . . . .27
Help ..........................28
General information
Safety . . . . . . . . . . . . . . . . . . . . . . . . .29
Cleaning . . . . . . . . . . . . . . . . . . . . . . .29
Environmental . . . . . . . . . . . . . . . . . . .29
Guarantee . . . . . . . . . . . . . . . . . . . . . .31
How many telephones can you have? . .32
Switchboard compatibility . . . . . . . . . .33
R&TTE Directive . . . . . . . . . . . . . . . . .33
Wall mounting your phone .........34
4
In this guide
BT Converse 1400 – Edition 4 – 22.12.05 – 7097