BTEK WorldWEIGH BWS Series User manual

V1.09p
BWS
Series
Indicator
Technical Manual
800-000316


CONTENTS
1. SPECIFICATION... 2
2. INTRODUCTION... 3
C arging...3
3. INSTALLATION. 4
Installation.. 4
Wiring....4
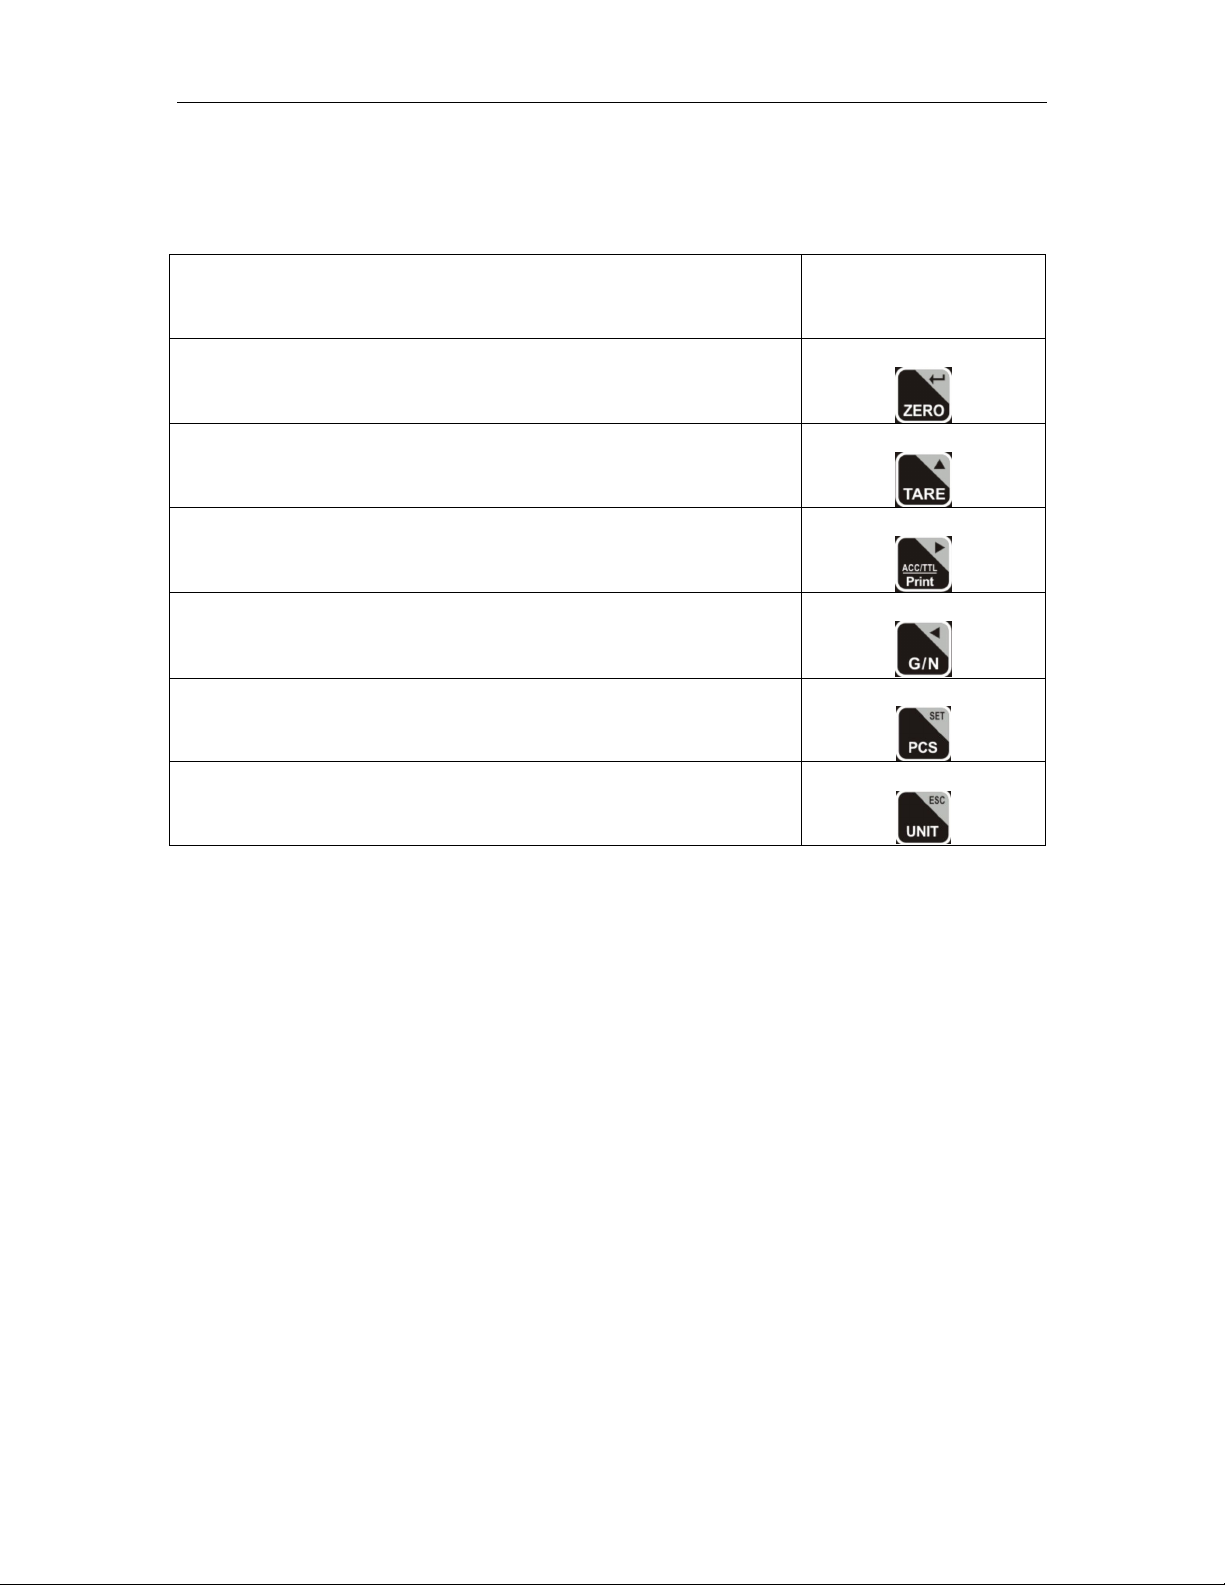
4. KEYS DESCRIPTION... 6
Key Board... 6
Secondary functions of t e keys.8
5. OPERATION 8
5.1. Basic Operation... ...8
1. Power On /Off..8
2. Zero...8
3. Tare...8
4. Select Unit8
5.2. C eck Weig ing..9
5.2.1. Set Limits......9
5.2.2. Set C eck Weig ing...9
5.3. Accumulation10
5.3.1. Memory Recall.....10
5.3.2. Memory Clear...10
5.3.3. Automatic Accumulation...11
5.4. Parts Counting.....11
5.5. Animal Weig ing..12
5.6. Key Board Lock12
5.7. Set Auto Power Off..13
5.8. Set Back Lig t..13
6. PARAMETERS.14
7. CALIBRATION..18
8. RS-232 OUTPUT19
8.1. Specifications.19
8.2. Connecter19
RS-232 Output19
8.3. Continuous output protocol.19
9. DRAWING20
9.1. BWS Drawing20
9.2. BWS Parts List..21
10. ERROR CODES..22

BWS Series Indicator Tec nical Manual
- 1 -
PRECAUTIONS
WARNING
DISCONNECT ALL POWER TO THIS UNIT
BEFORE INSTALLING, CLEANING, OR
SERVICING. FAILURE TO DO SO COULD
RESULT IN BODIL HARM OR DAMAGE TO
THE UNIT.
CAUTION
• Only qualified Service personal to service this instrument
• Before connecting or disconnecting any components, Disconnect
power.
• Failure to observe these precautions could cause bodily harm or
damage or destruction of the equipment.
• T e BWS weig ing indicator is a precision electronic
instrument, andle wit care.
• Do not install in direct sunlig t.
• Verify t e local voltage and receptacle type are correct for
t e scale.
• Pluggable equipment must be installed near an easily
accessible socket outlet.
• Avoid unstable power sources. Do not use near large
consumers of electricity suc as welding equipment or large
motors.
• Avoid sudden temperature c anges, vibration, wind and
water.
• Avoid eavy RF noise.
• Avoid ig stactic areas.
• Keep t e indicator clean.

BWS Series Indicator Tec nical Manual
- 2 -
1. SPECIFICATION
Model BWS
Display 52mm LCD/ 2” LCD
Housing Stainless Steel
Operating Temperature 0°C - 40°C / 14°F - 104°F
Resolution 1/30,000 (Non Approved) 1/6000 (NTEP Approved)
Key Pad 7 Keys
Power Battery (6V/4A ) estimated run time on fully c arged
battery 50 ours
Calibration Automatic External
Interface 1 RS-232 Output
Load cell drive Voltage Max: 5V/150mA
Load Cells Up to 4 load cell
ADC Sigma Delta
ADC Update ≤1/10 second
Stabilization Time One second typically

BWS Series Indicator Tec nical Manual
- 3 -
2. INTRODUCTION
T e BWS series weig ing indicator amplifies signals from a load cell, t en
converts it to digital data and displays it as a mass value number
It is suitable for general weig ing or more specialized applications suc as
c eck weig ing, animal weig ing and accumulation applications
Can be connected to a printer, PC, or scoreboard
Large LCD wit w ite LED back lig t displays
Charging
• To c arge t e battery, plug cord into power outlet. T e scale does not need
to be turned on, to c arge.
• T e battery estimated c arge time to full capacity is 12 ours.
• An LED to indicate t e status of battery c arge is located on t e left side of
t e Display. W en t e scale is plugged into a power source t e internal
battery will be rec arging. If t e LED is green, t e battery as a full c arge.
If it is red, t e battery is nearly disc arged and if yellow, t e battery is
being c arged.
• Verify t at t e AC power outlet is properly protected.
Note: Please charge the battery before using the scale for the first time.

BWS Series Indicator Tec nical Manual
- 4 -
3. INSTALLATION
Installation
• Place t e Indicator on a table or connect to t e supplied mounting bracket.
• Connect t e load cell cable to t e indicator Bd9 load cell connecter.
• Plug equipment into an easily accessible outlet wit a protective ground/
eart contact.
• Turn BWS on wit use of t e On/Off key. If you want to turn off, press t is
key again.
• Display will start self c ecking/ followed by number of calibrations/ number
of option c anges/ t en error 4/ T en enter into main weig ing screen.
• Warm-up time of 15 minutes elps stabilizes t e measured values after
switc ing on.
• Calibrate wit exact calibration weig ts, a minimum 1/3 of t e scale
capacity s ould be used for calibration. For calibration instructions see
details under parameters.
Wiring
Supplied 18 foot cable (to load cells) Self made cable (from BWS)
SIG- Green
SIG+ W ite
EX- Black
EX+ Blue
SEN- Yellow
SEN+ Red
S ield Grey
SEN and EX needs to be tied
Toget er if no sense wires..
Terminal strip and Cut pigtail wiring on t e next page
Pins to DB9
1 SIG-
2 SIG+
3 EX+
4 EX-
5 SEN+
6 Connect to 7
7 Connect to 6
8 SEN-
9 S ield

BWS Series Indicator Tec nical Manual
- 5 -
Wiring
Cut Pigtail
Wiring
Terminal
Strip
Pins to DB9
Green SIG-
W ite SIG+
Brown S ield
Black EX-
Grey SEN-
S eild Sen+
Blue Ex+
Yellow I/O gnd (Must connect to red)
Red I/O (must be connected to Yellow)

BWS Series Indicator Tec nical Manual
- 6 -
4. KE S DESCRIPTION
Keyboard
Keys
Description
Power turn ON/OFF
Zero Display
To perform a tare function, subtracts weig t
Accumulator key, current values will store to t e memory, to
send t e data to printer or PC
S ift between Gross / Net Weig t
Counting
To c ange t e unit of measure

BWS Series Indicator Tec nical Manual
- 7 -
Secondary functions of t e keys (Setup)
(See Parameter section 6)
Secondary Functions
Keys
To confirm t e selected menu
To c ange t e menu and active digit
To move t e active digit to rig t
To move t e active digit to left
To enter in to t e menu
Escape from t e menu to normal operation

BWS Series Indicator Tec nical Manual
- 8 -
5. OPERATION
Initial Start-up
Warm-up time of 15 minutes elps stabilizes t e measured values after switc ing
on.
5.1. Basic Operation
1. Power On/Off:
Switc on t e BWS by pressing t e key.
T e display is now switc ed on and t e start-up test as started, if wanting
to switc off, press t e key again.
2. Zero:
Environmental conditions can lead to t e BWS not being exactly zero
even if t e weig ing platform is clear of a weig t. However, you can set
t e display of your BWS to zero any time by pressing t e key and
t erefore ensure t at weig ing starts at zero.
3. Tare:
T e weig t of any container can be tared by pressing button so t at
wit subsequent weig ing t e net weig t of t e object being weig ed is
always displayed.
• Load weig t on t e platform.
• Press key. Zero is displayed, and tare is subtracted.
• Remove weig t from t e platform. Tared weig t is displayed. T e BWS
can only store one tare value. (see parameter P4) It will be s own wit a
minus value.
• Press to c ange between gross weig t and net weig t.
• To clear t e tare value, remove t e load and press key. Zero is
displayed, tare weig t is cleared.
4. Select Unit: (Units not being used can be disabled see parameter 6)
Press t e key, to c ange units kg/g/lb/oz.

BWS Series Indicator Tec nical Manual
- 9 -
5.2. C eck Weig ing
T e BWS can set an upper or lower limit w en weig ing wit a limited range.
During t e limit controls t e BWS will indicate w et er t e upper or lower limits
value as been met and an alarm will sound.
5.2.1. Setting Limits:
• Press and key toget er, display will s ow set h.
• Press key to select set h or set l
• Press key to confirm, display will s ow
00000
and t e last digit will
blink.
• Enter t e ig limit value by using and keys to c ange t e
active digits and press key to increase t e value.
• Press key to confirm, display will s ow set l
• Enter t e Low limit value by using and keys to c ange t e
active digits and press key to increase t e value.
• Press key to confirm.
To escape from t e settings press key.
5.2.2. Set Check Weighing:
• Press and key toget er, display will s ow set h.
• Press key to select display beep.
• Press key to confirm, display will s ow none or ok or ng
• Check mode none : No beep sound in t e limits. Function turned off.
• Check mode ok : W en t e weig t is between t e limits. OK will s ow
and beeper will be sounded.

BWS Series Indicator Tec nical Manual
- 10 -
• Check mode ng : W en t e weig t is out of t e limits, t e beeper will be
sounded and OK will s ow.
Note: Check weighing available only when weight more than 20d
5.3. Accumulation
T e scale can be set to accumulate manually by pressing key. For settings,
see t e parameter p 1 Com » mode » pr 2
Before operation scale s ould be stable and returned to zero, accumulation
available only w en weig t is more t an 20d.
Accumulation Operation
• Place t e load on t e platform.
• Press key, w en STABLE is displayed on t e screen.
• Display will be s ow acc 1 t en will s ow t e total saved value. T ese
displays will only be s own for t ree seconds.
• Remove t e weig t from t e platform.
• W en display get zeroed and stable t en place t e second weig t on t e
platform.
• T is will continue until t e memory gets full or 99 items.
5.3.1 Memory Recall:
To recall t e memory press key.
Display will be s ow acc X (X: Total number of accumulations) t en will s ow
t e total saved value. T ese displays will be s own for only t ree seconds.
5.3.2. Memory Clear:
To clear t e memory, press and keys toget er.
Display will s ow Acc 0 , all accumulation memory will be cleared.

BWS Series Indicator Tec nical Manual
- 11 -
5.3.3. Automatically accumulation:
T e scale can be set to accumulate automatically. For settings, see t e
parameter p 1 Com » mode » auto
Automatic Accumulation Operation
• Place t e load on t e platform.
• W en display s ows a STABLE indication, display will be s ow acc 1
t en will s ow t e total saved value. T ese displays will be s own only for
t ree seconds.
• Remove t e weig t from t e platform
• W en display get zeroed and stable t en place t e second weig t on t e
platform.
• T is can continue until t e memory gets full or 99 items.
5.4. Parts Counting
Parts Counting Operation
• Place t e load on t e platform
• To enter parts counting, press key, display will t en s ow p 10
Press to c ange t e parts quantity.
Options: p 10 / p 20 / p 50 / p100 / p 200
• Press key to confirm, display will s ow ---- t en will s ow t e
quantity of t e item on t e platform.
• T en items can be added to t e platform, display will update t e parts
quantity automatically.
Press key to go back to t e weig ing mode.

BWS Series Indicator Tec nical Manual
- 12 -
5.5. Animal Weig ing
BWS can be used for unstable loads. T is function is called animal weig ing. For
settings, see parameter p 3 oth » anm
W en load is applied on t e platform, after a few seconds of a stable weig t, t e
reading will be locked.
Adding or removing loads, updates t e weig ing locked values.
To enter or exit animal weig ing mode, press and release and key
toget er at t e same time.
W en in animal weig ing mode HOLD will be indicated on t e display.
5.6. Keyboard Lock
To set key board lock, see parameter p 3 oth » lock
W en t e keys are not used wit in 10 minutes, t e keys will be locked
automatically.
After entering into t e lock function, w en a key is pressed display will s ow k-
lok. T en will return to t e normal display.
To unlock and use t e keys again, press and old , and keys
for t ree seconds. Display will s ow u lck T en t e BWS returns to t e normal
display.

BWS Series Indicator Tec nical Manual
- 13 -
5.7. Set auto power off
To set auto power off of t e BWS
• Hold key t ree seconds display will s ow setbl
• Press key to c ange Set of and press key to confirm.
• Press key to c ange t e options.
off To set auto off function off, for scale always on
Of 5 Set to turn off five minutes later
Set of
Of 15 Set to turn off fifteen minutes later
• After selecting t e auto off option press key to confirm and press
key to escape from t e settings.
5.8. Set Back Lig t
To set back lig t.
• Hold key for t ree seconds display will s ow setbl
• Press key to confirm.
au To set auto option. W en in use back lig t will be
on, w en use stops back lig t also will off.
on To set always on. Back lig t will always be on.
setbl
off To set back lig t off. Back lig t will be always off
• After selecting t e back lig t option press key to confirm and press
key to escape from t e settings.

BWS Series Indicator Tec nical Manual
- 14 -
6. PARAMETERS
For Key function in Setup menu see page 7
To setup parameters, turn on t e scale.
• Press and Release key during t e self c ecking countdown
• Display will be s ow
pn
pnpn
pn
• Press and release, t en press and release, t en and
release keys to enter setup, display will s ow
p
pp
pO CH-
O CH-O CH-
O CH-
• Inside t e menu, Press key to c ange selection and press
key to confirm selection
Menu Sub Menu Description
Set H Set ig limit for c eck weig ing
Set lo Set low limit for c eck weig ing
one
No beep for c eck weig ing
Ok Beep, w en c eck weig ing is between
t e limits
P 0 CH
P 0 CHP 0 CH
P 0 CH-
--
-
CHECK
WEIGHING
beep
ng Beep, w en c eck weig ing is out of t e
limits
P 1
P 1 P 1
P 1 C
CC
Com
omom
om
COM PORT
SETTINGS
Mode
(Type of print Function)
Options:
Cont : Send data continuously
St 1 : Send data one time, w en
stable.
St c : Send data continuously, w en
stable
P r1 : Send data one time, w en
press Key (weig t needs to return
to zero)
Pr 2 : Send data to print and
accumulation, w en press .key
Auto : Auto accumulate and auto
print mode w en weig t is stable and or
return to zero.
Ask :NOT Used
Wireles :NOT Used

BWS Series Indicator Tec nical Manual
- 15 -
Baud
(Baud Rate)
To set t e baud rate
Options:
600 / 1200 / 2400 / 4800 /
9600
Pr
(Parity)
To set t e parity
Options:
7 e1 / 7 o1 / 8 n1
Ptype
(Printer Type)
To set printer model
Options:
Tm295 : Epson tm295
Tm220 : Epson tm220
Lp50 : WorldWEIGH LP50
Lab
(Print Formats)
(t ese are not
customizable)
To set print format 4 c oices
Options:
LAB 0
(Accumulation)
NO.
NET: 0.666kg
TARE: 0.222kg
GROSS: 0.888kg
TOTAL: 0.888kg
LAB 1
(G/T/N)
NET: 0.666kg
TARE: 0.222kg
GROSS: 0.888kg
LAB 2
(W at is on t e screen)
NET: 0.222kg or GROSS: 0.222KG
LAB 3
(Piece count ONLY)
U.W.: 0.00998 lb
NET : 1.996 lb
TOTAL: 200Pcs
LAB 4
(Piece count and normal weig ing mode)
U.W.: 0.01000 lb
NET : 2.002 lb
TARE : 1.000 lb
TOTAL: 200Pcs
<piece count
U.W.: 0.00000 lb
NET : 0.996 lb
TARE : 1.018 lb
TOTAL: 1.199 lb
<gross

BWS Series Indicator Tec nical Manual
- 16 -
To select single range operation
Count To c eck internal counts
Deci To set decimal points
0 / 0.0 / 0.00 / 0.000
Div To set increment
1 / 2 / 5 / 10 / 20 / 50
Cap Set Capacity
Cal Calibration
Si g r
gra Gravity
To select dual range - mode 1
Note: Once active second interval (div 2), T en
second interval will work until display return to zero
Count To c eck internal counts
Deci To set decimal points
Di v 1 To select first division
Div
Di v 2 To select second
division
Cap 1 To select first
capacity
Cap
Cap 2 To select second
capacity
Cal Calibration
Dual 1
gra Gravity (Do not C ange)
To select dual interval - mode 2
Note: First interval will active in CAP 1
Second interval will be active in CAP 2
Count To c eck internal counts
Deci To set decimal points
Di v 1 To select first division
Div
Di v 2 To select second
division
Cap 1 To select first
capacity
Cap
Cap 2 To select second
capacity
Cal Calibration
P 2 mod
P 2 modP 2 mod
P 2 mod
MODE
(K3 to enter)
Dual 2
gra Gravity
Lock To set keypad lock
Options: on / off
P3 ot
P3 otP3 ot
P3 otH
HH
H
OTHER
anm To set animal mode.
Options: on / off

BWS Series Indicator Tec nical Manual
- 17 -
St O Multi tare operation turn on
P4 S t
P4 S tP4 S t
P4 S t
TARE
St OFF Multi tare operation turn off
CLr CAL Clear all calibration data
P
PP
P5
55
5
CLR
CLRCLR
CLR
RESET
CLr oPt Clear ALL parameters
kg
To set “kg” unit Options: on / off
g
To set “g” unit Options: on / off
(lb or kg must be set to .000 to be
able to turn on grams) once selected
to the main weight screen change
unit to g then enter back into P6 and
you can turn off kg or lb if needed
lb
To set “lb” unit Options: on / off
P6 Unt
P6 UntP6 Unt
P6 Unt
UNIT
oz
To set “oz” unit Options: on / off
Table of contents
Other BTEK Measuring Instrument manuals
Popular Measuring Instrument manuals by other brands

Vemer
Vemer EVM-2DIN user manual

CDI Meters
CDI Meters CDI 25 Series Installation and operating instructions

Ninglu
Ninglu AM706-H Operation & installation manual

GANN
GANN HYDROMETTE BL operating instructions

Hanna Instruments
Hanna Instruments Checker HI721 instruction manual

Hitachi
Hitachi C41V instruction manual