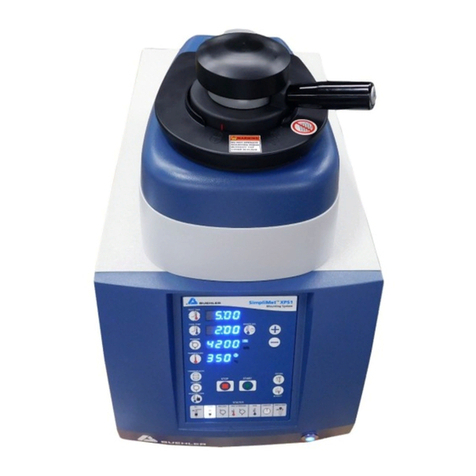
Buehler Vibromet 2 User manual

MA671635_13.1 1/23/2012
www.buehler.com
VibroMet®2
Vibratory Polisher

i
MA671635_13.1 [Original Instructions] 1/23/2012
Buehler Worldwide Mission Statement
We are Buehler, the science behind materials preparation and analysis, and the premier company in our
field, since 1936. Our global mission is to deliver outstanding value and delight our customers by
providing innovative, quality, on-time products, and services.
To fulfill our mission, we will continue to:
•Listen to and understand our customers to exceed their expectations.
•Apply engineering and technical support to provide innovative solutions to our customers.
•Achieve profitable growth.
•Foster an environment of creativity, respect, teamwork, open communication, and ethical
behavior.
•Provide the training and tools which allow all of us to achieve our mission.
•Continually improve our performance in all aspects of the business.
About Buehler
For over 75 years, Buehler has been a leading manufacturer of scientific instruments and supplies for use
in materials analysis. Buehler products are used throughout the world in manufacturing facilities, quality
laboratories, and universities to analyze all types materials, including:
•Ferrous and Non-ferrous metals
•Thermal spray coatings
•Printed Circuit Boards
•Fasteners
•Ceramics
•Composites
•Semiconductors
•Rocks
•Glasses
•Plastics
Companies use Buehler products to improve the material within their product, monitor production or
incoming purchased material, do failure analysis, and perform basic materials research. Buehler products
fall into three categories:
•Sample preparation equipment for cutting, grinding and polishing specimen material (usually cross
sectioning) prior to microstructural inspection.
•Metallographic consumables for the sample preparation equipment including; cutoff wheels, saw
blades, mounting compounds, grinding papers, polishing cloths and polishing suspensions.
•Inspection and testing equipment including microscopes, image analyzers, video equipment, and
hardness testers.

ii
MA671635_13.1 [Original Instructions] 1/23/2012
EC – DECLARATION OF CONFORMITY
Name of Manufacturer and contact information:
BUEHLER USA
41 Waukegan Road
Lake Bluff, Illinois 60044 USA
1-800-BUEHLER / www.buehler.com
Contact information of Buehler’s authorized
representative within the Community:
BUEHLER GmbH
In der Steele 2
40599 Düsseldorf, Germany
(49) (211) 974 100 / www.buehler-met.de
Juergen Vossbruch
Machine Name and Description:
Name: VibroMet®2 Vibratory Polisher
Catalog Number: 67-1635-160 / 67-1635-250
Description: Vibratory Polisher with amplitude vibratory
drive system
Machine Serial Number: Serial Number: Month Code – VP2 – Number of units built.
(Every unit assembled is registered in our database.)
Buehler declares this product to be in accordance with EC Directive(s):
Safety of Machinery (2009): EMC (2007):
2006/42/EC according to the following standards: 98/37EC according to the following standards:
EN ISO 12100-1: 2003
EN ISO 12100-2: 2003
EN 60204-1: 2006
EN 61000-6-2: 2005-01)
EN 61000-6-4: 2002
EN 61326: 2001, A1, A2, A3
Quality Assurance: Underwriters Laboratories, Inc. / ID# A3104
1130 W. Lake Cook Road / Suite 340
Buffalo Grove, IL 60089 / USA
This machine is CE-marked: Lake Bluff, Illinois, USA
Prepared by: Kate Watling, Technical Communicator
THIS MANUAL IS A CUSTOM GENERATED DOCUMENT. IT INCLUDES ALL REVISIONS RELATIVE
TO THIS SPECIFIC BUEHLER ITEM AS OF THE DATE SHOWN BELOW.
The items covered in this communication including all attachments may be subject to the export laws of the United States of
America, including without limitation the Export Administration Regulations and the Office of Foreign Asset Control Regulations. The
export, re-export or diversion of these items in contravention of these or other applicable regulations is strictly prohibited.
This information contained in this communication is intended only for the use of the individual or entity to which it is addressed and
may contain information that is privileged, confidential and exempt from disclosure under applicable law.
© 2010 – 2011 Buehler, a division of Illinois Tool Works Inc. All rights reserved.

Table of Contents
iii
MA671635_13.1 [Original Instructions] 1/23/2012
VibroMet 2 Vibratory Polisher .......................................................................................................................1
Warranty........................................................................................................................................................ 1
Specifications................................................................................................................................................1
Unpacking .....................................................................................................................................................2
Safety Information.........................................................................................................................................3
Machine Use and Care...........................................................................................................................3
Safety Terms .......................................................................................................................................... 4
Installation.....................................................................................................................................................4
Electrical Installation .....................................................................................................................................4
Power Switch..........................................................................................................................................5
Applying Polishing Cloths..............................................................................................................................5
Operation.......................................................................................................................................................6
Front Control Panel ................................................................................................................................6
Loading Specimens................................................................................................................................7
Specimen Weights..................................................................................................................................7
Abrasive Application...............................................................................................................................8
Metadi®Diamond Pastes.................................................................................................................8
Polishing Tips................................................................................................................................................ 9
VibroMet 2 Recommended Polishing Procedures......................................................................................10
Maintenance................................................................................................................................................11
Adjusting the Air Gap............................................................................................................................11
Trouble Shooting Chart...............................................................................................................................12
VibroMet 2 Vibratory Polisher Accessories.................................................................................................13
Buehler Environmental Policy.....................................................................................................................14

1
MA671635_13.1 [Original Instructions] 1/23/2012
VibroMet 2 Vibratory Polisher
The VibroMet 2 Vibratory Polisher is designed to prepare high quality polished surfaces on a wide variety
of materials. The VibroMet 2 has a powerful drive mechanism that produces nearly 100% horizontal
vibratory motion with virtually no vertical motion.
The horizontal motion of 7200 cycles-per-minute produces a gentle and very effective polishing action
with superior quality results and exceptional flatness. The unique vibratory action produces less
deformation, flatter surfaces, and reduces edge rounding.
Warranty
This unit is guaranteed against defective materials and poor workmanship for a period of 24 months or
2000 hours (whichever comes first), from the date of receipt by the customer. The warranty is void if
inspection shows evidence of abuse, misuse, unsafe use or unauthorized repair. This warranty covers all
Buehler costs associated with the replacement of defective materials (e.g., parts and labor).
If for any reason this unit must be returned to Buehler for warranty service, please contact Buehler
Service at www.Buehler.com or 1-800-283-4537 for prior authorization and shipping instructions.
(If outside the US or Canada contact your local Buehler Representative.) Please include the following
information:
•Customer Purchase Order Number
•Buehler Invoice Number and Date
•Serial Number
•Reason for Return
Specifications
VibroMet 2 Vibratory Polisher
67-1635-160 VibroMet 2 Vibratory Polisher
67-1635-250
Dimensions 18” W x 22.5” D x 14” H / (460 mm W x 570 mm D x 360 mm H)
Voltage Range 110 V (+/- 10%) 60 Hz 1 Phase 220 V (+/- 10%) 50 Hz 1 Phase
Wattage 30 W 30 W
Shipping Weight 175 lbs (80 kg) 175 lbs (80 kg)
VibroMet 2 Vibratory Polisher Decibels (dB)
Non-load with hood closed decibel (dB) level was taken approximately one foot from the front of the
machine, level with the control panel.
•Ambient sound 60 dB.
•At 30% Vibration Amplitude ......62 dB
•At 50% Vibration Amplitude ......63 dB
•At 100% Vibration Amplitude ....65 dB

2
MA671635_13.1 [Original Instructions] 1/23/2012
Unpacking
The VibroMet 2 has been carefully packaged to protect it during transit from the factory to your location.
Carefully unpack and check contents. If any components are missing or damaged, save the packing list
and materials and advise the carrier and Buehler of the discrepancy.
Carefully unpack and check that the following items have been received:
•AK Kit #120
40-7222 MicroCloth®12-inch, PSA backed, Polishing Cloth
40-7742 MasterTex® 12-inch, PSA backed, Polishing Cloth
•Load fixture
•MasterMet®Colloidal Silica Suspension 0.06 μm (2 oz)
•MicroPolish®II Deagglomerated Alumina Suspension (6 oz)
WARNING
!
Equipment Damage. The VibroMet 2 weighs 175 lbs (80 kg) Follow local safety practices to safely
lift the VibroMet 2 from the shipping carton. Improper lifting can result in personal injury or
machine damage.
The VibroMet 2 is bolted to a wood base for protection during shipping. Open areas are provided at the
corners of the base for ease of lifting. Use the removable handles at the bottom of the machine to lift the
VibroMet 2 out of the carton.
Do not lift the VibroMet 2 by the clamp or bowl assembly.Position the VibroMet 2 on a table so it
overhangs on the edge and remove the bolts securing the VibroMet 2 to the wood base.

3
MA671635_13.1 [Original Instructions] 1/23/2012
Safety Information
For safe installation and operation of this equipment, carefully read and understand the contents of this
manual. Improper operation, handling, or maintenance can result in severe personal injury and equipment
damage.
The VibroMet 2 is designed for use in dry, indoor laboratory and workshop environments away from
strong electromagnetic fields and with normal temperature ranges (41° F to 104° F / 5° C to 40° C) and
non-condensing humidity ranges (30-90%).
Machine Use and Care
All operators should be trained in the use of the VibroMet 2 Vibratory Polisher.If training is
needed contact Buehler at 800.BUEHLER (800.283.4537) or your local Buehler Sales
Representative.
Always use safety glasses. Flying debris and liquids can cause severe eye injury.
Dress properly. Do not wear loose clothing or jewelry and contain long hair. They can be caught
in moving parts and may result in severe personal injury.
Protective equipment should be worn to handle specimens, which may be sharp or hot.
Do not operate machine in explosive atmospheres, such as in the presence of flammable
liquids, gases, or dust. Sparks may ignite the dust or fumes.
Maintain the VibroMet 2 with care. Properly maintained machines are less likely to bind and are
easier to control. Any alteration or modification is a misuse and may result in a dangerous
situation.
Only qualified repair personnel must perform machine service. Service or maintenance
performed by unqualified personnel could result in a risk of injury.
Replace damaged or defective parts immediately and use only identical replacement parts.
Use of unauthorized parts or failure to follow maintenance instructions may create a risk of
electrical shock or injury.
Check for misalignment or binding of moving parts, breakage of parts, and any other
condition that may affect the machine operation. If damaged, have the machine serviced
before using. Poorly maintained machines cause many accidents.
Do not abuse the power cord. Never use the cord to cart the machine or pull the plug from
an outlet. Keep the cord away from heat, oil, sharp edges, or moving parts. Replace
damage cords immediately. Damage cords increase the risk of electrical shock.
Use of extension cords is not recommended for Buehler machines and equipment.
Remove worn-out Pressure Sensitive Adhesive (PSA) backed abrasive papers and cloths from
the platen after use. If left on the polisher for a prolonged period they may be difficult to remove.

4
MA671635_13.1 [Original Instructions] 1/23/2012
Safety Terms
DANGER
!
WARNING
!
CAUTION
!
NOTICE
Installation
WARNING
!
Equipment Damage. Follow all locally approved procedures and safety practices when lifting and
installing this machine. Improper lifting can result in machine damage.
Select a location for your VibroMet 2 that provides an adequate working space and a power source.
Placement of the VibroMet 2 should be on a sturdy, level surface. Buehler Tech-Met®tables are highly
recommended.
Electrical Installation
Electrical Shock Hazard. A qualified electrical technician should perform electrical installation and
maintenance.
Electrical Shock Hazard. Do not change the power plug in any way. Buehler machines are
equipped with a polarized plug (one blade is wider than the other) and a ground pin. Polarized
plugs reduce the risk of electrical shock. This plug will fit in a polarized outlet only one way.
•Disconnect the power supply before making any electrical adjustments.
•Capacitors inside the machine may retain a charge even if the machine is disconnected from
the power supply.
Installation of the VibroMet 2 must comply with local electrical standards or codes of practice.
The Specification Plate is located on the back of the VibroMet 2. Check that Specification Plate values for
phase, voltage, current, and power consumption are compatible with the intended electrical supply before
installation.
DANGER indicates a hazardous situation which, if not
avoided, will result in death or serious injury.
WARNING indicates a hazardous situation which, if not avoided,
could result in death or serious injury
CAUTION indicates a potentially hazardous situation which,
if not avoided, may result in minor or moderate injury.
NOTICE indicates practices not related to personal injury.

5
MA671635_13.1 [Original Instructions] 1/23/2012
Power Switch
The main power switch is located in the left corner on the back of the machine.
To activate power to the VibroMet 2, move the power switch to the UP position.
Note: If the VibroMet 2 malfunctions for any reason, shut the power off by moving the power
switch to the DOWN position.
Applying Polishing Cloths
The platen surface must be clean and dry before polishing cloths can be applied, especially when using
pressure sensitive (PSA) backed cloths.
1. Remove the screws securing the PVC Polishing bowl to the VibroMet 2 (see Figure 1).
2. Remove any residue from previous polishing cloths with a suitable cleaning solvent.
3. Remove the release liner on the back of the polishing cloth.
4. Place one edge of the polishing cloth on the edge of the platen.
5. Make sure the polishing cloth is centered on the platen.
6. Working in one direction, slowly press the polishing cloth on to the platen. This will help eliminate the
formation of air bubbles.
Rubbing the polishing cloth from the center out to the edge can eliminate any remaining air bubbles.
7. Replace the PVC Polishing Bowl and secure with the screws.
Figure 1 VibroMet 2 PVC Polishing Bowl
Screws securing the
PVC Polishing Bowl
PVC Polishing Bowl

6
MA671635_13.1 [Original Instructions] 1/23/2012
Operation
Front Control Panel
Figure 2 VibroMet 2 Front Control Panel
Amplitude The PERCENT bar graph indicates the percentage of
vibration amplitude.
Using a vibratory sensor, the cycles-per-minute can be correlated with
the percent of vibration indicated on the graph.
Press the INCREASE button to increase the amount of vibratory
amplitude.
Press the DECREASE button to decrease the amount of vibratory
amplitude.
CycleControls the polishing action of the VibroMet 2 Polisher.
Press the button to activate the polishing action.
Press the button to stop the polishing action.
Power Activates power to the VibroMet 2 Polisher.
Press the button to activate the power.
Press the button to deactivate the power.
CAUTION
!
Equipment Damage. If a loud striking noise occurs during the polishing cycle, stop the
machine immediately. The striking noise may be caused by the armature and core making
contact. Continue striking may result in damage to the machine. See the Maintenance
(Adjusting the air gap) section for corrective action.

7
MA671635_13.1 [Original Instructions] 1/23/2012
Loading Specimens
1. Place the loading fixture on a flat, level surface.
2. Place the mounted specimen, face down, in the appropriate circle indent (1½”, 1¼,” and
1” diameters).
3. Place the specimen holder over the mounted specimen. The specimen holder will rest on the
loading fixture.
4. Tighten the setscrew with the supplied wrench to secure the specimen mount in the
specimen holder.
Figure 3 Loading Fixture with Specimen Figure 4 Specimen Holder on Loading Fixture
Specimen Weights
Mounted specimens are set in special holders that provide pressure to effectively polish
specimen surfaces.
If additional pressure is needed, weights can be added to the specimen holders.
1. Screw the threaded shaft into the opening on top of the specimen holder.
2. Hand-tighten the shaft until secure.
3. Place a weight through the shaft to rest on top of the specimen holder.
Up to three weights can be added to each specimen holder.
When adding weights, wet the surface of the weights before installation with a clean polishing
lubricant (i.e. Metadi®Fluid or AutoMet®Lapping Oil) to prevent chatter during the polishing
process.
Figure 5 VibroMet 2 Specimen Weights

8
MA671635_13.1 [Original Instructions] 1/23/2012
NOTICE
Un-mounted specimen with sufficient weight, thin specimens mounted to wafer holders,
and specimens mounted in other specimen holders from different machines can also be
polished with the VibroMet 2 Polisher.
Weight Unit of Force
Pounds Grams lb/in2gm/in2
Sample Holders
1-inch mounts .88 400 1.12 79.0
1¼-inch mounts .88 400 .72 50.5
1½-inch mounts .88 400 .50 35.0
Accessory weight
studs (1 per holder) .44
.02 200
10 N/A N/A
Wafer Holders .88 22.25 N/A N/A
Table 1 VibroMet 2 Specimen Holder Weight Specifications
Abrasive Application
Thoroughly wet the polishing cloth with distilled or deionized water before applying an abrasive
suspension.
Apply a sufficient amount of abrasive to completely cover the polishing cloth by redistributing the
abrasive with clean fingers or by the movement of the specimens during the polishing process.
Metadi®Diamond Pastes
When using Metadi®diamond pastes, dispense the paste from the applicator to the polishing
cloth in a spoke-like pattern.
Redistribute the paste with clean fingers to provide uniform coverage and add enough extender to
completely cover the polishing cloth with a film of liquid.
When using Metadi®diamond compounds with AutoMet®Lapping Oil, make sure the diamond
paste is well distributed or the polishing action of the samples may be irregular.

9
MA671635_13.1 [Original Instructions] 1/23/2012
Polishing Tips
If the specimen material is water reactive, ethylene glycol can be used as a substitute for water, however
the polishing time may need to be extended.
Buffer water can be used to prevent reaction with water sensitive materials. Buffer solutions are adjusted
to a specific pH and a pH solution of 7.0 (neutral) is recommended for vibratory polishing.
Polishing steps and times will vary depending on the specimen material.
a. Run through a polishing sequence and monitor the progress at 15 to 30 minute intervals.
b. Remove the specimens from the polisher.
c. Clean and dry them.
d. Examine the specimen under a microscope.
e. Adjust the polishing sequence as needed. Some polishing times will exceed one hour.
f. Keep a record of successful preparation and polishing sequences for future applications.

10
MA671635_13.1 [Original Instructions] 1/23/2012
VibroMet 2 Recommended Polishing Procedures
NOTICE
These recommendations are guidelines to assist in determining the best procedure for a specific
specimen material.
Starting
Condition Surface or
Covering Abrasive Type/Style Lubricant Approximate
Load Vibratory
Times
Low to Medium Carbon Steel and General Purpose Procedure
600 grit TexMet®/ Nylon 6 micron Metadi®Metadi® Fluid 1 weight 60-240 min
6 micron MicroCloth®1 micron Metadi® Metadi ® Fluid 1 weight 60-180 min
Graphite Irons for the retention of graphite
600 grit (dry) CarbiMet®3 micron AutoMet®Lapping
Oil 1 weight 30-45 min
3 micron MicroCloth® 1 micron Metadi ® 1 weight 30-45 min
Hard Ferrous Alloys
6 micron TexMet® 3 micron Metadi® Fluid 2 weights 80-240 min
3 micron MicroCloth® 1 micron Metadi® Fluid 2 weights 60-120 min
Stainless Steels, Nickel, Zirconium, and Hafnuim Alloys
600 grit TexMet® 6 micron Metadi ® Metadi® Fluid 1 weight 120-240 min
6 micron TexMet® / Nylon 1 micron
.05 micron Metadi® Fluid 2 weights 120-240 min
1 micron MicroCloth® Alumina /
MasterMet® Metadi® Fluid 2 weights 60-240 min
Aluminum, Brass, and other Non-ferrous Alloys
1200 grit TexMet® / Nylon 3 micron Metadi® Fluid 1 weight 60-240 min
3 micron TexMet® / Nylon 1 micron Metadi® Fluid 1 weight 120-240 min
1 micron MicroCloth® .06 micron MasterMet® None 120-240 min
PC Boards
1200 grit TexMet® / Nylon 3 micron Metadi® Fluid 1 weight 60-180 min
3 micron TexMet® / Nylon 1 micron Metadi® Fluid 2 weights 60-180 min
1 micron MicroCloth® .06 micron MasterPolish®
MasterMet®1 weight 30 min
Ceramics
15 micron TexMet® 9 micron Suspensions 2-3 weights 120-360 min
9 micron TexMet® 6 micron Suspensions 2-3 weights 120-360 min
3 micron TexMet® 1 micron Suspensions 2-3 weights 120-360 min
1 micron TexMet® MasterMet®Suspensions 2-3 weights 120-360 min
Table 2 VibroMet 2 Recommended Polishing Procedures

11
MA671635_13.1 [Original Instructions] 1/23/2012
Maintenance
The VibroMet 2 will continue to perform at optimum levels with proper care, daily cleaning, and general
maintenance.
The protective hood and touch-panel control pad should be cleaned using mild soap and water applied
with a soft cloth. Do not use ammonia-based cleaners, i.e. Windex®. Cloudiness and cracking can occur.
Exterior painted surfaces should be cleaned with a non-abrasive household cleaner.
Adjusting the Air Gap
The air gap is the space between the armature face and the core assembly face. The air gap
must be set at .035 inch. A proper air gap is necessary for optimum performance. The air gap is
set and tested before leaving Buehler. However, the air gap can change due the application of
high voltage or improper handling.
When the air gap is too narrow the armature and core will collide during a polishing cycle. This
“striking” can cause machine damage (i.e. broken springs, cracked base or bowl, or cracked
armature or core).
If the air gap is too wide the VibroMet 2 will draw a high current, which may cause coil burnout,
lack of vibratory action, or failure of control.
Electrical Shock Hazard. Power off the unit before servicing.
Tools Needed
•7/16 Socket Wrench
•9/16 Wrench
•Feeler Gauge
1. Disconnect and unplug the VibroMet 2 from all power sources.
2. Remove the PVC polishing bowl and drive plate.
3. Remove the screws securing the cabinet to the base of the machine.
4. Lift off the cabinet and disconnect the electrical cables from the cabinet to the base.
5. Loosen the screws that secure the core assembly to the base. Only loosen the screws just
enough to relieve holding pressure.
6. Move the core assembly in small increments in the appropriate direction (either away from or
closer to the armature assembly). Keep the core assembly equal on each side.
7. When a .035-inch gap has been reached, tighten the screws securing the core assembly to
the base.
8. Recheck the gap space after the core assembly has been secured.
9. Reconnect the electrical cables from the base to the cabinet.
10. Replace the cabinet and secure to the base.
11. Replace the drive plate PVC polishing bowl.
12. Reconnect power to the VibroMet 2.

12
MA671635_13.1 [Original Instructions] 1/23/2012
Figure 7 VibroMet 2 Air Gap Adjustment Diagram
Trouble Shooting Chart
Problem Possible Cause Correction
No response Faulty switch Replace or repair the switch
Failed magnet Replace the magnet
Electrical short Repair the short
Weak action Low voltage Correct the power supply
Loose bowl Tighten the securing screws
Broken springs Replace the Springs**
Loose springs Tighten the spring bolts**
Hum but no vibration Defect SCR or rectifier Replace broken parts
Loud striking noise Air gap not adjusted correctly Adjust air gap to correct gap of
.035 inch
No lubrication between weights
and holders Coat contacting surface with
clean lubricant
Specimen holders not rotating
at normal rate (6 rev-per-min) Control set too low Increate the rate
Insufficient lubricant Add clean polishing medium
Cloth not secured Secure the cloth in the proper
manner
Machine is not level Level the machine
** For more detailed information, contact Buehler Service at 1-800 BUEHLER (1-800-283-4537) or
Service@buehler.com

13
MA671635_13.1 [Original Instructions] 1/23/2012
VibroMet 2 Vibratory Polisher Accessories
Specimen Holders............................................................................................................................67-1525
Set of 3 holders for 2-inch (50 mm) diameter mounted specimens
Specimen Holders............................................................................................................................67-1526
Set of 3 holders for 1-inch (25 mm) diameter mounted specimens
Specimen Holders............................................................................................................................67-1527
Set of 3 holders for 1¼-inch (30 mm) diameter mounted specimens
Specimen Holders............................................................................................................................67-1528
Set of 3 holders for 1½-inch (40 mm) diameter mounted specimens
Specimen Weights ...........................................................................................................................67-1529
Set of 9 weights and 3 studs for use with 67-1526, 67-1527, and 37-1528 Specimen Holders.
Up to 3 weights can be used with each holder.
Extra Polishing Bowl .......................................................................................................................67-1530
Loading Fixture ................................................................................................................................67-1540
1-inch (25 mm), 1¼-inch (30 mm), and 1½-inch (40 mm) loading fixture
Loading Fixture ................................................................................................................................67-1541
2-inch (50 mm) loading fixture
MasterMet®Colloidal Silica Suspension 0.06 μm (6 oz) .......................................................40-6370-006
MicroPolish®II Deagglomerated Alumina Suspension (6 oz) ..............................................40-6365-006
MasterTex®12-inch, PSA backed, Polishing Cloth.......................................................................40-7742
MicroCloth®12-inch, PSA backed, Polishing Cloth......................................................................40-7222

14
MA671635_13.1 [Original Instructions] 1/23/2012
Buehler Environmental Policy
Buehler is committed to complying with accepted environmental practices, including the commitment to
meet or exceed applicable legal and other requirements, to strive for continual improvement in our
environmental management system, and to minimize the creation of wastes and pollution. We at Buehler
will, therefore, manage our processes, our materials, and our people in order to reduce the environmental
impacts associated with our products.
To help conserve natural resources and to protect human health and environment, please follow your
state and local regulations on recycling and disposing of waste, consumables, or parts related to your
Buehler machine.
For End Of Life on Buehler machines, if recycling and disposal facilities are not available in your area,
please call Buehler Service at 1.800.BUEHLER (283.4537) or email at service@buehler.com. We will
provide options on how to properly recycle and dispose of your Buehler machine.

VibroMet®2 Assembly Drawing and Parts List
Note: Drawings and part numbers are subject to change without notice.
15
MA671635_13.1 [Original Instructions] 1/23/2012
Figure 8a VibroMet 2 Assembly Diagram
See Detail A

VibroMet®2 Assembly Drawing and Parts List
Note: Drawings and part numbers are subject to change without notice.
16
MA671635_13.1 [Original Instructions] 1/23/2012
Figure 8b VibroMet 2 Assembly Diagram Parts List
This manual suits for next models
3
Table of contents
Other Buehler Laboratory Equipment manuals