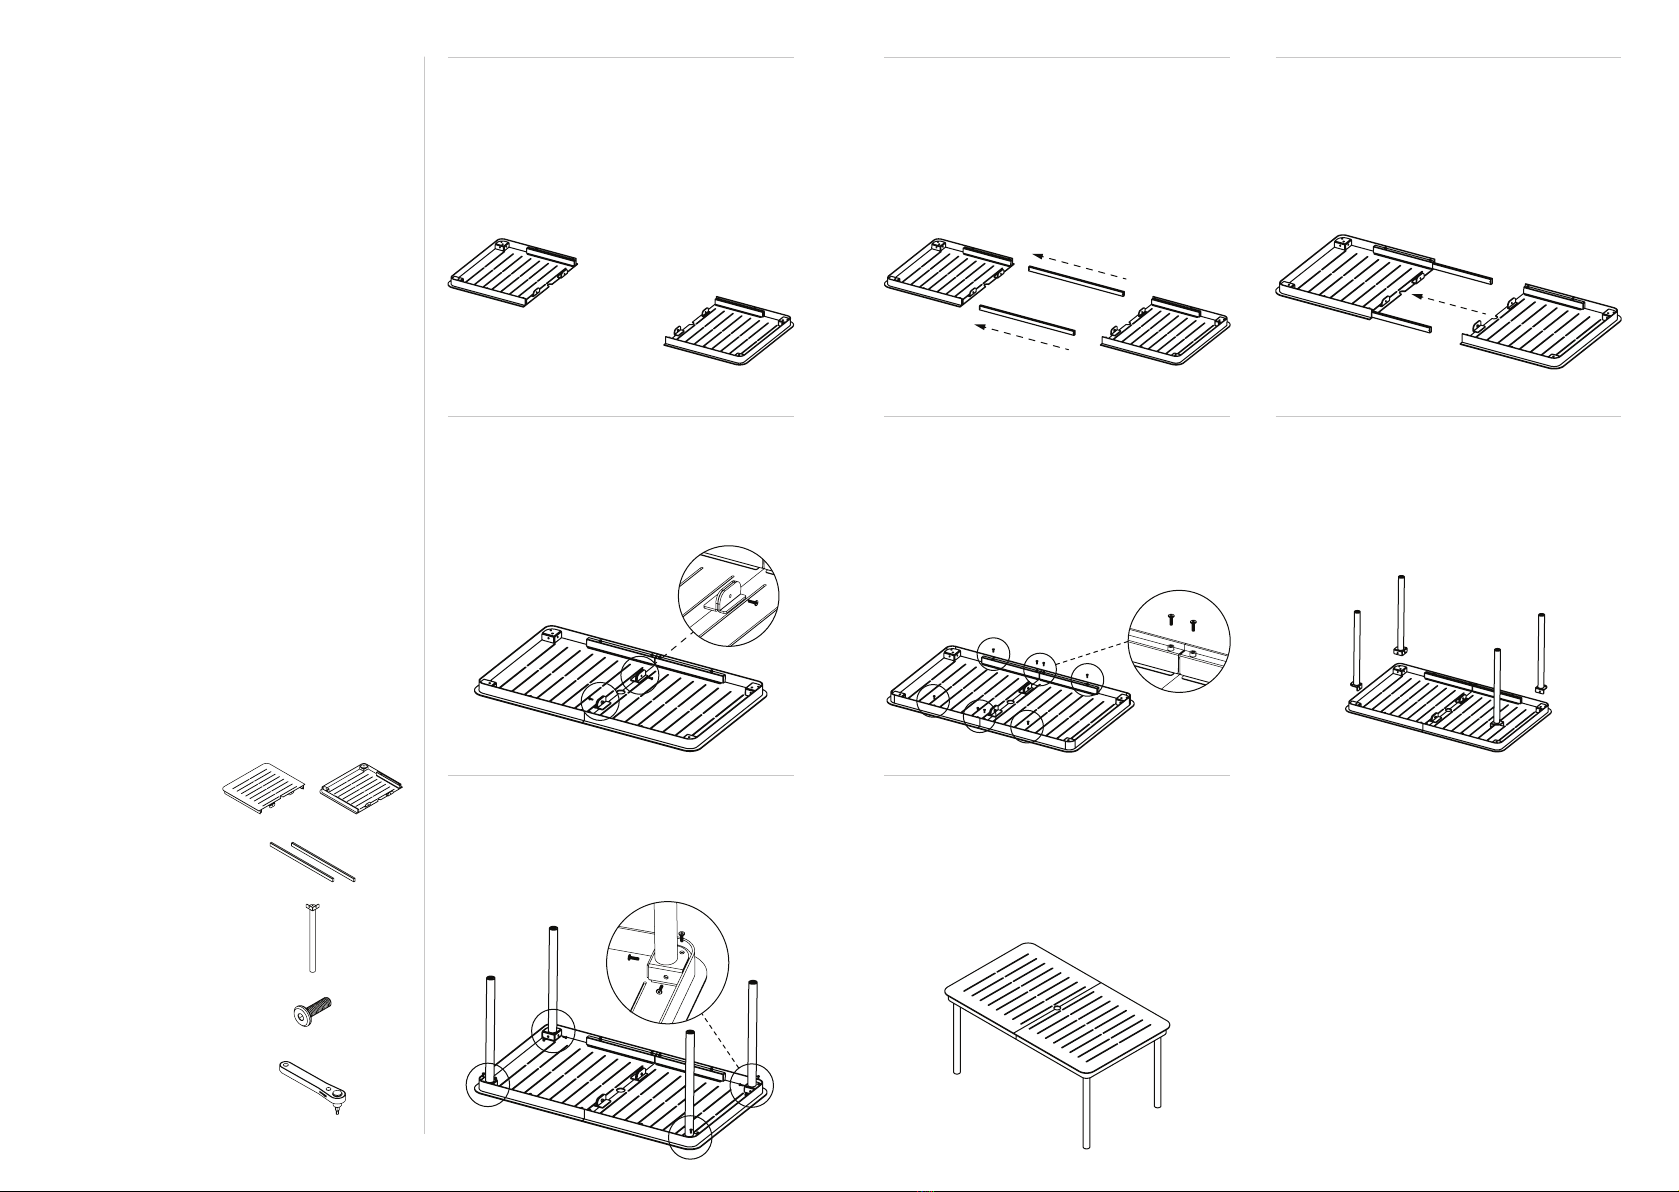
1
Set thetwo halves of the tabletop upside-
downon a soft surface, like the flattened
cardboard box or a carpet.
2
Grab the batons and fit them into the
hollowtubes on thelong edge of one of
the tabletops. It doesn’t matter which side
you start with.
3
Guide the other half of the tabletop
together with the batons, fitting them into
the corresponding hollow tubes, until the
tabletops are flush with each other.
7
1
2
3
Securely attach the legs with three screws
in the order shown, using the ratchet
screwdriver to make surethey’re tight.
8
With apartner, flip the table upright so it’s
standing on its legs, and you’re all set. Don’t
forget to tag @burrow on Instagram with your
new outdoor setup — we’d love to see it!
4
Insert a screw through each of the holes on
the two center brackets, and securely tighten
them withthe ratchet screwdriver.
5
Grab anothereight screws, and insert
them into the four holes on each of the
hollowtubes. Tighten them with the
ratchet screwdriver; they’ll apply pressure
to the batons and the friction will hold
them in place.
6
Take the four legs, and fit the topof the
leg into the corner bracket, so that the
holes are aligned with the inserts on the
bottom of the tabletop.
Parts & hardware
2 x
Tabletop halves
2 x
Batons
4 x
Legs
22 x
Screws
1 x
Ratchet screwdriver
Welcome to Relay
Your new outdoor dining table is incredibly
easy to set up. Everything you need is
included, but we recommend working with
a partner to help flip it over. Before you
begin, flatten the boxes or make sure you
have a soft surface like a carpet to work
on, to prevent dings and scratches.
Tip: The foot of each leg doubles as a
built-in leveler, so you can twist them to
raise or lower the leg to accommodate
uneven ground.
Tip: When using screws in steps 4, 5 and 7
we recommend loosely attaching all
screws to get the alignment right, rather
than fully tightening one before the other.
Once all screws are loosely threaded,
tighen away.


