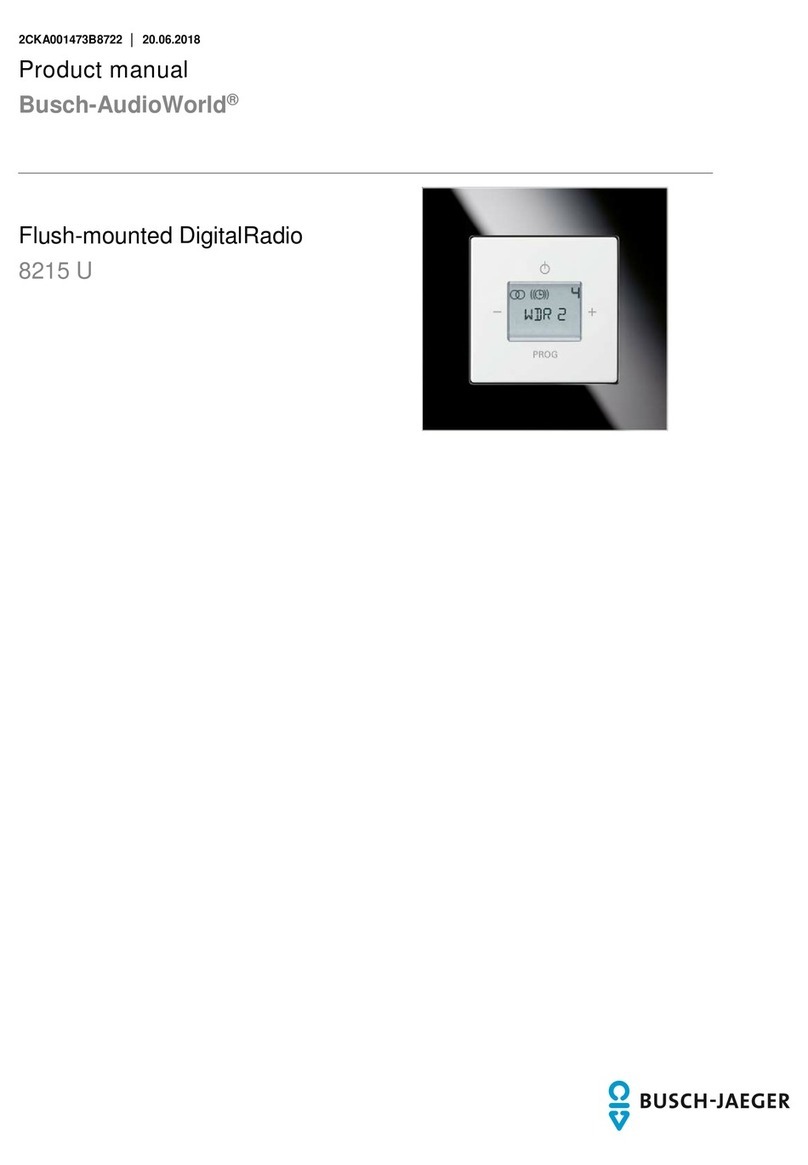
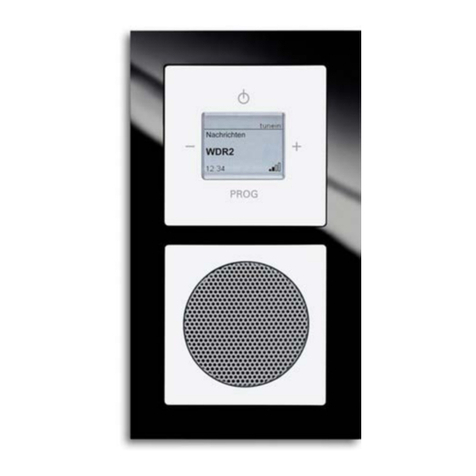
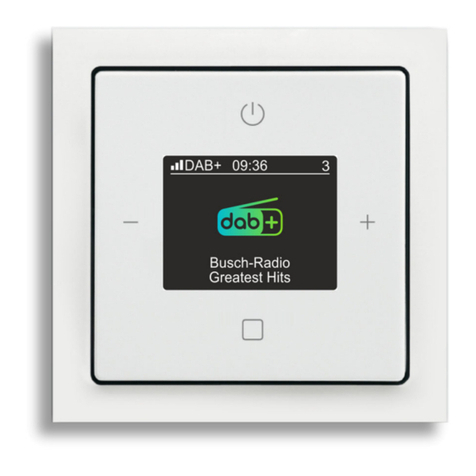
Busch-Jaeger AudioWorld 8216 U User manual

1
473-1-796
9
O
per
a
Busch
Pos: 2 /#Neustruktur#/ Online-Dokumentati on (+KNX)/Titelbl ätter/AudioVide o/Titelblatt - 8216 - BJ E @ 25\mod_133
9
8216
U
iNet
R
=== Ende der Liste für Textmarke Co ver ===
9
│Rev. 02
a
ting In
h
-Audi
o
9768252953_15.doc x @ 217800 @ @ 1
U
R
adio
-- SW 1.0 │
structi
o
o
World
®
25.04.2013
o
ns
®

Operating Instructions
Busch-AudioWorld®
Operating Instructions | 1473-1-7969 — 2 —
Pos:4 /#Neustruktur#/Leermodule/-----------------------------------------Inhalt----------------------------------------------------@ 25\mod_1340801075429_15.doc x @ 220481 @ @ 1
Pos: 5 /#Neustruktur#/ Online-Dokument ation (+KNX)/Inhal tsverzeichnis (- -> Für alle Dokumente <-- )/Inhaltsverzeichni s @ 19\mod_1320649044386_ 15.docx @ 109653 @ @ 1
1Safety....................................................................................................................................................................... 3
1.1Intended use ........................................................................................................................................... 3
1.2Environment............................................................................................................................................ 3
2Start-up .................................................................................................................................................................... 4
2.1Mains voltage activation.......................................................................................................................... 4
2.1.1State of the new device at the point of delivery....................................................................................... 4
2.1.2The device has already been in use in a different network ..................................................................... 4
2.2Connect the radio with the WLAN network.............................................................................................. 4
2.3Connecting the radio with the router (access point mode) ...................................................................... 5
3Operation ................................................................................................................................................................. 6
3.1Key assignment ...................................................................................................................................... 6
3.2Display and icons.................................................................................................................................... 7
3.3Setting up the device manually ............................................................................................................... 8
3.3.1Main menu .............................................................................................................................................. 8
3.3.2Navigation menu ................................................................................................................................... 10
3.3.3Menu "Internet Radio" ........................................................................................................................... 11
3.3.4Menu "Favourite station" ....................................................................................................................... 12
3.3.5Menu "Use server" ................................................................................................................................ 12
3.3.6Menu "My player" .................................................................................................................................. 13
3.3.7Menu "Timer/alarm" .............................................................................................................................. 14
3.3.7.1Menu "Alarm call function" .................................................................................................................... 14
3.3.7.2Menu "Duration of play" ........................................................................................................................ 16
3.3.7.3Menu "Sleep function"........................................................................................................................... 18
3.3.8Menu "Settings"..................................................................................................................................... 20
3.3.8.1Menu "Language".................................................................................................................................. 20
3.3.8.2Menu "Output quality" ........................................................................................................................... 21
3.3.8.3Menu "Music style / genre".................................................................................................................... 22
3.3.8.4Menu "Display"...................................................................................................................................... 23
3.3.8.5Menu "Display lighting" ......................................................................................................................... 24
3.3.8.6Menu "Energy consumption / connecting speed" .................................................................................. 25
3.3.9Menu "Summertime" ............................................................................................................................. 26
3.3.10Menu "Restart radio" ............................................................................................................................. 26
3.3.11Menu "Firmware update"....................................................................................................................... 27
3.3.12Menu "Device information".................................................................................................................... 28
3.3.13Rest (resetting the device) .................................................................................................................... 30
3.4Setting the device via WLAN................................................................................................................. 31
3.4.1New connection with the radio .............................................................................................................. 31
3.4.2Welcome screen "Start page" ............................................................................................................... 32
3.4.3"Network settings"................................................................................................................................. 33
3.4.4Monitor "General settings" .................................................................................................................... 34
3.4.5Station list "Station list" ......................................................................................................................... 37
4Update options....................................................................................................................................................... 38
5Technical data........................................................................................................................................................ 38
6Setup and function................................................................................................................................................. 38
6.1Possible combinations .......................................................................................................................... 39
7Installation and electrical connection ..................................................................................................................... 40
7.1Requirements for the electrician ........................................................................................................... 40
7.2Mounting ............................................................................................................................................... 41
7.3Electrical connection ............................................................................................................................. 43
7.3.1Loudspeaker ......................................................................................................................................... 43
7.3.2Mains voltage........................................................................................................................................ 43
8Cleaning................................................................................................................................................................. 44
=== Ende der Liste für Textmarke TOC ===
Operating Instructions
Busch-AudioWorld®Safety
Operating Instructions | 1473-1-7969 — 3 —
Pos:7 /#Neustruktur#/Leermodule/----------------------------------------Sicherheit-------------------------------------------------- @ 25\mod_1340800449 237_15.docx @ 220316 @ @ 1
Pos:8 /#Neustruktur#/Online-Dokumentation (+KNX)/Überschriften(--> FüralleDokumente<--)/1. Ebene/S - T/Si cherheit @ 18\mod_130261279179 0_15.docx @ 103357 @ 1 @ 1
1 Safety
Pos:9 /#Neustruktur#/Online-Dokumentation (+KNX)/Sicherheitshinweiseund Hinweise(--> Für alleDokumente<--)/Warnhinweise/Sicherheit- 230 V @ 18\mod_130260681675 0_15.docx @ 103308 @ @ 1
Warnin
g
Electric voltage!
Risk of death and fire due to electrical voltage of 230 V.
– Work on the 230V supply system may only be performed by authorised electricians!
– Disconnect the mains power supply prior to installation and/or disassembly!
Pos:10 /#Neustruktur#/Online-Dokumentation(+KNX)/Überschriften (-->Für alle Dokumente <--)/2.Ebene/A -F/ Bestimmungsgemäßer Gebrauc h @ 25\mod_1340691838858_1 5.docx @ 220036 @ 2 @ 1
1.1 Intended use
Pos:11 /#Neustruktur#/Online-Dokumentation(+KNX)/Benutzerinformationen (--> Füralle Dokumente<--)/Hinweise/Hinweis - ExternesGer äter forderlich @ 25\mod_133999 6653404_15.doc x@ 218113 @ @ 1
The device serves for the replay of Internet radio stations via a WLAN router, music data from a UPnP server or
from an analogue external source.
To set up the device and the Internet radio station requires an external device, e.g. a laptop.
The device may only be mounted in deep flush-mounted sockets according to DIN 49073-1.
Pos:12.1 /#Neustruktur#/Online-Dokumentation(+KNX)/Überschriften(--> Für alleDokumente<--)/2. Ebene/U - Z/Umwelt @ 25\mod_134 0691935719_15.doc x@ 220 064@ 2 @ 1
1.2 Environment
Pos:12.2 /#Neustruktur#/Online-Dokumentation(+KNX)/Sicherheitshinweise und Hinweise(--> Füralle Dokumente<--)/Hinweise- Umwel t/Hinweis - Umwelt - Hin weis Elektrogeräte @ 18\mo d_1302763973434_15.doc x @ 103500 @ @ 1
Consider the protection of the environment!
Used electric and electronic devices must not be disposed of with domestic waste.
– The device contains valuable raw materials which can be recycled. Therefore, dispose of the
device at the appropriate collecting depot.
Pos:12.3 /#Neustruktur#/Online-Dokumentation(+KNX)/Sicherheitshinweise und Hinweise(--> Füralle Dokumente<--)/Hinweise- Umwel t/Hinweis - Umwelt - Entsorgu ng Elektrogeräte @ 20\ mod_1325760695972_15. docx @ 136583 @ @ 1
All packaging materials and devices bear the markings and test seals for proper disposal. Always dispose of the
packaging material and electric devices and their components via the authorized collecting depots and disposal
companies.
The products meet the legal requirements, in particular the laws governing electronic and electrical devices and
the REACH ordinance.
(EU Directive 2002/96/EC WEEE and 2002/95/EC RoHS)
(EU REACH ordinance and law for the implementation of the ordinance (EC) No.1907/2006)
Pos:13 /#Neustruktur#/Online-Dokumentation(+KNX)/Steuermodule- Online-Dokumentation(--> Für alleDokumente<--)/++++++++++++Seitenumbruc h ++++++++++++ @ 9\mod_12688 98668093_0.doc x@ 52149 @ @ 1

Operating Instructions
Busch-AudioWorld®Start-up
Operating Instructions | 1473-1-7969 — 4 —
Pos: 14 /#Neustruktur #/Leermodule/-----------------------------------------Erstinbetriebnahme-----------------------------------------@ 25\mod_1340800537629_15.doc x@ 220 369 @ @ 1
Pos:15 /#Neustruktur#/Online-Dokumentation(+KNX)/Überschriften (-->Für alle Dokumente <--)/1.Ebene/A -F/ Erstinbetriebnahme @ 17\ mod_1299234649340_15. docx @ 100978 @ 1 @ 1
2 Start-up
Pos: 16 /#Neustruktur #/Online-Dokumen tation (+KNX)/Erstinbe triebnahme/AudioVi deo/Erstinbetr iebnahme - 8216 @ 36\mod_13 66350474662_15.doc x@ 294834 @ 22223333333322222 222 @ 1
2.1 Mains voltage activation
2.1.1 State of the new device at the point of delivery
Fig. 1: State of the device at the point of delivery
1. Switch on the mains power supply. If the state of the device is at the point of delivery, the display shows a
date, the latest software version and the serial number. The device will then switch itself off.
2.Reactivate the device. The display will now show that it is an access point. It will also show the name of the
device (composed of product name and the first four digits of the MAC address) and the WLAN receiving
status.
2.1.2 The device has already been in use in a different network
1. If the device has been in use in a different network, reset it to the factory settings.
2. Press the entire rocker switch for approximately 5 seconds.
2.2 Connect the radio with the WLAN network
Fig. 2: Connecting the device with the WLAN network
1. Press the "ON/OFF" button.
2. Search for the WLAN networks with a WLAN-capable device (dependent on the operating system).
3.Check whether the WLAN network "Radio-43cc“ is displayed.
4.Establish a connection with the WLAN network "Radio-43cc".
PROG
Access
IP:
MAC:
Point
Radio-43cc
78:C4:0E:01:43:CC
192.168.55.55
PROG

Operating Instructions
Busch-AudioWorld®Start-up
Operating Instructions | 1473-1-7969 — 5 —
2.3 Connecting the radio with the router (access point mode)
Fig. 3: Connecting the device with the router
5. Enter the default IP address of the radio in the browser (http://192.168.55.55).
6. Select the desired language in "Language setting".
7. Enter the network name (SSID) and the password.
8. Then select "DHCP" (recommended) or "User-defined".
Note
Observe lower and uppercase letters.
Change the name of the device if required and click "Save".
9. The radio starts again. The time (CET) is displayed after 2 minutes. The reference >“Access Point mode
deactivated. Radio mode is now active!“< is displayed.
If necessary, the radio carries out an automatic Firmware update.
10. Wait for approximately 2 minutes, until the date and time are displayed!
The radio is now ready for operation.
11. Press the "ON/OFF" button to listen to the first pre-set radio station.
Pos:17 /#Neustruktur#/Online-Dokumentation(+KNX)/Benutzerinformationen (--> Füralle Dokumente<--)/Hinweise/Hinweis- Möglichkeiten der Einrichtung @ 25\mod_ 1340702043039_15. docx@ 220124 @ @ 1
To set up your device you have two options:
1. To set up the device manually, see from page 8.
2. To set up the device via WLAN, see page 31.
Pos:18 /#Neustruktur#/Online-Dokumentation(+KNX)/Steuermodule- Online-Dokumentation(--> Für alleDokumente<--)/++++++++++++Seitenumbruc h ++++++++++++ @ 9\mod_12688 98668093_0.doc x@ 52149 @ @ 1
PROG
192.168.55.55

Operating Instructions
Busch-AudioWorld®Operation
Operating Instructions | 1473-1-7969 — 6 —
Pos: 19 /#Neustruktur #/Leermodule/-----------------------------------------Bedienung-------------------------------------------------- @ 25\mod_1340800580707_15.docx @ 220383 @ @ 1
Pos:20 /#Neustruktur#/Online-Dokumentation(+KNX)/Überschriften (-->Für alle Dokumente <--)/1.Ebene/A -F/ Bedienung @ 11\mod_12791855416 49_15.docx @ 83043 @ 1 @ 1
3 Operation
Pos:21 /#Neustruktur#/Online-Dokumentation(+KNX)/Überschriften (-->Für alle Dokumente <--)/2.Ebene/S -T/Tas tenbelegung @ 23\mod_13 36978335991_15.doc x@ 209274 @ 2 @ 1
3.1 Key assignment
Pos: 22 /#Neustruktur #/Online-Dokumen tation (+KNX)/Bedienu ng/AudioVideo/ Tastenbelegung - 8216 @ 36\mod_13 66350761116_15.doc x @ 294850 @ @ 1
Abb. 4: Key assignment
Key Operation Navigation menu Adjusting the menu item Adjusting values RESET
ON/OFF Open menu / back Press all keys of the
rocker switch
simultaneously for
approx. 5 seconds
Quiet Select menu Select menu item Adjust values
Loud
Open menu Open menu OK Accept value
Pos:23 /#Neustruktur#/Online-Dokumentation(+KNX)/Steuermodule- Online-Dokumentation(--> Für alleDokumente<--)/++++++++++++Seitenumbruc h ++++++++++++ @ 9\mod_12688 98668093_0.doc x@ 52149 @ @ 1
PROG
PROG

Operating Instructions
Busch-AudioWorld®Operation
Operating Instructions | 1473-1-7969 — 7 —
Pos:24 /#Neustruktur#/Online-Dokumentation(+KNX)/Überschriften (-->Für alle Dokumente <--)/2.Ebene/A -F/ Display und Symbole @ 25\mod_13 40698574878_15.doc x@ 220111 @ 2 @ 1
3.2 Display and icons
Pos: 25 /#Neustruktur #/Online-Dokumen tation (+KNX)/Bedienu ng/AudioVideo/Di splayerklärung - 8216 @ 25\mod_1339768322389_ 15.docx @ 217829 @ @ 1
Standard display
No. Function
1 Date display
2 Sleep function icon (sleep timer)
3 Duration of play icon (short-time timer)
4 Alarm call function icon (alarm clock)
5 Time
6 WLAN reception indicator
Menu display
No. Function
1 Next menu item
2 Selected menu item
3 Previous menu item
4 Menu / menu level
5 Menu number
Radio display
No. Function
1 Time
2 Current radio station
3 Music icon (radio is active)
4 WLAN reception indicator
Pos:26 /#Neustruktur#/Online-Dokumentation(+KNX)/Steuermodule- Online-Dokumentation(--> Für alleDokumente<--)/++++++++++++Seitenumbruc h ++++++++++++ @ 9\mod_12688 98668093_0.doc x@ 52149 @ @ 1
PROG
xx.xx.2012
00:00
1
2
3
4
5
6
PROG
MainMenu
Info
Presets
1/7
Internet Radio
4
3
2
1
5
PROG
♫
WDR2
00:00
2
1
3
4

Operating Instructions
Busch-AudioWorld®Operation
Operating Instructions | 1473-1-7969 — 8 —
Pos:27 /#Neustruktur#/Online-Dokumentation(+KNX)/Überschriften (-->Für alle Dokumente <--)/2.Ebene/G - L/ Gerät manuell Einric hten @ 25\mod_1339763813157_1 5.docx @ 217663 @ 2 @ 1
3.3 Setting up the device manually
Pos:28 /#Neustruktur#/Online-Dokumentation(+KNX)/Überschriften (-->Für alle Dokumente <--)/3.Ebene/G - L/ Hauptmenü @ 25\mod_134002 5026190_15.docx @ 218467 @ 3 @ 1
3.3.1 Main menu
Pos: 29 /#Neustruktur #/Online-Dokumen tation (+KNX)/Bedienu ng/AudioVideo/Menü/ Menueuebersic ht- 8216 @ 36\mod_1366350859240 _15.docx @ 294866 @ @ 1
The device has a main menu with a subdivision of menu levels and menu items.
The menu levels consist of individual menu items in which the desired settings can be made.
Menu no. Menu level Menu item Settings Display
1/7 Internet Radio (see
page 11)
TuneIn Online radio
2/7 Favourite station
(Favourites, see page
12)
Station list 1 to 8 stations
3/7 Use station (My music /
UPnP, see page 12)
My music / UPnP Access to other devices
4/7 My player (Busch
iDock/AUX, see page
13)
Busch iDock/AUX Access to an external
device via the iDock station
PROG
Main Menu
Info
Presets
1/7
Internet Radio
PROG
Main
Internet Radio
Music/UPnPMy
2/7
Presets
Menu
PROG
Presets
Music/UPMy
3/7
AUX input
Main Menu
PROG
Busch
4/7
Timer/Alarm
Music/UPnPMy
iDock/AU
Main Menu

Operating Instructions
Busch-AudioWorld®Operation
Operating Instructions | 1473-1-7969 — 9 —
Menu no. Menu level Menu item Settings Display
5/7 Timer / Alarm (see page
14)
Alarm call (alarm
clock)
Alarm clock
Duration of play
(short-time timer)
Adjusting duration of play
Sleep function
(sleep timer)
Adjusting off-period
6/7 Settings (see page 20) Language 11 languages are available
for selection
Audio mode "Mono" or "Stereo"
Sound mode Setting the music style /
genre
Display mode Screen display
Lighting Display lighting
Energy Energy consumption
Summertime Normal:
No automatic changeover
between summertime and
wintertime.
Automatic:
Automatic changeover
Restart the radio Restart the device
Firmware update
7/7 Info (see page 28) WLAN strength
Device name
IP address
Subnet mask
IP mode
Gateway / router
address
SSID
MAC address
Country
Serial number
SW Version
These menu levels and menu items are described in the following chapters.
Pos:30 /#Neustruktur#/Online-Dokumentation(+KNX)/Steuermodule- Online-Dokumentation(--> Für alleDokumente<--)/++++++++++++Seitenumbruc h ++++++++++++ @ 9\mod_12688 98668093_0.doc x@ 52149 @ @ 1
PROG
Timer/Alarm
5/7
Setup
AUX input
Main Menu
PROG
Main Menu
Setup
4/7
Info
Timer/Alarm
PROG
Main Menu
Info
7/7
Internet Radio
Setup

Operating Instructions
Busch-AudioWorld®Operation
Operating Instructions | 1473-1-7969 — 10 —
Pos:31 /#Neustruktur#/Online-Dokumentation(+KNX)/Überschriften (-->Für alle Dokumente <--)/3.Ebene/M - O/Menü-Navigation @ 25\mod_134 0704729568_15.doc x @ 220167 @ 3 @ 1
3.3.2 Navigation menu
Pos: 32 /#Neustruktur #/Online-Dokumen tation (+KNX)/Bedienu ng/AudioVideo/Menü/ Menü-Navigation - 8216 @ 36\mod_1366351373994 _15.docx @ 294882 @ @ 1
The navigation menu describes the basic options of a menu item and the response of the device.
Open menu
To switch to the menu while the radio is on, press button "PROG" followed by "ON/OFF". You are now in the main
menu in item "Favourites".
Non-relevant functions
If a menu item and its setting options is not relevant for you, you can change to a different menu item by pressing
the "plus / minus" buttons. With the ON/OFF button you jump back one level.
Incorrect menu selection
If you are inadvertently in the wrong menu level, press the "ON/OFF" button.
You return to the menu level.
Setting confirmed
After a setting has been made and confirmed with the "PROG" button, the menu returns to the menu item. After a
brief pause the device changes back to the radio mode.
Adjusting the volume
You can adjust the volume in the following menus via the "PLUS/MINUS"button.
Menu level Menu item
Internet Radio TuneIn
Select a radio station. When you hear the station, you can adjust the volume.
Favourite station
/Favourites)
Station list
Select a radio station. When you hear the station, you can adjust the volume.
Using a server My music/UPnP
Select a radio station. When you hear the station, you can adjust the volume.
My player (AUX) Busch iDock
Select your music from your player. As soon as you hear the music, you can adjust the volume.
Pos:33 /#Neustruktur#/Online-Dokumentation(+KNX)/Steuermodule- Online-Dokumentation(--> Für alleDokumente<--)/++++++++++++Seitenumbruc h ++++++++++++ @ 9\mod_12688 98668093_0.doc x@ 52149 @ @ 1

Operating Instructions
Busch-AudioWorld®Operation
Operating Instructions | 1473-1-7969 — 11 —
Pos:34 /#Neustruktur#/Online-Dokumentation(+KNX)/Überschriften (-->Für alle Dokumente <--)/3.Ebene/M - O/Menü"I nternet Radio" @ 25\mod_ 1340025286329_15.doc x @ 218508 @ 3 @ 1
3.3.3 Menu "Internet Radio"
Pos: 35 /#Neustruktur #/Online-Dokumen tation (+KNX)/Bedienu ng/AudioVideo/Menü/ Menü "Internet Radi o" - TuneIn - 8216 @ 36\mod_13 66351542744_15.doc x@ 294898 @ @ 1
Fig. 5: Menu level "Internet Radio“
In menu level "Internet Radio" you find menu item "TuneIn".
TuneIn is an online Internet radio.
The device offers you additional local and international live radio stations, talk shows, stations according to your
style of music and sports stations.
TuneIn menu Functions / settings
Local radio All local radio stations are listed under this menu item.
Music Select this menu when you wish to listen to a specific style of music / genre.
Talk In this menu item you will find a selection of talk-show stations.
Sport Here you can switch on the current sports talk-show stations.
Locations Select your radio station according to a continent.
Languages Select the desired language from the list of languages.
Podcasts A podcast (audio file) contains audio information about a topic that can be played with a player and listened
to. The recorded live programs of some radio stations can be called up at a later point in time as a podcast
and listened to. Select this menu to listen to a cut of an older live show from a radio station.
1. Select menu "Internet Radio".
2. Wait until the connection has been established.
3. Select a TuneIn menu.
4. Select a station from the list.
The device establishes the Internet connection to the selected station.
As soon as the connection has been established you can hear the station.
Pos:36 /#Neustruktur#/Online-Dokumentation(+KNX)/Steuermodule- Online-Dokumentation(--> Für alleDokumente<--)/++++++++++++Seitenumbruc h ++++++++++++ @ 9\mod_12688 98668093_0.doc x@ 52149 @ @ 1
PROG
00:00
Server.....
tunein
TuneIn
PROG
Main
Info
Presets
1/7
Internet Radio
Menu

Operating Instructions
Busch-AudioWorld®Operation
Operating Instructions | 1473-1-7969 — 12 —
Pos:37 /#Neustruktur#/Online-Dokumentation(+KNX)/Überschriften (-->Für alle Dokumente <--)/3.Ebene/M - O/Menü„ Lieblingssender“ (Favoriten) @ 25\mod_13400 25404298_15.doc x@ 2185 35 @ 3 @ 1
3.3.4 Menu "Favourite station"
Pos: 38 /#Neustruktur #/Online-Dokumen tation (+KNX)/Bedienu ng/AudioVideo/Menü/ Favoriten - Sender liste - 8216 @ 25\mod_1340025 437341_15.doc x@ 21854 8 @ @ 1
Fig. 6: Menu level "Favourites".
The "Favourites" menu offers you the option of selecting your favourite stations.
You can set up your favourite stations yourself, see chapter 3.4, on page 31.
1. Select menu "Favourites".
2. The stored stations are displayed.
3. Select your favourite station.
4. Confirm your selection by pressing the "PROG" button.
Pos:39 /#Neustruktur#/Online-Dokumentation(+KNX)/Überschriften (-->Für alle Dokumente <--)/3.Ebene/M - O/Menü"Ser ver verwenden" ( Meine Musik/UPnP) @ 25\mod_134 0025475508_15.doc x @ 218562 @ 3 @ 1
3.3.5 Menu "Use server"
Pos: 40 /#Neustruktur #/Online-Dokumen tation (+KNX)/Bedienu ng/AudioVideo/Menü/ Meine Musik/UPnP - ....... - 8216 @ 36\mod_136635 1699210_15.doc x@ 294 914 @ @ 1
Fig. 7: Menu level "My music/UPnP"
Menu level "My music/UPnP" allows you universal networking of devices without a server and computer and the
exchange of services.
You can play your music from a server located in the network.
Preconditions:
Smartphone or tablet with iOS or Android operating system and UPnP replay app, e.g. bubble UPnP
1.Select the menu "My music/UPnP.
2.The radio is now ready to play music that runs on a UPnP server.
3.Start the UPnP replay app on your mobile device.
4.Select the music source in the app, e.g. your Smartphone (local server) or a media server (e.g. NAS drive).
5.Select "Radio-INet-xxx" as player (renderer) in the app.
6.Select a piece of music from the playlist and start the replay.
7.The music is replayed from the radio.
Pos:41 /#Neustruktur#/Online-Dokumentation(+KNX)/Steuermodule- Online-Dokumentation(--> Für alleDokumente<--)/++++++++++++Seitenumbruc h ++++++++++++ @ 9\mod_12688 98668093_0.doc x@ 52149 @ @ 1
PROG
Main
Internet Radio
Music/UPnPMy
2/7
Presets
PROG
Presets
CNN Arizona
Antenne Bayern
1/8
WDR2
PROG
♫
WDR2
00:00
Menu
Menu
AUX
Server.....
PROG
Main
Presets
Music/UPMy
3/7
AUX
PROG
UPnP
Music/UPMy
00:00
Server.....
input

Operating Instructions
Busch-AudioWorld®Operation
Operating Instructions | 1473-1-7969 — 13 —
Pos:42 /#Neustruktur#/Online-Dokumentation(+KNX)/Überschriften (-->Für alle Dokumente <--)/3.Ebene/M - O/Menü„ Mein Abspielgerät" ( AUX) @ 25\mod_1340025664390_ 15.docx @ 218589 @ 3 @ 1
3.3.6 Menu "My player"
Pos: 43 /#Neustruktur #/Online-Dokumen tation (+KNX)/Bedienu ng/AudioVideo/Menü/ AUX - Busch iDock - 8216 @ 36\ mod_1366351991638_15. docx @ 29493 0 @ @ 1
Fig. 8: Menu level "AUX"
Menu "My player" describes menu level "AUX". This menu allows you to use the Busch iDock. The iDock can play
music from your iPhone or a different player via the device and loudspeakers.
A different player (not Apple) can be connected via the lateral jack socket.
Note
To use of this function the Busch iDock station must be connected and available.
Further information about the Busch iDock is available at http://www.busch-jaeger-
media.de/busch-jaeger_D/Standard/index.jsp
1. Ensure that an iDock-station is available!
2. Connect an iPhone, an iPod, or a different player.
Select the suitable connecting option.
No. Function
1 Connection for Apple devices (only for iPod,
iPhone)
2 Jack socket (for other players)
3. Select your desired music from your iPod, iPhone or a different player.
4. Then select "Play".
5. The device shows "iPod" on its display and you hear the music you have selected.
Pos:44 /#Neustruktur#/Online-Dokumentation(+KNX)/Steuermodule- Online-Dokumentation(--> Für alleDokumente<--)/++++++++++++Seitenumbruc h ++++++++++++ @ 9\mod_12688 98668093_0.doc x@ 52149 @ @ 1
PROG
Busch
4/7
PROG
Busch iDock/AUX
00:00
iDock/AU Busch iDock/AU
Timer/Alarm
Music/UPnPMy
Main Menu
1
2

Operating Instructions
Busch-AudioWorld®Operation
Operating Instructions | 1473-1-7969 — 14 —
Pos:45 /#Neustruktur#/Online-Dokumentation(+KNX)/Überschriften (-->Für alle Dokumente <--)/3.Ebene/S -T/Ti mer/Alarm @ 25\mod_13400 25758768_15.docx @ 2186 16 @ 3 @ 1
3.3.7 Menu "Timer/alarm"
Pos:46 /#Neustruktur#/Online-Dokumentation(+KNX)/Überschriften (-->Für alle Dokumente <--)/4.Ebene/M - O/Menü"W eckfunktion" (Wec ker) @ 25\mod_13407091922 69_15.docx @ 220180 @ 4 @ 1
3.3.7.1 Menu "Alarm call function"
Pos: 47 /#Neustruktur #/Online-Dokumen tation (+KNX)/Bedienu ng/AudioVideo/Menü/ Timer/Alarm - W ecker - 8216 @ 36\mod_1366352055480_1 5.docx @ 294946 @ @ 1
Fig. 9: Menu item "Alarm clock"
The "Alarm call function" menu describes menu item "Alarm clock" in menu level "Timer/alarm".
You can activate the alarm call function via this menu.
Activating the alarm call function
1. Select menu "Timer/alarm".
2. In the next menu, select menu item "Alarm clock".
3. Set the value for the "Alarm hour".
Alarm hour describes the time between 0 to 24 hours.
4. Confirm the "Alarm hour".
The menu automatically switches to the next setting option.
5. Set the value for the "Alarm minute".
Alarm minute describes the time between 0 to 59 minutes.
6. Confirm the "Alarm minute".
You can now choose between you favourite stations and an electronic alarm tone with the "PLUS/MINUS"
buttons.
7. Switch the alarm call function on by pressing the "PLUS" button.
The display shows the set time for the alarm call function and the "ON" status with the icon.
8. Confirm the activation of the alarm call function by pressing the "PROG" button.
Note
When you have set the alarm time and activated the alarm call function, the alarm clock icon is
not displayed! The alarm clock icon will appear in the display after you have switched from the
menu to the main display with the "On/Off" button.
PROG
Alarm einschalten
00:00
PROG
alarm-music activate
electric ring tone
Antenne Bayern
WDR 2
PROG
Alarm einschalten
00:00
PROG
Alarm einschalten
00:00 Aus
PROG
Alarm einschalten
00:00
PROG
Alarm einschalten
00:00 Ein
PROG
Timer/Alarm
Alarm Clock
1/3
Short
Sleep
PROG
Set Alarm Hour
0
PROG
Timer/Alarm
5/7
AUX
PROG
0
Set Alarm Minute
Alarm einschalten
00:00
Enable Alarm
00:00 Off 00:0000:00
Enable Alarm
On
Main Menu
Setup
AUX input Timer
Timer

Operating Instructions
Busch-AudioWorld®Operation
Operating Instructions | 1473-1-7969 — 15 —
Fig. 10: Main display - alarm clock has been set
Deactivating the alarm call function
1. Select menu "Timer/alarm".
2. In the next menu, select menu item "Alarm clock".
3. Switch to setting option "Alarm activation".
4. Switch the alarm call function off by pressing the "MINUS" button.
The display shows the time for the alarm call function and the "OFF" status.
5. Confirm the deactivation of the alarm call function by pressing the "PROG" button.
Pos:48 /#Neustruktur#/Online-Dokumentation(+KNX)/Steuermodule- Online-Dokumentation(--> Für alleDokumente<--)/++++++++++++Seitenumbruc h ++++++++++++ @ 9\mod_12688 98668093_0.doc x@ 52149 @ @ 1
PROG
AUX
XX:XX
AUX input

Operating Instructions
Busch-AudioWorld®Operation
Operating Instructions | 1473-1-7969 — 16 —
Pos:49 /#Neustruktur#/Online-Dokumentation(+KNX)/Überschriften (-->Für alle Dokumente <--)/4.Ebene/M - O/Menü"Spi eldauer" (Kur zzeit-Timer) @ 25\mod_134 0025898047_15.doc x@ 21865 7 @ 4 @ 1
3.3.7.2 Menu "Duration of play"
Pos: 50 /#Neustruktur #/Online-Dokumen tation (+KNX)/Bedienu ng/AudioVideo/Menü/ Timer/Alarm - K urzzeit-Timer - 8216 @ 25\mod_134 0025934090_15.doc x @ 218670 @ @ 1
Fig. 11: Menu item "Short-time timer".
The "Duration of play" menu describes menu item "Short-time timer" in menu level "Timer/alarm".
You can activate the play duration via this menu.
Activating the duration of play
1. Select menu "Timer/alarm".
2. In the next menu, select menu item "Short-time timer".
3. Set the value for the "Short-time timer minutes".
Short-time timer minutes describes the time between 0 to 59 minutes.
4. Confirm the "Short-time timer minutes".
The menu automatically switches to the next setting option, "Short-time timer".
The display shows the time set for the duration of play and the "OFF" status.
5. Switch the duration of play on by pressing the "PLUS" button.
The display shows the set time for the duration of play and the "ON" status with the icon.
6. Confirm the activation of the duration of play by pressing the "PROG" button.
Note
When you have set the "Short-time timer" time and activated it, the "Short-time timer" icon is not
displayed! The Short-time timer icon will appear in the display after you exit the main display.
PROG
Timer/Alarm
Short
2/3
Sleep
Alarm Clock
PROG
Start Short Timer
0
PROG
Main Menu
Timer/Alarm
5/7
Setup
AUX input
PROG
0
Start Short Timer
PROG
Alarm einschalten
00:00
PROG
00:00 Off
PROG
Alarm einschalten
00:00
PROG
00:00 On
Timer
Timer
Start Short Timer Start Short Timer

Operating Instructions
Busch-AudioWorld®Operation
Operating Instructions | 1473-1-7969 — 17 —
Fig. 12: Main display - "Short-time timer" has been set
Deactivating the duration of play
1. Select menu "Timer/alarm".
2. In the next menu, select menu item "Short-time timer".
3. Switch to setting option "Short-time timer activation".
4. Switch the duration of play off by pressing the "MINUS" button.
The display shows the time set for the duration of play and the "OFF" status.
5. Confirm the deactivation of the duration of play by pressing the "PROG" button.
Pos:51 /#Neustruktur#/Online-Dokumentation(+KNX)/Steuermodule- Online-Dokumentation(--> Für alleDokumente<--)/++++++++++++Seitenumbruc h ++++++++++++ @ 9\mod_12688 98668093_0.doc x@ 52149 @ @ 1
PROG
xx.xx.2012
00:00

Operating Instructions
Busch-AudioWorld®Operation
Operating Instructions | 1473-1-7969 — 18 —
Pos:52 /#Neustruktur#/Online-Dokumentation(+KNX)/Überschriften (-->Für alle Dokumente <--)/4.Ebene/M - O/Menü"Sc hlaffunktion" ( Schlaf-Timer) @ 25\ mod_1340025971241_15.doc x @ 218684 @ 4 @ 1
3.3.7.3 Menu "Sleep function"
Pos: 53 /#Neustruktur #/Online-Dokumen tation (+KNX)/Bedienu ng/AudioVideo/Menü/ Timer/Alarm - Sc hlaf-Timer - 8216 @ 25\mod_13400 26015329_15.doc x@ 21869 8 @ @ 1
Fig. 13: Menu item "Sleep timer"
The "Sleep function" menu describes menu item "Sleep timer" in menu level "Timer/alarm".
Via this menu you can fix a specific time for the device to deactivate itself.
Activating the sleep function
1. Select menu "Timer/alarm".
2. In the next menu, select menu item "Sleep timer".
3. Set the value for the "Sleep timer minutes".
Sleep timer minutes describes the time fixed between 0 to 59 minutes.
4. Confirm the "Sleep timer minutes".
The menu automatically switches to the next setting option, "Sleep timer activation".
The display shows the minutes set for the sleep function and the "OFF" status.
5. Switch the sleep function on by pressing the "PLUS" button.
The display shows the set time and the "ON" status with the icon.
6. Confirm the activation of the sleep function by pressing the "PROG" button.
Note
When you have set the "Sleep timer" and activated it, the "Sleep timer" icon is not displayed! The
sleep timer icon will appear in the display after you exit the main display.
PROG
Timer/Alarm
Sleep
3/3
Alarm Clock
Short
PROG
Start Sleep Timer
0
PROG
Main Menu
Timer/Alarm
5/7
Setup
AUX input
PROG
0
PROG
Alarm einschalten
00:00
PROG
Enable Alarm
00:00 Off
PROG
Alarm einschalten
00:00
PROG
Enable Alarm
00:00
Start Sleep Timer
On
Timer
Timer

Operating Instructions
Busch-AudioWorld®Operation
Operating Instructions | 1473-1-7969 — 19 —
Fig. 14: Main display - "Sleep timer" has been set
Deactivating the sleep function
1. Select menu "Timer/alarm".
2. In the next menu, select menu item "Sleep timer".
3. Switch to setting option "Sleep timer activation".
4. Switch the sleep function off by pressing the "MINUS" button.
The display shows the set time and the "OFF" status.
5. Confirm the deactivation of the sleep function by pressing the "PROG" button.
Pos:54 /#Neustruktur#/Online-Dokumentation(+KNX)/Steuermodule- Online-Dokumentation(--> Für alleDokumente<--)/++++++++++++Seitenumbruc h ++++++++++++ @ 9\mod_12688 98668093_0.doc x@ 52149 @ @ 1
PROG
xx.xx.2012
00:00
PROG
xx.xx.2012
00:00

Operating Instructions
Busch-AudioWorld®Operation
Operating Instructions | 1473-1-7969 — 20 —
Pos:55 /#Neustruktur#/Online-Dokumentation(+KNX)/Überschriften (-->Für alle Dokumente <--)/3.Ebene/M - O/Menü"Ei nstellungen" @ 25\mo d_1340025151674_15.doc x @ 218495 @ 3 @ 1
3.3.8 Menu "Settings"
Pos:56 /#Neustruktur#/Online-Dokumentation(+KNX)/Überschriften (-->Für alle Dokumente <--)/4.Ebene/M - O/Menü"Spr ache" @ 25\mod_134096 9904237_15.docx @ 22060 3 @ 4 @ 1
3.3.8.1 Menu "Language"
Pos: 57 /#Neustruktur #/Online-Dokumen tation (+KNX)/Bedienu ng/AudioVideo/Menü/ Einstellungen - Sprache - 8216 @ 25\mod_13397683 73759_15.docx @ 217858 @ @1
Fig. 15: Menu item "Language"
In menu item "Language" you find menu level "Settings".
The device offers you several languages for selection.
Selecting languages
1. Select menu "Settings".
2. In the next menu, select menu item "Language".
3. Use the "PLUS" button to change the languages.
4. Select the desired language.
5. Confirm your selection with the "PROG" button.
Pos:58 /#Neustruktur#/Online-Dokumentation(+KNX)/Steuermodule- Online-Dokumentation(--> Für alleDokumente<--)/++++++++++++Seitenumbruc h ++++++++++++ @ 9\mod_12688 98668093_0.doc x@ 52149 @ @ 1
PROG
Main Menu
Setup
4/7
Info
Timer/Alarm
PROG
Setup
Language
1/6
Audio Mode
EnergySet Efficiency
PROG
Set Language
English
Table of contents
Other Busch-Jaeger Radio manuals

Busch-Jaeger
Busch-Jaeger Busch-AudioWorld 8217 U-101 User manual

Busch-Jaeger
Busch-Jaeger Busch-AudioWorld 8215 U-101 User manual

Busch-Jaeger
Busch-Jaeger AudioWorld 8215 U User manual

Busch-Jaeger
Busch-Jaeger AudioWorld 8215 U User manual

Busch-Jaeger
Busch-Jaeger Busch-AudioWorld 8216 U Busch-Radio iNet User manual