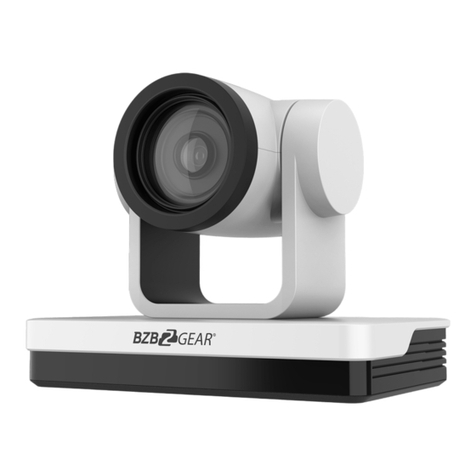
BZB Gear BG-VPTZN-HSU3 User manual

BG-VPTZN-HSU3
PTZ Full HD 1080P 10X/20X/30X Zoom HDMI/SDI/USB3.0/IP
Live Streaming Camera with POE and NDI
User Manual

BZBGEAR BG-VPTZN-HSU3 PRODUCT MANUAL
Address: 830 National Drive #140, Sacramento, CA 95834, USA ·Tel: +1(888)499-9906 ·Email: support@bzbgear.com 2

BZBGEAR BG-VPTZN-HSU3 PRODUCT MANUAL
Table of Contents
Safety Precaution 4
Features 5
Packing List 6
Specifications 7
Operation Controls and Functions 8
Remote Control 11
Operation Instructions 12
Menu Settings 14
Network Connection 18
Camera Web Interface 22
Application Example 30
Installation Instructions 31
Tech Support 32
Warranty 32
Mission Statement 32
Copyright 32
Address: 830 National Drive #140, Sacramento, CA 95834, USA ·Tel: +1(888)499-9906 ·Email: support@bzbgear.com 3

BZBGEAR BG-VPTZN-HSU3 PRODUCT MANUAL
Statement
Please read these instructions carefully before connecting, operating, or configuring this
product. Please save this manual for future reference.
Safety Precaution
●To prevent damaging this product, avoid heavy pressure, strong vibration, or immersion
during transportation, storage, and installation.
●The housing of this product is made of organic materials. Do not expose to any liquid,
gas, or solids which may corrode the shell.
●Do not expose the product to rain or moisture.
●The product has no power switch. Remove power immediately if camera is not in proper
working condition to avoid electrical shock.
●To prevent the risk of electric shock, do not open the case. Installation and maintenance
should only be carried out by qualified technicians.
●Do not use the product beyond the specified temperature, humidity, or power supply
specifications.
●This product does not contain parts that can be maintained or repaired by users.
Damage caused by dismantling the product without authorization from BZBGEAR is not
covered under the warranty policy.
●Installation and use of this product must strictly comply with local electrical safety
standards.
●Do not turn camera head manually. Doing so may result in mechanical damage. Camera
should only be placed on a stable horizontal surface and cannot be installed at an
angle.
●Make sure there are no obstacles within the camera’s rotational range when installing.
Never power on before installation has been completed.
Address: 830 National Drive #140, Sacramento, CA 95834, USA ·Tel: +1(888)499-9906 ·Email: support@bzbgear.com 4

BZBGEAR BG-VPTZN-HSU3 PRODUCT MANUAL
Introduction
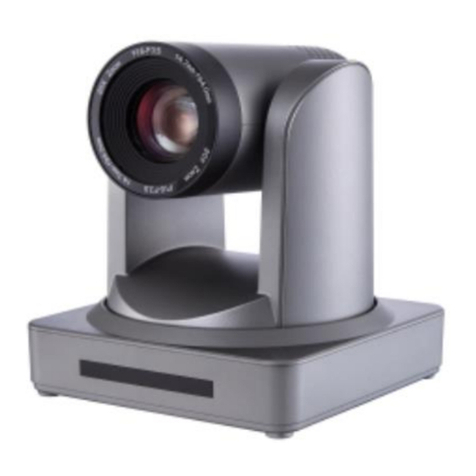
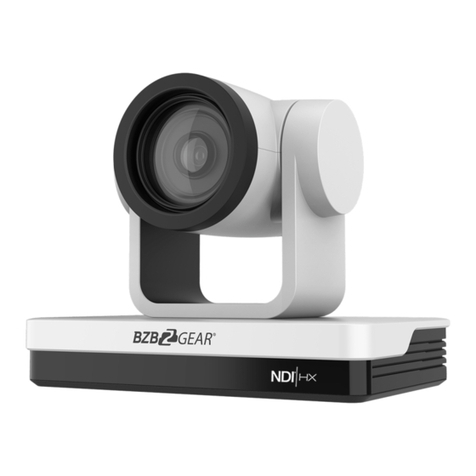
The BG-VPTZN-HSU3 is a compact 1080p HD PTZ camera with NDI|HX. Designed with a
small footprint to unobtrusively blend into offices and classrooms, this performer is
equipped with simultaneous HDMI, 3G-SDI, USB 3.0, NDI|HX / IP streaming outputs. The
camera also supports H.264 and H.265 video compression formats, and can broadcast in
ONVIF, RTSP, and RTMP IP streaming protocols.
The BG-VPTZN-HSU3 camera can capture clear images at resolutions up to 1080p@60Hz
thanks to a high signal to noise ratio CMOS sensor. The built-in 3.5mm audio input jack
allows the BG-VPTZN-HSU3 to embed audio directly into the video stream for easier
production.
NDI® (Network Device Interface) technology which provides the ability for multiple video
systems to communicate via a local area network (LAN) and eliminates the requirement for
video cables like HDMI, DVI, and SDI for streaming, providing convenience and versatility.
The technology was developed by NewTek™ to simplify remote connections, streaming,
capture/playback, replay, and production.
NDI cameras support bi-directional communication featuring ultra-low latency and
ultra-high video streams on shared connections. To function properly, the network needs to
support 1GB throughput using at least CAT5/6 cables for connectivity. Software programs
offering NDI capture will also typically require a NDI plugin to be installed.
The BG-VPTZ-HSU3 camera can be controlled using RS-232, RS-485, LAN, or IR remote
control. There are 255 available preset positions that can be stored internally, with nine of
those presets being available via IR remote control. These features, small size, and quiet
operation make the BG-VPTZN line of cameras ideal for education, conferencing, houses of
worship, and telemedicine, where space may be limited but thanks to the BG-VPTZN your
options are not!
Address: 830 National Drive #140, Sacramento, CA 95834, USA ·Tel: +1(888)499-9906 ·Email: support@bzbgear.com 5

BZBGEAR BG-VPTZN-HSU3 PRODUCT MANUAL
Features
●1080P Full High-definition: 1/2.8" high quality CMOS sensor (1/2.7" sensor on 10x),
can reach maximum 1920 x 1080 resolutions and output frame rate up to 60fps.
●NDI|HX: Allows the camera to be powered, controlled, and its video output through
just one CAT 5e/6/7 cable greatly simplifying installation.
●10/20/30X Optical Zoom with 72°/65°/65.4° horizontal field of view: Equipped
with advanced image processing technology and a full HD 1/2.8" CMOS Sensor
(1/2.7" sensor on 10x), 10/20/30X Optical Zoom, and a maximum resolution of
1080P@60fps.
●Low Video Noise: The inclusion of a high SNR (Signal to Noise Ratio) CMOS sensor
combined with 2D and 3D noise reduction functions reduces video noise to provide a
clear image, even under low-light conditions.
●Multiple Simultaneous Outputs: Equipped with simultaneous USB3.0, 3G-SDI,
HDMI, NDI|HX, and 4 channels of IP streaming outputs (RTSP/RTMP/RTMPS).
●Quiet Pan and Tilt Movement: High-precision stepper motors and an advanced
motor drive processor ensure smooth, quiet, and responsive camera movement.
●Multiple Control Options: The camera can be operated via RS232, RS485, LAN, or
IR remote control. Supported protocols include VISCA, PELCO-P/D, ONVIF, and
VISCA over IP.
●Preset Image Freeze: When enabled, this function captures a still image and holds
it until the camera has moved to the next selected preset, eliminating jarring
transitions.
●Multi-preset: Supports up to 255 presets. (Remote control can only set and recall 9
presets.)
●Suitable for a wide variety of applications: The compact footprint makes this
camera an ideal fit for education, conferencing, telemedicine, houses of worship, and
any other scenario where space is limited but high- quality video is required.
●Multiple Network Protocols: Supports NDI|HX, ONVIF, RTSP, RTMP, and RTMPS
protocols.
Packing List
●1x BG-VPTZN-HSU3 Camera
●1x IR Remote Controller
●1x RS-232 to DB 9-pin cable
●1x 12V 2.0 A DC Power Adapter
●1x User Manual
Address: 830 National Drive #140, Sacramento, CA 95834, USA ·Tel: +1(888)499-9906 ·Email: support@bzbgear.com 6
BZBGEAR BG-VPTZN-HSU3 PRODUCT MANUAL
Specifications
Model
BG-VPTZN-10HSU3
BG-VPTZN-20HSU3
BG-VPTZN-30HSU3
Camera Parameters
CMOS Sensor
1/2.7" Exmor CMOS
l/2.8"Exmor CMOS
l/2.8"Exmor CMOS
Effective Pixels
2.7 Megapixels
2.38 Megapixels
2.7 Megapixels
Video Format
1080P60/59.94/50/30/29.97/25;1080I60/59.94/50/30/29.97/25;720P60/50/30/25,480I60,576I50
Optical Zoom
10X Optical; 12X Digital Zoom
20X Optical; 12X Digital Zoom
30X Optical
Focus
f=5.1mm~51mm
f=4.7mm^94.0mm
f=5.2mrrrl48.4mm
HOV
72°
65°
65.4“
F-number
F=1.6(W)-3.5(T)
F=1.6(W)-3.5(T)
F=1.3(W)-4.8(T)
Min. Illumination
0.005Lux (F1.8,AGC:ON)
Digital Noise Reduction
2D & 3D
White Balance
Auto/Manual/Indoor/outdoor/White Balance/3000K/4000K/5000K/6500K
Focus
Auto/Manual
Iris
Auto/Manual
Backlight Compensation
1-7/Off
Control Panel
Brightness, Hue, Saturation, Contrast, Sharpness
Interface Parameters
Video Output Interface
HDMI, 3G-SDI, IP Streaming, USB 3.0, NDI|HX
Video Network Coding
H.265, H.264, MJPEG
Communication
IX RS232 IN, IX RS232 Out, IX RJ45, RS485
Control Protocol
VISCA/PELCO-D/PELCO-P/Visca Over IP/ONVIF
Baud Rate
2400/4800/9600/115200
Audio Input
1-ch 3.5mm audio interface, Line In
Audio Compression Format
G.711, G.722, G.722.1, G.728, G.722.1C AAC
Network Interface
100M internet access (10/100BASE-TX)
Network Protocol
NDI|HX, TCP/IP, HTTP, RTSP, RTMP, RTMPS, ONVIF, DHCP, Multicast
Power Interface
JEITA type (DC IN 12V)/POE
Mechanical Parameters
Pan Rotation Angle
-178°- +178°
Vertical Angle of View
-30°- +90°
Pan Speed Range (per sec)
0.1~180o/s
Tilt Speed Range (per sec)
0.1-120%
Presets
255
Other Parameters
Power Adapter
AC100V-AC240V in, DC12V/2A out
Input Voltage
DC 12V
Power Consumption
12W
Storage Environment
-10°C - +60°C / 20% - 95%
Working Environment
-10°C - +50°C / 20% - 80%
Optional Accessories
Wall mount (BG-VPTZ-WM); ceiling mount (BG-VPTZ-CM)
Address: 830 National Drive #140, Sacramento, CA 95834, USA ·Tel: +1(888)499-9906 ·Email: support@bzbgear.com 7

BZBGEAR BG-VPTZN-HSU3 PRODUCT MANUAL
Operation Controls and Functions
Connections Overview
No.
Name
1
IR Lens
2
IR Receiver
3
Power Indicator
4
DC12V Input
5
COM Port (RS485/RS232)
6
RJ45 IP Streaming, NDI|HX, PoE
7
3G-SDI Output
8
HDMI Output
9
USB 3.0 Type-B
10
3.5mm Audio-Input
Address: 830 National Drive #140, Sacramento, CA 95834, USA ·Tel: +1(888)499-9906 ·Email: support@bzbgear.com 8

BZBGEAR BG-VPTZN-HSU3 PRODUCT MANUAL
RS232 Interface Specifications
For serial connection to computers or joystick controllers.
RS232 INPUT
NO.
Function
Definition
1
DTR
Data Terminal
Ready
2
DSR
Data Set Ready
3
TXD
Transmit Data
4
GND
Ground
5
RXD
Receive Data
6
GND
Ground
7
IR OUT
IR Signal Output
8
NC
No Connection
Address: 830 National Drive #140, Sacramento, CA 95834, USA ·Tel: +1(888)499-9906 ·Email: support@bzbgear.com 9

BZBGEAR BG-VPTZN-HSU3 PRODUCT MANUAL
Camera Dimensions
Address: 830 National Drive #140, Sacramento, CA 95834, USA ·Tel: +1(888)499-9906 ·Email: support@bzbgear.com 10

BZBGEAR BG-VPTZN-HSU3 PRODUCT MANUAL
Remote Control
No.
Key
Function
1
Power Key
After pressing, the camera enters standby mode
2
P/T RST Key
After pressing, the camera enters self-check
3
Flip Key
Flip the camera image
4
Camera
Select Key
Select the camera to be controlled
5
BLC Key
Turn on/off BLC
6
Menu Key
Enter/Exit Menu
7
Camera PTZ
Control Key
Press the HOME button to return the camera to the
center position
8
Preset
Erase Key
Press "Reset"+ Number (1-9)to erase the corresponding
Preset
9
Preset
Setting Key
Press "Preset"+ Number (1-9)to save the corresponding
preset
10
Focus Key
[AUTO]: Automatic focus [MANUAL]: Manual focus
[FAR]: Manual focus on distant objects
[NEAR]: Manual focus on nearby objects
11
Zoom Key
+ increase, - decrease
12
Number Key
Used for setting and recalling Presets
Note: Always maintain a direct and unobstructed line of sight between the remote control
and the sensor on the front of the camera.
Address: 830 National Drive #140, Sacramento, CA 95834, USA ·Tel: +1(888)499-9906 ·Email: support@bzbgear.com 11

BZBGEAR BG-VPTZN-HSU3 PRODUCT MANUAL
Operation Instructions
Camera ID Select
Select the target camera ID (from No.1 to No.4)
Pan/Tilt Control
Move camera lens up ▲
Move camera lens down ▼
Move camera lens to the left ◀
Move camera lens to the right ▶
Return camera lens to center [HOME]
Tip: Pressing the directional button will rotate the camera lens slowly. Pressing and holding
the button will rotate it faster.
Menu Display
Click the [MENU] button to display the on-screen menu. To
exit, press [MENU] again.
Focus
[AUTO] Enable auto focus
[MANUAL] Switch to manual focus mode
[FAR] Manually focus on a distant object
[NEAR] Manually focus on a nearby object
Back Light Compensation
Strong background light can create unwanted shadows.
Press [BLC] to activate backlight compensation mode.
Press [BLC] again to deactivate.
Address: 830 National Drive #140, Sacramento, CA 95834, USA ·Tel: +1(888)499-9906 ·Email: support@bzbgear.com 12

BZBGEAR BG-VPTZN-HSU3 PRODUCT MANUAL
Zoom
Click the [+] Button, to zoom in.
Click the [-] Button, to zoom out.
Setting, Recalling, and Erasing Presets
To save a preset, press [PRESET] then press any of the
numbers (no. 1-9). You can save up to 9 presets.
To call a preset, press the saved preset number (no. 1-9).
To reset a preset, press [RESET] then press the preset
number (no. 1-9) you want to reset.
Image Flip & P/T Reset
Click the [FLIP] button to invert the image for ceiling
applications.
Click the [P/T RST] button to automatically recalibrate the
PTZ controls.
Address: 830 National Drive #140, Sacramento, CA 95834, USA ·Tel: +1(888)499-9906 ·Email: support@bzbgear.com 13

BZBGEAR BG-VPTZN-HSU3 PRODUCT MANUAL
Menu Settings
1. Press the [MENU] button on the remote control to
display the OSD menu.
2. Use the arrow keys to navigate the menu, press left and
right buttons to adjust the settings.
Exposure
Press the [MENU] button to display the OSD menu, press arrow
keys to highlight EXPOSURE and then press right to enter the
sub-menu.
●[AE MODE]: AUTO/SHUTTER/IRIS/BRIGHT/MANUAL
●Press right button to select options as defined below:
●[AE LEVEL]: Changes depending on selected AE
MODE (Not available in AUTO Mode)
○Manual Mode Only
○[SHUTTER]: Shutter priority mode:1/1 -
1/10000
○[IRIS]: priority mode: F1.6 - F24
○[GAIN] -3DB - 28DB
●[EXPCOMP]: -10.5DB - +10.5DB / OFF
●[HLC]: 0-15
●[BACKLIGHT]: 1-7 / OFF
●[FLICKER]: 50HZ, 60HZ, OFF
Address: 830 National Drive #140, Sacramento, CA 95834, USA ·Tel: +1(888)499-9906 ·Email: support@bzbgear.com 14

BZBGEAR BG-VPTZN-HSU3 PRODUCT MANUAL
Color
Press the [MENU] button to display the OSD menu, press arrow
keys to highlight COLOR and then press right to enter the sub
menu.
●[WB MODE]: AUTO/INDOOR/OUTDOOR/
OPW/ATW/MANUAL/3000K/
4000K/5000K/6500K
●[SATURATION]: 60%-200%
●[COLOR HUE]: 0-14
●[RED GAIN]: 0-255
(MANUAL mode only)
●[BLUE GAIN]: 0-255
(MANUAL mode only)
Picture
Press the [MENU] button to display the OSD menu, press the
arrow keys to highlight [PICTURE] and then press
the right button to enter the sub-menu.
●[BRIGHT]: 0-14
●[CONTRAST]: 0-14
●[SHARPNESS]: 0-15
●[ICR]: COLOR/BLACK
●[STYLE]: STANDARD/BRIGHT/RTSP/SOFT
●[GAMMA]: 0-9
Address: 830 National Drive #140, Sacramento, CA 95834, USA ·Tel: +1(888)499-9906 ·Email: support@bzbgear.com 15

BZBGEAR BG-VPTZN-HSU3 PRODUCT MANUAL
P/T/Z
Press the [MENU] button to display the OSD menu, then press
the arrow keys to highlight [P/T/Z] and press right to enter the
sub-menu.
●[FLIP]: ON/OFF (flips image vertically)
●[L/R DIRECTION]: ON/OFF (changes L/R
controls for when image is flipped)
●[AF MODE]: AUTO/MANUAL/Z Trigger
●[AF SENS]: NORMAL/LOW
●[PRESET FREEZE]: ON/OFF
●[PRESET SPEED]: 1-24
Noise Reduction
Press the [MENU] button to display the OSD menu, press the
arrow keys to highlight [NOISE REDUCTION], then
press right to enter the submenu.
●[2D NR]: 0-5 / OFF
●[3D NR]: 0-5 / OFF
●[DYN HOT PIXEL]: ON/OFF
Video Format
Press the [MENU] button to display the OSD menu, press the
arrow keys to highlight [VIDEO OUT], then press right to enter
the sub-menu.
●[VIDEO OUT]:
1080P60/59.9 4/50/30/29.97/25
1080I60/59.94/50
720P/60/59/50
●[REBOOT]: Reboots the camera
●[UVC]: ON / OFF (enables USB video output, OFF by default)
●[DIGITAL AUDIO]: ON / OFF (embed audio from 3.5mm stereo mini)
Address: 830 National Drive #140, Sacramento, CA 95834, USA ·Tel: +1(888)499-9906 ·Email: support@bzbgear.com 16

BZBGEAR BG-VPTZN-HSU3 PRODUCT MANUAL
System Setup
Press the [MENU] button to display the OSD menu, press the
arrow keys to highlight [SYSTEM SETUP], then press right to
enter the sub-menu.
●[SYSTEM INFO]: press right button to the sub
menu, as the right picture shown
●[LANGUAGE]: ENGLISH/CHINESE
●[ZOOM LABEL]: ON/OFF
●[PROTOCOL]: VISCA/PELCO-D/PELCO-P
●[ADDRESS]: 1-255 / AUTO
●[BAUDRATE]: 2400/4800/9600/19200/38400
Restore Default
Press the [MENU] button to display the OSD menu,
press the arrow keys to move to [DEFAULT], press
the right button to make the OSD parameters return
to default.
Address: 830 National Drive #140, Sacramento, CA 95834, USA ·Tel: +1(888)499-9906 ·Email: support@bzbgear.com 17

BZBGEAR BG-VPTZN-HSU3 PRODUCT MANUAL
Network Connection
To successfully complete this process, you will need several pieces of information. The first
is the IP address of your computer. You will also need to select an unused IP address on
your local network (This is the address you will set the camera to). The third piece is the
default IP address of your camera. Finally, you will need the IP address of your Default
Gateway/Router.
All versions of the BZBGEAR VPTZ series cameras have the following default IP address:
192.168.1.162
The computer must be on the same subnet as the camera to connect successfully,
therefore the computer must be connected to the 192.168.1.x subnet. If your network is
already using this IP address subnet, simply enter the cameras’ IP address in a web
browser to connect. If the current IP subnet is not the same then the computers’ network
adapter settings must be changed.
• Right-click on the internet connection in the lower right corner of the desktop and
select ‘Open Network & Internet Settings’.
• Select “Change Adapter Options".
Address: 830 National Drive #140, Sacramento, CA 95834, USA ·Tel: +1(888)499-9906 ·Email: support@bzbgear.com 18

BZBGEAR BG-VPTZN-HSU3 PRODUCT MANUAL
• Right-click on your connection (Wi-Fi or Ethernet) and select ‘Properties.’
• Select ‘Internet Protocol Version 4 (TCP/IPv4)’ as shown below and click
‘Properties.’
• For the following steps refer to the diagram below. Select ‘Use the following IP
address.’
• In the IP address field enter a non-conflicting IP address on the same subnet as the
camera. If there is another device with the same IP address you will not be able to
connect. In the example below we are using 192.168.1.200
• In the Subnet mask field enter 255.255.255.0 In the Default gateway field type
192.168.1.1 You can leave the DNS fields blank.
Address: 830 National Drive #140, Sacramento, CA 95834, USA ·Tel: +1(888)499-9906 ·Email: support@bzbgear.com 19

BZBGEAR BG-VPTZN-HSU3 PRODUCT MANUAL
NOTE: When you are finished configuring the camera you will need to return to this screen
and select ‘Obtain an IP address automatically’ and ‘Obtain DNS server automatically’ to
restore internet connectivity to your computer. Also make sure to reconnect any ethernet
cables you may have unplugged.
• Click OK to apply your settings.
• Click OK to close the network properties screen.
• Once you have applied your settings open your web browser and enter the IP
address of your camera.
• Enter the login information to access the interface.
oUser: admin / Password: admin
• At the top left of your screen select ‘Config’.
• On the left side of your screen select ‘Network’. In the IP address field, you will enter
the unused IP address you selected at the beginning. Our example will use an
address of 192.168.20.186.
*This address MUST NOT be in use by any other device on your network
or you will create an IP conflict and be unable to access your camera. *
• In the ‘Subnet Mask’ field enter 255.255.255.0 and enter the IP address of your
Default Gateway in the field below. Double-check your values and click the Save
Button.
• Unless you are given different information by your network administrator you should
enter 8.8.8.8 for DNS1 and 8.8.4.4 for DNS2. Click Save.
Address: 830 National Drive #140, Sacramento, CA 95834, USA ·Tel: +1(888)499-9906 ·Email: support@bzbgear.com 20
This manual suits for next models
3
Table of contents
Other BZB Gear Digital Camera manuals

BZB Gear
BZB Gear BG-LVPTZ-30XHSP User manual

BZB Gear
BZB Gear BG-UPTZ-ND 12X User manual

BZB Gear
BZB Gear BG-MAESTRO User manual

BZB Gear
BZB Gear BG-ADAMO-JR User manual

BZB Gear
BZB Gear BG-PACKSHOT-C10X User manual

BZB Gear
BZB Gear BG-B20SHA User manual

BZB Gear
BZB Gear BG-BFS User manual

BZB Gear
BZB Gear BG-VPTZ-HSU3 User manual

BZB Gear
BZB Gear BG-ADAMO-JRND User manual

BZB Gear
BZB Gear BG-BSHAN User manual