Call Us Toll-Free Today!
1.833.203.2473
WWW.CAIREMEDICAL.COM
QUICK START GUIDE ECLIPSE 5®
ON/OFF Button (Green) Indicator
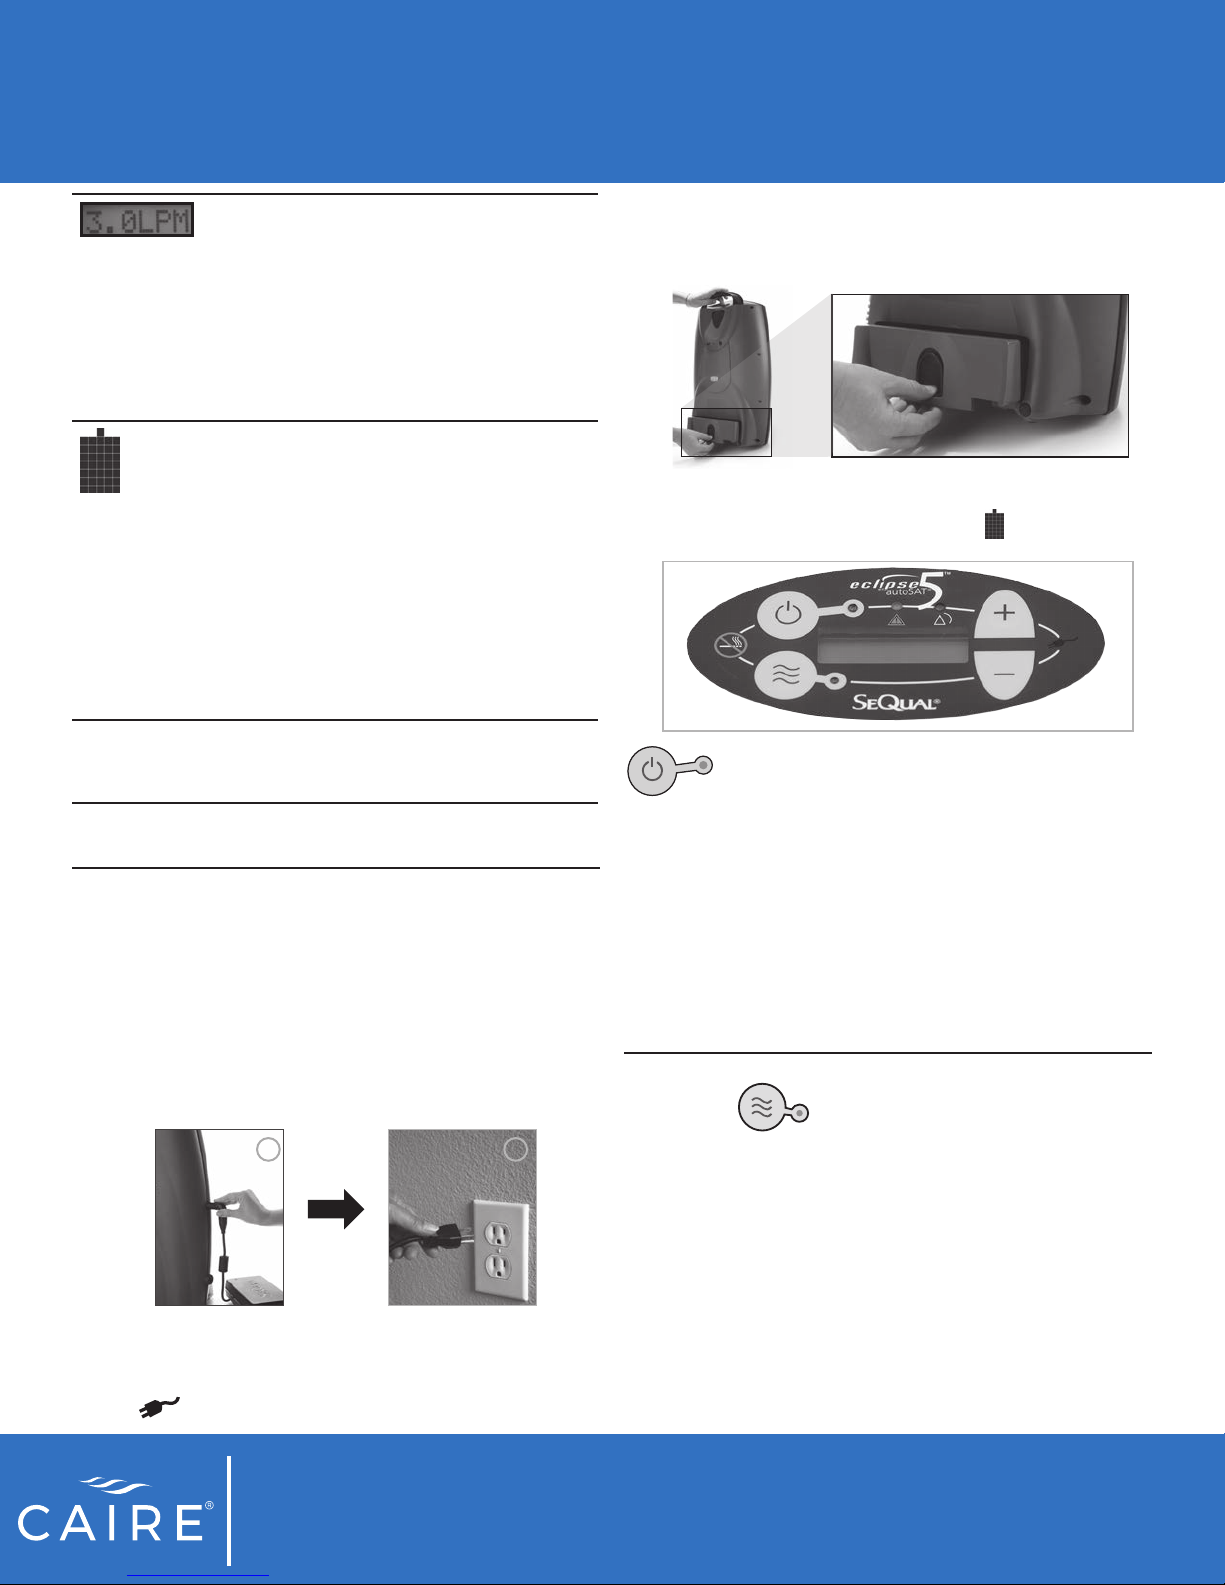
Press and hold the “ON/OFF” button for two (2) seconds to
power ON your Eclipse 5. A brief audible and visual power
on self-test will occur. Verify that all the indicators are
illuminated and the buzzer sounds for three (3) seconds.
Press and hold the “ON/OFF” button for two (2) seconds
to power OFF your Eclipse 5.
To connect to AC power source: Insert the AC Power
Supply cord securely into the External Power Receptacle
on the right side of the device. If your power supply has
three pins, plug the AC power cord into a grounded AC
outlet. If your power supply has a two pin plug, plug the
AC cord into a grounded or non-grounded AC outlet.
Install the Battery: Slide the battery into the empty
compartment until it locks into position and is ush with
the back of the device.
When the battery is properly installed and the Eclipse 5 is
ON, the Power Cartridge Status Gauge will appear.
2
STEP
1
STEP
3
Powering On the Eclipse 5
Flow Setting Indicator: This is the main
focus on your control panel. Your home
care provider will correctly set your
prescribed ow for the Continuous Flow
Mode (LPM) and/or your Pulse Dose
Mode (mL) settings. Each time you power
the device ON, the previous mode and/or
setting has been saved and will be used at
start-up.
Power Cartridge (battery) Status Gauge:
This indicator displays the charge
remaining in the battery. Each of the
ve horizontal gray bars represents
approximately 20% of the total battery
charge. When the battery is being
charged, the charge indicator bars will
blink in a waterfall-type fashion. If the
battery is not installed, or if it is improperly
installed, the Power Cartridge (battery)
Status Gauge will not be illuminated or will
ash on and o.
Buzzer: An audible alarm (or buzzer) alerts you to the
operating condition of the device, either a warning or
failure, and conrms a valid key press.
Flow Mode Button and Indicator
Press the Flow Mode button to select your desired ow
mode. Pressing this button repeatedly will toggle you
back and forth between continuous ow and pulse dose
modes. In Continuous Flow Mode the oxygen is provided
at a constant ow rate between 0.5 and 3.0 LPM. In Pulse
Dose Mode, oxygen is supplied in a bolus at the beginning
of each inspiration, providing a selectable range of settings
1-9 with bolus sizes 16-192 mL. Flow settings in both
modes should be prescribed for you by your physician.
4
Select Flow Delivery Mode
When the Eclipse 5 is plugged in properly, a green
indicator on the AC Power Supply will light and the
External Power Indicator, will appear on the user control
panel.