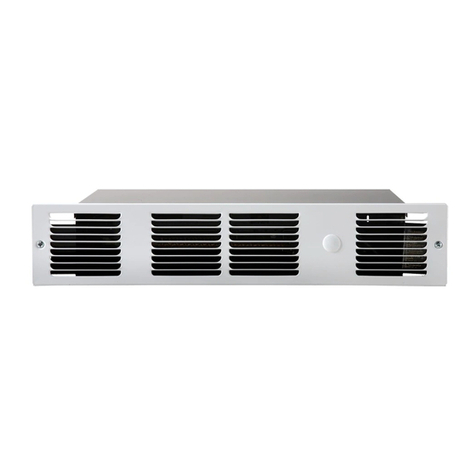
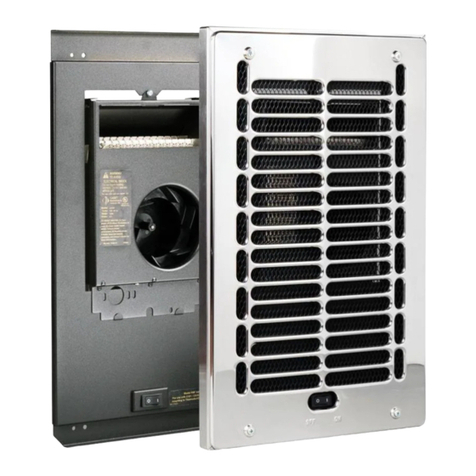
Cadet EP101T User manual

cadetheat.com Tel: 855.CADETUS PO Box 1675 Vancouver, WA 98668-1675
%HQH¿WV<RX&DQ'HSHQG2Q
SAVE THESE INSTRUCTIONS
Energy Plus Heater
Owner’s Guide
F
NO
NO
HEAT
FAN
ONLY
SLEEP
HEAT
+
5/8”
1.6cm
9”
22.9cm
Side Grill Front Wall Can Side
Wall Can Bottom
12”
30.5cm
10”
25.4cm
111/8”
28.3cm
3¼”
8.3cm 1¼”
3.2cm
1¾”
4.5cm
1¼”
3.2cm
3”
7.6cm 4”
10.2cm
77/8”
20.0cm
F
NO
NO
HEAT
Model:
Volts:
Watts:
WARNING! TO AVOID ELECTRICAL SHOCK
Disconnect powerat circuit breaker before servicing.
Do not operatewithout grill.
cadetheat.com
Vancouver,WA Mfg Date:
Beforepushing
RESETbuttonsee
Owner’sGuide
for displayfault
codesand other
troubleshooting
information.
3108579
conforms
to UL STD
2021
072xxx
TOOLS REQUIRED:
• Phillips Screwdriver
• Straight Screwdriver
• Wire Strippers
• Utility Knife
• (4) 1½" Wood Screws
• (2) Insulated Wire Connectors
• (1) Strain Relief Connector
• 6HQVLEOHDQGHQHUJ\HI¿FLHQWXVHXSWROHVV
energy
• %ULQJV\RXRQO\WKHKHDW\RXQHHGZKHQ\RXQHHGLW
and adjusts automatically to save you money
• <RXGH¿QH\RXUFRPIRUW²PDLQWDLQV\RXUURRPWHP-
perature within one degree
• Our most thoughtful design features:
Large digital display shows your room temperature
and heating mode
(DV\LQWXLWLYHRQHWRXFKFRQWUROV
Night/Away option for extra savings
,PSURYHDLUFLUFXODWLRQDGGFRPIRUWLQRIIVHDVRQ
with three fan speeds
• ,QVWDOOVLQHDV\VWHSV
• Common sense components designed with you in
mind:
Peace of mind safety with automatic high
temperature shutoff
No sharp edges
Corrosion resistant
Our sturdiest element provides comfortable warmth
for years of reliable use
• Your Energy Plus heater has been thoroughly tested
and is guaranteed with a \HDUH[WHQGHGZDUUDQW\
(QHUJ\3OXV0RGHOV
/LQH
9ROWDJH 0RGHO :DWWV $PSV
120 (37 1000 8.3
http://www.cadetheat.com/products/wall-heaters/energy-plus
Information is also available on our website:
Page 1
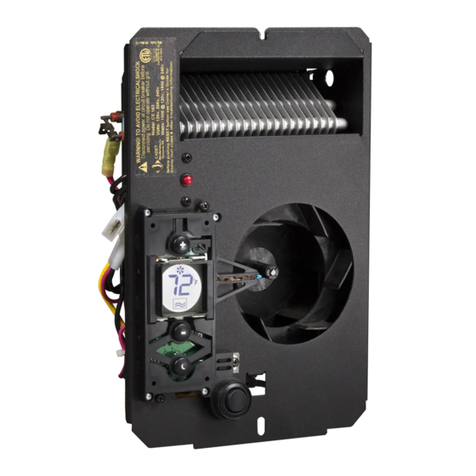
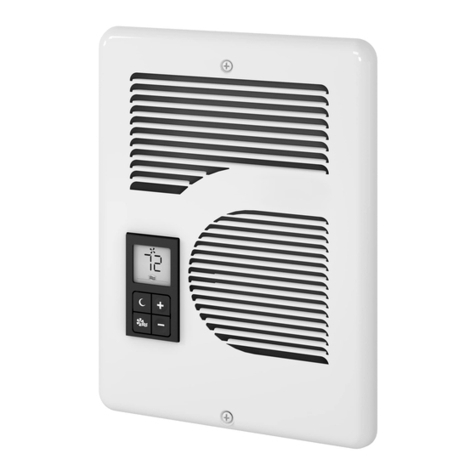
Energy Plus Model With Built-In Controller
:DOO7KHUPRVWDW1RW5HTXLUHG
Controller with Digital Display
and Push Buttons
Rating Label
PATENT PENDING
Conforms to UL Std.
DQG&HUWL¿HGWR
CAN/CSA Std. C22.2
No. 46
COM-PAK

SAVE THESE INSTRUCTIONS
cadetheat.com Tel: 855.CADETUS PO Box 1675 Vancouver, WA 98668-1675
IMPORTANT INSTRUCTIONS
Wiring Diagram
THERMOSTAT
CONTROL
MANUAL RESET
HIGH TEMPERATURE
LIMIT
MOTOR
MODE SWITCH
HEATING ELEMENT
BLACK
WHITE
WHITE
THERMISTOR
BLACK
RED
RED
YELLOW YELLOW
BLACK
BROWN
ORANGE
VOLTAGE
KEY
WHITE
1 2 3 4
1 2 3 4
L1 L2 or N
1. Read all instructions before installing or using
this heater.
2. :$51,1*
Risk of Fire. This heater is hot when in use.
&DXWLRQ²+LJK 7HPSHUDWXUH 5LVN RI )LUH .HHS
HOHFWULFDO FRUGV GUDSHU\ IXUQLVKLQJV DQG RWKHU
FRPEXVWLEOHVDWOHDVWIHHWPIURPWKHIURQW
RIWKHKHDWHUDQGLQFKHVFPDERYHDQG
on both sides.
:$51,1*
%XUQ+D]DUG7RDYRLGEXUQVGRQRWOHWEDUHVNLQ
touch hot surfaces. Extreme caution is necessary
when any heater is used by or near children or
invalids and whenever the heater is left operating
and unattended.
4. :$51,1*
Risk of Electrical Shock. Do not operate any
heater after it malfunctions. Disconnect power
at service panel and have heater inspected by a
TXDOL¿HGHOHFWULFLDQEHIRUHUHXVLQJ
:$51,1*
Do not use outdoors.
7RGLVFRQQHFWKHDWHUWXUQFRQWUROVWRRIIDQG
turn off power to heater circuit at main disconnect
panel.
:$51,1*
Risk of Electrical Shock. Do not insert or allow
foreign objects to enter any ventilation or exhaust
opening as this may cause an electric shock or
¿UHRUGDPDJHWKHKHDWHU
:$51,1*
5LVN RI )LUH 7R SUHYHQW D SRVVLEOH ¿UH GR QRW
block air intakes or exhaust in any manner.
:$51,1*
Fire or explosion may occur. A heater has hot and
arcing or sparking parts inside. Do not use it in
DUHDVZKHUHJDVROLQHSDLQWRUÀDPPDEOHYDSRUV
or liquids are used or stored.
8VH WKLV KHDWHU RQO\ DV GHVFULEHG LQ WKLV
manual. Any other use not recommended by the
PDQXIDFWXUHUPD\FDXVH¿UHHOHFWULFDOVKRFNRU
injury to persons.
11. The heater must be properly installed before
it is used.
12. :$51,1*
Risk of Electrical Shock and Fire. Do not operate
without grill.
6DYHWKHVHLQVWUXFWLRQV
:$51,1*
:KHQXVLQJHOHFWULFDODSSOLDQFHVEDVLFSUHFDXWLRQVVKRXOGDOZD\VEHIROORZHGWRUHGXFHWKHULVNRI¿UH
HOHFWULFVKRFNDQGLQMXU\WRSHUVRQVLQFOXGLQJWKHIROORZLQJ
Page 2

%HIRUH\RXEHJLQ\RXVKRXOGNQRZ
F
N
O
N
O
HE
A
T
A
A
FAN
ONLY
SLEEP
HEAT
+
F
N
O
N
O
HE
A
T
A
A
FAN
ONLY
SLEEP
HEAT
+
F
N
O
NO
HE
A
T
A
A
FAN
ONLY
SLEEP
HEAT
+
Remove
thermostat
Junction
box cover
(not included
)
To heater
To breaker White wiresBlack wires
All ground wires
DERXWWKH&DGHW(QHUJ\3OXVKHDWHU
VRPHLQVWDOODWLRQIDFWV
VRPHJHQHUDOWLSV
WKDWDZDOOWKHUPRVWDWLVQRWUHTXLUHG
7KH&DGHW(QHUJ\3OXV+HDWHUSURYLGHVZDUPWKDQGFRPIRUWWRDURRPE\XVLQJDQHI¿FLHQW
YDULDEOHVSHHGIDQWRFLUFXODWHWKHZDUPDLUDQGDQLQWHOOLJHQWWKHUPRVWDWWRGHOLYHUSUHFLVH
temperature control.
The Cadet Energy Plus heater is designed to save energy and run at a low speed and heat
output once the desired room temperature is reached. This is normal operation for maintaining
and regulating desired room temperature. This low speed fan movement also provides better
DLUPL[LQJZLWKLQWKHURRPDQGIHZHURQRIIF\FOHV
6DIHW\LV&DGHW¶V¿UVWSULRULW\$OOKHDWHUVIHDWXUHDKLJKWHPSHUDWXUHOLPLWVZLWFKWKDWVKXWVWKH
heater off when excessive operating temperatures are detected.
)RUHIIHFWLYHDQGVDIHRSHUDWLRQDQGWRSURORQJWKHOLIHRIWKHKHDWHUUHDGDOOLQVWUXFWLRQVDQG
VDIHW\LQIRUPDWLRQDQGIROORZWKHPDLQWHQDQFHLQVWUXFWLRQVLQWKLV2ZQHU¶V*XLGH
)RUQHZLQVWDOODWLRQ\RXVKRXOGEHSUHSDUHGWRUXQZLUHRUHOHFWULFDOFRQGXLWWR\RXUGHVLUHG
location for your heater.
$TXDOL¿HGRUGHGLFDWHGFLUFXLWIURPWKHPDLQGLVFRQQHFWSDQHOLVUHTXLUHG
$QLQZDOOHOHFWULFIDQKHDWHULVDSHUPDQHQWVDIHKDUGZLUHGVROXWLRQWKDWUHTXLUHVDFXWRXW
LQ\RXUZDOOWRUHFHVVWKHKHDWHUXQOHVVD&DGHWVXUIDFHPRXQWDGDSWHULVXVHG
• The Cadet Energy Plus heater must only be installed vertically in a wall.
7KHKHDWHUPXVWQRWEHLQVWDOOHGLQWKHÀRRURUFHLOLQJHYHQLI\RXDUHUHSODFLQJDQH[LVWLQJ
heater that was installed in either of these locations.
• Installation on an inside wall is recommended.
)RUEHWWHUFRPIRUWGRQRWLQVWDOOZKHUHDLULVOLNHO\WRFRQWLQXRXVO\EORZGLUHFWO\RQWR\RXRU
another person.
7KHUHFRPPHQGHGKHLJKWIURPWKHÀRRULVLQFKHVFPIRUHDV\DFFHVVWRWKHGLJLWDO
WKHUPRVWDW,WZLOOIXQFWLRQSURSHUO\LQORZHUSRVLWLRQVEXWPXVWQRWEHORZHUWKDQòLQFKHV
FPDERYHWKHÀRRU
• The Cadet Energy Plus heater must only be installed with a Com-Pak style wall can model
CC.
%HVXUHWKDW\RXUZDOOFDQLVPRXQWHGÀXVKZLWKWKHRXWVLGHRIWKHVKHHWURFN
7KHKHDWHUKDVDFRROGRZQIHDWXUHWKDWZLOOUXQWKHIDQIRUXSWRPLQXWHVDIWHUVZLWFKLQJWR
FAN ONLY mode or if set point is reached and mild outdoor temperatures create low demand.
7KLVLVQRUPDO7KHDLUEHLQJGLVFKDUJHGPD\IHHOFRROEXWLVDFWXDOO\URRPWHPSHUDWXUHUHVLGX-
al heat moving into the room.
%HFDXVHWKHGLJLWDOWKHUPRVWDWLVEXLOWLQWKH(QHUJ\3OXVKHDWHULWLVYHU\LPSRUWDQWWRFRQ-
GXFWSURSHUPDLQWHQDQFH6HH3DJHRIWKHKHDWHUWRPDLQWDLQSHDNSHUIRUPDQFHDQGVDIHW\
7KH&DGHW(QHUJ\3OXVKHDWHU¶VXQLTXHYDULDEOHVSHHGEORZHUZLOODXWRDGMXVWEDVHGRQWKH
URRPUHTXLUHPHQWVDQGKHDWRXWSXW,WZLOOTXLHWO\GHOLYHUKHDWDWDORZVSHHGIRURSWLPXPSHU-
formance and energy savings once desired temperature setpoint is reached.
A wall thermostat may not be used to control this heater. The Energy Plus heater is equipped
with a unique built-in thermostat that both regulates the heater output and provides precise
WHPSHUDWXUHFRQWURO,IUHSODFLQJDKHDWHUFRQWUROOHGE\DQH[LVWLQJZDOOWKHUPRVWDWUHPRYHZDOO
thermostat from the heater circuit and cover hole with a faceplate.
725(029($1(;,67,1*:$//7+(50267$7)520+($7(5&,5&8,7
1. Make sure power is off at the main disconnect panel.
2. Remove wall thermostat mounting screws.
3XOOWKHWKHUPRVWDWDZD\IURPWKHZDOODQGFRXQWWKHZLUHV
$,I\RXFRXQWEODFNVXSSO\ZLUHVDQGZKLWHVXSSO\ZLUHVLQWKHER[GLVFRQQHFW
thermostat and connect the 2 black wires together with one wire connector (not included).
Connect the 2 white wires together with another wire connector (not included). Connect all
ground wires together.
%,I\RXKDYHEODFNVXSSO\ZLUHDQGZKLWHVXSSO\ZLUHGLVFRQQHFWWKHUPRVWDWDQG
connect the black and white wires together with a wire connector (not included). Connect
all ground wires together.
&,I\RXKDYHPRUHWKDQEODFNRUZKLWHZLUHVSOHDVHFRQVXOWDTXDOL¿HGHOHFWULFLDQ
,I\RXKDYHDPHWDOMXQFWLRQER[LWPXVWEHJURXQGHGXVHDJURXQGLQJVFUHZRUFOLS
6. Install a blank faceplate (not included) over the exposed junction box.
3DJH

INSTALLATION INSTRUCTIONS
STRAIN RELIEF
CONNECTOR
KNOCK-OUT
(TWIST TO REMOVE)
SUPPLY WIRE
GROUNDING
SCREW
¾"
(1.9cm)
Min.
1. :$51,1*
Verify that the electrical supply wires are the same
voltage as the heater.
,IUHSODFLQJDQH[LVWLQJKHDWHUFKHFNWKHODEHO
of the old heater.
$OOHOHFWULFDO ZRUN DQGPDWHULDOVPXVW FRPSO\
ZLWKWKH1DWLRQDO(OHFWULF&RGH1(&WKH2FFX-
SDWLRQDO 6DIHW\ DQG +HDOWK$FW 26+$ DQG DOO
state and local codes.
4. If you need to install a new circuit or need addi-
WLRQDOZLULQJLQIRUPDWLRQFRQVXOWDTXDOL¿HGHOHF-
trician.
8VHFRSSHUFRQGXFWRUVRQO\
6. :$51,1*
Risk of Electrical Shock. DO NOT install the heat-
er directly above bathtub or sink. DO NOT install
in shower stall area. Manufacturer recommends a
minimum 2 foot (61 cm) clearance.
+HDWHUPXVWEHLQVWDOOHGLQDZDOOFDQ
Model EP Wall Can CC
:$51,1*
5LVNRI)LUH'2127LQVWDOOWKHKHDWHULQDÀRRU
LQWKH FHLOLQJ EHORZ DWRZHOEDUEHKLQGDGRRU
or anywhere the air discharge may be blocked in
any manner.
:$51,1*
Fire or Explosion May Occur. A heater has hot
and arcing or sparking parts inside. Do not use it
LQDUHDVZKHUHJDVROLQHSDLQWRUÀDPPDEOHYD-
pors or liquids are used or stored.
:$51,1*
Risk of Electrical Shock. Connect grounding lead
to grounding screw provided. Keep all foreign ob-
jects out of heater.
11.:$51,1*
Risk of Fire. This heater is hot when in use.
&DXWLRQ²+LJK 7HPSHUDWXUH 5LVN RI )LUH .HHS
HOHFWULFDO FRUGV GUDSHU\ IXUQLVKLQJV DQG RWKHU
FRPEXVWLEOHVDWOHDVWIHHWPIURPWKHIURQW
RIWKHKHDWHUDQGLQFKHVFPDERYHDQG
on both sides.
__________________________ 3DUW2QH __________________________
PLACEMENT: Install vertically. Heater is not approved for horizontal or ceiling mount applications.
CONTROLS: A built-in digital thermostat is included. May not be used with a wall thermostat.
5(48,5('0,1,080GLVWDQFHRIôLQFKHVFPIURP
DGMDFHQWVXUIDFHVVXFKDVZDOOVDQGòLQFKHVFPIURP
WKHÀRRU6HH)LJXUH+RZHYHU&DGHWUHFRPPHQGVLQFKHV
FPIURPDGMDFHQWVXUIDFHVDQGÀRRUIRUORQJHUDQGFOHDQHU
SHUIRUPDQFH+HDWHUVPXVWEHVSDFHGDWOHDVWIHHWP
apart.
Secure the wall can to the stud with 2 screws (not included). (See
)LJXUHV$VDQRSWLRQWKHUXEEHUVKLPSURYLGHGPD\EH
attached to side of wall can to square the wall can to the stud.
How do I install for new construction?
STEP 1 0RXQW7KH:DOO&DQ
)LJXUH
)LJXUH
Face of wall can must extend
òLQFKFP RUǫLQFK
cm) from face of stud to allow for
thickness of sheetrock.
Attach wall can to stud with screws
(not included) through holes provid-
ed in wall can. IMPORTANT: wall
FDQVKRXOGEHPRXQWHGÀXVKZLWK
outside of sheetrock.
STEP 2 5RXWH6XSSO\:LUHV
Route supply wire from the circuit breaker to the heater. Remove
a knockout from the wall can and attach the supply wire with a
strain relief connector (not included) leaving a minimum of 6 inch-
HVFPZLUHOHDG&RQQHFWVXSSO\JURXQGZLUHWRJURXQGLQJ
VFUHZLQZDOOFDQ6HH)LJXUH
Proceed to Part Two.
How do I install in an existing wall?
STEP 1 &XW$+ROH,Q7KH:DOO
5(48,5('0,1,080GLVWDQFHRIôLQFKHVFPIURP
DGMDFHQWVXUIDFHVVXFKDVZDOOVDQGòLQFKHVFPIURP
WKHÀRRU6HH)LJXUH+RZHYHU&DGHWUHFRPPHQGVLQFKHV
FPIURPDGMDFHQWVXUIDFHVDQGÀRRUIRUORQJHUDQGFOHDQHU
SHUIRUPDQFH+HDWHUVPXVWEHVSDFHGDWOHDVWIHHWP
apart.
&XWDKROHLQFKHVFPZLGHE\óLQFKHVFP high
next to a wall stud.
STEP 2
67(3
5RXWH6XSSO\:LUHV
0RXQW7KH:DOO&DQ
,QVHUWZDOOFDQLQWRRSHQLQJNHHSLQJZDOOFDQÀXVKZLWKZDOOVXU-
face. Secure can to wall stud with 2 screws (not included) through
holes provided in can. IMPORTANT: wall can should be mounted
ÀXVKZLWKRXVLGHRIVKHHWURFN
Proceed to Part Two.
Route supply wire from the circuit breaker to the heater. Remove
a knockout from the wall can and attach the supply wire with a
strain relief connector (not included) leaving a minimum of 6 inch-
HVFPZLUHOHDG&RQQHFWVXSSO\JURXQGZLUHWRJURXQGLQJ
VFUHZLQZDOOFDQ6HH)LJXUH
)LJXUH
)LJXUH
Page 4

INSTALLATION INSTRUCTIONS (continued)
__________________________ 3DUW7ZR __________________________
9HULI\6XSSO\9ROWDJH
STEP 1
%HIRUHLQVWDOOLQJYHULI\SRZHUVXSSO\LVYROWV
$TXDOL¿HGRUGHGLFDWHGFLUFXLWIURPPDLQGLVFRQQHFWSDQHOLVUHTXLUHG
How do I insert the heater assembly into the wall can?
,QVWDOO+HDWHU$VVHPEO\
STEP 2
,QVWDOO*ULOO
67(3
$OLJQSXVKEXWWRQVDQGGLJLWDOGLVSOD\ZLWKJULOOFXWRXWVEHIRUHWLJKWHQLQJZLWKJULOOVFUHZVSURYLGHG'RQRWRYHUWLJKWHQ6HH)LJXUH
7XUQKHDWHUDVVHPEO\VRWKDWWKHIURQWLVIDFLQJWKHÀRRUHOHPHQWGRZQZLWKPRWRUIDFLQJXS<RXFDQWKHQUHVWERWWRPHGJHRIWKH
KHDWHUDVVHPEO\RQWKHERWWRPRIWKHZDOOFDQZKLOHVXSSRUWLQJWKHHGJHFORVHVWWR\RX6HH)LJXUH
Connect the supply wires to the heater wires with wire connectors (not included). (See Figure 6). Now rotate heater assembly into wall
FDQVRWKDWWKHERWWRPHGJHGURSVLQWRWKHKDOIURXQGVORWVLQERWWRPOLSRIZDOOFDQ6HH)LJXUH
,03257$17 Push wires into bottom and left side of wall can during insertion. Be sure supply wires are not caught between motor and
wall can.
$IWHUFRQ¿UPLQJWKDWWKHERWWRPHGJHRIKHDWHULVSRVLWLRQHGLQWKHVORWVLQERWWRPOLSRIZDOOFDQDWWDFKDVVHPEO\DWWRSZLWKVFUHZ
provided.
&RQ¿UP3URSHU,QVWDOODWLRQ
STEP 4
7XUQHOHFWULFDOSRZHUEDFNRQDWWKHPDLQGLVFRQQHFWSDQHO:$,7VHFRQGVIRUKHDWHUWRSRZHUXSEHIRUHSXVKLQJDQ\EXWWRQV
7KH(QHUJ\3OXVKHDWHULVHTXLSSHGZLWKDVPDUWVHQVRUWKDWZLOOLQGLFDWHLIWKHYROWDJHGRHVQRWPDWFKWKHUHTXLUHGYROWVXSSO\
If the heater has been properly installed:
'LVSOD\EDFNOLJKWZLOOFRPHRQDQGUHDG³´IRUDPRPHQWWKHQÀDVKWKHWHPSHUDWXUHVHWSRLQWLILQ+($7PRGHRURULILQ
FAN ONLY mode.
$IWHUVHFRQGVURRPWHPSHUDWXUHZLOOEHGLVSOD\HG
Proceed to OPERATING INSTRUCTIONS.
,IWKHKHDWHUKDVEHHQLPSURSHUO\LQVWDOOHGD)DXOW&RGHZLOOGLVSOD\6HH)DXOW&RGHVSDJH
)LJXUH )LJXUH )LJXUH )LJXUH
3DJH

OPERATING INSTRUCTIONS
F
N
O
N
O
HE
A
T
A
A
NO FAN
NO HEAT
FAN
ONLY
SLEEP
HEAT
+
:$51,1*Risk of Electrical Shock and Fire.
The heater must be properly installed before it is
used.
1. Do not operate without grill.
.HHSHOHFWULFDOFRUGVGUDSHU\IXUQLVKLQJVDQG
RWKHUFRPEXVWLEOHVDWOHDVWIHHWPDZD\
IURP WKH IURQW RI WKH KHDWHU DQG LQFKHV
cm) away from the sides.
'RQRWWDPSHUZLWKWKHRYHUWHPSHUDWXUHOLPLW
control.
4. If the heater over temperature limits trip more
WKDQRQFHSHUGD\WKHKHDWHUPXVWEHUHSODFHG
&OHDQKHDWHUDWOHDVWHYHU\VL[PRQWKV
$IWHUDOORZLQJWKHKHDWHUWRFRROWXUQSRZHURII
at circuit breaker panel before removing grill.
8VH D KDLU GU\HU RU YDFXXP RQ EORZ F\FOH
to blow debris through the top element (do not
touch element).
,QVWDOOWKHJULOOEHIRUHWXUQLQJRQSRZHU
:$51,1*Any other service not detailed in
this Owner’s Guide should be performed by an
authorized service representative.
'LJLWDO'LVSOD\ &RQWURO%XWWRQV
+HDWHU0RGHV 6HWWLQJ'HVLUHG+HDWLQJ7HPSHUDWXUH
3URJUDPPLQJ<RXU1LJKW$ZD\%XWWRQ
(QHUJ\6DYLQJ7LSV
• Set your Night/Away set point to as low as you are com-
IRUWDEOHIRUDFRROHUQLJKWWLPHWHPSHUDWXUH
• :KHQ\RXH[LWWKHURRPRUOHDYH\RXUKRPHSXVKWKH1LJKW
button to drop the temperature set point.
• If your heater is positioned in a drafty area or exposed to
GLUHFWVXQOLJKWWHPSHUDWXUHUHDGLQJZLOOEHDIIHFWHG6HWWHP-
SHUDWXUHWRGHVLUHGFRPIRUWOHYHOQRWD³QXPEHU´RQWKHGLJLWDO
display.
You can preset a night or away temperature
VHWSRLQWIRUTXLFNDQGHDV\³RQHWRXFK´
energy savings.
• Push rocker switch to HEAT mode.
• Push Night button to activate. The moon
icon will show in display screen. The “night/
DZD\´VHWSRLQWWHPSHUDWXUHZLOOÀDVKIRU
seconds.
• Push the Up or Down button to
change your desired night/away set point.
• To return to your previous HEAT set point
ZKHQ\RXDZDNHRUUHWXUQSXVKWKH1LJKW
DJDLQ7KHVHWSRLQWWHPSHUDWXUHZLOOÀDVK
IRUVHFRQGV7KHPRRQLFRQZLOOQRORQJHU
be in display screen.
• To return to your previous night/away set-
SRLQWVLPSO\SXVKWKH1LJKWEXWWRQ
8VLQJWKHURFNHUVZLWFK\RXFDQPRYHWKHVZLWFKWRWZRPRGHV
/()7326,7,21+($702'(
Your Com-Pak Energy Plus heater has a unique variable speed
blower that auto adjusts the heat output based on the room’s
requirements. Once you set the thermostat to your desired tem-
SHUDWXUHWKHKHDWHUZLOOYDU\WKHZDWWDJHRXWSXWIRUPD[LPXP
HI¿FLHQF\
The digital display will show the level of heat being output to
maintain the room’s temperature.
5,*+7326,7,21)$121/<02'(
The FAN ONLY mode can circulate air but will not supply heat.
Three fan speeds are available. To adjust the fan speed: With
URFNHUVZLWFKLQWKH5,*+7SRVLWLRQSXVK8SRU'RZQGLJ-
LWDOEXWWRQV'LVSOD\ZLOOUHDG³´IRUORZVSHHG³´IRUPHGLXP
VSHHGRU³´IRUKLJKVSHHGGXULQJWKHVHWXSSURFHVVWKHQ
resume to temperature display.
• Push rocker switch to HEAT mode.
• Touch the up button or the down but-
ton to set your desired temperature.
7HPSHUDWXUH6HWSRLQW5DQJHÛ)Û)
Û&Û&
5RFNHU6ZLWFK
+HDWLQJ)XOO3RZHU +HDWLQJ0LG3RZHU +HDWLQJ/RZ3RZHU
)DQ2QO\1R+HDW
NIGHT /
AWAY
1LJKW$ZD\
%XWWRQ
1LJKW$ZD\0RGH
)DQ2SHUDWLRQ
)DKUHQKHLW6HWWLQJ
1LJKW$ZD\0RGH
,FRQ
3URSRUWLRQDO+HDW
&RQWURO,QGLFDWRU
+HDWLQJ
0RGH
,QGLFDWRU
7HPSHUDWXUH
)DQ0RGH
,QGLFDWRU
HEAT FAN
ONLY
FAN
ONLY
HEAT
NIGHT /
AWAY
5RFNHU6ZLWFK
1LJKW%XWWRQ
'LJLWDO'LVSOD\
8S%XWWRQ
'RZQ%XWWRQ
8S
'RZQ
Page 6

OPERATING INSTRUCTIONS (continued)
Resetting the Manual Reset Limit Control
Warranty
Fault Codes
Digital Display Reads Problem Solution
F
NO
NO
HEAT
Model:
Volts:
Watts:
WARNING!TOAVOID ELECTRICAL SHOCK
Disconnectpower at circuit breaker beforeservicing.
Do not operatewithout grill.
cadetheat.com
Vancouver,WA Mfg Date:
Beforepushing
RESETbuttonsee
Owner’sGuide
fordisplay fault
codesand other
troubleshooting
information.
3108579
conforms
toUL STD
2021
072xxx
For more effective and safer operation and to prolong the life of
WKHKHDWHUUHDGWKH2ZQHU¶V*XLGHDQGIROORZWKHPDLQWHQDQFH
instructions. Failure to properly maintain the heater will void any
warranty and may cause the heater to function improperly. War-
ranties are non transferable and apply to original consumer only.
Warranty terms are set out below.
/,0,7('),9(<($5:$55$17<Cadet will repair or replace
DQ\(QHUJ\3OXV(3KHDWHUIRXQGWREHGHIHFWLYHZLWKLQ¿YH
years after the date of purchase.
7KHVHZDUUDQWLHVGRQRWDSSO\
1. Damage occurs to the product through improper installation or incor-
rect supply voltage;
'DPDJHRFFXUVWRWKHSURGXFWWKURXJKLPSURSHUPDLQWHQDQFHPLVXVH
DEXVHDFFLGHQWRUDOWHUDWLRQ
7KHSURGXFWLVVHUYLFHGE\DQ\RQHRWKHUWKDQ&DGHW
4. If the date of manufacture of the product cannot be determined;
,IWKHSURGXFWLVGDPDJHGGXULQJVKLSSLQJWKURXJKQRIDXOWRI&DGHW
6. The use of unauthorized accessories or unauthorized components
constitutes an alteration and voids all warranties. Refer to Cadet website
RUFDOOFXVWRPHUVHUYLFHDW&$'(786IRUOLVWRIDXWKRUL]HGDFFHVVR-
ries and components.
&$'(7¶6:$55$17<,6/,0,7('725(3$,5255(3/$&(0(17
AS SET OUT HEREIN. CADET SHALL NOT BE LIABLE FOR DAMAGES
SUCH AS PROPERTY DAMAGE OR FOR CONSEQUENTIAL DAMAG-
ES AND/OR INCIDENTAL EXPENSES RESULTING FROM BREACH
OF THESE WRITTEN WARRANTIES OR ANY EXPRESS OR IMPLIED
WARRANTY.
,17+((9(17&$'(7(/(&76725(3/$&($1<3$572)<285
&$'(7352'8&77+(5(3/$&(0(173$576$5(68%-(&772
THE SAME WARRANTIES AS THE PRODUCT. THE INSTALLATION
OF REPLACEMENT PARTS DOES NOT MODIFY OR EXTEND THE
UNDERLYING WARRANTIES. REPLACEMENT OR REPAIR OF ANY
CADET PRODUCT OR PART DOES NOT CREATE ANY NEW WAR-
RANTIES.
7KHVHZDUUDQWLHVJLYH\RXVSHFL¿FOHJDOULJKWVDQG\RXPD\DOVR
KDYHRWKHUULJKWVZKLFKYDU\IURPVWDWHWRVWDWH&DGHWQHLWKHUDVVXPHV
QRUDXWKRUL]HVDQ\RQHWRDVVXPHIRULWDQ\RWKHUREOLJDWLRQRUOLDELOLW\LQ
connection with its products other than as set out herein.
,I\RXEHOLHYH\RXU&DGHWSURGXFWLVGHIHFWLYHSOHDVHFRQWDFW&DGHW
0DQXIDFWXULQJ&RDW&$'(786GXULQJWKHZDUUDQW\SHULRGIRU
instructions on how to have the repair or replacement processed. War-
ranty claims made after the warranty period has expired will be denied.
Products returned without authorization will be refused.
3DUWVDQG6HUYLFH
Visit cadetheat.com/parts-service for information on where to obtain parts
and service.
5HGXFH5HXVH5HF\FOH
This product is made primarily of recyclable materials. You
can reduce your carbon footprint by recycling this product at
the end of its useful life. Contact your local recycling support
center for further recycling instructions.
The heater is protected by a temperature-limiting control. The manual reset temperature limit control is designed to open the heater cir-
FXLWDQGVWRSWKHHOHFWULFDOFXUUHQWÀRZ when excessive operating temperatures are detected. The problem must be assessed (typically
the heater is blocked or needs cleaning) and the limit must be reset to resume operation.
$ERXWWKH0DQXDO5HVHW7HPSHUDWXUH/LPLW&RQWURO
5HVHWWLQJWKH0DQXDO5HVHW7HPSHUDWXUH/LPLW&RQWURO
If the manual reset limit control has opened the heater circuit due to excessive operating tempera-
WXUHVWKHKHDWHUZLOOQRWZRUNXQWLOWKHPDQXDOUHVHWOLPLWEXWWRQLVSUHVVHG
7KH³PDQXDOUHVHWOLPLWEXWWRQ´LVWKHUHGEXWWRQORFDWHGRQWKHXSSHUOHIWVLGHRI\RXUKHDWHUEHKLQG
the grill louvers just above the digital temperature display.
$IWHUDOORZLQJWKHXQLWWRFRROIRUDWOHDVWPLQXWHVDQGUHVROYLQJWKHSUREOHPFDXVLQJWKHOLPLWWR
trip (typically the heater is blocked or needs cleaning); use a narrow object such as a ball-point pen
to access the manual reset button through the upper-left center section of the heater grill. Press
),50/<DQGEHVXUHWROLVWHQDQGIHHOIRUDFOLFNLQGLFDWLQJLWKDVEHHQUHVHW
No Display 1RSRZHULQWHUQDOIXVH
EORZQLQWHUQDOFRQWUROIDXOW\
&KHFNWKDWSRZHULVEHLQJVXSSOLHGWRKHDWHULIRSHUDWLQJRQJHQHUDWRUSRZHU
FRQ¿UPJHQHUDWRUVHWWLQJLIGLVSOD\VWLOOGRHVQ¶WWXUQRQFRQWUROLVIDXOW\5HSODFH
heater assembly.
F1 Grill is interfering with
buttons
7XUQSRZHURIIDWPDLQGLVFRQQHFWSDQHOUHDOLJQJULOOVREXWWRQVFDQSXVKIUHHO\
Turn power back on at main disconnect panel.
F3 Wrong supply voltage (QVXUHVXSSO\YROWDJHLVYROWV
F4
1. Line voltage is too low
/RRVHZLUHFRQQHFWLRQV
or voltage key is not fully
engaged
1. Clears automatically when line voltage returns to normal.
2. Check wire connections and that voltage key is securely in place.
F6 Line voltage is too high Clears automatically when line voltage returns to normal.
F7 Thermal limit (temperature
limiting control) tripped
,QVSHFWKHDWHUIRUEORFNDJHREVWUXFWLRQDQGRUSURSHUFOHDUDQFH0RYHURFNHU
switch to (FAN ONLY) position and wait for heater to cool. Push manual reset limit
EXWWRQSHUWKH0$,17$,1,1*<285+($7(5LQVWUXFWLRQV3DJH
F8 Internal control fault 'LVFRQQHFWSRZHUUHFRQQHFWSRZHU,I)FRGHUHWXUQVFRQWUROLVIDXOW\5HSODFH
heater assembly.
12 or 24 Loose voltage key 7XUQSRZHURIIDWWKHPDLQGLVFRQQHFWSDQHOFKHFNYROWDJHNH\WXUQSRZHUEDFN
on at main disconnect panel.
3DJH
Manual
Reset
Limit
Button

Troubleshooting Chart
Symptom Problem Solution
MAINTAINING YOUR HEATER
&2168/7/2&$/(/(&75,&$/&2'(672'(7(50,1(:+$7:25.0867%(3(5)250('%<48$/,),('
(/(&75,&$/6(59,&(3(56211(/
+HDWHULVZRUNLQJ
but room does not
reach desired tem-
perature.
1. Heat loss from room is greater than
heater capacity.*
2. Furniture or other surfaces may be too
close to the heater.
&ORVHGRRUVDQGZLQGRZV3URYLGHDGGLWLRQDOLQVXODWLRQRULQVWDOODKLJKHU
wattage heater or multiple heaters if necessary. (If your circuit is rated for more
capacity.)
5HPRYHIXUQLWXUHRURWKHUVXUIDFHVWRDSSURSULDWHFOHDUDQFHVVRDLUFDQÀRZ
IUHHO\WKURXJKRXWURRP0DLQWDLQDPLQLPXPGLVWDQFHRIôLQFKHVFPIURP
DGMDFHQWVXUIDFHVòLQFKHVFPIURPWKHÀRRUDQGIHHWPIURP
furniture or other objects placed directly in front of the heater.
Breaker trips
immediately upon
energizing heater.
1. Overloaded circuit.*
2. A short circuit exists in the supply or
heater wiring.*
'HIHFWLYHFLUFXLWEUHDNHU
4. Thermostat malfunction.
1. The total amperage of all heaters on a branch circuit must not be more than
RIWKHDPSHUDJHUDWLQJRIWKHFLUFXLWEUHDNHUDQGVXSSO\ZLUHUDWLQJV8VHD
ORZHUZDWWDJHKHDWHURUUHGXFHWKHQXPEHURIKHDWHUVRQWKHFLUFXLW
2. Shorted supply or heater wires may be accompanied by severe sparking.
Inspect all supply and heater wiring insulation for damage. Do not reset the circuit
breaker until all electrical shorts have been repaired.
5HSODFHWKHFLUFXLWEUHDNHU
4. Replace heater assembly.
Heater fan oper-
DWHVEXWGRHVQRW
discharge warm air.
1. Rocker switch is not set to HEAT mode.
2. Element has failed.*
1. Push rocker switch to HEAT mode.
2. Replace element.
Heater will not shut
off.
1. Heater continues to run at low speed.
2. Heat loss from room is greater than
heater capacity.*
7KHUPRVWDWLVQRWIXQFWLRQLQJSURSHUO\
,IURRPWHPSHUDWXUHLVEHLQJUHJXODWHGDQGPDLQWDLQHGDORZIDQVSHHGDQGORZ
heat output is normal for this energy saving heater.
&ORVHGRRUVDQGZLQGRZV3URYLGHDGGLWLRQDOLQVXODWLRQRULQVWDOODKLJKHU
wattage heater or multiple heaters if necessary. (If your circuit is rated for more
capacity.)
5HSODFHKHDWHUDVVHPEO\
Heater discharges
smoke or emits a
burnt odor.
'XVWOLQWRURWKHUPDWWHUKDVDFFXPX-
lated inside heater.
2. Poor or loose electrical connections.
&OHDQKHDWHU6HH³0$,17$,1,1*<285+($7(5´VHFWLRQIRULQVWUXFWLRQV
2.Turn off power at circuit breaker. Inspect all supply and heater wires for loose or
poor connections. Secure or reconnect all loose connections. Do not reset circuit
breaker until all connections have been checked or repaired.
Element heats for
a moment without
WKHIDQWXUQLQJWKHQ
immediately stops
heating.
1. Defective motor or internal connection.*
2. Fan is jammed.
1. Heater or fan motor requires replacement.
5HPRYHREVWUXFWLRQDQGFRQ¿UPWKDWIDQLVVSLQQLQJIUHHO\3UHVVPDQXDOUHVHW
WHPSHUDWXUHOLPLWEXWWRQSHUWKH³23(5$7,1*,16758&7,216´VHFWLRQ
Heater does not
run.
1. Thermostat is set too low.
+HDWHUKDVWULSSHGWKHPDQXDOUHVHW
temperature limit.
4. Power not on at the circuit breaker.
%URNHQRUSRRUO\FRQQHFWHGZLUHVWR
heater.
6. Defective thermostat.
&LUFXLWEUHDNHUQRWLQVWDOOHGFRUUHFWO\
1. Adjust thermostat to a higher temperature until heater operates (See Problem
#6 if the problem persists).
3UHVVWKHPDQXDOUHVHWWHPSHUDWXUHOLPLWEXWWRQ6HH³23(5$7,1*,16758&-
7,216´VHFWLRQIRULQVWUXFWLRQV
4. Turn on the correct circuit breaker in the main disconnect panel.
7XUQRIISRZHUDWFLUFXLWEUHDNHU&KHFNVXSSO\ZLUHFRQWLQXLW\DQGSURSHUFRQ-
nection to heater wires.
6. Repair or replace the heater assembly.
&RUUHFWWKHFLUFXLWEUHDNHULQVWDOODWLRQ
Heater continually
trips the manual
reset temperature
limit control.
'XVWOLQWRURWKHUPDWWHUKDVDFFXPX-
lated inside heater.
$LUÀRZLVEORFNHG
)DQRUPRWRULVMDPPHG
4. None of the above.
&OHDQKHDWHU6HH³0$,17$,1,1*<285+($7(5´VHFWLRQIRULQVWUXFWLRQV
5HPRYHREVWUXFWLRQ0DLQWDLQDPLQLPXPGLVWDQFHRIôLQFKHVFPIURP
DGMDFHQWVXUIDFHVòLQFKHVFPIURPWKHÀRRUDQGIHHWPIURP
furniture or other objects placed directly in front of the heater.
5HPRYHREVWUXFWLRQDQGSUHVVKHDWHUPDQXDOUHVHWWHPSHUDWXUHOLPLWEXWWRQ
6HH³23(5$7,1*,16758&7,216´VHFWLRQIRULQVWUXFWLRQV
4. Replace heater assembly.
Maintenance As Needed, or every six months minimum.
1. It is important that you verify power has been turned off and no
power is going to the heater before proceeding. Circuit breakers
are often not marked correctly and turning the wrong breaker off
FRXOGPHDQHOHFWULFLW\LVÀRZLQJWRWKHKHDWHUHYHQLIWKHKHDWHU
does not appear to be working. If you are uncomfortable working
ZLWKHOHFWULFDODSSOLDQFHVXQDEOHWRIROORZWKHVHJXLGHOLQHVRUGR
QRWKDYHWKHQHFHVVDU\HTXLSPHQWFRQVXOWDTXDOL¿HGHOHFWULFLDQ
2QFH \RXYHULI\WKHSRZHUKDVEHHQWXUQHGRIIFRUUHFWO\SUR-
ceed to the next step.
5HPRYHVFUHZVDQGWDNHRIIJULOO
4. Wash grill with hot soapy water and dry.
:KLOHKROGLQJIDQWRDYRLGGDPDJHRUEHQGLQJXVHDKDLUGU\HU
or vacuum on blow cycle to blow debris through the top element
(do not touch element).
6. Vacuum fan area without touching the elements.
'RQRWOXEULFDWHPRWRU
5HSODFHJULOODQGVHFXUHZLWKVFUHZV
7XUQWKHUPRVWDWWRGHVLUHGVHWWLQJ
7XUQSRZHUEDFNRQDWWKHPDLQGLVFRQQHFWSDQHO
:$51,1*%HIRUHUHPRYLQJJULOOWXUQWKHHOHFWULFDOSRZHURIIDWWKHPDLQGLVFRQQHFWSDQHO
(circuit breaker or fuse box). Lock or tag the main disconnect panel door to prevent someone
from accidentally turning the power on while you are working on the heater. Failure to do so
FRXOGUHVXOWLQVHULRXVHOHFWULFDOVKRFNEXUQVRUSRVVLEOHGHDWK
:$51,1*Any other service not detailed in this Owner’s Guide should be performed by an autho-
rized service representative.
&DGHW3ULQWHGLQ86$5HY
3DJH
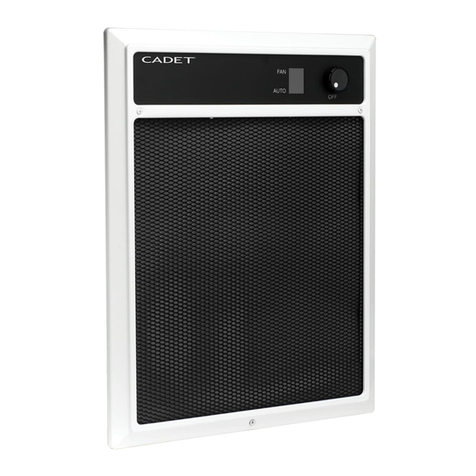
Table of contents
Other Cadet Heater manuals

Cadet
Cadet BASEBOARD User manual

Cadet
Cadet SoftHEAT User manual

Cadet
Cadet Com-Pak CBC132TW User manual

Cadet
Cadet CE163T User manual

Cadet
Cadet The Com-Pak Plus User manual

Cadet
Cadet Hot One User manual

Cadet
Cadet CM162 User manual

Cadet
Cadet The Hot One RCP402S User manual

Cadet
Cadet The Perfectoe UC072 User manual

Cadet
Cadet The Register Plus RM162 User manual

Cadet
Cadet Energy Plus CE083T User manual

Cadet
Cadet CEH-003M User manual

Cadet
Cadet SL101T User manual

Cadet
Cadet The Com-Pak Plus Guide

Cadet
Cadet Apex72 HW162 User manual

Cadet
Cadet CST252 User manual

Cadet
Cadet CGH562 User manual

Cadet
Cadet NLW302TW User manual

Cadet
Cadet Apex72 User manual

Cadet
Cadet RBF Series User manual