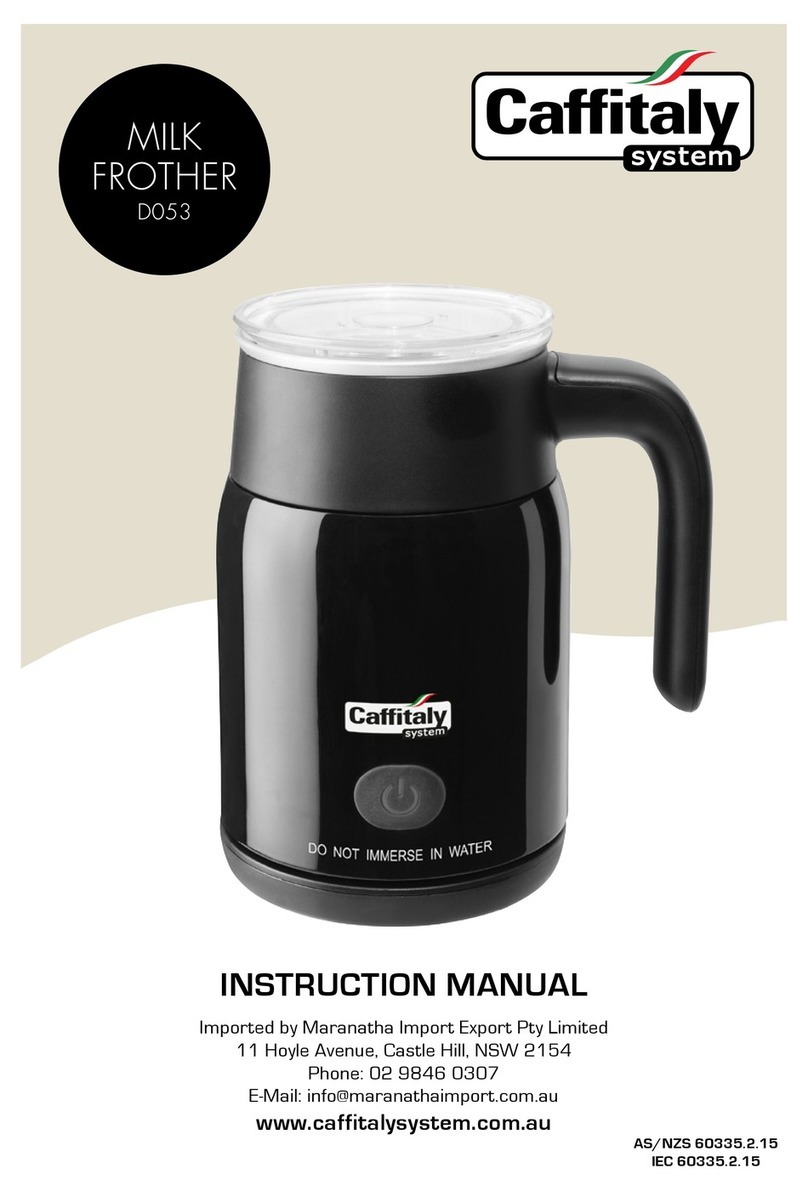
Caffitaly System 9495 User manual

INSTRUCTION MANUAL
Imported by Roasting Australia Holdings Pty Limited
11 Hoyle Avenue, Castle Hill NSW 2154
Customer Service AU 02 9846 0307
Customer Service NZ 0800 540 894
Email: info@maranathaimport.com.au
www.caffitalysystem.com.au
InductIon MIlk Frother
9495

1.
Congratulations on the purchase of your new Caffitaly System
Induction Milk Frother.
This Milk Frother has been designed for frothing and heating milk to add
to your coffee to make a Cappuccino, Latte, Flat White and Hot Chocolate
at the press of a button.
When used in conjunction with the Caffitaly System Capsule Machine and your
favourite Caffitaly compatible capsules, the choice of hot beverages is only limited
to your imagination.
Your Taste…Your Choice
CONGRATULATIONS

2.
INDEX
• Welcome 1
• Index 2
• Customer Care Information 2
YOUR SAFETY:
• Safety Warnings 3
• Cleaning Caution 4
• Symbols Guide 4
ABOUT YOUR MACHINE:
• Machine Elements 5
• Getting to know your Accessories 6
• How to set up your Frother accessories to Froth and Heat Milk 7
• How to set up your Frothing Accessories to Heat Milk Only 7
INSTRUCTIONS:
• How to Froth and Heat Milk 8
• How to Heat Milk Only 9
• How to Make Hot Chocolate 10
• Interrupting or ending a Cycle 10
• General Care and Cleaning 11
• Storing Your Accessories 11
MISCELLANEOUS:
• Troubleshooting 12
• Technical Data 13
CAFFITALY SYSTEM CARE CONTACT
Phone: AU 02 9846 0307 | NZ 0800 450 894
Email: info@maranathaimport.com.au
For more information on the machine operation, available capsules and other useful hints
and tips, go the Caffitaly System website:
www.caffitalysystem.com.au

3.
SAFETY WARNINGS
Read all instructions carefully before you use the Milk Frother and retain
the Instruction Manual in a safe place for future reference. Misuse of the
Caffitaly System Milk Frother could void the warranty conditions.
• This appliance is intended for Domestic use only. It is not intended for use in
environments such as staff kitchens, shops, offices, farms or other work environments,
nor is it intended to be used by clients in hotels, motels, bed and breakfasts and other
non residential environments.
• Before connecting the appliance to the power supply, check if the voltage indicated
on the appliance corresponds with the voltage in your home.
• Only connect the appliance to an earthed wall socket.
• Always disconnect the appliance from the mains if you leave the appliance unattended
and before you assemble, disassemble or clean it.
• Do not use the appliance if the plug, power cord or any other parts are damaged.
If the plug or power cord is damaged in any manner, return the appliance to
your store of purchase or contact the Roasting Australia Customer Service Line
on AU 02 9846 0307 or NZ 0800 450 894. Do not attempt to repair the appliance
yourself as this will void your warranty.
• Do not let the power cord hang over the edge of the surface on which
the appliance stands.
• Always place the base and the milk jug on a dry, at and stable surface.
• Always operate the appliance with the lid rmly in place.
• Ensure the powerbase and underneath the milk jug is completely dry before use.
• The milk jug is subject to residual heat after use. DO NOT TOUCH!
• Only use the appliance to heat or froth milk. Do not use it to process any other
ingredients other than cocoa powder as directed in the manual.
• Do not overll the jug with milk past the maximum capacity indicated for frothing
and heating as the milk could overow and cause scalding or electrical issues.
• Do not move the appliance while it is in operation and never leave the appliance
unattended while in operation.
• Do not place the appliance on a hot surface and prevent the power cord from
coming into contact with hot surfaces.
Continued on next page... >>

4.
SAFETY WARNINGS - Continued
CLEANING - CAUTION
SYMBOL GUIDE
CAUTION: This is the safety warning symbol. It is used to call your
attention to possible risks of personal injury. Abide by the safety messages
provided in order to avoid possible injury or death.
INFORMATION:
This is the symbol used to highlight some actions that will optimise
the use of the Milk Frother.
MAINTENANCE TIPS:
Read these tips to learn how to keep your Milk Frother in perfect
working condition.
• Only use the appliance in combination with its original base and accessories.
Never use accessories or parts from other manufacturers. Use of such accessories or
parts not supplied by the manufacturer or Roasting Australia will void your warranty.
• Do not use the appliance in combination with a transformer, as this could have
hazardous results.
• This appliance is not intended for use by persons with reduced physical, sensory
or mental capabilities, lack of experience and knowledge, unless properly supervised
by a person responsible for their safety.
• Children should not operate, play with or near the appliance.
• Keep the appliance and its power cord out of the reach of children.
• Correct cleaning of the Milk Frother is very important for continued reliable
performance and to maintain the perfect frothing or heating result.
• Ensure you clean your Milk Frother thoroughly after every use.
See Page 11 for full cleaning instructions.
• Make sure that the Milk Frother has been switched off before you remove
the Milk Jug from the base.
• Never use scouring pads, abrasive cleaning agents or aggressive liquids
such as petrol or acetone to clean the appliance.

5.
MACHINE ELEMENTS
Lid with
storage for
accessories
Milk Jug
and handle
Power Cord
with plug
On/Off Switch
Milk Jug
Power Base
Diagram 1
Diagram 2

6.
GETTING TO KNOW YOUR ACCESSORIES
Your accessories will be stored in the lid.
Before using your Milk Frother for the first time: ensure you remove any packaging material and
check that all the accessories are present. Your accessories will be stored in the lid, if you are unable to
locate your accessories, please check the Milk Jug or the outer packaging.
FROTHING HEAD
(serrated for frothing
& heating milk)
Diagram 3
INSIDE THE MILK JUG
View 1
View 1
View 2
View 2
Diagram 5
Diagram 6 Diagram 7
Mount
inside the stainless
steel Milk Jug
Max. line for
Heating Only
Max. line
Frothing &
Heating Only
SMOOTH COLLAR FOR HEATING MILK
(goes over the Frothing Head to heat milk)
Diagram 4
ACCESSORY SET-UP
for Frothing
& Heating Milk
ACCESSORY SET-UP
for Heating
Milk Only

7.
SETTING UP YOUR ACCESSORIES
IMPORTANT: CLEAN the Frother thoroughly as described in General Care
and Cleaning on Page 11.
DO NOT immerse the Powerbase into water, only wash the stainless steel Milk Jug
and Accessories. Follow the same Cleaning Instructions if you haven’t used your
Frother for an extended period of time.
2.
1.
Place the Frothing
Head onto the
Mount inside the Milk
Jug. You will feel a
magnetic pull when
positioned correctly.
2.
Select the Frothing
Head (Serrated).
1.
Place the combined
Frothing Head and
Smooth Collar onto
the Mount inside the
Milk Jug. Ensure the
Smooth Collar is
facing down.
Select the Frothing
Head and place it into
the Smooth Collar.
HOW TO SET UP TO FROTH AND HEAT MILK
HOW TO SET UP TO HEAT MILK ONLY
TAKE NOTE OF THE MINIMUM AND MAXIMUM CAPACITY
FOR FROTHING AND HEATING MILK.
FROTHING MILK: The minimum capacity is 60ml, the maximum capacity is 120ml.
HEATING MILK: The minimum capacity is 60ml, the maximum is 180ml.
If you are unsure of the minimum and maximum quantities of milk, refer to the
MIN. & MAX. indictors within the Milk Jug displayed below.
Minimum Indicator
on the ‘Mount’ is the
same for both
Frothing Milk and
Heating Milk only.
Maximum Indicator
for Frothing Milk.
Maximum Indicator
for Heating Milk.

8.
Place the Milk Frother on a at surface
and remove the lid.
Add your milk until it reaches the Maximum
Frothing Line – 120ml and replace lid.
(Diagram 5).
Switch the Milk Frother on at the
Power Point and press the On/Off Button.
You will hear a beep and the motor can
be heard starting up.
Remove the Milk Jug from the Power Base
and pour the milk and froth directly from
the Milk Jug. Note: You can still remove the
Milk Jug while the cooling system is running.
Ensure you clean the Milk Frother after
each use. See Page 11 for detailed
cleaning instructions.
Selected the Frothing Head and place onto
the Mount inside the Milk Jug. You will feel
a magnetic pull when positioned correctly.
(Diagram 6).
WARNING: Don’t overll the Milk Jug
with milk when frothing as the milk
could overow – risk of scalding and
electrical issues.
DO NOT use metal spoons or other sharp
implements as they may damage the non-stick
coating and void your warranty.
WARNING: Wait for the Milk Frother to cool
down between uses and before cleaning.
When the frothing & heating is complete,
the Milk Frother will automatically stop and
you will hear 2 beeps. (Approx. 2.5 min.)
The cooling system will continue to run
for a brief period.
1.
3.
4.
6.
7.
2.
5.
HOW TO FROTH AND HEAT MILK

9.
Place the Milk Frother on a at surface
and remove the lid.
Place the combined Frother Head & Smooth
Collar onto the Mount inside the Milk Jug.
Ensure the Smooth Collar is facing down.
(Diagram 7) You will feel a magnetic pull
when positioned correctly.
Switch the Milk Frother on at the Power Point
and press the On/Off Button. You will hear a
beep and the motor can be heard
starting up.
Remove the Milk Jug from the Power Base
and pour the heated milk directly from the
Milk Jug. Note: You can still remove the Milk
Jug while the cooling system is running.
Ensure you clean the Milk Frother after each
use. See Page 11 for detailed cleaning
instructions.
Take the Serrated Head and place it into
the Smooth Collar. (Diagram 7).
Add your milk until it reaches the
Maximum Heating Line – 180ml
and replace lid. (Diagram 5).
DO NOT use metal spoons or other
sharp implements as they may damage the
non-stick coating and void your warranty.
WARNING: Wait for the Milk Frother
to cool down between uses and before
cleaning.
When the heating is complete, the Milk
Frother will automatically stop and you will
hear 2 beeps. (Approx. 3.5 mins.)
The cooling system will continue to run
for a brief period.
1.
3.
5.
7.
8.
2.
4.
6.
HOW TO HEAT MILK

10.
You can select to either froth or just heat
your Hot Chocolate.
Proceed as described in ‘Frothing & Heating’
or ‘Heating Milk Only’ depending on your
selection.
When the Milk Frother has finished, it will
automatically stop and you will hear 2
beeps. (Approx. 2.5 min.) The cooling
system will continue to run for a brief period.
Remove the Milk Jug from the Power Base
and pour the Hot Chocolate directly from the
Milk Jug into a mug or cup. Note: You can
still remove the Milk Jug while the cooling
system is running.
Ensure you clean the Milk Frother after each
use. See Page 11 for detailed
cleaning instructions.
After 1 minute, lift the lid and add the desired
amount of cocoa powder into the Milk Jug,
then replace the lid.
NOTE: Do not use grated chocolate
or chocolate chips as this will block the
mechanism.
DO NOT use metal spoons or other sharp
implements as they may damage the
non-stick coating and void your warranty.
WARNING: Wait for the Milk Frother
to cool down between uses and before
cleaning.
1.
3. 4.
5.
2.
MAKING HOT CHOCOLATE
The Induction Milk Frother is also suitable for the preparation of cocoa drinks.
NOTE: DO NOT use grated chocolate or chocolate chips as this will block the mechanism.
Press the On/Off Button to stop the heating
and stirring process. (The motor cooling
system can be heard.)
To continue the heating and stirring process,
press the On/Off Button again.
1. 2.
INTERRUPTING OR ENDING A CYCLE

11.
Always remove the Plug from the Power Point
and wait until the motor has come
to a complete standstill before cleaning.
The Milk Jug, Frothing Head, Smooth Collar
and Lid should be cleaned after each
use either in detergent & water or in the
Dishwasher. If necessary, the Frothing Head
may be cleaned with a suitable brush.
To avoid the risk of electric shock, do not
clean the Power Base or the Power Cord
with water. DO NOT IMMERSE POWER
BASE OR POWER CORD IN WATER.
Ensure you thoroughly dry all parts before
use or storing.
The Power Base may be cleaned with
a damp cloth.
1.
3.
2.
4.
GENERAL CARE AND CLEANING
WARNING
DO NOT USE ABRASIVES OR HARSH CLEANING SOLUTIONS.
STORING YOUR ACCESSORIES
The Frothing Head and Smooth Collar accessories may be stored in the lid.
To remove the
accessories:
Gently remove the
Smooth Collar and
the Frother Head
from the lid.
3.
Place the two joined
accessories with the Frother
Head (serrated) side onto
the lid and push gently into
the lid.
2.
1.
Fit the Frothing Head
inside of the
Smooth Collar.

12.
TROUBLESHOOTING
The Milk Frother
doesn’t turn on.
The plug is not in the
Power Point.
The Power Button has not
been pressed.
Check the plug is in the power socket
and is turned on.
Press the Power Button on the
Milk Frother.
If the Milk Frother still doesn’t turn on,
please contact the Roasting Australia
Customer Service Line on
AU 02 9846 0307 | NZ 0800 450 994
PROBLEM CAUSE SOLUTION
The milk is not frothing.
The milk is not hot enough. Thermostat has shut the
Frother down.
The temperature is set up to
65 ºC, once this temperature has been
reached, the Thermal Safety mechanism
will turn the Frother off.
The Frothing Head is not in place
correctly.
The Smooth Collar is around the
Frothing Head.
The Milk Frother doesn’t work
after use.
The Motor has turned off. The Frother motor needs to ‘cool down’
after repeated use. Do not use it more
than twice without leaving it to cool down.
Remove the Frothing Head and replace
over the Mount in the Milk Jug.
Remove the Smooth Collar from the
Frothing Head.

13.
All materials and objects in contact with food products comply with
the requirements of European Regulation 1935/2004.
The appliance has been manufactured using high quality
materials that can be reused or recycled. Dispose of the
appliance in a suitable waste collection centre.
AU 02 9846 0307 | NZ 0800 540 894
E-Mail: info@maranathaimport.com.au
For more information on the machine operation, available capsules
and other useful hints and tips go to the Caffitaly website:
www.caffitalysystem.com.au
CAFFITALY SYSTEM CARE CONTACT
TECHNICAL DATA
Device Induction Milk Frother
Model SM 9495
Mains Data 220 – 240 V, 50 – 60Hz
Power Consumption 500W
Capacity Frothing Min: 60ml – Max: 120ml
Capacity Heating Min: 60ml – Max: 180ml
External Measurement 135mm x 154mm x 245mm
Net Weight 844g

Induction Milk Frother 9495

For more information on the machine operation,
available capsules and other useful hints and tips go
to the Caffitaly website:
www.caffitalysystem.com.au
When you use a Caffitaly System Capsule
Machine, you are free to choose from your
favourite Caffitaly Compatible Brand.
Your Taste...Your Choice

WARRANTY DETAILS
Dear Customer,
Thank you for buying this product. This Machine has been designed and produced
using the best technologies available.
1. Warranty Details:
(a) If your Caffitaly System Machine develops a
fault or defect during the warranty period,
and subject to the terms below, we will repair
it or replace it.
(b) We offer this warranty on top of any
guarantees imposed by the Australian
Competition and Consumer Act 2010
and any other applicable State or Territory
legislation (if your product was purchased in
Australia] and the New Zealand Consumers
Guarantees Act (if your product was
purchased in New Zealand).
(c) The warranty applies for 12 months from the
date of purchase.
(d) The warranty covers fault or defects in the
product’s materials or manufacturing.
(e) The warranty does not cover:
(f ) Misuse, or use other than in accordance with
the product’s instructions;
(g Negligence on your part;
(h Normal wear and tear; or
(i) Faults or defects caused by third parties,
including work done by unauthorised service
or repair agents.
2. Making a Warranty Claim
(a) To make a claim you should first contact the
Caffitaly System Customer Service Line by
telephone on 02 9846 0307 in Australia or
0800 450 894 in New Zealand and we will
be able to provide you with the appropriate
next steps for service or replacement of
your machine.
b) Before contacting the Caffitaly System
Customer Service Line, please make sure you
have carefully read the Instruction Manual
supplied with the machine.
c) After you have initiated the claim via the
telephone, we may ask you to return the
product to us, as per the address details in
Point 4.
d) You will need to provide your receipt as proof
of purchase in order to make a claim under
the warranty.
e) Once you return the product and lodged a
claim to us, we will assess the claim and let
you know whether it is covered. The decision
whether to repair or replace a product
is at our sole discretion unless there is a
‘major failure’ as defined in the Australian
Consumer Law or New Zealand Consumers
Guarantees Act.
f) If it is covered we will deliver the repaired or
replaced product back to you. We will bear
this cost.
g) If it is not covered, we will deliver the product
back to you and you will bear the transport
cost.
3. General service and repair enquiries
For general service and repair enquiries,
please contact us on the telephone number
below.
4. Roasting Australia Holdings contact details
Roasting Australia Holdings Pty Limited
11 Hoyle Avenue, Castle Hill, NSW 2154
Phone Australia: 02 9846 0307
Phone New Zealand: 0800 450 894
5. Statutory Guarantees
As well as the Roasting Australia Holdings
Pty Limited warranty, our goods come with
guarantees that cannot be excluded under
the Australian Consumer Law and New
Zealand Consumers Guarantees Act . You
are entitled to a replacement or refund for
a major failure and for compensation for
any other reasonably foreseeable loss or
damage. You are also entitled to have the
goods repaired or replaced if the goods fail to
be of acceptable quality and the failure does
not amount to a major failure.
6. Claim Details
If you are making a claim under the warranty
or the statutory guarantees, we will require
the following information from you:
a) Name;
b) Address;
c) Product purchased;
d) Date of purchase;
e) Machine Serial Number;
f) Shop of purchase;
g) Description of the problem.
Table of contents
Other Caffitaly System Kitchen Appliance manuals
Popular Kitchen Appliance manuals by other brands

Clas Ohlson
Clas Ohlson Coline WK-0807-UK instruction manual

Eldom
Eldom ST140C instruction manual

La Sommeliere
La Sommeliere LS51.2ZBLACK Use instruction

High & Mighty Enterprises
High & Mighty Enterprises Mighty Fast Herbal Infuser user guide

Agrisan
Agrisan MT 12 owner's manual

Maxwell
Maxwell MW-1855 Manual instruction