Safe operation
Each of the below safety instructions is repeated where relevant.
WARNING! Risk of personal injury.
Do not use the vehicle if you are not fit to ride due to alcohol, drugs,
or medicine.
Do not use the vehicle if you are physically or mentally impaired.
Do not ride with a passenger unless you have installed a proper CAKE
passenger seat, see
ridecake.com/en/products/spare-parts/
.
The vehicle is completely silent when it has been powered on but is at
a standstill. Anyone not realizing the vehicle is powered on may get
hurt if the throttle is accidentally twisted. Do not forget to power o.
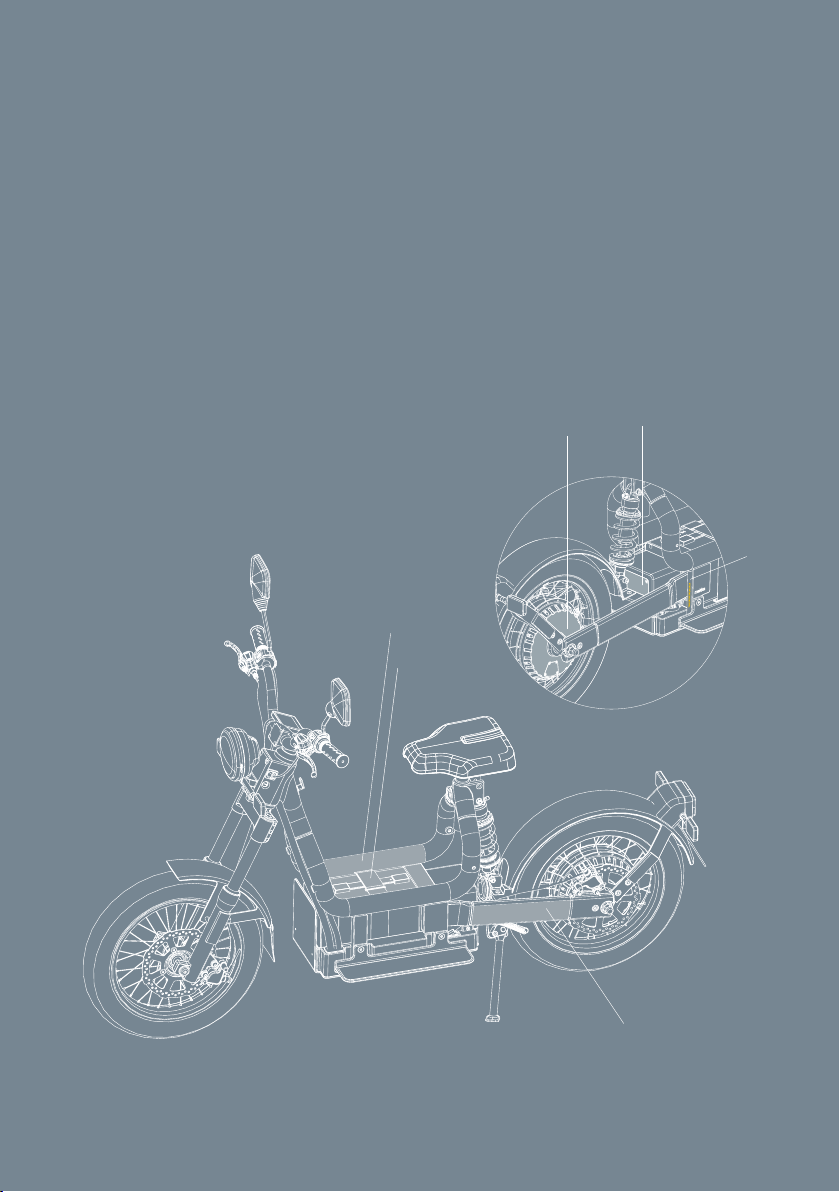
There is no foot brake. Remember that you control both the rear and
front brakes from the handlebar.
When slowing down using the motor brake, other road users are not
notified of your slowing down. Use the motor brake with caution.
Always use the mechanical brakes to bring the vehicle to a standstill.
When charging, always first connect the charger to the battery.
Thereafter, connect the charger to the mains supply.
Safe charging cannot be guaranteed if another charger or battery
than the intended is used. Only use the intended charger. Only use
the intended battery.
Regularly examine the charger for any damages, especially the cord,
plug, and enclosure. Do not use a damaged charger. Contact
CAKE
Service & support
.
During charging, place the battery in a well-ventilated area.
WARNING! Risk of burns. Stay clear of vehicle parts that are hot
after usage.
10