manuals.online logo
Brands
  1. Home
  2. •
  3. Brands
  4. •
  5. Camtree
  6. •
  7. Camera Accessories
  8. •
  9. Camtree G-PM User manual

Camtree G-PM User manual

1
Instruction Manual
Camtree Power Mount
Gripper (G-PM)
2
Subject Page
Foreword 3
Introducon 4
Assembling 5-10
Warranty 11
At Camtree, our goal is to ensure 100% Customer Sasfacon in all that we do.
We back our sales with a 1 year warranty from the date of purchase and work hard
to resolve any problems in the unlikely event one should arise.
With our commitment to connuous improvement and your Feedback, building on
our reputaon of providing aordable, quality products is
PRIORITY #1.
Table of Contents
3
Dear Client,
On behalf of all the people that work so hard to provide you with the most
up-to-date, exible and cost-ecient producon gear, we would like to welcome
you into the Camtree family.
By purchasing your Camtree Power Mount Gripper, you have just joined a host of
designers, engineers, machinists, assembly, customer service and oce sta that
take great pride in all that they do. Our mantra of connuous improvement has
been the guiding principle of how we conduct our business since day one.
Once you have the opportunity to experience your new Camtree Power Mount
Gripper, we hope you will agree that we cra quality products at a compeve
price. Products designed to meet and exceed the standards of today’s real
producon world.
Standards set by our valued clients and standards we strive to maintain.
With Best Wishes,
Camtree Team
Welcome To Camtree!
4
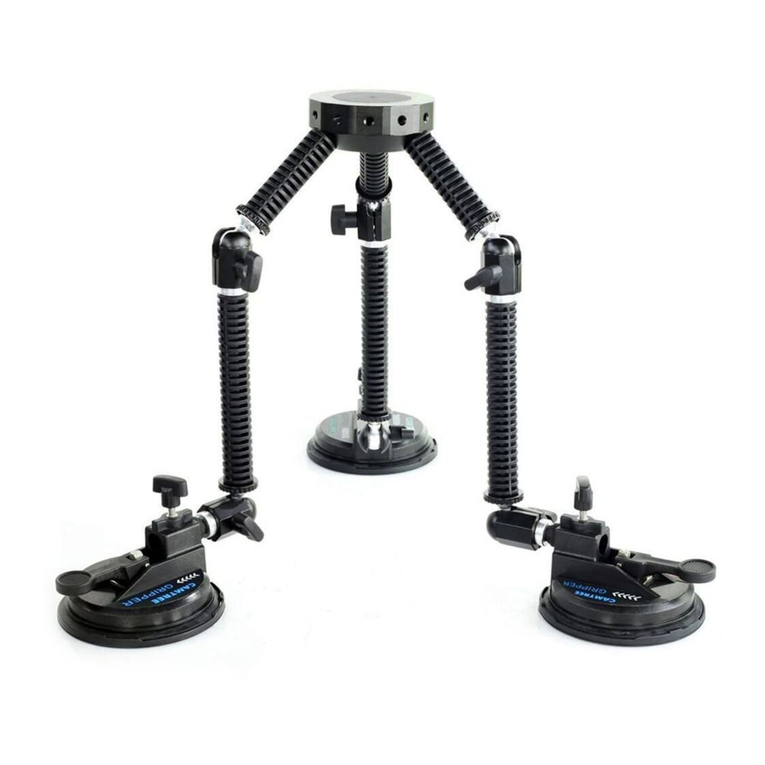
Capture your live acons on moving a vehicle with incredible freedom, style, and
precision without worrying about the camera. Our Camtree Power Mount
Gripper Car Sucon Cup Mount is a perfect video equipment to execute those
tricky moving shots with condence!
Astrong, secure car window system with professional-grade sucon mounts has a
115mm diameter exible-edge concave gripper and a built-in plasc pump with
pressure warning indicator. Each sucon cup camera mount is ed with an
adjustable ball joint, allowing for an extensive range of lockable posions for the
aached interchangeable mul-length legs. It’s a complete soluon contained in a
lightweight aracve carry bag.
Please inspect the contents of your shipped package to ensure you have received
everything that is listed below.
Introducon
What’s In The Box
Hard Case
2 X Rope
Hooks
75 mm Bowl
Head
Camera Mounng
Plaorm
2 X Rope
1/4” & 3/8”
Camera
Mounng Bolt
3 X Ball Tilt Head
5 X Rubber GrippersAluminum Rods
5
Assembling
 Sucon cup mounts can be axed to just about any smooth surface on any vehicle. With a
few pumps of the large pin on the side of each unit, sucon mounts are good to go.
 Screw in the Ball Tilt Head on sucon cups. Adjustable Ball Tilt Heads allow for an extensive
range of lockable posions for the Aluminium Rods.
 Three adjustable length legs screw into the adjustable locking ball lt heads at the top of the
3 sucon cup mounts.
6
Note: Three rods are provided for each length – 3”, 6” & 12”. These rods can be linked together
in any combinaon you need to create the perfect length Power Mount Gripper.
 Tighten the knob of Ball Tilt Head to lock
it in a posion.
 Screw in camera mounng plaorm to Rods.
 Now x both the sucon cup with metal
loops on your vehicle.
7
 Aach one end of Rope with metal Hooks to camera mounng plaorm and another end to
Metal loop of Sucon cup. Tighten the Rope properly.
 Now loosen the four Allen bolts on Camera plaorm, align 75mm bowl with it.
 Re-insert the bolts and ghten with
Allen key properly.
8
 Now mount your Fluid Head (NOT Included) on Bowl Head. And then secure your camera set
up on uid head.
 To use the Rope Hooks, press the lever to loosen the rope. Remove the metal hook from
Metal loop of sucon cups.
 Aach the Rope Hooks to your vehicle, then aach metal hooks to Rope Hooks and ghten
the rope properly to secure your gripper.
9
 You can also aach your camera set up
directly to camera mounng plaorm
with provided screw.
 The Camera mounng plaorm of the Power Mount Gripper has three leg aachment points
that are each ed with two posive locking ratchet joints, one for lt and one for swivel.
Each locking ratchet joint has a quick turn knurled lock ring foe easy adjustment. You can un-
lock and lock each joint with a slight twist.
 To adjust the lt or swivel of each leg, rst make sure the lock ring on the appropriate joint is
in the UNLOCK posion, then adjust the posion of the leg as per the need. And then turn the
lock ring back in the LOCK direcon so that the camera won’t shake from joint movement
while the vehicle is in moon.
Swivel Adjustments
10
YOUR CAMTREE POWER MOUNT GRIPPER
ALL DRESSED UP AND READY TO GO!
(SHOWN WITH OPTIONAL ACCESSORIES)
Tilt Adjustments
WARRANTY
We oer a one year warranty for our products from the date of purchase.
We will repair or replace your product, free of charge, in the event of a defect in materials or
crasmanship obtained during normal use or handling based on the user manual. Please note
that we will not cover any shipping costs for returning the product to us. If any VAT or import
dues are applied to the return, we will also charge these costs to the customer.
11
The warranty does not include, by the way of example, damage caused by products that we do
not supply or from mishandling in transit, accident, misuse, neglect, lack of care of the product ,
or service by anyone other than our company.
We are not liable for incidental or consequenal damages resulng from the use of the unit or
occurring due to any breach of this warranty.
Replacement parts of the product will be provided at nominal cost (covering the cost price of the
replacement parts only) to the customers aer the Warranty Period has expired. We will cover
the complete cost of sending replacement parts within the warranty period. Aer that, Nominal
cost of the product & Actual shipping cost will be charged.
Do not send the unit to us without rst geng a response and geng the approval to send back
the item.
In case of any kind of dissasfacon, we urge you to Contact us immediately and we shall do our
Best to help you out. For any other assistance you can reach us via email.
For any other assistance you can reach us via email.

Other manuals for G-PM

1

Other Camtree Camera Accessories manuals
Camtree FF -PRIME User manual

Camtree

Camtree FF -PRIME User manual

Camtree CH-QM-H User manual

Camtree

Camtree CH-QM-H User manual
Camtree CH-DTPQ User manual

Camtree

Camtree CH-DTPQ User manual

Camtree G-51 User manual

Camtree

Camtree G-51 User manual

Camtree G-51 User manual

Camtree

Camtree G-51 User manual

Camtree G-51 User manual

Camtree

Camtree G-51 User manual

Camtree CH-DTPQ User manual

Camtree

Camtree CH-DTPQ User manual

Camtree MB-20 User manual

Camtree

Camtree MB-20 User manual

Camtree MB-20 User manual

Camtree

Camtree MB-20 User manual

Camtree HUNT III DSLR Setup guide

Camtree

Camtree HUNT III DSLR Setup guide

Camtree CH-RSE-SRK User manual

Camtree

Camtree CH-RSE-SRK User manual

Camtree MB-CMS User manual

Camtree

Camtree MB-CMS User manual

Camtree C-Kit-201 User manual

Camtree

Camtree C-Kit-201 User manual

Camtree CH-BC-GH34 User manual

Camtree

Camtree CH-BC-GH34 User manual

Camtree C-MB-23-CF User manual

Camtree

Camtree C-MB-23-CF User manual

Camtree HUNT User manual

Camtree

Camtree HUNT User manual

Camtree CH-BMUM-C User manual

Camtree

Camtree CH-BMUM-C User manual

Camtree CH-PC-BMPC User manual

Camtree

Camtree CH-PC-BMPC User manual

Camtree CH-FS7-CKIT User manual

Camtree

Camtree CH-FS7-CKIT User manual

Camtree CH-RS-CD User manual

Camtree

Camtree CH-RS-CD User manual

Camtree HUNT User manual

Camtree

Camtree HUNT User manual

Camtree C-G-10 User manual

Camtree

Camtree C-G-10 User manual

Camtree CH-BMUM-SK User manual

Camtree

Camtree CH-BMUM-SK User manual
Popular Camera Accessories manuals by other brands

Sperry instrument Breaker Finder CS61200 user manual

Sperry instrument

Sperry instrument Breaker Finder CS61200 user manual

HIKOKI UC 18YTSL Handling instructions

HIKOKI

HIKOKI UC 18YTSL Handling instructions

PROAIM P-STRG-01 Assembly manual

PROAIM

PROAIM P-STRG-01 Assembly manual

Jarocells ARO-BTP Series manual

Jarocells

Jarocells ARO-BTP Series manual

Lowepro C840 Compatibility guide

Lowepro

Lowepro C840 Compatibility guide

Sanyo Xacti VPC-J4 Service manual

Sanyo

Sanyo Xacti VPC-J4 Service manual

Bowens Ringflash Pro Brochure & specs

Bowens

Bowens Ringflash Pro Brochure & specs

Vicon SurveyorVFT Programming manual

Vicon

Vicon SurveyorVFT Programming manual

Vicon roughneck V900 Addendum to instruction manual

Vicon

Vicon roughneck V900 Addendum to instruction manual

Westfalia 36 98 27 instruction manual

Westfalia

Westfalia 36 98 27 instruction manual

Square Jellyfish Jelly Legs micro tripod user manual

Square Jellyfish

Square Jellyfish Jelly Legs micro tripod user manual

Sanyo Twicell HR-4/5AUC Specifications

Sanyo

Sanyo Twicell HR-4/5AUC Specifications

Kaiser Fototechnik Softbox Assembly and operating manual

Kaiser Fototechnik

Kaiser Fototechnik Softbox Assembly and operating manual

ZILR NP-F970 user manual

ZILR

ZILR NP-F970 user manual

Nauticam 36072 instruction manual

Nauticam

Nauticam 36072 instruction manual

Digital Juice SHARP SHOOTER Getting started guide

Digital Juice

Digital Juice SHARP SHOOTER Getting started guide

JVC DPT 115 Operation manual

JVC

JVC DPT 115 Operation manual

Olympus Camedia TCON-SA2 instructions

Olympus

Olympus Camedia TCON-SA2 instructions

manuals.online logo
manuals.online logoBrands
  • About & Mission
  • Contact us
  • Privacy Policy
  • Terms and Conditions

Copyright 2025 Manuals.Online. All Rights Reserved.