manuals.online logo
Brands
  1. Home
  2. •
  3. Brands
  4. •
  5. Cando
  6. •
  7. Fitness Equipment
  8. •
  9. Cando Multi-Grip Exerciser User manual

Cando Multi-Grip Exerciser User manual

1
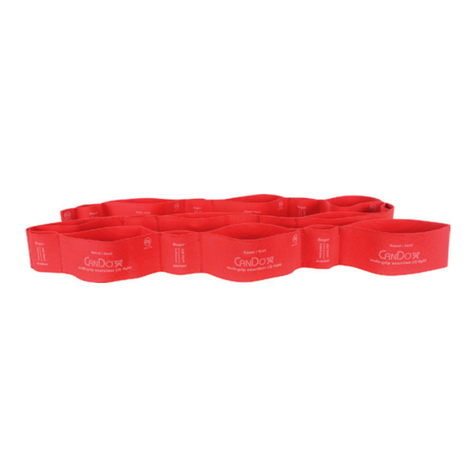
Multi-Grip exerciser
Exercises for use
SAFETY INFORMATION:
• Consult with your clinician before starting an exercise program using this
exerciser. Anyone with a medical condition should only use this product with a
clinician’s approval.
• If you have any dizziness, trouble breathing, increasing pain or begin to feel sick
while using the exerciser, stop exercising and contact your clinician immediately.
• Children should only use this product when instructed by a clinician, and then
only with an adult present.
• Inspect your exerciser for damage before each use. Do not use if knit material
or thread is torn, punctured or nicked. Discard damaged product immediately.
• When cutting the exerciser to a different length, only cut on indicated lines.
• Avoid using the exerciser around sharp objects that may puncture or tear the
exerciser; such as fingernails, or objects on the floor or under your shoe.
• Before exercising remove all rings, watches and jewelry.
• Use exerciser in an open area where you can move freely so that the exerciser
will not get caught on any objects.
• Never use the exerciser to lift a person or any other object off the ground.
• Any exerciser can break or slip from its anchoring point during use. If
this happens, it can hit your body or cause you to fall. Take the following
precautions when using your exerciser:
◊ Wear eye protection.
◊ Maintain proper stance during exercises.
◊ When using one of the grips as a handle, grasp at its end.
◊ Check the security of any attachment to accessories or to your feet before
beginning your exercise.
◊ Do not snap the exerciser towards anyone’s face or body.
◊ Do not let go of the exerciser if it is under tension.
◊ Do not over-stretch the exerciser more than three times its unstretched
length. This applies to each individual grip, as well as the overall exerciser.
• This product is not a toy. Keep out of reach of children or pets.
EXERCISE TIPS:
• The exercise tips are guidelines. They do not replace any instructions or
directions given by your clinician.
• As with any exercise program, muscle soreness may be experienced after
initial usage over the first few days. If muscle soreness persists for more than
a few days, consult your clinician.
• Do not exercise while experiencing pain.
• For beginners, practice exercises without the exerciser until you are
comfortable with the movements. Then begin exercises with this product.
• Proper body stance is critical while practicing standing exercises. Square
your balance at all times. Be sure to practice the safest posture possible by
maintaining your natural spinal position.
• Avoid hyper-extending or over-flexing joints while exercising. Do not lock-up
joints.
• Control your breathing while practicing exercises. Never hold your breath while
exercising. Exhale during the more difficult phase of your exercise repetition.
• Use the exerciser to practice slow and controlled exercises. Always maintain
control of your exerciser. Never allow the exerciser to snap back.
• Only perform exercises with the color/resistance level prescribed to you by
your clinician. If the color/resistance level is too easy to use, consult your
clinician prior to advancing to the next color/resistance level.
• Don’t over exercise. Perform the prescribed number of set and repetitions.
Take a break between sets.
Wrist Pronation
Step 1. Begin in a seated position, place your
whole hand into the end large grip
and grasp onto the exerciser. Then
place your foot into the large grip that
creates the desired resistance allowing
your forearm to rest on your thigh.
Step 2. With a closed hand grip, palm facing
upward so your fist is supinated.
Step 3. Rotate your hand inward toward the
center of your body so that your fist
is now pronated. Be sure that you
are only moving your hand and wrist
keeping your elbow stationary and
your thumb tight to your hand.
Step 4. Hold briefly and slowly return to
starting position.
Upper Body Jump
Step 1. Place your feet in the middle large grips
separated by one small grip.
Step 2. Hold the ends of the exerciser in each
hand with either an open hand or closed
hand grip. Spread your feet to hip width
apart and assume a semi-squat position.
Step 3. From your semi-squatted position jump
upward while extending your arms against
the exerciser. Be sure to land with your
knees in line with your shoulders and not
let your knees buckle inward.
Upper Body Brugger
Step 1. Begin by placing each hand into a
large grip so that hands are one large
grip apart using an open handed grip.
Step 2. Rotate your hands facing outward so
that palms are supinated.
Step 3. Raise your hands so that your elbows
are at a 90° angle and hands are in
front of you. Extend your elbows and
shoulders straight outward and retract
your shoulder blades.
Step 4. Hold briefly and slowly return to
starting position.
Trunk Stabilization Horizontal Abduction
Step 1. Begin by anchoring your exerciser to a
door anchor at chest level. Standing in
line with the door anchor and place the
last large grip in your open hand.
Step 2. Beginning with your arm across your
body, fully extend arm out to your side
holding the exerciser out to your side
at about 30°.
Step 3. Use the other hand to push the
exerciser forward while maintaining
stability in your core. Hold briefly and
return to starting position to repeat.
TheraBand colors are licensed by Goldberg from Hygenic Corp without endorsement. CanDo, Multi-Grip, , and Fabrication Enterprises are trademarks of Goldberg. © 2018 FEI, all rights reserved.
2
Thoracic Extension in Sitting
Step 1. In a seated position, begin by placing each foot into the end large grips.
Step 2. Pull the center of the exerciser up
and twist to create an “X” in front of
you, place your arms through the
center large grips over the elbows
and fold and raise arms to
shoulder height.
Step 3. Bend your trunk forward rounding
your upper back. Return to straight
back seated position with arms at
shoulder height pulling against the
resistance of the exerciser.
Step 4. Hold briefly and repeat.
Shoulder Serratus Press
Step 1. Attach your exerciser securely to a
door anchor.
Step 2. While placing your hand into the last
large grip, turn and face your body
away from the anchor point.
Step 3. Move away from the anchor to create
appropriate resistance. With an open
hand grip and holding your arm
fully extended in front of you, push
forward against the resistance of the
exerciser moving only your shoulder.
Step 4. Keep your elbow straight and avoid
shrugging your shoulder. Hold briefly
and return to your starting position.
Scaption / Elevation - Bilateral
Step 1. Begin by placing hands inside the
end large grips. With a staggered
stance place one foot on top of the
center of the exerciser.
Step 2. With a closed hand grip and thumbs
pointed upward begin raising your
arms to shoulder level, maintaining
a 30° angle in front of your body. Be
sure not to “shrug” your shoulders
and keep your back straight while
performing this exercise.
Step 3. Hold briefly and slowly return to
starting position.
Shoulder Reverse Throw
Step 1. Beginning in a staggered stance, place
your foot in the second to last large grip
of your exerciser.
Step 2. Place your opposite hand in the desired
large grip to create the proper resistance
when at the top of the exercise.
Step 3. Lift your hand upward and outward as
if you were motioning your shoulder to
throw a ball. Slowly allow your throwing
arm to come down across your body
as if you were throwing a ball and then
repeat.
Shoulder Push Up
Step 1. Place one hand in a large grip and wrap the exerciser around your
back, then place your other hand in the desired large grip to create your
desired resistance.
Step 2. Kneel down on the floor
and move your arms
and legs in to a push
up position. Perform
a resisted push up
and roll into a side
plank and perform a
resisted full arm
extension.
Step 3. Slowly return to
starting position and
repeat on opposite side.
Shoulder Lower Trap Retraction - Depression
Step 1. Attach the end large grip of your exerciser securely to a door anchor at
a level above your head.
Step 2. Begin with your body diagonally facing the anchor point. Place your
upper arm into the exerciser so that the exerciser is anchored just
below your shoulder. Adjust
your standing point to create
the appropriate resistance.
Step 3. Pull the exerciser downward and
back moving only your shoulder
blade. Do not rotate your trunk
or hips.
Step 4. Hold briefly and slowly return to
start position.
Shoulder Linton External Rotation
Step 1. Begin by placing one hand in the last
large grip and the other hand 2 or 3 large
grips away to create resistance.
Step 2. Assume a hands-and-knees position with
your hands directly below your shoulders.
Lift your hand in the last large grip up and
anchor the upper arm to your side.
Step 3. Now externally rotate your shoulder and
then lift your arm up and outward against
the exerciser with your thumb facing
upward until your arm is parallel with the
ground.
Step 4. Hold and slowly return to starting position
and repeat.
Shoulder External Rotation at side
Step 1. Attach your exerciser securely to a door
anchor.
Step 2. Place your hand into the last large grip
and stand so there is slight resistance
when your arm is across your body and
your elbow is bent at 90°.
Step 3. With an open hand grip and keeping
your upper arm steady begin to rotate
your hand out so that it is lined up with
the side of your body.
Step 4. Hold briefly and return to starting
position. An alternate exercise you can
complete this exercise with a closed
hand grip. To do this place a Twist-n’
Bend bar or towel under your arm and
grip the large grip in your hand and
complete exercise as normal.
Shoulder External Rotation - Bilateral
Step 1. Begin by placing both hands into a large
grip, one small grip apart.
Step 2. With you hands in front of you and
arms bent at 90° begin to move your
hands away from the mid-line which will
create the rotational movement in your
shoulders. Be sure to keep your elbow at
90° anchored to your side and perform
within a comfortable range of motion.
3
Shoulder Dynamic Hug
Step 1. Begin by placing your hands in the
center large grips about 2 to 3 large
grips apart to create resistance.
Step 2. Place the exerciser around your upper
back and adjust your hands so that
you have an open handed grip and
palms are prone.
Step 3. Abduct your shoulders about 60° and
bend your elbows about 45°. Keeping
your arms raised and in position, push
your arms forward and inward as if you
were giving someone a hug. When
your hands cross slightly in the middle,
hold briefly and then slowly return to
the starting position. Avoid shrugging
shoulders to perform exercise.
Shoulder Abduction-External Rotation at 90
Step 1. Begin by placing your foot through the
middle large grip of your exerciser. Then take
the last large grip on one end of the exerciser
and place your arm through it so that the
exerciser is above your elbow.
Step 2. Grasp the last large grip on the other end of
the exerciser with an open hand grip.
Step 3. Place your body in a staggered stance.
Step 4. Using an open hand grip, raise your hand
and arm upward and outward as if you were
cocking your shoulder to throw a ball.
Step 5. Slowly allow your throwing arm to come
down across your body as if you were
throwing a ball and then repeat.
Resisted Push
Step 1. Begin by placing a foot into the middle
large grip of the exerciser. This will
become your back foot during the
exercise. Place each hand into the end
large grips of the exerciser.
Step 2. With your non-anchored foot, step
forward and slightly lunge as you raise
your hands into a “blocking” position.
Return to starting position and repeat.
Lateral Lunge
Step 1. Begin by anchoring both ends of your
exerciser to a door anchor at waist level.
Step 2. Wrap the middle of the exerciser around
your waist. Start with feet hip width apart
and then step out to your side away
from the anchor and perform a small
side lunge. Be sure to keep your trunk
upright during this exercise.
Step 3. Hold briefly and slowly return to starting
position and repeat.
Hip Quick Kick
Step 1. Place each foot into a large grip with one
large grip in-between. Each grip should
be placed around your ankles. With your
feet about hip width apart lean to one
side and move your balance to that foot,
use a chair for added safety if needed.
Step 2. Keep your knees straight use the other
foot to kick outwards. Continue to kick
outward without letting that leg touch
the ground. Keep your back straight and
avoid leaning or bending over.
Hip Monster Walk
Step 1. Place your feet through the middle
two large grips of the exerciser and
move the grips right above your
knees on our thighs.
Step 2. Grab the remaining exerciser
ends and either hold in hand or
place hands inside the large grips.
Maintaining an athletic stance with
knees and hips slightly bent take
3 side steps laterally against the
exerciser while keeping your back
straight.
Step 3. Return to your starting position and
repeat.
Hip Extension
Step 1. Place each foot into a large grip with one large
grip in between them. Move the grips around
your ankles.
Step 2. With your feet hip width apart center your
balance onto one leg.
Step 3. Keeping the opposite leg straight slowly
raise and kick backwards. Continue to kick
backwards without letting that leg touch the
ground.
Step 4. Once finished place leg back into starting
position and repeat with other leg. Keep your
back straight and avoid leaning or bending over.
Front Squat - Russian Squat
Step 1. Begin by stepping each foot into the end
large grips of the exerciser. Then feed each
arm through the two center large grips
leaving one large grip in between.
Step 2. Fold and raise arms to shoulder height and
place feet hip width apart. Maintain your
arms with elbows bent and hands crossed
at shoulder level as you slowly squat until
your thighs are parallel to the floor.
Step 3. Without leaning forward slowly return to
a standing position maintaining a neutral
back and neck alignment.
Elbow Biceps Curl
Step 1. Begin by placing your hands inside the end
large grips and place your feet on the center
of the exerciser hip width apart. You should
feel tension at the mid-line.
Step 2. With an open or closed hand grip lower your
arms into starting position, keeping your
palms supinated. Begin by raising your hands
to your shoulders by bending at the elbow
and keeping your upper arms at your sides.
Step 3. Hold briefly and slowly return to starting
position. If more resistance is desired, move
your grip to the next large grip down.
Chest Press
Step 1. Wrap the exerciser around your back and grasp the large grip at each
end of the exerciser 2 to 3 large grips in until you feel resistance.
Step 2. Keeping your hands at
chest level begin pushing
hands straight forward
until they are fully extended
in front of you at chest level.
Step 3. Hold briefly and then
return to starting position.
4
Cross Squat-Hip Abduction Combo
Step 1. Begin standing with your feet hip width apart. Place your
feet and step through the middle large grips.
Step 2. Cross the exerciser behind your legs to form an X then
cross the exerciser in front of your legs creating another X.
Grasp the end large grips.
Step 3. With a slight bend in your
knees and maintaining
your balance, kick one
straight leg out to the
side, bring your foot to
the ground and then
kick the opposite leg.
Keep your trunk upright
and your back in a neutral
position. Don’t lean your
hips or trunk to either
side. For an optional
combo, perform a
mini-squat movement
between leg kicks.
Core Stabilization Quadruped Arm and Leg
Step 1. Place each foot into the middle large grips of the exerciser leaving
one large grip in between.
Step 2. Place each hand into the end large grips of the exerciser. Assume
a hands and knees position with your arms directly below your
shoulders and knees directly below your hips.
Step 3. Simultaneously lift one leg and the
opposite arm while maintaining your
balance. When lifting extend the leg
until your knee is straight and parallel to
the floor while stabilizing the exerciser
with your hands and opposite foot.
Keep your head and neck in a neutral
position throughout the exercise.
Step 4. Slowly return and repeat on the
other side.
Core Stabilization - Supine Arms and Legs
Step 1. Place each foot into the middle large grips of the exerciser
leaving one large grip in between.
Step 2. Place each hand into the end large grips of the exerciser.
Step 3. Lying flat on your back on a padded surface begin the exercise
with knees bent and feet on the floor and hands by your side.
Simultaneously lift one knee and
the opposite arm while stabilizing the
exerciser with your other hand and
foot. Keep your back in a neutral
position during the exercise.
Step 4. Slowly return and repeat on the
other side.
Core Side Plank with External Rotation
Step 1. Begin by laying on your side on a padded surface.
Step 2. Place both hands in a large grip at the
desired distance to create appropriate
resistance during the exercise.
Step 3. Resting on your bent arm located
directly below your shoulder, lift hips
off of ground engaging core to
stabilize you.
Step 4. With the opposite arm close to you
side and elbow bent at 90 °, rotate
your open hand outward until you
can rotate no further.
Step 5. Hold briefly and return to starting
position and repeat on both sides.
Core Bar Lift
Step 1. Place a WaTE™ bar through the end small
grips of the exerciser.
Step 2. Step on the middle of the exerciser with one
foot and kneel with the other leg.
Step 3. Holding the ends of the bar with the exerciser
ends inside your hand grip, use straight arms
to lift the bar
diagonally over
your head. Be
sure to keep your
torso facing
forward.
Step 4. Hold briefly and
repeat on both
sides.
Core Bar Chop
Step 1. Begin by anchoring the middle of your exerciser to a
door anchor above your head.
Step 2. Place a WaTE™ bar through the end small grips of
the exerciser and hold onto the bar and grips.
Step 3. Bend down to one knee
and use the other leg to
stabilize. Holding both the
bar and the exerciser in
front of you rotate your
trunk and push the end of
your bar toward the
opposite hip.
Step 4. Hold briefly and return to
starting position and repeat
on both sides.
Cervical Dynamic Isometric Retraction
Step 1. Using an open hand grip, place
your hands through two large grips
leaving two large grips in between.
Step 2. Place the exerciser around the top
of your head in line with your ears.
Hold arms in front of you at eye
level with elbows bent at
90 degrees keeping slight tension
on your exerciser.
Step 3. Keeping your neck in a neutral
position and chin slightly tucked
in to stabilize, extend your elbows
until your arms are straight in front
of you.
Step 4. Hold briefly and slowly return to
your starting position.
Ankle Dorsiflexion-Eversion
Step 1. Begin in a seated position, place one foot inside
the end large grip and the other in the grip next
to it so that there is one large grip in between.
Step 2. Hold the remaining exerciser in your lap. Place
feet hip width apart and flex exercising toes
toward your body and away from the midline
against the resistance of the exerciser until
you can lift and rotate no further. Be sure to
keep your heel on the ground and your legs
stationary.
Step 3. Hold briefly and slowly return to your starting
position.

This manual suits for next models

4

Other Cando Fitness Equipment manuals

Cando 10-0716 User manual

Cando

Cando 10-0716 User manual

Cando MGE exerciser User manual

Cando

Cando MGE exerciser User manual

Cando 01-8010 User manual

Cando

Cando 01-8010 User manual

Cando Magneciser User manual

Cando

Cando Magneciser User manual

Cando 10-0708 User manual

Cando

Cando 10-0708 User manual

Cando 10-0709 User manual

Cando

Cando 10-0709 User manual

Cando Digi-Flex 10-0751 User manual

Cando

Cando Digi-Flex 10-0751 User manual

Cando 10-1745 User manual

Cando

Cando 10-1745 User manual

Cando Classic Mat Platform User manual

Cando

Cando Classic Mat Platform User manual

Cando AFE180 User manual

Cando

Cando AFE180 User manual

Popular Fitness Equipment manuals by other brands

GOZONE 42702672 Assembly instructions

GOZONE

GOZONE 42702672 Assembly instructions

HoMedics Sport EMS Toning Pads instruction manual

HoMedics

HoMedics Sport EMS Toning Pads instruction manual

Bodyorbit WONDER CORE 2 user guide

Bodyorbit

Bodyorbit WONDER CORE 2 user guide

Marpo Kinetics VMX Maintenance and safety manual

Marpo Kinetics

Marpo Kinetics VMX Maintenance and safety manual

Impex MARCY DBR-86 owner's manual

Impex

Impex MARCY DBR-86 owner's manual

Body Wisdom Suspension Training System user guide

Body Wisdom

Body Wisdom Suspension Training System user guide

Keys Fitness KF-PT owner's manual

Keys Fitness

Keys Fitness KF-PT owner's manual

Stairmaster StepMill SM916 owner's manual

Stairmaster

Stairmaster StepMill SM916 owner's manual

WaterRower M1 SERIES owner's manual

WaterRower

WaterRower M1 SERIES owner's manual

KIDSFIT Cardio Kids 615 Elementary Snowboarder owner's manual

KIDSFIT

KIDSFIT Cardio Kids 615 Elementary Snowboarder owner's manual

MAXXMEE Crunch-Trainer user manual

MAXXMEE

MAXXMEE Crunch-Trainer user manual

True Emerge LED Configuration manual

True

True Emerge LED Configuration manual

Precor Discovery Series Assembly guide

Precor

Precor Discovery Series Assembly guide

Gold's Gym GGBE1957.0 user manual

Gold's Gym

Gold's Gym GGBE1957.0 user manual

KingsBox Mighty Strenght Corner quick start guide

KingsBox

KingsBox Mighty Strenght Corner quick start guide

Weider Crossbar By 100lb Power Pack Manuel de l'utilisateur

Weider

Weider Crossbar By 100lb Power Pack Manuel de l'utilisateur

Impex MARCY DIAMOND ELITE MD-843 owner's manual

Impex

Impex MARCY DIAMOND ELITE MD-843 owner's manual

ergoline ergoselect 4 Operator's manual

ergoline

ergoline ergoselect 4 Operator's manual

manuals.online logo
manuals.online logoBrands
  • About & Mission
  • Contact us
  • Privacy Policy
  • Terms and Conditions

Copyright 2025 Manuals.Online. All Rights Reserved.