Candy GOC 781B User manual

INSTRUCTION BOOK
GOC 781B
Condenser Tumble Dryer
English 2
-
Norsk
Suomi
Dansk
Svenska
13
35
24
46

EN 2
Introduction
Delivery Information
Unpacking the Product
Safety Reminders
Use
Installation
The Laundry
Environmental Issues
Gias Service
Installation
Electrical Requirements
Adjusting the Feet
Ventilation
Preparing the Load
Clothes Preparation
Do Not Tumble Dry
Energy Saving
Sorting the Load
Drying Guide
Controls and Indicators
Selecting the Programme
Door and Filter
Opening the Door
Filter
Filter Care Indicator
Water Container
To Remove the Container
Condenser
To Remove the Condenser
Operation
Delay Start Function
Cancelling and Resetting the Programme
Cleaning and Routine Maintenance
Cleaning the Dryer
Technical Specifications
Troubleshooting
Customer Service
Spares
Gias Service
INDEX
3
3
3
3
3
4
4
4
4
5
5
5
5
6
6
6
6
6
6
7
8
9
9
9
9
9
9
10
10
10
11
11
11
11
11
12
12
12
12

INTRODUCTION
Use
Please check that the following items are
delivered with the appliance:
● Instruction manual
● Guarantee card
● Energy label
Remove the machine from
its packaging close to the
final location of the
machine.
1- Cut carefully around the
base of the packaging and
up one corner.
2- Remove the polythene
sleeve and lift the dryer off
the polystyrene base.
Please read and follow these instructions carefully and operate the machine accordingly. This
booklet provides important guidelines for safe use, installation, maintenance and some useful
advice for best results when using your machine.
Keep all documentation in a safe place for future reference or for any future owners.
Delivery Information UNPACKING THE PRODUCT
Dispose of the packaging safely. Make
sure it is out of the reach of children,it is a
potential source of danger.
Failure to comply with the above can
compromise the safety of the appliance. You
may be charged for a service call if a problem
with your machine is caused by misuse.
Check that no damage has occurred to the
machine during transit. If it has, call for service
by GIAS.
EN 3
SAFETY REMINDERS
●This appliance is not intended for use by persons (including children) with reduced physical,
sensory or mental capabilities,or lack of experience and knowledge, unless they have been given
supervision or instruction concerning use of the appliance by a person responsible for their safety.
● Children should be supervised to ensure that they do not play with the appliance.
● WARNING Misuse of a tumble dryer may create a fire hazard.
●This machine is solely for domestic use, i.e. to dry household textiles and garments.
●This machine should only be used for its intended purpose as described in this manual. Ensure
that the instructions for installation and use are fully understood before operating the appliance.
● Do not touch the appliance when hands or feet are damp or wet.
● Do not lean on the door when loading the machine or use the door to lift or move the machine.
●Do not allow children to play with the machine or its controls.
● WARNING Do not use the product if the fluff filter is not in position or is damaged; fluff could be
ignited.
● WARNING Where the hot surface symbol is located the temperature rise during operation
of the tumble dryer may be in excess of 60 degrees C.
●Remove the plug from the electricity supply. Always remove the plug before cleaning the
appliance.
● Do not continue to use this machine if it appears to be faulty.
● Lint and fluff must not be allowed to collect on the floor around the outside of the machine.
● The drum inside may be very hot. Always allow the dryer to complete the cool down period before
removing the laundry.

SAFETY REMINDERS
EN 4
This appliance is marked according
t o t h e E u r o pe a n d ir e c t iv e
2002/96/EC on Waste Electrical and
Electronic Equipment (WEEE).
By ensuring this product is disposed of correctly,
you will help prevent potential negative
consequences for the environment and human
health, which could otherwise be caused by
inappropriate waste handling of this product.
The symbol on the product indicates that this
product may not be treated as household waste.
Instead it shall be handed over to the applicable
collection point for the recycling of electrical and
electronic equipment.
For more detailed information about treatment,
recovery and recycling of this product, please
contact your local city office,your household
waste disposal service or the shop where you
purchased the product. Disposal must be
carried out in accordance with local
environmental regulations for waste disposal.
European Directive 2002/96/EC
● To ensure the continued safe and efficient
operation of this appliance we recommend that
any servicing or repairs are only carried out by
an authorised GIAS service engineer.
GIAS Service
If the appliance is not running properly or
breaks down, switch it off and disconnect the
plug from the socket. Consult GIAS Service for
possible repair.
● All packaging materials used are
environmentally-friendly and recyclable.
Please help dispose of the packaging via
environmentally-friendly means. Your local
council will be able to give you details of current
means of disposal.
● To ensure safety when disposing of an old
tumble dryer disconnect the mains plug from
the socket, cut the mains power cable and
destroy this together with the plug. To prevent
children shutting themselves in the machine
break the door hinges or the door lock.
Environmental Issues
● Check that the product has no visible signs of
damage before use. If damaged do not use and
please call GIAS Service.
● Do not use adapters, multiple connectors
and/or extensions.
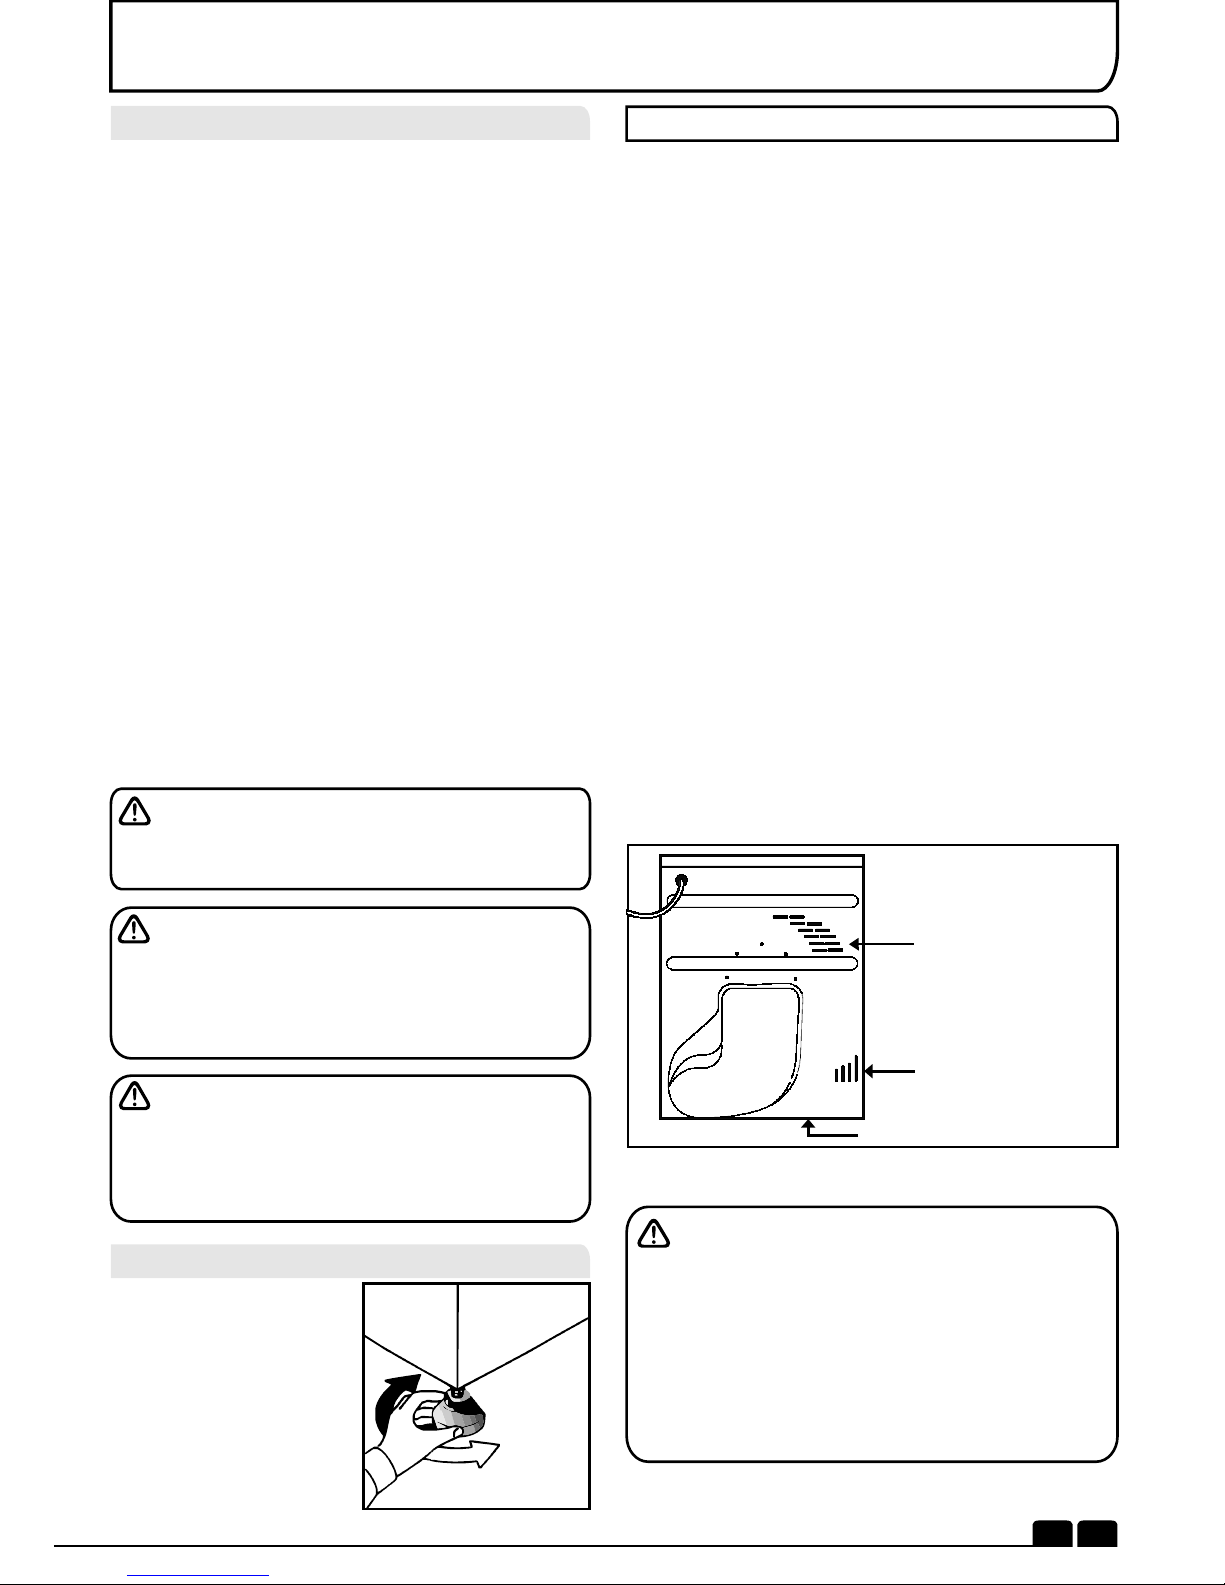
● Never install the dryer against curtains and be
sure to prevent items from falling or collecting
behind the dryer.
● The appliance must not be installed behind a
lockable door, a sliding door or a door with a
hinge on the opposite side to that of the tumble
dryer.
Installation
●Do not dry unwashed items in the tumble dryer.
● WARNING Do not tumble dry fabrics treated
with dry cleaning fluids.
●WARNING Foam rubber materials can, under
certain circumstances, when heated become
ignited by spontaneous combustion. Items
such as foam rubber (latex foam), shower caps,
waterproof textiles, rubber backed articles and
clothes or pillows fitted with foam rubber pads
MUST NOT be dried in the tumble dryer.
● Always refer to the laundry care labels for
directions on suitability for drying.
● Clothes should be spin dried or thoroughly
wrung before they are put into the tumble dryer.
Clothes that are dripping wet should not be put
into the dryer.
● Lighters and matches must not be left in
pockets and NEVER use flammable liquids
near the machine.
● Glass fibre curtains should NEVER be put in
this machine. Skin irritation may occur if other
garments are contaminated with the glass
fibres.
● Items that have been soiled with substances
such as cooking oil, acetone, alcohol, petrol,
kerosene, spot removers, turpentine, waxes
and wax removers should be washed in hot
water with an extra amount of detergent before
being dried in the tumble dryer.
● Fabric softeners, or similar products, should
be used as specified by the fabric softener
instructions.
The Laundry

EN 5
INSTALLATION
Tumble dryers are supplied to operate at a
voltage of 230V, 50 Hz single phase. Check that
the supply circuit is rated to at least 10A
Electricity can be extremely dangerous.
This appliance must be earthed.
The socket outlet and the plug on the
appliance must be of the same type.
Do not use multiple adapters and/or
extension leads.
The plug should be accessible for
disconnection after the appliance has been
installed.
The wires in the mains lead are coloured in
accordance with the following codes:
Blue NEUTRAL
BrownLIVE
Green and Yellow EARTH
CE Appliance complies with European Directive
89/336/EEC, 73/23/EEC and subsequent
amendments.
Electrical Requirements
If the mains cord on this appliance is
damaged, it must be replaced by a special cord
which is ONLY obtainable from the spares
service. It must be installed by a competent
person.
You may be charged for a service call if a
problem with your machine is caused by
incorrect installation.
Once the machine is in
place the feet should
be adjusted to ensure
that the machine is
level.
Adjusting the Feet
Adequate ventilation must be provided in the
room where the tumble dryer is located to
prevent gases from appliances burning other
fuels, including open fires, being drawn into the
room during operation of the tumble dryer.
● Exhaust air must not be discharged into a flue
which is used for exhausting fumes from
appliances burning gas or other fuels.
● Check regularly that the air flowing through
the dryer is not restricted.
●Check the fluff filter after use, and clean, if
necessary.
●The inlet and outlets should be kept free from
obstructions. To ensure adequate ventilation
the space between the bottom of the machine
and the floor must not be obstructed. There
should be a gap of at least 12mm between the
machine and any obstructions.
● Prevent items from falling or collecting behind
the dryer as these may obstruct the air inlet and
outlet.
● NEVER install the dryer up against curtains.
VENTILATION
Do not plug the machine in and switch it
on at the mains until the installation is
completed.For your safety, this dryer must be
correctly installed. If there is any doubt about
installation, call GIAS Service for advice.
Air Outlets
Air Outlets in the Base
Air Inlent Vents
Do not install the product in a room where
there is a risk of frost occurring. At temperature
around freezing point the product may not be
able to operate properly: there is a risk of
damage if the water is allowed to freeze in the
hydraulic circuit (valves, hoses, pumps).
For a better product performance the ambient
room temperature must be between +2°C and
+35°C.

PREPARING THE LOAD
Before using the tumble dryer for the first time:
● Please read this instruction book thoroughly.
● Remove all items packed inside drum.
●Wipe the inside of the drum and door with a
damp cloth to remove any dust which may
have settled in transit.
Make sure that the laundry you are going to dry
is suitable for drying in a tumble dryer, as shown
by the care symbols on each item.
Check that all fastenings are closed and that
pockets are empty. Turn the articles inside out.
Place clothes loosely in the drum to make sure
that they don't get tangled.
Clothes Preparation
● Cottons Max. 8 kg
● Synthetics Max. 4 kg
Maximum Drying Weight
Do not overload the drum, large items
when wet can exceed the maximum admissible
clothes load (for example: sleeping bags,
duvets).
Sort the Load as Follows
. .
.
● By care symbols
These can be found on the collar or inside seam:
Suitable for tumble drying.
Tumble drying at high temperature.
Tumble drying at low temperature only.
Do not tumble dry.
If the item does not have a care label it must be
assumed that it is not suitable for tumble drying.
● By amount and thickness
Whenever the load is bigger than the dryer
capacity, separate clothes according to
thickness (e.g. towels from thin underwear).
● By type of fabric
Cottons/linen: Towels, cotton jersey, bed and
table linen.
Synthetics: Blouses, shirts, overalls, etc. made
of polyester or polyamid, as well as for
cotton/synthetic mixes.
● By drying level
Sort into: iron dry, cupboard dry, etc. For delicate
articles press the Delicates button to select low
drying temperature.
Woollens, silk, delicate fabrics, nylon stockings,
delicate embroidery, fabrics with metallic
decorations, garments with PVC or leather
trimmings, training shoes, bulky items such as
sleeping bags, etc.
Do Not Tumble Dry:
IMPORTANT: Do not dry articles which
have been treated with a dry cleaning fluid or
rubber clothes (danger of fire or explosion).
Only put into the tumble dryer laundry which
has been thoroughly wrung or spin-dried. The
drier the laundry the shorter the drying time thus
saving electricity.
ALWAYS
● Try to dry the maximum weight of laundry, this
will save time and electricity.
● Check that the filter is clean before every
drying cycle.
NEVER
● Exceed the maximum weight, this will waste
time and electricity.
● Put dripping wet items into the tumble dryer,
this may damage the appliance.
Energy Saving
The table shows approximate drying times,depending on
the type of fabric and dampness of the clothes.
Drying Guide
FABRIC
COTTON HIGH 140-165min 70-80min
70-80min---
---
50-65min
50-65min
40-55min
30-40min
LOW
LOW
SYNTHETICS
ACRYLIC
HEAT
SETTING
HEAVY
LOAD
MEDIUM
LOAD LIGHT
LOAD
During the last 15 minutes (roughly) the
load is always tumbled in cool air
EN 6

The Sensor Dry machine gives many options for drying the laundry
to suit all circumstances. The table on the next page lists the
programmes and the function of each programme.
Note:
The sensor may not detect a small load of small articles. For small
loads and separate items or pre-dried fabrics with low moisture
content, use the timed programmes.
If the sensor does not detect the item the dryer will only operate for
10 minutes before going into cooldown.
If the load is too large or too wet to tumble dry the dryer will
automatically go into cooldown after approximately 3 hours.
In these cases we advise to use a time cycles between 30 and
75minutes depending on the load size and dryness required, and
select high or low heat depending upon the fabric type.
Programme Selector – Select the required programme
Time Selection Button – Allows the user to change duration of the program selected by
Programme Selector. It can be used only with the selection of: Mix&Dry, Shirts and Time Programs
Delay Start Button – Allows the user to delay the start of the drying cycle (see details of
Operation )
Acrylic Synthetic Button – Press to select the type of fabrics to dry Acrylic and Synthetics, when
pressed Acrylic Synthetics option is activated and the indicator lights up.
Anti- Crease Button – Allows the user to select a post drying anti-crease cycle.
Start/Pause Button – Press to commence/ to pause the selected drying programme.
Memo Button – Allows user to record the program by pressing simultaneously the Anti-
Crease and the Acrylic Synthetic buttons for 3 seconds, after 2 minutes duration of the chosen
program/option
Filter Care indicator – lights when the filter needs cleaning
Empty Water indicator – lights when the water container is full
Program Display – Related indicator lights when a auto program has been selected.
Refresh – The indicator lights up when the program starts the cool down stage.
CONTROLS AND INDICATORS
Control Panel and Indicator Lights
Time Selection
Button
Programme
Selector
Acrylic Synthetic
Button
Anti-Crease
Button
Filter Care
Indicator
Program
Display
SELECTING THE PROGRAMME
Start/Pause
Button
Delay Start
Button
Empty Water
Indicator
EN 7

SELECTING THE PROGRAMME
PROGRAMME
Bone Dry
Store Dry
Hang Dry
Iron Dry
Wool Finish
Rapid 40'
Mix & Dry
Shirts
Time
Memo
Relax
DESCRIPTION
Select the degree of dryness that you require. This range from
for bath towels and bathrobes, through for items that will be
put away without ironing, to the programme that leaves the laundry
suitable for ironing.
A gentle programme specially created to get woollens softer after
air-drying.This delicate warm air cycle, lasting 12 minutes, can
also be used to get woollens 'refreshed' after being stored in the
wardrobe.
This is a special timed program for a maximum load of 4kg (117
min). The default duration is 99 minutes and allows to dry up to 3kg.
With this program you can dry together cotton and synthetic
fabrics.
This is a special timed program for shirts of max load of 3kg (78
minutes). For synthetic shirts you have to press the Acrylic
Synthetic button. The default duration is 60 minutes and allows to
dry up to 2kg.
Time selection includes all the manual time programs: from 30
minutes to 180 minutes. The 20 minutes selection time in only cool
air ventilation (Refresh)
Memo Program allows to re-perform a program that the user has
saved before, without selecting the correct sequence of program
selector positions and option buttons for that particular program.
The programme provides a conditioning and anticrease function.
The dryer will heat the load for 9 minutes followed by a 3 minute cool
down period and is especially good for garments which may have
been left for some time prior to ironing, in a linen basket for
example. Garments may also become stiffened when dried outside
on a washing line or inside on radiators.
This programme relaxes the creases in the fabric making ironing
quicker and easier.
The Rapid 40' programme allows a drying cycle to be completed
quickly. This is an ideal programme for having dry, refreshed and
ready-to-wear clothes in less than 40'. This special programme
constantly monitors the temperature in the drum. The maximum load
is 2 kg and the programme is suitable for all types of fabrics where
tumble drying is appropriate.
EN 8

DOOR and FILTER
Opening the Door
Pull on handle to open
the door.
To restart the dryer,
close the door and
press .
WARNING! When the tumble dryer is in
use the drum and door may be VERY HOT.
Never stop a tumble dryer before the end of the
drying cycle unless all items are quickly
removed and spread out so that the heat is
dissipated.
Filter Care Indicator
Lights when the
filter needs cleaning.
If the laundry is not
drying check that the
filter is not clogged.
DO NOT USE WATER TO CLEAN THE FILTER.
Filter
IMPORTANT: To maintain the efficiency of the
dryer check that the fluff filter is clean before
each drying cycle.
1 . P u l l t h e f i l t e r
upwards.
2. Open filter as shown.
3.Gently remove lint
using a soft brush or
your fingertips.
4 . S n a p t h e f i lt er
together and push
back into place.
WATER CONTAINER
The water removed from the laundry during the
drying cycle is collected in a container at the
bottom of the dryer. When the container is full
the indicator on the control panel will light,
and the container MUST be emptied. However,
we recommend that the container is emptied
after each drying cycle.
NOTE: Very little water will collect during the
first few cycles of a new machine as an internal
reservoir is filled first.
To Remove the Container
1.Gently pull the bottom
of the kickplate so that it
unclips from the dryer.
The top section can
then be unhinged
allowing the kickplate to
b e c o m p l e t e l y
removed.
2.Pull firmly on the
handgrip and slide the
water container out of
the dryer.
Support the container
with both hands. When
full, the water container
will weigh about 4kg.
3. Open the lid located
on the top of the
container and empty
the water.
4. Refit the lid and slide
the water container
back into position.
PUSH FIRMLY INTO
PLACE.
5. Refit the kickplate by
engaging the hinges at
the top and 'snapping'
the lower clips into
place.
6. Press button to
restart the cycle.
EN 9

To Remove the Condenser
Important: Always switch off and remove the
plug from the electricity supply before cleaning
the condenser.
To maintain the efficiency of the dryer regularly
check that the condenser is clean.
1 . R e m o v e t h e
kickplate.
2. Turn the two locking
levers anti-clockwise
an d p ull ou t the
condenser.
3 . P u l l o u t t h e
condenser unit.
4. Gently remove any
dust or fluff with a cloth,
then wash the unit by
holding it under a
running tap turning it
so that water flows
between the plates, to
remove any dust or
fluff.
5. Refit the condenser
ensuring it is in the
c o r r e c t w a y ( a s
indicated by the arrow)
and pushed firmly into
place. Lock the two
levers by turning them
clockwise.
6. Refit the kickplate.
CONDENSER
OPERATION
1. Open the door and load the drum with
laundry. Ensure that garments do not hinder
closure of the door.
2. Gently close the door pushing it slowly until
you hear the door 'click' shut.
3. Turn the Programme Selector dial to select
the required drying programme (see
Programme Guide).
4. If drying synthetics, acrylics or delicate items,
press the button to reduce the heat level.
The indicator will light up when the machine is in
low heat setting. To deselect in the first few
minutes of the programme, press the button
, after this time reset the machine to change the
setting.
5. Press the button. The dryer will start
automatically and the indicator above the
button will be continuously lit.
6. If the door is opened during the programme to
check the laundry, it is necessary to press to
recommence drying after the door has been
closed.
7. When the cycle is nearing completion the
machine will enter the cool down phase, the
clothes will be tumbled in cool air allowing the
load to cool down.
8. Following the completion of the cycle the
drum will rotate intermittently to minimize
creasing. This will continue until the machine is
switched OFF or the door is opened.
Do not open the door during the automatic
programs in order to obtain a proper drying.
EN 10

IMPORTANT Always switch off and
remove the plug from the electricity supply
before cleaning this appliance.
For electrical data refer to the rating label
on the front of the dryer cabinet (with the door
open).
Technical Specifications
Cleaning the Dryer
Drum capacity 115 litres
Maximum load 8 kg
Height 85 cm
Width 60 cm
Depth 60 cm
Energy Label Band B
OPERATION
● Clean the filter and empty the water
container after every drying cycle.
● Regularly clean the condenser.
● After each period of use, wipe the inside of
the drum and leave the door open for a while to
allow circulation of air to dry it.
● Wipe the outside of the machine and the
door with a soft cloth.
● DO NOT use abrasive pads or cleaning
agents.
● To prevent the door sticking or the build up
of fluff clean the inner door and gasket with a
damp cloth after every drying cycle.
WARNING! The Drum, door and load may
be very hot.
CLEANING AND ROUTINE MAINTENANCE
Delay Start Function
The Delay Start Function allows the user to delay the start of the drying cycle by 1 to 24 hours.
When the function is first selected the display will show a delay of 1 hour, subsequent presses of
the button will increase the delay with 1 hour steps.
To commence the programme press and the appliance will complete the drying cycle at the
end of this time. The indicator light will flash to indicate that the start delay is in progress.
Cancelling and Resetting the Programme
To cancel a programme press the button for 3 seconds. In the TIME CONTROL display 0:00
Light will flash to indicate that it has been reset.
EN 11

TROUBLESHOOTING
What Might be the Cause of...
Defects you can remedy yourself
Before calling GIAS Service for technical
advice please run through the following
checklist. A charge will be made if the machine
is found to be working or has been installed
incorrectly or used incorrectly.
If the problem persists after completing the
recommended checks, please call GIAS
Service, they may be able to assist you over the
telephone.
Time display to end could change during
drying cycle. The time to end is
continuously checked during the drying
cycle and the time is adjusted to give the
best estimation time. The displayed time
may increase or decrease during the cycle
and this is normal.
Drying time is too long/clothes are not dry
enough…
●Have you selected the correct drying
time/programme?
● Were the clothes too wet? Were the clothes
thoroughly wrung or spindried?
● Does the filter need cleaning?
● Is the dryer overloaded?
●Has the option been selected from a
previous cycle?
The dryer does not operate…
● Is there a working electricity supply to the
dryer? Check using another appliance such as
a table lamp.
● Is the plug properly connected to the mains
supply?
● Is there a power failure?
● Has the fuse blown?
● Is the door fully closed?
● Is the dryer switched on, both at the mains
supply and at the machine?
● Has the drying time or the programme been
selected?
● Has the machine been switched on again after
opening the door?
CUSTOMER SERVICE
Spares
GIAS Service
Should there still be a problem with your dryer
after completing all the recommended checks,
please call GIAS Service for advice.
They may be able to assist you over the
telephone or arrange for a suitable appointment
for an engineer to call under the terms of your
guarantee. However, a charge may be made if
any of the following applies to your machine:
● Is found to be in working order.
● Has not been installed in accordance with the
installation instructions.
● Has been used incorrectly.
Always use genuine spares, available direct
from GIAS Service.
For service and repairs call your local GIAS
Service engineer.
The dryer is noisy…
● Switch off the dryer and contact GIAS Service
for advice.
The Indicator is on…
● Does the filter need cleaning?
The Indicator is on…
● Does the water container need emptying?
The manufacturer declines all responsibility
in the event of any printing mistakes in this
booklet. The manufacturer also reserves the
right to make appropriate modifications to
its products without changing the essential
characteristics.
EN 12

Introduktion
Leveringsoplysninger
Udpakning af produktet
Sikkerhedspåmindelser
Installation
Anvendelse
Vasketøjet
Miljøhensyn
GIAS Service
Installation
Elektriske krav
Justering af fødder
Ventilation
Forberedelse af ilægning af tøj
Klargøring af tøj
Sortering af vasketøj
Må ikke tørres i tørretumbler
Energibesparelse
Tørrevejledning
Knapper og indikatorer
Valg af program
Låge og filter
Åbning af lågen
Filter
Filterplejeindikator
Vandbeholder
Sådan aftages beholderen
Kondensator
Sådan udtages kondensatoren
Betjening
Forsinket start
Annullering og genindstilling af program
Rengøring og løbende vedligeholdelse
Rengøring af tørretumbleren
Tekniske specifikationer
Fejlfinding
Service
Reservedele
GIAS Service
INDEKS
DA 13
14
14
14
14
14
15
15
15
15
16
16
16
16
17
17
17
17
17
17
18
19
20
20
20
20
20
20
21
21
21
22
22
22
22
22
23
23
23
23

INTRODUKTION
Anvendelse
Kontrollér at følgende ting fulgte med
maskinen:
● Instruktionsbog
● Garantibevis
● Energietiket
Tag maskinen ud af
emballagen, så tæt som
muligt på der, hvor den skal
stå.
1. Skær forsigtigt rundt om
den underste kant af
emballagen og op langs et
af hjørnerne.
2 . Ta g p o l y t h e n b e k -
lædningen af og løft
t ø r r e t u m b l e r e n a f
polystyrenfoden.
Læs venligst denne instruktionsbog grundigt igennem og følg anvisningerne. Denne
instruktionsbog giver dig nogle vigtige retningslinjer angående sikker anvendelse, installation,
vedligehold samt gode råd om hvordan, du opnår de bedste resultater med din maskine.
Opbevar alle papirer et sikkert sted, så du har dem når du skal bruge dem igen, eller hvis du sælger
maskinen.
Leveringsoplysninger UDPAKNING AF PRODUKTET
Bortskaf emballagen på sikker vis.
Opbevares utilgængeligt for børn.
Følges ovenstående ikke kan maskinen
tage skade. Du kan komme til at betale for
reparation, hvis der opstår problemer med din
maskine, og dette skyldes misbrug.
Kontrollér at maskinen ikke er beskadiget,
når du modtager den. Hvis den er, skal du ringe
til GIAS.
SIKKERHEDSPÅMINDELSER
● Maskinen er ikke beregnet til at blive benyttet af personer (herunder også børn) med mindskede
fysiske, sensoriske eller mentale evner, eller af personer, der mangler erfaring og viden,
medmindre den person, der er ansvarlig for deres sikkerhed har observeret dem eller har
instrueret dem i, hvordan maskinen benyttes.
● Børn skal være under opsyn af en voksen for at sikre, at de ikke leger med maskinen.
● ADVARSEL Misbrug af tørretumbleren kan medføre brandfare.
● Maskinen er kun til husholdningsbrug, dvs. til at tørring af tekstilvarer og tøj I en husholdning.
● Denne maskine må kun anvendes til det tilsigtede formål som beskrevet I denne håndbog. Husk
at alle instruktioner vedr. installation og anvendelse skal både læses og forstås før maskinen tages
i brug.
● Undgå at røre ved maskinen med fugtige eller våde hænder og fødder.
● Man må ikke læne sig op af lågen, når der lægges tøj i maskinen, eller bruge lågen til at løfte eller
flytte maskinen.
● Børn må ikke lege med maskinen og dens knapper.
● ADVARSEL Produktet må ikke bruges hvis fnugfilteret sidder forkert eller er beskadiget; fnug
kan antændes.
●ADVARSEL Der hvor symbolet for varm overflade er placeret, kan temperaturen, under
tumbling, overstige 60 grader C.
● Tag stikket ud at kontakten. Tag altid stikket ud før apparatet rengøres.
● Maskinen må ikke anvendes, hvis den virker defekt.
● Bomuldsfibre og fnug må ikke ophobes på gulvet omkring maskinen.
● Tromlens inderside kan være meget varm. Lad altid tørretumbleren fuldføre afkølingsperioden
før tøjet tages ud.
DA 14

Denne maskine er markeret i
overensstemmelse med det
europæiske direktiv 2002/96/EC
vedrørende elektrisk affald og
elektronisk udstyr (WEEE).
Ved at sikre, at dette produkt bortskaffes
korrekt, bidrager du til at forhindre eventuelle
skadelige konsekvenser for miljøet og
helbredet, som ellers kan forårsages af
uhensigtsmæssig bortskaffelse af dette
produkt. Symbolet på produktet angiver, at
dette produkt ikke må bortskaffes som
husholdningsaffald. I stedet bør det overdrages
til en genbrugsstation med henblik på
genanvendelse af elektrisk og elektronisk
udstyr. Bortskaffelse bør ske i henhold til de
lokale miljømæssige regler. Du kan få
yderligere oplysninger om håndtering,
genskabelse og genanvendelse af dette
produkt ved at kontakte dit lokale rådhus,
genbrugsstationen eller den forhandler, du
købte produktet af.
Europæisk Direktiv 2002/96/EC
● For at sikre apparatets fortsatte sikre og
effektive drift anbefaler vi, at eventuel service
eller reparation kun udføres af en autoriseret
GIAS servicetekniker.
GIAS Service
Hvis maskinen ikke kører ordentligt eller går
istykker, så sluk for den og tag stikket ud af
stikkontakten. Kontakt GIAS Service mht.
eventuel reparation.
● Den anvendte emballage er miljøvenlig og
genanvendelig. Bortskaf emballagen med
tanke for miljøet. Hent vejledning til
bortskaffelse af emballagen hos din lokale
kommune.
● For at sikre sikker bortskaffelse af en gammel
tørretumbler, skal du tage stikket ud af væggen,
skære ledningen og stik af og smide dem ud.
Bræk hængslerne af lågen eller ødelæg låsen,
så det undgås at børn kommer til at lukke sig
selv inde i maskinen.
Miljøhensyn
● Kontroller at produktet ikke viser tegn på
beskadigelse – før det tages i brug. Er det
beskadiget må det ikke bruges og GIAS
Service skal kontaktes.
● Der må ikke anvendes adaptere, flere
stikdåser og/eller forlængerledninger.
● Tørretumbleren må aldrig installeres opad
gardiner, og genstande skal forhindres i at
falde ned bag ved eller samles bag
tørretumbleren.
● Maskinen må ikke installeres bag en dør, der
kan låses, bag en skydedør eller bag en dør,
hvor hængslet sidder i modsatte side af
tørretumblerens hængsel.
Installation
● Unlad at tørre uvaskede ting i tørretumbleren.
● ADVARSEL Man må ikke tørretumble tørt
stof behandlet med kemiske rensevæsker.
●ADVARSEL Skumgummimateriale kan,
under visse omstændigheder, selvantænde,
hvis det bliver for varmt. Skumgummi (latex
skum), badehætter, vandafvisende tekstiler,
materialer med gummibehandlet bagside og
tøj eller puder medskumgummi fyld MÅ IKKE
tørres i tørretumbleren.
● Kontroller altid vaskemærkerne, om tøjet
tåler tørretumbling.
●Tøjet skal centrifugeres eller vrides
omhyggeligt, før det lægges I tørretumbleren.
Tøj, der er drivvådt, må IKKE lægges i
tørretumbleren.
● Lightere og tændstikker må ikke efterlades i
lommer, og der må ALDRIG anvendes
brandfarlige væsker i nærheden af maskinen.
●Glasfibergardiner må IKKE lægges i
maskinen. Der kan opstå hudirritation, hvis
andre beklædningsgenstande kontamineres
med glasfibre.
● Tøj, der er blevet snavset af stoffer som
madolie, acetone, alkohol, benzin, petroleum,
pletfjerner, terpentin, voksprodukter og
voksfjerner, bør vaskes i varmt vand tilsat
ekstra meget vaskemiddel, før det tørres i
tørretumbleren.
● Skyllemidler eller lignede produkter skal
anvendes i overensstemmelse med
skyllemidlets brugervejledning.
Vasketøjet
SIKKERHEDSPÅMINDELSER
DA 15

INSTALLATION
Tørretumblere kan køre på 230V, 50 Hz
enfaset. Kontrollér at strømkredsen er
klassificeret til mindst 10A.
Elektricitet kan være meget farligt.
Dette apparat skal være jordforbundet.
Stikkontakten og maskinens stik skal
passe sammen.
Der må ikke anvendes flere adaptere
og/eller forlængerledninger.
Stikket skal være tilgængeligt til afbrydelse
efter,at apparatet er blevet installeret.
Ledningerne i netledningen er farvede i
overensstemmelse med følgende koder:
Blå NUL
Brun STRØMFØRENDE
Grøn og gul JORDFORBINDELSE
Dette apparat opfylder kravene i EU
direktiverne 89/336/EØF, 73/23/EØF og
efterfølgende ændringer.
Elektriske Krav
Hvis hovedledningen til denne maskine
erbeskadiget, skal den udskiftes med en
s æ r l i g l e d n i n g , s o m K U N f å s h o s
reservedelsforha ndleren. Den skal installeres
af en kvalificeret person.
Du kan komme til at betale for reparation,
hvis der opstår problemer med din maskine, der
skyldes ukorrekt installation.
Når maskinen er på
plads, skal fødderne
justeres, så maskinen
står vandret.
Justering af Fødder
Der skal være tilstrækkelig ventilation i det rum,
hvor tørretumbleren placeres, så det undgås at
gasser fra andre apparater, eller åben ild,
trækkes ind I rummet under tørrebumbling.
● Udsugningsluft må ikke afledes i en træ
kkanal, der er beregnet til aftræk af røggasser
fra apparater, der kører på gas eller anden
brændsel.
● Kontrollér regelmæssigt at luften, der strø
mmer gennem tørretumbleren, ikke hæmmes.
● Kontrollér fnugfiltret efter brug og rengør det
om nødvendigt.
● Indløb og udløb skal holdes fri for tilstopninger.
For at sikre tilstrækkelig ventilation må
mellemrummet mellem maskinens bund og
gulvet ikke tilstoppes. Der skal være mindst 12
mm fri luft mellem maskinen og ting, der kan
blokere.
● Genstande skal forhindres i at falde ned og
samles mellem tørretumblerens sider og
bagside, da disse kan tilstoppe luftindsugning
og -udsugning.
● Tørretumbleren må ALDRIG installeres op
mod gardiner.
VENTILATION
Du må ikke sætte stikket i og tænde for
maskinen, før installationen er fuldført. Af
hensyn til din egen sikkerhed skal denne
tørretumbler være installeret korrekt. Hvis der er
nogen tvivl om installation, skal du ringe til GIAS
Service for rådgivning.
Dette produkt må kun anvendes i et frost
frit rum. Ved temperature under 2 gr. vil
produktet ikke fungere korrekt. Der er risiko for at
det hydrauliske system kan fryse. Produktet
fungerer optimalt fra 2-35 gr. Celsius.
Luftudsugningskanaler
Luftudsugningskanaler I Bunden
Luftindsugningskanaler
DA 16

FORBEREDELSE AF ILÆGNING AF TØJ
Før tørretumbleren anvendes første gang:
● Læs venligst denne instruktionsbog grundigt.
● Fjern alle genstande som er lagt ind I tromlen.
● Aftør tromlens inderside og låge med en fugtig
klud for at fjerne eventuelt støv, som har sat sig
under transporten.
Du skal sikre, at det vasketøj, du skal til at
tørre, egner sig til tørring i en tørretumbler,
som vist på vaskemærker på hver genstand.
Kontroller at alle lukninger er lukkede, og at
lommerne er tomme. Vend vrangen ud på
genstandene. Læg tøjet løst i tromlen for at
sikre, at det ikke filtrer sig sammen..
Klargøring Af Tøj
● Bomuld Maks. 8 kg
● Syntetiske stoffer Maks. 4 kg
Maksimal tørrevægt
Tromlen må ikke overfyldes, større, våde
ting, kan overstige den maksimalt tilladte vægt
(f.eks.: soveposer og dyner).
Sorter Tøjet, Der Skal Lægges I, Som Følger:
. .
.
● Efter vaskemærker
De findes i kraven eller på en indvendig søm:
Egnet til tørring i tumbler.
Tørring i tumbler ved høj temperatur.
Kun tørring i tumbler ved lav
temperatur.
Må ikke tørres i tørretumbler.
Hvis der ikke findes noget vaskemærke, må det
betragtes som uegnet til tørretumbling.
● Efter antal og tykkelse
Når det tøj, der skal lægges i, overstiger
tørretumblerens kapacitet, skal tøjet adskilles i
overensstemmelse med tykkelse (f.eks.
håndklæder fra tyndt undertøj).
● Efter stoftype
Bomuld/linned: Håndklæder, bomuldsjersey,
sengelinned og duge.
Syntetiske stof: Skjortebluser, skjorter, overalls,
osv., fremstillet af polyester eller polyamid samt
efter bomulds/syntetiske blandinger.
● Efter tørringsniveau
Sorter tøjet i: Strygetørt, Skabstørt, osv. For
sarte genstande tryk på knappen for at vælge lav
tørretemperatur.
Uld, silke, sarte stoffer, nylonstrømper, sart
broderi, stof med metaldekoration,
beklædningsgenstande med PVC eller
læderkanter, gummisko, pladskrævende
genstande, som f.eks. soveposer, osv.
Må ikke tørres I tørretumbler:
VIGTIGT: Tør ikke genstande som er
behandlet med kemisk rensevæske eller
gummitøj (fare for brand eller eksplosion).
I løbet af de sidste ca. 15 minutter tørres tøjet
altid i nedkølet luft.
Læg kun vasketøj i tørretumbleren som er
blevet grundigt vredet eller centrifugeret. Jo
mere tørt vasketøj er, jo kortere vil tørretiden
være og derved spare elektricitet.
ALTID
● Prøv altid at tørre vasketøj så meget vasketøj
som maskinen tillader, dette sparer både tid og
elektricitet.
● Det skal altid kontrolleres, at filtret er rent før
hver tørrecyklus.
ALDRIG
● Den maksimale vægt må aldrig overskrides,
dette vil spilde tid og elektricitet.
●Læg aldrig drivvåde genstande I
tørretumbleren, dette kan beskadige apparatet.
Energibesparelse
Tabellen viser omtrentlige tørretider afhængig
af stoftype og tøjets fugtighed.
Tørrevejledning
STOF
BOMULD HØJ 140-165min 70-80min
70-80min---
---
50-65min
50-65min
40-55min
30-40min
LAV
LAV
SYNTETISKE
STOFFER
AKRYL
VARMEIND
STILLING
STOR
MÆNGDE
MEDIUM
MÆNGDE LILLE
MÆNGDE
DA 17

KNAPPER OG INDIKATORER
Programvælger – Vælg det ønskede program
Tidsindstillingsknap – Giver brugeren mulighed for at ændre varigheden af det valgte
program vha. programvælgeren. Den kan kun bruges ved valg af: Mix&Dry, Skjorter og
Tidsprogrammer
Knap for udskudt start – Giver brugeren mulighed for at udskyde starten på
tørrecyklussen (se detaljer under Betjening)
Knap for akryl/syntetisk – Tryk her for at vælge stoftype, hvis du skal tørre akryl og
syntetiske stoffer; ved tryk aktiveres akryl/syntetisk, og der kommer lys i indikatoren.
Antikrølknap – Giver brugeren mulighed for at vælge eftertørring med antikrølcyklus.
Start/Pause-knap – Tryk for at starte eller afbryde det valgte tørreprogram.
Memo-knap – Giver brugeren mulighed for at registrere det valgte program ved samtidig
tryk på knapperne for antikrøl og akryl/syntetisk i 3 sekunder, 2 minutter efter det valgte
program/funktion
Indikator for filterbehandling – Tændes, når filtret skal rengøres.
Indikator for ingen vand – Tændes, når vandbeholderen er fyldt op.
Display for automatisk vaskeprogram – Den tilknyttede indikator tændes, når der er valgt et
automatisk vaskeprogram.
Opfriskning – Indikatoren tændes, når programmet starter nedkølingsfasen.
Kontrolpanel Og Indikatorlys
DA 18
Tidsindstillings
knap Knap for
akryl/syntetisk Antikrølknap
Filterpleje-
indikator Displayet Start/Pause
-knap
Forsinket
start-knap
Tøm vand
indikator
Programvælger
VALG AF PROGRAM
Denne Candy sensor tørretumbler giver dig mange muligheder
for at tilpasse tørringen til dine specielle behov.
I tabellen nedenfor kan du se de forskellige programmer og
hvordan de fungerer.
Bemærk: Sensoren vil måske ikke kunne mærke hvis der kun er
få ting lagt I.Til små mængder tøj og enkelte stykker eller
fortørrede stoffer med lavt fugtindhold, skal de tidsindstillede
programmer anvendes. Indstil programmet til mellem 30 og 75
minutter afhængig af tøjmængden og den ønskede tørhedsgrad
og vælg høj eller lav varme afhængig af stoftype.
Hvis sensoren ikke kan mærke noget i tørretumbleren, kører den
kun i 10 min. før den går ind I afkølingsfasen.Er tøjmængden for
stor eller for våd til at tørretumbles, vil tørretumbleren automatisk
gå ind i afkølingsfasen efter ca. 3 timer.

VALG AF PROGRAM
DA 19
Rapid 40'
Mix & Dry
Skjorte
Tid
Memo
Vælg ønsket tørringsgrad. Du kan vælge mellem tørringsgrad til
håndklæder og badekåber, eller til tøj, som skal gemmes uden
strygning, eller det program, som gør vasketøjet klar til strygning.
Et skåneprogram udviklet specielt til at gøre uldstoffer blødere
efter lufttørring. Denne skånsomme varmluftscyklus, der varer 12
minutter, kan også bruges til at friske uldstoffer op, efter at de
har været gemt væk i klædeskabet.
Dette program er med særlig tidsindstilling til vasketøjsmængder
på op til 4 kg (117 min.). Standardvarigheden er 99 minutter og
giver mulighed for at tørre op til 3 kg. Med dette program kan du
tørre bomuld og syntetiske stoffer sammen.
Dette program er med særlig tidsindstilling til skjorter og med en
maksimal tøjmængde på 3 kg (78 min.). Hvis skjorterne er
syntetiske, skal du trykke på knappen for akryl/syntetisk.
Standardvarigheden er 60 minutter og giver mulighed for at tørre
op til 2 kg.
Tidsindstillingen omfatter alle de manuelle tidsprogrammer: fra 30
minutter til 180 minutter. Tidsindstillingen på 20 minutter gælder
kun ventilation med nedkølet luft (Opfriskning)
Memo-programmet giver mulighed for at gentage et program, som
brugeren har gemt tidligere, uden at vælge den rigtige
indstillingssekvens for programvælger og indstillingsknapper for
det pågældende program.
Programmet har en klargørings- og antikrølfunktion.
Tørretumbleren opvarmer vasketøjet i 9 minutter efterfulgt af 3
minutters nedkøling; denne funktion er særlig velegnet til tøj, som
har ligget et stykke tid inden strygning, f.eks. i en vaskekurv. Tøj kan
også blive stift, når det tørres udenfor på en tørresnor eller indenfor
på en radiator.
Dette program undgår, at tøjet krøller, og gør strygning hurtigere og
lettere.
Programmet Rapid 40' giver mulighed for hurtig afslutning af en
tørrecyklus. Dette program er ideelt, hvis du på mindre end 40
minutter gerne vil have tørt, opfrisket tøj lige klar til at tage på. Dette
specialprogram kontrollerer hele tiden temperaturen i tromlen. Den
maksimale tøjmængde er 2 kg, og programmet egner sig til alle slags
stoffer, hvor tørretumbling kan bruges.
PROGRAM BESKRIVELSE
Strygetørt
Meget tørt
Skabstørt
Dryptørt
Relax
Uld-finish

LÅGE OG FILTER
Åbning Af Døren
Træk i håndtaget for at
åbne lågen.
For at genstar te
tørretumbleren, luk
lågen og tryk på.
ADVARSEL! Når tørretumbleren er i brug
kan tromlen og lågen blive MEGET VARME. Du
må aldrig stoppe tørretumbleren, før
tørreprogrammet er afsluttet, medmindre tøjet
tages ud og spredes hurtigt, så det kan køles
ned.
Filterplejeindikator
lyser når filtret
behøver rengøring.
Hvis vasketøjet ikke
tørrer, skal det kontrol-
leres, at filtret ikke er
tilstoppet.
BRUG IKKE VAND TIL RENGØRING AF FILTERET
Filter
VIGTIGT: For at bevare tørretumblerens
effektivitet skal det kontrolleres, at fnugfiltret er
rent før hver tørrecyklus.
1. Træk filtret opad.
2. Åbn filtret som vist.
3 . F j e r n f o r s i g t i g t
bomuldsfibrene med
en blød børste eller
fingerspidserne.
4.Smæk filtret sammen
og skub det på plads.
VANDBEHOLDER
Det vand, der fjernes fra vasketøjet under
tørringen, amles i en beholder ved
tørretumblerens bund. Når beholderen er fuld,
lyser indikatoren på kontrolpanelet, og
beholderen SKAL tømmes. Vi anbefaler dog, at
beholderen tømmes efter hver tørring.
BEMÆRK: Der samles kun meget lidt vand I
forbindelse med en ny maskines første
tørringer, da en indvendig beholder fyldes først.
DA 20
Sådan Aftages Beholderen
1. Træk forsigtigt
bunden af sparke-
pladen, så den kan
tages af tørretum-
bleren. Den øverste del
kan derefter løftes af,
så sparkepladen kan
aftages helt.
2. Træk med et fast
greb i håndtaget og
træk vandbeholderen
ud af tørretumbleren.
Støt beholderen med
begge hænder. Når den
er fuld, vejer vand-
beholderen ca. 4 kg.
3 . Å b n l å g e t p å
beholderens overside
og hæld vandet ud.
4. Sæt låget på igen og
skub vandbe-holderen
tilbage på plads.
SKUB DEN PÅ PLADS
MED ET FAST GREB.
5. Sæt sparkepladen på
igen ved at tilkoble
hængslerne i toppen og
lad de nederste holdere
gå på plads med et
‘klik’.
6. Tryk på startknappen
f o r a t g e n t a g e
cyklussen.
Table of contents
Languages:
Other Candy Dryer manuals

Candy
Candy GCC 591NB User manual

Candy
Candy GO DV58GF User manual

Candy
Candy GODC38T/1 User manual

Candy
Candy CV116-S User manual

Candy
Candy GO DC 38T User manual

Candy
Candy CDV671X User manual

Candy
Candy GO DC 38 User manual

Candy
Candy CDC668 User manual

Candy
Candy CDV 265 E User manual

Candy
Candy GCV 580NC User manual

Candy
Candy RapidO H11A2TCEX-S User manual

Candy
Candy GRAND'O EVO EVOH 9813NA2 User manual

Candy
Candy GCC 590NB User manual

Candy
Candy GVC 71013NB Grand O Vita User manual

Candy
Candy Grando Evo EVOV 580NC User manual

Candy
Candy Grand O Evo Easy Case User manual

Candy
Candy GO DC 68G User manual

Candy
Candy GCC 590NB User manual

Candy
Candy GVC 7813NB User manual

Candy
Candy CV166 User manual