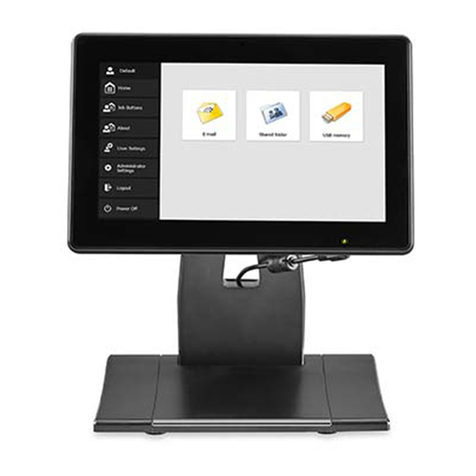
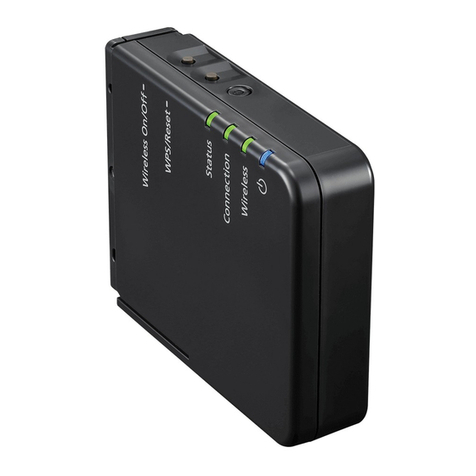
Canon Scan Kiosk II User manual

18001-20-UD2-001
Version 2.0
User’s Guide

2 Scan Kiosk II V2.0 User’s Guide
This page is intentionally left blank.

Scan Kiosk II V2.0 User’s Guide 3
Contents
Preface.......................................................................................................5
How to Use This Manual ..............................................................................................5
Symbols Used in This Manual ...................................................................................5
Buttons Used in This Manual.....................................................................................5
Displays Used in This Manual....................................................................................6
Hyperlinks..................................................................................................................6
Legal Notices................................................................................................................7
Trademarks................................................................................................................7
Copyright ...................................................................................................................7
Disclaimers ................................................................................................................7
Important Safety Instructions........................................................................................8
Installation Location...................................................................................................8
Power .....................................................................................................................9
Handling...................................................................................................................10
Chapter 1 Introduction..........................................................................11
1.1 Overview..........................................................................................................11
1.2 Parts and Their Functions................................................................................12
1.3 Entering Characters.........................................................................................15
1.3.1 Entering Characters Using the Virtual Keyboard........................................15
1.3.2 Entering Characters Using a USB Keyboard..............................................18
Chapter 2 Using Scan Kiosk II V2.0.....................................................19
2.1 Logging On ......................................................................................................19
2.2 Scanning to an E-Mail Address........................................................................22
2.3 Scanning to an FTP Server..............................................................................29
2.4 Scanning to a Shared Folder...........................................................................36
2.5 Scanning to USB Memory................................................................................43
2.6 Scanning to a Fax Server ................................................................................50
2.7 Scanning to a Printer.......................................................................................57
2.8 Specifying the Scan and Send Settings...........................................................65
2.9 Specifying the Batch Separation Settings......................................................104
Chapter 3 Configuring User Settings ................................................111
3.1 Configuring the User Administration Settings ................................................111
3.2 Configuring the Job Button Settings...............................................................138
3.2.1 Creating a New Job Button and Specifying the Job Button Settings........138
3.2.2 Modifying the Job Button Settings............................................................153
3.2.3 Copying a Job Button...............................................................................157
3.2.4 Deleting a Job Button...............................................................................164
3.2.5 Exporting a Job Button.............................................................................168
3.2.6 Importing a Job Button .............................................................................176


4 Scan Kiosk II V2.0 User’s Guide
3.3 Configuring the Address Book Settings .........................................................185
3.3.1 Creating a New Address...........................................................................185
3.3.2 Modifying an Address...............................................................................206
3.3.3 Copying an Address.................................................................................212
3.3.4 Deleting an Address.................................................................................219
3.3.5 Exporting an Address...............................................................................223
3.3.6 Importing an Address ...............................................................................228
3.4 Showing the Operation History......................................................................237
3.5 Displaying the Version Information................................................................241
3.6 Logging Off ....................................................................................................243
3.7 Powering OFF the Device..............................................................................244

Scan Kiosk II V2.0 User’s Guide 5
Preface
Thank you for purchasing Scan Kiosk II V2.0. Please read this manual thoroughly before
using the product. This is to familiarize you with the application’s capabilities, and make the
most of its many functions. After reading this manual, store it in a safe place for future
reference.
How to Use This Manual
This manual assumes that the reader has a good understanding of Canon’s DR G-Series
scanners and how to use a tablet PC.
This manual instructs the user on how to use Scan Kiosk II V2.0. This manual does not
provide instructions on how to specify Windows settings on the tablet, or how to configure
Scan Kiosk II V2.0. For instructions on configuring Scan Kiosk II V2.0, see the “Scan Kiosk
II V2.0 Setup and Administrator’s Guide.”
Symbols Used in This Manual
The following symbols are used in this manual to explain procedures, restrictions, handling
precautions, and instructions that should be observed for safety.
WARNING Indicates a warning for operations that may lead to death or injury to people
if not performed correctly. To use the tablet PC safely, always pay attention
to these warnings.
CAUTION Indicates a caution for operations that may lead to an injury if not performed
correctly. To use the tablet PC safely, always pay attention to these cautions.
IMPORTANT Indicates operational requirements and restrictions. Be sure to read these
items carefully to operate the machine correctly, and avoid damaging the
machine.
NOTE Indicates a clarification of an operation, or contains additional explanations
for a procedure. Reading these notes is highly recommended.
Buttons Used in This Manual
The following button names are a few examples of how buttons to be pressed are represented
in this manual:
Tablet PC [Button Name]
Example: Press [OK]

6 Scan Kiosk II V2.0 User’s Guide
Displays Used in This Manual
Screen shots of the tablet PC screens used in this manual are those taken when the Scan
Kiosk II V2.0 is being used with the DR-G1130 scanner.
The keys/buttons that you should press are marked with a circle, as shown below.
When multiple keys and buttons can be pressed, all keys and buttons are marked.
Example:
1. Press [FTP].
Hyperlinks
When this manual is in its native PDF form, the blue underlined text represents a hyperlink to
the corresponding sections of this manual or to external Web sites.
For example: See Chapter 1, “Introduction,” on p. 11.
Likewise, all entries in the Table of Contents are hyperlinks.
Press this
button for
operation.

Scan Kiosk II V2.0 User’s Guide 7
Legal Notices
Trademarks
Canon and the Canon logo are registered trademarks, of Canon Inc. in the United States and
may also be trademarks or registered trademarks in other countries.
imageFORMULA is a trademark of Canon Electronics Inc.
Microsoft, Windows, Windows Server, and Internet Explorer are registered trademarks of
Microsoft Corporation in the United States and are trademarks or registered trademarks of
Microsoft Corporation in other countries.
Adobe, Acrobat, and Adobe Reader are registered trademarks or trademarks of Adobe
Systems Incorporated in the United States and other countries.
Other product and company names herein are, or may be, the trademarks of their respective
owners.
Copyright
Copyright 2020 by Canon U.S.A., Inc. All rights reserved.
No part of this publication may be reproduced or transmitted in any form or by any means,
electronic or mechanical, including photocopying and recording, or by any information
storage or retrieval system without the prior written permission of Canon U.S.A., Inc.
Disclaimers
The information in this document is subject to change without notice.
CANON U.S.A., INC. MAKES NO WARRANTY OF ANY KIND WITH REGARD TO
THIS MATERIAL, EITHER EXPRESS OR IMPLIED, EXCEPT AS PROVIDED HEREIN,
INCLUDING WITHOUT LIMITATION, THEREOF, WARRANTIES AS TO
MARKETABILITY, MERCHANTABILITY, FITNESS FOR A PARTICULAR PURPOSE
OR USE OR NON-INFRINGEMENT. CANON U.S.A., INC. SHALL NOT BE LIABLE
FOR ANY DIRECT, INCIDENTAL, OR CONSEQUENTIAL DAMAGES OF ANY
NATURE, OR LOSSES OR EXPENSES RESULTING FROM THE USE OF THIS
MATERIAL.

8 Scan Kiosk II V2.0 User’s Guide
Important Safety Instructions
To ensure the safe operation of this product, be sure to read the safety warnings and
precautions described below.
Installation Location
Make sure that the location where the tablet PC is installed meets the criteria described below.
•Provide adequate space around the product for the proper operation, maintenance, and
ventilation.
•Avoid locations where a considerable amount of dust accumulates.
•Avoid warm or humid locations, such as in the vicinity of a water faucet, water heater, or
humidifier.
•Avoid locations where the fumes from ammonia, paint thinner, or other volatile
chemicals may be present.
•Avoid locations that are subject to vibration.
•Avoid exposing the product to rapid changes in temperature. If the room in which the
product is installed is cold, but rapidly heated, water droplets (condensation) may form
inside the product.
•Avoid locations near equipment that generate a magnetic field, such as speakers,
televisions, or radios.

Scan Kiosk II V2.0 User’s Guide 9
Power
•Connect the power plug to a power outlet of the rated voltage and power supply
frequency (either 120 V, 60 Hz or 220-240 V, 50/60 Hz, depending on your region).
•Do not connect other electrical equipment to the same power outlet to which the product
is connected. Also, when using an extension cord, make sure that the extension cord is
rated for the current requirements of the tablet PC.
•Never try to disassemble the AC adapter or modify it in any way, as this is extremely
dangerous.
•The power cord and AC adapter may become damaged if they are often stepped on, or if
heavy objects are placed on them. Continued use of a damaged power cord and AC
adapter can lead to an accident, such as a fire or electrical shock.
•Do not use the power cord while it is coiled.
•Do not pull directly on the power cord. When disconnecting the power cord, grasp the
plug and remove it from the outlet.
•Keep the area around the power plug clear of objects, so that the power cord can be
disconnected easily in an emergency.
•Use only the AC adapter provided with this product. Also, do not use the AC adapter
provided with any other electrical devices.

10 Scan Kiosk II V2.0 User’s Guide
Handling
Follow these precautions whenever you use the product. Failure to do so, may result in a fire
or electric shock.
WARNING
•Never use alcohol, benzene, paint thinner aerosol sprays, or any other highly flammable
substance near the product.
•Do not cut, damage, or modify the power cord or AC adapter. Do not place heavy objects
on the power cord or AC adapter, and do not pull or excessively bend the power cord.
•The supplied power cord set is intended for use with this product only. Do not use it with
other electronic equipment. In addition, do not use power cord sets other than the one
supplied with this product.
•Never connect the power cord when your hands are wet.
•Do not connect the product to a multi-plug power strip.
•Do not knot or coil the power cord. When connecting the power cord, make sure that the
power plug is securely and completely inserted into the power outlet.
•Never try to take the product apart or modify it in any way.
•Never try to take the AC adapter apart or modify it in any way.
•When cleaning the product, turn the power OFF and disconnect the power cord from the
power outlet.
•Do not allow water or flammable substances (alcohol, paint thinner, or benzene) to spill on
the product.
•Do not use the product with a power supply voltage other than 120V/220V to 240V AC.
CAUTION
•Do not install the product on a surface that is unstable or tilted, or in an area subject to
excessive vibrations, as this may cause the product to fall, and result in personal injury or
damage to the product.
•Do not drop the product or subject it to impact or strong shock. Should the product ever
become damaged, immediately turn the power OFF, and disconnect the power plug from
the power outlet.
•Do not place objects on top of the product, as they may tip over and fall, resulting in
personal injury.
•Turn OFF the power for safety when not using the product for a long period of time, such
as overnight. Also, turn OFF the power, and disconnect the AC adapter from the product
and disconnect the power cord from the power outlet for safety when the product will not
be used for an extended period of time, such as during consecutive holidays.

Scan Kiosk II V2.0 User’s Guide 11
Chapter 1 Introduction
This chapter provides an overview of the Scan Kiosk II V2.0 solution, the parts and functions
of the product, how to enter characters on the pop-up virtual keyboard, and an overview of
the User settings.
1.1 Overview
Scan Kiosk II V2.0 consists of a desktop Windows tablet PC and stand, support for a
specific series of DR scanners, and optional USB keyboard.
Scan Kiosk II V2.0 provides a Web-based scanning framework and scanning Web
service that enables users of an imageFORMULA DR-G-Series scanner to scan to a
shared folder, e-mail account (if configured), and USB memory.

12 Scan Kiosk II V2.0 User’s Guide
1.2 Parts and Their Functions
This section describes the tablet PC’s parts and their functions, and the Home screen.
Front and Side Views
¬Power Button:
Press to turn the tablet PC ON.
Indicator Lights (From Left to Right):
Power Indicator: Lights green when the
power is ON.
Hard Disk Drive: Lights green when there is
HDD activity.
Network Indicator: Lights green to indicate a
network connection.
® Tablet PC Stand:
Provides a stable platform to which the tablet
PC must be attached.
¯ Touch Panel Display:
Touch this screen to operate the Scan Kiosk II
V2.0 application.
Bottom View
¬ Serial Ports:
Not used in this configuration.
Network Ports:
Connect an Ethernet cable to configure your
network for the Scan Kiosk II V2.0 solution.
® USB 3.0 Ports:
Connect up to four USB peripherals, such as
a USB keyboard, mouse, and USB memory.
¯ Power and HDD Indicator Lights:
The Power indicator lights green when the
power is ON. The HDD indicator lights yellow
when there is HDD activity.
° Power Connector:
Connect the supplied AC adapter plug.

Scan Kiosk II V2.0 User’s Guide 13
Home Screen
Item Description
This button shows the user who is logged on to the device.
Press [Home] to go directly to the Home screen from another screen. The
button is grayed-out when the user is on the Home screen.
Press [Job Buttons] to go to the Job Buttons screen. The button is grayed-
out when the user is on the Job Buttons screen.
Press [About] to view the device information, such as the device’s IP
address.
Press [User Settings] to open the User Settings menu screen. The button is
grayed-out when the user is in the User Settings menu.
Press [Administrator Settings] to open the Administrator Settings password
screen. All sidebar buttons, except Logout and Power Off, are grayed-out
when the user is in the Administrator Settings menu.
Press [Logout] to log off the system.
Press [Power Off] to shut down and power OFF the system.
Press [E-mail] to start the scan-to-e-mail flow, and access the Address
selection screen. [E-mail] is only displayed if the Administrator configured
an e-mail server.
Press [FTP] to start the scan-to-FTP flow.

14 Scan Kiosk II V2.0 User’s Guide
Home Screen
Item Description
Press [Shared folder] to start the scan-to-shared folder flow, and access
the Address selection screen.
Press [USB memory] to start the scan-to-USB memory flow.
Press [FAX] to start the scan-to-fax flow. [FAX] is only displayed if the
Administrator configured a Fax server.
Press [Printer] to start the scan-to-print flow.

Scan Kiosk II V2.0 User’s Guide 15
1.3 Entering Characters
This section describes how to enter characters using the pop-up virtual keyboard or
optional USB keyboard that is attached to the Windows tablet PC.
1.3.1 Entering Characters Using the Virtual Keyboard
If you touch a text box and the pop-up virtual keyboard appears, enter characters
using the keys displayed on the touch panel display.
IMPORTANT
Certain keys on the keyboard, such as [CTRL] and [ALT] only work in the
Maintenance (Windows Administrator) mode.

16 Scan Kiosk II V2.0 User’s Guide
1. When the pop-up virtual keyboard appears, enter characters.
To enter uppercase letters, press [], [SHIFT], or [CAPS].
To enter a space, press the space bar.
To move the cursor, press [<] or [>].
To display the elongated (full) keyboard, press [ ] ➞select the full-size
keyboard layout.
To switch between letters, numbers and symbols, press [&123] ➞enter the
desired numbers or symbols. To scroll through the symbols press [ ][ ].
To go to the next field on the screen, press [Tab].
To change the layout of the keyboard, press [ ].
To fix the keyboard to the bottom of the screen, press [ ]. To enable a floating
keyboard, so that you can drag it anywhere on the screen), press [ ].
NOTE
•If you make a mistake when entering characters, press [] (Backspace), or
press [<] or [>] to position the cursor ➞press [] (Backspace) to delete the
characters.
•The maximum number of characters that you can enter vary, depending on the
fields in which you are entering characters.
•The [ENTER] key ( ) acts as if you pressed [OK] on the screen. It does not
move you to the next line in a field.

Scan Kiosk II V2.0 User’s Guide 17
2. When you have entered all characters, press [] to close the keyboard.

18 Scan Kiosk II V2.0 User’s Guide
1.3.2 Entering Characters Using a USB Keyboard
If you connect a USB keyboard to the machine, you can enter characters using that
keyboard.
1. Press the text boxes into which you want to enter characters ➞make sure the
cursor is focused in the text box ➞enter characters.
If a virtual keyboard appears, press [] to close the virtual keyboard.
IMPORTANT
The ENTER key on the USB keyboard is only used to enter line breaks, and to
log in on the Log In screen.

Scan Kiosk II V2.0 User’s Guide 19
Chapter 2 Using Scan Kiosk II V2.0
This chapter describes how to use the Scan Kiosk II V2.0 solution. It also shows how to log
on to Scan Kiosk II V2.0 (if configured), and how to use Job Buttons, scan to a shared folder,
an e-mail address (if a mail server is configured), and to USB memory.
2.1 Logging On
If the Administrator configured an Authentication server and log-on credentials, you
must log on to the device.
There are two log on screen types:
1. List Type: You must select your user name from a list of registered users.
2. Key-in Type: You must enter your user name and password.
IMPORTANT
The User Name and Password fields are case-sensitive.

20 Scan Kiosk II V2.0 User’s Guide
1. Log on to the device.
1.1 If the Administrator configured the List Type Login screen, select your user
name from the list ➞enter your password in the [Password] text box.
For instructions on entering characters from the pop-up virtual keyboard or
USB keyboard, see “Entering Characters,” on p. 15.
Other manuals for Scan Kiosk II
1
Table of contents
Other Canon Adapter manuals

Canon
Canon CA-30 User manual

Canon
Canon BU-10 User manual

Canon
Canon WA10 User manual

Canon
Canon CA-400 User manual

Canon
Canon EF-EOS R User manual

Canon
Canon CA-PS500 User manual

Canon
Canon IEEE 1394 User manual

Canon
Canon EF-EOS M User manual

Canon
Canon LV-WN02 User manual

Canon
Canon ProLock-i Mark3 User manual

Canon
Canon CA-570 User manual

Canon
Canon Scan Kiosk II Instruction Manual

Canon
Canon PD-MM100 User manual

Canon
Canon CB-400 User manual

Canon
Canon CA-PS700 Installation instructions

Canon
Canon PA-V18 User manual

Canon
Canon NA10 User manual

Canon
Canon 7920A001 - GL 2 Camcorder User manual

Canon
Canon FAU-S11 User manual