Canon Scan Kiosk II Instruction Manual

18001-20-UD1-003
Version 2.0
Setup and Administrator’s
Guide

2 Scan Kiosk II V2.0 Setup and Administrator’s Guide
This page is intentionally left blank.

Scan Kiosk II V2.0 Setup and Administrator’s Guide 3
Contents
Preface.......................................................................................................7
How to Use This Manual ..............................................................................................7
Symbols Used in This Manual ...................................................................................7
Buttons Used in This Manual.....................................................................................7
Displays Used in This Manual....................................................................................8
Hyperlinks..................................................................................................................8
Legal Notices................................................................................................................9
Trademarks................................................................................................................9
Copyright ...................................................................................................................9
Disclaimers ................................................................................................................9
FCC Regulations......................................................................................................10
Radio Interference Regulations................................................................................11
Important Safety Instructions......................................................................................12
Installation Location.................................................................................................12
Power ...................................................................................................................13
Handling...................................................................................................................14
Chapter 1 Introduction..........................................................................15
1.1 Overview..........................................................................................................15
1.2 System Requirements......................................................................................16
1.2.1 Scan Kiosk II Tablet PC Specifications.......................................................16
1.2.2 Hardware Requirements.............................................................................17
1.2.2.1 Scanner Specifications............................................................................17
1.2.2.2 Windows 10 Enterprise Features............................................................17
1.2.2.3 Network Environment..............................................................................18
1.2.2.4 Directory Service Support.......................................................................18
1.3 Parts and Their Functions................................................................................19
1.4 Entering Characters.........................................................................................20
1.4.1 Entering Characters Using the Virtual Keyboard........................................20
1.4.2 Entering Characters Using a USB Keyboard..............................................23
Chapter 2 Setting Up Scan Kiosk II......................................................25
2.1 Initial System Startup.......................................................................................25
2.2 Logging On to the Windows Admin Mode........................................................27
2.3 Enabling Auto Login.........................................................................................29
2.4 Updating the Device Certificate .......................................................................32
2.5 Applying Windows Updates.............................................................................34
Chapter 3 Logging On ..........................................................................37
3.1 Logging On for the First Time..........................................................................37
3.2 Logging On after the Administrator Password Has Been Set ..........................40

4 Scan Kiosk II V2.0 Setup and Administrator’s Guide
Chapter 4 Configuring the Administrator Settings.............................43
4.1 Configuring the User Administration Settings ..................................................43
4.1.1 Creating a New User and Specifying the User Administration Settings......44
4.1.2 Modifying a User.........................................................................................74
4.1.3 Restricting User Functions .........................................................................77
4.1.4 Deleting a User...........................................................................................84
4.1.5 Deleting a User by Server Synchronization................................................88
4.1.6 Exporting a User.........................................................................................92
4.1.7 Importing a User.........................................................................................96
4.2 Configuring the Job Button Settings...............................................................102
4.2.1 Creating a New Job Button and Specifying the Job Button Settings ........102
4.2.2 Modifying the Job Button Settings............................................................116
4.2.3 Copying a Job Button...............................................................................119
4.2.4 Deleting a Job Button...............................................................................125
4.2.5 Exporting a Job Button.............................................................................128
4.2.6 Importing a Job Button .............................................................................135
4.3 Configuring the Server Settings.....................................................................143
4.3.1 Configuring an E-Mail Server ...................................................................143
4.3.2 Configuring a Fax Server..........................................................................155
4.3.3 Configuring an Authentication Server.......................................................159
4.3.4 Configuring an Address Book Server .......................................................168
4.3.5 Configuring an FTP Server.......................................................................172
4.3.6 Configuring an HTTP Proxy Server..........................................................175
4.3.7 Configuring an FTP Proxy Server.............................................................178
4.4 Configuring the Address Book Settings .........................................................181
4.4.1 Creating a New Address...........................................................................181
4.4.2Modifying an Address...............................................................................194
4.4.3 Copying an Address.................................................................................199
4.4.4 Deleting an Address.................................................................................206
4.4.5 Exporting an Address...............................................................................210
4.4.6 Importing an Address ...............................................................................215
4.5 Device Configuration Settings........................................................................222
4.5.1 Specifying the SMB Settings....................................................................222
4.5.2 Verifying the Language, Time Zone, and Daylight Saving Time...............226
4.5.3 Verifying the Date and Time.....................................................................229
4.5.4 Specifying the Auto Log Out Settings.......................................................232
4.5.5 Accessing the Windows Admin Mode.......................................................236
4.5.6 Updating the Device Certificate................................................................239
4.5.7 Initializing All Settings...............................................................................243
4.6 Configuring the System Settings....................................................................246
4.6.1 Backing Up All Data..................................................................................246
4.6.2 Restoring Data..........................................................................................253
4.6.3 Displaying the Version Information...........................................................257
4.6.4 Specifying the Logging Settings...............................................................260

Scan Kiosk II V2.0 Setup and Administrator’s Guide 5
4.7 Configuring the System Administration Settings............................................267
4.7.1 Specifying the Log On Type.....................................................................267
4.7.2 Testing the Network Connection...............................................................271
4.7.3 Changing the Administrator’s Password and E-Mail Address...................275
4.8 Importing Root Certificates ............................................................................280
4.8.1 Importing a Root Certificate......................................................................281
4.8.2 Viewing the Detailed Information of a Certificate......................................287
4.8.3 Deleting a Root Certificate........................................................................290
4.9 Showing the Operation History......................................................................294
4.9.1 Viewing the Device’s Operation History....................................................294
4.9.2 Exporting the Device’s Operation History.................................................299
4.9.3 Deleting the Device’s Entire Operation History.........................................303
4.10 Registering and Deleting an SFTP Private Key.............................................306
4.10.1 Registering an SFTP Private Key.............................................................306
4.10.2 Deleting an SFTP Private Key..................................................................310
Chapter 5 Troubleshooting ................................................................315

6 Scan Kiosk II V2.0 Setup and Administrator’s Guide
This page is intentionally blank.

Scan Kiosk II V2.0 Setup and Administrator’s Guide 7
Preface
Thank you for purchasing Scan Kiosk II V2.0. Please read this manual thoroughly before
setting up and configuring the product. This is to familiarize you with the application’s
capabilities, and make the most of its many functions. After reading this manual, store it in a
safe place for future reference.
How to Use This Manual
This manual assumes that the reader has a good understanding of Canon’s DR G-Series
scanners, a Windows tablet PC, the Windows 10 Enterprise OS (Operating System), and an
understanding of how to set up a network and network servers, such as an e-mail server.
This manual provides instructions for the configuration and administration of Scan Kiosk II.
This manual does not provide instructions on how to specify Windows settings on the tablet
or instructions on how to use Scan Kiosk II. For instructions on using Scan Kiosk II, see the
“Scan Kiosk II User’s Guide.”
Symbols Used in This Manual
The following symbols are used in this manual to explain procedures, restrictions, handling
precautions, and instructions that should be observed for safety.
WARNING Indicates a warning for operations that may lead to death or injury to people
if not performed correctly. To use the tablet PC safely, always pay attention
to these warnings.
CAUTION Indicates a caution for operations that may lead to an injury if not performed
correctly. To use the tablet PC safely, always pay attention to these cautions.
IMPORTANT Indicates operational requirements and restrictions. Be sure to read these
items carefully to operate the machine correctly, and avoid damaging the
machine.
NOTE Indicates a clarification of an operation, or contains additional explanations
for a procedure. Reading these notes is highly recommended.
Buttons Used in This Manual
The following button names are a few examples of how buttons to be pressed are represented
in this manual:
Tablet PC [Button Name]
Example: Press [OK]

8 Scan Kiosk II V2.0 Setup and Administrator’s Guide
Displays Used in This Manual
Screen shots of the tablet PC screens used in this manual are those taken when the Scan
Kiosk II is being configured on the DR-G1130 scanner.
The keys/buttons that you should press are marked with a circle, as shown below.
When multiple keys/buttons can be pressed, all keys/buttons are marked.
Example:
1. Press [Address Book Settings].
Hyperlinks
When this manual is in its native PDF form, the blue underlined text represents a hyperlink to
the corresponding sections of this manual or to external Web sites.
For example: See Chapter 1, “Introduction,” on p. 15.
Likewise, all entries in the Table of Contents are hyperlinks.
Press this
button for
operation.

Scan Kiosk II V2.0 Setup and Administrator’s Guide 9
Legal Notices
Trademarks
Canon and the Canon logo are registered trademarks, of Canon Inc. in the United States and
may also be trademarks or registered trademarks in other countries.
imageFORMULA is a trademark of Canon Electronics Inc.
Microsoft, Windows, Windows Server, and Internet Explorer are registered trademarks of
Microsoft Corporation in the United States and are trademarks or registered trademarks of
Microsoft Corporation in other countries.
Adobe, Acrobat, and Adobe Reader are registered trademarks or trademarks of Adobe
Systems Incorporated in the United States and other countries.
Other product and company names herein are, or may be, the trademarks of their respective
owners.
Copyright
Copyright 2020 by Canon U.S.A., Inc. All rights reserved.
No part of this publication may be reproduced or transmitted in any form or by any means,
electronic or mechanical, including photocopying and recording, or by any information
storage or retrieval system without the prior written permission of Canon U.S.A., Inc.
Disclaimers
The information in this document is subject to change without notice.
CANON U.S.A., INC. MAKES NO WARRANTY OF ANY KIND WITH REGARD TO
THIS MATERIAL, EITHER EXPRESS OR IMPLIED, EXCEPT AS PROVIDED HEREIN,
INCLUDING WITHOUT LIMITATION, THEREOF, WARRANTIES AS TO
MARKETABILITY, MERCHANTABILITY, FITNESS FOR A PARTICULAR PURPOSE
OR USE OR NON-INFRINGEMENT. CANON U.S.A., INC. SHALL NOT BE LIABLE
FOR ANY DIRECT, INCIDENTAL, OR CONSEQUENTIAL DAMAGES OF ANY
NATURE, OR LOSSES OR EXPENSES RESULTING FROM THE USE OF THIS
MATERIAL.

10 Scan Kiosk II V2.0 Setup and Administrator’s Guide
FCC Regulations
This device complies with Part 15 of the FCC Rules. Operation is subject to the following
two conditions: (1) This device may not cause harmful interference, and; (2) This device
must accept any interference received, including interference that may cause undesired
operation.
NOTE: This equipment has been tested and found to comply with the limits for a Class B
digital device, pursuant to part 15 of the FCC Rules. These limits are designed to provide
reasonable protection against harmful interference in a residential installation. This
equipment generates—and can radiate—radio frequency energy and, if not installed and used
in accordance with the instructions, may cause harmful interference to radio communications.
However, there is no guarantee that interference will not occur in a particular installation. If
the equipment does not cause harmful interference to radio or television reception, which can
be determined by turning the equipment off and on, the user is encouraged to try to correct
the interference by one or more of the following measures:
-Reorient or relocate the receiving antenna
-Increase the separation between the equipment and the receiver
-Connect the equipment into an outlet on a circuit different from that to which the receiver
is connected.
The provided shielded USB cable must be used with this unit to ensure compliance with the
Class B FCC limits.
WARNING: CHANGES OR MODIFICATIONS TO THIS UNIT NOT EXPRESSLY
APPROVED BY THE PARTY RESPONSIBLE FOR COMPLIANCE, COULD VOID THE
USER'S AUTHORITY TO OPERATE THE EQUIPMENT.
DO NOT MAKE ANY CHANGES OR MODIFICATIONS TO THE EQUIPMENT UNLESS
OTHERWISE SPECIFIED IN THE MANUAL. IF SUCH CHANGES OR MODIFICATIONS
SHOULD BE MADE, YOU COULD BE REQUIRED TO STOP OPERATION OF THE
EQUIPMENT.
ICES-003 Class B Notice – NMB-003, Class B
This Class B digital apparatus complies with Canadian ICES-003.
Cet appareil numérique de la classe B est conforme à la norme NMB-003 du Canada.
Canon USA, Inc.
One Canon Park, Melville, NY 11747, U.S.A., Tel. No. (800) 652-2666

Scan Kiosk II V2.0 Setup and Administrator’s Guide 11
Radio Interference Regulations
This digital apparatus does not exceed the Class B limits for radio noise emissions from
digital apparatus as set out in the Interference-causing equipment standard entitled “Digital
Apparatus,” ICES-003 of the Industry Canada.
RÈGLEMENT SUR LE BROUILLAGE RADIOÉLECTRIQUE
Cet appareil numérique respecte les limites de bruits radioélectriques applicables aux
appareils numériques de Classe B prescrites dans la norme sur le matériel brouilleur:
“Appareils Numériques”, NMB-003 édictée par l’Industrie Canada.

12 Scan Kiosk II V2.0 Setup and Administrator’s Guide
Important Safety Instructions
To ensure the safe operation of this product, be sure to read the safety warnings and
precautions described below.
Installation Location
Make sure that the location where the tablet PC is installed meets the criteria described below.
•Provide adequate space around the product for the proper operation, maintenance, and
ventilation.
•Avoid locations where a considerable amount of dust accumulates.
•Avoid warm or humid locations, such as in the vicinity of a water faucet, water heater, or
humidifier.
•Avoid locations where the fumes from ammonia, paint thinner, or other volatile
chemicals may be present.
•Avoid locations that are subject to vibration.
•Avoid exposing the product to rapid changes in temperature. If the room in which the
product is installed is cold, but rapidly heated, water droplets (condensation) may form
inside the product.
•Avoid locations near equipment that generate a magnetic field, such as speakers,
televisions, or radios.

Scan Kiosk II V2.0 Setup and Administrator’s Guide 13
Power
•Connect the power plug to a power outlet of the rated voltage and power supply
frequency (either 120 V, 60 Hz or 220-240 V, 50/60 Hz, depending on your region).
•Do not connect other electrical equipment to the same power outlet to which the product
is connected. Also, when using an extension cord, make sure that the extension cord is
rated for the current requirements of the tablet PC.
•Never try to disassemble the AC adapter or modify it in any way, as this is extremely
dangerous.
•The power cord and AC adapter may become damaged if they are often stepped on, or if
heavy objects are placed on them. Continued use of a damaged power cord and AC
adapter can lead to an accident, such as a fire or electrical shock.
•Do not use the power cord while it is coiled.
•Do not pull directly on the power cord. When disconnecting the power cord, grasp the
plug and remove it from the outlet.
•Keep the area around the power plug clear of objects, so that the power cord can be
disconnected easily in an emergency.
•Use only the AC adapter provided with this product. Also, do not use the AC adapter
provided with any other electrical devices.

14 Scan Kiosk II V2.0 Setup and Administrator’s Guide
Handling
Follow these precautions whenever you use the product. Failure to do so, may result in a fire
or electric shock.
WARNING
•Never use alcohol, benzene, paint thinner aerosol sprays, or any other highly flammable
substance near the product.
•Do not cut, damage, or modify the power cord or AC adapter. Do not place heavy objects
on the power cord or AC adapter, and do not pull or excessively bend the power cord.
•The supplied power cord set is intended for use with this product only. Do not use it with
other electronic equipment. In addition, do not use power cord sets other than the one
supplied with this product.
•Never connect the power cord when your hands are wet.
•Do not connect the product to a multi-plug power strip.
•Do not knot or coil the power cord. When connecting the power cord, make sure that the
power plug is securely and completely inserted into the power outlet.
•Never try to take the product apart or modify it in any way.
•Never try to take the AC adapter apart or modify it in any way.
•When cleaning the product, turn the power OFF and disconnect the power cord from the
power outlet.
•Do not allow water or flammable substances (alcohol, paint thinner, or benzene) to spill on
the product.
•Do not use the product with a power supply voltage other than 120V/220V to 240V AC.
CAUTION
•Do not install the product on a surface that is unstable or tilted, or in an area subject to
excessive vibrations, as this may cause the product to fall, and result in personal injury or
damage to the product.
•Do not drop the product or subject it to impact or strong shock. Should the product ever
become damaged, immediately turn the power OFF, and disconnect the power plug from
the power outlet.
•Do not place objects on top of the product, as they may tip over and fall, resulting in
personal injury.
•Turn OFF the power for safety when not using the product for a long period of time, such
as overnight. Also, turn OFF the power, and disconnect the AC adapter from the product
and disconnect the power cord from the power outlet for safety when the product will not
be used for an extended period of time, such as during consecutive holidays.

Scan Kiosk II V2.0 Setup and Administrator’s Guide 15
Chapter 1 Introduction
This chapter provides an overview of the Scan Kiosk II solution, system requirements for
setting up and configuring the software, the parts and functions of the product, how to enter
characters on the pop-up virtual keyboard, and an overview of the Administrator settings.
1.1 Overview
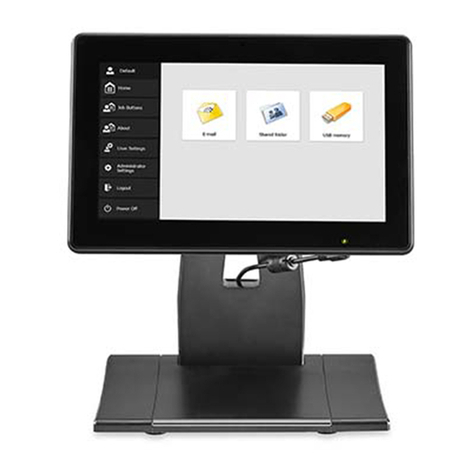
Scan Kiosk II V2.0 consists of a desktop Windows tablet PC and stand, support for a
specific series of DR scanners, and optional USB keyboard.
Scan Kiosk II provides a Web-based scanning framework and scanning Web service
that enables users of an imageFORMULA DR-G-Series scanner to scan to a shared
folder, e-mail account (if configured), and USB memory.
The tablet PC hosts the Windows 10 operating system, which is accessible to
administrators by switching between the Kiosk and Maintenance modes.
•Maintenance Mode: This is also called the Windows Admin Mode. It provides the
System Administrator with full access to the Windows 10
Enterprise OS on the tablet PC.
IMPORTANT
•Only use this mode if you want to change the network configuration or apply
Windows updates to the tablet PC.
•Be careful when you perform operations in the Windows Admin Mode. Any
procedures that are not mentioned in this guide, may disable the Scan Kiosk II device.
•Kiosk Mode: The end-user can only access the Scan Kiosk II application in
the Kiosk mode.
IMPORTANT
•Scan Kiosk II requires an Administrator to be authenticated to set up and configure
the product on the Windows tablet PC.
•Scan Kiosk II can be configured at the device, or remotely from a Web browser. If
you are configuring Scan Kiosk II remotely, some screens may differ from the ones
that appear on the local UI. This manual mainly shows how to configure Scan Kiosk
II remotely.

16 Scan Kiosk II V2.0 Setup and Administrator’s Guide
1.2 System Requirements
Scan Kiosk II requires the proper set up and configuration of all the items documented
in this guide. Failure to correctly set up and configure Scan Kiosk II will affect its
operation.
1.2.1 Scan Kiosk II Tablet PC Specifications
Item
Scan Kiosk II Specifications
Type Network Scanning Station
Display 10.1” HD touch screen
Windows OS Embedded Windows 10 Enterprise IoT
Supported Web Browser
Microsoft Internet Explorer 11 or higher
Firefox 6.4 or higher
Chrome 7.1 or higher
System Resources Intel Core i5 CPU, 128 GB storage, 16 GB RAM
Network Compatibility Ethernet 10/100/1,000Base-T, RJ-45 port (x2)
Interface
Two (2) Network ports
Four (4) USB 3.0 ports
Options USB Keyboard
Power
Consumption
Maximum
(While in
Operation)
Approximately 28.6 W
Sleep Mode Approximately 2.64 W
Dimensions (W x D x H)
Tablet and Stand: Approximately 10.75” x 7.5” x 12”
Tablet Only: Approximately 10.75” x 1.7” x 7.0”
Weight
Tablet and Stand: Approximately 6.5 lb
Tablet Only: Approximately 3.4 lb
Warranty
90 days

Scan Kiosk II V2.0 Setup and Administrator’s Guide 17
1.2.2 Hardware Requirements
Scan Kiosk II is designed to operate on the following Canon imageFORMULA DR
scanners.
•DR-G1100
•DR-G2110
•DR-G2110 (USB Only)
•DR-G1130
•DR-G2140
•DR-G2140 (USB Only)
•DR-X10C II
•DR-G2090 (USB Only)
IMPORTANT
The DR Scanners are sold separately, and are not included in the Scan Kiosk II
package.
1.2.2.1 Scanner Specifications
1.2.2.2 Windows 10 Enterprise Features
•Supports the transfer of scanned image files to shared folders, USB memory, and
e-mail addresses
•Tablet Mode for Scan Kiosk II’s User Account
•Support for Touch Screen Virtual Keyboard
•Support for Directory Services (Active Directory and OpenLDAP)
CAUTION
It is recommended that you do not specify or change settings in Windows.
Changing the Windows settings, may affect the operation of Scan Kiosk, and cause
it to malfunction.
IMPORTANT
Windows Automatic Updates are disabled.
DR-G1100 DR-G1130 DR-X10CII DR-G2090 USB Only DR-G2110 (and USB Only) DR-G2140 (and USB Only)
Monochrome Speed 100ppm/200ipm 130ppm/260ipm 130ppm/260ipm 90ppm/180ipm 110ppm/220ipm 140ppm/280ipm
Color Speed 100ppm/200ipm 130ppm/260ipm 130ppm/260ipm 90ppm/180ipm 110ppm/220ipm 140ppm/280ipm
ADF Capacity 500 Sheets 500 Sheets 500 Sheets 300 Sheets 500 Sheets 500 Sheets
Scanning Side Simplex/Duplex Simplex/Duplex Simplex/Duplex Simplex/Duplex Simplex/Duplex Simplex/Duplex
Suggested Daily Volume 25, 0000 scans 30, 0000 scans 60, 0000 scans 30, 0000 scans 50, 0000 scans 70, 0000 scans
Document Size up to ledger up to ledger up to ledger up to ledger up to ledger up to ledger
Scanner Spec by Model
Scan Kiosk II with Scanner

18 Scan Kiosk II V2.0 Setup and Administrator’s Guide
1.2.2.3 Network Environment
The Scan Kiosk II device supports the network protocols described below.
•Network Protocol:
Scan Kiosk II uses the TCP/IP protocol to connect to the network.
•IP Address Assignment:
The TCP/IP protocol uses one IP address for each device connected to the
network via DHCP (Dynamic Host Configuration Protocol). The Administrator
can configure static IP address for each device via the Windows Admin mode. For
more information, see “Accessing the Windows Admin Mode,” on p. 236.
•DHCP Support:
Scan Kiosk II uses the DHCP. The DHCP obtains the device’s IP address
automatically from a DHCP server. If this is acceptable for your network
environment, you do not have to configure the IP address for the device.
•1000Base-T Support:
Scan Kiosk II supports up to 1000Base-T Ethernet. However, communication
may be slower than the communication speed of the network, depending on the
number of devices connected to the network and the type of hub.
•SMTP (E-mail) Server Support
If you set up an SMTP (Simple Mail Transfer Protocol) server, you can send
scanned image files directly from a supported scanner to an e-mail address.
1.2.2.4 Directory Service Support
The Scan Kiosk II device supports the directory services described below.
•Active Directory:
Active Directory enables network administrators to create and manage domains,
users, and objects within a network. For example, an Administrator can create a
group of users and give them specific access privileges to certain directories on
the server.
●OpenLDAP Server:
OpenLDAP servers connect to the network through the LDAP (Lightweight
Directory Access Protocol). OpenLDAP enables an Administrator to authenticate
registered users on the OpenLDAP server, reference their e-mail addresses, and
register them in the Address Book in Scan Kiosk II.

Scan Kiosk II V2.0 Setup and Administrator’s Guide 19
1.3 Parts and Their Functions
This section describes the tablet PC’s parts and their functions.
Front and Side Views
¬Power Button:
Press to turn the tablet PC ON.
Indicator Lights (From Left to Right):
Power Indicator: Lights green when the
power is ON.
Hard Disk Drive: Lights green when there is
HDD activity.
Network Indicator: Lights green to indicate a
network connection.
® Tablet PC Stand:
Provides a stable platform to which the tablet
PC must be attached.
¯ Touch Panel Display:
Touch this screen to operate the Scan Kiosk II
application.
Bottom View
¬ Serial Ports:
Not used in this configuration.
Network Ports:
Connect an Ethernet cable to configure your
network for the Scan Kiosk II solution.
® USB 3.0 Ports:
Connect up to four USB peripherals, such as a
USB keyboard, mouse, and USB memory.
¯ Power and HDD Indicator Lights:
The Power indicator lights green when the
power is ON. The HDD indicator lights yellow
when there is HDD activity.
° Power Connector:
Connects to the supplied AC adapter plug.

20 Scan Kiosk II V2.0 Setup and Administrator’s Guide
1.4 Entering Characters
This section describes how to enter characters using the pop-up virtual keyboard or
optional USB keyboard that is attached to the Windows tablet PC.
1.4.1 Entering Characters Using the Virtual Keyboard
If you touch a text box and the pop-up virtual keyboard appears, enter characters
using the keys displayed on the touch panel display.
IMPORTANT
Certain keys on the keyboard, such as [CTRL] and [ALT] only work in the
Maintenance (Windows Administrator) mode.
Other manuals for Scan Kiosk II
1
Table of contents
Other Canon Adapter manuals

Canon
Canon PA-V18 User manual

Canon
Canon CA-PS700 Installation instructions

Canon
Canon Scan Kiosk II User manual

Canon
Canon BU-10 User manual

Canon
Canon FAU-S11 User manual

Canon
Canon CA-30 User manual

Canon
Canon EF-EOS M User manual

Canon
Canon PD-MM100 User manual

Canon
Canon NA10 User manual

Canon
Canon CA-PS500 User manual