manuals.online logo
Brands
  1. Home
  2. •
  3. Brands
  4. •
  5. Canon
  6. •
  7. All In One Printer
  8. •
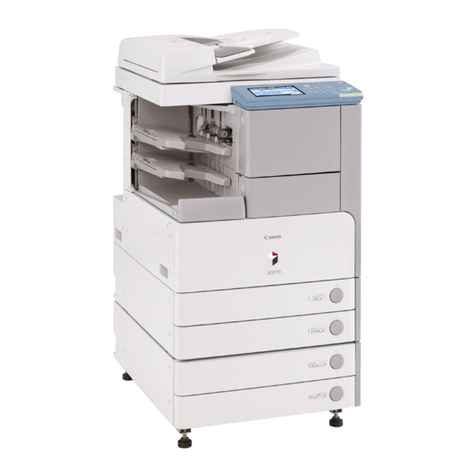
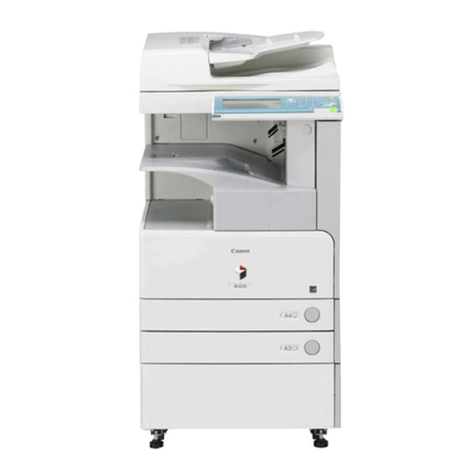
  9. Canon imageRUNNER Advance C2020i Operating and installation instructions

Canon imageRUNNER Advance C2020i Operating and installation instructions

(1/11)
Service Information
Office Imaging Products Quality Assurance Center
Copier Color
HARDWARE
Revised:
Location:
LASER SCANNER UNIT
Subject:
Measure to E020-1x60 immediately after replacing the drum unit
Symptom
E020-1x60 may occur immediately after replacing the drum unit.
- E020-1x60: Detected light patch reading value (X:0=Y, 1=M, 2=C, 3=K)
Cause
The laser scanner unit is assembled in clean room so that no dust can get inside which causes faulty images. Also the
seams of the housing are sealed up to shut out dusts from the operation environment. However, small particles of 1
micrometer or less may invade inside the machine depending upon the operation environment, and the invaded small
particles may soil the polygon mirrors. This soiling diminished laser intensity that led to the above mentioned
symptom.
Model:
imageRUNNER ADVANCE C2020i
imageRUNNER ADVANCE C2020L
imageRUNNER ADVANCE C2025i
imageRUNNER ADVANCE C2030i
imageRUNNER ADVANCE C2030L
iR-ADV C2220I
iR-ADV C2220L
iR-ADV C2225
iR-ADV C2225I
iR-ADV C2230I
Ref No.:
F2-T01-N13-10125-01
Date:
December 17, 2013
Approved by:
Ichiki Yasuhisa
F2-T01-N13-10125-01
(2/11)
Service work
Distinguish if the polygon mirrors are soiled by following the procedure below. If the cleaning of the polygon mirrors
are required after this work, perform the cleaning following "B. Procedure to clean the polygon mirrors" hereinafter
described.
[Caution] During the cleaning procedure to be described, disassembly in field environment may allow dusts get
inside. Therefore be careful not to allow dusts get inside as far as possible.
A. Procedure to distinguish the soiled polygon mirrors
Way to distinguish 1
If the polygon mirrors inside the laser scanner unit are soiled, the laser intensity is diminished and the density of the
end of the image within the red circled parts come out lighter. The sample below is test print of PG-TYPE:16.
Because the writing direction of the laser is different between Y/M and C/K, the directions come out lighter are
different, that is, [A] sides come out lighter with Y and M, [B] sides with C and K. [C] indicates the direction of
feeding paper.
F2-T01-N13-10125-01
(3/11)
1) Set the replaced old drum temporarily and turn the main power on.
2) Go to Service mode > Mode List > COPIER > Test > PG > PG-PICK and select the paper source of "A4" or "LTR"
paper.
3) Go to Service mode > Mode List > COPIER > Test > PG > PG-TYPE and enter "16", push "OK" key and then
"Start" button.
[Reference] When outputting the test print of PG-TYPE: 16, the density is fixed to "160" regardless of the set values
in DENS-Y/M/C/K.
4) Check to see if the light image is not generated on [A] sides of Y/M or on [B] sides of C/K with the test print output
in the step 3). If the light image is generated, then go to "B. Procedure to clean the polygon mirrors". If it is difficult
to check whether the image is light or not, then go to "Way to distinguish 2".
Way to distinguish 2
1) Go to Service mode > Mode List > COPIER > Test > PG > PG-PICK and select the paper source of "A4" or "LTR"
paper.
2) Go to Service Mode > Mode List > COPIER > Test > PG > PG-TYPE and enter "5".
3) Go to Service Mode > Mode List > COPIER > Test > PG >, set DENS-Y/M/C/K as shown in the table below, then
output test print of halftone for each color.
T-1
DENS-Y DENS-M DENS-C DENS-K
Yellow halftone image 128 0 0 0
F2-T01-N13-10125-01
(4/11)
In the test print of halftone with the above mentioned settings, if a sample image is output in lighter color such as the
red circled [a] parts as shown below, go to "B. Procedure to clean the polygon mirrors". The arrow indicates the
direction of feeding paper.
If the light image is not generated, then check other factors.
B. Procedure to clean the polygon mirrors
1) Turn off the main power SW, and pull the cassette 1 out of main body slightly.
2) Open the front cover, and remove 1 screw to remove the left cover.
3) Remove the fan duct [1] in the direction of the arrow while removing 1 boss [a].
Magenta halftone image 0 128 0 0
Cyan halftone image 0 0 128 0
Black halftone image 0 0 0 128
DENS-Y DENS-M DENS-C DENS-K
F2-T01-N13-10125-01
(5/11)
4) Disconnect the 2 flat cables and 1connector.
5) Push the scanner retaining spring [1] in the direction of [a] to release from the guide and then remove the same
spring.
F2-T01-N13-10125-01
(6/11)
6) Unlock the protrusion [a] in the direction of [b], release the harness guide and disconnect the flat cable by moving
in the direction of [c].
7) Lift the grip so that the protrusion [a] beneath the laser scanner unit comes off the hole [b] at the stay on the main
body, and pull out the laser scanner unit.
F2-T01-N13-10125-01
(7/11)
[Caution] Pay attention to the following points when to install the Laser scanner unit.
- Be sure to hook the rail on the Laser scanner unit to the rail [a] on the host machine [b] to install.
- Be sure that the flat cable [c] on the side of the Laser scanner unit is not disconnected.
- The photo [A] below indicates the condition that has a gap [b] because the protrusion [a] beneath the laser scanner
unit [A] is not properly fit into the hole. Fit the protrusion [a] completely as shown in the photo [B] so that no gap
is left such as [c], and then install the laser scanner unit.
F2-T01-N13-10125-01
(8/11)
8) Remove the 2 screws [1] and the 9 cover fastening claws [a] of the laser scanner unit to detach the upper cover of
the laser scanner unit.
[Caution] When detaching the cover, be sure not to touch the 4 dustproof glasses [2]. Also be careful not to give
stresses to the flat cables [3] or the connectors.
9) Fold the lint-free paper stacked in pairs three times as shown below and permeate alcohol into all the layers of the
folded lint-free paper.
F2-T01-N13-10125-01
(9/11)
10) Be careful not to put a load to the polygon motor other than the load in the rotating direction while cleaning the
polygon mirrors pinching the upper part of the polygon mirrors with fingers, by wiping twice for each face with a
pressure just enough to push all the folded layers of the lint-free paper against the mirror.
[Caution] Pay attention to the following points when to clean the polygon mirrors.
- Move the lint-free paper at a constant speed to wipe a face within a motion.
- Change the part of the lint-free paper to push against the mirror after each face of the mirror has been wiped off so
that not to reuse the used part of the paper for another face.
- Permeate enough alcohol into the paper again as required to avoid giving a flaw on the polygon mirrors.
- When completed all the 5 faces, look at any unevenly wiped marks left visually, and if the mark does exist, then
clean them again with the alcohol permeated lint-free paper.
11) Blow away the dust on the reflection mirrors or the polygon mirrors inside the laser scanner unit with a blower
brush. Also blow the dust inside the upper cover with a blower brush.
[Caution]
- Be sure not to leave any dust after cleaning with blower brush as the dust on the reflection mirrors or the polygon
mirrors causes white streaks.
- Do not wipe on the reflection mirrors or lenses directly with the lint-free paper. Because the surface of the lens is
easily scratched, also the paper dust of lint-free paper tends to remain on the surface of the mirror and the main cause
F2-T01-N13-10125-01
(10/11)
of this issue is the soiling on the polygon mirrors.
12) Fit the 9 cover fastening claws into their positions on the laser scanner unit and attach the 2 screws.
[Caution]
- Be careful not to soil the dustproof glass while attaching.
- Put the flat cable [1] through the guides [a].
13) Reassemble the parts in reverse order from the step 6).
14) Go to Service Mode > Mode List > COPIER > Test > PG >PG-PICK and select the paper source of "A4" or
"LTR" paper.
15) Go to Service Mode > Mode List > COPIER > Test > PG > PG-TYPE, enter "16" and press "OK" key and then
"Start" button. Check the image and if the light image is not generated, then go to the step 19). Otherwise, if light
images or white streaks are generated, then go to the step 16).
F2-T01-N13-10125-01
(11/11)
[Reference] When outputting the test print of PG-TYPE: 16, the density is fixed to "160" regardless of the set values
in DENS-Y/M/C/K.
16) Go to Service Mode > Mode List > COPIER > Function > MISC-P > SHT-OPEN and press "OK" to open the
laser shutter.
17) Open the front door and clean the dustproof glass with the dustproof glass cleaning tool.
18) Close the front door and perform the work of the step 15) again. If the symptom does not improve, detach the
laser scanner unit again, clean inside the laser scanner unit with a blow brush, revert back the laser scanner unit and
repeat the same works from the step 14).
19) Revert the drum to the new one at the time of E020-1x60 occurrence and execute the full adjust of the auto
gradation correction.

This manual suits for next models

4

Other Canon All In One Printer manuals
Canon FaxPhone L90 Assembly instructions

Canon

Canon FaxPhone L90 Assembly instructions

Canon PIXMA TS5150 Setup guide

Canon

Canon PIXMA TS5150 Setup guide

Canon IMAGERUNNER 2010F User manual

Canon

Canon IMAGERUNNER 2010F User manual

Canon imageCLASS MF3010 Safety guide

Canon

Canon imageCLASS MF3010 Safety guide

Canon imageRUNNER C3125i User manual

Canon

Canon imageRUNNER C3125i User manual

Canon PIXMA MX882 Series Manual

Canon

Canon PIXMA MX882 Series Manual

Canon MultiPASS MP390 User manual

Canon

Canon MultiPASS MP390 User manual

Canon Color imageRUNNER C5185 User manual

Canon

Canon Color imageRUNNER C5185 User manual

Canon PIXMA MX700 Series User manual

Canon

Canon PIXMA MX700 Series User manual

Canon C1127P User manual

Canon

Canon C1127P User manual

Canon 1238iF II User manual

Canon

Canon 1238iF II User manual

Canon imageCLASS D480 Assembly instructions

Canon

Canon imageCLASS D480 Assembly instructions

Canon imageRUNNER ADVANCE 615iZ III User manual

Canon

Canon imageRUNNER ADVANCE 615iZ III User manual

Canon MultiPASS F60 User guide

Canon

Canon MultiPASS F60 User guide

Canon MAXIFY iB4040 User manual

Canon

Canon MAXIFY iB4040 User manual

Canon imageRunner Advance 6275 User manual

Canon

Canon imageRunner Advance 6275 User manual

Canon imageCLASS MF5850dn Assembly instructions

Canon

Canon imageCLASS MF5850dn Assembly instructions

Canon Laser Class 700 Series User manual

Canon

Canon Laser Class 700 Series User manual

Canon ImageRUNNER C1335iF User manual

Canon

Canon ImageRUNNER C1335iF User manual

Canon iR4570 Series User manual

Canon

Canon iR4570 Series User manual

Canon Color imageCLASS MF8170c User manual

Canon

Canon Color imageCLASS MF8170c User manual

Canon IMAGERUNNER 2020 User manual

Canon

Canon IMAGERUNNER 2020 User manual

Canon MX390 series Setup guide

Canon

Canon MX390 series Setup guide

Canon MX470 User manual

Canon

Canon MX470 User manual

Popular All In One Printer manuals by other brands

Samsung CJX-2000FW Series Quick install guide

Samsung

Samsung CJX-2000FW Series Quick install guide

Triumph Adler DC 2020 Instruction handbook

Triumph Adler

Triumph Adler DC 2020 Instruction handbook

Epson RX580 - Stylus Photo Color Inkjet manual

Epson

Epson RX580 - Stylus Photo Color Inkjet manual

Epson ET-3843 user manual

Epson

Epson ET-3843 user manual

Brother MFC 5490CN - Color Inkjet - All-in-One Quick setup guide

Brother

Brother MFC 5490CN - Color Inkjet - All-in-One Quick setup guide

Samsung CLX-3300 Specifications

Samsung

Samsung CLX-3300 Specifications

Konica Minolta Magicolor 3300 Service manual

Konica Minolta

Konica Minolta Magicolor 3300 Service manual

Ricoh Aficio SP 204SN Software installation guide

Ricoh

Ricoh Aficio SP 204SN Software installation guide

Columbus V - 990 Mark II user manual

Columbus

Columbus V - 990 Mark II user manual

Oce cm5520 user guide

Oce

Oce cm5520 user guide

Brother MFC-9320CW Quick setup guide

Brother

Brother MFC-9320CW Quick setup guide

Ricoh Pro C5210s operating instructions

Ricoh

Ricoh Pro C5210s operating instructions

Sharp DX-C311 - Color - All-in-One Operation guide

Sharp

Sharp DX-C311 - Color - All-in-One Operation guide

Xerox Legacy 4112 user guide

Xerox

Xerox Legacy 4112 user guide

Epson NX110 - Stylus Color Inkjet Notices and warranty

Epson

Epson NX110 - Stylus Color Inkjet Notices and warranty

imagistics ipc1- im8130 Administrator's guide

imagistics

imagistics ipc1- im8130 Administrator's guide

TallyGenicom 6312 installation instructions

TallyGenicom

TallyGenicom 6312 installation instructions

Brother MFC-8480DN Quick setup guide

Brother

Brother MFC-8480DN Quick setup guide

manuals.online logo
manuals.online logoBrands
  • About & Mission
  • Contact us
  • Privacy Policy
  • Terms and Conditions

Copyright 2025 Manuals.Online. All Rights Reserved.