manuals.online logo
Brands
  1. Home
  2. •
  3. Brands
  4. •
  5. Canon
  6. •
  7. All In One Printer
  8. •
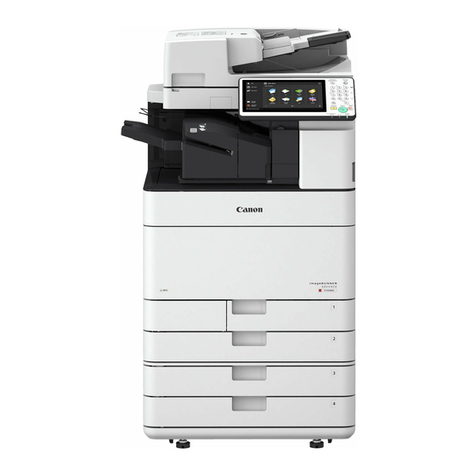
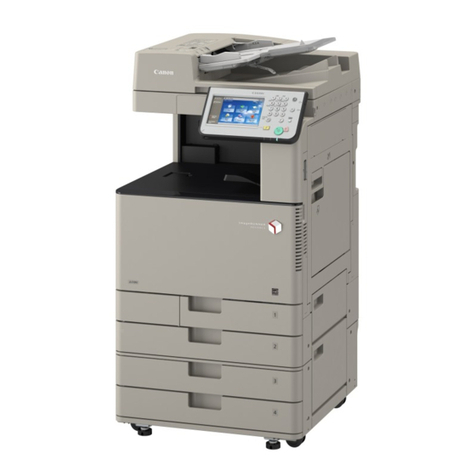
  9. Canon IMAGERUNNER ADVANCE C5051 User manual

Canon IMAGERUNNER ADVANCE C5051 User manual

987654321
imageRUNNER ADVANCE
C5051/C5045/C5035/C5030 Series
Service Manual
September 13, 2017
Revision 15
Product Overvew
Technology
Periodical Service
Parts Replacement and Cleaning
Adjustment
Troubleshooting
Error Code
Service Mode
Installation
Appendix
Application
This manual has been issued by Canon Inc. for qualied persons to learn technical theory,
installation, maintenance, and repair of products. This manual covers all localities where the
products are sold. For this reason, there may be information in this manual that does not
apply to your locality.
Corrections
This manual may contain technical inaccuracies or typographical errors due to improvements
or changes in products. When changes occur in applicable products or in the contents of this
manual, Canon will release technical information as the need arises. In the event of major
changes in the contents of this manual over a long or short period, Canon will issue a new
edition of this manual.
The following paragraph does not apply to any countries where such provisions are
inconsistent with local law.
Trademarks
The product names and company names used in this manual are the registered trademarks
of the individual companies.
Copyright
This manual is copyrighted with all rights reserved. Under the copyright laws, this manual may
not be copied, reproduced or translated into another language, in whole or in part, without the
consent of Canon Inc.
Copyright CANON INC. 2015
Caution
Use of this manual should be strictly supervised to avoid disclosure of condential
information.
Explanation of Symbols
The following symbols are used throughout this Service Manual.
Symbols Explanation Symbols Explanation
Check. Remove the claw.
Check visually. Insert the claw.
Check the noise. Use the bundled part.
Disconnect the connector. Push the part.
Connect the connector. Plug the power cable.
Remove the cable/wire
from the cable guide or wire
saddle.
Turn on the power.
Set the cable/wire to the
cable guide or wire saddle.
Remove the screw.
Tighten the screw.
The following rules apply throughout this Service Manual:
1. Each chapter contains sections explaining the purpose of specic functions and the
relationship between electrical and mechanical systems with reference to the timing of
operation.
In the diagrams, represents the path of mechanical drive; where a signal
name accompanies the symbol, the arrow indicates the direction of the
electric signal.
The expression "turn on the power" means ipping on the power switch, closing the
front door, and closing the delivery unit door, which results in supplying the machine with
power.
2. In the digital circuits, '1' is used to indicate that the voltage level of a given signal is
"High", while '0' is used to indicate "Low". (The voltage value, however, differs from
circuit to circuit.) In addition, the asterisk (*) as in "DRMD*" indicates that the DRMD
signal goes on when '0'.
In practically all cases, the internal mechanisms of a microprocessor cannot be checked
in the eld. Therefore, the operations of the microprocessors used in the machines
are not discussed: they are explained in terms of from sensors to the input of the DC
controller PCB and from the output of the DC controller PCB to the loads.
The descriptions in this Service Manual are subject to change without notice for product
improvement or other purposes, and major changes will be communicated in the form of
Service Information bulletins.
All service persons are expected to have a good understanding of the contents of this Service
Manual and all relevant Service Information bulletins and be able to identify and isolate faults
in the machine.
0 Safety Precautions
Laser Safety --------------------------------------------------------------------0-2
Handling of Laser System --------------------------------------------------0-2
Turn power switch ON -------------------------------------------------------0-3
Safety of Toner -----------------------------------------------------------------0-3
About Toner ------------------------------------------------------------------------- 0-3
Toner on Clothing or Skin -------------------------------------------------------- 0-3
Notes When Handling a Lithium Battery --------------------------------0-3
Notes Before it Works Serving ---------------------------------------------0-3
Points to Note at Cleaning --------------------------------------------------0-3
1 Product Overvew
Product Lineup -----------------------------------------------------------------1-2
Host machine ----------------------------------------------------------------------- 1-2
Option --------------------------------------------------------------------------------- 1-3
Feature --------------------------------------------------------------------------1-5
Product feature --------------------------------------------------------------------- 1-5
Features at servicing -------------------------------------------------------------- 1-5
Specication --------------------------------------------------------------------1-6
Specication ------------------------------------------------------------------------- 1-6
Weight / Size ------------------------------------------------------------------------ 1-7
Productivity (Print speed) -------------------------------------------------------- 1-7
Paper type --------------------------------------------------------------------------- 1-8
Name of Parts ---------------------------------------------------------------- 1-12
External View ----------------------------------------------------------------------1-12
Cross Sectional View ------------------------------------------------------------1-13
Operation ---------------------------------------------------------------------- 1-14
Power Switch ----------------------------------------------------------------------1-14
Description of Control Panel ---------------------------------------------------1-15
Service Mode ----------------------------------------------------------------------1-17
Contents
2 Technology
Basic Conguration -----------------------------------------------------------2-2
Functional Conguration --------------------------------------------------------- 2-2
Controller System ------------------------------------------------------------2-5
Overview ----------------------------------------------------------------------------- 2-5
Controls ----------------------------------------------------------------------------- 2-11
Service Operations ---------------------------------------------------------------2-29
Laser Exposure System --------------------------------------------------- 2-30
Overview ----------------------------------------------------------------------------2-30
Various Controls -------------------------------------------------------------------2-32
Service Works ---------------------------------------------------------------------2-42
Image Formation System ------------------------------------------------- 2-43
Overview ----------------------------------------------------------------------------2-43
Controls -----------------------------------------------------------------------------2-46
Service work -----------------------------------------------------------------------2-79
Fixing System ---------------------------------------------------------------- 2-80
Overview ----------------------------------------------------------------------------2-80
Controls -----------------------------------------------------------------------------2-83
Service work -----------------------------------------------------------------------2-90
Pickup Feed System ------------------------------------------------------- 2-92
Overview ----------------------------------------------------------------------------2-92
Various Controls -------------------------------------------------------------------2-97
Service Works ------------------------------------------------------------------- 2-107
External Auxiliary System ----------------------------------------------- 2-108
Various Controls ----------------------------------------------------------------- 2-108
Service Operations ------------------------------------------------------------- 2-114
MEAP -------------------------------------------------------------------------2-115
Changes --------------------------------------------------------------------------- 2-115
Checking the Operating Environment ------------------------------------- 2-118
Setting Up the Network -------------------------------------------------------- 2-121
Login to SMS --------------------------------------------------------------------- 2-122
Setting the method to login to SMS ---------------------------------------- 2-126
Checking MEAP Application Management Page ----------------------- 2-129
Starting and Stopping a MEAP Application ------------------------------- 2-130
Checking the Platform Information ----------------------------------------- 2-130
MEAP Specications ----------------------------------------------------------- 2-131
MEAP Application System Information ------------------------------------ 2-133
Installing an Application ------------------------------------------------------- 2-135
Adding a License File ---------------------------------------------------------- 2-137
Disabling a License File ------------------------------------------------------- 2-138
Downloading / Removing an Invalidated License File ----------------- 2-140
Reusable license ---------------------------------------------------------------- 2-141
License for forwarding --------------------------------------------------------- 2-142
Uninstalling an Application ---------------------------------------------------- 2-144
Login Service -------------------------------------------------------------------- 2-145
Changing Login Services ----------------------------------------------------- 2-150
Initializing the Password ------------------------------------------------------ 2-151
Backup of the MEAP Application Area and Recovery of the
Backup Data Using SST ------------------------------------------------------ 2-152
Formatting and Replacing the HDD ---------------------------------------- 2-156
MEAP Safe Mode (level 2) --------------------------------------------------- 2-158
Collection of MEAP Console Logs ------------------------------------------ 2-160
Setting HTTP port for MEAP application (level 2) ---------------------- 2-165
Using USB Devices ------------------------------------------------------------ 2-168
Reference material ------------------------------------------------------------- 2-173
Option for exclusive individual measure ---------------------------------- 2-175
Embedded RDS ----------------------------------------------------------- 2-177
Product Overview --------------------------------------------------------------- 2-177
Limitations ------------------------------------------------------------------------ 2-178
Service cautions ----------------------------------------------------------------- 2-179
E-RDS Setup --------------------------------------------------------------------- 2-179
FAQ --------------------------------------------------------------------------------- 2-191
Troubleshooting ----------------------------------------------------------------- 2-193
Error code and strings --------------------------------------------------------- 2-196
Updater ---------------------------------------------------------------------- 2-199
Overview -------------------------------------------------------------------------- 2-199
Installing MEAP Application/System Option ------------------------------ 2-200
Limitations and Cautions ------------------------------------------------------ 2-203
Preparation ----------------------------------------------------------------------- 2-204
System Management Operations ------------------------------------------- 2-212
Maintenance --------------------------------------------------------------------- 2-219
FAQ --------------------------------------------------------------------------------- 2-220
3 Periodical Service
Consumable Parts,Replacement Parts, and Cleaning Parts-------3-2
Cleaning Parts -----------------------------------------------------------------3-8
4 Parts Replacement and Cleaning
List of Parts ---------------------------------------------------------------------4-2
List of Cover ------------------------------------------------------------------------- 4-2
List of Main Unit -------------------------------------------------------------------- 4-5
Clutch / Solenoid ------------------------------------------------------------------- 4-9
Motor ---------------------------------------------------------------------------------4-12
Fan -----------------------------------------------------------------------------------4-19
Sensor -------------------------------------------------------------------------------4-23
Heater / Other ----------------------------------------------------------------------4-31
Switch --------------------------------------------------------------------------------4-34
PCB ----------------------------------------------------------------------------------4-37
Conector ----------------------------------------------------------------------------4-43
Main Controller -------------------------------------------------------------- 4-65
Removing the HDD ---------------------------------------------------------------4-65
Removing the Main Controller PCB 1 ---------------------------------------4-68
Removing the Main Controller PCB 2 ---------------------------------------4-69
Opening the Controller Box ----------------------------------------------------4-72
Removing the DC Controller PCB --------------------------------------------4-73
Removing the Main Power Unit -----------------------------------------------4-74
Removing the AC Driver --------------------------------------------------------4-76
Removing the Control Panel ---------------------------------------------------4-77
Laser Exposure System --------------------------------------------------- 4-79
Cleaning the Dust-blocking Glass --------------------------------------------4-79
Removing the Dust-blocking Glass Cleaning Pad ------------------------4-80
Removing the Laser Scanner Unit --------------------------------------------4-80
Image Formation System ------------------------------------------------- 4-86
Removing the Toner Filter ------------------------------------------------------4-86
Removing the ITB Unit ----------------------------------------------------------4-86
Cleaning the Patch Sensor -----------------------------------------------------4-89
Remove the Patch Sensor (front,center,rear)------------------------------4-89
Removing the ITB Cleaning Unit ----------------------------------------------4-91
Removing the ITB Cleaning Blade Unit -------------------------------------4-92
Installing the ITB Cleaning Blade Unit ---------------------------------------4-92
Removing the ITB -----------------------------------------------------------------4-95
Removing the Primary Transfer Roller (Bk) --------------------------------4-98
Removing the Primary Transfer Roller (C,M,Y) ------------------------- 4-100
Removing the Secondary Transfer Inner Roller ------------------------- 4-103
Reinstalling the ITB ------------------------------------------------------------- 4-105
Removing the Recycle Toner Bottle ---------------------------------------- 4-110
Pulling Out the Process Unit ------------------------------------------------- 4-110
Removing the Process Unit -------------------------------------------------- 4-112
Reinstalling the Process Unit ------------------------------------------------ 4-113
Removing the Drum Unit ------------------------------------------------------ 4-115
Reinstalling the Drum Unit ---------------------------------------------------- 4-116
Removing the Developing Assembly --------------------------------------- 4-118
Installing a new Developing Assembly ------------------------------------ 4-119
Removing the Secondary Transfer Outer Roller and
Secondary Transfer Separation Guide Unit ------------------------------ 4-121
Reinstalling the Secondary Transfer Outer Roller and
Secondary Transfer Separation Guide Unit ------------------------------ 4-123
Removing the Toner Bottle manually -------------------------------------- 4-124
Removing the Main Drive Unit ----------------------------------------------- 4-127
Removing the Toner Container Front Inner Cover ---------------------- 4-131
Removing the Hopper (M) ---------------------------------------------------- 4-133
Removing the Hopper (Y) ----------------------------------------------------- 4-134
Removing the Hopper (C) ---------------------------------------------------- 4-136
Removing the Hopper (Bk) --------------------------------------------------- 4-139
Fixing System -------------------------------------------------------------- 4-141
Removing the Fixing Assembly ---------------------------------------------- 4-141
Removing the Film Unit ------------------------------------------------------- 4-142
Cleaning the Fixing Separation Guide ------------------------------------- 4-144
Cleaning the Shutter Cover -------------------------------------------------- 4-145
Removing the Pressure Roller and Pressure Roller Bearing -------- 4-146
Pickup Feed System ----------------------------------------------------- 4-148
Cleaning the Secondary Transfer Guide ---------------------------------- 4-148
Cleaning the Feed Contact Point Guide ---------------------------------- 4-148
Cleaning the Registration Roller -------------------------------------------- 4-149
Cleaning the Pre-registration Guide Assembly -------------------------- 4-149
Cleaning the Transparency Sensor ---------------------------------------- 4-150
Cleaning the Vertical Path Sensor and the Lightproof Sheet -------- 4-150
Cleaning the Fixing Delivery Guide Assembly --------------------------- 4-152
Cleaning the Post-xing Roller ---------------------------------------------- 4-152
Cleaning the Fixing Delivery Roller ----------------------------------------- 4-153
Cleaning the Duplex Feed Upper Roller, Wheel ------------------------ 4-153
Cleaning the Duplex Feed Lower Roller, Wheel ------------------------ 4-154
Cleaning the Second and Third Delivery Roller and Wheeis,
and the First, Second and Third Delivery Rollers ----------------------- 4-154
Removing the Second and Third Delivery Unit -------------------------- 4-155
Removing the First Delivery Unit -------------------------------------------- 4-157
Removing the Duplex Unit ---------------------------------------------------- 4-159
Removing the Multi-purpose Tray Pickup Roller ------------------------ 4-160
Removing the Multi-purpose Tray Separation Roller ------------------ 4-161
Removing the Pickup Roller -------------------------------------------------- 4-162
Removing the Feed Roller ---------------------------------------------------- 4-163
Removing the Separation Roller -------------------------------------------- 4-163
Removing the Pickup Assembly Idler Gear ------------------------------ 4-164
Removing the Right Lower Cover ------------------------------------------ 4-164
Removing the Cassette 1 Pickup Unit ------------------------------------- 4-166
Removing the Cassette Right Upper Cover ------------------------------ 4-167
Removing the Cassette 2 Pickup Unit ------------------------------------- 4-168
Removing the Cassette Size Detection Unit ----------------------------- 4-169
Option ------------------------------------------------------------------------ 4-170
Removing the ADF Unit ------------------------------------------------------- 4-170
Removing the Reader Unit --------------------------------------------------- 4-176
Data to be handled by SRAM(with HDD Encryption Board ---- 4-181
The kind of data to handle ---------------------------------------------------- 4-181
5 Adjustment
Main Controller ----------------------------------------------------------------5-2
HDD ----------------------------------------------------------------------------------- 5-2
Main controller PCB 1 ------------------------------------------------------------ 5-2
Main controller PCB 2 ------------------------------------------------------------ 5-3
DC controller PCB ----------------------------------------------------------------- 5-3
Control Panel CPU PCB / LCD Panel ---------------------------------------- 5-3
TPM PCB ---------------------------------------------------------------------------- 5-3
Image Formation System ---------------------------------------------------5-4
Developing Assembly ------------------------------------------------------------- 5-4
Patch sensor ------------------------------------------------------------------------ 5-4
ITB Unit ------------------------------------------------------------------------------- 5-4
ITB ------------------------------------------------------------------------------------- 5-4
Secondary Transfer Outer Roller ---------------------------------------------- 5-4
Hopper Unit -------------------------------------------------------------------------- 5-4
Pickup Feed System ---------------------------------------------------------5-5
Method of Setting 8K and 16K (Chinese Paper) --------------------------- 5-5
Method of Setting Special Paper ----------------------------------------------- 5-5
6 Troubleshooting
Initial Check --------------------------------------------------------------------6-2
Initial check items list ------------------------------------------------------------- 6-2
Test Print ------------------------------------------------------------------------6-3
Overview ----------------------------------------------------------------------------- 6-3
Steps to select the test print TYPE -------------------------------------------- 6-3
How to use the test print --------------------------------------------------------- 6-4
Troubleshooting items -------------------------------------------------------6-7
Troubleshooting items list -------------------------------------------------------- 6-7
Image Faults ------------------------------------------------------------------------ 6-7
Operation Error --------------------------------------------------------------------6-14
Startup System Failure Diagnosis -------------------------------------- 6-17
The viewpoint of this Startup System Failure Diagnosis ----------------6-17
Startup Failure Analysis Policy ------------------------------------------------6-18
Flow A: Execution Flow for Control Panel Startup Failure -------------6-20
Flow B: Control Panel 12V Check Flow -------------------------------------6-22
Flow C: Main Controller Analysis Flow --------------------------------------6-25
Flow D: All-night Power Supply (3.3V) System Flow---------------------6-27
Flow E: 12V Power Supply System Flow -----------------------------------6-30
Flow F: Connector Disconnection Flow -------------------------------------6-33
Reference: Activation conditions of the Control Panel Backlight -----6-34
Flow G: Execution Flow of Startup System Failure Diagnosis --------6-35
Procedure A: Detailed Procedure of Startup System
Failure Diagnosis -----------------------------------------------------------------6-36
Controller Self Diagnosis -------------------------------------------------- 6-37
Introduction -------------------------------------------------------------------------6-37
Overview ----------------------------------------------------------------------------6-37
Operation ---------------------------------------------------------------------------6-40
Debug log --------------------------------------------------------------------- 6-45
Scope of Application -------------------------------------------------------------6-45
Overview ----------------------------------------------------------------------------6-45
Storing System Information ----------------------------------------------------6-45
Collecting System Information -------------------------------------------------6-46
Collecting Debug Log (USB memory device) ------------------------------6-46
DEBUG-1 ---------------------------------------------------------------------------6-47
Uploading Data by SST ---------------------------------------------------------6-47
Version upgrade ------------------------------------------------------------- 6-50
Overview ----------------------------------------------------------------------------6-50
Version Upgrade via SST -------------------------------------------------------6-56
Version Upgrade using USB memory Storage Device ------------------6-71
Troubleshooting -------------------------------------------------------------------6-86
Version Upgrade via CDS ------------------------------------------------------6-87
7 Error Code
Overview ------------------------------------------------------------------------7-2
Outline -------------------------------------------------------------------------------- 7-2
Error Code ----------------------------------------------------------------------7-4
Error Code Details ----------------------------------------------------------------- 7-4
Jam Code --------------------------------------------------------------------7-115
Jam screen display specication -------------------------------------------- 7-115
image RUNNER ADVANCE C5051/C5045/C5035/C5030 ----------- 7-116
Duplex Color Image Reader Unit-B1 /
Color Image Reader Unit-B2 ------------------------------------------------- 7-118
Staple Finisher-C1 / Booklet Finisher-C1 --------------------------------- 7-119
Inner Finisher-A1 ---------------------------------------------------------------- 7-121
Alarm Code ----------------------------------------------------------------- 7-122
Alarm Code ----------------------------------------------------------------------- 7-122
8 Service Mode
Overview ------------------------------------------------------------------------8-2
Points to note when using Service Mode ------------------------------------ 8-2
Service Mode Menu --------------------------------------------------------------- 8-2
Service mode item explanations ----------------------------------------------- 8-3
I/O information enhancement --------------------------------------------------- 8-3
Display of Error Code/Alarm Code description ----------------------------- 8-4
COPIER > OPTION > BODY, Item Segmentation ------------------------- 8-4
Security features ------------------------------------------------------------------- 8-5
Switching Screen (Level 1 < - > 2) -------------------------------------------- 8-6
Language switch ------------------------------------------------------------------- 8-6
Back-up of service mode --------------------------------------------------------- 8-7
COPIER -------------------------------------------------------------------------8-8
DISPLAY ----------------------------------------------------------------------------- 8-8
IO -------------------------------------------------------------------------------------8-57
ADJUST -----------------------------------------------------------------------------8-82
FUNCTION ----------------------------------------------------------------------- 8-137
OPTION --------------------------------------------------------------------------- 8-161
TEST ------------------------------------------------------------------------------- 8-238
COUNTER ------------------------------------------------------------------------ 8-241
FEEDER --------------------------------------------------------------------- 8-255
DISPLAY -------------------------------------------------------------------------- 8-255
ADJUST --------------------------------------------------------------------------- 8-256
FUNCTION ----------------------------------------------------------------------- 8-257
SORTER -------------------------------------------------------------------- 8-260
ADJUST --------------------------------------------------------------------------- 8-260
FUNCTION ----------------------------------------------------------------------- 8-264
OPTION --------------------------------------------------------------------------- 8-265
BOARD ---------------------------------------------------------------------- 8-267
OPTION --------------------------------------------------------------------------- 8-267
9 Installation
How to Check this Installation Procedure -------------------------------9-2
When Using the Parts Included in the Package---------------------------- 9-2
Symbols in the Illustration ------------------------------------------------------- 9-2
Things to do Before Installation -------------------------------------------9-2
Selecting an Installing Location ------------------------------------------------ 9-2
Points to Note Before Installation -----------------------------------------9-3
Combination Table of Accessory Installation ---------------------------9-4
Combination of the Options installing to the
Right Side of the Host Machine ------------------------------------------------ 9-4
Checking the Contents ------------------------------------------------------9-4
Unpacking -----------------------------------------------------------------------9-7
Installation Procedure ------------------------------------------------------ 9-10
Installing the Drum Unit ---------------------------------------------------------9-10
Fixing the Machine in Place ----------------------------------------------------9-18
Setting the Environment Heater Switch -------------------------------------9-19
Turning the Main Power ON / Setting the Toner Container ------------9-20
Turning OFF the Main Power Switch ----------------------------------------9-22
Setting for K Paper (China only) ----------------------------------------------9-22
Cassette Setting -------------------------------------------------------------------9-23
Checking after the Installation -------------------------------------------------9-25
Execute the ITB Equilibrium Position Detection---------------------------9-25
Auto Adjust Gradation -----------------------------------------------------------9-25
Adjusting Image Position --------------------------------------------------------9-27
Installing Other Parts -------------------------------------------------------------9-34
Checking Network Connection ------------------------------------------------9-37
Troubleshooting of Network ----------------------------------------------------9-38
Printer Cover-C1/C2 -------------------------------------------------------- 9-39
Checking the Contents ----------------------------------------------------------9-39
Turning OFF the Main Power Switch ----------------------------------------9-41
Installation Procedure -----------------------------------------------------------9-42
Reader Heater Unit (EUR onry) ----------------------------------------- 9-45
Checking the contents -----------------------------------------------------------9-45
Turning OFF the power of the Host Machine. -----------------------------9-45
Installation Procedure ------------------------------------------------------------9-46
Checking after the installation -------------------------------------------------9-51
Cassette Heater Unit ------------------------------------------------------- 9-52
Checking the Contents (ASIA only) ------------------------------------------9-52
Checking the Parts to be Installed (EUR only) ----------------------------9-52
Turning OFF the Main Power Switch ----------------------------------------9-53
Installation Procedure ------------------------------------------------------------9-53
Checking After the Installation -------------------------------------------------9-55
Cassette Heater Unit-32 --------------------------------------------------- 9-56
Checking Bundled Components ----------------------------------------------9-56
Turning OFF the Main Power Switch ----------------------------------------9-56
Installation Procedure ------------------------------------------------------------9-57
Utility Tray-A2 ---------------------------------------------------------------- 9-63
Points to Note at Installation ---------------------------------------------------9-63
Checking the Contents ----------------------------------------------------------9-63
Installation Outline Drawing ----------------------------------------------------9-64
Installation Procedure ------------------------------------------------------------9-64
When installing the Keyboard --------------------------------------------------9-66
Key Switch Unit-A2 --------------------------------------------------------- 9-67
Checking the Content ------------------------------------------------------------9-67
Turning OFF the power of the Host Machine ------------------------------9-67
Installation Procedure ------------------------------------------------------------9-68
Checking after installation ------------------------------------------------------9-73
Voice Operation Kit C2 ---------------------------------------------------- 9-74
Checking the Contents ----------------------------------------------------------9-74
Points to note when Installing --------------------------------------------------9-75
Turning OFF the Host Machine------------------------------------------------9-75
Installation Procedure ------------------------------------------------------------9-76
Setting Check ----------------------------------------------------------------------9-83
Operation Check ------------------------------------------------------------------9-83
Voice Guidance Kit-F1 ----------------------------------------------------- 9-84
Checking the Contents ----------------------------------------------------------9-84
Points to note when Installing --------------------------------------------------9-85
Turning OFF the Host Machine------------------------------------------------9-85
Installation Procedure ------------------------------------------------------------9-86
Checking after installation ------------------------------------------------------9-93
Operation Check -----------------------------------------------------------------9-93
Card Reader-C1/Copy Card Reader-F1 ------------------------------ 9-94
Points to Note at Installation ---------------------------------------------------9-94
Checking the Contents ----------------------------------------------------------9-94
Turning OFF the Host Machine------------------------------------------------9-97
Installation Procedure ------------------------------------------------------------9-97
Setting After Installation ------------------------------------------------------- 9-106
Copy Tray-J1 --------------------------------------------------------------- 9-107
Checking the contents --------------------------------------------------------- 9-107
Turning OFF the host machine ---------------------------------------------- 9-107
Installation procedure ---------------------------------------------------------- 9-108
Setting after installation ------------------------------------------------------- 9-109
Inner 2-way Tray-F1 -------------------------------------------------------9-110
Checking the Contents -------------------------------------------------------- 9-110
Turning Off the Main Power Switch ---------------------------------------- 9-110
Installation Procedure -----------------------------------------------------------9-111
Setting after installation ------------------------------------------------------- 9-112
Additional Memory TypeB (512MB) -----------------------------------9-113
Checking the contents --------------------------------------------------------- 9-113
Pre-Check ------------------------------------------------------------------------ 9-113
Turning OFF the Host Machine---------------------------------------------- 9-113
Installation Procedure ---------------------------------------------------------- 9-114
Checking after installation ---------------------------------------------------- 9-117
Expansion Bus-F1/F2, IPSec Board-B2,
Wireless LAN Board-B1/B2 Installation Procedure ----------------9-118
Points to Note when Installing ----------------------------------------------- 9-118
Checking the contents --------------------------------------------------------- 9-119
Turning the Host Machine OFF---------------------------------------------- 9-121
Installation Procedure ---------------------------------------------------------- 9-122
Checking after installation ---------------------------------------------------- 9-134
Relocating the Machine ------------------------------------------------- 9-135
Combination of HDD Options ------------------------------------------ 9-136
[TYPE-1] Option HDD (250GB) --------------------------------------- 9-137
Checking the Contents -------------------------------------------------------- 9-137
Points to Note Regarding Data Backup/Export-------------------------- 9-138
Making a Backup of the Data (Reference only) ------------------------- 9-139
Check Items when Turning OFF the Main Power----------------------- 9-142
Installation Procedure ---------------------------------------------------------- 9-143
Installing the System Software Using the SST -------------------------- 9-146
Execution of Auto Adjust Gradation ---------------------------------------- 9-146
[TYPE-2] Standard HDD + Removable HDD Kit ------------------ 9-147
Checking the Contents -------------------------------------------------------- 9-147
Check Items when Turning OFF the Main Power----------------------- 9-148
Installation Procedure ---------------------------------------------------------- 9-148
[TYPE-3] Option HDD (250GB) + Removable HDD Kit --------- 9-163
Checking the Contents -------------------------------------------------------- 9-163
Points to Note Regarding Data Backup/Export-------------------------- 9-166
Making a Backup of the Data (Reference only) ------------------------- 9-167
Check Items when Turning OFF the Main Power----------------------- 9-170
Installation Procedure ---------------------------------------------------------- 9-171
Installing the System Software Using the SST -------------------------- 9-184
Execution of Auto Adjust Gradation ---------------------------------------- 9-184
[TYPE-4] Standard HDD + Option HDD (80GB) +
HDD Mirroring Kit or HDD Data Encryption & Mirroring Kit ---- 9-185
Points to Note when HDD Data Encryption & Mirroring Kit
has been Installed -------------------------------------------------------------- 9-185
Checking the Contents -------------------------------------------------------- 9-185
Points to Note Regarding Data Backup/Export-------------------------- 9-188
Making a Backup of the Data (Reference only) ------------------------- 9-189
Check Items when Turning OFF the Main Power----------------------- 9-192
Installation Procedure ---------------------------------------------------------- 9-193
Installing the System Software Using the SST
(Only when installing HDD Data Encryption & Mirroring Kit)--------- 9-206
Checking the Security Version (Only when installing HDD Data
Encryption & Mirroring Kit) ---------------------------------------------------- 9-206
Checking the Security Mark
(Only when installing HDD Data Encryption & Mirroring Kit)--------- 9-206
Setting the Mirroring ------------------------------------------------------------ 9-207
Reporting to the System Administrator at the End of the Work
(Only when installing HDD Data Encryption & Mirroring Kit)--------- 9-207
Execution of Auto Adjust Gradation
(Only when installing HDD Data Encryption & Mirroring Kit)--------- 9-207
[TYPE-5] 2 Option HDDs (250GB) + HDD Mirroring Kit or
HDD Data Encryption & Mirroring Kit -------------------------------- 9-208
Points to Note when HDD Data Encryption & Mirroring Kit
has been Installed -------------------------------------------------------------- 9-208
Checking the Contents -------------------------------------------------------- 9-208
Points to Note Regarding Data Backup/Export-------------------------- 9-211
Making a Backup of the Data (Reference only) ------------------------- 9-212
Check Items when Turning OFF the Main Power----------------------- 9-215
Installation Procedure ---------------------------------------------------------- 9-216
Installing the System Software Using the SST -------------------------- 9-230
Checking the Security Version
(Only when installing HDD Data Encryption & Mirroring Kit)--------- 9-230
Checking the Security Mark
(Only when installing HDD Data Encryption & Mirroring Kit)--------- 9-230
Setting the Mirroring ------------------------------------------------------------ 9-231
Reporting to the System Administrator at the End of the Work
(Only when installing HDD Data Encryption & Mirroring Kit)--------- 9-231
Execution of Auto Adjust Gradation ---------------------------------------- 9-231
[TYPE-6] Standard HDD + HDD Data Encryption &
Mirroring Kit ----------------------------------------------------------------- 9-232
Points to Note when HDD Data Encryption & Mirroring Kit
has been Installed -------------------------------------------------------------- 9-232
Checking the Contents -------------------------------------------------------- 9-232
Points to Note Regarding Data Backup/Export-------------------------- 9-234
Making a Backup of the Data (Reference only) ------------------------- 9-235
Check Items when Turning OFF the Main Power----------------------- 9-238
Installation Procedure ---------------------------------------------------------- 9-239
Installing the LED Board ------------------------------------------------------ 9-243
Installing the System Software Using the SST -------------------------- 9-250
Checking the Security Version ----------------------------------------------- 9-250
Checking the Security Mark -------------------------------------------------- 9-250
Checking after Installation ---------------------------------------------------- 9-250
Reporting to the System Administrator at the End of the Work ----- 9-251
Execution of Auto Adjust Gradation ---------------------------------------- 9-251
[TYPE-7] Option HDD (250GB) + HDD Data Encryption &
Mirroring Kit ----------------------------------------------------------------- 9-252
Points to Note when HDD Data Encryption & Mirroring Kit
has been Installed -------------------------------------------------------------- 9-252
Checking the Contents -------------------------------------------------------- 9-252
Points to Note Regarding Data Backup/Export-------------------------- 9-255
Making a Backup of the Data (Reference only) ------------------------- 9-256
Check Items when Turning OFF the Main Power----------------------- 9-259
Installation Procedure ---------------------------------------------------------- 9-260
Installing the LED Board ------------------------------------------------------ 9-266
Installing the System Software Using the SST -------------------------- 9-273
Checking the Security Version ----------------------------------------------- 9-273
Checking the Security Mark -------------------------------------------------- 9-273
Checking after Installation ---------------------------------------------------- 9-273
Reporting to the System Administrator at the End of the Work ----- 9-274
Execution of Auto Adjust Gradation ---------------------------------------- 9-274
[TYPE-8] Standard HDD + Option HDD (80GB) +
Removable HDD Kit + HDD Mirroring Kit or HDD Data
Encryption & Mirroring Kit ----------------------------------------------- 9-275
Points to Note when HDD Data Encryption & Mirroring Kit
has been Installed -------------------------------------------------------------- 9-275
Checking the Contents -------------------------------------------------------- 9-275
Points to Note Regarding Data Backup/Export-------------------------- 9-280
Making a Backup of the Data (Reference only) ------------------------- 9-281
Check Items when Turning OFF the Main Power----------------------- 9-284
Installation Procedure ---------------------------------------------------------- 9-285
Installing the System Software Using the SST
(Only when installing HDD Data Encryption & Mirroring Kit)--------- 9-305
Checking the Security Version
(Only when installing HDD Data Encryption & Mirroring Kit)--------- 9-305
Checking the Security Mark
(Only when installing HDD Data Encryption & Mirroring Kit)--------- 9-305
Setting the Mirroring ------------------------------------------------------------ 9-306
Reporting to the System Administrator at the End of the Work
(Only when installing HDD Data Encryption & Mirroring Kit)--------- 9-306
Execution of Auto Adjust Gradation
(Only when installing HDD Data Encryption & Mirroring Kit)--------- 9-306
[TYPE-9] 2 Option HDDs (250GB) + Removable HDD Kit +
HDD Mirroring Kit or HDD Data Encryption & Mirroring Kit ---- 9-307
Points to Note when HDD Data Encryption & Mirroring Kit
has been Installed -------------------------------------------------------------- 9-307
Checking the Contents -------------------------------------------------------- 9-307
Points to Note Regarding Data Backup/Export-------------------------- 9-312
Making a Backup of the Data (Reference only) ------------------------- 9-313
Check Items when Turning OFF the Main Power----------------------- 9-316
Installation Procedure ---------------------------------------------------------- 9-317
Installing the System Software Using the SST -------------------------- 9-337
Checking the Security Version
(Only when installing HDD Data Encryption & Mirroring Kit)--------- 9-337
Checking the Security Mark
(Only when installing HDD Data Encryption & Mirroring Kit)--------- 9-337
Setting the Mirroring ------------------------------------------------------------ 9-338
Reporting to the System Administrator at the End of the Work
(Only when installing HDD Data Encryption & Mirroring Kit) -------- 9-338
Execution of Auto Adjust Gradation ---------------------------------------- 9-338
[TYPE-10] Standard HDD +Removable HDD Kit +
HDD Data Encryption & Mirroring Kit -------------------------------- 9-339
Points to Note when HDD Data Encryption & Mirroring Kit
has been Installed -------------------------------------------------------------- 9-339
Checking the Contents -------------------------------------------------------- 9-339
Points to Note Regarding Data Backup/Export-------------------------- 9-343
Making a Backup of the Data (Reference only) ------------------------- 9-344
Check Items when Turning OFF the Main Power----------------------- 9-347
Installation Procedure ---------------------------------------------------------- 9-348
Installing the Removable HDD Kit ------------------------------------------ 9-352
Installing the LED Board ------------------------------------------------------ 9-358
Installing the System Software Using the SST -------------------------- 9-365
Checking the Security Version ----------------------------------------------- 9-365
Checking the Security Mark -------------------------------------------------- 9-365
Checking after Installation ---------------------------------------------------- 9-365
Reporting to the System Administrator at the End of the Work ----- 9-366
Execution of Auto Adjust Gradation ---------------------------------------- 9-366
[TYPE-11] Option HDD (250GB) + Removable HDD Kit +
HDD Data Encryption & Mirroring Kit -------------------------------- 9-367
Points to Note when HDD Data Encryption & Mirroring Kit
has been Installed -------------------------------------------------------------- 9-367
Checking the Contents -------------------------------------------------------- 9-367
Points to Note Regarding Data Backup/Export-------------------------- 9-372
Making a Backup of the Data (Reference only) ------------------------- 9-373
Check Items when Turning OFF the Main Power----------------------- 9-376
Installation Procedure ---------------------------------------------------------- 9-377
Installing the Removable HDD Kit ------------------------------------------ 9-381
Installing the LED Board ------------------------------------------------------ 9-387
Installing the System Software Using the SST -------------------------- 9-394
Checking the Security Version ----------------------------------------------- 9-394
Checking the Security Mark -------------------------------------------------- 9-394
Checking after Installation ---------------------------------------------------- 9-394
Reporting to the System Administrator at the End of the Work ----- 9-395
Execution of Auto Adjust Gradation ---------------------------------------- 9-395
How to Check this Installation Procedure --------------------------- 9-396
Description on the parts included in the package----------------------- 9-396
When Using the Parts Included in the Package------------------------- 9-396
Symbols in the Illustration ---------------------------------------------------- 9-396
Points to Note at Installation ------------------------------------------- 9-396
Check Items when Turning OFF the Main Power ----------------- 9-396
Installation Outline Drawing -------------------------------------------- 9-396
Checking the Contents -------------------------------------------------- 9-397
USB Device Port-E1/E2/E3 -------------------------------------------------- 9-397
Multimedia Reader/Writer-A2 ------------------------------------------------ 9-398
Installation Procedure ---------------------------------------------------- 9-399
Installing the USB Device Port ---------------------------------------------- 9-399
Installing the Card Reader ---------------------------------------------------- 9-411
Installing the Multimedia Reader/Writer-A2 ------------------------------ 9-412
Operation Check [Multimedia Reader/Writer-A2] ----------------- 9-415
Writing Check -------------------------------------------------------------------- 9-415
Reading Check ------------------------------------------------------------------ 9-416
Memory Media Removal ------------------------------------------------------ 9-417
How to check this installation procedure ---------------------------- 9-418
When using the parts included in the package -------------------------- 9-418
Symbols in the illustration ----------------------------------------------------- 9-418
Points to Note at Installation ------------------------------------------- 9-419
Checking the Contents -------------------------------------------------- 9-419
Serial Intreface KIT-K2 -------------------------------------------------------- 9-419
Check Items when Turning OFF the Main Power ----------------- 9-420
Installation Outline Drawing -------------------------------------------- 9-420
Installation Procedure ---------------------------------------------------- 9-421
Removing the Main Controller PCB 1 ------------------------------------- 9-421
Installing the Serial Interface KIT-K2 --------------------------------------- 9-423
Installing the Main Controller PCB 1 --------------------------------------- 9-425
Appendix
Service Tools ----------------------------------------------------------------- 10-2
Special Tools -----------------------------------------------------------------------10-2
Solvents and Oils -----------------------------------------------------------------10-4
General Timing Chart ------------------------------------------------------ 10-5
General Timing Chart ------------------------------------------------------------10-5
General Circuit Diagram Signal Input/Output List ------------------- 10-7
General Circuit Diagram ------------------------------------------------ 10-13
General Circuit Diagram (1/16) ---------------------------------------------- 10-13
General Circuit Diagram (2/16) ---------------------------------------------- 10-14
General Circuit Diagram (3/16) ---------------------------------------------- 10-15
General Circuit Diagram (4/16) ---------------------------------------------- 10-16
General Circuit Diagram (5/16) ---------------------------------------------- 10-17
General Circuit Diagram (6/16) ---------------------------------------------- 10-18
General Circuit Diagram (7/16) ---------------------------------------------- 10-19
General Circuit Diagram (8/16) ---------------------------------------------- 10-20
General Circuit Diagram (9/16) ---------------------------------------------- 10-21
General Circuit Diagram (10/16) -------------------------------------------- 10-22
General Circuit Diagram (11/16) -------------------------------------------- 10-23
General Circuit Diagram (12/16) -------------------------------------------- 10-24
General Circuit Diagram (13/16) -------------------------------------------- 10-25
General Circuit Diagram (14/16) -------------------------------------------- 10-26
General Circuit Diagram (15/16) -------------------------------------------- 10-27
General Circuit Diagram (16/16) -------------------------------------------- 10-28
List of User Mode --------------------------------------------------------- 10-29
Environment Settings ---------------------------------------------------------- 10-29
Adjustment/Maintenance ------------------------------------------------------ 10-38
Function Settings --------------------------------------------------------------- 10-39
Set Destination ------------------------------------------------------------------ 10-50
Management Settings --------------------------------------------------------- 10-51
Backup Data ---------------------------------------------------------------- 10-55
Detail of HDD partition --------------------------------------------------- 10-58
Soft counter specications ---------------------------------------------- 10-59
Soft counter specications ---------------------------------------------------- 10-59
■Laser Safety
■Handling of Laser System
■Turn power switch ON
■Safety of Toner
■Notes When Handling a
Lithium Battery
■Notes Before it Works
Serving
■Points to Note at Cleaning
imageRUNNER ADVANCE
C5051/C5045/C5035/C5030
Series
Safety Precautions
Laser Safety
Since radiation emitted inside the machine is completely conned within protective housings,
external covers and interlock switches, the laser beam cannot escape from the machine
during any phase of user operation.
Therefore this machine is classied in Class 1 laser products that are regarded as safe during
normal use according to International Standard IEC60825-1.
Handling of Laser System
This machine is classied in Class 1 laser products.
However, inside the machine, Class 3B laser beam is emitted and is hazardous when entered
into an eye.
When servicing the area around the laser assembly, be sure to turn off the main power.
If you must service while the power is turned on, be sure to keep the followings:
- Do not use a screwdriver or tools that have a high level of reectance in the laser path.
- Remove watches and rings before starting the work. (They can reect the laser beam,
possibly hitting an eye.)
The machine's covers that conne laser beam radiation are identied by means of a warning
label (Figure). If you must open the cover and defeat interlock switches, be sure not to enter
the laser beam into an eye during the work.
The following warnings are given to comply with Safety Principles (EN60950-1).
Diese Maschine ist der Klasse 1 der Laserprodukte zugeordnet.
Innerhalb der Maschine wird jedoch ein Laserstrahl der Klasse 3B ausgestrahlt und es ist
gefährlich, wenn dieser Strahl in die Augen gerät.
Bei Servicearbeiten am oder in der Nähe des Laserteils zuerst das Hauptgerät abschalten.
Bei Servicearbeiten, die unbedingt bei eingeschaltetem Gerät durchgeführt werden müssen,
auf jeden Fall die folgenden Vorsichtsmaßnahmen beachten.
- Keine stark reektierenden Schraubenzieher oder ähnliche Werkzeuge direkt in den
Lichtpfad des Laserstrahls bringen.
- Vor Beginn der Arbeit Uhren, Ringe und ähnliche Gegenstände abnehmen. (Reektierende
Laserstrahlen könnten sonst in die Augen geraten.)
Die Geräte-Abdeckungen, die Laserstrahlen reektieren können, werden durch einen
besonderen Warnaufkleber gekennzeichnet (siehe Bild).
Muss die Abdeckung geöffnet und die Sicherheitssperre ausgeschaltet werden, besondere
Vorsicht walten lassen, damit der Laserstrahl nicht in die Augen gerät.
F-0-1
Turn power switch ON
The machine is equipped with 2 power switches: main power switch and control panel power
switch.
The machine goes on when the main power switch is turned on (i.e., other than in low power
mode, sleep mode).
CAUTION:
Do not turn off the main power switch while the progress bar is indicated, during which
access is made to the HDD. If deprived of power, the HDD can suffer a fault (E602).
Safety of Toner
About Toner
The machine's toner is a non-toxic material made of plastic, iron, and small amounts of dye.
CAUTION:
Do not throw toner into re. It may cause explosion.
Toner on Clothing or Skin
• If your clothing or skin has come into contact with toner, wipe it off with tissue; then, wash it
off with water.
• Do not use warm water, which will cause the toner to jell and fuse permanently with the
bers of the cloth.
• Tonner is easy to react with plastic material, avoid contact with plastic.
Notes When Handling a Lithium Battery
CAUTION:
RISK OF EXPLOSION IF BATTERY IS REPLACED BY AN INCORRECT TYPE.
DISPOSE OF USED BATTERIES ACCORDING TO THE INSTRUCTIONS.
The following warnings are given to comply with Safety Principles (EN60950-1).
CAUTION:
Wenn mit dem falschen Typ ausgewechselt, besteht Explosionsgefahr.
Gebrauchte Batterien gemäß der Anleitung beseitigen.
Notes Before it Works Serving
CAUTION:
At servicing, be sure to turn OFF the power source according to the specied steps and
disconnect the power plug.
Points to Note at Cleaning
CAUTION:
When performing cleaning using organic solvent such as alcohol, be sure to check that
the component of solvent is vaporized completely before assembling.
1
1Product Overvew
Product Overvew
■Product Lineup
■Feature
■Specication
■Name of Parts
■Operation
1
1
1-2
1-2
Product Overvew > Product Lineup > Host machine > Model type
Product Lineup
Host machine
F-1-1
■Host machine conguration
Host machine conguration
Printer only
■Model type
C5051 C5045 C5035 C5030
Print Speed (BW /
Color) 51 / 51ppm 45 / 45ppm 35 / 35ppm 30 / 30ppm
Positioning High-speed / high-quality Middle-Ofce
model
Target machine :
iRC5180 / 4580 / 3880Series
Cost-prioritized Standard-Ofce model
Target machine :
iRC3380 / 2880Series,
iRC6800Series, iRC3100Series
imageRUNNER ADVANCE C50 51
A: Product category (90: Production model, 50 : Office model)
B: Print speed (unit is ppm : print per minutes)
A B
T-1-1
T-1-2
F-1-2
1
1
1-3
1-3
Product Overvew > Product Lineup > Option > Pickup delivery / image reading options
Option
■Pickup delivery / image reading options
【1】
【2】
【3】
【4】【5】
【6】
【7】
【8】
【9】
【10】
【11】
【12】
【13】
【14】
【15】
【16】
【17】
【18】
【19】
【20】
F-1-3
No. Brand name Remarks and condition
1 Inner Finisher Additional Tray-A1 -
2 Inner Finisher-A1 Built-in nisher
3 Duplex Color Image Reader Unit-B1 ADF-XD (1 Path Duplex Type DADF) + Reader
4 Reader Heater Kit-G1 For USA,CCI,CLA, this is provided as a service
part.
5 Color Image Reader Unit-B1 ADF-SU (Reverse Duplex Type DADF) + Reader
6 Color Image Reader Unit-B2 Copyboard + Reader
7 Printer Cover-C1 -
8 Copy Tray-J1 -
9 Cassette Heater Unit-32 Deck Heater for Paper Deck Unit-B1.
10 Paper Deck Unit-B1 -
11 Envelope Feeder Attachment-D1 Cassette Attachment for envelope
12 FL Cassette-AG1 -
13 FL Cassette-AH1 -
14 Cassette Heater Unit-37 Cassette Heater for host machine, 2-Cassette
Pedestal-AD1
15 Cassette Feeding Unit-AD1 -
16 Buffer Pass Unit-G1 -
17 Inner 2Way Tray-F1 For host machine delivery additional tray
18 External 2 Hole Puncher-B1 External 2/3 Hole Puncher-B1(USA,CAN,CLA),
External 2/4 Hole Puncher-B1(EUR,FRA,CA),
External 4 Hole Puncher-B1(EUR)
19 Booklet Finisher-C1 Buffer Path Unit G1 is required
20 Staple Finisher-C1 Buffer Path Unit G1 is required
T-1-3
1
1
1-4
1-4
Product Overvew > Product Lineup > Option > Function expanding option
■Function expanding option
Voice
Guidance
Unit
Voice
Guidance
PCB
Voice
Operation
Unit
Voice
Operation
PCB
【1】
【2】
【3】
【4】
【5】
【6】
【7】
【8】
【9】
【10】
【11】
【12】
【13】
【14】
【15】
【16】
【17】
【18】
【19】
【20】
【21】
【22】
【23】
【24】
No. Brand name Remarks and condition
1 Voice Operation Kit-C1 Note
2 Voice Guidance Kit-F1 Note
3 Removable HDD Kit-AC1 -
4 2.5inch/80GB HDD-C1 -
2.5inch/250GB HDD-D1 Only when Mirroring Kit is extended
5 Copy Card Reader-C1/F1 Note
Copy Card Reader Attachment-B1 Note
6 Utility Tray-A1 Note
7 Multimedia Reader/Writer-A1 USB device port-B1 is required
8 USB Device Port-B1 -
9 ColorPASS-GX300/PS-GX300 -
10 Key Switch Unit-A2 -
11 HDD Mirroring Kit-D1 -
12 HDD Data Encryption & Mirroring Kit-C1 -
13 Expansion Bus-F1 -
F-1-4
No. Brand name Remarks and condition
14 Additional Memory Type B (512MB) -
15 Image Data Analyzer Board-A1 Document Scan Lock Kit-A1 is required
16 Super G3 FAX Board-AE1 -
17 Super G3 2nd Line Fax Board-AE1 1-line FAX board is required
18 Super G3 3rd/4th Line Fax Board-AE1 1-line FAX board + additional 2nd line FAX Board
is required (A European region is excluded. )
19 imagePASS-B1 -
20 IPSec Board-B2 PCI bus expansion kit-F1 is required
21 Wireless LAN Board-B1 -
22 Signal Interface Kit-A1 -
23 Serial Interface Kit-K1 -
24 PCL Printer Kit-AE1 -
Direct Print Kit (for PDF/XPS)-H1 -
Barcode Printing Kit-D1 -
Encrypted Secure Print Software-D1 -
IMPOSE(Ver2.7) Roman Number of license: 1, 3, 7
Universal Send Digital User Signature
Kit-C1
-
Universal Send Advanced Feature Set-D1 -
Universal Send Security Feature Set-D1 -
Remote Operators Software Kit-B1 -
Remote Operators Software Kit-A3 -
HOTFOLDER VER.2 -
HDD Data Erase Kit-A1 -
Remote Fax Kit-A1 -
PS Printer Kit-AE1 -
Secure Watermark-A1 -
Document Scan Lock Kit-A1 -
ACCESS MANAGEMENT SYSTEM Kit-B1 -
Web Access Software-H1 -
iR-ADV Security Kit-A1 for IEEE 2600.1
Common Criteria Certication
NOTE:
There is a combination restriction when installing No1,2,5 to 6. (Part No5 can be
installed with any of those. Other than No5, only one of them can be installed.)
T-1-4

Other manuals for IMAGERUNNER ADVANCE C5051

11

This manual suits for next models

3

Other Canon All In One Printer manuals

Canon PIXMA MG6120 Series Manual

Canon

Canon PIXMA MG6120 Series Manual

Canon imageRUNNER ADVANCE C9280 PRO User manual

Canon

Canon imageRUNNER ADVANCE C9280 PRO User manual

Canon MultiPASS C530 User manual

Canon

Canon MultiPASS C530 User manual

Canon imageCLASS MF4890dw Safety guide

Canon

Canon imageCLASS MF4890dw Safety guide

Canon PIXMA MP500 Instruction Manual

Canon

Canon PIXMA MP500 Instruction Manual

Canon PIXMA MP130 User manual

Canon

Canon PIXMA MP130 User manual

Canon PIXMA MX512 User manual

Canon

Canon PIXMA MX512 User manual

Canon PIXMA MP780 User manual

Canon

Canon PIXMA MP780 User manual

Canon Laser Class 700 Series User manual

Canon

Canon Laser Class 700 Series User manual

Canon imageRUNNER ADVANCE 8105 User manual

Canon

Canon imageRUNNER ADVANCE 8105 User manual

Canon PIXMA TS6000 Series Setup guide

Canon

Canon PIXMA TS6000 Series Setup guide

Canon imageRUNNER 2645i User manual

Canon

Canon imageRUNNER 2645i User manual

Canon PIXMA MP495 Series Manual

Canon

Canon PIXMA MP495 Series Manual

Canon imageRUNNER 1750i User manual

Canon

Canon imageRUNNER 1750i User manual

Canon PIXMA MG6120 Series Manual

Canon

Canon PIXMA MG6120 Series Manual

Canon PIXMA MP170 User manual

Canon

Canon PIXMA MP170 User manual

Canon imageCLASS D780 Installation and maintenance instructions

Canon

Canon imageCLASS D780 Installation and maintenance instructions

Canon Color imageCLASS MF8580Cdw User manual

Canon

Canon Color imageCLASS MF8580Cdw User manual

Canon imageRUNNER ADVANCE C5255 User manual

Canon

Canon imageRUNNER ADVANCE C5255 User manual

Canon MB2300 series Setup guide

Canon

Canon MB2300 series Setup guide

Canon MG5700 Series Setup guide

Canon

Canon MG5700 Series Setup guide

Canon imageCLASS MF6500 Series User guide

Canon

Canon imageCLASS MF6500 Series User guide

Canon imageRUNNER ADVANCE C7260 Guide

Canon

Canon imageRUNNER ADVANCE C7260 Guide

Canon imageRUNNER ADVANCE 6055 Operating manual

Canon

Canon imageRUNNER ADVANCE 6055 Operating manual

Popular All In One Printer manuals by other brands

Brother DCP-9020CDW Advanced user's guide

Brother

Brother DCP-9020CDW Advanced user's guide

Xerox WorkCentre 7220 installation guide

Xerox

Xerox WorkCentre 7220 installation guide

Ricoh FAX1800L operating instructions

Ricoh

Ricoh FAX1800L operating instructions

Lexmark XM1145 FTP guide

Lexmark

Lexmark XM1145 FTP guide

Air Techniques ScanX Duo instruction manual

Air Techniques

Air Techniques ScanX Duo instruction manual

Xerox WorkCenter 7132 Quick use guide

Xerox

Xerox WorkCenter 7132 Quick use guide

Epson CX6400 - Stylus Color Inkjet user manual

Epson

Epson CX6400 - Stylus Color Inkjet user manual

Ricoh Aficio MP C2051 operating instructions

Ricoh

Ricoh Aficio MP C2051 operating instructions

Ricoh B064 SERIES Service manual

Ricoh

Ricoh B064 SERIES Service manual

Lexmark CX310 series Service manual

Lexmark

Lexmark CX310 series Service manual

Muratec MFX-1450 Software guide

Muratec

Muratec MFX-1450 Software guide

Toshiba e-Studio 350 User functions guide

Toshiba

Toshiba e-Studio 350 User functions guide

Lexmark Prestige Pro805 Specifications

Lexmark

Lexmark Prestige Pro805 Specifications

Samsung SCX-4824FN Specifications

Samsung

Samsung SCX-4824FN Specifications

Xerox WorkCentre 5230A System administration guide

Xerox

Xerox WorkCentre 5230A System administration guide

Dell 7330 user guide

Dell

Dell 7330 user guide

Xerox WorkCentre 5019 Network addendum

Xerox

Xerox WorkCentre 5019 Network addendum

Brother 8085DN - DCP B/W Laser user guide

Brother

Brother 8085DN - DCP B/W Laser user guide

manuals.online logo
manuals.online logoBrands
  • About & Mission
  • Contact us
  • Privacy Policy
  • Terms and Conditions

Copyright 2025 Manuals.Online. All Rights Reserved.