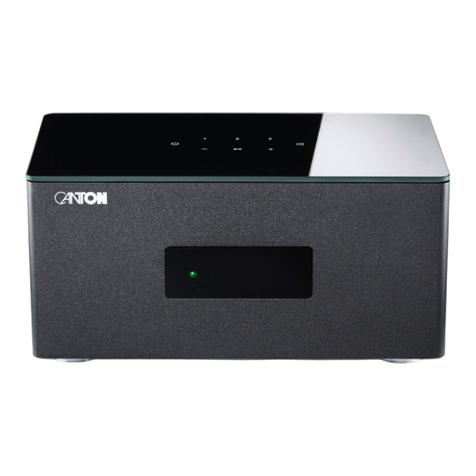
Canton Smart Amp 5.1 User manual

Operating instruCtions
Smart amp 5.1
OPERATING INSTRUCTIONS English

Content
Important safety instructions ���������������������������������������������������������������������������������������������������������������������������������������������������������������������������������������� Page 7
Unpacking����������������������������������������������������������������������������������������������������������������������������������������������������������������������������������������������������������������������� Page 11
Setting up the remote control�������������������������������������������������������������������������������������������������������������������������������������������������������������������������������������� Page 11
Connection terminal����������������������������������������������������������������������������������������������������������������������������������������������������������������������������������������������������� Page 12
Touch pad�����������������������������������������������������������������������������������������������������������������������������������������������������������������������������������������������������������������������Page 14
Remote control ��������������������������������������������������������������������������������������������������������������������������������������������������������������������������������������������������������������Page 15
LED indications���������������������������������������������������������������������������������������������������������������������������������������������������������������������������������������������������������������Page 16
Display indications���������������������������������������������������������������������������������������������������������������������������������������������������������������������������������������������������������Page 16
Using Chromecast built-in���������������������������������������������������������������������������������������������������������������������������������������������������������������������������������������������Page 19
Google Assistant �����������������������������������������������������������������������������������������������������������������������������������������������������������������������������������������������������������Page 20
Using Spotify Connect��������������������������������������������������������������������������������������������������������������������������������������������������������������������������������������������������Page 20
Playback via Bluetooth® wireless technology ������������������������������������������������������������������������������������������������������������������������������������������������������������ Page 21
Using AirPlay 2 technology ������������������������������������������������������������������������������������������������������������������������������������������������������������������������������������������Page 22
Playback via AirPlay 2 technology�������������������������������������������������������������������������������������������������������������������������������������������������������������������������������Page 23
Preset 1–3�����������������������������������������������������������������������������������������������������������������������������������������������������������������������������������������������������������������������Page 24
Automatic Updates�������������������������������������������������������������������������������������������������������������������������������������������������������������������������������������������������������Page 25
Menu structure and navigation������������������������������������������������������������������������������������������������������������������������������������������������������������������������������������Page 25
1. Speaker Setup [SPS]��������������������������������������������������������������������������������������������������������������������������������������������������������������������������������������������������Page 26
– Channel Level [CHL] ������������������������������������������������������������������������������������������������������������������������������������������������������������������������������������������������Page 26
– Distance [DST] ��������������������������������������������������������������������������������������������������������������������������������������������������������������������������������������������������������� Page 27
– DRC [DRC]����������������������������������������������������������������������������������������������������������������������������������������������������������������������������������������������������������������Page 28
– Voice Clarity [VOI] ���������������������������������������������������������������������������������������������������������������������������������������������������������������������������������������������������Page 28
– Equalization [EQ ]�����������������������������������������������������������������������������������������������������������������������������������������������������������������������������������������������������Page 29
– Xover Small Speakers [XOV] ������������������������������������������������������������������������������������������������������������������������������������������������������������������������������������Page 29
– Subwoofer Setup [SUB]�������������������������������������������������������������������������������������������������������������������������������������������������������������������������������������������Page 30
– Sub Phase [PHA] ����������������������������������������������������������������������������������������������������������������������������������������������������������������������������������������������������Page30
– Sub Stereo [SSM]��������������������������������������������������������������������������������������������������������������������������������������������������������������������������������������������������Page 30
– Stereo Sub Xover [SSX] �����������������������������������������������������������������������������������������������������������������������������������������������������������������������������������������Page 31
– Room Height [RHE]���������������������������������������������������������������������������������������������������������������������������������������������������������������������������������������������������Page 31
– Device Heights [DHE] ���������������������������������������������������������������������������������������������������������������������������������������������������������������������������������������������� Page 32
Thank you very much for choosing this Canton product� You can now look forward to
countless hours filled with excellent sound�
If you have any questions or need further information, please do not hesitate to contact
us!
Service-Telefon: 06083 / 287–87
Service E-Mail: service@canton�de
Canton Elektronik GmbH + Co� KG
Neugasse 21 – 23
61276 Weilrod, Germany
Thanks!

3
5
English
– Pair Mode [BTP] ����������������������������������������������������������������������������������������������������������������������������������������������������������������������������������������������������Page 48
– BT Select [BTS] �����������������������������������������������������������������������������������������������������������������������������������������������������������������������������������������������������Page 49
– BT Reset [BRE] ������������������������������������������������������������������������������������������������������������������������������������������������������������������������������������������������������Page 50
– AutoPlay [APL] ������������������������������������������������������������������������������������������������������������������������������������������������������������������������������������������������������Page 50
– Wireless Reset [WRE]�����������������������������������������������������������������������������������������������������������������������������������������������������������������������������������������������Page 51
5. Output Setup [OPS] ���������������������������������������������������������������������������������������������������������������������������������������������������������������������������������������������������Page 51
– Speaker Configuration [SPC]�����������������������������������������������������������������������������������������������������������������������������������������������������������������������������������Page 52
– Speaker Mapping [SPM]�������������������������������������������������������������������������������������������������������������������������������������������������������������������������������������������Page 55
6. System Info [INF]������������������������������������������������������������������������������������������������������������������������������������������������������������������������������������������������������� Page 57
– Firmware Info [FWI] �������������������������������������������������������������������������������������������������������������������������������������������������������������������������������������������������Page 58
– Network Info [NWI]��������������������������������������������������������������������������������������������������������������������������������������������������������������������������������������������������Page 59
Trouble shooting������������������������������������������������������������������������������������������������������������������������������������������������������������������������������������������������������������Page 60
Technical data���������������������������������������������������������������������������������������������������������������������������������������������������������������������������������������������������������������� Page 67
EU declaration of conformity ����������������������������������������������������������������������������������������������������������������������������������������������������������������������������������������Page 68
Further important information ��������������������������������������������������������������������������������������������������������������������������������������������������������������������������������������Page 69
Warranty ������������������������������������������������������������������������������������������������������������������������������������������������������������������������������������������������������������������������Page 70
License Notices���������������������������������������������������������������������������������������������������������������������������������������������������������������������������������������������������������������Page 71
– Sound Setup [SND] ���������������������������������������������������������������������������������������������������������������������������������������������������������������������������������������������Page 32
2. System Setup [SYS]����������������������������������������������������������������������������������������������������������������������������������������������������������������������������������������������Page 33
– Sleep Timer [SLP]������������������������������������������������������������������������������������������������������������������������������������������������������������������������������������������������Page 33
– IR Menu [IRM] ������������������������������������������������������������������������������������������������������������������������������������������������������������������������������������������������������Page 34
– IR Learn [IRL]����������������������������������������������������������������������������������������������������������������������������������������������������������������������������������������������������Page 34
– Direct Input Learn [DIL] �����������������������������������������������������������������������������������������������������������������������������������������������������������������������������������Page 35
– IR Clear [CLR]���������������������������������������������������������������������������������������������������������������������������������������������������������������������������������������������������Page 36
– HDMI CEC [CEC] �������������������������������������������������������������������������������������������������������������������������������������������������������������������������������������������������Page 36
– Standby Mode [STB] ������������������������������������������������������������������������������������������������������������������������������������������������������������������������������������������� Page 37
– Input Configuration [INP]������������������������������������������������������������������������������������������������������������������������������������������������������������������������������������Page 38
– Analog Gain [OFS]�����������������������������������������������������������������������������������������������������������������������������������������������������������������������������������������������Page 39
– Input Select [SEL] �����������������������������������������������������������������������������������������������������������������������������������������������������������������������������������������������Page 40
– Lipsync [LIP]��������������������������������������������������������������������������������������������������������������������������������������������������������������������������������������������������������Page 40
– Max Volume [VOL]������������������������������������������������������������������������������������������������������������������������������������������������������������������������������������������������Page 41
– Playmode [PLM] ���������������������������������������������������������������������������������������������������������������������������������������������������������������������������������������������������Page 41
– 3D Audio [3D]������������������������������������������������������������������������������������������������������������������������������������������������������������������������������������������������������Page 42
– Display Setup [UIS] ���������������������������������������������������������������������������������������������������������������������������������������������������������������������������������������������Page 42
– Language [LAN] �����������������������������������������������������������������������������������������������������������������������������������������������������������������������������������������������Page 42
– LED Flashing [LED]�������������������������������������������������������������������������������������������������������������������������������������������������������������������������������������������Page 42
– Input Stream Display [ISD] ������������������������������������������������������������������������������������������������������������������������������������������������������������������������������Page 43
– Slave Display [SUI] �������������������������������������������������������������������������������������������������������������������������������������������������������������������������������������������Page 43
– Factory Reset [RES] ��������������������������������������������������������������������������������������������������������������������������������������������������������������������������������������������Page 44
– OTA Recovery [OTA] ����������������������������������������������������������������������������������������������������������������������������������������������������������������������������������������Page 45
3. Network Setup [NWS] �����������������������������������������������������������������������������������������������������������������������������������������������������������������������������������������Page 45
– Network Select [NWC]������������������������������������������������������������������������������������������������������������������������������������������������������������������������������������Page 45
– Network Reset [NWR]�������������������������������������������������������������������������������������������������������������������������������������������������������������������������������������Page 46
4. Wireless Setup [WIS] ������������������������������������������������������������������������������������������������������������������������������������������������������������������������������������������� Page 47
– Transmission Poiwer [TXP]���������������������������������������������������������������������������������������������������������������������������������������������������������������������������������� Page 47
– RF Channel [CHN] ����������������������������������������������������������������������������������������������������������������������������������������������������������������������������������������������� Page 47
– Bluetooth Setup [BT] ������������������������������������������������������������������������������������������������������������������������������������������������������������������������������������������Page 48

3
7
English
6
English
Important safety instructions
Note
Read and follow all instructions�
Keep these instructions�
Observe all warnings and safety instructions�
Operate this device only in a moderate climate (not in a tropical climate)�
Do not operate this device at altitudes above 2000 m above sea level�
Only operate this device indoors, not outdoors or in damp rooms�
To avoid the risk of fire or electric shock, the device must not be exposed to rain or moisture�
Do not operate this device near water�
Do not expose this device to dripping or splashing water�
CAUTION
Risk of
electric shock
Do not open!
CAUTION:
To reduce the rist of fire and electric shock,
do not open the device.
There are no serviceable parts inside.
Refer all servicing to qualified service
personnel only.
CAUTION
Danger of explosion!
CAUTION:
Replaceable lithium batteries!
Caution: Danger of
explosion if battery is incorrectly replaced.
Replace only with the same or equivalent type.
CAUTION
Danger of life!
CAUTION:
Do not ingest battery. Chemical burn hazard.
Danger of life!
Safety instructions
Please observe the safety instructions when choosing the correct location for your Smart Amp 5�1 and when maintaining and operating it!
The user is responsible for the proper handling of the amplifier� Canton cannot accept any responsibility for damage or accidents caused by
improper installation or connection�
Choose a flat surface Avoid moisture Avoid shocks Do not touch the mains
cable with wet hands
Do not throw in
household waste
Distance to
sources of heat
Do not use aggressive,
alcoholic or abrasive
agents for cleaning
Do not reach into the
housing opening
Disconnect mains plug
during thunderstorms
Turn down the system if
there is an overload
Avoid direct sunlight Protect from
extreme cold
Do not open
the housing
Make sure the polarity
of the battery and remo-
te control is correct
Ensure free access
to the power plug

3
9
English
8
English
Always choose a level surface� The device must be in a vertical position�
Do not exert force on operating elements, connections and lines�
The device may only be operated with the voltage and frequency specified on the device or the type plate�
Do not insert any objects or body parts into the openings of the device� Live parts inside the housing could
be touched and/or damaged� This can lead to short circuits, electric shocks and fire�
Only use fixing materials and accessories that are approved by the manufacturer and/or supplied with the device�
Only use trolleys, stands, tripods, holders or tables specified by the manufacturer or sold with the device�
When using a trolley, be careful when moving the trolley/device assembly to prevent damage and injury from tipping over�
Only clean this device with a clean, dry cloth�
Do not use any aggressive, alcoholic or abrasive agents for cleaning�
To avoid electric shock, do not open the housing! There are no user-serviceable parts in the device�
Consult qualified personnel for all repair and maintenance work� This is required when the device has been
damaged in any way, such as mains cable or plug damage, liquid or objects have been spilled, exposed to rain
or moisture, does not operate normally, or has been dropped�
Do not make any changes to the device or accessories� Unauthorised modifications can compromise safety,
regulatory compliance or system performance� In this case, the type approval/guarantee may expire�
If sound distortions such as unnatural knocking, throbbing or high-frequency clicking occur during playback,
the volume level must be reduced immediately�
To avoid possible hearing damage, do not listen at high levels for long periods of time� Interrupt the playback if you hear ringing or
whistling noises in your ears or if you have the impression that you can no longer hear high sounds (even for a short time)�
New and used batteries must be kept away from children� Devices in which the battery compartment
cannot be closed securely must not be used any longer and must be kept away from children�
Strong temperature fluctuations lead to condensation (water droplets) in the device�
Wait until the moisture has evaporated (at least three hours)�
Do not place objects filled with liquids (such as vases) on the device�
Do not place an open fire, such as lit candles, on or near the device�
Do not place the device near heat sources such as radiators, heat accumulators, stoves or other devices
(including amplifiers) that generate heat�
Avoid direct sunlight�
Keep a clearance of at least 5 cm around the device�
Never prevent the protective function of polarised or grounded plugs: A polarised plug has two pins, one wider than the other�
An earthed plug has a third earthing pin� The wide or third pin is for your safety� If the plug does not fit into your outlet, contact
a qualified electrician to replace the obsolete outlet�
To avoid electric shock, connect the mains plug only to sockets or extensions where the contact
pins can be fully inserted to prevent exposed contact pins�
Never touch the signal and mains cable with wet hands�
Do not step on or pinch the mains cable, especially not in the area of the plugs, sockets or where the cable is led out of the device�
For devices without a mains switch, in which the mains plug or the device mains socket serves as an isolating device,
the plug of the mains cable or the device mains socket must be freely accessible at all times�
Disconnect the device from the mains during thunderstorms or prolonged periods of non-use�
To completely disconnect the device from the power supply, unplug the mains cable from the wall outlet�
Where the MAINS plug or an appliance coupler is used as the disconnect device, the disconnect device shall remain readily operable
Always switch off the device before connecting or disconnecting connection cables�
Always pull the plugs and not the cables�
Install the device according to the manufacturer's instructions�

3
11
English
10
English
Unpacking
Unpack the box carefully and check that all the following parts
are present:
Delivery content
• 1x Smart Amp 5�1
• 1x Remote control
• 1x Power cord
• 1x Short manual
Setting up the
remote control
The remote control comes with a
battery already installed� Simply
remove the protective film to
activate� When replacing the battery
ensure that it is correctly inserted
according to the polarity markings
(+/–)�
Only use the battery specified for this
system (CR 2032)�
CR 2032
OPEN CLOSE
Place the Smart Amp 5�1 in the desired location and connect
it to the power input using the power cord� Make sure that
your TV is plugged in� If you want to connect your Amp to the
WiFi network, please make sure your WiFi router is active and
has a connection to the Internet�
Connection
The remote control supplied with this device contains a button cell as battery� Swallowing the button cell
can cause serious internal burns and thus death in only 2 hours!
Do not ingest the battery, Chemical Burn Hazard�
If you think batteries might have been swallowed or placed inside any part of the body, seek immediate medical attention�
Take care of your environment when disposing of the battery� Batteries must be disposed of at a battery collection point�
Do not expose batteries to high temperatures, such as direct sunlight, fire or the like�
Batteries must be inserted correctly according to the polarity imprint� Incorrect insertion can lead to damage�
Only use the batteries or rechargeable batteries specified for the device�
The batteries supplied are not rechargeable batteries, i�e� these batteries must not be recharged�
The device and/or the accessory may contain small parts that can be swallowed�
Therefore not suitable for children under three years�
This symbol indicates uninsulated dangerous voltages inside the case that are sufficiently
strong (amplitude) to cause a fire or electric shock�
This symbol warns you of important operating and maintenance instructions in the
accompanying documentation (manual) supplied�
This symbol indicates Class II devices, where protection against electric shock is provided by double or
reinforced insulation during specified use and therefore no protective earth connection is required�

3
13
English
12
English
Phys. Input
ARC
HD1
HD2
HD3
OPT
COA
LIN
Bluetooth®
Network (WiFi/Ethernet)
OSD
ARC
HDMI1
HDMI2
HDMI3
OPT
COAX1
ANALOG
BT
NETWORK
Name (display indication)
TV
BDP
SAT
PS
CD
DVD
AUX
BT
NET
Note:The physical inputs have the following designations, (which you can match to the connected source at any time, except for
BT and NET):
Note:The eARC/ARC function can be used at any time with the Amp 5�1 and does not need to be activated or deactivated�
For your TV to support the eARC / ARC function it must have at least one HDMI® input with enhanced Audio Return Channel
(eARC) / Audio Return Channel (ARC)� The CEC function must be activated� For more information please consult the
operating manual of your TV�
Connection Terminal
1HDMI®Output (HDMI®with 3D, 4K, eARC/ARC, HDCP 2�2, CEC, HDR)
For the connection with the HDMI®(eARC / ARC) input of your TV�
2HDMI®Inputs (3x HDMI®with 3D, 4K, HDCP 2�2, CEC, HDR)
For the connection with the HDMI®Output of your digital source devices�
3LINE L/R (AUX) (2x RCA, max� 2Vrms)
For the connection with the analog line output of your source device�
4COAXIAL (COA) Input (RCA, max� 96kHz)
For the connection with your (digital) coax audio output of your TV or digital source device�
5SUB OUT (RCA, max� 2Vrms)
For connection with an active subwoofer�
6OPTICAL IN (OPT) (TOSLINK, max� 96kHz)
For the connection with your (digital) optical audio output of your TV or digital source device�
7ETHERNET (LAN) (RJ45 Socket, 8-pole)
For the connection with a network router via ethernet cable�
8SERVICE CONNECTOR (USB A Socket, no audio, no charging)
Used for the Canton customer service only�
9Speaker Terminal (Screw terminal, max� 6mm2)
For the connection with passive loudspeakers and/or a passive subwoofer�
10 POWER INPUT (IEC C18, 100–240V~, 50/60Hz, 400W)
For connection with the Mains�
Note:
eARC is only available on devices of the
second generation (Amp 5�1 S2)�

3
15
English
14
English
Remote Control
1Power Toggles Soundbar status (on/standby)
2Mute
Mutes audio
3Upwards
[ ]
Sets input or menu item upwards
4Downwards
[ ]
Sets input or menu item downwards
5OK Enters next menu level (confirms selection)
6Plus [+] Increases volume or menu value
7Minus [-] Decreases volume or menu value
8Menu Enters settings menu or previous menu level
9Play Mode Toggles btw� the several play modes:
Stereo For stereo playback
Movie Virtual surround sound for movies
Music Virtual surround sound for concert audio playback etc�
Discrete Surround sound for movies and concert audio playback etc�
(Play mode only available with connected surround speakers)
Party Plays the front channels (FL+FR) additionally on the surround speakers�
(Play mode only available with connected surround speakers)
Night (Virtual) surround sound with reduced dynamic and higher speech intelligibility at low
volume levels for "night usage"
Pure Direct Surround sound without usage of a virtualizer or upmixer
10 Sound Toggles btw� bass, midrange and treble tone control settings:
Bass Bass adjustment from -10dB to +10dB
Midrange Midrange adjustment from -10dB to +10dB
Treble Treble adjustment from -10dB to +10dB
11 Preset Preset keys for direct access of previously stored (sound)settings and Spotify playlists
12 Play/Pause Play/Pause function for Chromecast built-in, Spotify Connect, AirPlay and Bluetooth®
wireless technology
13 Skip FW Skip forward function for Chromecast built-in, Spotify Connect, AirPlay and Bluetooth®
wireless technology
14 Skip BW Skip backward function for Chromecast built-in, Spotify Connect, AirPlay and Bluetooth®
wireless technology
15 Bluetooth Pairing Initializes the pairing process with a (mobile) device
Touch Keys
1Power: Toggles power status between On and Standby
2Preset 1–3: Preset keys for direct access of previously stored sound settings and
Spotify playlists
3Input: Toggles through the inputs
4Plus: Increase main volume
5Minus: Decrease main volume
6Play/Pause: Play/Pause function for Chromecast built-in,
Spotify Connect, AirPlay and Bluetooth®wireless technology
Menu control:
1Input
• Get to the menu (press and hold for 3 seconds)
• One level back in the menu
• Exit the menu (press and hold for 3 seconds)
2Plus
• Menu selection upwards
• Increase menu value
3Minus
• Menu selection downwards
• Decrease menu value
4Play/Pause
• Continue to the next menu level
• Confirm selection

3
17
English
16
English
LED indications
The LED indicates the following conditions:
• LED off (not illuminated) Amplifier disconnected from the mains
• LED shining red Amplifier in standby mode
• LED flashing green quickly Amplifier is booting
• LED shining green Amplifier is active (network connected)
-------------------------------------------------------------------------------------------------------------
• LED flashing green slowly Network disconnected
• LED flashing green Network setup mode
• LED flashing green/red Amplifier is executing a FW update
• LED flashing green two times Ethernet setup mode (LAN connected)
Display indications
On-Screen Display (OSD)
All settings and configurations of the Amp 5�1 can comfortably be done using the On-Screen display with your TV-Screen� To do so the Amp must be
connected with your TV using a HDMI®-cable� The menu is comprehensibly structured� Pressing the menu button (M) on the remote guides you to
the main menu�
Note:
To change the language of the OSD (German or English), navigate to the main menu by pressing the menu button "M".
Select the menu Systemeinstellungen [SYS] by using the arrow buttons " " or " " and enter by pressing the "OK" button�
Use the arrow buttons " " or " " to select the menu item Sprache [LAN] in the submenu Display Setup [UI] and confirm by
pressing the "OK" button� Use the "+" or "-" button to select the desired language as German [DEU] or English [ENG] and
confirm your selection with the "OK" button�
Exit the menu by pressing and hold the menu button "M"�
LED Display
The Amp 5�1 has a multifunctional LED display build in the front of the Amp which will light up for 5 seconds when receiving a command� The most
important indications and their meanings are listed below:
Operation Display Meaning
Input TV HDMI®ARC input selected
Input BDP HDMI®HD1 input selected
Input SAT HDMI®HD2 input selected
Input PS HDMI®HD3 input selected
Input BT Bluetooth®input selected
Input NET Network input selected
Input AUX Analogue input selected
Input DVD First coax digital input selected
Input PAD Second coax digital input selected
Input CD Optical digital input selected
Sound Setting V35 Volume to 35 (of max� 70)
Sound Setting – – – Amp 5�1 is muted
Sound Setting BAS Bass tone control adjustment
Sound Setting MID Midrange tone control adjustment
Sound Setting TRE Treble tone control adjustment
Playmode STEREO Stereo mode selected
Playmode MOVIE Virtual surround sound for movie playback
Playmode MUSIC Virtual surround sound for music playback
Playmode NIGHT Virtual surround sound with reduced dynamic
Playmode PARTY Copy the audio signal from the front-speakers to the surround speakers
Playmode DISCRETE Surround sound for movie and music playback
Playmode PURE DIRECT Plays the input signal without using a virtualizer or upmixer
Bluetooth® BTP Pairing mode (Pairing)
Bluetooth® BT- / CON Connection established
Bluetooth® BT- / DIS Connection closed
Bluetooth® FAI Failure occurred during pairing process

3
19
English
18
English
Operation Display Meaning
Incoming Signal DOLBY ATMOS Dolby Atmos®bitstream
Incoming Signal DOLBY DIGITAL Dolby®digital multichannel-bitstream
Incoming Signal DOLBY DIGITAL 2�0 Dolby®digital two-channel-bitstream
Incoming Signal DOLBY DIGITAL PLUS Dolby Digital PlusTM multichannel-bitstream
Incoming Signal DOLBY SURROUND Dolby®surround sound
Incoming Signal DTS-HD DTS-HD®bitstream
Incoming Signal DTS DTS®digital surround bitstream
Incoming Signal PCM Digital stereo signal
Networking CAST Usage of Chromecast built-in
Networking SPOTIFY Usage of Spotify Connect
Networking AIRPLAY Usage of AirPlay technology
Networking WIF / CON Network (WiFi) connected
Networking WIF / DIS Network (WiFi) disconnected
Networking ETH / CON Network (ethernet) connected
Networking ETH / DIS Network (ethernet) disconnected
Networking NET / SET Smart Amp 5�1 ready for network setup
Note:The Playmodes Discrete, Party and Pure Direct are only selectable if surround speakers have been activated in the menu
"Output Setup" [OPS]� Please find further informations in the explanations of the menu "Output Setup" [OPS]�
Using Chromecast built-inTM
Requirements:
• (Mobile) device with activated WiFi and Bluetooth® function
• Network access (wireless by WiFi or wired by Ethernet)
• The Google Home app
• An app that supports playback via Chromecast built-in (e�g� Spotify, AllCast, TuneIn, etc�)� Audio playback with the Google Home app directly is
not possible�
• Please keep the standard settings of your WiFi router� Changing the settings of your router, especially changes on the DHCP settings,
could lead to an unnstable or not working network connection� For compatible routers please refer to the following Link:
https://support�google�com/chromecast/table/6207427?hl=en-IN
To use the integrated function Chromecast built-in, you need to install the Google Home app on your (mobile) device and to connect the device to
the Amp 5�1� Therefore your (mobile) device and the Amp 5�1 must be connected to the same network�
Please do as follows:
1Power up your Smart Amp 5�1 and start your (mobile) device� The WiFi and Bluetooth® function must be activated on your (mobile)device� If the
Amp 5�1 has been disconnected from the mains please wait with the procedure until the display indicates [NET] followed by [SET]�
Note: If you have already installed the Google Home app on your (mobile) device, you can skip item 2 and 3 below�
2Open the Play Store/ App Store on your (mobile) device�
3Search for the Google Home app and install it on your (mobile) device� You will need to accept access to several items, like identity and others�
4Start the Google Home app and follow the instructions� You will need to assign a Google Account to this app� Please register or login to your
account�
5Your (mobile) device will now search for available devices in range� If neccessary, you may have to select the related search function manually�
6Select Smart Amp 5�1xxxxx as device to be installed�
7Now, the (mobile) device tries to connect to the Amp 5�1� Please follow the instructions of the Google Home app�
8After the connection has been established the Amp plays a melody (sound sequence) through the connected speakers� Please confirm in the app
that you have heard the melody�
9Now, please select the “room” where you will use the amplifier (e�g� family room) and confirm with “next”�
10 Please select the WiFi network (WLAN) which you want to use for the Amp 5�1 and click on “next”�

3
21
English
20
English
11 The Google Home app and the Amp 5�1 will now be connected� After a successful connection the display of the Amp 5�1 shows [WIF] followed by
[CON] for 5 seconds�
12 Now the installation is almost finished� Please follow the last steps on your (mobile) device to fully complete the installation�
13 To play music using Chromecast built-in, open an app that supports this feature (Spotify, TuneIn, etc�)� This is indicated by the Chromecast
built-in icon on the screen� Depending on the app, it may be necessary to start playback (the stream) first so that this function is displayed and
available�
14 In order to play back music that you have stored locally on your (mobile) device via the Smart Amp 5�1 using Chromecast built-in, you can
use the manufacturer's own playback app� If the music app of the manufacturer does not support Chromecast built-in, you can
alternatively use a freely available app (such as the app "AllCast" from ClockworkMod)�
Google Assistant
You can operate the Smart Amp 5�1 in two ways with the „Google Assistant“�
1Connecting to a Google Home device�
2Using the integrated voice control of the Google Home app�
Further information can be found under: www�assistant�google�de
Note: Google Assistant is not available in certain languages and countries�
Using Spotify Connect
Use your phone, tablet or computer as a remote control for Spotify� Go to spotify�com/connect to learn how�
Playback via Bluetooth®wireless technology
For wireless audio streaming you can connect your (mobile) device with the Amp 5�1 using Bluetooth® wireless technology�
Requirements:
• The Bluetooth® wireless technology must be activated on the (mobile) device
• The (mobile) device must support at least the Bluetooth® standard 2�0
• The (mobile) device must be within range of the Smart Amp 5�1 (max� 10 m)�
Pairing process
To pair or connect the two devices please do as follows:
1Please select the input [BT] using the buttons Up ( ) or Down ( )and then press the "Bluetooth Pairing" button on your remote� The
display shows [BTP]�
2Start the search function on your (mobile) device�
3Select the Canton Smart Amp 5�1 as the playback device�
Note: If you have entered a specific name during the network setup (e�g� Living Room), this name will be listed as playback device�
4Once confirmed, the connection will be made automatically and will appear as [BT-] and [CON] in the display�
5If the (mobile) device requires an access code, please enter 0000�
6If the connection fails the message [FAI] will appear� Please ensure the requirements (see above) are fullfied and repeat the pairing process�
7If [BT-] and [DIS] appears in the display, your (mobile) device is out of range or logged out�
Operating a (mobile) device
The device most recently connected to the Amp connects automatically when the Bluetooth® function is activated and the input
Bluetooth® has been selected� In this case the message [BT-] followed by [CON] appears� Start the playback of a medium on your (mobile) device
and the sound will be played back by the speakers connected to the Smart Amp 5�1�

3
23
English
22
English
USING AirPlay 2 TECHNOLOGY
Note:AirPlay resp� AirPlay 2 is only available on devices of the second generation (Amp 5�1 S2)�
With Apple AirPlay technology, you can play audio content over the wireless network (WLAN) using your Smart Amp 5�1�
Additionally, AirPlay 2 technology offers you the possibility to play your content on several loudspeakers and/or amplifiers synchronously�
Connecting the Smart Amp 5.1 to the WLAN (WiFi network) via iPhone, iPad or iPod touch
To connect your Smart Amp 5�1 to your wireless network (WLAN) via iPhone, iPad or iPod touch, please proceed as follows:
1Disconnect your Amp 5�1 from the power outlet, wait for at least 30 seconds and reconnect your Amp 5�1 to the mains afterwards�
Now please wait until the display shows [NET] and [SET] and continue with the following steps within max� 10 minutes�
2On your iPhone, iPad or iPod touch, select „Settings“ and then „Wi-Fi“ (WLAN)�
3Under the menu item „SET UP NEW AIRPLAY SPEAKER“ select the Smart Amp 5�1 as the device to be installed�
4The „AirPlay Config���“ window opens�
a� Under „Network“ select the network to which you want to connect the Smart Amp 5�1�
b� Under “Speaker name” enter the name (synonym) you want to assign to the Amp 5�1�
c� Optionally, you can assign a password under „SPEAKER PASSWORD“�
d� Select the function „Next“ and wait (approx� 30 seconds) until the Amp 5�1 shows [WIF] / [CON] in the display�
5Finalize the registration process in the „Configuration finished“ window that opens by pressing the „Done“ button� The Smart Amp 5�1 is now
connected to your WLAN (Wi-Fi network) and ready for use�
Playback via AirPlay resp. AirPlay 2 technology
Note:AirPlay resp� AirPlay 2 is only available on devices of the second generation (Amp 5�1 S2)�
Requirements to play music using AirPlay 2 technology:
• iPhone, iPad, iPod touch or HomePod with iOS 11�4 or higher�
• Apple TV 4k or Apple TV HD with tvOS 11�4 or higher
• Mac or PC with iTunes 12�8 or higher resp� Mac with macOS Catalina or higher�
Playback on Smart Amp 5�1 (and other devices):
1To play your music using the Amp 5�1, start the playback of the desired title in a media app on your (mobile) device�
2Open the Control Center on your Apple device � Swipe from the top right corner (iOS 12 or higher) or from the bottom (iOS 11 or lower) towards
the center of the display�
3Select the AirPlay symbol in the Audio Card, and in the dialog that opens select the speaker(s) resp� amplifier(s) which you want to use for play-
back�
To start music playback on one or more AirPlay-enabled speaker(s) via Mac, Apple TV or Apple Music, please refer to the following support page:
https://support�apple�com/en-ca/HT202809
Notes: • Use Siri on your iPhone, iPad, HomePod, or Apple TV to control the Amp 5�1 with just your voice�
• The Smart Amp 5�1 supports only audio streaming, no video streaming�

3
25
English
24
English
Preset Buttons 1-3 (Presets)
The Amp 5�1 is able to assign three memory buttons with „presets“� Settings like volume, selected input and settings in the Speaker Setup [SPS]
menu (sound settings, etc�) as well as playlists from the app „Spotify“ can be stored� The memory buttons can be operated via the Smart remote
control as well as via the keypad on top of the Amp 5�1�
Practical tip:
• We recommend that you store the settings you have made in the loudspeaker menu during the initial set-up of the Amp 5�1, e�g� regarding
loudspeaker levels and distances, sound settings, etc�, to one of the three preset buttons so that your settings are not overwritten by the
factory (neutral) settings if you accidentally press one of the preset buttons�
To store playlists and/or (sound)settings, please proceed as follows:
1Please apply the desired settings regarding volume, sound, input, etc� and press and hold the memory button 1, 2 or 3 until the corresponding
number [P1], [P2] or [P3] is shown in the display and no longer flashes�
2To store a playlist, please open the desired playlist on the app „Spotify“ on your (mobile) device and start playback� Be sure to select Spotify
Connect as your connection to Amp 5�1, not Chromecast built-in� Now, please press and hold the corresponding memory button 1, 2 or 3 until the
corresponding number [P1], [P2] or [P3] is shown in the display and no longer flashes� Storing a playlist automatically stores all (sound)settings,
too�
3To recall the settings resp� a playlist from these presets, please press the corresponding button 1, 2 or 3 briefly� The settings are then called up,
resp� the tracks from the stored playlist are played back automatically by the Amp 5�1 (even without using your (mobile) device)�
Note: To delete the settings or a playlist from a preset button, please press and hold the relating button for 10 seconds until the corresponding
preset [P1], [P2] or [P3] is shown in the display rapidly flashing�
Automatic Updates
After you have connected the Amp 5�1 to the network, firmware updates are executed automatically� After each connection to the power supply and
at regular intervals (also in standby mode), the Amp 5�1 searches for an update and installs this, if available� The LED flashes green/red
during the update and the display first shows „DOWNLOADING“, then „UPDATING“� During this time the Amp 5�1 is not operable�
To do this, the Amp 5�1 must have been connected to the network router via the Google Home app or an iOS device (by use of WLAN) or
alternatively by a network cable (by use of LAN)�
Attention: Do NOT disconnect the Amp 5�1 from the power supply during an update process!
Menu Structure and Navigation
Overview
Most settings of the Smart Amp 5�1 are included into the main menu� This main menu is controlled with the touch keys on the top side of the Smart
Amp 5�1 or with the Canton Smart Remote� The main menu is displayed by the OSD (On-Screen Display) on your TV screen� The LED display in the
amplifier shows the respective function in the form of an abbreviation or as scroll text when the menu is activated� This means that the Amp 5�1 can
also be adjusted without a screen�
Please find an instruction on how to navigate through the menu using the remote below:
• To enter the main menu, press the "M" button�
• To enter the next menu level, press the "OK" button�
• To navigate upwards or downwards within the menu, press the Up " " or Down " " key�
• To change the value of a parameter, press the "+" (Volume +) or "–" (Volume -) button�
• To confirm your settings please press the "OK" button�
• To enter the previous menu level, press the "M" button�
•To exit the menu:
a) Either press and hold the "M" button until the selected input (e�g� TV) is displayed, or
b) wait for 30 seconds without pressing any button�
Practical tip:
• To change the language of the On-screen display from German to English, please go to the main menu by pressing the button „M“�
Under „Systemeinstellung“ [SYS] select the menu item „Displayeinstellungen“ [UIS] and change the language under the menu item „Sprache“
[LAN]�

3
27
English
26
English
1. Speaker Setup [SPS]
The first item in the main menu is the Speaker Setup� Here you can make sound-relevant settings relating to the connected speakers�
This Speaker Setup includes the menu items
•Channel Level [CHL]
•Speaker Distance [DST]
•DRC [DRC]
•Voice Clarity [VOI]
•EQ [EQ ]
•Xover Small Speakers [XOV]
•Subwoofer Setup [SUB]
–Sub Phase [PHA] –Sub Stereo [SSM] –Stereo Sub Xover [SSX]
•Room Height [RHE]
•Device Heights [DHE]
•Sound Setup [SND]
Channel Level [CHL]
At the Channel Level menu you can adjust the volume level of each individual channel in 1dB (1 Decibel) steps between -10dB and +10dB, where 0dB
is the factory setting� For an easier relative volume adjustment between the different speakers, the Amp 5�1 is equipped with a test tone generator�
Caution: Before activating the test tone generator, please set the main volume to a level between 20 and 30� The test tone generator is depending
on the main volume level and cannot be increased or decreased within the menu�
For adjusting the relative volume of the different speakers connected, please follow below instructions:
1Press the menu button "M" on the remote to enter the menu�
2Confirm the first menu item Speaker Setup [SPS] by pressing the "OK"button�
3Confirm the menu item Channel Level [CHL] by pressing the "OK"button�
4As first item Test Tone [TON] is selected automatically� Press The "OK"button if you want to activate the Test Tone generator�
5Select [ON] to activate the test tone generator using the "+" key, select [OFF] to disable it using the "–" key�
6If activated, the front left speaker [FL] generates a pink noise signal� Press "M" and then the Down key " ", or directly the Down key " "to select
this left front speaker [FL] from the speaker list�
7Use the "+" resp� the "-" button to change the volume level� Go back to the speaker selection list by pressing"OK"�
8To select a different speaker, use the "+" resp� the "–" key�
9The speaker selected in the list of speakers plays back the test tone� At your listening position, all speakers should have approximately the same
volume level�
10 Only speakers that have been activated in the Output Setting [OPS] / Speaker Config [SPC] menu are selectable� Speakers that have been deac-
tivated (displayindication [NO]) can not be selected and are grayed out�
11 It is difficult to find the correct volume level for a subwoofer, because of the different frequency band� Therefore, adjust the Subwoofer value to
your preferred level�
12 To exit the menu item, press the "M" button� The test tone generator will be deactivated automatically�
Speaker Distance [DST]
An adjustment of the distance between the speakers and listening position is needed for a perfect spatial effect, especially in case of multichannel
input signals� Measure and enter the distance between the speakers and your listening position� The distance is adjustable between 0�0m and 9�9m,
in steps of 0�1m, where 3�0m is the factory setting�
To adjust the distance please do as follows:
1To enter the menu, press the "M" button�
2Enter the first menu item Speaker Setup [SPS] by pressing "OK"�
3Select the menu item Speaker Distance [DST] using the " " or " " button and confirm with the "OK"button�
4Select the speaker that you want to adjust the distance of by using the " " or " " button and press "OK"�
Only speakers that have been activated in the Output Setting [OPS] / Speaker Config [SPC] menu are selectable� Speakers that have been
deactivated (displayindication [NO]) can not be selected and are grayed out�
5You can adjust the distance by using the "+" and "–" buttons� To go back to the speaker list press the "OK" button�
6Press the "M" button to exit this menu item�
Note:If the distance is bigger than 9,9m, set the difference values of the individual distances in relation to 3m� Decisive for the calculation of the
spatial effect are the differences between the channels, not the absolute distance values�

3
29
English
28
English
DRC [DRC]
Dynamic Range Control (DRC) is a setting option created by Dolby Laboratories� When activated, the dynamic range of encoded data
streams can be automatically reduced, which also reduces differences in volume� This makes it possible to enhance quiet tones and
suppress loud ones�
To activate or deactivate the function DRC please do the following:
1Press the menu button "M" on the remote to enter the menu�
2Confirm the first menu item Speaker Setup [SPS] by pressing the "OK" button�
3Use the " " or " " button to select the menu item Compression [DRC] and confirm with the "OK" button�
4Activate or deactivate the function Dynamic Range Control [DRC] using the "+" or "-" key:
[ON] means the DRC function is activated and the dynamic range is controlled by the meta data of the data stream�
[OFF] means the function is deactivated and the dynamic range will not be controlled�
5Press the "M" button to exit this menu item�
Voice Clarity [VOI]
Use the “Voice Clarity” function to improve the speech intelligibility� This allows you to better understand dialogues (speech) in films with loud
effects, for example�
To activate respectively deactivate the function "Voice Clarity" please do as follows:
1To enter the menu, press the "M" button�
2Enter the first menu item Speaker Setup [SPS] by pressing "OK"�
3Use the " " or " " button to navigate to the item Voice Clarity [VOI] and confirm with the "OK" button�
4Activate or deactivate the function Dynamic Range Control [DRC] using the "+" or "-" key:
[ON] = Fuction is activated
[OFF] = Function is deactivated
5Press the "M" button to exit this menu item�
Eq [EQ]
In this menu you can adjust the frequency response of the loudspeakers that are connected to the Smart Amp 5�1 to match the room condition� You
can choose between 3 EQ-settings for each speaker resp� each pair of speakers� A free position in the room is the factory setting�
To change the equalizer settings for a specific speaker or pair of speakers please do the following:
1To enter the menu, press the "M" button�
2Enter the first menu item Speaker Setup [SPS] by pressing "OK"�
3Select the menu item Equalization [EQ ] using the " " or " " button and confirm with the "OK" button�
4Select the desired speaker by using the " " and " " button and confirm your selection by pressing "OK"�
5Choose between the 3 following settings:
•EQ1 for free positioning in the room�
•EQ2 for positioning close to a rear or side wall�
•EQ3 for positioning in a corner of the room�
6Press the "M" button to go back to the selection list and repeat the process for the rest of speakers�
7Press the "M" button to exit this menu item�
Xover Small Speakers [XOV]
With this menu item you can set the crossover frequency between a small or bookshelf speaker (Speakerconfiguration [SPC] = Small) and a connec-
ted subwoofer� This function is only available if at least one of the connected speakers ist set as Small or if you are using small or bookshelf Canton
Smart speakers (Speakerconfiguration [SPC] = Smart), otherwise this function is grayed out� All speakers that are set as Large (Speakerconfiguration
[SPC] = Large) will receive the full audio signal without any filtering� Multiple crossover frequencies are available between 40Hz and 200Hz� In gene-
ral: The smaller a speaker, the higher the crossover frequency�
To set the crossover frequency between speakers and the subwoofer please do as follows:
1Press the menu "M"button on the remote to enter the menu�
2Confirm the first menu item Speaker Setup [SPS] by pressing the "OK"button�
3Use the " " or " " button to select the menu item Xover Small Speakers [XOV] and confirm with the "OK"button�
4Choose the desired crossover frequency using the "+" resp� the "–" key�
5Press the "M" button to exit this menu item�

3
31
English
30
English
Subwoofer Setup [SUB]
In this menu you can adjust the phase of a connected subwoofer and activate different Sub Stereo Modes [SSM] and adjust the crossover frequency
between a subwoofer and the front speakers� This menu item is only available if a subwoofer (Smart or Analog) is activated in the Speakerconfigura-
tion menu�
Sub Phase [PHA]
Use this function Sub Phase to change the phase of a connected subwoofer between 0 degree (factory setting) and 180 degree (phase inverted)
relative to the other speakers� Try a phase shift of 180 degree in case the bass level at the selected crossover frequency in the menu Xover Small
Speakers [XOV] seems to be much too low or completely off� This function works for both, wirelessly and wired subwoofers� This function is only
available if a subwoofer (Smart or Analog) has been selected in the menu Speakerconfiguration [SPC]�
To set the subwoofer’s phase to 180 degree resp� back to 0 degree, please do the following:
1To enter the menu, press the "M" button.
2Use the " " or " " button to navigate into the menu Speaker Setup [SPS] and confirm with the "OK"button�
3Use the " " or " " button to navigate into the menu Subwoofer Setup [SUB] and confirm with the "OK"button�
4Use the " " or " " button select the menu item Sub Phase [PHA] and confirm with the "OK"button�
5Change the setting using the "+" or "-" key between 0 degree [0] and 180 degree [180] and confirm with the "OK"button�
6To exit the menu, press the "M" button�
Sub Stereo [SSM]
If you are using large speakers (Speakerconfig [SPC] = Large) you can select the Sub Stereo Mode "Parallel" to have the full music signal (in-
cluding the bass) routed to the front speakers (FL, FR) and have the bass routed additionally to the subwoofer in the playmode Stereo.
In the Sub Stereo Mode "Xover" you can split the signal between the subwoofer and the large front speakers using a crossover. The crosso-
ver frequency can be adjusted in the menu item Stereo Sub Xover [SSX]in values between 40 Hz and 100 Hz. This function is only available if a
subwoofer (Smart or Analog) is activated in the Speakerconfiguration menu� This function is set to Off [OFF] as factory setting�
To activate or change the Sub Stereo Mode please do as follows:
1To enter the menu, press the "M" button.
2Confirm the first menu item Speaker Setup [SPS] with the "OK"button�
3Use the " " or " " button to select the menu item Subwoofer Setup [SUB] and confirm with the "OK"button�
4Use the " " or " " button to select the menu item Sub Stereo Mode [SSM] and confirm with the "OK"button�
5Use the "+" resp� the "–" key to select the desired function:
Off [OFF] means that the bass signals are played through the front speakers Front Left and Front Right�
Parallel [PAR] means that the subwoofer plays the bass signals additionally to the front speakers
Xover [XOV] means that the bass signals below the set crossover frequency Stereo Sub Xover are played through the subwoofer
6Confirm and exit the menu item by pressing the "M" button�
Stereo Sub Xover [SSX]
With this menu item you can set the frequency at which the audio signal is split into the signal for the subwoofer and the signal for the front
speakers in the Sub Stereo Mode "Xover"� This menu item is only available if the Sub Stereo Mode is set to "Xover"�
To adjust the crossover frequency between subwoofer and front speakers please do the following:
1To enter the menu, press the "M" button.
2Use the " " or " " button to navigate into the menu Speaker Setup [SPS] and confirm with the "OK"button�
3Use the " " or " " button to navigate into the menu Subwoofer Setup [SUB] and confirm with the "OK"button�
4Use the " " or " " button select the menu item Stereo Sub Xover[SSX] and confirm with the "OK"button�
5Change the setting using the "+" or "-" key between 40 Hz [40] and 100 Hz [100] and confirm with the "OK"button�
6To exit the menu, press the "M" button�
Room Height [RHE]
To get an optimal spatial impression (3D sound) during the playback of Dolby Atmos® bitstreams, the setting of the room height is necessary� The
room height can be set up to 9�90m in 0�1m steps, with 2�5m being the factory setting�
To set the room height please do the following:
1To enter the menu, press the "M" button.
2Confirm the first menu item Speaker Setup [SPS] with the "OK"button�
3Use the " " or " " button to select the menu item Room Height [RHE] and confirm with the "OK"button�
4Use the "+" resp� the "–" key to set the desired height�
5Confirm and exit the menu item by pressing the "M" button�
Note:The menu item Room Height [RHE] is only available and not grayed out if Top Front-speakers have been activated in the menu
"Speaker Config" [SPC]�

3
33
English
32
English
Device Heights [DHE]
In case of using Dolby Atmos® enabled speakers that direct the sound upwards to the ceiling it is necessary to set the heights of these speakers (for
example when placed on top of normal speakers or on a nearby surface) to achive an optimal spatial surround impression (3D sound)� The heights
can be set in 0�1m steps for the front and rear "Upfire" speakers seperately, with 1m being the factory setting�
To set the device heights please do as follows:
1To enter the menu, press the "M" button.
2Confirm the first menu item Speaker Setup [SPS] with the "OK"button�
3Use the " " or " " button to select the menu item Device Heights [DHE] and confirm with the "OK"button�
4Use the "+" resp� the "–" key to select the desired pair of speakers (front or rear) and confirm your selection with the "OK"button�
5Use the "+" resp� the "–" key to set the height and confirm your selection with the "OK"button� Repeat this steps in case for the other pair of
speakers�
6Confirm and exit the menu item by pressing the "M" button�
Note:The menu item Device Heights [DHE] is only available and not grayed out if Top Front-speakers have been activated in the menu
"Speaker Config" [SPC]�
Sound Setup [SND]
In this menu you can adjust the tone control settings for bass, mid and treble� These adjustments are identical to the ones that can be made using
the Sound-button on the Smart remote�
To adjust the settings for the tone control settings, please do as follows:
1To enter the menu, press the "M" button�
2Enter the first menu item Speaker Setup [SPS] and press the "OK" button�
3Use the " " or " " button to navigate to the item Sound Setup [SND] and confirm with the "OK"button�
4Use the " " or " " button to navigate to the paramter you want to adjust and use the "+" or "–" button to select the desired gain given in dB�
4Press the "M" button to exit this menu item�
2. System Setup [SYS]
The second item in the main menu is the System Setup� It contains the following menu items:
•Sleep Timer [SLP]
•IR Menu [IRM]
–IR Learn [IRL] –Direct Input Learn [DIL] –IR Clear [RES]
•HDMI CEC [CEC]
•Standby Mode [STB]
•Input Config [INP]
•Analog Gain [OFS]
•Input Select [SEL]
•Lipsync [LIP]
•Max Volume [VOL]
•Playmode [PLM]
•3D Audio [3D]
•Display Setup [UI]
–Language [LAN] –LED Flashing [LED] –Input Stream Display [ISD] –Slave Display [SUI]
•Factory Reset [RES]
–OTA Recovery [OTA]
Sleep Timer [SLP]
If this function is enabled, the system shuts down to standby mode after a specified time� You can select 15, 30, 45 or 60 Minutes�
If the value OFF is selected, the function is disabled�
To adjust the shut down time, please follow the next steps:
1To enter the menu, press the "M" button.
2Use the " " or " " button to navigate to the menu System Setup [SYS] and confirm with the "OK"button�
3Confirm the first menu item Sleep Timer [SLP] by pressing the "OK"button�
4Select the desired time using the + or – keys�
5Press the "M" button to exit this menu item�
Note: The Sleep Timer will be disabled automatically after a power down� That means the shut down time must be selected again after
every power up sequence in order to use this function�

3
35
English
34
English
IR Menu [IRM]
This menu includes all functions relevant for the infrared operation of the amplifier� It consists of three submenus�
IR Learn [IRL]
The system can learn the infrared codes of your TV remote control and therefore allows you to control the functions of the amplifier and your TV
via one remote control� You can allocate any key of the TV remote control to your Amp 5�1� When choosing a key, make sure that the instruc-
tions for the amplifier do not conflict with the TV� We recommend that you deactivate the internal loudspeakers of the TV once the amplifier is
connected� Then you can use the volume keys for the Amp 5�1�
To learn the IR codes of a third party remote please do the following steps:
1To enter the menu, press the "M"button�
2Use the " " or " " button to navigate to the menu System Setup [SYS] and confirm with the "OK"button
3Select the IR Menu [IRM] by using the " " or " " buttons and press the "OK"button to confirm�
4Confirm the first menu item Sleep Timer [SLP] with the "OK"button� "Please press key you want to learn" appears on the screen, the display
flashes [IRL]�
5Please press the desired function on the Canton Smart remote control�
Note: The IR codes of a TV remote can be assigned to all buttons of the optionally available Canton Smart remote alike�
6"Press the new button" will be shown on the screen with the name of the selected key (e�g� "Volume +") below� The display indicates the
selected function as well (e�g� V+])�
7Within 15 seconds, press the key you wish to allocate to this function on the TV remote�
8Once the IR command has been successfully allocated, the display shows [OK] resp� the OSD shows "Success" and you can continue with the
programming of the next function, e�g� “Volume –“�
9If the display shows [FAI] and the name of the selected key disappears, the allocation has failed or the time exceeded� Now you need to
repeat steps 5 to 8� Please try a lower or higher distance between the Amp 5�1 and the TV remote control in case the process fails again�
Alternatively, try to press the key on the TV remote shorter or longer�
10
To exit the IR Learn menu, press and hold the "M" button for 3 seconds� After one minute without input, the system automatically returns to
the IR menu�
Notes: •The “On/Standby” key has a dual function� Press it once and the display shows [ON] which allows the "on" function to be
programmed� If the key on is pressed twice in quick sequence, the display shows [STB] and the "Standby" function can be learned�
If your TV remote control has only one key for the “On” and “Standby” functions, both the “On” and “Standby” function must still be
allocated with this command�
•Due to the variety of infrared codes it is not possible to guarantee that every IR remote control signal can be learned by the Smart
Amp 5�1� Signals from radio frequency (RF) remote controls cannot be learned in general!
Direct Input Learn [DIL]
This function allows the user a direct selection of the signal inputs if using a third party remote control� In addition to the INPUT UP( ) and IN-
PUT DOWN( ) function, you can directly select the signal inputs (e�g� ARC) when using your TV or universal remote control� That means you can
allocate the desired input to a key on your remote control�
To learn the relating IR codes please do the following steps:
1To enter the menu, press the "M"button�
2Use the " " or " " button to navigate to the menu System Setup [SYS] and confirm with the "OK"button�
3Select the IR Menu [IRM] by using the " " or " " buttons and press the "OK"button to confirm�
4Choose the function Direct Input Learn [DIL] by using the " " or " " button and press the "OK"button to confirm�
5"Press the new button" will be shown on the screen with the name of the first input "BDP"� The display flashes [HD1]� Now you can allocate a
key on your TV or universal remote to the input BDP [HD1]�
Note: If you press this key on the remote control while the Amp 5�1 is in normal mode, the system switches directly to the HD1 (BDP) input�
6Press the desired key on the remote control� If the infrared code has been successfully stored by the system, [OK] is shown briefly in the
display resp� "Success" on the screen, followed by the next input�
7If the code could not be learned, [FAI] appears briefly on the display resp� "Failed" appears on the screen to indicate that no code has been
stored� In this case [HD1] will still be displayed� Please try a lower or higher distance between the Amp 5�1 and the TV remote control in case
the process fails again� Alternatively, try to press the key on the TV remote shorter or longer�
8If you do not want to assign a button to input HD1, you can select the next input (in this case HD2) by pressing the " " button� The " " button
takes you to the previous input�
9If you do not press any button on the TV remote control within 15 seconds, the system returns to the IR Menu�
10 The BT input is the last entry in the list� After this input the system jumps back to the IR menu�
Note: Due to the variety of infrared codes it is not possible to guarantee that every IR remote control signal can be learned by the Connect 5�1�
Signals from radio frequency (RF) remote controls cannot be learned, generally!

3
37
English
36
English
IR Clear [CLR]
Use this function to delete all IR codes stored on the Amp 5�1�
To delete IR commands please do the following:
1To enter the Menu, press the "M" button.
2Use the " " or " " button to navigate to the menu System Setup [SYS] and confirm with the "OK"button�
3Use the " " or " " button to select the IR Menu [IRM] and confirm with the "OK"button�
4Use the " " or " " button to select the menu item IR Clear [CLR] and confirm with the "OK"button�
5"Reset All" appears on the screen and [YES] appears on the display� Press the OK button on the Canton Smart remote to delete the sto-
red commands� The screen will display "Please Wait"� The system will then return to the IR menu [IRM]�
6To cancel the operation, press the "M" button or press "OK"�
HDMI CEC [CEC]
Consumer Electronics Control is a cross-market standardized protocol for controlling devices connected to the HDMI® inputs/outputs� By default
this function activated [ON]�
The CEC functions supported by the Smart Amp 5�1 are:
- One touch Play: By pressing the “Play” button of e�g� a Blu-Ray player the Amp 5�1 switches on automatically and changes to the
corresponding HDMI® input�
- System Standby: With the TV switched on and then turning it into standby mode by pressing the “Power” key the Amp 5�1 also goes
automatically into standby mode�
Note: Depending on the programming of the TV device, the Amp 5�1 can also be automatically activated with the TV�
- Volume/Mute: The volume of the Amp 5�1 can be operated using the Mute and Volume buttons of the TV remote control�
To activate/deactivate this function please proceed with the following steps:
1To enter the Menu, press the "M"button�
2Use the " " or " " button to select the menu item System Setup [SYS] and confirm with the "OK"button�
3Use the " " or " " button to select the menu item HDMI CEC [CEC] and confirm with the "OK"button�
4Use the " " or " " button to select "OFF" [OFF] to disable the CEC function resp� "ON" [ON] to enable the function�
5Press the "M" button to exit this menu item�
Notes: •Many device manufacturers have developed their own protocols for controlling their devices based on the CEC standard�
This can mean that the functions described above only function partially or does not function at all�
•In order to avoid conflicts when controlling the Smart Amp 5�1, the “Volume +/–“, “Mute” and “Power” buttons on the TV remote control
should not be learned through the IR learn function of the amplifier when using the CEC function� Delete the codes if necessary�
Standby Mode [STB]
This function controls, how the Amp 5�1 powers up resp� down – manually or automatically, partly dependent on an incoming audio signal� The Amp
5�1 supports the following functions:
• ECO [ECO]: If ECO is selected, the Amp 5�1 enters standby mode after 20 minutes without any detected audio signal at the selected input and
needs to be powered up manually using the remote control�
• Network [NSB]: If Network [NSB] is selected, the Amp 5�1 must be turned on manually and will automatically enter standby after 20 minutes
without detected audio at the selected input� However, there is a difference to the ECO mode, as described below� Network [NSB] is the
default setting of the Amp 5�1�
• Auto [AUT]: If Auto is selected, the Amp 5�1 turns on automatically if an audio signal is detected at the input recently used� If no signal is
detected any longer, the Amp 5�1 enters standby mode after 1 minute (at the digital inputs Optical, Coaxial and Bluetooth) resp� 15 minutes
(at the analog input Line [AUX])�
• Manuell [MAN]: If Manual is selected, the Amp 5�1 stays active permanently and must be powered up and down manually, using the
remote control�
If ECO is selected, all wirelessly connected speakers will be powered down automatically, but each speaker must be powered up individually� This is
the operation mode with the lowest standby power consumption� All the other modes Network, Auto, and Manual provide an automatic power up
function for all wirelessly connected speakers when powering up the Smart Amp 5�1 (Master Device)�
Notes: •If the standby mode is set to Auto [AUT] and the Amp 5�1 is set to standby mode using the “ON/Standby” key of the remote control, it is
not possible for the Amp 5�1 to switch on automatically� To use the Auto mode of the Amp 5�1 as intended, do not power down the Amp 5�1
using the On/Standby key but always wait until the Amp 5�1 powers down, automatically�
•To avoid an unintentional power-up of the Amp 5�1 using the analogue input, the threshold value has been set quite high� To make sure the
Amp 5�1 powers up correctly, please set the output level of your analog audio source to a high level (but not more than 2Vrms)�

3
39
English
38
English
To set the standby mode, please do the following:
1To enter the menu, press the "M" button.
2Use the " " or " " button to navigate into the menu System Setup [SYS] and confirm with the "OK"button�
3Choose the function Standby Mode [STB] using the " " or " " button and confirm with the "OK"button.
4Use the "+" or "-" button to select select the wanted Standby mode and confirm with the "OK"button�
5Press the "M" button to exit this menu item�
Input Config [INP]
As the factory settings all physically available inputs are already assigned with a source name� Therefore, the LED display and the screen do not
show the name of the (physical) input, but the source name of a (possible) source device� You can change the name assigned to an input to suit your
source device in the menu Input Config [INP]� It is also possible to deactivate (- – -) physical inputs so that they are no longer displayed, which will
make the source selection faster�
The factory settings are as follows:
Physical Input OSD Display Source Name
HDMI® Input 1 HDMI1 [HD1] BDP (Blu-Ray Player)
HDMI® Input 2 HDMI2 [HD2] SAT (Satelite Receiver)
HDMI® Input 3 HDMI3 [HD3] PS (Video Console)
HDMI® Output ARC [ARC] TV (Television)
Optical Digital Input OPT [OPT] CD (CD Player)
Coaxial Digital Input COAX [COA] DVD (DVD Player)
Analoque Line Input Analog [ANA] AUX (Analogue Device)
To change the name of an input or to deactivate an input please proceed as follows:
1To enter the menu, press the "M" button�
2Use the " " or " " button to navigate into the menu System Setup [SYS] and confirm with the "OK" button�
3Use the " " or " " button to select the menu item Input Config [INP] and confirm with the "OK" button�
4Use the " " or " " button to select the desired input and confirm with the "OK" button�
5Select the desired source name by using the " " or " " button� You can choose from the following predefined designations:
“- – -” (input disabled), TV, BDB, SAT, CD, DVD, CAM, REC, PAD, POD, TAB, TUN, DAB, PS, VCR, ATV, PC, AUX� After selecting the
name exit the input item by pressing the "OK" button�
6To assign a name to another input, repeat steps 4 and 5�
7To leave this menu item, press the "M" button�
Notes: •Should you assign a name to an input that is already assigned, the input previously assigned with this name will be deactivated (“ – – – “)�
To continue using this input, you must assign a different name� Each source name can be assigned only once�
•Inputs which have been deactivated (“- – -”) are no longer displayed when selecting the inputs�This simplifies the selection of the
desired input�
•The name for the input BT (Bluetooth®) and NET (Network) cannot be changed�
Analog Gain [OFS]
With this function you can adjust the signal gain of the analogue Line input [AUX] relating to that of the digital source(s) in a range from -6dB to
+6dB� You may use this function to balance the volume levels� 6dB doubles (+6dB) resp� halfs (-6dB) the output gain of your playback source�
For setting the offset volume level, proceed as follows:
1To enter the menu, press the "M" button.
2Use the " " or " " button to navigate to the menu System Setup [SYS] and confirm with the "OK"button�
3Select the menu item Analog Gain [OFS] using the " " or " " buttons and confirm with the "OK"button�
2Use the "+" resp� the "–" key to adjust the volume level�
3Press the "M" button to exit this menu item�
Other manuals for Smart Amp 5.1
4
Table of contents
Other Canton Amplifier manuals

Canton
Canton Smart Amp 5.1 How to use

Canton
Canton Smart Amp 5.1 How to use

Canton
Canton Smart Amp 5.1 User manual

Canton
Canton Smart Connect 5.1 User manual

Canton
Canton Smart Connect 5.1 How to use

Canton
Canton Smart Connect 5.1 User manual

Canton
Canton Smart Connect 5.1 User manual

Canton
Canton Smart Amp 5.1 User manual