Canton Smart Connect 5.1 User manual

BEDIENUNGSANLEITUNG
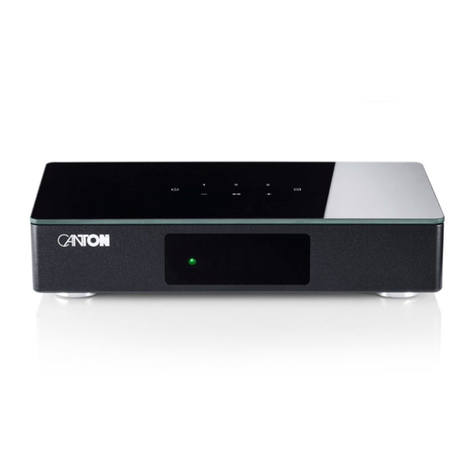
Smart Connect 5.1 OPERATING INSTRUCTIONS
Deutsch
English

Thank you very much for choosing this Canton product. You can now look forward to countless
hours filled with excellent sound.
If you have any questions or need further information, please do not hesitate to contact us!
Service-Telefon: 06083 / 287-87
Canton Elektronik GmbH + Co. KG
Neugasse 21–23
61276 Weilrod, Germany
Thanks!

Content
Important safety instructions .................................................................................................................................................................Page 77
Unpacking..............................................................................................................................................................................................Page 81
Setting up the remote control.................................................................................................................................................................Page 81
Connection terminal...............................................................................................................................................................................Page 82
Touch keys .............................................................................................................................................................................................Page 84
Remote control.......................................................................................................................................................................................Page 85
LED indications ......................................................................................................................................................................................Page 86
Display indications.................................................................................................................................................................................Page 86
Using Chromecast built-in .....................................................................................................................................................................Page 89
Google Assistant....................................................................................................................................................................................Page 90
Using Spotify Connect ...........................................................................................................................................................................Page 91
Automatic Updates ................................................................................................................................................................................Page 91
Playback via Bluetooth® wireless technology........................................................................................................................................Page 92
Preset 1-3...............................................................................................................................................................................................Page 93
Menu structure and navigation ..............................................................................................................................................................Page 94
1. Speaker Setup [SPS]............................................................................................................................................................................Page 95
– Channel Level [CHL].........................................................................................................................................................................Page 95
– Distance [DST]..................................................................................................................................................................................Page 96
– Compression [DRC] ..........................................................................................................................................................................Page 97
– Voice Clarity [VOI]............................................................................................................................................................................Page 98
– Equalization [EQ] ..............................................................................................................................................................................Page 98
– Xover Small Speaker [XOV]...............................................................................................................................................................Page 98
– Subwoofer Setup [SUB].....................................................................................................................................................................Page 99
– Sub Phase [PHA]............................................................................................................................................................................Page 99
– Sub Stereo Mode [SSM].................................................................................................................................................................Page 99
– Stereo Sub Xover [SSX] ................................................................................................................................................................Page 100
– Room Height [RHE] ........................................................................................................................................................................Page 101
– Device Heights [DHE] .....................................................................................................................................................................Page 101
2. System Setup [SYS] ..........................................................................................................................................................................Page 102
– Sleep Timer [SLP] ............................................................................................................................................................................Page 102

– IR Menu [IRM]........................................................................................................................................................................... Page 103
– IR Learn [IRL].......................................................................................................................................................................... Page 103
– Direct Input Learn [DIL] .......................................................................................................................................................... Page 104
– IR Clear [CLR] ......................................................................................................................................................................... Page 105
– HDMI CEC [CEC]....................................................................................................................................................................... Page 106
– Standby Mode [STB].................................................................................................................................................................. Page 107
– Input Configuration [INP] .......................................................................................................................................................... Page 108
– Analog Gain [OFS]..................................................................................................................................................................... Page 109
– Input Select [SEL]....................................................................................................................................................................... Page 109
– Lipsync [LIP] .............................................................................................................................................................................. Page 110
– Max Volume [VOL].................................................................................................................................................................... Page 110
– Playmode [PLM] ........................................................................................................................................................................ Page 111
– 3D Audio [3D] ........................................................................................................................................................................... Page 111
– Display Setup [UI]...................................................................................................................................................................... Page 112
– Language [LAN]...................................................................................................................................................................... Page 112
– LED Flashing [LED].................................................................................................................................................................. Page 112
– Factory Reset [RES].................................................................................................................................................................... Page 113
3. Network Setup [NWS]................................................................................................................................................................. Page 114
– Network Select [NWC]............................................................................................................................................................ Page 114
– Network Reset [NWR] ............................................................................................................................................................ Page 114
4. Wireless Setup [WIS] .................................................................................................................................................................. Page 115
– Bluetooth Setup [BT].................................................................................................................................................................. Page 115
– Pair Mode [BTP]...................................................................................................................................................................... Page 115
– BT Select [BTS]........................................................................................................................................................................ Page 116
– AutoPlay [APL] ....................................................................................................................................................................... Page 117
– BT Reset [BRE] ........................................................................................................................................................................ Page 117
– Transmission Power [TXP].......................................................................................................................................................... Page 118
– RF Channel [CHN] ..................................................................................................................................................................... Page 118
– Wireless Reset [WRE]................................................................................................................................................................. Page 119
5. Output Setup [OPS] .................................................................................................................................................................... Page 119

– Speaker Config [SPC]................................................................................................................................................................. Page 120
– Speaker Mapping [SPM] ............................................................................................................................................................ Page 123
6. System Info [INF] ........................................................................................................................................................................ Page 125
– Firmware Info [FWI] .................................................................................................................................................................. Page 126
– Network Info [NWI]................................................................................................................................................................... Page 127
Trouble shooting ............................................................................................................................................................................. Page 128
Technical data ................................................................................................................................................................................. Page 135
EU declaration of conformity........................................................................................................................................................... Page 136
Further important information......................................................................................................................................................... Page 137
Warranty ......................................................................................................................................................................................... Page 138
License Notices ............................................................................................................................................................................... Page 139

76
English
Safety instructions
Please observe the safety instructions when choosing the correct location for your Smart Connect 5.1 and when maintaining and operating it!
The user is responsible for the proper handling of the pre-amplifier. Canton cannot accept any responsibility for damage or accidents caused
by improper installation or connection.
Choose a flat surface Avoid moisture Avoid shocks Do not touch the mains
cable with wet hands
Do not throw in
household waste
Distance to
sources of heat
Do not use aggressive,
alcoholic or abrasive agents
for cleaning
Do not reach into the
housing opening
Disconnect mains plug
during thunderstorms
Turn down the system if
there is an overload
Avoid direct sunlight Protect from
extreme cold
Do not open
the housing
Make sure the polarity
of the battery and remote
control is correct
Ensure free access
to the power plug

3
77
English
Important safety instruction
CAUTION
Risk of
electric shock
Do not open!
CAUTION:
To reduce the rist of fire and electric shock,
do not open the device.
There are no serviceable parts inside.
Refer all servicing to qualified service
personnel only.
CAUTION
Danger of explosion!
CAUTION:
Replaceable lithium batteries!
Caution: Danger of
explosion if battery is incorrectly replaced.
Replace only with the same or equivalent type.
CAUTION
Danger of life!
CAUTION:
Do not ingest battery. Chemical burn hazard.
Danger of life!
Note
Read and follow all instructions.
Keep these instructions.
Observe all warnings and safety instructions.
Operate this device only in a moderate climate (not in a tropical climate).
Do not operate this device at altitudes above 2000 m above sea level.
Only operate this device indoors, not outdoors or in damp rooms.
To avoid the risk of fire or electric shock, the device must not be exposed to rain or moisture.
Do not operate this device near water.
Do not expose this device to dripping or splashing water.

78
English
Strong temperature fluctuations lead to condensation (water droplets) in the device. Wait until the moisture has evaporated (at least three
hours).
Do not place objects filled with liquids (such as vases) on the device.
Do not place an open fire, such as lit candles, on or near the device.
Do not place the device near heat sources such as radiators, heat accumulators, stoves or other devices (including amplifiers) that generate
heat.
Avoid direct sunlight.
Keep a clearance of at least 5 cm around the device.
Never prevent the protective function of polarised or grounded plugs: A polarised plug has two pins, one wider than the other. An earthed
plug has a third earthing pin. The wide or third pin is for your safety. If the plug does not fit into your outlet, contact a qualified electrician
to replace the obsolete outlet.
To avoid electric shock, connect the mains plug only to sockets or extensions where the contact pins can be fully inserted to prevent
exposed contact pins.
Never touch the signal and mains cable with wet hands.
Do not step on or pinch the mains cable, especially not in the area of the plugs, sockets or where the cable is led out of the device.
For devices without a mains switch, in which the mains plug or the device mains socket serves as an isolating device, the plug of the mains
cable or the device mains socket must be freely accessible at all times.
Disconnect the device from the mains during thunderstorms or prolonged periods of non-use.
To completely disconnect the device from the power supply, unplug the mains cable from the wall outlet.
Where the MAINS plug or an appliance coupler is used as the disconnect device, the disconnect device shall remain readily operable
Always switch off the device before connecting or disconnecting connection cables.
Always pull the plugs and not the cables.
Install the device according to the manufacturer's instructions.
Always choose a level surface. The device must be in a horizontal position.

3
79
English
Do not exert force on operating elements, connections and lines.
The device may only be operated with the voltage and frequency specified on the device or the type plate.
Do not insert any objects or body parts into the openings of the device. Live parts inside the housing could be touched and/or damaged.
This can lead to short circuits, electric shocks and fire.
Only use fixing materials and accessories that are approved by the manufacturer and/or supplied with the device.
Only use trolleys, stands, tripods, holders or tables specified by the manufacturer or sold with the device. When using a trolley,
be careful when moving the trolley/device assembly to prevent damage and injury from tipping over.
Only clean this device with a clean, dry cloth.
Do not use any aggressive, alcoholic or abrasive agents for cleaning.
To avoid electric shock, do not open the housing! There are no user-serviceable parts in the device.
Consult qualified personnel for all repair and maintenance work. This is required when the device has been damaged in any way, such as
mains cable or plug damage, liquid or objects have been spilled, exposed to rain or moisture, does not operate normally, or has been drop-
ped.
Do not make any changes to the device or accessories. Unauthorised modifications can compromise safety, regulatory compliance or system
performance. In this case, the type approval/guarantee may expire.
If sound distortions such as unnatural knocking, throbbing or high-frequency clicking occur during playback, the volume level must be
reduced immediately.
To avoid possible hearing damage, do not listen at high levels for long periods of time. Interrupt the playback if you hear ringing or
whistling noises in your ears or if you have the impression that you can no longer hear high sounds (even for a short time).
New and used batteries must be kept away from children. Devices in which the battery compartment cannot be closed securely must not be
used any longer and must be kept away from children.
The remote control supplied with this device contains a button cell as battery. Swallowing the button cell can cause serious internal burns
and thus death in only 2 hours!
Do not ingest the battery, Chemical Burn Hazard.

80
English
If you think batteries might have been swallowed or placed inside any part of the body, seek immediate medical attention.
Take care of your environment when disposing of the battery. Batteries must be disposed of at a battery collection point.
Do not expose batteries to high temperatures, such as direct sunlight, fire or the like.
Batteries must be inserted correctly according to the polarity imprint. Incorrect insertion can lead to damage.
Only use the batteries or rechargeable batteries specified for the device.
The batteries supplied are not rechargeable batteries, i.e. these batteries must not be recharged.
The device and/or the accessory may contain small parts that can be swallowed.
Therefore not suitable for children under three years.
This symbol indicates uninsulated dangerous voltages inside the case that are sufficiently
strong (amplitude) to cause a fire or electric shock.
This symbol warns you of important operating and maintenance instructions in the
accompanying documentation (manual) supplied.
This symbol indicates Class II devices, where protection against electric shock is provided by double or
reinforced insulation during specified use and therefore no protective earth connection is required.

3
81
English
Unpacking
Unpack the Connect 5.1 carefully and check that all the following
parts are present:
Delivery content
• 1x Smart Connect 5.1
• 1x Power cord
• 1x Short manual
Setting up the remote control
(optionally available)
The remote control comes with a
battery already installed. Simply
remove the protective film to
activate. When replacing the
battery ensure that it is correctly
inserted according to the polarity
markings (+/–).
Only use the battery specified for
this system (CR 2032).
CR 2032
OPEN CLOSE
In this chapter we will show you the connection terminals
and how to operate the Connect 5.1 using the optionally
available remote control.
Place the Smart Connect 5.1 in the desired location and
connect it to the power input using the power cord. Make
sure that your TV is plugged in. If you want to connect
your Connect to the WiFi network, please make sure your
WiFi router is active and has a connection to the Internet.
Connection

82
English
Connection Terminal
1PRE OUT
For connection with active speakers and/or amplifiers (6x RCA, max. 2Vrms).
2LINE L/R (AUX)
For the connection with the analogue line output of your source device (2x RCA, max. 2Vrms).
3COAXIAL (COA) Input
For the connection with your (digital) coax audio output of your TV or digital source device (2x RCA, max. 96kHz).
4OPTICAL IN (OPT)
For the connection with your (digital) optical audio output of your TV or digital source device (TOSLINK, max. 96kHz).
5ETHERNET (LAN)
For the connection with a network router via ethernet cable (RJ45 Socket, 8-pole).
6SERVICE CONNECTOR
Used for the Canton customer service only (USB A Socket, covered, no audio, no charging).
7HDMI®Input - HD1 / HD2 / HD3
For the connection with the HDMI®Output of your digital source device (supports 3D / 4K / HDCP 2.2 / CEC).
8HDMI®Output (ARC) - (Audio Return Channel)
For the connection with the HDMI®(ARC) input of your TV (supports 3D/ 4K / ARC / HDCP 2.2 / CEC).
9POWER INPUT
For connection with the Mains (IEC C8, 100-240V~, 50/60Hz, 10W).

3
83
English
Phys. Input
ARC
HD1
HD2
HD3
OPT
COA / COAX1
COA / COAX2
LIN / Line
Bluetooth®
Network (WiFi/Ethernet)
OSD
ARC
HDMI1
HDMI2
HDMI3
OPT
COAX1
COAX2
ANALOG
BT
NETWORK
Name (display indication)
TV
BDP
SAT
PS
CD
DVD
PAD
AUX
BT
NET
Note: The physical inputs have the following default designations, which you can match to the connected source (except for BT and NET)
at any time (see chapter Inputconfiguration [INP]):
Note: The ARC function can be used at any time with the Connect 5.1 and does not need to be activated or deactivated. For your TV to
support the ARC function it must have at least one HDMI® input with Audio Return Channel (ARC). The CEC function must be
activated. For more information please consult the operating manual of your TV.

84
English
Touch Keys
Device control:
1Power: Toggles power status between On and Standby
2Preset 1-3: Preset keys for direct access of previously stored and Spotify playlists
3Input: Toggles through the inputs
4Plus: Increase main volume
5Minus: Decrease main volume
6Play/Pause: Play/Pause function for Chromecast built-in,
Spotify Connect and Bluetooth®wireless technology
Menu control:
3Input
• Enter main menu (Press and hold for 3 seconds)
• Jump to previous menu level
• Exit the menu (Press and hold for 3 seconds)
4Plus
• Menu selection upwards
• Increase menu item value
5Minus
• Menu selection downwards
• Decrease menu item value
6Play/Pause
• Enter next menu level
• Confirm selection

3
85
English
Remote Control (optional)
1Power Toggles system status (on/standby)
2Mute Mutes audio
3Upwards Sets input or menu item upwards
4Downwards Sets input or menu item downwards
5OK Enters next menu level (confirms selection)
6Plus [+] Increases volume or menu value
7Minus [-] Decreases volume or menu value
8Menu Enters settings menu or previous menu level
9Play Mode Toggles btw. the several play modes:
Stereo For stereo playback
Movie Virtual surround sound for movies
Music Virtual surround sound for concert audio playback etc.
Discrete Surround sound for movies and concert audio playback etc.
Night (Virtual) surround sound with reduced dynamic and higher speech intelligibility at low
volume levels for "night usage"
Pure Direct Surround sound without a Virtualizer or Upmixer.
Party Plays the front channels (L+R) additionally on the surround speakers
10 Sound Toggles btw. bass, midrange and treble tone control settings:
Bass Bass adjustment from -10dB to +10dB
Midrange Midrange adjustment from -10dB to +10dB
Treble Treble adjustment from -10dB to +10dB
11 Preset Preset keys for direct access of previously stored settings and Spotify playlists
12 Play/Pause Play / Pause function for Chromecast built-in, Spotify Connect and Bluetooth®wireless technology
13 Skip FW Skip forward function for Chromecast built-in, Spotify Connect and Bluetooth®wireless technology
14 Skip BW Skip backward function for Chromecast built-in, Spotify Connect and Bluetooth®wireless technology
15 Bluetooth Pairing Initializes the pairing process with a (mobile) device
Note: Every Canton Smart remote that comes is included with Canton Smart loudspeakers can be used to control the Smart Connect 5.1.
The Canton Smart remote is available at www.canton.de.

86
English
LED Indications
The LED indicates the following conditions:
• LED off (not illuminated) Pre-amplifier disconnected from the mains
• LED shining red Pre-amplifier in standby mode
• LED flashing green quickly Pre-amplifier is booting
• LED shining green Pre-amplifier is active (network connected)
-------------------------------------------------------------------------------------------------------------
• LED flashing green/red Pre-amplifier is executing a firmware update
• LED flashing green slowly Network disconnected
• LED flashing green Network setup mode
• LED flashing green two times Ethernet setup mode (ethernet cable connected)
Display Indications
On-Screen Display (OSD)
All settings and configurations of the Connect 5.1 can comfortably be done using the On-Screen display with your TV-Screen. To do so the
Connect must be connected with your TV using a HDMI®-cable. The menu is comprehensibly structured. Pressing the menu button (M) on
the remote guides you to the main menu.
To change the default language of the On-Screen display (german or english) please do as follows:
1Press and hold the input-button " " for minimum 3 seconds.
2Confirm the first menu item Systemeinstellungen [SYS] with the Play /Pause button" ".
3Use the "+" or "–" button to navigate to the menu item Sprache [LAN] and confirm with the Play/Pause button" ".
4Use the "+" or "–" button to select the desired language German [DEU] or English [ENG] and confirm your selection with the Play/Pause
button " ".
5Exit the menu by pressing the Input-button " " twice.

3
87
English
LED Display
The Connect 5.1 has a multifunctional LED display build in the front of the Connect 5.1 which will light up for 5 seconds when receiving a
command. The most important indications and their meanings are listed below:
Operation Display Meaning
Input TV HDMI®ARC input selected
Input BDP HDMI®HD1 input selected
Input SAT HDMI®HD2 input selected
Input PS HDMI®HD3 input selected
Input BT Bluetooth®input selected
Input NET Network input selected
Input AUX Analogue input selected
Input DVD First coax digital input selected
Input PAD Second coax digital input selected
Input CD Optical digital input selected
Sound Setting V35 Volume to 35 (of max. 70)
Sound Setting - - - Connect 5.1 is muted
Sound Setting BAS Bass tone control adjustment
Sound Setting MID Midrange tone control adjustment
Sound Setting TRE Treble tone control adjustment
Playmode STEREO Stereo mode selected
Playmode MOVIE Virtual surround sound for movie playback
Playmode MUSIC Virtual surround sound for music playback
Playmode NIGHT Virtual surround sound with reduced dynamic
Playmode PARTY Copy the audio signal from the front-speakers to the surround speakers
Playmode DISCRETE Surround sound for movie and music playback
Playmode PURE DIRECT Plays the input signal without using a virtualizer or upmixer
Bluetooth® BTP Pairing mode (Pairing)
Bluetooth® BT- / CON Connection established
Bluetooth® BT- / DIS Connection closed
Bluetooth® FAI Failure occurred during pairing process
Incoming Signal DOLBY ATMOS Dolby Atmos®bitstream
Incoming Signal DOLBY DIGITAL Dolby®digital multichannel-bitstream

88
English
Operation Display Meaning
Incoming Signal DOLBY DIGITAL 2.0 Dolby®digital two-channel-bitstream
Incoming Signal DOLBY SURROUND Dolby®surround sound
Incoming Signal DTS-HD DTS-HD®bitstream
Incoming Signal DTS DTS®digital surround bitstream
Incoming Signal PCM Digital stereo signal
Networking CAST Usage of Chromecast built-in
Networking SPOTIFY Usage of Spotify Connect
Networking WIF / CON Network (WiFi) connected
Networking WIF / DIS Network (WiFi) disconnected
Networking ETH / CON Network (ethernet) connected
Networking ETH / DIS Network (ethernet) disconnected
Networking NET / SET Smart Connect 5.1 ready for network setup

3
89
English
Using Chromecast built-in
Requirements:
• (Mobile) device with activated WiFi and Bluetooth® function
• Network access (wireless by WiFi or wired by Ethernet)
• The "Google Home app"
• An app that supports playback via Chromecast built-in (e.g. Spotify Music, AllCast, TuneIn, etc.).
Audio playback with the "Google Home app" directly is not possible.
• Please keep the standard settings of your WiFi router. Changing the settings of your router, especially changes on the DHCP settings,
could lead to no or instable network connection. For compatible routers please refer to the following Link:
https://support.google.com/chromecast/table/6207416?
To use the integrated function Chromecast built-in, you need to install the "Google Home app" on your (mobile) device and to connect the
device to the Connect 5.1. Therefore your (mobile) device and the Connect 5.1 must be connected to the same network.
Please do as follows:
1Power up your Smart Connect 5.1 and start your (mobile) device.
The WiFi and Bluetooth® function must be activated on your (mobile) device. If the Connect 5.1 has been disconnected from the mains
please wait with the procedure until the display indicates [NET] followed by [SET].
Note: If you have already installed the "Google Home app" on your (mobile) device, you can skip item 2 and 3 below.
2Open the Play Store/ App Store on your (mobile) device.
3Search for the "Google Home app" and install it on your (mobile) device. You will need to accept access to several items, like identity and
others.
4Start the "Google Home app" and follow the instructions. You will need to assign a Google Account to this app. Please register or login to
your account.
5Your (mobile) device will now search for available devices in range. If neccessary, you may have to select the related search function
manually.
6Select Smart Connect 5.1xxxxx as device to be installed.
7Now, the (mobile) device tries to connect to the Connect 5.1. Please follow the instructions of the "Google Home app".
8After the connection has been established the Connect 5.1 plays a melody (sound sequence) through the connected speakers.

90
English
Please confirm that you have heard the melody.
9Now, please select the “room” where you will use the pre-amplifier (e.g. family room) and confirm with “next”.
10 Please select the WiFi network (WLAN) which you want to use for the Connect 5.1 and click on “next”.
11 The "Google Home app" and the Connect 5.1 will now be connected. After a successful connection the display of the Connect 5.1 shows
[WIF] followed by [CON] for 5 seconds.
12 Now the installation is almost finished. Please follow the last steps on your (mobile) device to fully complete the installation.
13 To play music using Chromecast built-in, open an app that supports this feature (Spotify, TuneIn, etc.). This is indicated by the Chromecast
built-in icon on the screen. Depending on the app, it may be necessary to start playback (the stream) first so that this function is displayed
and available.
14 In order to play back music that you have stored locally on your (mobile) device via the Smart Connect 5.1 using Chromecast built-in, you
can use the manufacturer's own playback app. If the music app of the manufacturer does not support Chromecast built-in for audio, you
can alternatively use a freely available app (such as the app "AllCast" from ClockworkMod).
Google Assistant
You can operate the Smart Connect 5.1 in two ways with the „Google Assistant“.
1Connecting to a Google Home device.
2Using the integrated voice control of the Google Home app.
Further information can be found under: www.assistant.google.de
Note: Google Assistant is not available in certain languages and countries.
Other manuals for Smart Connect 5.1
3
Table of contents
Other Canton Amplifier manuals

Canton
Canton Smart Connect 5.1 User manual

Canton
Canton Smart Amp 5.1 User manual

Canton
Canton Smart Amp 5.1 How to use

Canton
Canton Smart Amp 5.1 User manual

Canton
Canton Smart Amp 5.1 User manual

Canton
Canton Smart Connect 5.1 User manual

Canton
Canton Smart Amp 5.1 How to use

Canton
Canton Smart Connect 5.1 How to use