manuals.online logo
Brands
  1. Home
  2. •
  3. Brands
  4. •
  5. Cardo Systems
  6. •
  7. Intercom System
  8. •
  9. Cardo Systems cardo BK-1 User manual

Cardo Systems cardo BK-1 User manual

QUICKGUIDE
...continued on next page
Intercom communication (one-on-one) is
possible between up to ve users, i.e you and
four other cardo BK-1 users, through the four
available channels (“A”, “B”, “C” or “d”). Intercom
conferencing is available between 3 cyclists via
Channels “A” and “B” only.
Intercom Conference mode Toggling mode
Channel A
Channel C
Channel B
Channel D
Pairing with another cardo BK-1 unit: To chat
with another cardo BK-1 user via Intercom, rst
pair the cardo BK-1 units to each other. Pairing
is a one-time process. Once paired, the cardo
BK-1 units will automatically recognize each
other whenever they are within range.
TWO-WAY INTERCOM / INTERCOM
TOGGLING MODE
INTERCOM
CHANNEL
PAIRING /
BUTTON
PAIRING
MODE LED
INDICATORS
Channel “A” Channel “A”
Button
Rapid RED
ashing
Channel “B” Channel “B”
Button
Rapid BLUE
ashing
Channel “C”
Channel “A” +
Volume Up
Buttons
Rapid PURPLE
ashing
Channel “D”
Channel “B” +
Volume Down
Buttons
Rapid PURPLE
ashing
1. Check that both BK-1 units are turned ON and
in Standby mode. (single BLUE ash every
3 seconds)
2. Choose an available channel to pair the rst
BK-1 (Channel “A”, “B”, “C” or “D”).
3. Place the unit in Intercom Pairing mode by
pressing and holding the correct button(s)
on the rst BK-1 for at least 5 seconds until
the BLUE / RED/ PURPLE Light begins ashing
rapidly.
4. Immediately repeat Step 2-3 for the second
cardo BK-1. Both units will now be in Intercom
Pairing mode.
5. After a few seconds, both cardo BK-1 units
will show a solid light for 2 seconds, indicating
that they are now paired, connected and ready
to use.
NOTE: If Pairing is not completed within two minutes,
the cardo BK-1 will return to Standby mode.
Start/End Intercom
call with Channel:
Perform this action:
“A” Tap the Channel “A”
Button
“B” Tap the Channel “B”
Button
“C” Double Tap the Channel
“A” Button
“D” Double Tap the Channel
“B” Button
THREE-WAY INTERCOM
Pairing three cardo BK-1 units:
1. Cyclist 1 pairs to Cyclist 2 using Channel “A” as
described in section TWO WAY INTERCOM
2. Now Cyclist 1 pairs to Cyclist 3 using Channel “B”
as described in TWO WAY INTERCOM.
There are two ways to start an intercom
conference call with devices that are paired to
your cardo BK-1.
Option 1: VOICE
CONNECT (VOX)
Option 2: ALWAYS ON
MODE
Start Intercom
Conference Call with
Channels “A” and “B”
Speak any word loudly
into the microphone
(Intercom Call ends
automatically after 30
seconds of silence)
Add/Remove Channel
“A”: Tap the Channel “A”
Button
Add or Remove Channel
“B”: Tap the Channelton
(To end Intercom Call
press “A” or “B” Button)
RECEIVING INTERCOM CALLS
If another paired cardo BK-1 tries calling you via
Intercom, the call will begin almost instantly.
INTERCOM CONFIGURATION
The c ar do BK-1 Intercom allows Bicycle-to-Bicycle full-duplex
Intercom Communication at a range of up to 500 m / 1,640 ft.
Under tough environmental conditions (dense forest, narrow
buildings, heavy trac etc.), intercom range may decrease. Once
conditions improve, the range will increase again.
Please visit www.cardosystems.com/download/
manuals for a complete detailed User Guide.
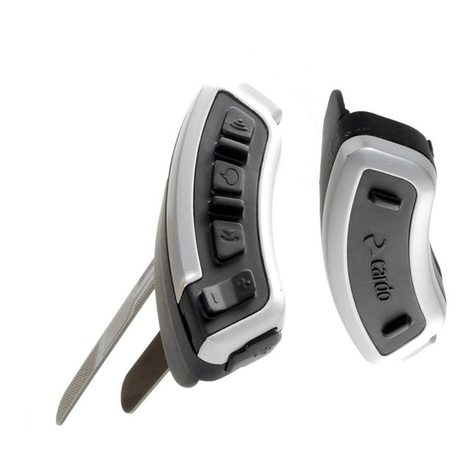
1. Multi-Port
(Charging /
SoftwareUpgrade
/ Aux Line-in)
2. Channel B
Button
3. Channel A
Button
• MP3 Button
4. Volume Down /
Rewind Button
5. Mobile Button –
Receive / Reject /
Pairing
6. Volume Up /
Forward Button
2.
4.
1.
5.
6.
3.
cardo BK-1 Headset
PAIRING THE CARDO BK1 TO A
BLUETOOTH ENABLED DEVICE
To connect a Bluetooth device such as a Mobile
phone, a GPS or an MP3 player you must rst pair it
to the cardo BK-1. Then the Bluetooth device and
the cardo BK-1 will automatically recognize each
other within range of 10m / 33ft.
Mobile Phone
& A2DP
GPS MP3 Player
Bike-to-Bike
Intercom
Between 5 Separate
Cyclists
GENERAL FUNCTIONS
Power ON / OFF Press and hold the Mobile
Button for 2 seconds
Volume Tap Volume Up or Volume
Down
Mute Tap Volume Up and Volume
Down simultaneously
Battery level
indicator
Press and hold Volume Up for
2 seconds
LED:
• Blue = Full charge
• Purple = Half charge
• Red = Almost empty
Enable/Disable AGC
(Automatic Gain Control):
AGC automatically adjusts
the volume according to
ambient noise and riding
speed.
(Default: ENABLED)
With the cardo BK-1 in
Standby Mode, press and hold
the Volume Down Button for
5 seconds
LED:
• Enabled: BLUE ash for 2 seconds
• Disabled: RED ash for 2 seconds
VOX SETTINGS
The VOX activation can be customized to make it
more or less sensitive. You can choose between
‘Regular’ (default) and ‘High’ VOX sensitivity.
With the cardo BK-1 in Standby Mode, press and
hold Volume Up and Down Buttons simultaneously
for 2 seconds.
LED:
• Regular VOX Sensitivity (default): BLUE ash for 2
seconds
• High VOX Sensitivity: PURPLE ash for 2 seconds
• VOX Disabled:RED ash for 2 seconds
PAIRING A MOBILE PHONE
• Make and receive calls
• Listen to Stereo Music via A2DP (with compatible
phones)
1. Turn on your mobile phone and make sure the
Bluetooth function is activated.
2. Verify that the cardo BK-1 is turned ON and in
Standby mode. (single BLUE ash every 3 seconds)
3. Press and hold the Mobile Button for at least
6 seconds. The BK-1 will rst ash RED. Continue
to hold the Button until the RED and BLUE lights
begin rapidly alternating.
4. Search for Bluetooth devices on your phone by
following the phone’s instructions.
5. After a few seconds the phone will list
“cardo BK-1” as a discovered device. Select
“cardo BK-1” from the list.
6. If prompted for a PIN or Passkey, enter 0000 (four
zeros).
7. The phone will conrm that Pairing has succeeded,
and the cardo BK-1 will begin ashing slowly
in BLUE.
NOTES:
• If Pairing is not completed within 2 minutes, the
cardo BK-1 will return to Standby mode.
• After Pairing, you may need to tap the Mobile Button
to connect the cardo BK-1 to the phone.
MAKING AND RECEIVING PHONE CALLS
BASIC FUNCTIONS
Voice Dial
(if supported by
mobile phone)
Tap the Mobile Button and follow
the prompt from the mobile
Reject a call Remain silent for 15 seconds, or
press and hold the Mobile Button
for 2 seconds
End a call Tap the Mobile Button
Answer a call Tap the MobileButton or speak
any word loudly to answer by VOX
Reconnect Tap the Mobile Button
MOBILE INTERCOM CONFERENCE MODE
Add/Remove
Channel “A” to/
from a call
Tap the Channel “A” Button
during a phone call
Add/Remove
Channel “B” to/
from a call
Tap the Channel “B” Button
during a phone call
PAIRING A GPS DEVICE
1. Turn on your GPS.
2. Verify that the cardo BK-1 is turned ON and in
Standby mode (single BLUE ash every 3 seconds).
3. Press and hold the Volume Up Button for at least
5 seconds, until the PURPLE light begins ashing
rapidly.
4. Search for Bluetooth device on the GPS device by
following the instructions in the GPS User Manual.
5. Once your GPS lists the “cardo BK-1” as a
discovered device, select it. If prompted for a PIN
or Passkey, enter 0000 (four zeros).
6. Your GPS device will conrm that Pairing has
succeeded and the cardo BK-1 will begin
ashing slowly in BLUE.
PAIRING TO AN A2DP MUSIC PLAYER
1. Turn on the Music Player and make sure that
Bluetooth function is activated.
2. Verify that your cardo BK-1 is turned ON and in
Standby mode (single BLUE ash every 3 seconds).
3. Press and hold the Mobile Button for at least 6
seconds, until the RED and BLUE lights begin
rapidly alternating.
4. Search for Bluetooth device on the Music Player
by following the device’s instructions.
5. Once your Music Player lists the “cardo BK-1” as
a discovered device, select it. If prompted for a
PIN or Passkey, enter 0000 (four zeros).
6. The Music Player may conrm that Pairing has
succeeded, and the cardo BK-1 will begin
ashing slowly in BLUE.
LISTENING TO MUSIC:
A2DP BLUETOOTH AUDIO SOURCES
BASIC FUNCTIONS Available only on AVRCP
compatible Bluetooth audio sources
Play Press and hold the MP3 Button for
2 seconds
Pause/
Stop
Press and hold the MP3 Button for
2 seconds
Forward Press and hold the Volume Up Button for
2 seconds
Rewind* Press and hold the Volume Down Button
for 2 seconds
*With some phones you may need to repeat this action
CABLECONNECTED MP3 PLAYERS
The Multi-Port may be used to connect a non-
Bluetooth audio source with a 3.5 mm–⁄” stereo
jack using the enclosed cable.
Multi-Port
(Charging /
Software Upgrade /
Aux Line-in)
1. Verify that the cardo BK-1 is turned ON and in
Standby mode. (Single BLUE ash every 3 seconds)
2. Connect the MP3 cable to the Music Player’s jack and
insert the other end of the cable into the Multi-Port.
To listen to music from a cable-connected device,
operate the Music Player using its Buttons as usual
(FF/REW/ PLAY/PAUSE).
NOTE: While listening to audio from the Multi-Port, the
VOX feature is disabled.
QUICKGUIDE
MAN00104 CARDO BK-1 J 202
Click-to-Link is the spontane-
ous, “social” feature of your
cardo BK-1. Use Click-to-
Link to instantly initiate
1-on-1 intercom calls with
other users near you.
ENABLE/DISABLE
CLICKTOLINK
With the cardo BK-1 in
Standby Mode, press and hold
the Volume Down Button for
2 seconds.
• Enabled: BLUE ash for
2 seconds
• Disabled: RED ash for
2 seconds
NOTE: By default, Click-to-Link is
DISABLED.
CLICKTOLINK®
If you want to… Perform this action:
Start a Click-to-Link call request
(search lasts up to 10 seconds)
Press and hold the Channel “B” Button for 3 seconds
End a Click-to-Link call /
Cancel a Click-to-Link call request
Tap the Channel “A” Button
Accept a Click-to-Link call When hearing the Click-to-Link ringtone
Tap the Channel “A” Button or speak any word loudly to
answer by VOX
Reject a Click-to-Link call While hearing the Click-to-Link ringtone
Remain silent for 10 seconds or until the ring tone subsides
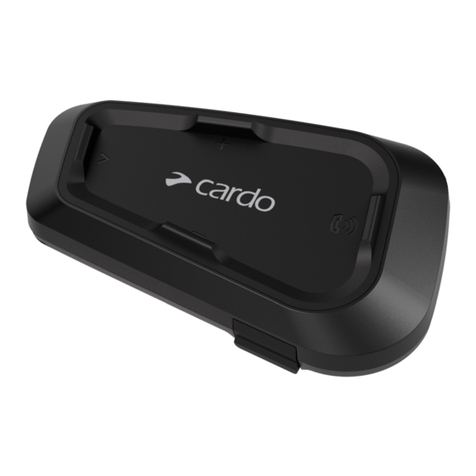
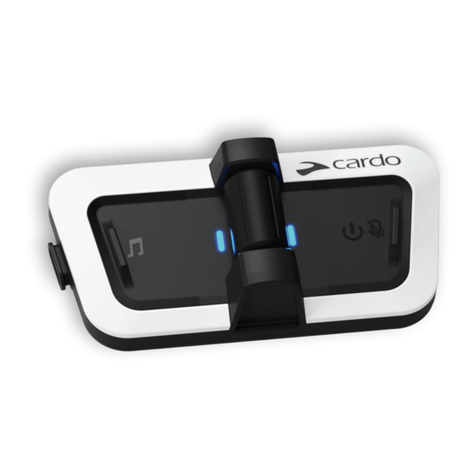
Other manuals for cardo BK-1

2

Other Cardo Systems Intercom System manuals

Cardo Systems PRO1 User manual

Cardo Systems

Cardo Systems PRO1 User manual

Cardo Systems PACKTALK CUSTOM User manual

Cardo Systems

Cardo Systems PACKTALK CUSTOM User manual

Cardo Systems FREECOM 1 Plus User manual

Cardo Systems

Cardo Systems FREECOM 1 Plus User manual

Cardo Systems Freecom 4 Plus User manual

Cardo Systems

Cardo Systems Freecom 4 Plus User manual

Cardo Systems Packtalk NEO User manual

Cardo Systems

Cardo Systems Packtalk NEO User manual

Cardo Systems PACKTALK CUSTOM User manual

Cardo Systems

Cardo Systems PACKTALK CUSTOM User manual

Cardo Systems SMARTH User manual

Cardo Systems

Cardo Systems SMARTH User manual

Cardo Systems SHO-1 User manual

Cardo Systems

Cardo Systems SHO-1 User manual

Cardo Systems FREECOM 4+ User manual

Cardo Systems

Cardo Systems FREECOM 4+ User manual

Cardo Systems Scala Rider G9 User manual

Cardo Systems

Cardo Systems Scala Rider G9 User manual

Cardo Systems FREECOM 4+ User manual

Cardo Systems

Cardo Systems FREECOM 4+ User manual

Cardo Systems Spirit HD User manual

Cardo Systems

Cardo Systems Spirit HD User manual

Cardo Systems FREECOM 1+ User manual

Cardo Systems

Cardo Systems FREECOM 1+ User manual

Cardo Systems G9 Powerset User manual

Cardo Systems

Cardo Systems G9 Powerset User manual

Cardo Systems PACKTALK User manual

Cardo Systems

Cardo Systems PACKTALK User manual

Cardo Systems FREECOM 1 Plus User manual

Cardo Systems

Cardo Systems FREECOM 1 Plus User manual

Popular Intercom System manuals by other brands

Interphone F4XT quick guide

Interphone

Interphone F4XT quick guide

Aiphone GH-1KD Installation and operation manual

Aiphone

Aiphone GH-1KD Installation and operation manual

AES global Styluscom Video manual

AES global

AES global Styluscom Video manual

Toa EXES-1000 Installation handbook

Toa

Toa EXES-1000 Installation handbook

Auta NEOS DIGITAL 751925 manual

Auta

Auta NEOS DIGITAL 751925 manual

Toa N-SP80AS1 user manual

Toa

Toa N-SP80AS1 user manual

SDC S6000DE installation instructions

SDC

SDC S6000DE installation instructions

Zennio GetFace IP ZVPFFRA1B Assembly instructions

Zennio

Zennio GetFace IP ZVPFFRA1B Assembly instructions

Byron BY101 manual

Byron

Byron BY101 manual

SKS-Kinkel HT 4600 user guide

SKS-Kinkel

SKS-Kinkel HT 4600 user guide

HME Clear-Com Encore MS-702 instruction manual

HME

HME Clear-Com Encore MS-702 instruction manual

RTS KP-98 operation instruction

RTS

RTS KP-98 operation instruction

GAI-Tronics GC-AC1 manual

GAI-Tronics

GAI-Tronics GC-AC1 manual

Midland BTX1 FM Instruction guide

Midland

Midland BTX1 FM Instruction guide

Star STW Series user manual

Star

Star STW Series user manual

Commax DRC-8TML/RF1 user manual

Commax

Commax DRC-8TML/RF1 user manual

Telex IC-S user manual

Telex

Telex IC-S user manual

Fermax LOFT VISION 5 manual

Fermax

Fermax LOFT VISION 5 manual

manuals.online logo
manuals.online logoBrands
  • About & Mission
  • Contact us
  • Privacy Policy
  • Terms and Conditions

Copyright 2025 Manuals.Online. All Rights Reserved.