CARE CV-395 User manual

Les choses à savoir avant de commencer
A. Démarrage auto et fonction stop
Pédalez et l’écran s’allumera immédiatement. Arrêtez de pédaler et il s’arrêtera après 4 secondes. Vous ne
pouvez sélectionner le programme et définir l’exercice qu’à l’arrêt.
B. Fonction HAUT (UP) et BAS (DOWN)
1. Lors du réglage du programme, tournez le bouton pour augmenter (sens horaire) ou diminuer (sens anti-
horaire) la valeur.
2. Pendant l’exercice, tournez le bouton pour augmenter ou diminuer le niveau de résistance.
C. Fonction Entrée (Enter)
Appuyez sur le bouton pour confirmer votre choix de programme ou la valeur cible pour votre exercice. Vous
pouvez définir la durée, la distance et le nombre de calories brûlées, mais seule une valeur peut être votre cible
à chaque fois.
D. Fonction réinitialisation de l’écran (Reset monitor)
Maintenir le bouton enfoncé 3 secondes permet de réinitialiser l’écran.
E. Fonction de récupération de la fréquence cardiaque (Pulse Recovery)
Une fois votre objectif atteint, l’écran émettra le son bip pendant 5 secondes. Veuillez alors placer vos mains sur
le capteur de fréquence cardiaque. Vous obtiendrez le résultat après une minute.
le compte à rebours commence : 01:00 - 00:59 - - jusqu’à 00:00. Une fois 00:00 atteint, l’ordinateur affichera
votre statut de récupération de la fréquence cardiaque par une note comprise entre F1.0 et F6.0.
1.0 signifie EXCEPTIONNEL
1.0<
<<
<F<
<<
<2.0 signifie EXCELLENT
2.0≦
≦≦
≦F≦
≦≦
≦2.9 signifie BIEN
3.0≦
≦≦
≦F≦
≦≦
≦3.9 signifie MOYEN
4.0≦
≦≦
≦F≦
≦≦
≦5.9 signifie SOUS LA MOYENNE
6.0 signifie MAUVAIS
F

Image de test normal Image d’absence de fréquence cardiaque
F. Fréquence cardiaque cible
Vous pouvez définir votre fréquence cardiaque cible. Une fois votre cible atteinte, l’écran émettra le son bip
pour vous en informer.
A. Sélection de programme et réglage de valeur
1. Tournez le bouton pour sélectionner le programme puis appuyez sur ENTRÉE (ENTER) pour confirmer
votre mode d’exercice.
2. En mode Manuel, tournez le bouton pour régler la DURÉE (TIME), la DISTANCE, les CALORIES et la
FRÉQUENCE CARDIAQUE (PULSE) pour votre exercice. Appuyez sur le bouton pour confirmer votre
valeur cible.
3. Pédalez pour commencer l’exercice.
4. Une fois la cible atteinte, l’ordinateur émettra le son bip et passera à la fonction de récupération de la
fréquence cardiaque.
B. Comment rallumer le moniteur
Le moniteur se mettra en VEILLE (écran éteint) s’il ne reçoit pas de signal ou si aucune touche n’est activée
pendant 4 minutes. Touchez l’écran pour rallumer le moniteur.
Fonctions et caractéristiques :
1. TEMPS : Montre votre temps d'entraînement écoulé en minutes et secondes. Votre ordinateur comptera
automatiquement de 0:00 à 99:59 par intervalles d'une seconde. Vous pouvez également programmer votre
ordinateur pour décompter à partir d'une valeur réglée en utilisant les touches UP et DOWN. Si vous continuez
l’exercice une fois que le temps a atteint 0:00, l'ordinateur commencera à biper et se remettra au temps réglé,
vous faisant savoir que votre séance d'entraînement est terminée.
2. DISTANCE : Montre la distance cumulée pendant chaque séance d'entraînement jusqu’au maximum de
99.9KM.
3. RPM : Votre cadence de pédalage.
4. WATT : La quantité d’énergie mécanique que l'ordinateur reçoit de votre exercice.
5. VITESSE : Montre votre vitesse d'entraînement en KM par heure.
6. CALORIES : Votre ordinateur estimera les calories cumulatives brûlées à un moment donné pendant votre
séance d'entraînement.
7. POULS : Votre ordinateur indique votre pouls en battements par minute pendant votre séance
d'entraînement.
8. ÂGE : Vous pouvez programmer votre âge de 10 à 99 ans. Si vous ne réglez pas l’âge, cette fonction sera
toujours par défaut réglée à 35.
9. FRÉQUENCE CARDIAQUE CIBLEE (POULS CIBLE) : La fréquence cardiaque que vous devez maintenir
s'appelle votre fréquence cardiaque ciblée en battements par minute.
10. BARRE DE DISTANCE : Chaque barre correspond à 100 mètres ou 0,1 mile.
Introduction & mode d’emploie des programmes :
Programme manuel : Manuel
P1 est un programme manuel. L'utilisateur peut commencer l'exercice en appuyant sur la touche START/STOP.
Le niveau de résistance par défaut est 5. Les utilisateurs peuvent s'exercer à tout niveau de résistance désiré
(en ajustant par les touches UP et DOWN pendant la séance d'entraînement) avec un certain temps ou un
certain nombre de calories ou une certaine distance.
Mode d’emploi :
1. Employez les touches UP et DOWN pour choisir le programme MANUEL (P1).
2. Appuyez sur la touche ENTER pour entrer dans le programme MANUEL.
3. Le TEMPS clignotera et vous pouvez appuyer sur les touches UP et DOWN pour régler votre TEMPS
d'exercice. Appuyez sur la touche ENTER pour confirmer votre TEMPS désiré.
4. La DISTANCE clignotera et vous pouvez appuyer sur les touches UP et DOWN pour régler votre DISTANCE
ciblée. Appuyez sur la touche ENTER pour confirmer votre DISTANCE désirée.

5. Les CALORIES clignoteront et vous pouvez appuyer sur les touches UP et DOWN pour régler vos
CALORIES ciblées. Appuyez sur la touche ENTER pour confirmer les CALORIES désirées.
6. Le POULS clignotera et vous pouvez appuyer sur les touches UP et DOWN pour régler votre POULS ciblé.
Appuyez sur la touche ENTER pour confirmer votre pouls désiré.
7. Pédalez pour commencer l’exercice.
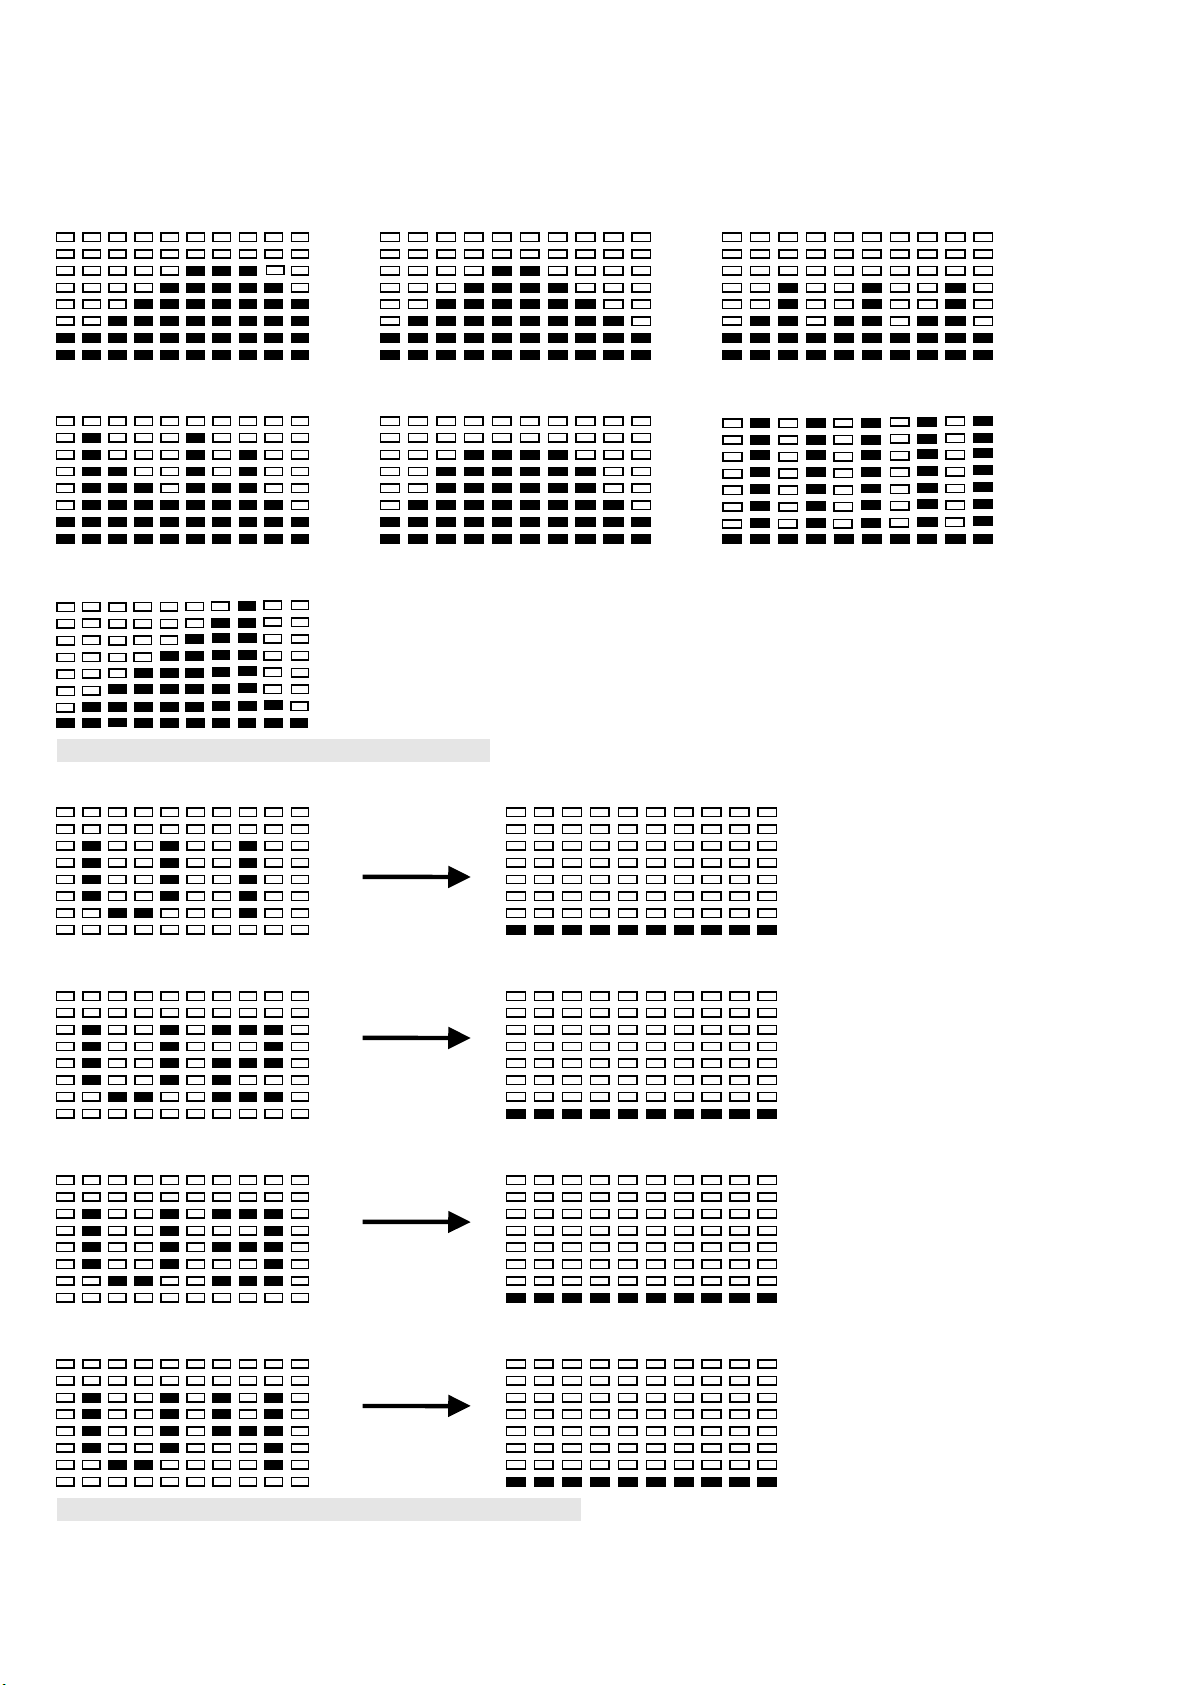
Programme préréglé : pas, colline, roulement, vallée, brûlage de graisse, rampe, montagne, intervalles,
aléatoires, plateau, Fartlek, programme de précipice
Les PROGRAMMES 2 à 13 sont des programmes préréglés. Les utilisateurs peuvent s'entraîner avec différents
niveaux dans différents intervalles comme les profils l’indiquent. Les utilisateurs peuvent s'entraîner au niveau
de résistance désiré (en ajustant avec les touches UP et DOWN pendant la séance d'entraînement) avec une
certaine période ou un nombre de calories ou une distance.
Mode d’emploi :
1. Employez les touches UP et DOWN pour choisir les programmes de P2 à P13.
2. Appuyez sur la touche ENTER pour entrer dans le programme.
3. Le TEMPS clignotera et vous pouvez appuyer sur les touches UP et DOWN pour régler votre TEMPS
d'exercice. Appuyez sur la touche ENTER pour confirmer votre TEMPS désiré.
4. La DISTANCE clignotera et vous pouvez appuyer sur les touches UP et DOWN pour régler votre DISTANCE
ciblée. Appuyez sur la touche ENTER pour confirmer votre DISTANCE désirée.
5. Les CALORIES clignoteront et vous pouvez appuyer sur les touches UP et DOWN pour régler vos
CALORIES ciblées. Appuyez sur la touche ENTER pour confirmer les CALORIES désirées.
6. Le POULS clignotera et vous pouvez appuyer sur les touches UP et DOWN pour régler votre POULS ciblé.
Appuyez sur la touche ENTER pour confirmer votre pouls désiré.
7. Pédalez pour commencer l’exercice.
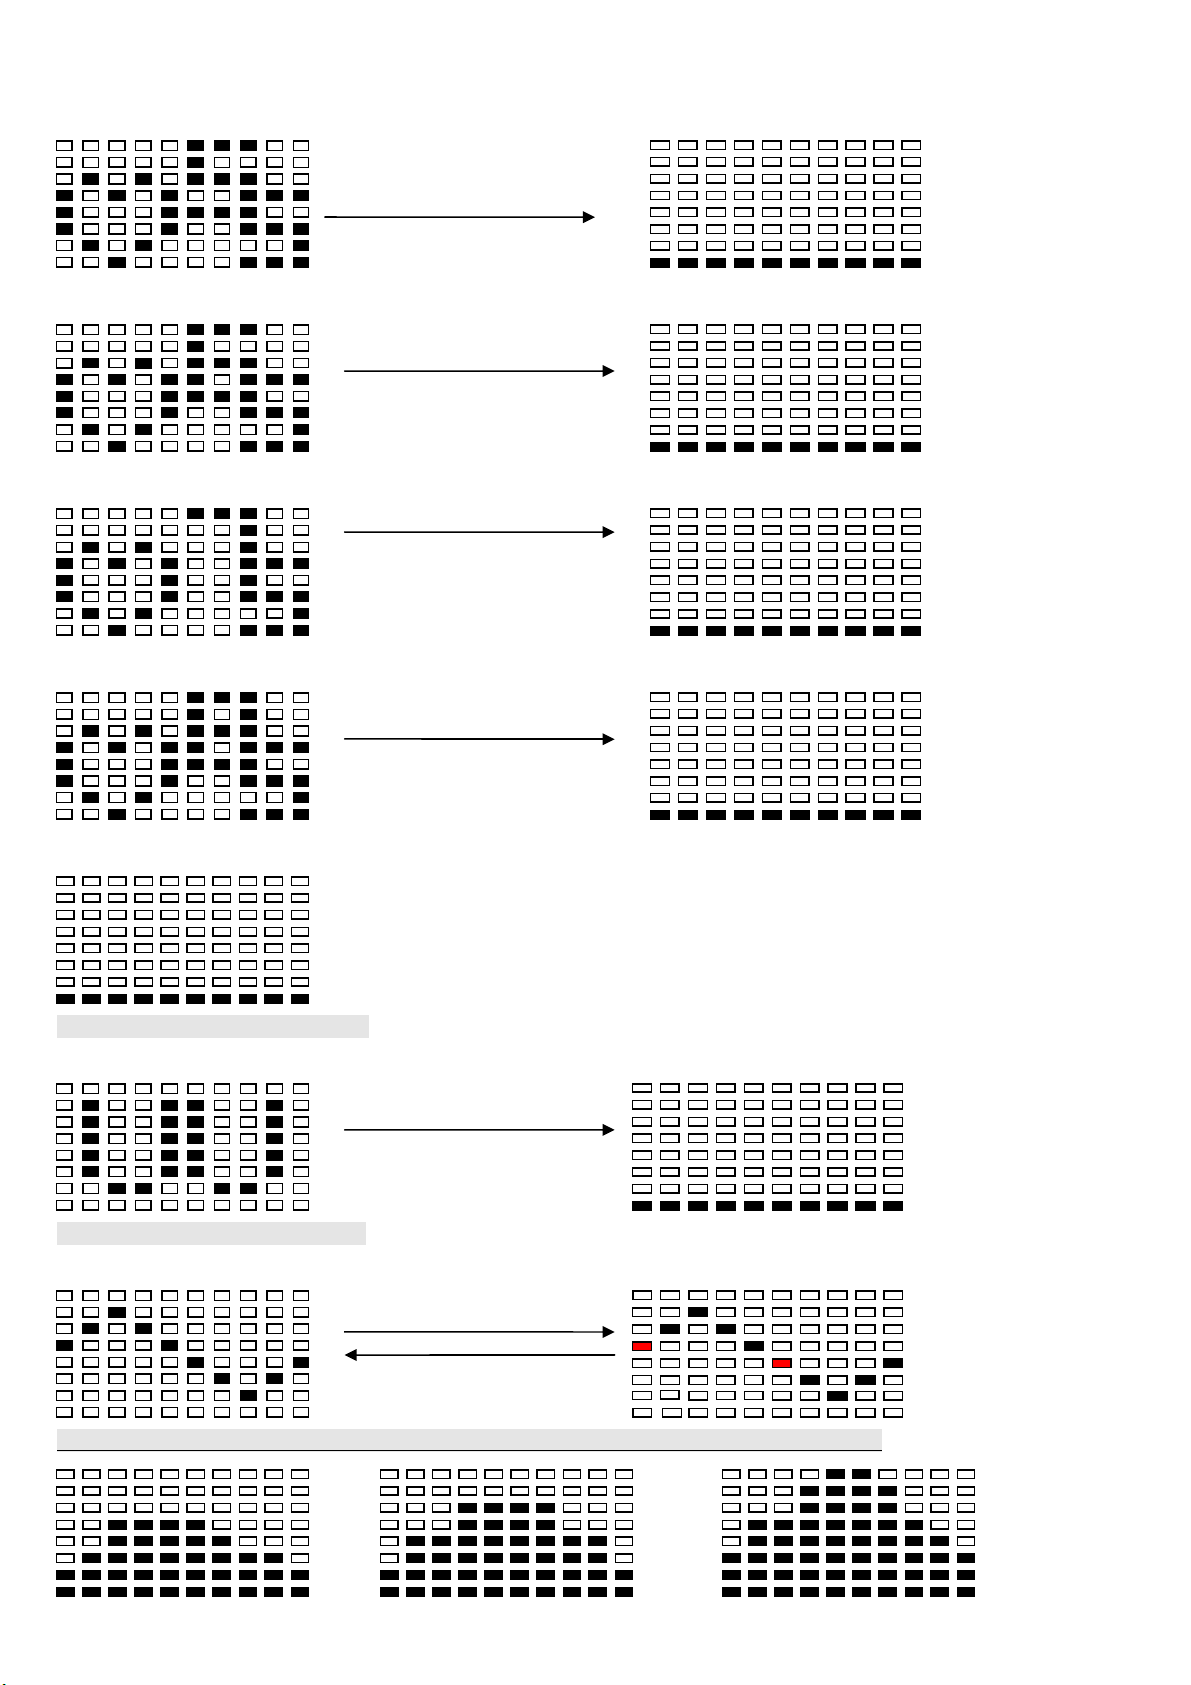
Programme de réglage utilisateur : Utilisateur 1, utilisateur 2, utilisateur 3 et utilisateur 4
Les programmes 14 à 17 sont des programmes de réglage par l’utilisateur. Les utilisateurs sont libres de créer
les valeurs de TEMPS, DISTANCE, CALORIES et niveau de résistance dans 10 colonnes. Les valeurs et les
profils seront stockés dans la mémoire après réglage. Les utilisateurs peuvent également changer le
chargement continu dans chaque colonne avec les touches UP et DOWN, et ils ne changeront pas le niveau de
résistance stocké dans la mémoire.
Mode d’emploi :
1. Employez les touches UP et DOWN pour choisir les programmes de P14 à P17.
2. Appuyez sur la touche ENTER pour entrer dans le programme.
3. La colonne 1 clignotera, utilisez les touches UP et DOWN pour créer votre profil personnel d'exercice.
Appuyez sur la touche ENTER pour confirmer votre première colonne de profil d'exercice. Le niveau par défaut
est la charge 1.
4. La colonne 2 clignotera, utilisez les touches UP et DOWN pour créer votre profil personnel d'exercice.
Appuyez sur la touche ENTER pour confirmer votre deuxième colonne de profil d'exercice.
5. Suivez la description ci-dessus 5 et 6 pour finir vos profils personnels d'exercice. Appuyez sur la touche
ENTER pour confirmer votre profil désiré d'exercice
6. Le TEMPS clignotera et vous pouvez appuyer sur les touches UP et DOWN pour régler votre TEMPS
d'exercice. Appuyez sur la touche ENTER pour confirmer votre TEMPS désiré.
7. La DISTANCE clignotera et vous pouvez appuyer sur les touches UP et DOWN pour régler votre DISTANCE
ciblée. Appuyez sur la touche ENTER pour confirmer votre DISTANCE désirée.
8. Les CALORIES clignoteront et vous pouvez appuyer sur les touches UP et DOWN pour régler vos
CALORIES ciblées. Appuyez sur la touche ENTER pour confirmer les CALORIES désirées.
9. Le POULS clignotera et vous pouvez appuyer sur les touches UP et DOWN pour régler votre POULS ciblé.
Appuyez sur la touche ENTER pour confirmer votre pouls désiré.
10. Pédalez pour commencer l’exercice.
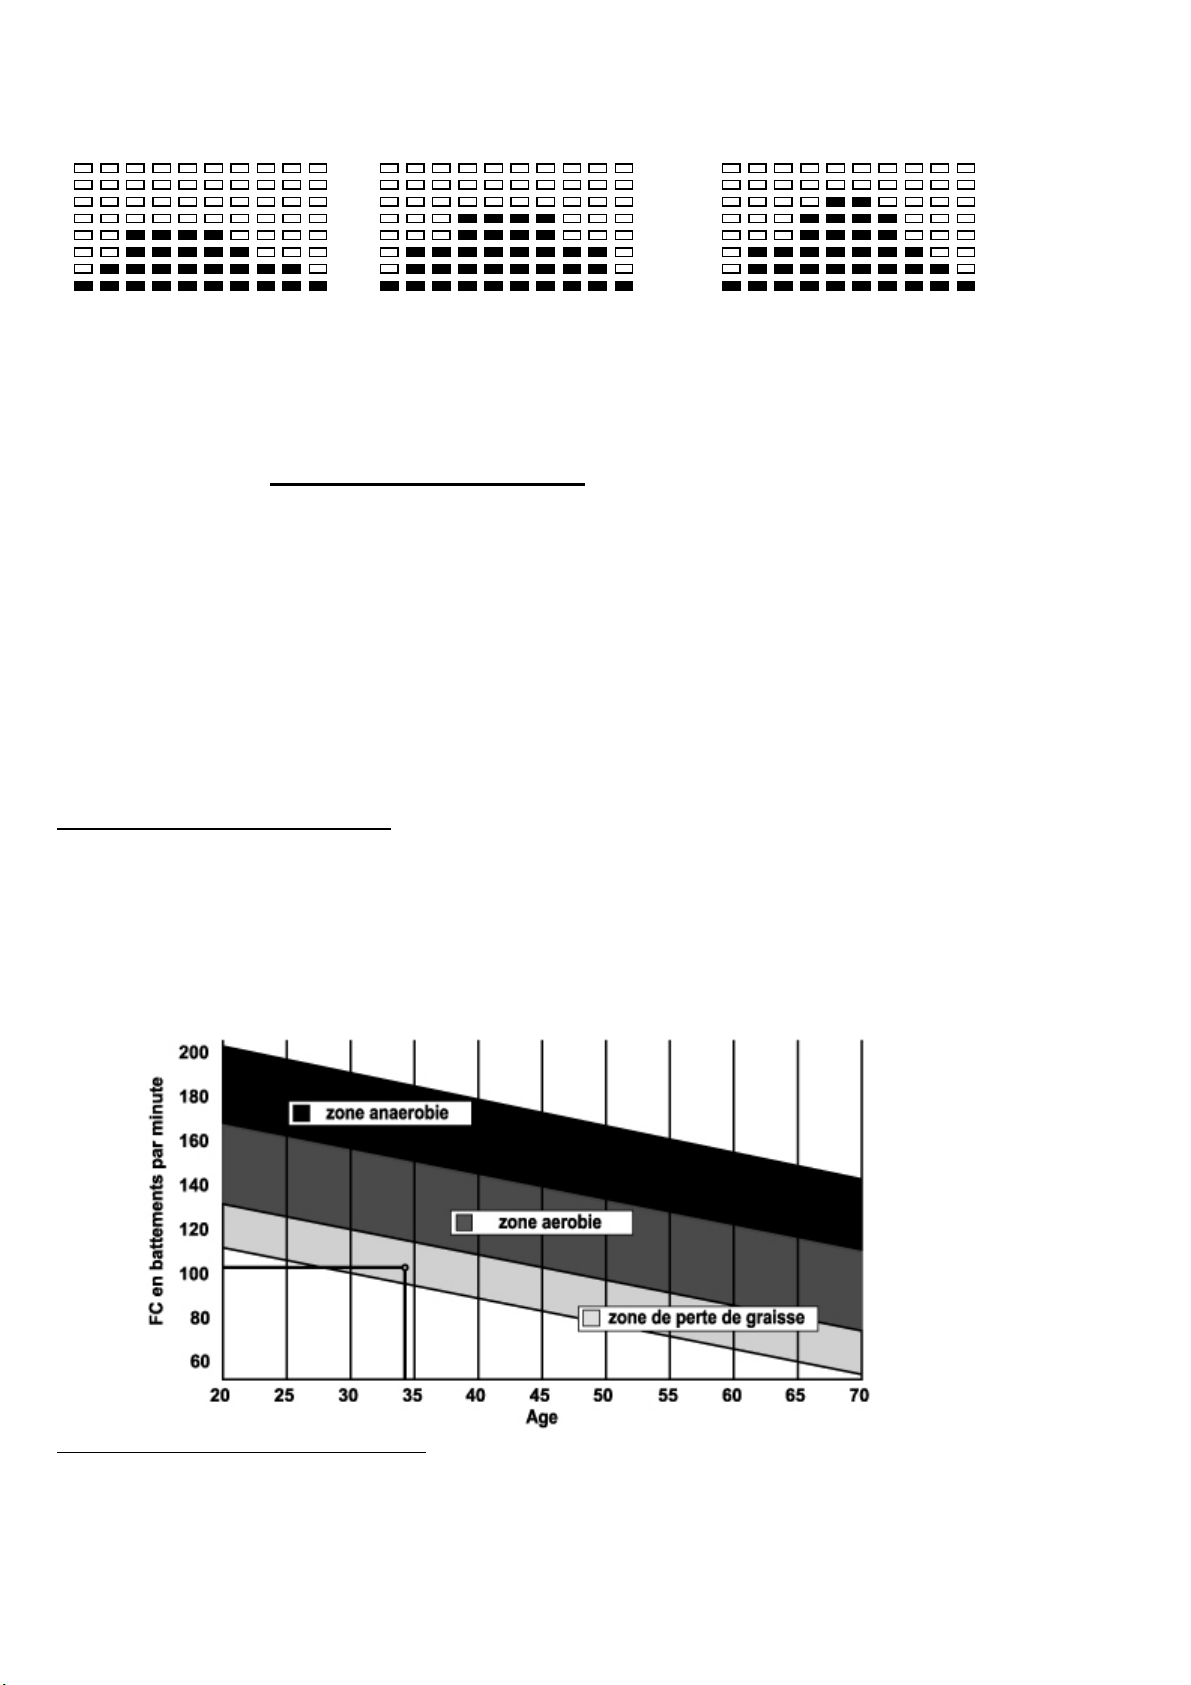
Programme Contrôle de fréquence cardiaque : 55% H.R.C., 65% H.R.C., 75% H.R.C., 85% H.R.C., Target
(cible) H.R.C.
Programmes 18 à 22 : Contrôle de fréquence cardiaque et Programme 22 : Contrôle de fréquence cardiaque
ciblée.
Programme 18 : 55% Max H.R.C. - - Target H.R. = (220 – AGE) x 55%
Programme 19 : 65% Max H.R.C. - - Target H.R. = (220 – AGE) x 65%
Programme 20 : 75% Max H.R.C. - - Target H.R. = (220 – AGE) x 75%
Programme 21 : 85% Max H.R.C. - - Target H.R. = (220 – AGE) x 85%
Programme 22 : Target H.R.C. - - Entraînement à votre valeur de fréquence cardiaque ciblée.

Les utilisateurs peuvent s'entraîner selon leur programme désiré de fréquence cardiaque en réglant ÂGE,
TEMPS, DISTANCE, CALORIES ou POULS CIBLE. Dans ces programmes, l'ordinateur ajustera le niveau de
résistance selon la fréquence cardiaque détectée. Par exemple, le niveau de résistance peut augmenter
toutes les 20 secondes tandis que la fréquence cardiaque détectée est inférieure à la CIBLE H.R et alors
l'ordinateur indiquera «RALENTISSEMENT» sur la fenêtre de message.
Mode d’emploi :
1. Employez les touches UP et DOWN pour choisir un programme de P18 à P22.
2. Appuyez sur la touche ENTER pour entrer dans le programme.
3. L’AGE clignotera dans les programmes P18 à P21 et vous pouvez appuyer sur les touches UP et DOWN
pour régler votre AGE. L’âge par défaut est 35 ans.
4. Au programme 22, le POULS CIBLE clignotera et vous pouvez appuyer sur les touches UP et DOWN pour
régler votre POULS ciblé entre 80 et 180. Le pouls ciblé par défaut est 120.
5. Le TEMPS clignotera et vous pouvez appuyer sur les touches UP et DOWN pour régler votre TEMPS
d'exercice. Appuyez sur la touche ENTER pour confirmer votre TEMPS désiré.
6. La DISTANCE clignotera et vous pouvez appuyer sur les touches UP et DOWN pour régler votre DISTANCE
ciblée. Appuyez sur la touche ENTER pour confirmer votre DISTANCE désirée.
7. Les CALORIES clignoteront et vous pouvez appuyer sur les touches UP et DOWN pour régler vos
CALORIES ciblées. Appuyez sur la touche ENTER pour confirmer les CALORIES désirées.
Vous ne pouvez configurer que l'un d'entre eux et le moniteur ira au réglage de fréquence cardiaque cible
7. Pédalez pour commencer l’exercice.
Programme de contrôle de watt : contrôle de watt
Le programme 23 est un programme indépendant de vitesse. Pressez sur la touche ENTER pour régler les
valeurs WATT CIBLE, TEMPS, DISTANCE et CALORIES. Dans le mode exercice, le niveau de la résistance
n'est pas réglable. Par exemple, le niveau de la résistance peut augmenter tandis que la vitesse est trop lente.
Aussi le niveau de la résistance peut diminuer tandis que la vitesse est trop rapide. En conséquence, la valeur
calculée WATT sera proche de la valeur WATT CIBLEE réglée par les utilisateurs.
Mode d’emploi :
1. Employez les touches UP et DOWN pour choisir le programme contrôle de watt P23.
2. Appuyez sur la touche ENTER pour entrer dans le programme.
3. Le TEMPS clignotera et vous pouvez appuyer sur les touches UP et DOWN pour régler votre TEMPS
d'exercice. Appuyez sur la touche ENTER pour confirmer votre TEMPS désiré.
4. La DISTANCE clignotera et vous pouvez appuyer sur les touches UP et DOWN pour régler votre DISTANCE
ciblée. Appuyez sur la touche ENTER pour confirmer votre DISTANCE désirée.
5. Les WATT clignoteront et vous pouvez appuyer sur les touches UP et DOWN pour régler votre valeur WATT
ciblée. Appuyez sur la touche ENTER pour confirmer votre valeur WATT ciblée. La valeur par défaut est 100.
6. Les CALORIES clignoteront et vous pouvez appuyer sur les touches UP et DOWN pour régler vos
CALORIES ciblées. Appuyez sur la touche ENTER pour confirmer les CALORIES désirées.
7. Le POULS clignotera et vous pouvez appuyer sur les touches UP et DOWN pour régler votre POULS ciblé.
Appuyez sur la touche ENTER pour confirmer votre pouls désiré.
8. Pédalez pour commencer l’exercice.
NOTE:
1. WATT = TORQUE (KGM) * RPM * 1.03
2. Dans ce programme, la valeur WATT restera constante. Cela signifie que si vous pédalez
rapidement, le niveau de résistance diminuera et si vous pédalez lentement, le niveau de
résistance augmentera. Essayez toujours de vous maintenir dans la même valeur de watt.
Programme graisse : graisse
Le programme 24 est une conception de programme spéciale pour calculer le rapport de graisse du corps de
l'utilisateur et pour offrir un profil spécifique de chargement pour les utilisateurs. Il y a 3 types de corps divisés
selon le % calculé de graisse.
Type1 : % GRAISSE > 27
Type2 : 20 < % GRAISSE < 27
Type3 : % GRAISSE < 20
L'ordinateur donnera les résultats du test de POURCENTAGE DE GRAISSE, BMI et BMR.
Mode d’emploi :

1. Utilisez les touches UP et DOWN pour choisir le programme graisse (P24).
2. Appuyez sur la touche ENTER pour entrer dans votre programme d'entraînement.
3. La TAILLE clignotera et vous pouvez appuyer sur les touches UP et DOWN pour régler votre TAILLE.
Pressez sur la touche ENTER pour confirmer votre TAILLE. La TAILLE par défaut est 170cm.
4. Le POIDS clignotera et vous pouvez appuyer sur les touches UP et DOWN pour régler votre POIDS.
Pressez sur la touche ENTER pour confirmer votre POIDS. Le POIDS par défaut est 70kgs.
5. Le SEXE clignotera et vous pouvez appuyer sur les touches UP et DOWN pour choisir votre sexe. Le
numéro 1 signifie MASCULIN et le numéro 0 signifie FEMININ. Pressez sur la touche ENTER pour
confirmer votre sexe. Le sexe par défaut est 1 (HOMME).
6. L'ÂGE clignotera et vous pouvez appuyer sur les touches UP et DOWN pour régler votre ÂGE.
Pressez sur la touche ENTER pour confirmer votre ÂGE. L'ÂGE par défaut est 35.
7. Appuyez sur la touche START/STOP pour commencer la mesure de la graisse. Si la fenêtre indique E,
assurez-vous que vos mains sont bien sur les poignées ou que la ceinture de poitrine est bien en
contact avec votre corps. Appuyez à nouveau sur la touche START/STOP pour commencer la mesure
de graisse.
8. Après avoir fini votre mesure, l'ordinateur indiquera les valeurs de BMR, BMI et pourcentage de
graisse sur l’écran d'affichage. En outre, l'ordinateur indiquera votre propre profil d'exercice pour votre
type de corps.
9. Pédalez pour commencer l’exercice.
Guide :
1. Mode veille : L'ordinateur entre en mode veille quand il n'y a aucun signal et qu’aucune touche n’est
pressée après 4 minutes. Vous pouvez appuyer sur n'importe quelle touche pour réveiller l'ordinateur.
C. connection bluetooth & application
Copier le lien ci-dessous dans votre navigateur (Edge, Firefox, Chrome, Safari etc)
https://cloud.carefitness.com/index.php/s/AaPSTDkzU1Nsmyq
Et suivre les instructions détaillées
Message d'erreur :
E1 (ERREUR 1) :
État normal : Pendant la séance d'entraînement, quand le moniteur n'a pas obtenu de signal
de compte du moteur depuis plus de 4 secondes et après les contrôles 3 fois de
suite, l’écran indique E1.
Energie en l'état : Le moteur retourne à zéro automatiquement, quand le signal du moteur ne peut
pas être détecté pendant plus de 4 secondes alors le conducteur du moteur sera
coupé immédiatement et l’écran indiquera E1. Tous les autres nombres et
fonctions sont blancs, et les signaux sortants sont également coupés.
E2 (ERREUR 2) : Quand le moniteur a lu les données de mémoire, si le code d'identification n'est
pas correct ou que la mémoire IC est endommagée le moniteur indique E2
immédiatement au démarrage.
E3 (ERREUR 3) : Après 4 secondes en mode démarrage, l'ordinateur détecte si le moteur
défectueux n'a pas laissé un zéro, puis les barres d'affichage indiquent « E3 ».
Graphiques d’entraînement LCD
PROFILS DE PROGRAMME PREREGLES :
PROGRAMME 1 PROGRAMME 2 PROGRAMME 3
MANUEL PAS COLLINE
PROGRAMME 4 PROGRAMME 5 PROGRAMME 6
ROULEMENT VALLEE BRULAGE DE GRAISSE

PROGRAMME 7 PROGRAMME 8 PROGRAMME 9
RAMPE MONTAGNE INTERVALLES
PROGRAMME 10 PROGRAMME 11 PROGRAMME 12
ALEATOIRE PLATEAU FARTLEK
PROGRAMME 13
PRECIPICE
PROGRAMME REGLAGE PAR L’UTILISATEUR
PROGRAMME 14
UTILISATEUR 1
PROGRAMME 15
UTILISATEUR 2
PROGRAMME 16
UTILISATEUR 3
PROGRAMME 17
UTILISATEUR 4
PROFILS DE PROGRAMME FREQUENCE CARDIAQUE :

PROGRAMME 18
55% H.R.C.
Presser la touche ENTREE
PROGRAMME 19
65% H.R.C.
Presser la touche ENTREE
PROGRAMME 20
75% H.R.C.
Presser la touche ENTREE
PROGRAMME 21
85% H.R.C.
Presser la touche ENTREE
PROGRAMME 22
TARGET H.R.C.
PROGRAMME CONTROLE WATT
PROGRAMME 23
CONTROLE WATT
PROGRAMMES TEST GRAISSE :
PROGRAMME 24
GRAISSE (MODE STOP) GRAISSE (MODE START)
Un des six profiles suivants sera indiqué automatiquement après la mesure de votre graisse :

Durée entraînement: 40 minutes Durée entraînement: 40 minutes Durée entraînement: 20 minutes
CONSEILS D’ENTRAINEMENT
Attention :
Avant de programmer votre entraînement, il est indispensable de tenir compte de votre âge,
particulièrement pour les personnes de plus de 35 ans, ainsi que de votre condition physique. Si vous
avez un mode de vie sédentaire sans activité physique régulière, il est primordial de consulter votre
médecin pour déterminer le niveau d’intensité de votre entraînement. Une fois déterminé, ne chercher
pas à atteindre votre maximum dès les premiers entraînements. Soyez patient vos performances
augmenteront rapidement.
L’entraînement Cardio – Training :
Il permet de développé le système cardio – vasculaire (tonicité cœur / vaisseaux sanguin).
Lors d'un entraînement Cardio – Training , les muscles ont besoin d'un apport d'oxygène, de substances
nutritives, et d'éliminer leurs déchets. Notre cœur accélère son rythme, et véhicule vers l'organisme par
l'intermédiaire du système cardio-vasculaire une quantité plus importante d'oxygène.
Plus on effectue d'exercices de façon régulière et répétitive, plus le cœur se développe à la manière d'un
muscle ordinaire. Dans la vie courante, ceci se traduit par la faculté de supporter des efforts physiques plus
importants, et d'augmenter ses facultés intellectuelles.
Définition de votre Zone de travail :
La fréquence cardiaque maximale (FCM) = 220 – âge (180 – âge pour les personnes sédentaires).
La Zone d’échauffement et de retour au calme est égale à 55% de votre FCM.
La Zone de Perte de Graisse est comprise entre 55 / 65% de votre FCM.
La Zone Aérobie est comprise entre 65 / 85% de votre FCM.
La Zone Anaérobie, est comprise entre 85% de votre FCM et celle ci.
Les étapes d’un entraînement progressif :
1) Une phase d'échauffement :

Commencez chaque entraînement par un échauffement progressif (10-20 mn, plus au-delà de 50 ans) qui
mettra en éveil vos muscles et élèvera doucement votre rythme cardiaque. Elevez doucement vos pulsations à
55% de votre FCM (Fréquence Cardiaque Maximale).
Tenez votre Fréquence Cardiaque à ce niveau pendant la durée de l’échauffement.
Si vous commencez trop rapidement votre entraînement, vous risquez d’augmenter les risques de blessures
tendino - musculaire.
2) Une phase de travail :
C’est la partie principale de l’entraînement.
Selon vos buts spécifiques, perte de poids, amélioration de la résistance cardio – vasculaire (travail aérobie),
développement de la résistance (travail anaérobie) il est possible de choisir la zone cible adéquate.
La Zone de Perte de Graisse, 55 - 65%
La fréquence cardiaque doit être basse et la durée d'exercice assez longue. Cette zone est conseillée pour les
personnes reprenant une activité physique depuis longtemps oubliée, recherchant à éliminer un surcroît
pondérale, ou exposées à des problèmes cardiaques. N’oubliez pas que pour ce type d’entraînement la
durée de l’exercice doit être d’au moins 30 minutes et la Fréquence Cardiaque (FC) comprise entre 55 et 65%
de la FCM .
-Elevez graduellement de 30 à 60 minutes par séance.
-Exercez vous 3 ou 4 fois par semaine.
La Zone Aérobie, 65-85%
Cette zone est recommandée pour ceux qui ont une bonne condition physique et qui s’entraînent
régulièrement. En vous entraînant dans cette zone, vous augmenterez votre condition physique en évitant le
surmenage.
-Durée : 20 à 30 minutes par séance
-Fréquence : Au moins 3 ou 4 fois par semaine.
La Zone Anaérobie, 85%-FCM
Cette zone est seulement prévue pour des athlètes confirmés et n’est jamais recommandé sans
approbation ou surveillance médicale. Cette zone est uniquement destinée à des personnes très entraînées.
Elle est utilisée pour un entraînement en intervalle (ou pour des courtes courses de sprint) pour aider à
améliorer ou mesurer les niveaux d'endurance.
Le temps passé dans cette zone doit être bref sous peine d’accident.
3) Une phase de retour au calme :
Il s’agit de la réduction de l'effort (10 à 20 mn). Cela permet un retour au calme du système cardio-vasculaire
(55% de la FCM) et d’éviter ou de diminuer les douleurs musculaires tel que les crampes et les courbatures.
Les étirements doivent suivre la séance d'étirements pendant que les articulations sont encore chaudes. Cela
détend les muscles et aide à éviter les courbatures.
Etirez-vous lentement et doucement , il ne faut jamais vous étirer jusqu'à un point de douleur. Tenez chaque
étirement pendant 30 à 60 secondes en expirant.
Contrôlez votre progrès
En s’améliorant votre système cardio-vasculaire aura au repos une FC (fréquence cardiaque) qui se réduira.
Vous mettrez plus longtemps pour atteindre votre zone cible et il sera plus facile pour vous de vous y
maintenir. Les séances vous paraîtront de plus en plus facile et vous serez plus résistant au quotidien .
Si au contraire votre FC au repos est plus haute qu’à l’habitude, il vous faudra vous reposer ou diminuer
l’intensité de l’entraînement.
Fréquence d’entraînement :
Ne vous laissez pas décourager par les premières séances, motivez vous en planifiant des plages
d’entraînement fixes. Bon courage !
Entraînement quotidien = environ 10 minutes par séance.
2 à 3 séances par semaine = environ 30 minutes par séance.
1 à 2 séances par semaine = environ 50 minutes par séance.
* Il s’agit de la phase de travail. Les durées indiquées ne tiennent pas compte des phases d’échauffement et de
retour au calme.
Tous matériels ou pièces défectueuses ne pourront être remplacés qu’après réception de ceux-ci
retournés aux frais de l’expéditeur. Aucun retour de marchandises ne pourra être accepté sans notre
accord préalable

POUR
COMMANDER
DES
PIECES
DETACHEES
Dans un soucis d’efficacité munissez-vous des éléments suivants avant de contacter notre Service
Après Vente :
Le nom ou la référence du produit.
Le numéro de fabrication indiqué sur le châssis principal et sur le carton d’emballage.
Contacter du lundi au vendredi de 10H00 à 12H00 et de 14H00 à 17H00 (sauf jour fériés).
CARE Service Après Vente
18 / 22 rue Bernard – Z.I. les Vignes
93012 BOBIGNY Cedex
Tél. : 0820 821 167 - Fax : 00 33 1 48 43 51 03
E mail : sav@carefitness.com
.
The things you should know before exercise
A. Auto start and stop function
Pedaling exercise equipment, the monitor will start immediately. Stop pedaling after 4 seconds will go to stop
mode. You can select program and set up the exercise target only in the stop mode.
B. UP & DOWN function
1. During the program setting mode, turn the button to increase ( clockwork side) or decrease (reverse clock
side) value.
2. During the exercise mode,turn the button to increase or decrease the resistance level.
C. Enter function
Press the button to confirm your program choosing or confirm your target value to do exercise.You can set up
the exercise time,Distance and calorie but only can choose one of them to be your exercise target every time.
D. Reset monitor function
Press and hold button 3 seconds can reset the monitor.
E.Pulse Recovery function
Once reach your exercise target,the monitor will have Bi sound 5 seconds. Please move your hand to the heart
rate sensor. After one minute you can got your result.
time starts counting from 01:00 - 00:59 - - to 00:00. As soon as 00:00 is reached, the computer will show your
heart rate recovery status with the grade F1.0 to F6.0.
GB

1.0 means OUTSTANDING
1.0<
<<
<F<
<<
<2.0 means EXCELLENT
2.0
≦
≦≦
≦
F
≦
≦≦
≦
2.9 means GOOD
3.0
≦
≦≦
≦
F
≦
≦≦
≦
3.9 means FAIR
4.0
≦
≦≦
≦
F
≦
≦≦
≦
5.9 means BELOW AVERAGE
6.0 means POOR
Normal test picture No heart rate input picture
F. Target heart rate
You can set up your target heart rate value. Once reach your target, monitor will produce bi sound to remind
you.
A. Program select and setting value
1. Turn the button to select program mode and then press ENTER to confirm your exercise mode.
2. At the Manual mode, turn the button to set up your exercise TIME, DISTANCE, CALORIES, PULSE.
Press the button to confirm your target value.
3. pedaling the machine to start exercise.
4. When you reach the target, the computer will produce beep sounds and go to pulse recovery function.
B Wake-Up Function
The monitor will entry SLEEP mode (LCD off) when there is no signal input and no key be pressed after 4
minutes. Press the screen to start the monitor.
Functions and Features:
1. TIME: Shows your elapsed workout time in minutes and seconds. Your computer will automatically count up
from 0:00 to 99:59 in one second intervals. You can also program your computer to count down from a set
value by using the UP and DOWN keys. If you continue exercising once the time has reached 0:00, the
computer will begin beeping, and reset itself to the original time set, letting you know your workout is done.
2. DISTANCE: Displays the accumulative distance traveled during each workout up to a maximum of
99.9KM/MILE.
3. RPM: Your pedal cadence.
4. WATT: The amount of mechanical power the computer is receiving from your exercise.
5. SPEED: Displays your workout speed value in KM/MILE per hour.
6. CALORIES: Your computer will estimate the cumulative calories burned at any given time during your
workout.
7. PULSE: Your computer displays your pulse rate in beats per minute during your workout.
8. AGE: Your computer is age-programmable from 10 to 99 years. If you do not set an age, this function will
always default to age 35.
9. TARGET HEART RATE (TARGET PULSE): The heart rate you should maintain is called your Target Hear
Rate in beats per minute.
10. DISTANCE BAR: Every bar indicates 100 meter or 0.1 mile.
Program Introduction & Operation:
Manual Program: Manual
P1 is a manual program. User can start exercise by pressing START/STOP key. The default resistance level is
5. Users may exercise in any desirous of resistance level (Adjusting by UP/DOWN keys during the workout)
with a period of time or a number of calories or a certain distance.
Operations:
1. Use UP/DOWN keys to select the MANUAL (P1) program.
2. Press the ENTER key to enter MANUAL program.
3. The TIME will flash and you can press UP or DOWN keys to set your exercise TIME. Press ENTER
key to confirm your desired TIME.

4. The DISTANCE will flash and you can press UP or DOWN keys to set your target DISTANCE. Press
ENTER key to confirm your desired DISTANCE.
5. The CALORIES will flash and you can press UP or DOWN keys to set your exercise CALORIES.
Press ENTER key to confirm your desired CALORIES.
6. The PULSE will flash and then you can press UP or DOWN keys to set your exercise PULSE. Press
ENTER key to confirm your desired Pulse.
7. Pedaling the machine to begin exercise
.
Preset Program: Steps, Hill, Rolling, Valley, Fat Burn, Ramp, Mountain, Intervals, Random, Plateau,
Fartlek, Precipice Program
PROGRAM 2 to PROGRAM 13 is the preset programs. Users can exercise with different level of loading in
different intervals as the profiles show. Users may exercise in any desirous of resistance level (Adjusting by
UP/DOWN keys during the workout) with a period of time or a number of calories or a certain distance.
Operations:
1. Use UP/DOWN keys to select one of the above programs from P2 to P13.
2. Press the ENTER key to enter your workout program.
3. The TIME will flash and you can press UP or DOWN keys to setting your exercise TIME. Press
ENTER key to confirm your desired TIME.
4. The DISTANCE will flash and you can press UP or DOWN keys to setting your target DISTANCE.
Press ENTER key to confirm your desired DISTANCE.
5. The CALORIES will flash and you can press UP or DOWN keys to setting your exercise CALORIES.
Press ENTER key to confirm your desired CALORIES.
6. The PULSE will flash and then you can press UP or DOWN keys to set your exercise PULSE. Press
ENTER key to confirm your desired Pulse.
7. Pedaling the machine to begin exercise
User Setting Program: User 1, User 2, User 3 and User 4
Program 14 to 17 is the user setting program. Users are free to create the values in the order of TIME,
DISTANCE, CALORIES and the resistance level in 10 columns. The values and profiles will be stored in the
memory after setup. Users may also change the ongoing loading in each column by UP/DOWN keys, and they
will not change the resistance level stored in the memory.
Operations:
1. Use UP/DOWN keys to select the USER program from P14 to P17.
2. Press the ENTER key to enter your workout program.
3. The column 1 will flash, and then use the UP/DOWN keys to create your personal exercise profile.
Press ENTER to confirm your first column of exercise profile. The default level is load 1.
4. The column 2 will flash, and then use the UP/DOWN keys to create your personal exercise profile.
Press ENTER to confirm your second column of exercise profile.
5. Follow the above description 5 and 6 to finish your personal exercise profiles. Press ENTER to confirm
your desired exercise profile.
6. The TIME will flash and you can press UP or DOWN keys to setting your exercise TIME. Press
ENTER key to confirm your desired TIME.
7. The DISTANCE will flash and you can press UP or DOWN keys to setting your target DISTANCE.
Press ENTER key to confirm your desired DISTANCE.
8. The CALORIES will flash and you can press UP or DOWN keys to setting your exercise CALORIES.
Press ENTER key to confirm your desired CALORIES.
9. The PULSE will flash and then you can press UP or DOWN keys to set your exercise PULSE. Press
ENTER key to confirm your desired Pulse.
10. Pedaling the machine to begin exercise
Heart Rate Control Program: 55% H.R.C., 65% H.R.C., 75% H.R.C., 85% H.R.C., Target H.R.C.
Program 18 to Program 22 is the Heart Rate Control Programs and Program 22 is the Target Heart Rate
Control program.
Program 18 is the 55% Max H.R.C. - - Target H.R. = (220 – AGE) x 55%
Program 19 is the 65% Max H.R.C. - - Target H.R. = (220 – AGE) x 65%
Program 20 is the 75% Max H.R.C. - - Target H.R. = (220 – AGE) x 75%
Program 21 is the 85% Max H.R.C. - - Target H.R. = (220 – AGE) x 85%
Program 22 is the Target H.R.C. - - Workout by your target heart rate value.
Users can exercise according to your desired Heart Rate program by setting your AGE, TIME, DISTANCE,
CALORIES or TARGET PULSE. In these programs, the computer will adjust the resistance level according to
the heart rate detected. For example, the resistance level may increase every 20 seconds while the heart rate
detected is lower than the TARGET H.R and then the computer will show “SLOW DOWN” on the message

window. Also the resistance level may decrease every 20 seconds while the heart rate detected is higher than
the TARGET H.R and then the computer will show “HURRY UP” on the message window. As a result, the
user’s heart rate will be adjusted to close the TARGET H.R. between the range of TARGET H.R. +5 and
TARGET H.R. -5 and then the computer will show “KEEP GOING” on the message window.
Operations:
1. Use UP/DOWN keys to select one of the heart rate control program from P18 to P22.
2. Press the ENTER key to enter your workout program
3. The AGE will flash at P18 to P21 programs and you can press UP or DOWN keys to set your AGE.
The default age is 35.
4. At program 22, the TARGET PULSE will flash and you can press UP or DOWN keys to set your
TARGET PULSE between 80 to 180. The default TARGET PULSE is 120.
5. The TIME will flash and you can press UP or DOWN keys to set your exercise TIME. Press ENTER
key to confirm your desired TIME.
6. The DISTANCE will flash and you can press UP or DOWN keys to set your target DISTANCE. Press
ENTER key to confirm your desired DISTANCE.
7. The CALORIES will flash and you can press UP or DOWN keys to set your exercise CALORIES. Press
ENTER key to confirm your desired CALORIES. You only can set up the target one of them and the
monitor will go to the target heart rate setting
8. Pedaling the machine to begin exercise
Watt Control Program: Watt Control
Program 23 is a Speed Independent Program. Press ENTER key to set up the values of TARGET WATT,
TIME, DISTANCE and CALORIES. During the exercise mode, the level of resistance is not adjustable. For
example, the level of resistance may increase while the speed is too slow. Also the level of resistance may
decrease while the speed is too fast. As a result, the calculated value of WATT will close to the value of
TARGET WATT setup by users.
Operations:
1. Use UP or DOWN key to select the WATT CONTROL (P23) program.
2. Press ENTER key to enter your workout program.
3. The TIME will flash and you can press UP or DOWN key to set your exercise TIME. Press ENTER key
to confirm your desired TIME.
4. The DISTANCE will flash and you can press UP or DOWN key to set your target DISTANCE. Press
ENTER key to confirm your desired DISTANCE.
5. The WATT will flash and you can press UP or DOWN key to set your target WATT value. Press
ENTER key to confirm your target WATT. The default WATT value is 100.
6. The CALORIES will flash and you can press UP or DOWN key to set your exercise CALORIES. Press
ENTER key to confirm your desired CALORIES.
7. The PULSE will flash and then you can press UP or DOWN keys to set your exercise PULSE. Press
ENTER key to confirm your desired Pulse.
8. Pedaling the machine to begin exercise
NOTE:
1. WATT = TORQUE (KGM) * RPM * 1.03
2. In this program, the WATT value will keep constant value. It means that if you peddle quickly,
the resistance level will decrease and if you peddle slowly, the resistance level will increase.
Always try to keep you in the same watt value.
Body Fat Program: Body Fat
Program 24 is a special program design to calculate users’ body fat ratio and to offer a specific loading profile
for users. There are 3 body types divided according to the FAT% calculated.
Type1: BODY FAT% > 27
Type2: 27 BODY FAT% 20
Type3: BODY FAT % < 20
The computer will show the test results of FAT PERCENT, BMI and BMR.
Operations:
1. Use UP/DOWN keys to select the BODY FAT (P24) program.
2. Press the ENTER key to enter your workout program.
3. The HEIGHT will flash and you can press UP or DOWN keys to set your HEIGHT. Press ENTER key
to confirm your HEIGHT. The default HEIGHT is 170cm or 5’07” (5feet 7 inches).
4. The WEIGHT will flash and you can press UP or DOWN keys to set your WEIGHT. Press ENTER key
to confirm your WEIGHT. The default WEIGHT is 70kgs or 155lbs.

5. The GENDER will flash and you can press UP or DOWN keys to select your sex. Number 1 means
man and number 0 means female. Press ENTER key to confirm your Gender. The default sex is 1
(MAN).
6. The AGE will flash and you can press UP or DOWN keys to set your AGE. Press ENTER key to
confirm your AGE. The default AGE is 35.
7. Press the START/STOP key to begin body fat measurement. If the window show E on the window,
please make sure your hands are attached well on the grips or the chest belt is touch well on your
body. Then press the START/STOP key again to begin body fat measurement.
8. After finished your measurement, the computer will show the values of BMR, BMI and FAT PERCENT
on the LCD display. Furthermore, the computer will show your own exercise profile for your body type.
9. Pedaling the machine to begin exercise
Operation guide:
1. Sleep Mode: The computer will enter the sleep mode when there is no signal input and no keys be
pressed after 4 minutes. You can press any key to wake up the computer.
C. Bluetooth & application connection
Copy the link here under to your brower (Edge, Firefox, Chrome, Safari etc)
https://cloud.carefitness.com/index.php/s/AaPSTDkzU1Nsmyq
And Follorw the detailed instruction
Error Message:
E1 (ERROR 1):
Normal state: During workout, when the monitor did not get the count signal from the gear motor more
than 4 seconds and check under successive 3 times then the LCD will show E1.
Power on state: The gear motor will return to zero automatically, when the signal of motor cannot be
detected for more than 4 seconds then the gear motor’s driver will be cut off immediately
and show the E1 on the LCD display. All the other digital and function mark are blank, and
the output signals are cut off also.
E2 (ERROR 2): When the monitor read the memory data, if the I.D. code is not correct or the memory IC
damages then the monitor will show E2 immediately at power on.
E3 (ERROR 3): After 4 seconds by start mode, the computer detects the faulty motor did not leave the zero
point then the LCD bar displays “E3”.
LCD Workout Graphics
PRESET PROGRAM PROFILES:
PROGRAM 1 PROGRAM 2 PROGRAM 3
MANUAL STEPS HILL
PROGRAM 4 PROGRAM 5 PROGRAM 6
ROLLING VALLEY FAT BURN
PROGRAM 7 PROGRAM 8 PROGRAM 9
RAMP MOUNTAIN INTERVALS

PROGRAM 10 PROGRAM 11 PROGRAM 12
RANDOM PLATEAU FARTLEK
PROGRAM 13
PRECIPICE
USER SETTING PROGRAM
PROGRAM 14
USER 1
PROGRAM 15
USER 2
PROGRAM 16
USER 3
PROGRAM 17
USER 4
HEART RATE PROGRAM PROFILES:
PROGRAM 18
55% H.R.C.
Press ENTER key

PROGRAM 19
65% H.R.C.
Press ENTER key
PROGRAM 20
75% H.R.C.
Press ENTER key
PROGRAM 21
85% H.R.C.
Press ENTER key
PROGRAM 22
TARGET H.R.C.
WATT CONTROL PROGRAM
PROGRAM 23
WATT CONTROL
BODY FAT TEST PROGRAMS:
PROGRAM 24
BODY FAT (STOP MODE) BODY FAT (START MODE)
One of the Following Six Profiles Will Display Automatically after Measuring Your BODY FAT:
Workout Time: 40 minutes Workout Time: 40 minutes Workout time: 20 minutes

Workout Time: 40 minutes Workout Time: 40 minutes Workout time: 20 minutes
Cardio – Training:
Before programming your training, it is essential to take account of your age, particularly for people of more
than 35 years of age, as well as your physical condition. If you have a sedentary lifestyle without regular
physical activity, it is vital that you consult your doctor to determine the level of intensity of your training.
Once determined, do not attempt to achieve your maximum during the first training sessions. Be patient;
your performance will quickly improve.
Cardio – Training:
This enables you to develop your cardiovascular system (fitness of the heart / blood vessels). During Cardio-
Training, the muscles need a supply of oxygen and nutritive substances. They also need to eliminate waste. Our
heart increases its rhythm and sends a larger amount of oxygen to the body by means of the cardiovascular
system. The more often you exercise regularly and repetitively, the more your heart will develop, just like any
other muscle. In daily life, this translates into the ability to bear greater physical effort and improve your
intellectual faculties.
Definition of your work Zone:
The Maximum Heart Rate (MHR) = 220 - age (180 – age for sedentary people).
The Warming Up Zone and Cooling Down Zone are equal to 55% of your MHR.
The Fat Loss Zone is between 55 / 65% of your MHR.
The Aerobic Zone is between 65 / 85% of your MHR.
The Anaerobic Zone is between 85% of your MHR and your MHR.
Make a diagram of the target zones
The progressive training stages:
1) A warming up phase:
Start each training session by warming up progressively (10-20 min, more if you are over 50) which will put
your muscles on standby and gently increase your heart rate. Gently increase your pulse to 55% of your MHR
(Maximum Heart Rate).
Keep your Heart Rate at this level for the duration of the warming up time. If you begin your training too quickly,
you are in danger of increasing the risk of tendon or
muscle injury.
2) A work phase:

This is the main part of the training session. Depending on your specific goals and your initial physical condition,
weight loss, improvement of cardiovascular resistance (aerobic work), development of stamina (anaerobic
work), it is possible to choose the appropriate target zone.
The Fat Loss Zone, 55 – 65%
The heart rate must be low and the duration of the exercise quite long. This zone is advised for people
resuming physical activity after a long period of idleness, who are trying to eliminate excess weight or are
susceptible to cardiac problems. Do not forget that for this type of training the duration of the exercise must
be at least 30 minutes and the Heart Rate (HR) between 55 and 65% of the MHR.
- Gradually increase from 30 to 60 minutes per session.
- Exercise 3 or 4 times a week.
The Aerobic Zone, 65-85%
This zone is recommended for those who are in good physical condition who train regularly. By training in
this zone, you will improve your physical condition but avoid overworking.
- Duration: 20 to 30 minutes per session.
- Frequency: At least 3 or 4 times a week.
The Anaerobic Zone, 85% - MHR
This zone is exclusively for experienced athletes and is never recommended without medical approval
and supervision. This zone is designed only for very fit people. It is used for interval training (or for short
sprints) to help you to improve or measure your level of stamina. The time spent in this zone must be brief
to avoid the risk of accident.
3) A cooling down phase:
This entails a reduction of exertion (10 to 20 min). It enables you to return your cardiovascular system to normal
(55% of your MHR) and prevent or reduce muscular pain such as cramp and stiffness. You must follow the
training with a session of stretching exercises while your joints are still warm. This relaxes the muscles and
helps to prevent stiffness. Stretch slowly and gently. You must never stretch until you reach the pain threshold.
Hold each stretch for 30 to 60 seconds while breathing out.
Check your progress
As it improves, your cardiovascular system will have an HR which will be lower when at rest. You will take
longer to reach your target zone and it will be easier for you to maintain it. Sessions will seem easier and
easier and you will have more stamina in your daily life.
If, on the other hand, your HR is higher than usual when at rest, you will have to rest or reduce the intensity
of your training.
Do not be discouraged by the initial sessions. Motivate yourself by scheduling specific training times. Work hard!
All defective materials or parts can only be exchanged once we have received them. Shipping is at the
sender’s expense. No returns of goods will be accepted without our prior approval.
To order spare parts
To guarantee an efficient service, make sure you have the following items before you contact our After Sales
Service:
The name or reference of the product.
The manufacturing number shown on the main chassis and on the packing box.
The number of the missing or faulty part shown on the exploded view of the product described in this
manual.
After Sales Service
Email: service-uk@carefitness.com

Vor Trainingsbeginn zu beachten
B. Auto-Start und-Stoppfunktion
Radfahr-Trainingsausrüstung, der wird sofort aktiviert. Nach 4 Sekunden Tretpause wird der Stopp-Modus
aktiviert. Sie können nur im Stopp-Modus ein Programm wählen und das Übungsziel einstellen.
B. Funktion UP & DOWN
1. Drehen Sie den Schalter während der Programmeinstellung im Uhrzeigersinn, um den Wert zu erhöhen und
gegen den Uhrzeigersinn, um ihn zu mindern.
2. Drehen Sie den Schalter im Trainingsmodus, um den Widerstand zu erhöhen oder zu mindern.
C. Die Funktion Enter
Drücken Sie die Taste, um Ihre Programmwahl zu bestätigen oder bestätigen Sie Ihren Zielwert, um das
Training zu beginnen. Sie können die Trainingsdauer, die Entfernung und Kalorien einstellen, jedoch nur jeweils
eines als Trainingsziel wählen.
D. Die Reset-Funktion des Monitors
Drücken und halten Sie die Taste 3 Sekunden lang, um den Monitor zurückzusetzen.
E. Die Funktion Pulsregeneration
Nachdem Sie Ihr Trainingsziel erreicht haben, gibt der Monitor 5 Sekunden lang einen Signalton aus. Legen Sie
Ihre Hand auf den Herzfrequenzsensor. Nach einer Minute erhalten Sie Ihr Ergebnis.
Die Zeit wird vom 01:00 - 00:59 - - bis 00:00 gezählt. Sobald 00:00 erreicht ist, zeigt der Computer den Status
Ihrer Herzfrequenzregeneration mit der Stufe F1.0 bis F6.0 an.
1.0 bedeutet HERVORRAGEND
1.0<
<<
<F<
<<
<2.0 bedeutet AUSGEZEICHNET
2.0≦
≦≦
≦F≦
≦≦
≦2.9 bedeutet GUT
3.0≦
≦≦
≦F≦
≦≦
≦3.9 bedeutet MÄSSIG
4.0≦
≦≦
≦F≦
≦≦
≦5.9 bedeutet UNTER DEM DURCHSCHNITT
6.0 bedeutet SCHLECHT
D

Normales Testbild Bild Keine Herzfrequenzeingabe
F. Zielherzfrequenz
Sie können den Wert Ihrer Zielherzfrequenz eingeben. Nachdem Ihr Ziel erreicht ist, ertönt ein Signalton, der
darauf hinweist.
A. Programmauswahl und Einstellen des Werts
1. Drehen Sie den Schalter, um den Programm-Modus zu wählen und drücken Sie ENTER, um Ihren
Trainingsmodus zu bestätigen.
2. Im manuellen Betrieb drehen Sie den Schalter, um die ZEIT, DISTANZ, KALORIEN und den PULS für
Ihr Training einzustellen. Drücken Sie die Taste, um Ihren Zielwert zu bestätigen.
3. Treten Sie Pedale des Geräts, um das Training zu beginnen.
4. Wenn Sie Ihr Ziel erreicht haben, gibt der Computer Signaltöne aus und öffnet die Funktion
Pulsregeneration.
B. Schlaffunktion
Der Monitor geht in den SCHLAF-Modus über, wenn er 4 Minuten lang kein Signal empfängt und keine Taste
gedrückt wird. Auf den Bildschirm drücken, um Monitor zu starten.
Funktionen und Features
1.) TIME: Zeigt die Trainingsdauer in Minuten und Sekunden an. Ihr Computer wird automatisch von 0:00 bis zu
99:59 in Intervallen zu jeweils einer Sekunde aufzählen. Sie können Ihren Computer auch so einstellen, dass er
von einem vorgegeben Wert herab zählt. Nutzen Sie hierzu die Auf (UP) und Ab (DOWN) Tasten. Sollten Sie
nach Erreichen der 0:00 Marke das Training fortsetzen, wird der Computer einen Ton abgeben um das Ende
Ihres Trainings zu signalisieren und die ursprüngliche Zeiteinstellung wiederherstellen.
2.) DISTANCE: Zeigt die, über sämtliche Trainingseinheiten aufsummierte, zurückgelegte Trainingsdistanz bis
zu einem Höchstwert von 99.9 KM/MILE an.
3.) RPM: Ihre Pedal Umdrehungen pro Minute.
4.) WATT: Die Menge der, durch Ihr Training, erzeugter Energie die der Computer misst.
5.) SPEED: Zeigt Ihre Geschwindigkeit in KM/MILE pro Stunde an.
6.) CALORIES: Der Computer wird zu jeder beliebigen Trainingszeit einen aktuellen Schätzwert über die
verbrauchten Kalorien anzeigen.
7.) PULSE: Der Computer gibt den Pulsschlag pro Minute während des Trainings an.
8.) AGE: Das Alter kann zwischen 10 und 99 Jahren beliebig eingestellt werden. Sollten Sie kein Alter
eingestellt haben, so wird das Alter automatisch auf einen Standardwert von 35 Jahren festgesetzt.
9.) TARGET HEART RATE (TARGET PULSE): Der Pulsschlag, den Sie während des Trainings beibehalten
sollten, wird als Ihr angestrebter Zielpulsschlag bezeichnet.
10.) STRECKENSÄULEN: Jede Säule steht für 100 Meter oder 0,1 Meile.
Programmbeschreibung & -abläufe
Manuelles Programm: MANUAL
P1 ist ein manuelles Programm. Der Nutzer kann das Training durch Betätigen der START/STOP Taste
aufnehmen. Der voreingestellte Widerstandslevel beträgt 5. Der Nutzer kann in jedweden beliebigen
Widerstandsgrad (die Werte können Sie jederzeit während des Trainings durch UP/DOWN anpassen),
innerhalb einer gewissen Zeitperiode, bis zu einer bestimmten Kalorienanzahl oder einer bestimmten
Entfernung trainieren.
Abläufe: 1.) Benutzen Sie UP/DOWN um das MANUAL (P1) Programm auszuwählen.
2.) Bestätigen Sie die Auswahl mit ENTER.
3.) TIME wird aufleuchten und Sie können mit UP/DOWN die gewünschte Trainingszeit
einstellen. Bestätigen Sie mit ENTER.
4.) DISTANCE wird aufleuchten und Sie können mit UP/DOWN die gewünschte
Trainingsstrecke festlegen. Bestätigen Sie mit ENTER.
5.) CALORIES wird aufleuchten und Sie können mit UP/DOWN die zu verbrennen gewünschte
Kalorienanzahl festlegen. Bestätigen Sie mit ENTER.
6.) PULSE wird aufleuchten und Sie können mit UP/DOWN den gewünschten Pulsschlag
einstellen. Bestätigen Sie mit ENTER.
This manual suits for next models
1
Table of contents
Languages:
Other CARE Fitness Equipment manuals
Popular Fitness Equipment manuals by other brands

Octane Fitness
Octane Fitness 108581A Operation manual

Deltech Fitness
Deltech Fitness DF7600 Assembly instructions

Deskshaper
Deskshaper Ds_Deskshaper instruction manual

schwa-medico
schwa-medico TENStemeco basic Instructions for use

Ironman Fitness
Ironman Fitness GRAVITY 2000 owner's manual

Hammer
Hammer Crosstech XT manual