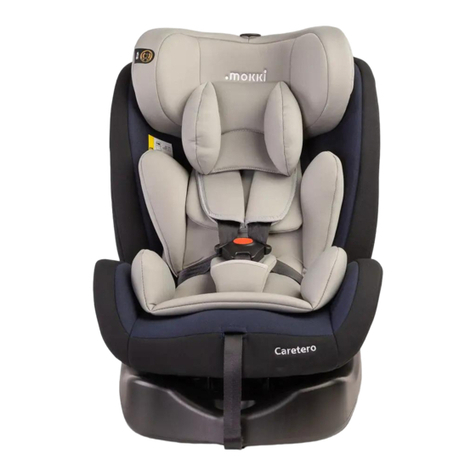
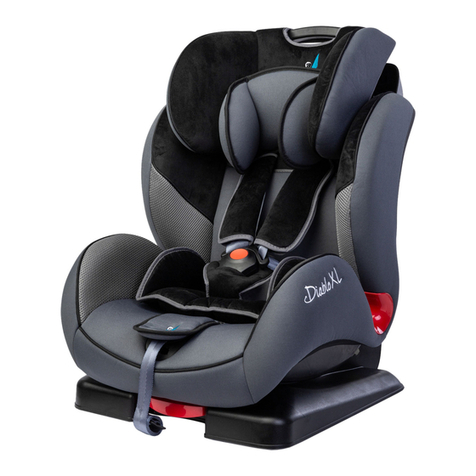
Caretero KAMPTOS User manual

KAMPTOS 40-150 cm
FOTELIK SAMOCHODOWY/CAR SEAT/KINDERSITZ
INSTRUKCJA UŻYTKOWANIA/USER MANUAL/
BEDIENUNGSANLEITUNG
WAŻNE! Prosimy o uważne przeczytanie niniejszej instrukcji użytkowania przed pierwszym użyciem produktu.
Instrukcję należy zachować na wypadek potrzeby ponownego z niej skorzystania.
IMPORTANT! Please read these instructions carefully before the first use of the product. This manual should
be kept for future use.
WICHTIG! Wir bitten um genaues Durchlesen dieser Bedienungsanleitung vor der ersten Anwendung des
Produkts. Die Bedienungsanleitung ist für den Fall der Notwendigkeit ihrer erneuten Nutzung aufzubewahren.
www.caretero.pl

Dziękujemy za zakup fotelika samochodowego Caretero KAMPTOS.
Kupili Państwo nowoczesny produkt wysokiej jakości.
Jesteśmy przekonani, że zapewni on Państwa maluchowi bezpieczeństwo i pomoże
w jego harmonijnym rozwoju.
Zachęcamy do zapoznania się z naszą kompletną ofertą na stronie www.caretero.pl.
Czekamy również na wszelkie uwagi dotyczące użytkowania naszych produktów.
Zespół marki Caretero.
Thank you for choosing the Caretero KAMPTOS car seat.
You purchased a modern and high-quality product.
We are sure that it will provide your child with safety and will ensure hir or her
proper, harmonous growth.
We encourage you to learn about our full offer by visiting our website
www.caretero.pl.
We are also eager to hear your opinions on our products. Should you have any
remarks, feel free to share them with us.
Caretero brand Team.
Wir danken Ihnen für den Kauf des Kindersitzes Caretero KAMPTOS.
Sie haben ein modernes Produkt von hoher Qualität erworben.
Wir sind überzeugt, dass es Ihrem Kind Sicherheit garantiert und es bei der
harmonischen Entwicklung unterstützt. Wir laden Sie herzlich dazu ein, sich mit
unserem vollständigen Angebot auf der Website www.caretero.pl bekannt zu
machen. Außerdem nehmen wir gern Anmerkungen und Hinweise zur Nutzung
unserer Produkte entgegen.
Caretero Mannschaft.

1ELEMENTY FOTELIKA/CAR SEAT ELEMENTS/AUFBAU DES AUTOSITZES
2
1. regulacja zagłówka / headrest adjustment /
Kopfstützenverstellung
2. tapicerka / upholstery / Polster
3. zagłówek/ headrest / Kopfstütze
4. prowadnica pasa ramiennego / shoulder
belt guide / Schultergurtführung
5. wkładka reduckyjna / reducing insert /
Reduziereinsatz
6. nakładka na pasy fotelika / seat belt cover /
Sicherheitsgurtabdeckung
7. pasy fotelika / seat belts / Sicherheitsgurte
8. prowadnica pasa biodrowego / waist belt
guide / Hüftgurtführung
9. system obrotu 360 / 360 rotation system /
360-Grad-Rotationssystem
10. przycisk naciągu pasów fotelika / seat belt
tension button / Taste für die Spannung des
Sicherheitsgurts
11. pas napinający / tension belt / Spanngurt
12. dźwignia pochylania fotelika / seat tilt lever
/ Sitzneigungshebel
13. regulacja nogi fotelika / seat leg adjust-
ment / Sitzbeinverstellung
14. schowek na instrukcję / instruction storage
/ Anweisungsspeicher
15. ochraniacz na boczne uderzenia / side
impact protector / Seitenaufprallschutz
16. łącznik ISOFIX / ISOFIX connector /
ISOFIX-Anschluss
17. przycisk zwalniania ISOFIX / ISOFIX
release button / ISOFIX-Entriegelungsknopf
18. noga fotelika / seat leg / Sitzbein
19. nakładni prowadzące na ISOFIX / guide
rails to ISOFIX / Führungsschienen an ISOFIX

3
2
PL
Wyciągnij nogę z podstawy fotelika (A). Gdy noga
będzie wychylona pod kątem 450 (B), pociagnij za
nogę aby wysunęła się (C) pozwalając na lepsze
dopasowanie do pojazdu.
EN
Pull the leg out of the seat base (A). When the leg is
at a 450angle (B), pull the leg to extend (C) allowing
a better fit to the vehicle.
DE
Ziehen Sie das Bein aus der Sitzbasis (A). Wenn
sich das Bein in einem 450-Winkel befindet (B),
ziehen Sie es zum Ausfahren (C), um eine bessere
Anpassung an das Fahrzeug zu ermöglichen.
UWAGA! Fotelik obraca się jedynie gdy noga wspierająca jest zamontowana.
ATTENTION! The seat only rotates when the support leg is attached.
AUFMERKSAMKEIT! Der Sitz dreht sich nur, wenn das Stützbein angebracht ist.
MONTAŻ I DEMONTAŻ NOGI WSPIERAJĄCEJ FOTELIKA / ASSEMBLY AND DISASSEMBLING THE SUPPORTING
LEG / MONTAGE UND DEMONTAGE DES STÜTZBEINS

4
PL
Aby schować nogę ustaw ją tak aby nachylona
pod kątem 450(A) i wsuń ją wgłąb fotelika (B).
Złóż nogę chowając ją w podstawie fotelika (C).
EN
To hide the leg, set it so that it is inclined at an
angle of 450(A) and slide it into the seat (B). Fold
the leg and hide it in the base of the seat (C).
DE
Um das Bein zu verstecken, stellen Sie es in
einen Winkel von 450(A) und schieben Sie es in
den Sitz (B). Falten Sie das Bein und verstecken
Sie es in der Sitzfläche (C).

5
PL
Fotelik może być ustawiony w 5 pozycjach nachylenia. Aby zmienić jego pozycję użyj dźwigni
pochyłu umieszczonej na przedzie fotelika i popchnij lub pociągnij fotelik aby ustawić go w
pożądanej pozycji. "Kliknięcie" oznacza poprawne ustawienie fotelika w pozycji.
EN
The seat can be set in 5 reclining positions. To change its position, use the recline lever located
on the front of the seat and push or pull the seat to the desired position. A "click" means the seat
is correctly positioned.
DE
Der Sitz kann in 5 Liegepositionen eingestellt werden. Um die Position zu ändern, verwenden Sie
den Neigungshebel an der Vorderseite des Sitzes und schieben oder ziehen Sie den Sitz in die
gewünschte Position. Ein „Klick“ bedeutet, dass der Sitz richtig positioniert ist.
3USTAWIENIE NACHYLENIA FOTELIA / SEAT TILT ADJUSTMENT / SITZNEIGUNGSVERSTELLUNG

6
PL
DOZWOLONE POZYCJE POCHYLENIA PRZY MONTAŻU TYŁEM
Dzieci o wzroście 40-105 cm mogą jeździć w foteliku ustawionym tyłem do kierunku jazdy we
wszystkich 5 pozycjach nachylenia.
DOZWOLONE POZYCJE POCHYLENIA PRZY MONTAŻU PRZODEM
Dzici o wzroście 76-105 cm mogą jeździć w foteliku ustawionym przodem do kierunku jazdy we
wszystkich 5 pozycjach nachylenia.
Dzici o wzroście 100-150 cm mogą jeździć w foteliku ustawionym przodem do kierunku jazdy w
pozycjach nachylenia 1, 2, 3 i 4.
EN
ALLOWED TILT POSITIONS FOR REAR MOUNTING
Children 40-105 cm tall can ride in a rear-facing car seat in all 5 reclining positions.
ALLOWED TILT POSITIONS FOR FRONT MOUNTING
Children 76-105 cm tall can ride in a forward-facing car seat in all 5 recline positions.
Children 100-150 cm tall can ride in a forward-facing car seat in recline positions 1, 2, 3 and 4.
DE
ZULÄSSIGE NEIGUNGSPOSITIONEN FÜR DIE HINTERE MONTAGE
Kinder mit einer Körpergröße von 40–105 cm können in allen 5 Liegepositionen rückwärtsgerich-
tet im Autositz mitfahren.
ZULÄSSIGE NEIGUNGSPOSITIONEN FÜR DIE FRONTMONTAGE
Kinder mit einer Körpergröße von 76–105 cm können in allen 5 Liegepositionen in einem nach
vorne gerichteten Autositz mitfahren.
Kinder mit einer Körpergröße von 100–150 cm können in einem nach vorne gerichteten Autositz
in den Liegepositionen 1, 2, 3 und 4 mitfahren.

7
4INSTALACJA FOTELIKA TYŁEM W GRUPIE 40-105 CM Z ISOFIX / REARWARD SEAT INSTALLATION IN GROUP
40-105 CM WITH ISOFIX / RÜCKWÄRTSMONTAGE DES SITZES IN DER GRUPPE 40-105 CM MIT ISOFIX
PL
Rozłóż nogę wspierającą i umieść fotelik w samocho-
dzie zgodnie z instrukcją w rozdziale 2. Naciśnij
przycisk na prowadnicach ISOFIX, wysuń prowadnice
z obu stron tak aby czerwony wskaźnik ISOFIX był
widoczny. Dociśnij fotelik montując zaczepy ISOFIX na
kotwicach umieszczonych w oparciu samochodu.
Kliknięcie oznacza prawidłowy montaż.
EN
Unfold the supporting leg and place the car seat in the
car according to the instructions in chapter 2. Press
the button on the ISOFIX guides, extend the guides on
both sides so that the red ISOFIX indicator is visible.
Press down on the seat by installing the ISOFIX
anchors on the anchors located in the car's backrest.
A click means correct installation.
DE
Klappen Sie das Stützbein aus und platzieren Sie den
Autositz gemäß den Anweisungen in Kapitel 2 im Auto.
Drücken Sie den Knopf an den ISOFIX-Führungen und
ziehen Sie die Führungen auf beiden Seiten heraus,
sodass die rote ISOFIX-Anzeige sichtbar ist. Drücken
Sie den Sitz nach unten, indem Sie die ISOFIX-Anker
an den Ankern in der Rückenlehne des Fahrzeugs
anbringen. Ein Klick bedeutet korrekte Installation.

8
PL
Dopchnij fotelik do oparcia samochodu. Pochwyć
fotelik i poprzez potrząśnięcie sprawdź czy fotelik
jest odpowiednio zamontowany. Zielony kolor na
wskaźniku ISOFIX oznacza poprawny montaż
zaczepów. Jeśli wskaźnik jest czerwony należy
ponownie podłączyć ISOFIX.
Naciśnij przycisk na wspierającej nodze fotelika aby
ją wydłużyć. Wyciągnij nogę na tyle aby opierała się
o podłoże samochodu. Zielony kolor na wskaźniku
nogi oznacza poprawny montaż. Jeśli wskaźnik jest
czerwony należy ponownie ustawić nogę wspierają-
cą.
EN
Push the car seat against the backrest of the car.
Grasp the car seat and check if the car seat is
properly installed by shaking it. The green color on
the ISOFIX indicator indicates correct installation of
the hooks. If the indicator is red, reconnect the
ISOFIX.
Press the button on the supporting leg of the seat to
extend it. Extend your leg so that it rests on the floor
of the car. A green color on the leg indicator indica-
tes correct assembly. If the indicator is red,
reposition the support leg.
DE
Schieben Sie den Autositz gegen die Rückenlehne
des Autos. Fassen Sie den Autositz und prüfen Sie
durch Schütteln, ob der Autositz richtig installiert ist.
Die grüne Farbe der ISOFIX-Anzeige zeigt die
korrekte Installation der Haken an. Wenn die
Anzeige rot leuchtet, schließen Sie den ISOFIX
wieder an.
Drücken Sie den Knopf am Stützbein des Sitzes,
um ihn auszufahren. Strecken Sie Ihr Bein so aus,
dass es auf dem Boden des Autos aufliegt. Eine
grüne Farbe auf der Beinanzeige zeigt die korrekte
Montage an. Wenn die Anzeige rot ist, positionieren
Sie das Stützbein neu.

9
PL
Użyj dźwigni obrotu fotelika aby obrócić go i ustawić
fotelik przodem do drzwi samochodu.
UWAGA! Przed każdą podróżą samochodem
należy się upewnić że fotelik po obrocie jest pewnie
zamocowany i ustawiony w odpowiednik kierunku.
Nie ruszaj pojazdem dopóki fotelik nie jest ustawio-
ny przodem lub tyłem do kierunku jazdy.
Poluzuj pasy fotelika poprzez naciśnięcie przycisku
naciągu pasów i pociągnięcie za ramienne części
pasów. Otwórz klamrę naciskając czerwony
przycisk, następnie rozłóż pasy na boki.
EN
Use the car seat swivel lever to turn it around and
position the car seat facing the car door.
ATTENTION! Before each car trip, make sure that
the car seat is securely fastened after turning and
set in the right direction. Do not move the vehicle
until the car seat is in a forward or rearward facing
position.
Loosen the seat belts by pressing the belt tension
button and pulling the shoulder belts. Open the
buckle by pressing the red button, then unfold the
straps to the sides.
DE
Drehen Sie den Autositz mithilfe des Schwenkhe-
bels um und positionieren Sie ihn so, dass er zur
Autotür zeigt.
AUFMERKSAMKEIT! Stellen Sie vor jeder Autofahrt
sicher, dass der Autositz nach dem Drehen sicher
befestigt und in die richtige Richtung eingestellt ist.
Bewegen Sie das Fahrzeug erst, wenn sich der
Autositz in einer nach vorne oder hinten gerichteten
Position befindet.
Lösen Sie die Sicherheitsgurte, indem Sie den
Gurtspannungsknopf drücken und an den Schulter-
gurten ziehen. Öffnen Sie die Schnalle, indem Sie
den roten Knopf drücken, und klappen Sie dann die
Riemen zu den Seiten auf.

10
PL
Umieść dziecko w foteliku. Dopasuj wysokość
zagłówka tak aby pasował do główki dziecka - nie
może być zbyt wysoko ani zbyt nisko, odniesieniem
są pasy które powinny być na wysokości barków
dziecka lub minimalnie wyżej. Połącz ze sobą części
klamry pasów i wepnij je w krokową część klamry.
Ciągnąc za pas napinający naciągnij pasy fotelika
tak aby nie były zbyt luźno ani zbyt ciasno. Poprawny
naciąg można określić poprzez włożenie otwartej
dłoni pomiędzy pas a klatkę piersiową dziecka -
powinna się mieścić bez ucisku. Ciągnąc za
dźwignię obrotu obróć fotelik tyłem do kierunku
jazdy.
EN
Place the child in the seat. Adjust the height of the
headrest so that it fits the child's head - it can not be
too high or too low, the reference is the straps that
should be at the height of the child's shoulders or
slightly higher. Connect the parts of the belt buckle
together and insert them into the crotch part of the
buckle. Pulling the tension belt, tighten the seat
belts so that they are not too loose or too tight. The
correct tension can be determined by placing an
open hand between the belt and the child's chest -
it should fit without pressure. Pulling the turning
lever, turn the seat backwards to the direction of
travel.
DE
Setzen Sie das Kind in den Sitz. Passen Sie die
Höhe der Kopfstütze so an, dass sie zum Kopf des
Kindes passt – sie darf nicht zu hoch oder zu niedrig
sein, als Referenz dienen die Gurte, die sich auf
Schulterhöhe des Kindes oder etwas höher
befinden sollten. Verbinden Sie die Teile der Gürtel-
schnalle miteinander und führen Sie sie in den
Schrittteil der Schnalle ein. Ziehen Sie am Spann-
gurt und ziehen Sie die Sicherheitsgurte so fest,
dass sie weder zu locker noch zu eng sind. Die
richtige Spannung lässt sich ermitteln, indem man
eine offene Hand zwischen Gurt und Brust des
Kindes legt – er sollte ohne Druck sitzen. Durch
Ziehen des Drehhebels drehen Sie den Sitz nach
hinten in Fahrtrichtung.

11
PL
Rozłóż nogę wspierającą i umieść fotelik w samocho-
dzie zgodnie z instrukcją w rozdziale 2. Naciśnij
przycisk na prowadnicach ISOFIX, wysuń prowadnice
z obu stron tak aby czerwony wskaźnik ISOFIX był
widoczny. Dociśnij fotelik montując zaczepy ISOFIX na
kotwicach umieszczonych w oparciu samochodu.
Kliknięcie oznacza prawidłowy montaż.
EN
Unfold the supporting leg and place the car seat in the
car according to the instructions in chapter 2. Press
the button on the ISOFIX guides, extend the guides on
both sides so that the red ISOFIX indicator is visible.
Press down on the seat by installing the ISOFIX
anchors on the anchors located in the car's backrest.
A click means correct installation.
DE
Klappen Sie das Stützbein aus und platzieren Sie den
Autositz gemäß den Anweisungen in Kapitel 2 im Auto.
Drücken Sie den Knopf an den ISOFIX-Führungen und
ziehen Sie die Führungen auf beiden Seiten heraus,
sodass die rote ISOFIX-Anzeige sichtbar ist. Drücken
Sie den Sitz nach unten, indem Sie die ISOFIX-Anker
an den Ankern in der Rückenlehne des Fahrzeugs
anbringen. Ein Klick bedeutet korrekte Installation.
INSTALACJA FOTELIKA W GRUPIE 76-105 CM Z ISOFIX / SEAT INSTALLATION IN GROUP
76-105 CM WITH ISOFIX / SITZEINBAU IN DER GRUPPE 76-105 CM MIT ISOFIX
5

12
PL
Dopchnij fotelik do oparcia samochodu. Pochwyć
fotelik i poprzez potrząśnięcie sprawdź czy fotelik
jest odpowiednio zamontowany. Zielony kolor na
wskaźniku ISOFIX oznacza poprawny montaż
zaczepów. Jeśli wskaźnik jest czerwony należy
ponownie podłączyć ISOFIX.
Naciśnij przycisk na wspierającej nodze fotelika aby
ją wydłużyć. Wyciągnij nogę na tyle aby opierała się
o podłoże samochodu. Zielony kolor na wskaźniku
nogi oznacza poprawny montaż. Jeśli wskaźnik jest
czerwony należy ponownie ustawić nogę wspierają-
cą.
EN
Push the car seat against the backrest of the car.
Grasp the car seat and check if the car seat is
properly installed by shaking it. The green color on
the ISOFIX indicator indicates correct installation of
the hooks. If the indicator is red, reconnect the
ISOFIX.
Press the button on the supporting leg of the seat to
extend it. Extend your leg so that it rests on the floor
of the car. A green color on the leg indicator indica-
tes correct assembly. If the indicator is red,
reposition the support leg.
DE
Schieben Sie den Autositz gegen die Rückenlehne
des Autos. Fassen Sie den Autositz und prüfen Sie
durch Schütteln, ob der Autositz richtig installiert ist.
Die grüne Farbe der ISOFIX-Anzeige zeigt die
korrekte Installation der Haken an. Wenn die
Anzeige rot leuchtet, schließen Sie den ISOFIX
wieder an.
Drücken Sie den Knopf am Stützbein des Sitzes,
um ihn auszufahren. Strecken Sie Ihr Bein so aus,
dass es auf dem Boden des Autos aufliegt. Eine
grüne Farbe auf der Beinanzeige zeigt die korrekte
Montage an. Wenn die Anzeige rot ist, positionieren
Sie das Stützbein neu.

13
PL
Użyj dźwigni obrotu fotelika aby obrócić go i ustawić
fotelik przodem do drzwi samochodu.
UWAGA! Przed każdą podróżą samochodem
należy się upewnić że fotelik po obrocie jest pewnie
zamocowany i ustawiony w odpowiednik kierunku.
Nie ruszaj pojazdem dopóki fotelik nie jest ustawio-
ny przodem lub tyłem do kierunku jazdy.
Poluzuj pasy fotelika poprzez naciśnięcie przycisku
naciągu pasów i pociągnięcie za ramienne części
pasów. Otwórz klamrę naciskając czerwony
przycisk, następnie rozłóż pasy na boki.
EN
Use the car seat swivel lever to turn it around and
position the car seat facing the car door.
ATTENTION! Before each car trip, make sure that
the car seat is securely fastened after turning and
set in the right direction. Do not move the vehicle
until the car seat is in a forward or rearward facing
position.
Loosen the seat belts by pressing the belt tension
button and pulling the shoulder belts. Open the
buckle by pressing the red button, then unfold the
straps to the sides.
DE
Drehen Sie den Autositz mithilfe des Schwenkhe-
bels um und positionieren Sie ihn so, dass er zur
Autotür zeigt.
AUFMERKSAMKEIT! Stellen Sie vor jeder Autofahrt
sicher, dass der Autositz nach dem Drehen sicher
befestigt und in die richtige Richtung eingestellt ist.
Bewegen Sie das Fahrzeug erst, wenn sich der
Autositz in einer nach vorne oder hinten gerichteten
Position befindet.
Lösen Sie die Sicherheitsgurte, indem Sie den
Gurtspannungsknopf drücken und an den Schulter-
gurten ziehen. Öffnen Sie die Schnalle, indem Sie
den roten Knopf drücken, und klappen Sie dann die
Riemen zu den Seiten auf.
14
PL
Umieść dziecko w foteliku. Dopasuj wysokość
zagłówka tak aby pasował do główki dziecka - nie
może być zbyt wysoko ani zbyt nisko, odniesieniem
są pasy które powinny być na wysokości barków
dziecka lub minimalnie wyżej. Połącz ze sobą części
klamry pasów i wepnij je w krokową część klamry.
Ciągnąc za pas napinający naciągnij pasy fotelika
tak aby nie były zbyt luźno ani zbyt ciasno. Poprawny
naciąg można określić poprzez włożenie otwartej
dłoni pomiędzy pas a klatkę piersiową dziecka -
powinna się mieścić bez ucisku. Ciągnąc za
dźwignię obrotu obróć fotelik przodem do kierunku
jazdy.
EN
Place the child in the seat. Adjust the height of the
headrest so that it fits the child's head - it can not be
too high or too low, the reference is the straps that
should be at the height of the child's shoulders or
slightly higher. Connect the parts of the belt buckle
together and insert them into the crotch part of the
buckle. Pulling the tension belt, tighten the seat
belts so that they are not too loose or too tight. The
correct tension can be determined by placing an
open hand between the belt and the child's chest -
it should fit without pressure. Pulling the rotation
lever, turn the seat forward facing.
DE
Setzen Sie das Kind in den Sitz. Passen Sie die
Höhe der Kopfstütze so an, dass sie zum Kopf des
Kindes passt – sie darf nicht zu hoch oder zu niedrig
sein, als Referenz dienen die Gurte, die sich auf
Schulterhöhe des Kindes oder etwas höher
befinden sollten. Verbinden Sie die Teile der Gürtel-
schnalle miteinander und führen Sie sie in den
Schrittteil der Schnalle ein. Ziehen Sie am Spann-
gurt und ziehen Sie die Sicherheitsgurte so fest,
dass sie weder zu locker noch zu eng sind. Die
richtige Spannung lässt sich ermitteln, indem man
eine offene Hand zwischen Gurt und Brust des
Kindes legt – er sollte ohne Druck sitzen. Drehen
Sie den Sitz durch Ziehen des Drehhebels nach
vorne.

15
INSTALACJA FOTELIKA W GRUPIE 100-150 CM Z ISOFIX / INSTALLATION OF THE SEAT IN THE 100-150 CM
GROUP WITH ISOFIX / MONTAGE DES SITZES IN DER 100-150 CM-GRUPPE MIT ISOFIX
6
PL
Rozłóż nogę wspierającą i umieść fotelik w samochodzie
zgodnie z instrukcją w rozdziale 2. Naciśnij przycisk na
prowadnicach ISOFIX, wysuń prowadnice z obu stron tak
aby czerwony wskaźnik ISOFIX był widoczny. Dociśnij
fotelik montując zaczepy ISOFIX na kotwicach umieszczo-
nych w oparciu samochodu. Kliknięcie oznacza prawidło-
wy montaż. Dopchnij fotelik do oparcia samochodu.
Pochwyć fotelik i poprzez potrząśnięcie sprawdź czy
fotelik jest odpowiednio zamontowany. Zielony kolor na
wskaźniku ISOFIX oznacza poprawny montaż zaczepów.
Jeśli wskaźnik jest czerwony należy ponownie podłączyć
ISOFIX.
EN
Unfold the supporting leg and place the car seat in the car
according to the instructions in chapter 2. Press the
button on the ISOFIX guides, extend the guides on both
sides so that the red ISOFIX indicator is visible. Press
down on the seat by installing the ISOFIX anchors on the
anchors located in the car's backrest. A click means
correct installation. Push the car seat against the backrest
of the car. Grasp the car seat and check if the car seat is
properly installed by shaking it. The green color on the
ISOFIX indicator indicates correct installation of the
hooks. If the indicator is red, reconnect the ISOFIX.
DE
Klappen Sie das Stützbein aus und platzieren Sie den
Autositz gemäß den Anweisungen in Kapitel 2 im Auto.
Drücken Sie den Knopf an den ISOFIX-Führungen und
ziehen Sie die Führungen auf beiden Seiten heraus,
sodass die rote ISOFIX-Anzeige sichtbar ist. Drücken Sie
den Sitz nach unten, indem Sie die ISOFIX-Anker an den
Ankern in der Rückenlehne des Fahrzeugs anbringen. Ein
Klick bedeutet korrekte Installation. Schieben Sie den
Autositz gegen die Rückenlehne des Autos. Fassen Sie
den Autositz und prüfen Sie durch Schütteln, ob der
Autositz richtig installiert ist. Die grüne Farbe der ISOFIX-
-Anzeige zeigt die korrekte Installation der Haken an.
Wenn die Anzeige rot leuchtet, schließen Sie den ISOFIX
wieder an.

16
PL
Dopasuj wysokość zagłówka tak aby pasował do głowy dziecka. Przełóż pas samochodowy przez
prowadnice. Umieść dziecko w foteliku i przełóż pas samochodowy przez klatkę piersiową dziecka.
Zapnij pas samochodowy i upewnij się że pasy są przeplecione przez wszystkie prowadnice oraz że
pasy nie są skręcone lub splątane. Upewnij się ze pasy są poprawnie zapięte i naciągnięte.
EN
Adjust the height of the headrest so that it fits your child's head. Pass the car belt through the
guides. Place the child in the car seat and pass the car belt over the child's chest. Fasten the car
seat belt and make sure that the belts are threaded through all guides and that the belts are not
twisted or tangled. Make sure the belts are properly fastened and tightened.
DE
Passen Sie die Höhe der Kopfstütze so an, dass sie zum Kopf Ihres Kindes passt. Führen Sie den
Autogurt durch die Führungen. Setzen Sie das Kind in den Autositz und führen Sie den Autogurt
über die Brust des Kindes. Legen Sie den Autosicherheitsgurt an und achten Sie darauf, dass die
Gurte durch alle Führungen geführt werden und dass die Gurte nicht verdreht oder verheddert sind.
Stellen Sie sicher, dass die Gurte richtig befestigt und gespannt sind.

17

18
7WSKAZÓWKI BEZPIECZEŃSTWA
PONIŻSZE INSTRUKCJE OBSŁUGI SĄ WAŻNE.
PRZED UŻYTKOWANIEM NALEŻY PRZECZYTAĆ NINIEJSZĄ INSTRUKCJĘ I ZACHOWAĆ JĄ NA PRZYSZŁOŚĆ.
BEZPIECZEŃSTWO DZIECKA MOŻE BYĆ ZAGROŻONE, JEŚLI ZALECENIA NINIEJSZEJ INSTRUKCJI NIE BĘDĄ
STOSOWANE.
Dziecięcy fotelik samochodowy - odpowiedni dla dzieci o wzroście od 40 do 150 cm.
UWAGA!!!
1. Jest to „Uniwersalne" ograniczenie dotyczące fotelików dziecięcych, zgodne z Przepisem ECE (Europejska Komisja
Gospodarcza ONZ) 44.04 dotyczącym ogólnego użytkowania fotelików w pojazdach. Foteliki tego typu pasują do
większości siedzeń samochodowych.
2. Odpowiedni montaż fotelika w samochodzie możliwy jest, jeśli producent samochodu zadeklarował w instrukcji
obsługi pojazdu, że pojazd jest przystosowany do „Uniwersalnych" ograniczeń dotyczących fotelików dziecięcych tej
grupy.
3. Ograniczenie to funkcjonuje jako „Uniwersalne" na surowszych warunkach niż te zastosowane wobec wcześnie-
jszych modeli, które nie posiadały tej adnotacji.
4. W razie wątpliwości należy skontaktować się z producentem albo sprzedawcą detalicznym.
Fotelik tego typu nadaje się tylko do pojazdu wyposażonego w pasy bezpieczeństwa z 3-punktową
blokadą i 3-punktowym elementem zwijającym, co jest zgodne z Przepisem UN/ECE nr 16 lub innymi
równoznacznymi standardami.
NIEBEZPIECZEŃSTWO! Dla ochrony dziecka:
• Stosować fotelik Caretero KAMPTOS wyłącznie do zabezpieczenia dziecka w pojeździe.
• Fotelik samochodowy należy montować jedynie przodem do kierunku jazdy używając do tego 3-stopniowego pasa
bezpieczeństwa na biodra i ukośnego na klatkę piersiową lub 3-stopniowego pasa bezpieczeństwa na biodra i
ukośnego na klatkę piersiową oraz zaczepów ISOFIX.
• Nie należy umieszczać fotelika na siedzeniu z włączoną poduszką powietrzną.
• Przed każdą podróżą należy sprawdzić, czy fotelik samochodowy jest dobrze umocowany.
• Najbezpieczniejszym miejscem do montażu fotelika w samochodzie jest tylne siedzenie.
• Należy upewnić się, że wszystkie elementy są zapięte prawidłowo, a fotelik nie jest zatrzaśnięty przez składane
siedzenia lub drzwi.
• Nie wolno używać ani przewozić fotelika bez zapięcia go na siedzeniu samochodu.
• Nie należy używać kontaktowych punktów nośnych innych niż te opisane w instrukcji i oznaczone na foteliku
samochodowym dla dziecka.
• Zabrania się użytkowania fotelika w domu jako siedziska lub zabawki.
• Podczas wypadku, w przypadku którego prędkość w chwili uderzenia przekracza 10 km/h, może dojść do
uszkodzenia fotelika, które niekoniecznie musi być widoczne. W takim przypadku fotelik należy wymienić.
• Należy pamiętać o prawidłowym przeprowadzeniu utylizacji.
• Zawsze zlecać kontrolę fotelika dla dziecka w przypadku jego uszkodzenia (np. upadku na ziemię).
• Regularnie sprawdzać wszystkie istotne elementy fotelika pod kątem uszkodzeń. Upewnić się, że w szczególności
wszystkie części mechaniczne są w pełni funkcjonalne.
• Zabrania się smarowania jakichkolwiek części fotelika.
• Nigdy nie pozostawiać dziecka znajdującego się w foteliku w pojeździe bez opieki.
• Dopilnować, aby dziecko wsiadało i wysiadało z pojazdu wyłącznie od strony chodnika.
• Chronić fotelik dla dziecka przed nadmiernym działaniem promieni słonecznych, gdy nie jest użytkowany.
• Fotelik dziecięcy może się bardzo nagrzać w wyniku bezpośredniego działania promieni słonecznych. Skóra dziecka
jest bardzo delikatna i może zostać w łatwy sposób uszkodzona.
• Im ciaśniej pasy przylegają do ciała dziecka, tym większy jest jego poziom bezpieczeństwa. Dlatego też należy uniknąć
zakładania dziecku grubej odzieży.
• Robić regularnie odpoczynki w trakcie dłuższych podróży, aby dać dziecku możliwość zabawy po wyjęciu go z fotelika.
• Użycie na tylnym siedzeniu: Przesunąć przednie siedzenie do przodu na tyle, aby dziecko nie sięgało stopami do
oparcia przedniego siedzenia (aby uniknąć niebezpieczeństwa zranienia).

19
OSTRZEŻENIE! Dla bezpieczeństwa mocującego fotelik:
• Przy otwieraniu lub zamykaniu nic nie może wejść pomiędzy siedzisko i podstawę fotelika. Mogłoby to doprowadzić
do przycięcia palców.
• W celu uniknięcia uszkodzeń uważać, aby nie zaklinować fotelika pomiędzy twardymi elementami pojazdu (drzwi,
prowadnice siedzenia itp.).
• Przechowywać fotelik dla dziecka w bezpiecznym miejscu jeżeli nie jest użytkowany. Unikać kładzenia na nim ciężkich
przedmiotów i nie przechowywać w pobliżu źródeł ciepła lub w bezpośrednim nasłonecznieniu.
OSTRZEŻENIE! Dla ochrony pojazdu:
• Na niektórych obiciach siedzeń samochodowych wykonanych z delikatnego materiału (np. z weluru, skóry itp.)
mogą wystąpić ślady zużycia powstałe na skutek użytkowania fotelika. W celu zapewnienia odpowiedniej ochrony
obić foteli, zalecamy stosowanie ochraniaczy na siedzenia samochodowe z oferty Akcesoria Caretero.
Nie umieszczaj fotelika na siedzisku z aktywną
poduszką powietrzną.
Pas biodrowy
Pas biodrowy
i piersiowy
NIEBEZPIECZEŃSTWO!
W razie jakichkolwiek modyfikacji fotelika certyfikacja zostanie unieważniona.
Tylko producent ma prawo do wprowadzania zmian do fotelika bezpieczeństwa.
NIEBEZPIECZEŃSTWO!
Prosimy postępować zgodnie z instrukcjami dotyczącymi korzystania z systemów zabezpieczających dzieci w instrukcji
użytkownika danego pojazdu.
Fotelik może być instalowany w następujących konfiguracjach:
Zgodnie z kierunkiem jazdy Tak
W kierunku przeciwnym do kierunku jazdy Tak
Na fotelach wyposażonych w systemy moco-
wania ISOFIX (znajdujące się pomiędzy sie-
dzeniem, a oparciem fotela samochodowego) Tak 1)
oraz 3-punktowe pasy samochodowe
Należy przestrzegać stosownych przepisów obowiązujących na terenie danego kraju.
1) W przypadku przedniej poduszki powietrznej -
przesunąć siedzenie pasażera daleko do tyłu, postępując zgodnie
z instrukcją użytkowania pojazdu.
Montaż poprawny
Montaż niedozwolony
Table of contents
Other Caretero Car Seat manuals

Caretero
Caretero VOLANTE FIX User manual

Caretero
Caretero Mokki User manual

Caretero
Caretero Mokki User manual

Caretero
Caretero HUGGI User manual

Caretero
Caretero FALCON FRESH User manual

Caretero
Caretero Sport Classic User manual

Caretero
Caretero EGIS User manual

Caretero
Caretero DIABLO XL User manual

Caretero
Caretero Vivo Fresh User manual

Caretero
Caretero NIMBUS User manual