Carico Nutri-Tech System Deluxe User manual

Nutri-Tech System™

About This Manual | 2
Setting Up the Nutri-Tech System | 3
The Nutri-Tech System’s Components | 5
Operating the Nutri-Tech System | 6
Care and Maintenance; Changing Filters | 9
Lifetime Hazard Warranty | 9
Table of Contents
Nutri-Tech System™

• Do not use this air purifier as sole protection
against harmful pollutants.
• Do not immerse the air purifier in water or
other liquids.
• Use the deodorizer function only when
people and pets are not in the room.
• Always disconnect the power from this air
purifier by unplugging the power cord before
adding or removing parts and before cleaning.
• Do not operate this air purifier if the cord or
plug is damaged; if the motor fan fails to
rotate; if it is not working properly; or if it was
dropped, damaged or subjected to water.
• If the supply cord is damaged, it must be
replaced by the manufacturer, its service
agent or similarly qualified persons in order to
avoid a hazard.
• Prior to cleaning or other maintenance, the
appliance must be disconnected from the
supply mains.
• Do not use this air purifier with an extension
cord.
• Only use this air purifier for its intended
purpose of air purifier in non-industrial
environments.
• Do not use this air purifier in areas with very
high concentrations of dust or powder to
prevent the danger of dust explosions.
• Do not use this air purifier near flammable
materials.
• Do not use this air purifier outdoors.
• Do not obstruct the air inlet and air outlet of
the air purifier.
• Do not place the air purifier on a soft surface
such as a bed or other soft furnishings.
• Only use this air purifier in an upright position.
•
Do not place this air purifier next to a humidifier.
• Keep the power cord away from heated
surfaces.
• This appliance can be used by
children aged from 8 years and
above and persons with reduced
physical, sensory or mental
capabilities or lack of experience
and knowledge if they have been
given supervision or instruction
concerning use of the appliance
in a safe way and understand the
hazards involved. Children shall
not play with the appliance.
Cleaning and user maintenance
shall not be made by children
without supervision.
2
Correct Disposal of this product
This marking indicates that this product should not be dis-
posed with other household wastes throughout the EU. To
prevent possible harm to the environment or human health
from uncontrolled waste disposal, recycle it responsibly to
promote the sustainable reuse of material resources. To
return your used device, please use the return and collec-
tion systems or contact the retailer where the product was
purchased. They can take this product for environmental
safe recycling.
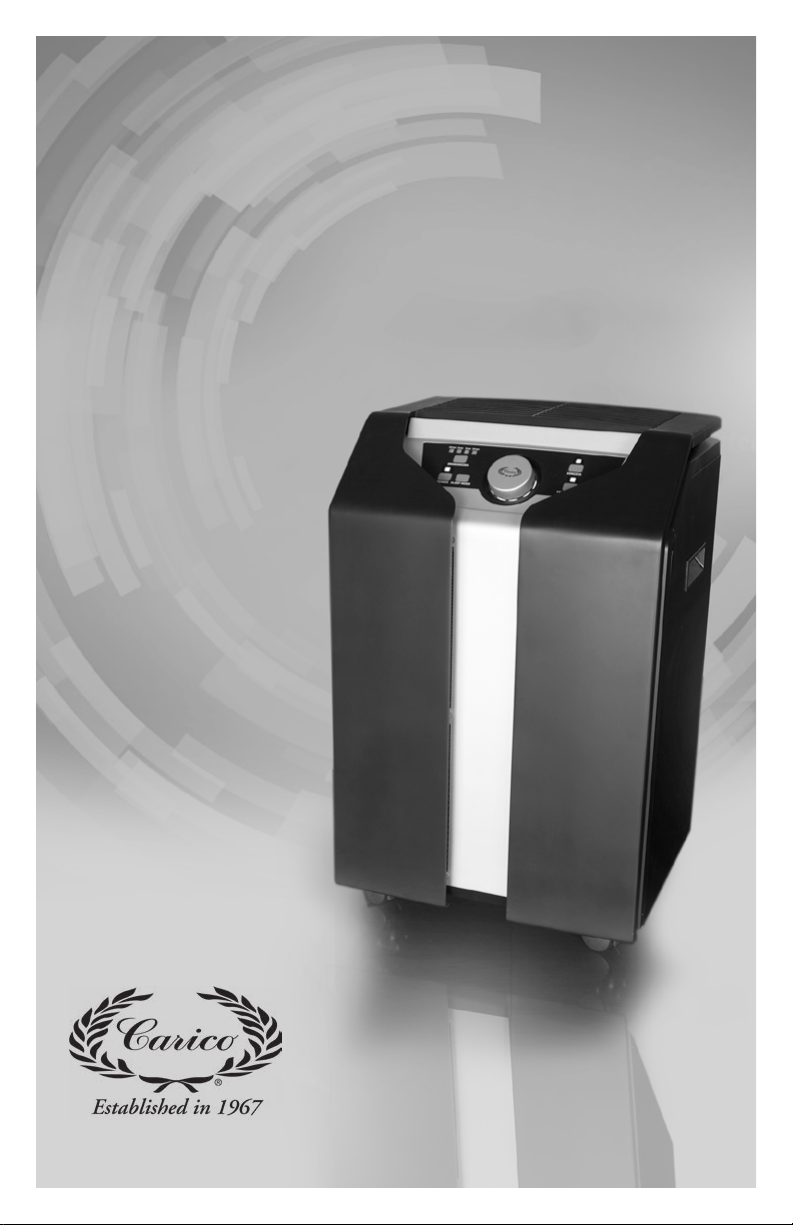
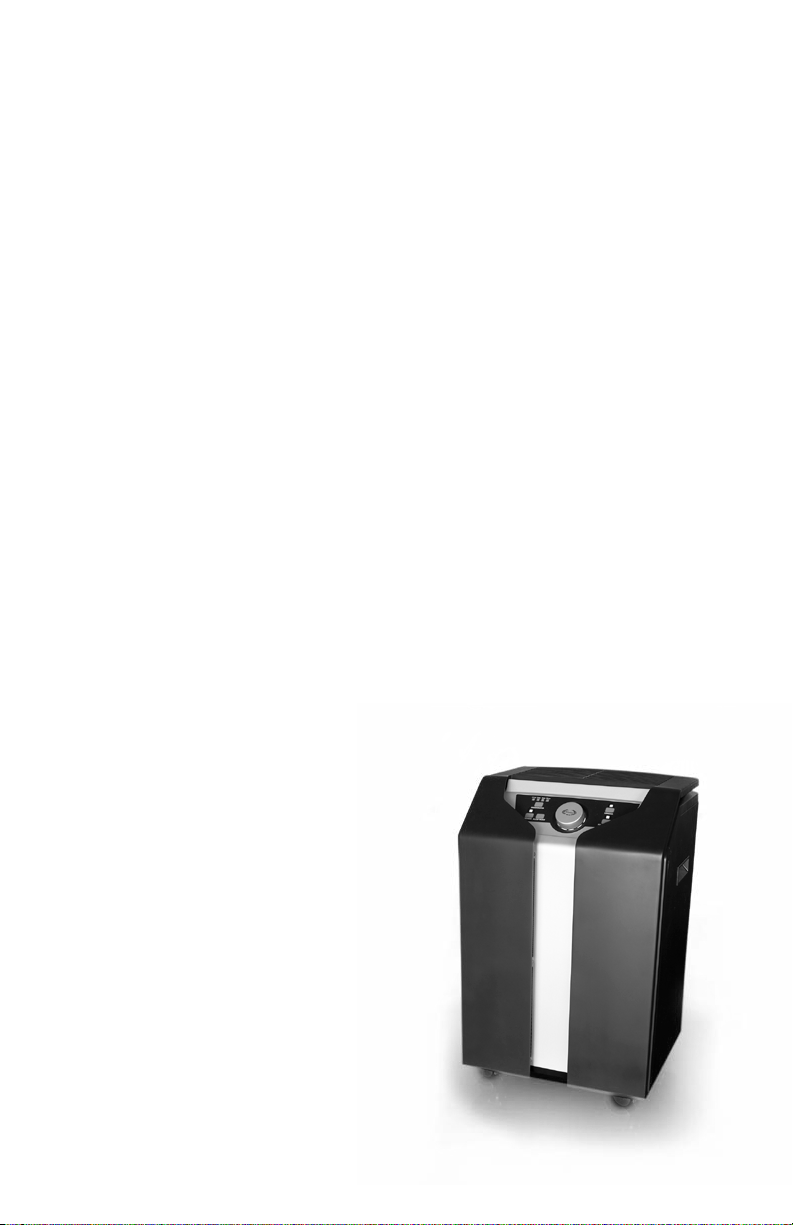
Carico Nutri-Tech Air Purification System
Model #: AIRMDEL Power: 100-240V, 50/60Hz Wattage: 115W
About this User Manual
Congratulations on investing in Carico’s Nutri-Tech™ Deluxe Air Purification System.
Please study this user manual carefully to familiarize yourself with the special features and func-
tions of your system and keep this manual in a safe place for future reference.
Read these instructions BEFORE using the air purifier:

1 – Setting Up the Nutri-Tech System™
1.1 Unpacking
To unpack the Nutri-Tech system, open the top of the box and remove the
square Styrofoam pad which contains the product literature. Lift the unit out
of the box by grasping the handles on each side.
Remove the plastic bag from the unit.
1.2 Cartridge Installation
Make sure the unit is not plugged into an outlet. Remove filter from the
plastic bag before operating. Open the cabinet by grasping the outside of the
grill near the top and gently pull the door toward you. (fig 1) Lift up and raise
away from the unit. Set the door panel down.
3
Pull the pre-filter out of the unit using the upper tab. (fig. 2) Remove the plastic
wrapping from cartridge before operating.
Remove the 5-stage main filter by pulling the pull tab on the cartridge toward you.
(fig 3) Remove the plastic.
fig 1
fig 3
fig 2
fig 4
Reinsert the main filter by setting the bottom in first and pushing the top. Make
sure that the air flow arrow on the top of the main cartridge points towards the
inside of the unit. (fig 4) Push the main filter in as far as it will go.
To put the door panel back on the unit, gently slide the door onto the cabinet
slots on the bottom of the unit, and gently push the top of the door into the unit
until it clicks in place.

43
1.3 Choosing a Suitable Location
When choosing a suitable location for the Nutri-Tech System, keep the following
considerations in mind:
• Choosing the most suitable room for the system will depend on where you
would like the focus of the air purifying efforts. Two main considerations are the
time you spend in a particular room and the location of the main air
pollution sources. Generally, the closer the system is located to the air
pollution source, the better the air purifying performance in the room.
• For the best air cleaning results in adjacent rooms, make sure that doors to
these rooms are left wide open.
• In general, the more centrally the system is positioned, the better the performance.
• Position the system close to a power outlet and make sure that the power cord
is positioned in a way that it does not present an obstacle in walkways.
• Make sure that the system is positioned in such a way that the control panel is
easily accessible.
1.4 Connecting to Power
Plug the connector end of the power cord into the recessed power inlet socket on
the back of the system.
Important:
Do not use the Nutri-Tech system when the power cord becomes damaged.
The power cord may be replaced with an approved cord with a three-prong
plug. Replacement cords are available from Carico.

5
2 – The Nutri-Tech System’s Components
The Nutri-Tech air purifier has an exclusive multi-stage full spectrum purification
system . . . this means as air passes through the unit, it is cleaned MULTIPLE times!
The cartridge is an innovative, technological break-through incorporating the
following stages:
Three Stage Replaceable Pre-Filter (fig 5)
Stage 1: THE POLYWEB™ ELECTROSTATIC PRE-FILTER: a static electrical
charge which captures bigger particles, dust and lint
Stage 2: WOVEN POLYESTER, which captures particles 15 microns and larger
Stage 3: THE PURATECH™ PRE-FILTER, which captures particles 10 microns
and larger
5 stage Main Filter (fig 5)
Stage 4: THE MICRO-GRIP™ TACKIFIED FILTER, a highly adhesive material
which captures particles 5 microns and larger
Stage 5: THE H.E.P.A. TYPE FILTER, which removes 99% of particles
0.3 microns and larger, including bacteria, viruses and mold spores
Stage 6: THE ANTIMICROBIAL FILTER which captures any other
surviving microorganisms
Stage 7: THE ULTRA-PURIFICATION GWM-X™ FILTER, which is scientifically
designed fabric woven from carbon. It is a defense against toxic
gases, off gassing and chemicals
Stage 8: HIGH CAPACITY ACTIVATED CARBON FILTER which adsorbs gases,
chemicals, tobacco smoke and cooking odors
Stage 9: Ionization Stage See Section 3.2 for details
Stage 10: Deodorizer/Ozonator. See Section 3.2 for details
fig 5

65
fig 6
3 – Operating the Nutri-Tech System
3.1. The Control Panel
The Nutri-Tech system is operated and controlled via the electronic control panel
located at the top of the front of the unit.
3.2 Description of Control Panel Keys (fig 6)
NOTE: When you press any button on the control panel, a corresponding beep sound
indicates the operation. Turning the speed control knob will not make any noise.
POWER ON/OFF
1. Plug unit into a properly grounded 120V, 60HZ and/or 220V, 50HZ power source
and the unit will be in standby mode where all the indicators on the control panel
are not lit up.
2. When unit is in standby mode, press the power button once to turn the unit on.
The unit will go through self-check and then the power indicator turns blue. The
unit will start operating on speed 3. The ionizer is activated when the unit starts
operating.
3. When the unit is turned on, press the power button once to shut the unit off.
Unit resumes standby mode.
4. If the unit is operating or in standby mode and suddenly loses power, it will
return to its last setting before the power was lost when the power returns.
NOTE: When the unit is turned on, it will run a self-check by cycling through all settings
to ensure that the unit is properly functioning before settling on the desired speed.
NOTE: If the unit will not turn on, check to make sure the power cord is securely
plugged into the back of the unit and the wall. Also, check to see that the outlet is
working. Check to see if the front panel is properly closed. If the unit still will not turn
on, try resetting the safety switch.
Unplug the unit. Open the cabinet by grasping the outside of the grill near the
top and gently pull the door toward you. Insert the
eraser end of a pencil into the hole in the cabinet
wall where the safety switch is several times until
you hear the switch click. By doing this you can
sometimes unstick a safety switch that has been
stuck. Replace the door by gently sliding it onto the
cabinet slots on the bottom of the unit, and gently
push the top of the door into the unit until it clicks in
place. (fig 7) fig 7

SPEED CONTROL
1. When the unit is operating, turn the speed control knob in a clockwise direction
to increase the speed. From speed 1 to 10, as the speed increases, the
corresponding indicator(s) light(s) up to show the speed. For example, when a
unit is operating at speed 6, 6 indicators will light up.
2. When unit is operating at the highest speed, all speed indicators will light up
and turning the knob clockwise will not increase the speed any further.
3. When the unit is operating, turn the speed control knob in a counter-clockwise
direction to decrease the speed. When a unit is operating at the lowest speed,
only 1 speed indicator will light up and turning the knob counter-clockwise will
not decrease the speed any further.
SLEEP MODE
1. When the unit is operating, adjust to desired speed for sleep mode. Press the
sleep mode button to activate. When sleep mode is activated, all the lights
in the control panel will turn off with only the power indicator lowly dimmed in
blue.
2. Press any button on the control panel or turn the knob to deactivate Sleep
Mode. The unit will remain operating at the same speed set for sleep mode
and all indicators are illuminated.
DEODORIZER
1. When the unit is in standby mode, the deodorizer indicator is turned off.
2. When the unit is turned on, the deodorizer function should remain turned off
and no indicator is lit.
3. Press the deodorizer button once, the 15 minutes indicator is lit in red. The
deodorizer will run in 15-minute cycles. This allows the deodorizer to run for 15
minutes, stop for 15 minutes and resume running for another 15 minutes.
4. Press the deodorizer button again, the 2-hrs indicator is lit in red. The deodorizer
will run for 2 hours and then stop operating.
5. Press the deodorizer button for the 3rd time, the 4-hrs indicator is lit in red. The
deodorizer will run for 4 hours and then stop operating.
6. Press the deodorizer button for the 4th time, the 24-hrs indicator is lit in red.
The deodorizer will run for 24 hours and then stop operating.
7. Press the deodorizer button for the 5th time to deactivate the deodorizer.
The deodorizing system creates activated oxygen which oxidize molecules
which cause odors that contaminate indoor air and aggravate allergic
reactions such as sneezing, sinus and ear irritations, asthma and itchy eyes by
significantly reducing chemical gases, new carpet odors, bacteria, fungus,
paint fumes, tobacco smoke, fungi and mold. They also remove any pet odor
and dander.
NOTE: Only use the deodorizer function when people and pets are not in the room.
7

IONIZER
1. The ionizer is activated when the unit is turned on. The ionizer indicator is
illuminated in blue.
2. When ionizer is activated, press the ionizer button once to deactivate the
ionizer and the corresponding indicator turns off. Press the same button one
more time to re-activate the ionizer.
The Nutri-Tech System has a fully controllable ionizer feature which, when
turned on, releases negative ions into outgoing filtered air to help the air
purification process.
What Are Ions?
Ions are tiny particles that carry a positive or negative charge. They exist
naturally around us: in the air, water, and ground. Both positive and negative
ions are colorless, odorless, and harmless.
How Does The Ionizer Work?
Negative ions help air purification by attaching themselves to very small
airborne particles in the room. These particles take on a negative charge
and may join with positively charged particles such as dust, pollen, smoke,
and pet dander to form larger particles. These larger particles are then more
easily captured by the filter system.
Important Notes:
Your ionizer may produce an occasional popping or cracking sound.
This is normal and occurs when a small buildup of ions is discharged.
After extended use, you may notice dust around the grills or front panel.
This is caused by negative ions exiting the air outlet, evidence of the
ionizer’s air cleaning effectiveness. You can remove the dust with a soft
brush or clean, damp cloth.
Larger particles are attracted to positively charged surfaces throughout
the home, like walls or floors.
FILTER CHECK
1. When the unit is in standby mode, the filter check button is not functional.
2. When the unit is operating normally, the check filter button remains
unlit. The check filter button will light up when it is time to clean your
cartridge. Replace your cartridge every twelve (12) months. We also rec-
ommend changing the ozone coil kit when you replace the cartridge.
See Care and Maintenance Section 4.
Depress and hold the button to reset the filter check. For details, please
refer to section 4.3.
87

4 – Care and Maintenance; Changing Filters
4.1. Removing the cartridges
The Nutri-Tech Air Purifier is easy to maintain. When the filter’s lifespan has
reached, the filter check light on your control panel will turn red. It is time to
clean or replace your filter cartridges.
Refer to section 1.2 on how to remove the cartridges.
4.2. Cleaning the cartridges
Clean the cartridges by dry vacuuming.
Replace your cartridges when the filter check light comes on or earlier if
you are in an environment with pets or smoke.
4.3. Resetting the filter check button
After replacing the filter, turn the unit on and press the filter check button
and buzzer beeps once. Hold button for 5 seconds. The indicator will flash
4 times and the buzzer beeps twice meaning that timer is successfully reset.
4.4 Ordering Replacement Filters
To order replacement filters, please contact your Carico salesperson or
call 800-440-1434 (international call +1-954-937-3900) or email Carico at
4.5 Cleaning the Cabinet
Unplug the Nutri-Tech System before attempting to clean it.
Use a soft and clean cloth for cleaning.
For water soluble stains, use a window cleaning fluid.
For the removal of tough, non-water soluble stains, use a silicon spray.
Do not use any solvents or any organic cleaning fluids
WARRANTY
1. Limited Warranty. The warranty obligations of Carico International, Inc. (“Carico”)
for this product are limited to the terms set forth below:
a. What is Covered? This limited warranty covers defects in materials and workman-
ship in your product.
b. What is Not Covered? This limited warranty does not cover any damage, deterio-
ration or malfunction resulting from any alteration, modification, improper or unrea-
sonable use or maintenance, misuse, abuse, accident, neglect, exposure to excess
moisture, fire, improper packing and shipping (you must presented such claims to
your shipping company), lightning, power surges, or other acts of nature. This limited
warranty does not cover (i) any damage, deterioration or malfunction resulting from
any unauthorized tampering or modification of the product; (ii) any repairs attempt-
ed by anyone unauthorized by Carico to make such repairs; or (iii) any other cause,
which does not relate directly to a defect in materials and/or workmanship of the
product.
9

109
2. How Long Does this Coverage Last? This Limited Warranty lasts for one (1)
year from the date of purchase. In addition, you are responsible for certain shipping
charges.
3. Who is Covered? Only the original purchaser of the Carico product is covered un-
der Carico’s limited warranty. This limited warranty is not transferable to subsequent
purchasers or owners of this product.
4. What Carico Will Do.
a. Carico will, at its sole option, provide one of the following three remedies to what-
ever extent Carico, in its sole discretion, deems necessary to satisfy a proper claim
under this limited warranty:
i. Repair or facilitate the repair of any defective unit or parts within a reasonable
period of time, free of any charge for the necessary parts and labor, other than any
applicable shipping, handling and processing fees as expressly set forth herein, to
complete the repair and restore this product to its proper operating condition. Unless
otherwise set forth herein, Carico will also pay the shipping costs necessary to return
this product once the repair is complete;
ii. Replace the defective product with a direct replacement or with a similar product
deemed by Carico, in its sole discretion, to perform substantially the same function as
the original product; or
iii.Issue a refund of the original purchase price less depreciation determined based
on the age of the product at the time remedy is sought under this limited warranty.
5. What Carico Will Not Do Under This Limited Warranty?
a. If you elect to return any product to Carico or the authorized Distributor from which
it was purchased or any other party authorized to repair Carico products, you must in-
sure the product during shipment, with said insurance and shipping charges prepaid
by you. If this product is returned uninsured, you assume all risks of loss or damage
during shipment.
b. Carico is not responsible for any costs related to the removal or re-installation of
any product.
c. Carico is not responsible for any costs related to installation of setting up of any
product, or any adjustment a product.
6. How to Obtain a Remedy Under This Limited Warranty.
a. To obtain a remedy under this limited warranty, you must first contact either Carico
or the authorized distributor from whom you purchased the product. To pursue any
remedy under this limited warranty, you must possess an original, dated contract or
receipt as proof of purchase from an authorized Carico distributor.
b. Do not return this product to Carico under this limited warranty without first obtain-
ing a return authorization number (“RMA”). You can obtain an RMA only from Carico’s
Customer Service Department (in the US call 1-800-440-1434 or email at CustSvc_
c. If Carico decides that you need to return it directly to Carico, make sure that you
properly pack the product, preferably in the original carton, for shipping.
d. Carico will refuse any cartons not bearing a return authorization number.

7. Limitation of Liability. THE MAXIMUM LIABILITY OF CARICO UNDER THIS LIM-
ITED WARRANTY SHALL NOT EXCEED THE ACTUAL PURCHASE PRICE PAID FOR
THE PRODUCT. TO THE MAXIMUM EXTENT PERMITTED BY LAW, CARICO IS NOT
RESPONSIBLE FOR DIRECT, SPECIAL, INCIDENTAL OR CONSEQUENTIAL DAMAGES
RESULTING FROM ANY BREACH OF WARRANTY OR CONDITION, OR UNDER ANY
OTHER LEGAL THEORY. Some countries, districts or states do not allow the exclusion
or limitation of relief, special, incidental, consequential or indirect damages, or the
limitation of liability to specified amounts, so the above limitations or exclusions may
not apply to you.
8. Exclusive Remedy. TO THE MAXIMUM EXTENT PERMITTED BY LAW, THIS LIM-
ITED WARRANTY AND THE REMEDIES SET FORTH ABOVE ARE EXCLUSIVE AND
IN LIEU OF ALL OTHER WARRANTIES, REMEDIES AND CONDITIONS, WHETHER
ORAL OR WRITTEN, EXPRESS OR IMPLIED. TO THE MAXIMUM EXTENT PERMITTED
BY LAW, CARICO SPECIFICALLY DISCLAIMS ANY AND ALL IMPLIED WARRANTIES,
INCLUDING, WITHOUT LIMITATION, WARRANTIES OF MERCHANTABILITY AND
FITNESS FOR A PARTICULAR PURPOSE. IF CARICO CANNOT LAWFULLY DISCLAIM
OR EXCLUDE IMPLIED WARRANTIES UNDER APPLICABLE LAW, THEN ALL IMPLIED
WARRANTIES COVERING THIS PRODUCT, INCLUDING WARRANTIES OF MER-
CHANTABILITY AND FITNESS FOR A PARTICULAR PURPOSE, SHALL APPLY TO THIS
PRODUCT AS PROVIDED UNDER APPICABLE LAW. IF ANY PRODUCT TO WHICH
THIS LIMITED WARRANTY APPLIES IS A “CONSUMER PRODUCT” UNDER THE MAG-
NUSON-MOSS WARRANTY ACT (15 U.S.C.A. §2301, ET SEQ.) OR OTHER APPICABLE
LAW, THE FOREGOING DISCLAIMER OF IMPLIED WARRANTIES SHALL NOT APPLY
TO YOU, AND ALL IMPLIED WARRANTIES ON THIS PRODUCT, INCLUDING WARRAN-
TIES OF MERCHANTABILITY AND FITNESS FOR THE PARTICULAR PURPOSE, SHALL
APPLY AS PROVIDED UNDER APPLICABLE LAW.
9. Full Lifetime Hazard Warranty. If your Carico product is destroyed by fire, flood,
storm, earthquake, misuse, neglect, accident, malfunction, or altered in any such way
that its performance is affected, Carico will replace your product for one half (1/2) of
the current retail purchase price plus Shipping.
10. Other Conditions.
a. This limited warranty gives you specific legal rights, and you may have other rights
which vary from country to country or state to state. This limited warranty is void if
(i) the label bearing the serial number of this product is removed or defaced, (ii) this
product is not purchased from Carico or an authorized Carico distributor; or (iii) the
product was altered. If you are unsure whether a seller is an authorized Carico distrib-
b. International Shipments may incur additional shipping charges.
c. All funds are in US currency.
d. Any fees mentioned in this warranty are subject to change without notice and you
will pay the fees in effect at the time you make your claim.
Carico thanks you for purchasing a Carico product.
We know it will give you years of satisfaction!
Carico International Inc.
2851 Cypress Creek Road
Fort Lauderdale, FL 33309 USA
(800) 440-1434
Email: [email protected]
www.carico.com

Sistema Nutri-Tech System™

Acerca de este Manual del Usuario | 2
Preparación del Sistema Nutri-Tech™ | 3
Los componentes del Sistema Nutri-Tech | 5
Funcionamiento del Sistema Nutri-Tech | 6
Cuidado y mantenimiento; cambio de filtros | 9
Garantía de Riesgo de por vida | 9
Tabla de contenido
Sistema Nutri-Tech™

2
• No use el purificador de aire como única
protección contra contaminantes nocivos.
• No sumerja el purificador de aire en agua u
otros líquidos.
• Use la función desodorante solo cuando no
haya personas o mascotas en la habitación.
• Siempre desconecte el purificador de aire de
la electricidad desenchufando el cable de
alimentación, antes de agregar o quitar
piezas y antes de limpiarlo.
• No use el purificador de aire si el cable o el
enchufe está dañado, si el ventilador del
motor
no gira, si no está funcionando
correctamente, o si se ha caído, dañado, o
le ha entrado agua.
• Si el cable de alimentación de corriente está
dañado, deberá ser reemplazado por el
fabricante, su agente de servicio o personas
igualmente calificadas para evitar riesgos.
• Antes de limpiar o hacer otro mantenimiento,
el sistema debe ser desconectado de la
fuente de corriente.
• No use el purificador de aire con un cable de
extensión.
•Use únicamente este purificador para purificar
el aire en ambientes no industriales.
• No use el purificador de aire en áreas con
concentraciones muy altas de polvo para
evitar el peligro de explosiones de polvo.
• No use el purificador de aire cerca de
materiales inflamables.
• No use el purificador de aire al aire libre.
• No obstruya la entrada ni la de salida de aire
de este purificador de aire.
• No coloque el purificador de aire sobre una
superficie blanda como la de una cama u
otros muebles blandos.
• Use el purificador de aire solamente en
posición vertical. Mantenga el cable de
alimentación lejos de las superficies calientes.
• Este sistema puede ser
utilizado por niños a partir de 8
años y personas con capacidades
físicas, sensoriales o mentales
reducidas o falta de experiencia
y conocimiento si se les ha dado
supervisión o instrucciones sobre
el uso del sistema de manera
segura y entienden los peligros
involucrado. Los niños no deben
jugar con el sistema. La limpieza
y el mantenimiento del usuario no
deben ser realizados por niños sin
supervisión.
Eliminación correcta de este producto
Esta marca indica que este producto no debe desecharse con
otros desechos domésticos en toda la UE. Para evitar posibles
daños al medio ambiente o la salud humana por la eliminación
incontrolada de desechos, recíclelo de manera responsable
para promover la reutilización sostenible de los recursos ma-
teriales. Para devolver su dispositivo usado, utilice los sistemas
de devolución y recolección o comuníquese con el minorista
donde compró el producto. Pueden tomar este producto para
reciclarlo de forma segura para el medio ambiente.
Sistema de Purificación de Aire Nutri-Tech™ de Carico
Modelo #: AIRMDEL Electricida: 100-240V, 50/60Hz Potencia: 115W
Acerca de este Manual del Usuario
Felicitaciones por su inversión en el Sistema de purificación de aire NutriTech Deluxe de Carico.
Por favor, lea con detenimiento este Manual del Usuario para familiarizarse con las características
y funciones especiales de su sistema, y guárdelo en un lugar seguro consultas futuras.
Lea estas instrucciones ANTES de usar el purificador de aire:

1 – Preparación del Nutri-System™
1.1 El desempaque
Para desempaquetar el Sistema Nutri-Tech, abra la parte superior de la caja
y retire la almohadilla cuadrada de poliestireno que contiene la literatura del
producto. Saque la unidad de la caja agarrándola por las agarraderas que tiene
a cada lado.
Retire la bolsa de plástico de la unidad.
1.2 Instalación de Cartucho
Asegúrese de que la unidad no esté enchufada a la toma de corriente. Retire
la bolsa de plástico que protege el filtro antes de usar la unidad. Para abrir la
unidad, sujete el panel frontal por ambos lados, cerca de la rejilla superior, y
hale hacia usted. (fig 1) Levante el panel y sepárelo de la unidad. Ponga el
panel a un lado.
3
Extraiga el prefiltro tirando de la lengüeta de extracción del cartucho. (fig 2)
Remueva la envoltura plástica del cartucho antes de usar la unidad.
Retire el filtro principal de 5 etapas tirando de la lengüeta de extracción del
cartucho hacia usted. (fig 3) Quítele el plástico.
fig 3
fig 1 fig 2
fig 4
Inserte de nuevo el filtro principal: coloque primero la parte inferior y presione por
arriba. Asegúrese de que la flecha de flujo de aire que aparece en la parte superior
del cartucho apunte hacia la unidad. (fig 4) Empuje el filtro principal hasta donde
sea posible.
Para volver a colocar el panel frontal en la unidad, deslice suavemente la puerta
sobre las ranuras que hay en la parte inferior de la unidad y empuje suavemente la parte
superior de la puerta, hasta que encaje con un clic en su lugar.

43
1.3 Elección de un lugar adecuado
Cuando busque un lugar adecuado donde ubicar el sistema Nutri-Tech, tenga en
cuenta lo siguiente:
• Elegir la habitación más adecuada para el sistema depende de dónde le
gustaría conseguir una mejor purificación del aire. Dos consideraciones a tener en
cuenta son: el tiempo que usted pasa en una habitación en particular, y dónde se
encuentran las principales fuentes de contaminación del aire. En general, cuanto
más cerca esté el sistema de la fuente de contaminación, mejor será la purificación
del aire en la habitación.
• Para obtener el mejor resultado al limpiar el aire de las habitaciones adyacentes,
asegúrese de que las puertas de esas habitaciones permanezcan abiertas.
• En general, cuanto más céntrico esté el sistema, mejor será su rendimiento.
• Coloque el sistema cerca de una toma de alimentación y asegúrese de que el
cable quede de manera que no represente un obstáculo en los lugares de paso.
• Asegúrese de colocar la unidad de forma que el panel de control sea
fácilmente accesible.
1.4 Conexión a la electricidad
Enchufe el conector del cable de alimentación a la toma eléctrica empotrada ubica-
da en la parte posterior de la unidad.
Importante:
No utilice el Sistema Nutri-Tech si el cable eléctrico está dañado.
El cable eléctrico deberá reemplazarse por un cable homologado con un en-
chufe de dos polos. Encontrará cables de repuesto en Carico.

5
2 – Los componentes del Sistema Nutri-Tech
El purificador de aire Nutri-Tech posee un exclusivo sistema de purificación de
espectro completo de varias capas. Esto significa que, a medida que el aire pasa
a través de la unidad, se limpia varias veces. El cartucho es un innovador adelanto
tecnológico que incorpora las siguientes etapas.
Prefiltro reemplazable de tres etapas (fig 5)
Etapa 1: El PREFILTRO ELECTROSTÁTICO POLYWEB™: una descarga de
electricidad estática atrapa las partículas más grandes, el
polvo y la pelusa.
Etapa 2: EL POLYESTER TEJIDO, que atrapa partículas de 15 micras o mayores.
Etapa 3: EL PREFILTRO PURATECH™, que atrapa partículas de 10 micras o mayores.
Filtro principal de cinco etapas: (fig 5)
Etapa 4: EL FILTRO ADHERENTE MICRO-GRIP™, contiene un material altamente
adhesivo que atrapa partículas de 5 micras o mayores.
Etapa 5: EL FILTRO TIPO H.E.P.A., elimina el 99% de las partículas de 0.3 micras
y mayores, incluyendo bacterias, virus y esporas del moho.
Etapa 6: EL FILTRO ANTIMICROBIANO, atrapa el resto de los
organismos sobrevivientes.
Etapa 7: EL FILTRO DE ULTRAPURIFICACIÓN GWM*-X™, es un tejido
científicamente diseñado de carbón. Es una defensa contra gases tóxicos, emana-
ciones y productos químicos.
Etapa 8: EL FILTRO DE CARBÓN ACTIVADO DE ALTA CAPACIDAD, adsorber
gases, productos químicos, el humo de tabaco y los olores de la cocina.
Etapa 9: Etapa de ionización. Vea la sección 3.2 para detalles.
Etapa 10: Desodorizante/Ionizador. Vea la sección 3.2 para detalles.
fig 5

65
3 – Funcionamiento del Sistema Nutri-Tech
3.1. El panel de control
El sistema Nutri-Tech se opera a través del panel de control electrónico ubicado en la
parte superior del frente de la unidad.
3.2 Descripción de los botones del panel de control (fig 6)
NOTA: Cuando se pulsa cualquier botón del panel de control se produce un pitido, como
señal sonora de la operación. Al girar la perilla de ajuste de velocidad, no se oirá ningún
sonido.
ENCENDIDO/APAGADO
1. Enchufe la unidad en una fuente de alimentación de 120V, 60Hz debidamente
conectada a tierra y la unidad permanecerá en modo de espera en el que no se encien-
den los indicadores del panel de control.
2. Mientras la unidad está en modo de espera, presione el botón de encendido
(POWER) una vez para encender la unidad. La unidad realizará una autoevaluación y
después se encenderá, mostrando una luz azul el indicador de encendido. La unidad
comenzará a funcionar en la velocidad tres. El ionizador se activa en cuanto la unidad
comienza a funcionar.
3. Una vez encendida la unidad, presione el botón de encendido una vez para
apagar la unidad. La unidad regresará al modo de espera.
4. Si la unidad está funcionando o en modo de espera y de pronto se corta la
corriente, cuando se enchufe de nuevo volverá al último ajuste que tenía antes de que la
corriente se cortara.
NOTA: Cuando la unidad se enciende, se ejecuta una autoevaluación, recorriendo todas las
configuraciones para asegurarse de que la unidad funciona correctamente antes de esta-
blecer la velocidad deseada.
NOTA: Si la unidad no enciende, compruebe que el cable de alimentación esté bien
conectado tanto a la parte posterior de la unidad como a la pared. Además, revise si
el tomacorriente funciona correctamente. Compruebe que el panel frontal este bien
cerrado. Si la unidad aún no enciende, pruebe reajustar el
interruptor de seguridad. Para eso,
desconecte la unidad. Abra la unidad sujetando
el panel frontal por ambos lados, cerca de
la rejilla, y tire suavemente hacia usted. Inserte el extremo
del borrador de un lápiz en el interruptor de seguridad
varias veces hasta que oiga que el interruptor hace clic.
Al hacer esto podría, en ciertas ocasiones, liberar el
interruptor de seguridad cuando se haya atascado.
Vuelva a colocar la puerta deslizándola suavemente so-
bre las ranuras en la parte inferior de la unidad y empúje-
la suavemente por la parte superior hasta que encaje en
su lugar. (fig 7) fig 7
fig 6

CONTROL DE VELOCIDAD
1. Cuando la unidad esté funcionando, gire el mando de control de velocidad en
el sentido de las agujas del reloj para aumentar la velocidad. Desde la velocidad
1 hasta la 10, a medida que la velocidad aumenta, el (los) indicador(es)
correspondiente(s) se enciende(n) para indicar la velocidad. Por ejemplo, cuando la
unidad está funcionando a la velocidad 6, se encenderán 6 indicadores.
2. Cuando la unidad está funcionando a la velocidad más alta, todos los indicadores de
velocidad se encenderán y seguir girando la perilla en el sentido de las agujas del reloj
no aumentará más la velocidad.
3. Cuando la unidad esté funcionando, gire el mando de control de velocidad en
dirección contraria a las agujas del reloj para disminuir la velocidad. Cuando la
unidad está operando a la mínima velocidad, sólo un indicador se encenderá
y el girar el mando hacia la izquierda no reducirá más la velocidad.
MODO DE REPOSO
1. Cuando la unidad esté funcionando, ajuste la velocidad deseada para el
modo de reposo. Presione el botón SLEEP MODE para activarlo. Cuando se
activa el modo de reposo, el panel de control completo se apaga quedando
sólo la luz azul atenuada del indicador de corriente.
2. Presione cualquier botón en el panel de control o gire el mando de velocidad
para desactivar el modo de reposo. La unidad seguirá funcionando a la
misma velocidad establecida para el modo de reposo y todos los indicadores
se iluminarán.
DESODORIZADO
1. Cuando la unidad está en modo de espera, el indicador del desodorizado
está apagado.
2. Cuando la unidad está encendida, la función del desodorizado debe
permanecer apagada sin encender ningún indicador.
3. Pulse el botón del desodorizado una vez: el indicador de 15 minutos
se enciende en rojo. El desodorizado se activará en ciclos de 15 minutos. Esto
permite que el desodorizado funcione durante 15 minutos, pare durante 15
minutos, y reanude su funcionamiento por otros 15 minutos.
4. Presione el botón del desodorizado otra vez: el indicador de 2 horas se
enciende en rojo. El desodorizado funcionará durante 2 horas y luego dejará
de funcionar.
5. Presione el botón del desodorizado por tercera vez: el indicador de 4 horas se
enciende en rojo. El desodorizado funcionará durante 4 horas y luego dejará
de funcionar.
6. Presione el botón de desodorizado por cuarta vez: el indicador de 24 horas se
enciende en rojo. El desodorizado funcionará durante 24 horas y luego dejará
de funcionar.
7. Pulse el botón del desodorizado por quinta vez para desactivar el desodorizado.
El sistema de desodorizado crea oxígeno activado que oxida las moléculas que
causan los olores que contaminan el aire de interior y agravan reacciones alérgicas tales
com estornudos, sinusitis, irritación de los oídos, asma y comezón en los ojos, al
reducir considerablemente los gases químicos, los olores de las alfombras
nuevas, bacterias, hongos, emanaciones de pintura, humo de tabaco, hongos y
moho. También elimina la caspa y el olor de los animales domésticos
7
This manual suits for next models
1
Table of contents
Languages:
Other Carico Air Cleaner manuals
Popular Air Cleaner manuals by other brands

Five Seasons
Five Seasons FSHEPA350 owner's manual

INNOLIVING
INNOLIVING PROFESSIONAL XL INN-560 user manual

Advanced PureAir
Advanced PureAir Air Purifier NEWPORT 9000 owner's manual

Philips
Philips 2000i Series manual

Sharp
Sharp Plasmacluster FP-F30J Operation manual

DeVilbiss
DeVilbiss DAD-504 Service bulletin