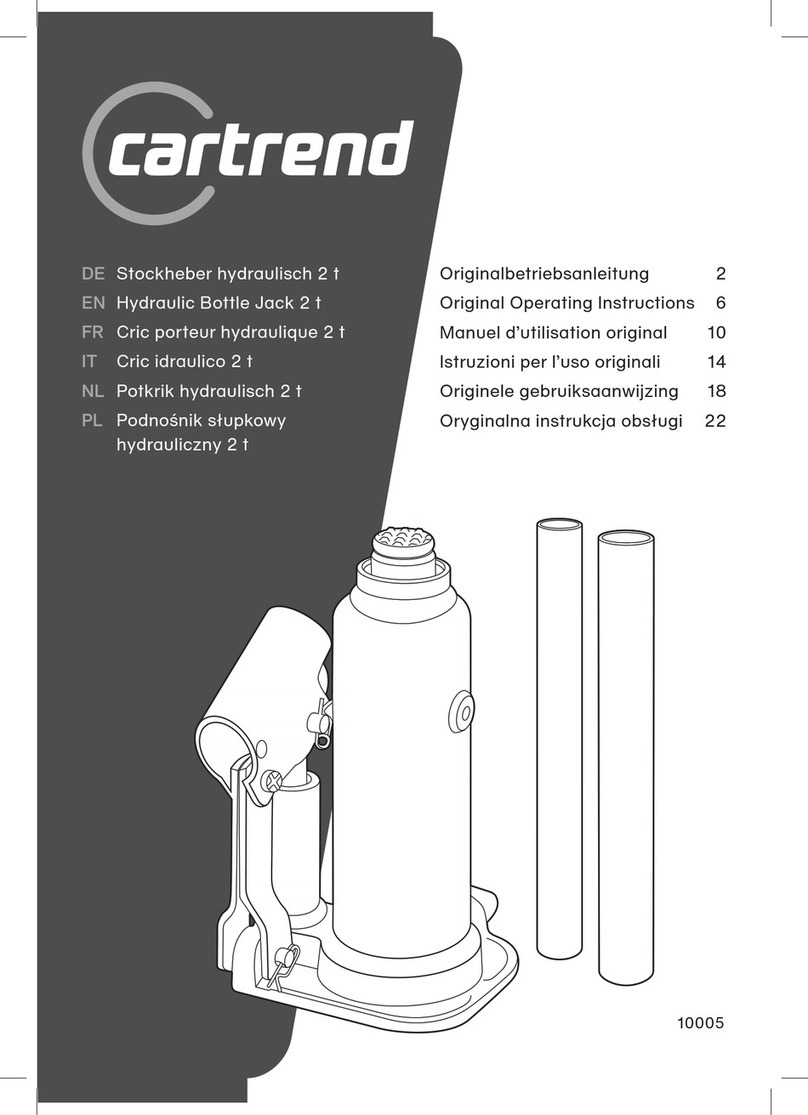
Cartrend 7740014 User manual

7740014-AZ-Wagenheber-2000kg-CTR-IM-INT-OEF-180716.indd 1 16.07.18 14:31

7740014
MTS MarkenTechnikService GmbH & Co. KG
Benzstr. 1
76185 Karlsruhe - Germany
www.mts-gruppe.com
Intertec Polska Sp. z o.o.
Stara Wies, ul. Grodziska 22
05-830 Nadarzyn - Poland
www.intertec-polska.pl
Tegro AG
Ringstr. 3
8603 Schwerzenbach - Switzerland
www.tegro.ch
EAN: 4038373012005
Stand: 07/2018
22
PAP
7740014-AZ-Wagenheber-2000kg-CTR-IM-INT-OEF-180716.indd 2 16.07.18 14:31

Hydraulischer
Rangierwagenheber 2t
7740014
D Originalbetriebsanleitung 4
GB Original operating instructions 6
F Notice d’instructions originale 8
I Istruzioni per l’uso originali 10
PL Oryginalna instrukcja eksploatacji 12
7740014-AZ-Wagenheber-2000kg-CTR-IM-INT-OEF-180716.indd 3 16.07.18 14:31

D Seite bitte ausklappen
Please open up the side
F Ouvrir le côté s.v.p.
I Piegare la pagina
Proszę obrócić tę stronę
7740014-AZ-Wagenheber-2000kg-CTR-IM-INT-OEF-180716.indd 4 16.07.18 14:31

1 2 4 5 3
2
1
6x
3
6
7740014-AZ-Wagenheber-2000kg-CTR-IM-INT-OEF-180716.indd 5 16.07.18 14:31

D
Hubhöhe mit Nennlast: 135 mm – 342 mm
Traglast: 2000 kg
Technische Daten...
1. Vor dem ersten Einsatz des Wagenhebers:
bei geöffnetem Ablassventil 1für Feststelleinrichtung den Griff
in die Griffhülse 2schieben und mit mindestens sechs kräftigen
Pumpbewegungen die Hydraulik betätigen und somit das Hydrauliköl gleichmäßig verteilen.
2. Zum Anheben der Last: Ablassventil durch Drehen im Uhrzeigersinn schließen . Darauf achten,
dass der Aufnahmebock 3mittig belastet wird. Anschließend Wagenheber betätigen .
3. Zum Ablassen der Last: Ablassventil 1durch Drehen gegen den Uhrzeigersinn langsam gerade so
weit öffnen, dass das Ventil geöffnet ist, sich aber nicht von dem Sockel löst.
Betrieb...
1. Im Interesse Ihrer eigenen Sicherheit den Wagenheber nicht
über die zulässige Traglast belasten.
2. Benutzen Sie den Wagenheber nicht unter folgenden Umständen:
- Unter erschwerten Bedingungen (z.B. sehr kaltes oder sehr heißes Klima, unter Beeinflussung
starker magnetischer Strahlung) und ähnlichen Situationen
- Im Zusammenhang mit explosiven Stoffen, Minen etc und ähnlichen Situationen.
-
Beim Lasten heben, die u.a. folgende Materialien enthalten: geschmolzenes Metall, Säure, radio-
aktives Material oder lose Güter, die nicht fest miteinander verbunden sind und ähnlichen Situationen.
- In Kontakt mit Lebensmitteln und ähnlichen Situationen.
- Auf Schiffen und ähnlichen Situationen.
3. Das Fahrzeug immer mit angezogener Handbremse anheben und gleichzeitig Unterlegkeile einset-
zen, um ein Wegrollen des Fahrzeugs zu verhindern.
4. Heben Sie niemals Personen mit dem Wagenheber an. Benutzen Sie den Wagenheber nicht, wenn
sich Personen im Fahrzeug befinden oder sich gegen das Fahrzeug lehnen.
5. Last immer im Mittelteil des Aufnahmebocks abstützen . Eventuell sind geeignete Adapter
zu verwenden, um Beschädigung der Aufnahmepunkte am Fahrzeug zu vermeiden. Bitte
Bedienungsanleitung des Fahrzeugherstellers beachten.
6. Das Sicherheitsventil ist werkseitig korrekt eingestellt und muss nicht nachjustiert werden.
7. Warnung: Der Wagenheber ist nur zur Hebung des Fahrzeuges gedacht. Vor Inspektions- und
Reparaturarbeiten muss die Last durch Hebeständer mit entsprechender Nennbelastung unter-
stützt werden. Nie unter der angehobenen Last ohne zusätzliche Stützen arbeiten!
8. Die Belastung des Hebers darf nicht über 2 Tonnen (4500 LBS) liegen, da bei einer Überbelastung
der Wagenheber beschädigt (z.B. Überlastung der mechanischen Eigenschaften) werden kann
und dadurch die Personensicherheit nicht mehr gewährleistet ist.
9. Bitte nur auf festem, ebenen Boden verwenden. Auf nicht befestigtem, unebenen Boden ist die
Stabilität nicht mehr gewährleistet und die Last kann verrutschen / beschädigt werden.
10. Wenn ein Ölleck auftritt, muss der Gebrauch gestoppt werden. Es ist dafür Sorge zu tragen, dass
kein weiteres Öl austritt und dass das bereits ausgetretene Öl umgehend aufgenommen und in
den dafür vorgesehenen Einrichtungen entsorgt wird.
11. Wenn die aufzubringende Handkraft mehr als 400 N (ca. 40 kg) beträgt, bitten wir Sie, eine zweite
Person zur Hilfe zu nehmen.
12. Man sollte den Zustand der Markierungen regelmäßig kontrollieren und sicherstellen, dass die
Markierungen den ursprünglichen entsprechen.
13. Überprüfen Sie den Wagenheber vor jedem Einsatz auf Beschädigungen, Öllecks, Korrosion.
Verwenden Sie den Wagenheber nicht, wenn er beschädigt ist. Der Wagenheber sollte gemäß
den Anweisungen des Herstellers gewartet und repariert werden. Solche Wartungen und
Reparaturen sollten nur von qualifizierten Fachkräften vorgenommen werden.
14. Umbau oder Änderungen, die die Konformität des Wagenhebers mir der Norm EN
1494:2000+A1:2008 auf schädliche Weise beeinflussen, dürfen nicht durchgeführt werden.
15. Es ist notwendig, dass der Bediener die Hebevorrichtung und die Last während aller Bewegungen
im Auge behält.
Zur Beachtung...
1
23
3
4
Angehobene Last immer zusätzlich mit Unterstellböcken abstützen.
Den hydraulischen Wagenheber niemals allein zur Lastabstützung
verwenden. Lesen Sie vor Inbetriebnahme sorgfältig die Bedienungs- und Wartungsanleitung.
Achtung...
7740014-AZ-Wagenheber-2000kg-CTR-IM-INT-OEF-180716.indd 6 16.07.18 14:31

D
5
PÖffnen des Ablassventils durch Drehen gegen den Uhrzeigersinn
(nach links).
PSchließen des Ablassventils durch Drehen im Uhrzeigersinn (nach rechts).
Abbildung 1 + 2:
fLast-Aufnahmebock
Im Falle der Entsorgung dieses Gerätes wenden Sie sich bitte an
Ihren lokalen Händler oder einen lokalen Wertstoffverwerter.
Führen Sie das Gerät keinesfalls einer kommunalen Sammelstelle zu! Entsorgen Sie das Gerät kei-
nesfalls über den normalen Hausmüll! Sie leisten damit einen wichtigen Beitrag zur Erhaltung der
Umwelt. Hydrauliköle sind über die Problemmüllsammelstelle zu entsorgen.
Abbildung 3:
Entsorgungshinweis:
1. Im unbenutzen Zustand sollten Hubarm und Griffhülse des Wagenhebers völlig heruntergeklappt
sein, um die Oberflächen der Kolbenstange und des Kolbenbolzens vor Korrosion zu schützen.
2. Beste Ergebnisse erzielt man, wenn man zum Nachfüllen ein Hydraulik-Wagenheberöl mit der
Viskosität SAE 10 verwendet. Wir empfehlen, die Wartungsarbeiten auf einer ölundurchlässigen
Unterlage durchzuführen. Es ist darauf zu achten, dass kein Öl verschüttet wird. Sollte versehentlich
doch etwas Öl verschüttet werden, ist dieses umgehend aufzunehmen und in dafür vorgesehenen
Einrichtungen sicher zu entsorgen.
3. Den Wagenheber immer gut reinigen und sämtliche außen liegenden beweglichen Teile gut einfetten.
Pflege und Wartung des Wagenhebers...
Fehlerliste
Griff des Wagenhebers
hebt sich unter Last
Griff des Wagenhebers
senkt sich unter Last
Wagenheber hebt Last
nicht an
Wagenheber kann Last
nicht halten
Wagenheber erreicht nicht
die volle Hubhöhe
Pumpe des Wagenhebers rea-
giert unter Last „schwammig“
Wagenheber senkt sich beim
Ablassen nicht vollkommen ab
Störungsbeseitigung
Der Wagenheber hat zu wenig Öl. Den Blindstopfen entfernen
und Ölbehälter mit sauberem Hydraulik-Wagenheberöl füllen.
Blindstopfen 4öffnen (Abdeckplatte 5entfernen),
um Hydraulikzylinder zu entlüften.
Wagenheber könnte Luftpuffer haben. Das Ablassventil 1
mit einer vollen Drehung öffnen. Den Wagenheber durch
Anheben der Hinterräder vom Boden in vertikale Position
bringen. Den Griff kräftig auf- und abbewegen. Ablassventil
wieder schließen und Wagenheber betätigen.
Die Ventile schließen nicht richtig. Den Hubarm absenken,
das Ablassventil schließen. Einen Fuß auf ein Vorderrad
stellen und den Hubarm manuell ganz nach oben ziehen. Das
Ablassventil öffnen und Hubarm absenken. Der Wagenheber
sollte nun wieder einsatzbereit sein.
Ausdrückbolzenfeder des Hubarms ist wahrscheinlich
gebrochen oder nicht eingehängt. Die Ausdrückbolzenfeder
austauschen oder richtig einhängen und fetten. Alle beweg-
lichen Teile des Hebemechanismus reinigen und ölen.
P P P
P P P
P P P
P P P P
P
16. Sollte sich der Wagenheber nicht mehr wie gewollt absenken lassen, sichern Sie unbedingt das
Fahrzeug durch Unterstellböcke gegen ein unbeabsichtigtes Absenken. Beschaffen Sie sich einen
weiteren Wagenheber, mit dem Sie das Fahrzeug so weit anheben können, dass der defekte
Wagenheber sicher entfernt werden kann. Nehmen Sie professionelle Hilfe in Anspruch, falls Sie
unsicher sind.
7740014-AZ-Wagenheber-2000kg-CTR-IM-INT-OEF-180716.indd 7 16.07.18 14:31

G
Once raised, always support the load with additional support blocks.
Never use the hydraulic jack alone to support a load. Before using
this jack for the first time please read the operating and
maintenance instructions carefully.
Lifting range with nominal load: 135 mm – 342 mm
Load: 2000 kg
Caution...
Technical data...
1. Before using the jack:
With the release valve 1for the locking device open, slide the
handle into the socket 2and using at least six forceful pumping
strokes activate the hydraulic system to distribute the oil evenly.
2. To lift the load: Close the release valve by turning it clockwise . Make sure that the load is
centralised on the loading cup 3. Then operate the jack .
3. To let down the load: Open the release valve 1by turning it slowly anticlockwise.
Turn the valve so that it is open but not out of its base.
Operation... 1
2
3
6
1. In the interests of your own safety do not load the jack beyond its
permitted loadbearing capacity.
2. Do not use the jack in the following circumstances:
- In difficult conditions (e.g. very cold or very hot climate, under the influence of strong magnetic
radiation) or similar situations.
- In connection with explosive substances, mines etc. or in similar situations.
-
For lifting loads that contain for instance, the following materials: molten metal, acids, radioactive
materials or loose goods that are not firmly attached to each other or in similar situations.
- In contact with foodstuffs or in similar situations.
- On ships or in similar situations.
3. Always lift the vehicle with its handbrake on and with chocks inserted underneath at the same
time to prevent the vehicle from rolling away.
4. Never lift people with the jack. Do not use the jack when there are people in the vehicle or leaning
against the vehicle.
5. Always support the load by the middle section of the support stand . If necessary use suitable
adapters to avoid damaging the vehicle at the support points. Please observe the vehicle’s
operating instructions.
6. The safety valve has been correctly set in the factory and does not have to be readjusted.
7. Warning: The jack is intended only for lifting the vehicle. Before inspection and repair work, the
load must be supported with ramps of the appropriate nominal loadbearing capacity. Never work
under the raised load without additional supports!
8. The jack must not be loaded with over 2 tonnes (4,500 lbs) since if the jack is overloaded it may be
damaged (e.g. overloading its mechanical characteristics) and as a result personal safety can no
longer be guaranteed.
9. Please only use it on a firm, even floor/ground. If on a floor/ground that is not firm, stability cannot
be guaranteed and the load may slip/ be damaged.
10. If an oil leak occurs, you must stop using the jack. You must make sure that no more oil leaks
out and that the oil that has already escaped is cleaned up without delay and disposed of in the
facilities provided for this purpose.
11. If the manual force to be applied is over 400 N (about 40 kg), we ask you to ask a second person to
help you.
12. The condition of the markings should be checked regularly and you should make sure that the
markings match the original ones.
13. Inspect the jack before every use for damage, oil leaks and corrosion. Do not use the jack if it is
damaged. The jack should be maintained and repaired in accordance with the manufacturer’s
instructions. Such maintenance and repair work should only be varied out by qualified specialists.
14. Conversions or modifications that affect the conformity of the jack with standard
EN 1494:2000+A1:2008 in a harmful manner may not be made.
15. It is essential for the operator to keep an eye on the lifting device and the load at all times during
all movements.
3
Please note...
7740014-AZ-Wagenheber-2000kg-CTR-IM-INT-OEF-180716.indd 8 16.07.18 14:31

G
7
POpen the release valve by turning it anticlockwise (to the left).
PClose the release valve by turning it clockwise (to the right).
Figure 1 + 2:
fLoad-Loading cup
Figure 3:
1. When the jack is not in use, the lifting arm and the socket are to be moved fully down so that the
piston rod and pin are protected from corrosion.
2. The best results will be achieved if the jack is topped up with a hydraulic jack oil with viscosity of
SAE 10. We recommend carrying out maintenance work on a base impermeable to oil. Make sure
that no oil is spilt. If some oil is nevertheless accidentally spilt, this is to be cleaned up without delay
and safety disposed of in the facilities provided for this purpose.
3. Always clean the jack thorougly and grease all the external parts well.
Care and maintenance of the jack...
Fault finding
The jack handle rises
under load
The jack handle lowers
under load
The jack does not lift
the load
The jack cannot hold
up the load
The jack does not reach
its full lifting height
Pumping the jack feels “spongy“
under load
The jack does not lower fully
when drained
Dealing with problems
The jack has too little oil.
Remove the filler plug and fill the oil reservoir with
clean hydraulic oil.
Open the filler plug 4remove cover 5) to remove air from the
hydraulic cylinder.
The jack could have an air lock.
Open the release valve 1one full turn. Bring the jack into the
vertical position by raising the rear wheels from the ground.
Move the handle forcefully up and down.
Close the release valve again and operate the jack.
The valves are probably not fully closed.
Lower the lifting arm and close the release valve.
With one foot on a front wheel, pull the lifting arm upwards by
hand. Open the release valve again and lower the lifting arm.
The jack should now be ready for use again.
The lifting arm return spring is probably broken or has become
detached.
Replace or re-attach the lifting arm return spring and grease it.
Clean and oil all moving parts on the lifting mechanism.
P P P
P P P
P P P
P P P P
P
16. Should it become difficult to lower the jack as desired, always secure the vehicle with jack stands
against unexpected sinking. Obtain a second jack that allows you to lift the vehicle high enough to
be able to safely remove the broken jack. In case of uncertainty, ask for help from a professional.
If this device must be disposed of, please contact your local dealer
or a local recycler. Do not in any event take the device to a public
collection point! Do not in any event dispose of the device in the normal domestic refuse! By cor-
rect disposal you are making an important contribution to safeguarding the environment. Hydraulic
oils are to be disposed of via the problem waste collection point.
Disposal:
7740014-AZ-Wagenheber-2000kg-CTR-IM-INT-OEF-180716.indd 9 16.07.18 14:31

F
Plage de levage avec charge nominale: 135 mm – 342 mm
Charge maxi: 2000 kg
Caractéristiques...
1. Avant l’utilisation du cric: ouvrez la soupape de décharge 1du
dispositif de blocage , enfoncez la poignée dans sa gaine 2et
effectuez au moins six mouvements de pompage pour répartir l’huile.
2. Pour lever la charge: fermez la soupape de décharge en tournant la poignée dans le sens des aiguilles
d’une montre . Vérifiez que la tête du cric 3soit bien centrée, puis pompez pour lever la charge .
3. Pour décharger: ouvrez la soupape de décharge 1en tounant lentement la poignée dans le sens
contraire des aiguilles d’une montre et jusqu’à ce que la soupape s’ouvre, sans pour autant qu’elle se
détache du socle.
Utilisation... 1
23
8
La charge levée doit toujours être soutenue par des tréteaux.
N’utilisez jamais le cric hydraulique seul pour soutenir une charge.
Lisez attentivement le mode d’emploi et le manuel d’entretien avant la mise en service.
Attention...
1. Dans l’intérêt de votre propre sécurité, ne pas charger le cric
au-delà de la charge portante autorisée.
2. N’utilisez pas le cric dans les conditions suivantes :
- Dans des conditions difficiles (per exemple climat très froid ou très chaud, sous l’influence d’un
rayonnement magnétique puissant) et dans des situations semblables.
- En liaison avec des substances explosives, des mines etc. et dans des situations semblables.
-
Lors du levage d’une charge contenant entre autres les matériaux suivants : métal fondu, acide,
matériau radioactif ou marchandises en vrac, non solidement fixées, et dans des situations semblables.
- En contact avec les produits alimentaires et dans des situations semblables.
- Sur des bateaux et dans des situations semblables.
3. Levez toujours le véhicule avec frein à main serré et placez en même temps des cales pour éviter
qu’il ne roule seul.
4. Ne levez jamais des personnes avec le cric. N’utilisez pas le cric si des personnes se trouvent
dans le véhicule ou s’appuient contre lui.
5. Etayez toujours la charge au centre du support de réception . Utilisez éventuellement des
adaptateurs appropriés pour éviter l’endommagement des points de réception sur le véhicule.
Veuillez observer la notice d’instruction du constructeur du véhicule.
6. La soupape de sûreté est correctement réglée à l’usine et ne doit pas être réajustée.
7. Avertissement : le cric est uniquement conçu pour lever un véhicule. La charge doit être soutenue
par des supports de levage à charge nominale correspondante avant les travaux d’inspection et
de réparation. Ne jamais travailler sous la charge levée sans supports complémentaires !
8. La charge du cric ne doit pas être supérieure à 2 tonnes (4500 LBS), car le cric pourrait être
endommagé avec une surcharge (par exemple, surcharge des propriétés mécaniques) et la
sécurité des personnes plus garantie.
9. Utilisez le cric uniquement sur un sol solide et plan. La stabilité n’est plus garantie sur un sol non
solide et inégal et la charge peut glisser / être endommagée.
10. Arrêter l’utilisation si une fuite d’huile se produit. Veiller à ce qu’il n’y ait pas d’autre d’huile
qui s’échappe et que l’huile déjà échappée soit collectée immédiatement et éliminée dans les
installations prévues à cet effet.
11. Si la force manuelle à fournir est supérieure à 400 N (env. 40 kg), nous vous demandons de faire
appel à une seconde personne.
12. Il est conseillé de contrôler régulièrement l’état des repères et de s’assurer qu’ils correspondent
à ceux d’origine.
13. Contrôlez le cric avant chaque utilisation en ce qui concerne les dommages, les fuites d’huile
et la corrosion. N’utilisez pas le cric s’il est endommagé. Le cric doit être entretenu et réparé
conformément aux instructions du fabricant. De tels entretiens et réparations ne doivent être
effectués que par des spécialistes qualifiés.
14. Les transformations ou modifications qui influencent la conformité du cric à la norme EN
1494:2000+A1:2008 de façon préjudiciable ne doivent pas être effectuées.
15. Il est important que l’utilisateur garde un œil sur le dispositif de levage et la charge pendant tous
les mouvements.
3
Remarques...
7740014-AZ-Wagenheber-2000kg-CTR-IM-INT-OEF-180716.indd 10 16.07.18 14:31

F
9
POuvrez la soupape de décharge en tournant la poignée dans le
sens contraire des aiguilles d’une montre (vers la gauche).
PFermez la soupape de décharge en tournant la poignée dans le
sens des aiguilles d’une montre (vers la droite).
Ill. 1 + 2:
fCharge-Tête du cric
Ill. 3:
1. Lorsque vous n’utilisez pas le cric, placez le levier et la poignée en position de repos, afin de
protéger les surfaces sensibles de la tige et de l’axe de piston de la rouille.
2.
On obtient les meilleurs résultats en utilisant une huile pour crics hydrauliques de viscosité SAE 10
pour le remplissage. Nous vous conseillons d’effectuer les travaux d’entretien sur un fondement imper-
méable à l’huile. Veiller à ne pas renverser d’huile. Si de l’huile devait être renversée par mégarde, la
collecter immédiatement et l’éliminer de manière sûre dans les installations prévues à cet effet.
3. Nettoyez régulièrement le cric et graissez les parties mobiles externes.
Nettoyage et entretien du cric hydraulique...
Liste d’erreurs
La poignée du cric se lève
sous la charge
La poignée du cric s’abaisse
sous la charge
Le cric ne soulève
pas la charge
Le cric ne soutient
pas la charge
Le cric n’atteint pas la hauteur
maximale de levage
La pompe du cric est “molle“
sous la charge
Le cric ne s’abaisse pas comp-
lètement lors de la descente
Dépannage
Le cric manque d’huile.
Ôtez le bouchon et remplissez le réservoir avec de
l’huile pour cric hydraulique propre.
Ouvrez le bouchon 4(retirez le couvercle 5) pour vidanger
l’air du cylindre hydraulique.
Formation probable de bulles d’air dans le cric. Ouvrez la
soupape de décharge 1avec un tour complet. Placez le
cric à la verticale en soulevant les roues arrières. Pompez
sec plusieurs fois. Refermez la soupape de décharge, posez
l’appareil, le cric est prêt à l’emploi.
Les soupapes ne ferment peut être pas correctement.
Abaissez le levier et fermez la soupape de décharge. Placez
un pied sur une roue avant et ramenez complètement le levier
vers le haut. Ouvrez la soupape de décharge et abaissez le
levier. Le cric doit à présent être en état de fonctionner.
Le ressort de rappel du levier est probablement cassé ou
n’est pas accroché. Remplacez ou raccrochez le ressort et
graissez-le. Nettoyez et huilez toutes les parties mobiles du
mécanisme de levage.
P P P
P P P
P P P
P P P P
P
16. Si le cric ne devait plus redescendre comme souhaité, sécurisez impérativement le véhicule sur
des cales contre l’abaissement involontaire. Prenez un autre cric avec lequel vous pouvez monter
le véhicule de sorte que vous puissiez retirer le cric défectueux. Si vous n’êtes pas sûr de vous,
demandez de l’aide à un professionnel.
Veuillez vous adresser à votre commerçant local ou à un recycleur
local en cas de mise au rebut de cet appareil. N’éliminez en aucun
cas l’appareil à une déchetterie communale ! N’éliminez en aucun cas l’appareil avec les déchets
ménagers courants ! Vous apporterez ainsi une contribution importante à la préservation de
l’environnement. Les huiles hydrauliques sont à éliminer à la déchetterie pour déchets à problèmes.
Mise au rebut:
7740014-AZ-Wagenheber-2000kg-CTR-IM-INT-OEF-180716.indd 11 16.07.18 14:31

I
Corsa di sollevamento con carico nominale: 135 mm – 342 mm
Carico: 2000 kg
Dati tecnici...
1. Prima di utilizzare il martinetto: con la valvola di scarico 1aper-
ta per il dispositivo di fissaggio , spingere l’impugnatura nella sua
boccola di presa 2ed azionare il sistema idraulico con almeno sei
movimenti di pompaggio, per distribuire in tal modo omogeneamente l’olio idraulico.
2. Per sollevare il carico: chiudere la valvola di scarico girandola in senso antiorario . Accertarsi che
il cavalletto di sostegno 3venga sollecitato al centro. Azionare successivamente il martinetto .
3. Per abbassare il carico: aprire lentamente la valvola di scarico 1girandola in senso antiorario fino
alla completa apertura, senza farla tuttavia staccare dallo zoccolo.
Servizio... 1
23
10
Appoggiare ulteriormente il carico sollevato con appositi cavalletti
di sostegno. Non utilizzare mai il martinetto idraulico da solo per
appoggiare i carichi. Leggere attentamente le istruzioni per l’uso e la manutenzione prima dell’utilizzo.
Attenzione...
1. Nell'interesse della propria sicurezza non caricare il martinetto
oltre il carico massimo ammesso.
2. Non usare il martinetto nelle seguenti circostanze:
- In condizioni gravose (ad es. clima troppo freddo o troppo caldo, sotto l'influenza di forte
radiazione elettromagnetica) e situazioni simili.
- In rapporto con sostanze esplosive, mine ecc. e situazioni simili.
-
Per sollevare carichi che contengono fra l'altro i seguenti materiali: metallo fuso, acido, materiale
radioattivo o prodotti sfusi non saldamente legati fra loro e situazioni simili.
- In contatto con generi alimentari e situazioni simili.
- A bordo di navi e in situazioni simili.
3. Sollevare l'autoveicolo sempre con il freno a mano tirato e contemporaneamente con cunei di
arresto sotto le ruote, per impedire movimenti incontrollati del veicolo.
4. Non sollevare mai persone con il martinetto. Non usare il martinetto quando vi sono persone
nell'interno del veicolo o appoggiate al veicolo.
5. Sostenere il carico sempre nella parte centrale del cavalletto di carico . Per evitare danni ai
punti di appoggio del veicolo, utilizzare eventualmente idonei adattatori. Osservare il manuale
d'uso del produttore dell'autoveicolo.
6. La valvola di sicurezza è stata correttamente regolata in fabbrica e non deve essere manomessa.
7. Avvertenza: il martinetto è previsto solo per il sollevamento dell'autoveicolo. Prima di procedere a lavori
d'ispezione e riparazione, il carico deve essere sostenuto con cavalletti di sollevamento con adeguato
carico nominale. Non lavorare mai sotto il carico sollevato senza di supporti supplementari!
8. Il carico del martinetto non deve superare 2 tonnellate (4500 LBS), poiché l'eventuale sovraccarico
può danneggiare il martinetto (ad es. sovraccarico delle proprietà meccaniche), compromettendo
con ciò anche la sicurezza delle persone.
9. Utilizzare il martinetto solo su suolo solido e piano. La stabilità non è più garantita su suolo non
consolidato, non piano e il carico può slittare / subire danni.
10. Se compare una macchia d'olio, interrompere l'uso. Impedire l'ulteriore perdita di olio, raccogliere
subito l'olio fuoriuscito e smaltirlo regolarmente in contenitori a tal fine previsti.
11. Se la forza manuale necessaria supera 400 N (ca. 40 kg), chiedere l'aiuto di una seconda persona.
12. Controllare regolarmente lo stato dei riferimenti e garantire che i riferimenti corrispondano allo
stato originario.
13. Controllare il martinetto prima di ogni impiego per accertare eventuali danni, perdite di olio,
corrosione. Non utilizzare il martinetto se danneggiato. Sottoporre il martinetto a manutenzione
e riparazione secondo le istruzioni del costruttore. Dette manutenzioni e riparazioni devono
essere effettuate solo da manodopera qualificata.
14. È vietato apportare trasformazioni o modifiche, che influiscono negativamente sulla conformità
del martinetto alla norma EN 1494:2000+A1:2008.
15. Durante tutti i movimenti l'operatore deve controllare il martinetto e il carico.
16. Se il successivo abbassamento del martinetto all‘altezza desiderata risultasse impossibile,
sostenere assolutamente l‘autoveicolo con cavalletti contro un abbassamento non intenzionale.
3
Da osservare...
7740014-AZ-Wagenheber-2000kg-CTR-IM-INT-OEF-180716.indd 12 16.07.18 14:31

I
11
PAprire la valvola di scarico girandola in senso antiorario (verso
sinistra).
P
Chiudere la valvola di scarico girandola in senso orario (verso destra).
Ill. 1 + 2:
fCarico-Cavalletto di sostegno
Ill. 3:
1. In stato non utilizzato il braccio elevatore e la boccola di presa dovrebbero trovarsi completamente in
stato abbassato, per proteggere le superfici della biella e del perno pistone da corrosione.
2. Per un risultato ottimale, utilizzare per il rabbocco un olio idraulico per martinetti con viscosità SAE 10.
Consigliamo di eseguire i lavori di manutenzione su una base impermeabile all'olio. Prestare attenzione
per evitare versamenti di olio. In caso di indesiderato versamento di olio, questo deve essere subito
raccolto e regolarmente smaltito in contenitori a tal fine previsti.
3. Pulire sempre il martinetto con la massima accuratezza ed ingrassare bene tutti i componenti esterni
mobili.
Manutenzione del martinetto...
Lista errori
L’impugnatura del martinetto
si solleva sotto il carico
L’impugnatura del martinetto
si abbassa sotto il carico
Il martinetto non solleva
il carico
Il martinetto non riesce a
sostenere il carico
Il martinetto non raggiunge
lamassima altezza di
sollevamento
La pompa del martinetto in stato
solle-citato reagisce in modo
“spugnoso“
Il martinetto non si abbassa
completamente una volta
scaricato
Eliminazione di guasti
Il martinetto non è sufficientemente riempito d’olio.
Rimuovere il tappo cieco e rifornire il serbatoio con
dell’olio idraulico per martinetti nuovo.
Aprire il tappo cieco 4(rimuovere la copertura 5)
per scaricare l’aria dal cilindro idraulico.
Nel martinetto potrebbero essere presenti delle bolle d’aria.
Aprire la valvola di scarico 1con un giro completo.
Portare il martinetto in posizione verticale, sollevando le ruote
posteriori dal pavimento. Muovere con forza l’impugnatura
in su e giù. Chiudere nuova-mente la valvola di scarico ed
azionare il martinetto.
Molto probabilmente le valvole non chiudono corretta-mente.
Abbassare il braccio elevatore e chiudere la valvola di scarico.
Appoggiare un piede su una ruota anteriore e tirare il braccio ele-
vatore completamente nella posizione superiore. Aprire la valvola
di scarico ed abbassare il braccio elevatore. A questo punto il
martinetto dovrebbe essere nuovamente disponibile per l’utilizzo.
Molto probabilmente si è rotta la molla d’esrazione del perno
del braccio elevatore oppure non è stato fissato correttamente.
Sostituire la molla d’estrazione del perno o fissarla corretta-
mente ed ingrassarla. Pulire accuratamente e lubrificare tutti i
componenti mobili del meccanismo elevatore.
P P P
P P P
P P P
P P P P
P
Procurarsi un altro martinetto, con il quale sollevare l‘autoveicolo quanto basta per rimuovere in
sicurezza il martinetto difettoso. In caso di incertezza, fare ricorso all‘aiuto di personale specializ-
zato.
In caso di smaltimento di questo apparecchio si rivolga per cortesia
al Suo negoziante locale o a un raccoglitore locale di materiali di
recupero. In nessun caso lasci l’apparecchio in una discarica comunale! In nessun caso smaltisca
l’apparecchio nei normali rifiuti domestici! Così facendo contribuirà in maniera rilevante alla tutela
dell’ambiente. Gli oli idraulici devono essere smaltiti attraverso il punto di raccolta dei rifiuti problematici.
Smaltimento:
7740014-AZ-Wagenheber-2000kg-CTR-IM-INT-OEF-180716.indd 13 16.07.18 14:31

Q
Zakres podnoszenia z obciążenie nominalne: 135 mm – 342 mm
Nośność: 2000 kg
Parametry techniczne:
1. Przed pierwszym użyciem podnośnika:
Przy otwartym zaworze
1
w celu ustawienia mechanizmu
połączyć drążek dźwigni uchwytem
2
i pompując, co najmniej
6 krotnie, uruchomić hydraulikę tak, aby olej hydrauliczny równomiernie rozprowadzić.
2. Aby podnieść ciężar:
Zamknąć zawór przekręcając go zgodnie z ruchem wskazówek zegara .
Uważać, aby podnośnik był
3
równomiernie obciążony. Uruchomić podnośnik .
3. Aby opuścić ciężar:
Zawór
1
wolno poluzować, przekręcając go w kierunku przeciwnym do ruchu wskazówek zegara.
Działanie:
1
2
3
12
Wsparty ciężar zawsze dodatkowo zabezpieczać podpórkami pod
nadwozie. Podnośnika hydraulicznego nigdy nie należy używać bez
dodatkowych zabezpieczeń. Przed użyciem podnośnika należy dokładnie zapoznać się z instrukcją obsługi.
Uwaga:
1. Dla własnego bezpieczeństwa nie należy obciążać podnośnika
samochodowego ponad jego dopuszczalne obciążenie graniczne.
2. Nie stosować podnośnika samochodowego w następujących okolicznościach:
- w utrudnionych warunkach (np. w bardzo zimnym lub gorącym klimacie, w warunkach mocnego
promieniowania magnetycznego) itp.,
- w pobliżu materiałów wybuchowych, min itp.,
- do podnoszenia ciężarów, które zawierają między innymi następujące materiały: stopiony metal,
kwas, materiał radioaktywny lub towary luźne, które nie są ze sobą na stałe połączone itp.,
- w przypadku kontaktu z produktami spożywczymi itp.,
- na statkach itp.
3. Pojazd należy zawsze podnosić przy zaciągniętym hamulcu ręcznym i podłożonych pod koła klinach,
aby zapobiec stoczeniu się pojazdu.
4. Nie wolno używać podnośnika samochodowego do podnoszenia osób. Nie wolno używać podnośnika
samochodowego, gdy w pojeździe znajdują się osoby. Nie wolno również opierać się o pojazd
podczas jego podnoszenia.
5. Ciężar należy zawsze podpierać wspornikiem mocującym . Ewentualnie można zastosować
odpowiednie adaptery, aby zapobiec uszkodzeniu punktów podparcia w pojeździe. Należy przy tym
przestrzegać instrukcji obsługi producenta pojazdu.
6. Zawór bezpieczeństwa jest fabrycznie odpowiednio nastawiony i nie trzeba go regulować.
7. Ostrzeżenie: podnośnik samochodowy przewidziany jest wyłącznie do podnoszenia pojazdów.
Przed rozpoczęciem prac związanych z przeglądem i naprawą należy podstawić pod pojazdem stojaki
podnoszące o odpowiednim obciążeniu znamionowym. Nigdy nie wolno wykonywać prac pod
pojazdem, gdy nie jest podparty dodatkowymi podporami.
8. Obciążenie podnośnika samochodowego nie może przekraczać 2 ton (4500 LBS), ponieważ
w przypadku przeciążenia podnośnik może zostać uszkodzony (np. przeciążenie elementów
mechanicznych), a w konsekwencji nie można zagwarantować bezpieczeństwa osób.
9. Podnośnika należy używać wyłącznie na twardym, równym podłożu. W przypadku używania
podnośnika na nieutwardzonym, nierównym podłożu jego stabilność nie jest zapewniona i pojazd
może ześlizgnąć się i ulec uszkodzeniu.
10. Nie wolno kontynuować używania podnośnika w przypadku wycieku oleju. Należy zapobiec
dalszemu wyciekowi oleju i zadbać o to, aby rozlany już olej został natychmiast zebrany i zutylizowany
w odpowiednim do tego celu zakładzie gospodarki odpadami.
11. Jeżeli siła ręczna, jakiej trzeba użyć, wynosi ponad 400 N (ok. 40 kg), należy poprosić o pomoc drugą
osobę.
12.
Należy regularnie kontrolować stan oznaczeń, aby upewnić się, że pokrywają się ze stanem początkowym.
13. Przed użyciem należy sprawdzić podnośnik samochodowy pod kątem uszkodzeń, wycieku oleju i korozji.
Nie wolno używać podnośnika samochodowego, gdy jest uszkodzony. Konserwację i naprawy
podnośnika samochodowego należy przeprowadzać zgodnie z zaleceniami producenta. Prace konser-
wacyjne i naprawy mogą być wykonywane wyłącznie przez wykwalifikowane w tym zakresie osoby.
3
Uwaga:
7740014-AZ-Wagenheber-2000kg-CTR-IM-INT-OEF-180716.indd 14 16.07.18 14:31

Q
13
P
Zwalnianie zaworu poprzez obrót w kierunku przeciwnym do ruchu
wskazówek zegara (w lewo).
PZamykanie zaworu poprzez obrót zgodnie z ruchem wskazówek zegara (w prawo)
.
Rysunek 1 + 2:
f
Ciężar
-
Strona podnoszona
Rysunek 3:
1.
Aby zapobiec korozji, nieużywany podnośnik powinien być całkowicie składany.
2.
Do uzupełniania oleju hydraulicznego w podnośniku samochodowym najbardziej zalecane jest używanie
oleju o lepkości SAE 10. Zaleca się, aby prace konserwacyjne przeprowadzać na nieprzepuszczającej
olejów podkładce. Należy uważać, aby nie rozlać oleju. Jeżeli jednak dojdzie do rozlania oleju, należy
go natychmiast zebrać i oddać do utylizacji do odpowiedniego zakładu gospodarki odpadami.
3.
Podnośnik należy dokładnie czyścić, a Wszystkie jego elementy dokładnie smarować.
Konserwacja podnośnika:
Zakłócenia:
Drążek podnośnika unosi się
pod ciężarem
Drążek podnośnika opuszcza się
pod ciężarem
Podnośnik nie podnosi
ciężaru
Podnośnik nie
utrzymuje ciężaru
Podnośnik nie osiąga
przewidzianej wysokości
Pod wpływem ciężaru pompka
podnośnika działa niestabilnie
Podnośnik wózkowy nie opuszcza
się całkiem podczas spuszczania
Usuwanie zakłóceń:
Podnośnik jest zbyt mało naoliwiony.
Napełnić podnośnik olejem.
Usunąć zatyczkę
4
(usunąć płytkę
5
),
aby dokonać odpowietrzenia.
Podnośnik może być zapowietrzony.
Otworzyć zawór
1
wykonując pełny obrót.
Postawić podnośnik w pozycji pionowej.
Mocno poruszać uchwytem.Ponownie zamknąć zawór.
Zawór nie został prawidłowo zamknięty.
Opuścić ramię podnośnika i zamknąć zawór.
Podnośnik powinien być ponownie gotowy do użytku.
Sprężyna przy drążku została prawdopodobnie zerwana
bądź spadła. Należy ją wymienić lub prawidłowo zaczepić.
Wszystkie elementy podnośnika wyczyścić i naoliwić.
P P P
P P P
P P P
P P P P
P
14. Przebudowy lub modyfikacje podnośnika, które negatywnie wpływają na jego zgodność z normą
EN 1494:2000+A1:2008 są zabronione.
15. Podczas używania podnośnika osoba obsługująca podnośnik musi koniecznie obserwować
podnośnik i pojazd.
16.
Jeżeli podnośnika samochodowego nie da się opuścić niżej do żądanej pozycji, należy koniecz-
nie zabezpieczyć pojazd za pomocą podpórek pod nadwozie przed niezamierzonym opadnięciem.
Należy zaopatrzyć się w nowy podnośnik samochodowy, za pomocą którego będzie można podnieść
pojazd na taką wysokość, aby możliwe było bezpieczne usunięcie wadliwego podnośnika. W razie
wątpliwości należy skorzystać z pomocy specjalistów.
W przypadku utylizacji tego urządzenia należy zwrócić się do lokalnego
dystrybutora lub lokalnego zakładu gospodarki odpadami. Nie wolno
oddawać urządzenia do punktu zbiórki odpadów komunalnych! Nie wolno wyrzucać urządzenia wraz z
domowymi odpadami! W ten sposób przyczynią się Państwo w znaczącym stopniu do zachowania
środowiska naturalnego w niezmienionym stanie. Oleje hydrauliczne należy utylizować, oddając je do
punktu zbiórki odpadów specjalnych.
Utylizacja:
7740014-AZ-Wagenheber-2000kg-CTR-IM-INT-OEF-180716.indd 15 16.07.18 14:31

7740014-AZ-Wagenheber-2000kg-CTR-IM-INT-OEF-180716.indd 16 16.07.18 14:31

7740014-AZ-Wagenheber-2000kg-CTR-IM-INT-OEF-180716.indd 17 16.07.18 14:31
Other manuals for 7740014
1
Table of contents
Languages:
Other Cartrend Jack manuals
Popular Jack manuals by other brands

Daytona
Daytona DA15LP Owner's manual & safety instructions

TECH
TECH TJ325LP manual

Northern Industrial Tools
Northern Industrial Tools 148830 owner's manual

King Tony
King Tony 9TYE721AB instruction manual

USAG
USAG 1955 A Original instructions

K Tool International
K Tool International KTI-63101A owner's manual