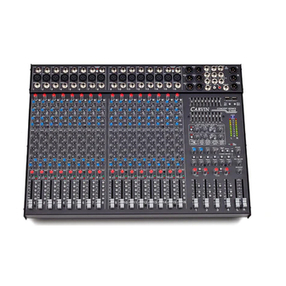
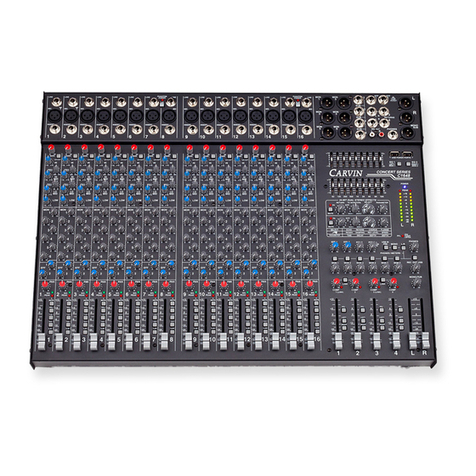
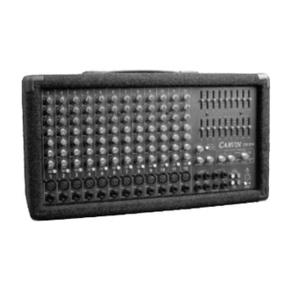
CARVIN C3248 User manual

Carvin has been serving the music community since 1946. From touring
professionals to bands at local clubs, our consoles have been at the heart
of their systems. Noted musicians such as Frank Zappa, Steve Vai &
Craig Chaquico have used Carvin consoles over the years.
Whether you are a rental company, touring band, recording artist,
nightclub, DJ, house of worship, school or theater, Carvin Audio has the
features and performance you can rely on night after night.
Simplicity In Operation
Ease of operation is incredibly important. The C Series consoles are
designed with the operator in mind. Everything is logically arranged.
Simply plug-in the channels, adjust the monitor levels and bring up
the main L/R faders and you’re up and running. If you need EQ (tone
changes), simply dial in the sound you want. The C Series is designed
on a small-scale platform making it easy to transport. No other console
offers more channels per linear inch.
Improving Your Live Sound
Your decision to own a C Series mixer will not only be for its ease of use,
but also for it’s incredible sonic capabilities. Your audience will quickly
notice how everything just sounds better with clear highs, natural mid
tones and a bass that is deep and punchy. Musicians on the stage will
appreciate the clarity they’ll get from their monitors. With THD less than
0.01%, every sound will remain pure to its source.
USB Record/Play
The USB connectivity allows digital recording of your
L/R stereo mix direct to your computer using a single
cable. The USB interface also gives you high quality
audio output from your computer into the console via the same cable.
Set-up playlists on your computer for unlimited hours of automated
playback through your sound system.
Stringent Testing
Our Quality Control department personally inspects every mixing
console. After the physical inspection, the most critical and most
important part of QC testing is to run every input channel and master
section connector through Audio Precision™ computers to verify every
function. This means everything meets 100% of its specifications.
This is great assurance that every EQ section, every output delivers the
highest voltages with the lowest possible distortion. The chart below
shows a 0 dBu signal into the XLR channel with a THD of only 0.002%
at Master Out.
Construction
Carvin Audio is passionate about delivering high-end audio through
engineering design and manufacturing processes. Ultra low-noise, high
slew rate IC’s are used for exceptional sound. “SMT” Surface Mount
Technology components ensure tight tolerances. Sealed controls and
switches guard against the elements. Steel chassis protect from physical
damage and repel RF noise.
C1648
C1648P
16262 WEST BERNARDO DR. SAN DIEGO, CA 92127
800-854-2235 CARVINAUDIO.COM
BUILT IN
USA
USER MANUAL
C3248, C2448, C1648, C1648P Concert Series Mixers
C2448
C3248
RECEIVING INSPECTION—read before getting started
INSPECTYOURUNITFORDAMAGE whichmayhave occurredduringshipping. Ifdamageis found
please notify the shipping company and CARVIN immediately.
SAVETHECARTON&ALLPACKINGMATERIALS. Intheevent youhavetore-shipyourunit,always
use the original carton and packing material. This will provide the best possible protection during ship-
ment. CARVIN and the shipping company are not liable for any damage caused by improper packing.
SHIPMENTSHORTAGE. Ifyoufinditems missing, theymayhavebeen shippedseparately.Please
allow several days for the rest of your order to arrive before inquiring.
RECORDTHESERIALNUMBER on the enclosedwarranty card and below foryour records. Keep
your portion of the card and return the portion with your name and comments to us.
SERIAL#_________________________ INVOICE #___________________ DATE___________

4
QUICK START UP
If you’re like most new owners, you’re probably in a
hurry to plug your mixer in and use it. Here are some
brief instructions to get you going quickly. With the mixer
unplugged and the unit turned off, complete the following
procedures:
1. CONNECTING AC POWER TO YOUR MIXER
The C1648, C2448 and C3248 use 90-250VAC,50~60Hz.
The 2000W powered C1648P requires 120VAC~60Hz and
the C1648P-E model uses 240VAC~50Hz.
2. CONNECTING INPUTS AND OUTPUTS TO YOUR MIXER
plug into the balanced MIC inputs using a shielded micro-
phone cable with XLR connectors.
instruments & keyboards, plug into the LINE input jacks
using a shielded cable with 1/4” phone plugs. Adjust the
GAIN knob for the mic or line input being used.
before turning the mixer on, but wait to turn the amps on
3. TURNING YOUR MIXER ON
and master LEVEL controls to
their positions
HI, MID, and controls and the
GRAPHICS to their center positions.
center posi-
tions.
POWER SWITCH
and watch for the POWER LED. Your mixer is now ready
to operate.
C SERIES CONTROLS
CHANNEL FEATURES
1. 1/4” LINE INPUTS
The line connectors are for connecting balanced and unbal-
machines, keyboards, ETC.
2. XLR MIC INPUTS
The balanced Mic inputs are for connecting microphones that
LINE and XLR MIC inputs
can be used simultaneously.
3. CHANNEL INSERT/DIRECT OUT
INSERTS AND DIRECT OUT illustration
4. GAIN
The GAINGAIN
is set too high, the PEAK LED will flash and distortion may
occur. Decrease the amount of GAIN until the PEAK LED
does not flash. It is important that the gain control should be
kept next to the PEAK LED flash point to maintain the lowest
noise of the channel. You can use the channel PFL switch to
the GAIN control to 0
the GAIN control should be set.
5. LOW CUT SWITCH
A 75 Hz LOW CUT filter helps eliminate unwanted low
stands or from acoustic/electric guitars. Turning up the
LOW EQ when using this filter can help create a punchier
bass response.
6. 4 BAND ACTIVE EQ WITH DUALMID SWEEPS
The C48 SERIES
LOW
control. The MID controls work at 45Hz to 10kHz, depend-
ing on the MID FREQ controls. The HI control functions at
11-20k for crisp highs.
Determine which position your MIDFREQsounds best, then
cut or boost your HI, HI MID, LOMID,and LOW frequencies as
needed. If you are trying to mic instruments such as acoustic
before
adjusting your tone controls. A typical setting may be: HI -3,
HI MID+5 (MIDFREQ set at 4kHz), LO MID-4MIDFREQ
set at 700HzLOW +3. Don’t be afraid to adjust the HI
and LOW controls to get good presence and depth while
reducing the LO MIDs to clean up your sound. This is one of
the keys to great sound.
7. HI & LO MID SWEEPS
MID controls will boost or
MID FREQs, you can select the exact frequency
-
mended settings for the MID FREQ
8. MONITOR 1 THRU 6 SEND CONTROLS
The channel MONITORS allow you to create six independent
monitor mixes. The MONITOR
routed to the master MON 1, 2, 3, 4, 5 and 6#22
#40
9. EFF 1 & EFF 2 SEND CONTROLS
The EFF 1 or EFF 2
from the channel to the master EFFECTS 1 or EFFECTS 2
#18 EFF 1 or
EFF 2 output#38
10. PAN CONTROL
Each channel’s PAN control allows stereo imaging by pan-
The PAN control also works for the sub-mix groups. A center
position will send a channel’s signal to a pair of sub-group
1-2, 3-4
signal is routed to only sub-group fader 1 or 3 when assigned.
Panning hard right routes the signal to sub-mix fader 2 or 4.
than standard pan controls
11. CHANNEL SIGNAL GREEN LED
The SIGNALLED is pre-fader and post EQ. This LED helps the
12. CHANNEL RED PEAK LED
This peak indicator is pre-fader and post EQ. If the PEAK LED
flashes, the channel needs a reduction with the GAIN control
#4PEAK LED indicates
that the channel has been MUTED.
13. CHANNEL MUTE SWITCH
The MUTEswitch will interrupt the channel signal. This
The PEAK LED will light solid ON with no SIG LED.
14. CHANNEL PFL SWITCH
#33
15. CHANNEL ASSIGNMENT SWITCHES
These switches assign the channels’ signal to the Master
L/R faders, or to the SUB-GROUP faders 1& 2, 3& 4for
PAN fully to the left
and assign a channel to Sub-Group fader 1 or 3 only. PAN
fully to the right and assign a channel to Sub-Group fader 2
or 4. Likewise assigning the L/R switches sends the channel
directly to the main L or R faders.
16. CHANNEL FADER
The CHANNEL FADER-
depending on both the Channel Assignment switches and the
PAN control. Calibrated 60mm FADERS with audio tapers are
featured for smooth fade-outs. Slide all faders down when
connecting your inputs.
17. MIC PHANTOM POWER SWITCH/RED LED
for sources that don’t require phantom power. The LINE
inputs are unaffected.
MASTER SECTION
18. DUAL STEREO 24-BIT EFFECTS
the channel EFF1 and EFF2 controls and the master EFF1 and
EFF2 controls. If the adjacent PK
EFF1 or EFF2 send
PK LED will show EFFECTS 1 or 2
been muted by the MUTEswitches. The RETURN control will
to the effects processors. The red PK LED will indicate when the
a.)ECHO: When the SELECT
position, it is selected to the first ECHO setting where you
the PARAMETER
time between the original signal and the echo. Increasing the
PARAMETER control to the right will increase the time delay
between the original signal and the echo. To increase the
number of echo repeats, turn the SELECT control clockwise
b.)REVERB: When the SELECT
position, it is selected to the first REVERBsetting. Turning the
SELECT control clockwise will increase the amount of high
PARAMETER control to
c.)CHORUS:When the SELECT
position it is selected to the first CHORUS setting. Turning the
SELECT
the chorus. Turning the PARAMETER
a minimal chorus depth setting. Increasing to the right will
increase the chorus depth.
d.)FLANGE: When the SELECT
position it is selected to the first FLANGE setting. Turning the
SELECT control clockwise will increase the flanger’s speed. Turning
the PARAMETER
Increasing to the right will increase the flanger’s depth.
TO MONITORS”
controls, MON 1/MON 2 & MON 1/MON 3. The center posi-
19. SEND 1 & 2
20. RETURN 3 L-R
RETURN
3 L /R jacks.
21. RETURN 4 L-R/ USB IN
RTN 4 L/R #39
from the rear USB port.
22. MONITOR 1-6 CONTROLS
These are the master outputs for the six monitor sends. These
correspond to the MON 1-6 XLR output jacks
#40
.
23. GROUP/SUB-MIX FADERS 1-4
Once a channel has been assigned to one of these faders,
the mixing process is simplified to using these four faders. If
these faders are not assigned to the Master L-R#28
then each fader is bused to the corresponding 4 GROUP1/4”
#41L-R
faders, the operator can use the faders to sub-mix groups.
24. GROUP PFL SWITCHES
These
PFL
switches allow the operator to monitor the entire
GROUP mix. If
distortion is heard or if
PEAK
on the Master L/R METERS, lower the channel faders
assigned to that group. Also check the channel PEAK
LEDs.
25. GROUP ASSIGNMENT SWITCHES
These switches send the sub-group mix to the main
L/RL/R.
OPERATING INSTRUCTIONS

26. 1-4 GROUP COMPRESSORS/LEDs
Each of the 4 sub groups features a compressor, which will
circuit is pre-fader, so you can set the COMP once and still
adjust the group fader as needed. The LED will indicate when
the compressor is working.
27. COMP LINK SWITCHES
These switches link the COMP controls for stereo pairs of
equal setting. The COMP1 or COMP3 control becomes the
master for the pair. Link 1-2 or 3-4.
28. MASTER L/R FADERS
by all channels and groups assigned to L/Rfaders. Output
appears at the L/Rbalanced XLR connectors
#44
.
29. MONO/SUB CONTROL
A mono output is created from the
L/R
for center, subwoofers, or side fill speakers. The output is
at the MONO#45
30. REC OUT/USB CONTROL
31. HEADPHONE AND METER SOURCE
The stereo PHONESPHONES
#42 PFL, L/R, MONO, MON 1-MON 6, USB
IN, and REC OUT USB switches allow for monitoring of
these sources through the headphones and the L/R LED
METERS #33
32. PFL RED LED
Indicates that the headphone & meters are monitoring
only the channels or groups where the PFL is switched on.
33. L/R LED VU METERS
selectable by the METER SOURCE or PFL switches
#31
34. DUAL 9 BAND GRAPHIC EQs
filters at 63,125, 250, 500, 1k, 2k, 4k, 8k & 16k Hz centers
enhance tone for the main or monitor mix.
35. EQ SWITCH 1 & 2
These switches swap the 9 band EQ’s from the standard L/R
main outputs OUT” to the MON 1 & MON 2 outputs IN”
.
36. USB POWER PORTS
-
ries like LED lighting or to charge phones or MP3 players.
Connect audio outputs to RETURNS 3 or 4, or to channel
inputs.
37. POWER BLUE LED Verifies the mixer is on.
38. EFFECTS 1 & 2 OUTPUT JACKS 1/4” out-
-
sor’s inputs to these jacks.
39. RETURNS 3 & 4 L-R INPUT JACKS
Returns a stereo signal from an external effect. Connect
your effects processors’ stereo outputs to these jacks. If
only one jack is used, the mono signal will go to both L/R .
40. MONITOR 1-6 XLROUTPUTS
The C SERIES. Connect your
monitor power amps to these connectors.
41. GROUP 1-4 OUTPUT JACKS
The C SERIES. Connect
your 4-track recorder or side fill power amps to these jacks.
42. HEADPHONEJACK
1/4” stereo jack for headphone or control room output.
43. REC OUT L-R RCA JACKS
RCA jacks for connecting to a recording input.
44. LEFT & RIGHT XLROUTPUT CONNECTORS
This set of balanced XLR connectors are for connecting
the main L/R output to power amps or recording gear.
45.MONO/SUB XLROUTPUT CONNECTOR
A bal. XLR output is featured for side fills or subwoofers.
46. REAR USB CONNECTOR
a computer for recording with compatible software and
comes into the RETURN 4 bus, controlled at the RTN4/
1
17 40 41
2
3
4
5
7
8
9
10
11
12
13
14
16
6
43
42
45
36
25 28
39 46
38
6
15
44
35
37
33
22
30
31
32
34
29
26
27
24
23
18
20 2119
19, 20, 21

6
Powered C1648P
Handle
C1648P Power Specs
4x 500w @ 4 ohms (2000w)
4x 300w @ 8 ohms (1200w)
1
optional wireless systems
2
5
643
C1648P REAR PANEL OPERATION:
1. SPEAKER OUTPUTS The SPEAKONTM combination jacks also accept 1/4” plugs. 12
gauge SPEAKONTM
NOT shielded instrument cables. Turn power off before connecting speaker cables.
The minimum load for each amp is 4 OHMS. Chaining together more than one speaker
on an output is fine as long as the total impedance is not below 4 ohms. If the speaker
FREE Carvin Impedance Calculator iPhone App at Carvin.com/iphone.
2. AMP ROUTING switch will select between two internally routed configurations:
OUT
IN: 1 amp each, for Monitors 1 thru 4.
The front panel GRAPHIC EQs function with the amps, depending on the front panel
EQ1 and EQ2 switch settings.
3. AMP PATCH INSERT jacks offer flexibility for mixer to amp signal routing. These
TIP is the power amp input. RING is the signal sent
from the mixer determined by the AMP ROUTING switch. The limiters are post insert.
Patching a compressor or equalizer between the mixer and the amp can be done by
RING signal to the INPUT of the
TIP
into the GROUP jacks on the top panel of the mixer. Plug the other ends of the cables
into the AMP PATCH INSERT jacks. The GROUP 1-4 faders will now control what is
heard at the SPEAKER OUTPUTS.
4. AMP CLIP LEDs - The red CLIP LEDs will flash when an amp has reached it’s
maximum output. Occasional flashing caused by bass frequencies is OK. Consistent
This will not damage the amp.
5. PROTECT LED - The yellow LED indicates the power amp system has gone into one
of its protection modes. There will be no output from the amps. If the amp output has
will go into protection. Check for shorted speaker cables and speaker impedance, then
operation will return in about 1-3 minutes.
C1648P Rear
Accessories UX600 WIRELESS SYSTEMS
UX600M Handheld Mic
UXGT
Mini XLRto 1/4” instrument cable UX-LP1 Lavalier mic
UX-HM3
Headset mic
Two UX600Rreceivers mounted in C1648P mixer using UX600KIT
UX600R Receiver
USB-L
USB LED light
ROAD WARRIOR CASES
Mixer Case
C1648 RW1648
C1648P RW1648P
C2448 RW2448
C3248 RW3248
UX600B Beltpack Transmitter
Concert Series Mixers
-

SOUND CHECK
CHANNEL CONNECTIONS AND SUB-MIXING
-
phones and instruments. Each microphone or instrument must be connected to one of the mixing
and then amplified by the system. The mixer can be operated on the stage or from a remote
NOTE: Most snake cables are not designed for speaker connections.
The Sound check
the system operator. If you miss something during the sound check, the sound may suffer during
thing to also check here is feedback in the monitors from the microphones. Good positioning of
in cases where a performer has multiple microphones such as drummers, set each drum mic
if something needs to be adjusted or a performer or microphone needs to be heard solo again.
Remember the sound check is not a rehearsal but a system check. It is always a good idea for
check. If a monitor system is being used, the operator’s microphone should only be directed
through the monitors when addressing the on stage performers, especially if something needs
to be checked during the show.
or line inputs. The XLR Mic inputs and balanced 1/4” Line inputs on each channel can be used
GAIN control. Adjust
the instrument. Then use the PAN controls on the two channels to pan hard left and right for
master section can be used.
mixing easier to manage.
The 4 bus section on the C48 mixers can be used for main outputs, surround outputs, side
fills, outputs to a multi-track recorder, etc. but the most common use is for sub mixing. Sub
grouping is the process of assigning multiple channels to a sub group fader in the master section.
This is usually done to decrease the number of faders needed to adjust a group of channels.
mix fader. If the drums need to be adjusted in the main mix, only one group fader needs to be
so it is important to get a balanced mix of the entire drum kit during the sound check. The drum
sub group faders higher than the master L-R faders. Using the L-R fader or sub group fader to
Floor Tom
Snare
Tom
Kick
1
2
3
4
5
channels 2-6 assigned to sub-mix group faders 1 and 2
The diagram depicts a standard live sound system
1. Stereo EQ and power amp for the main speakers on the Left/Right outputs.
2. Stereo power amp for two monitor mixes on the MON 1 and MON2 outputs.
3. Bridged power amp for a subwoofer on the MONO/SUB output.
4. Power amp for side fill or back of room fill on the Group output 4.
5. External effects processor connected to EFF 1 SEND and RETURNS 3.
6. Vocal mics.
7. Four drum mics on channels 2-6, assigned to subgroups 1 & 2 for sub mixing.
8. Mic’d guitar amp.
9. Direct Out from bass amp.
10. Stereo keyboard on 1/4” LINE inputs.
6 7
8 9
10
The main amps and speakers should contain an
The six independent monitor mixes use the MON 1
through MON 6 sends. On the channel these sends
are pre-EQ, pre-fader.
be used for a main mono mix, a center mix or as a
subwoofer output.
The sub group outputs can also be used as side or
at the back of the room. Set up a set of back fill loud-
speakers to fill in and add a digital delay to the main
speakers to correct the time delay from front to back.
When the 9 band graphic EQ sliders are in the center
the EQ sliders are raised or lowered from this position,
slider up and down to hear the difference.
harsh try reducing the 1kHz or 2kHz slider, if the mix
is too boomy try lowering the 250Hz or 500Hz slider.
To reduce feedback in the low frequency range, try
lowering one of the 63, 125 or 250 Hz sliders. High
frequency feedback is usually reduced by lowering the
2kHz or 4kHz slider.
To help with feedback reduction, the microphones
should be placed further back on the stage than the
main speakers.
MASTER OUTPUTS
9-BAND EQ

2
SPECIFICATIONS: Concert 48 Series
Freq. response: 20Hz-20kHz +/-0.5dB
THD distortion: .01% @ 20Hz-20kHz
EIN:
-117 dBu
S/N Ratio 90 dB
Dynamic Range: 104 dB
Mic Gain: 52 dB
Line Gain: 30 dB
Total Gain: 72 dB (balanced)
Max Output: +28 dBu
Power Requirement
90 to 250VAC 50-60Hz
C1648P Power Amp Specs:
4ohms: 500w x 4(2000w)
8ohms: 300w x4 (1200w)
Freq. Resp.: ±0.5dB, 20Hz-20kHz
±1.5dB, 10Hz-25kHz
THD: (50% output) 0.09%
Output Mode: 95% Efficient Class D
Protection Circuits: Soft Start, Short Circuit,
No Load, SpeakerGuard,
Thermal Shut-Off, Protect
and Clip Indicators,
Amp Peak Limiters
PowerRequirementC1648P:
USA120VAC~60HZ
EU 240VAC~50Hz
Dimensions:
C1648:
22.2”W x 16.3”D x 3.75”H wt: 18.1 lbs
563mm x 415mm x 95mm, wt: 8.2kg
C2448:
30.1”W x 16.3”D x 3.75”H wt: 24.5 lbs
763mm x 415mm x 95mm, wt: 11.1kg
C3248:
38.1”W x 16.3”D x 3.75”H, wt: 29.5 lbs
967mm x 415mm x 95mm,wt: 13.4 kg
C1648P:
22.2”W x 16.3”D x 5.75”H wt: 25.1 lbs
563mm x 415mm x 146mm, wt: 11.4kg
C1648, C1648P
563.15mm.
22.170in.
FRAME WIDTH:
FRAME PROFILES:
C1648P
C1648, C2448, C3248
414.35mm.
16.315in.
414.35mm.
16.315in.
409.60mm.
16.125in.
95.25mm.
3.750in.
145.85mm.
5.745in.
50.35mm.
1.980in.
145.85mm.
5.745in.
409.60mm.
16.125in.
C2448
762.55mm.
30.020in.
C3248
967.00mm.
38.070in.
LIMITED WARRANTY
Your Carvin Audio mixer is guaranteed against failure for 1YEAR unless otherwise stated. Carvin Corp.will
service and supply all parts at no charge to the customer providing the unit is under warranty. Shipping costs
aretheresponsibilityof thecustomer.CARVINCORP.DOESNOTPAYFORPARTSORSERVICINGOTHER
THAN OUR OWN. A COPYOF THE ORIGINAL INVOICE IS REQUIRED TO VERIFYYOUR WARRANTY.
CarvinCorp. assumesnoresponsibility forhorndrivers orspeakers damagedbythis unit.This warrantydoes
notcover,andnoliabilityisassumed,fordamagedueto:naturaldisasters,accidents,abuse,lossofparts,lack
ofreasonablecare,incorrectuse,orfailuretofollowinstructions.Thiswarrantyisinlieu ofallotherwarranties,
expressed or implied. No representative or person is authorized to represent or assume for Carvin Corp. any
liability in connection with the sale or servicing of Carvin Audio products.
CARVIN CORP. SHALL NOT BE LIABLE FOR INCIDENTAL OR CONSEQUENTIALDAMAGES.
MAINTAINING YOUR EQUIPMENT
Avoidspilling liquids or allowing anyotherforeign matter inside the unit.The panel of yourunitcanbe wiped
with a dry or slightly damp cloth in order to remove dust and bring back the new look. As with all pro gear,
avoid prolonged use in caustic environments (salt air). When used in such an environment, be sure the
amplifier is adequately protected.
SERVICE:
In the USA, please go to www.carvinaudio.com
under “SUPPORT” click on “REPAIR INFORMATION”
Outside the USA: contact your dealer or go to http://www.carvinaudio.com
click on “DEALERS” for your nearest service center.
Include a written description of the problem with serial number and date of purchase.
SAFETY INSTRUCTIONS (EUROPEAN)
The conductors in theAC power cord are colored in accordance with the following code.
GREEN & YELLOW—Earth BLUE—Neutral BROWN—Live
U.K. MAIN PLUG WARNING: A molded main plug that has been cut off from thecord is unsafe. NEVER
UNDER ANYCIRCUMSTANCES SHOULDYOU INSERT ADAMAGED OR CUT MAIN PLUG INTOA POWER SOCKET.
CAUTION
RISK OF ELECTRIC SHOCK
DO NOT OPEN
IMPORTANT! FOR YOUR PROTECTION, PLEASE READ THE FOLLOWING:
WATERAND MOISTURE: Applianceshould notbe usednear water(near abathtub,washbowl,sink,laundry
tub,inawetbasement, nearaswimming pool,etc).Careshouldbe takensothatobjectsdo notfallandliquids
are not spilled into the enclosure through openings.
POWERSOURCES:Theproduct shouldbe connectedtoa powersupply onlyofthe typedescribed inthe
operating instructions or as marked on the appliance.
GROUNDING OR POLARIZATION: Precautions should be taken so that the grounding or polarization
is not defeated.
POWER CORD PROTECTION: Power supply cords should be routed so that they are not likely to be
walked on or pinched by items placed upon or against them, paying particular attention to cords at plugs.
SERVICING:The user shouldnotattempt to service the appliancebeyondthat described in the operating
instructions. All other servicing should be referred to qualified service personnel.
FUSING: If your unit is equipped with a fuse receptacle, replace only with the same type fuse. Refer to
replacement text on the unit for correct fuse type.
REFER SERVICING TO QUALIFIED SERVICE PERSONNEL!
This symbol is intended to alert the user
that may be of sufficient magnitude to
constitute a risk of electric shock to
persons.
This symbol is intended to alert the user
to the presence of important operating
-
tions in the literature accompanying
the appliance.
76-02448E 010417
Other manuals for C3248
1
This manual suits for next models
4
Table of contents
Other CARVIN Music Mixer manuals

CARVIN
CARVIN C1600 User manual

CARVIN
CARVIN C3248 User manual

CARVIN
CARVIN MX2488 User manual

CARVIN
CARVIN XP1000L User manual

CARVIN
CARVIN RX 1200 User manual

CARVIN
CARVIN S16 User manual

CARVIN
CARVIN C1648 User manual

CARVIN
CARVIN PRO-MIX 7 User manual

CARVIN
CARVIN CX1272 User manual

CARVIN
CARVIN PA410 User manual

CARVIN
CARVIN SL User manual

CARVIN
CARVIN XP880 User manual

CARVIN
CARVIN C1240 User manual

CARVIN
CARVIN XP800L User manual

CARVIN
CARVIN MX2488 User manual

CARVIN
CARVIN C1644(P User manual

CARVIN
CARVIN XP650 User manual

CARVIN
CARVIN STUDIO MATE SM162 User manual

CARVIN
CARVIN XP800L User manual

CARVIN
CARVIN DXMIXER User manual