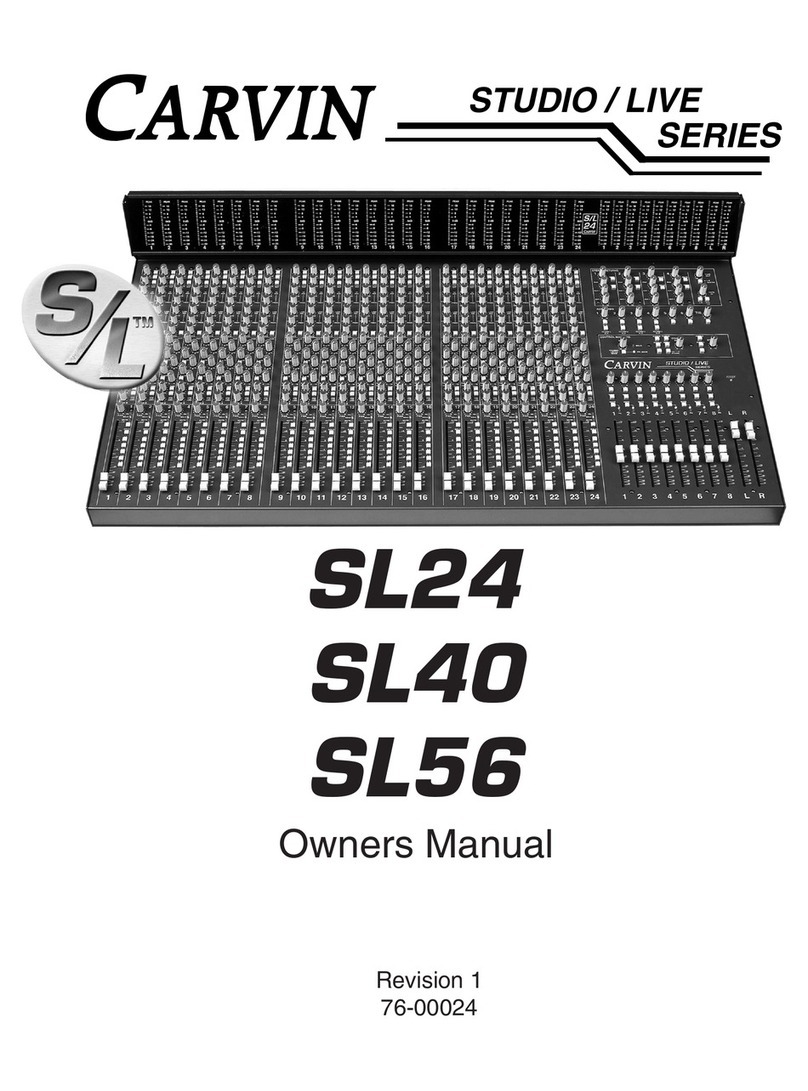
CARVIN MX2488 User manual

1-1
CC
CCOO
OONN
NNTT
TTEE
EENN
NNTT
TTSS
SS
SS
SS ee
ee cc
cc tt
tt ii
ii oo
oo nn
nn
DD
DD ee
ee ss
ss cc
cc rr
rr ii
ii pp
pp tt
tt ii
ii oo
oo nn
nn
PP
PP aa
aa gg
gg ee
ee
11
11 YY
YYoo
oouu
uurr
rr
NN
NNee
eeww
ww
MM
MMXX
XX22
2244
4488
8888
88
Table of Contents 1-1
Receiving Inspection
1-2
For the New Owner 1-3
22
22 QQ
QQuu
uuii
iicc
cckk
kk
SS
SStt
ttaa
aarr
rrtt
tt
UU
UUpp
pp
Quick Start Up 2-1
33
33 DD
DDee
eett
ttaa
aaii
iill
ll
CC
CCoo
oonn
nntt
ttrr
rroo
ooll
ll
DD
DDee
eess
sscc
ccrr
rrii
iipp
pptt
ttii
iioo
oonn
nnss
ss
Front Controls and Rear Connectors
3-1
44
44 SS
SS pp
pp ee
ee cc
cc ii
ii ff
ff ii
ii cc
cc aa
aa tt
tt ii
ii oo
oo nn
nn ss
ss
Specifications 4-1
55
55 TT
TTee
eecc
cchh
hhnn
nnii
iicc
ccaa
aall
ll
II
IInn
nnff
ffoo
oorr
rrmm
mmaa
aatt
ttii
iioo
oonn
nn
Schematic Diagrams 5
66
66 WW
WWaa
aarr
rrrr
rraa
aann
nntt
ttyy
yy
II
IInn
nnff
ffoo
oorr
rrmm
mmaa
aatt
ttii
iioo
oonn
nn
Warranty and Service Information
6-1
Receiving Inspection
INSPECT YOUR MX2488 FOR ANY DAMAGE which may have occurred during
shipping. If any damage is found, notify the shipping company and call CARVIN
immediately.
SAVE THE CARTON & ALL PACKING MATERIALS. In the event you have to reship
your amp, always use the original carton and packing material. This will provide
the best possible protection for your unit during shipment. CARVIN and the
shipping company are not liable for any damage caused by improper packing.
SAVE YOUR INVOICE. It will be required for warranty servicing of your unit.
Always check your invoice against the items you have received.
SHIPMENT SHORTAGE. If you find items missing, it may be that they were shipped
separately. Please allow several days for the rest of your order to arrive before
inquiring. If you determine (after allowing an appropriate amount of time) you
have not received all the items you ordered, please call CARVIN.

1-2
For the New Owner
OO
OOVV
VV EE
EERR
RRVV
VV II
IIEE
EEWW
WW
The CARVIN MX2488 are full function audio mixing consoles. They are designed
to serve both as a control center for an eight track recording studio or for live
sound reinforcement mixing. Their signal routing capabilities, low noise spec's
and interconnect functions are targeted directly to professional recording
applications. But, because of their rugged construction and additional "live
reinforcement" features, the MX2488 double duty as very effective live sound
reinforcement consoles.
This manual will deal with both of these applications, while attempting to
present the various technical aspects of the consoles in an easy to read and
understand format. Because the ultimate performance of your console depends a
great deal upon the operator and the installation of the console, much of this
manual centers around "user oriented" diagrams and explanations. Therefore, the
content of this manual deals with explaining the features, various connections
and technical aspects of the MX2488 to assure you the best possible performance
from your studio or live performance situation.
Additional sections deal with some of the aspects of operating a sound system
in general. Sections involving Bi-amping and Tri-amping as well as suggestions
for maintaining and operating a sound system are included.
CC
CCOO
OONN
NNTT
TTEE
EENN
NNTT
TT
We recommend that you read the entire Operation Manual. However, if you are
familiar with professional recording or live consoles, you may wish to skip to
Section #1 (MX2488 Control Descriptions). This section contains the basic
information about the features, various rear panel connections and technical
specifications of the MX2488. It contains all the important information needed to
be up and running for the more technically inclined user.
The appropriate descriptions of the MX2488's external power supply can be
found under "Rear Panel Connections" listed in Section #1-6 and #1-7 "MX2488
CONTROL DESCRIPTIONS".
Section #2 (Getting Started Using Your New Carvin Console) This section deals
with the use of your new console and how to get in contact with CARVIN should
you encounter any problems.
Section #3 (Getting To Know the Features Of The MX2488 Consoles) goes into
greater detail about the front and rear panel peatures common to both units. Each
of the features are numbered and correspond with a numbered picture that will
direct you to the feature described. Also, each number assigned to a feature will
correspond to the numbering included in Section #1 (MX2488 Control
Descriptions) for additional reference to a feature.
Section #4 (Recording With The MX2488) offers information on
interconnecting tape recorders in a typical 8-track studio application. It deals

1-3
with setting gain levels, operating the studio, as well as monitoring and mixdown
suggestions.
Section #5 (Live Sound Mixing With The MX2488) offers information on
connections appropriate when using the console as the control center for live
sound reinforcement. It deals with setting up main and monitor mixes and related
information that might be needed to achieve the best possible perfomance in live
sound reinforcement.
Section #6 (Bi-Amping & Tri-Amping) covers the basic differences between
conventional and Bi-Amped sound systems. Differences between Bi-Amping and
Tri-Amping and information covering the use of an active crossover in a Bi/Tri-
Amp situation is covered.
Section #7 (Suggestions For Efficient Set-Up & Quality Sound) covers special
information related to operating a studio using the MX2488 console as a control
center. It also covers information on operating a live sound system and special
considerations that will help organize a performance.
Section #9 (Servicing & Technical Information) includes the technical
specifications, circuit schematics, harness & block diagrams as well as component
layouts and listings. This section is designed to be a detailed overview of the
design and construction of the console. And, should the MX2488 ever need
servicing, this section should provide all the veeded information for your service
technician.
SS
SSEE
EECC
CCTT
TTII
IIOO
OONN
NN
##
##11
11--
--11
11
MM
MMXX
XX
CC
CCOO
OONN
NNTT
TTRR
RROO
OOLL
LL
DD
DDEE
EESS
SSCC
CCRR
RRII
IIPP
PPTT
TTII
IIOO
OONN
NNSS
SS
""
""
AA
AABB
BBOO
OOUU
UUTT
TT
TT
TTHH
HHEE
EE
MM
MMXX
XX22
2244
4488
8888
88
CC
CCOO
OONN
NNSS
SSOO
OOLL
LLEE
EE""
""
The MX2488 was engineered and subsequently constructed using up-to-date
and uncompromised materials. They represent the culmination of several years of
research and surveys of the professional sound community for the features thtat
are most important in a small production studio. Every detail of the console
received extensive scrutiny. CARVIN researched the most efficient metering,
monitoring and interfacing as well as state-of-the-art production techniques to
achieve the reliability and remarkable performance of the MX2488. The oberall
design of the console was focused on providing the versatility to accommodate
many different applications. And, its rugged construction, spec's and features
accomplish this goal with ease. It is excellent for concert sound reinforcement as
well as stage monitoring, television production, theatrical productions and multi-
track recording.
The MX2488 was subjected to an exhaustive program of field and laboratory
testing. The net result provided the information to fine tune the features and
performance of the consoles. Every aspect of this testing was scrutinized
including panel layout, color schemes, exterior dimensions and aesthetics. So,
although the MX2488 is an extremely sophisticated console, it remains unclutteded
and sensibly organized, and we feel this is important. It makes complicated
mixdown's and signal routing a breeze to accomplish!
Recording basic tracks, overdubbing sessions and final mixdown are all

1-4
handled with ease. Signals are automatically routed to appropriate sections of the
console for each recording operation. One of the key features of the MX2488 , but
not found on many P.A. "recording" consoles is an independant control room
monitor mixer with buss/tape sourve selection. This section makes buss
interconnects (for overdubbing) and sub-group effects routing extremely easy.
One of the most important considerations when analyzinga recording console
is the quality of the input pre-amps and equalization capabilities. CARVIN refused
to cut corners in these areas. Equivalent input noise is -128dB utilizing an ultra-
low noise differential mic pre-amp. THD is typically less than .03% @ 40dB gain,
0dBv from 20Hz to 20kHz. This quality spec is preserved throughout the console by
carefull attention to grounding & gain structure. Each channel features three
band continuously variable parametric equalization with bypass switching. This
is a high performance, extremely quiet and musical sounding equalizer. It will
handle the most critical of EQ needs making it a very effective tool i n
compensating microphone responses for various mixes.
Each input of the MX2488 console features an input "Gain" control for both the
line & mic inputs, four auxiliary mixing busses with pre/post switching, muting,
soloing, and odd/even pan controls for sub-group routing. Each channel's volume
control is a 100mm smooth operating "slider" type control for precise control of
signal processing imaginable.
The ouput sections of the MX2488 features independent control room
monitoring, made possible by the (2) Track Faders and "Pan" controls provided on
each output channel. A "Tape" switch is provided at each output channel to allow
the tape playback signal to feed the cue and control room mixes. This means that
valuable input channels do not have to be used to return tape playback signals
when doing overdubs.
""
""
SS
SSEE
EECC
CCTT
TTII
IIOO
OONN
NN
##
##11
11--
--22
22
Some of the quality components used throughout the consoles include the
professional signal connectors (3 pin & 1/4") and highly reliable ITT Schadow
switches. Large professional VU meters are accurately driven by a well damped
circuit and are easy to read. Long throw 100mm faders have a precise 15% audio
taper for smooth fade-outs. They feature integral dust shields for smooth
operation and long life. The rotary pots are optimally damped for smooth reliable
operation. All of the knobs have easy to read pointers and are color coded b y
function.
Construction of the MX2488 is modular, with individual circuit boards used
for each channel and master strip. Virtually all hand wiring has been eliminated
through the use of highly reliable circuit board and computer type ribbon cable.
All circuits are engineered for lowest possible noise and extreme reliability. A n
internal heavy duty power supply spares the expence and inconveniece of a
separate outboard supply and is located in such a way that system noise is not
affected. Tight voltage regulation helps keep crosstalk low while current limiting
protects the supply from accidental shorts. AC power is supplied to the mixer by
way of a standard detachable international line cord with safety ground. The
chassis is made of precision formed steel with long life pem-nut fasteners and a
durable epoxy finish. One inch thick solid oak ends and a padded hand rest add to
the good looks and overall aethetics of the MX2488 console.

1-5
Every aspect of the MX project was analized to provide the best possible
features, quality perfomance and versatility. The MX2488 addresses the mixing
console needs of (8) track recording studios, live sound mixing, production
studios, broadcast and sound mixing for film. It is an ultra-reliable state-of-the-
art console backed by CARVIN's commitment to excellence and extensive
background in console engineering and design. We think you will agree that the
MX2488's excellent design and advanced engineering make it truly the
"Professional's Choice". We're very proud of its design and operation and are
confident you will share our enthusiasm for the best-"The"
SS
SSEE
EECC
CCTT
TTII
IIOO
OONN
NN
##
##22
22--
--11
11
GG
GGEE
EETT
TTTT
TTII
IINN
NNGG
GG
SS
SSTT
TTAA
AARR
RRTT
TTEE
EEDD
DD
UU
UUSS
SSII
IINN
NNGG
GG
YY
YYOO
OOUU
UURR
RR
NN
NNEE
EEWW
WW
CC
CCAA
AARR
RRVV
VVII
IINN
NN
CC
CCOO
OONN
NNSS
SSOO
OOLL
LLEE
EE''
''
"A SPECIAL MESSAGE TO THE NEW OWNER"
Congratulations on your selection of CARVIN products "The Proffesional's
Choice." Your new "MX" series console demonstrates CARVIN's commitment to
producing the highest quality & most sophisticated engineering in the audio
industry today. Its wide acceptance and use by industry proffesionals illustrates
the basis for CARVIN's recognition as "The Proffesional's Choice".
Professioanlism can only be measured by people from the results they
achieve through their efforts and knowledge. It is not something that
automatically happens when buying a new or more sophisticated console. Rather,
its what you do with the equipment, and how well you do it that ultimately makes
the point. We are certain your new CARVIN console will deliver the performance
necessary for you to achieve solid results, and ultimately achieve a high degree of
professioanal gain & enjoyment.
To compliment your new console and help you acquire that knowledge,
we've included this maual. All the information you need to be up and running is
right here! You'll find using this manual easy and pleasant. We've gone to great
lenghts to make it so. We've attempted to present the technical aspects of your
new console accurately and in "Plain English". But, if you have any questions that
are not answered, please call us at our toll free numbers. Our sales staff is well
versed in the technical aspects of each of our products and are eagerly willing to
assist you with any problems you may have. We sincerely wish to ensure your
complete satisfaction and enjoyment with your new console.
If you would like to comment on features or performance of your new
console, please feel free to cantact us. Criticism and comments from our owners
have helped us improve and further develop our products and our buisiness. We
sincerely welcome any comments or ideas you may have.
Please send in the warrenty card. Although it is not necessary to ensure
warranty protection, it will allow us to better know how you are using our
equipment while keeping a ready reference to our files. And, it helps us mail out
literature and information that may be of interest to you as a professional
muscician. Let us know where you are so we can keep in touch!

1-6
In this manual there are plenty of diagrams & descriptions to aid in
understanding your new console. So, with this manual in hand you hold the key to
properly understanding and operating your new console, and to achieve truely
professional results.
May you enjoy many years of enjoyment, success, and fun with your new
CARVIN console.
TT
TTOO
OOLL
LLLL
LL
FF
FFRR
RREE
EEEE
EE
NN
NNAA
AATT
TTII
IIOO
OONN
NNAA
AALL
LL
((
((88
8800
0000
00))
))--
--88
8855
5544
44--
--22
2222
2233
3355
55
SS
SSEE
EECC
CCTT
TTII
IIOO
OONN
NN
##
##33
33--
--11
11
FF
FFEE
EEAA
AATT
TTUU
UURR
RREE
EESS
SS
OO
OOFF
FF
TT
TTHH
HHEE
EE
MM
MMXX
XX22
2244
4488
8888
88
CC
CCOO
OONN
NNSS
SSOO
OOLL
LLEE
EE
RECORDING FEATURES
* Eight track studio control center
* Complete headphone Cue mixing facilities
* Separate input & output channels with I/0 capabilities
* Separate (8) X (2) monitor mixer
* Three band sweepable parametric EQ with defeat per channel
* Four auxiliary busses per channel with pre/post switching
* Solo & mute on all input and output channels
* Two effects returns with Panning & Soloing
* Built-in Talkback system with Slate (incl. monitor dimming)
* 100mm precise faders on each input & output channel
* Studio mix outputs as well as control room outputs
* Stacking inputs
* Peak warning indicators per channel with peak stretching
* Send/Recieve/Direct Outs/Line-in patch points on each channel
* Microphone phantom power
* Highly reliable fully regulated & protected power supply
* Cue & Effects sends from output channels
* Alternate metering of Cue and two track
* Quick tape playback through monitors via "Tape" switch
* Independent mic and line pre-amps
* Totally modular internal construction
* Excellent performance - Low Noise (input noise of 1128 dBv.)
* +4dB or -10dB operating level capabilities (standard)
* THD less than .03%
LIVE SOUND MIXING FEATURES

1-7
* Eight Sub-Groups with solo and Mute
* Four independent monitor mixes available
* Headphone monitoring of Main or Monitor
* Compact and extremely rugged for road use
* Talkback to Monitors
* 11 step unput gain controls for fast easy set-up
* Channels and Outputs assignable to L&R Stereo Output
* Channel patching on all output channels
*XLR type, balanced, 600 ohm inputs & outputs
SS
SSEE
EECC
CCTT
TTII
IIOO
OONN
NN
##
##33
33--
--22
22
GG
GGEE
EETT
TTTT
TTII
IINN
NNGG
GG
TT
TTOO
OO
KK
KKNN
NNOO
OOWW
WW
TT
TTHH
HHEE
EE
FF
FFEE
EEAA
AATT
TTUU
UURR
RREE
EESS
SS
OO
OOFF
FF
TT
TTHH
HHEE
EE
MM
MMXX
XX--
--22
2244
4488
8888
88
CC
CCOO
OONN
NNSS
SSOO
OOLL
LLEE
EE
FF
FFRR
RROO
OONN
NNTT
TT
PP
PPAA
AANN
NNEE
EELL
LL
CC
CCOO
OONN
NNTT
TTRR
RROO
OOLL
LLSS
SS
**
****
****
**II
IINN
NNPP
PPUU
UUTT
TT
CC
CCHH
HHAA
AANN
NNNN
NNEE
EELL
LLSS
SS**
****
****
**
11
11))
))
MM
MMii
iicc
cc//
//LL
LLii
iinn
nnee
ee
SS
SSww
wwii
iitt
ttcc
cchh
hh
* This switch will select between the microphone input and the line
input at the rear of the console. Remember, the line input will accept signals
many times the strength of the mic input and this switch must be properly
selected, depending upon which input best suits the signal source. Mic inputs
typically accept signals from -60dB to -20dB. Line inputs can accept "pre-amp"
signals (i.e. line outputs of tape decks, effects, etc.) of up to 30 volts. You may have
both the line and mic inputs connected at the same time. In a live situation this is
a very effective way in which to select between a tape input or a mic input. For
instance, if you wish to play a tape back during a break you may wish to have
your tape deck inserted into the line inputs of an input already dedicated to a mic
input. This will allow you to switch to the tape source by simply depressing the
Mic/Line switch. The gain control directly below this switch controls the relative
gain from either the mic or line source.
* The MX-2488's line inputs on channels #1 through #8 are normally
used to playback signals from the multi-track recorder.
NN
NNoo
oott
ttee
ee::
::
The outputs of your (8) track or multi-track recorder
should be connected to the line inputs of channels #1
through #8.
Even when the Mic/Line switch is in the "Mic" position the line inputs inputs of
channels 1 through 8 are paralleled to the tape monitor section of the console, By
depressing the "Tape" switches (directly above the Output Channel Faders -
Outputs #1 through #8), the signals appearing at the line inputs of channels #1
through #8 are routed to the (2) Track Monitor Faders through this interconnect
section. This allows you to listen to the "2-TRK Master" faders by simply
depressing the "Tape" switches at the monitor section of the console. And, you are
able to adjust the volume of the multi-track playback using the "2-TRK" monitor
faders as well as "Pan" them through the stereo field using the "Pan" control
directly above this fader.

1-8
NN
NNoo
oott
ttee
ee::
::
Usually the 2-Track monitor secction will be used to mix the
outputs (fed to the multi-track recorder) in the controlroom
as a basic "control room mix". When the "Tape" switches are
depressed you will be listening to the same exact levels and mix
as previously was set up for the control room mix, during recording.
(This assumes that the inputs and outputs of the multi-track recorder
have been properly calibrated and adjusted.) The line inputs of channels
#9 through #16 are free to accept any high level input signal and will
even accept direct inputs from guitar or bass.
* When the Mic/Line switch is selected to the "Line" position, the
output of your multi-track recorder (Inputs channels #1 through #8) will be
directed to the input of the channel. This allows you to go into a "Mixdown" mode,
adding equalization and additional effects to each of your previously recorded
tracks and subsequently route them directly to the 2-TRK Master outputs feeding
your (2)-Track recorder.
SS
SSEE
EECC
CCTT
TTII
IIOO
OONN
NN
##
##33
33--
--33
33
NN
NNoo
oott
ttee
ee::
::
When routing signals through input channels #1 through
#8 for mixdown you will probably want to depress the
(L-R) "Left/Right " assignment switch to bypass the
subgroup output section of the console. Bypassing the
sub-group output section of the console and directly
routing the signals to the (2) Track provides the most
direct electrical path and the least possible noise. It also
makes the conversion to a "Mixdown Mode" extremely
easy.
22
22))
))
II
IInn
nnpp
ppuu
uutt
tt
GG
GGaa
aaii
iinn
nn
CC
CCoo
oonn
nntt
ttrr
rroo
ooll
ll
* The input gain control is very important for establishing the best
signal-to-noise ratio performance of the console. This simply means that proper
adjustment of this control will offer the lowest possible "hiss" or background
electronic noise. The best way to use this control is to rotate it fully clockwise to
the position marked as "10". This affords the maximum gain for the input. If the
signal is too strong from either your microphone or line input the red "Peak" LED
indicator just above the channel fader will light. This LED indicator will indicate a
strong red light for a short period of time whenever the signal is too strong.
Rotating the "Gain" control (One click at a time) counter-clockwise until the LED
"Peak" indicator light just goes out will properly attenuate the signal, delivering
just the right level to the channel. Rotating the "Gain" control edcessively
counter-clockwise beyond the point at which the peak LED goes out will drop the
signal too much and you may not have enough gain. This usually results in
having to set the volume controls much higher making the floor noise of (hiss)
level more apparant.
The best rule of thumb is to rotate the "Gain" control all the way to "10" and
look to see if the peak LED is lighting while the source is active. If it is not, then
no further adjustment is needed, However, if it is, then you should rotate hte
control counter-clockwise until the peak LED just goes out. Once this adjustment

1-9
has been made, you should not need to again touch this control through the rest
of the mix. You may wish to experiment with this control a little bit to become
familiar with its feel and operation. It is an exellent tool for properly matching
the different gains of various microphones to your console and achieving the
best signal-to-noise ratio.
22
22))
))
PP
PPaa
aarr
rraa
aamm
mmee
eett
ttrr
rrii
iicc
cc
CC
CChh
hhaa
aann
nnnn
nnee
eell
ll
EE
EEqq
qquu
uuii
iill
llii
iizz
zzee
eerr
rr
* The channel (parametric) equalizer on the MX2488 console is a very
precise tone control. The top control is the high frequency (treble) control, the
midrange control is in the center and the low frequency or (bass) is at the bottom
of this array. How tone controls work is basically similar to a volume control. The
difference being that a tone control litterally controls the volume of a specified
frequency range. So, when you are "Boosting" or "Cutting" with a tone control
you are litterally changing the volume of those frequencies at whatever their
range is defined to be. The general high, mid, and low frequency ranges of the
MX2488 are:
SS
SSEE
EECC
CCTT
TTII
IIOO
OONN
NN
##
##33
33--
--44
44
HH
HHii
iigg
gghh
hh
FF
FFrr
rree
eeqq
qq - 1kHz to 16kHz
MM
MMii
iidd
dd
FF
FFrr
rree
eeqq
qq
- 200Hz to 4kHz
LL
LLoo
ooww
ww
FF
FFrr
rree
eeqq
qq
- 40Hz to 800Hz
With a "Parametric" equalizer such as included in the MX2488 a small band
of frequencies within the range of the specific filter (high, mid or low) are able
to be adjusted, This means that you have the ability to "zero in" on a particular
frequency within a particular band and boost or cut its volume. For example, if
you wished to boost the volume of a frequency centered at 2kHz, you would use the
midrange control. Using the midrange "Frequency control adjustment" (lower
knob) you would rotate it to the "2k" setting. Then you would use the upper knob,
rotating it clockwise until the desired boost at that frequenct is attained. (Counter-
clockwise from the center detent position would produce a "cut" or lowered
volume at that frequency).
Using a parametric equalizer is quite easy and gives excellent control over
the tone of the various instruments. It is good to note that radical adjustments of
your tone controls should never have to be made. Usually these controls are used
as a means of compensating the response of the various microphones in order to
achieve the most natural response of the instuments you are mixing.
In the upper right of the EQ section you will find an EQ/Bypass switch. This
switch allows you to remove the (3) band parametric equalizer from the signal
path in a channel. It is an excellent tool to use when determining how little, or
how much equalization has been added to a particular instrument (when
compared to its non-equalized sound). And, if you find that a particular
instrument requires no equalization you may simply remove the equalizer from
the circuit by leaving the switch in the "Up" position.
NN
NNoo
oott
ttee
ee::
::
If you determine that no equalization is necessary it is prefered to
bypass the equalizer, thus ensuring the most direct signal path
and best overall signal-to-noise performance.

1-10
Experimentation with the parametric equalizer will help to familiarize you
with the various frequency centers and find which settings are most effective for
various instruments. The ablility of the parametric equalizer to "zero" in on the
exact frequency ranges of different instruments makes this control a very
effective tool in achieving the most natural sound possible from various
instruments. Familiarizing yourself with the parameters of this control and your
ability to make an instrument sound as natural as possible is part of the overall
art of professional sound mixing and recording.
44
44))
))
CC
CCuu
uuee
ee
&&
&&
EE
EEff
ffff
ffee
eecc
cctt
ttss
ss
SS
SSee
eenn
nndd
ddss
ss
* The Cue and Effects controls provide for separate echo, effects, or
monitor mixes. Either the (2) Cue sends or (2) Effects sends may be selected pre or
post channel fader. Both the "Cue" and "Effects" sends are always post EQ. (This
means that regardless of the pre/post switch setting, the equalizer will always
affect these sends.) Although the MX2488 uses the nomenclature "Cue" and
"Effects," many other names also describe these features. They are sometimes
called "Busses, Foldback, Echo or Monitor" sends. Although any of these names are
perfectly appropriate, the MX2488 uses "Cue" and "Effects" for simplicity and ease
of set-up. Usually the "Cue" sends will be used for headphone (Cues), and the
"Effects" sends will be used to send channel signals to various signal processing
devices (Effects).
SS
SSEE
EECC
CCTT
TTOO
OONN
NN
##
##33
33--
--55
55
*Usually the "Cue" sends will be selected to the pre fader setting. This
allows the Cue sends to work independently of the channel fader. This send is
then fed to the headphone or monitor amplifiers for subsequent amplification. An
adjustment of a Cue control on each channel will alter the relative amount of
volume that channel will send to its cooresponding main monitor output. (See
Effects Master Strip "Send Masters"). If you are operating a stereo headphone mix
you will have to use both Cue sends. Cue #1 would be dedicated to the Left and Cue
#2 would be the right sends. Varying the volumes of these controls with respect to
each other will deliver a stereo output. If you are using the Cue sends for live
stage monitor feeds it is recommended that you use caution when turning up or
down monitors during a live performance. Stage monitors are typically right next
to the microphones and as such are usually most susceptible to feedback. It will
take a certain amount of "feel" for addressing the proper monitor mix, however,
experimentation and practice are again the key to obtain the most consistent
results for professional performances.
* The "Effects Sends" (although selectable to either pre or post fader)
are usually selected to the "post" fader setting. This means that when the channel
fader is off, so are the effects controls. This is done because the control is usually
normalized to a signal processing effect such as reverb, delay, harmonizer, etc.,
and the effect should vary in intensity with alterations of the channel volume.
The best way to set this control would be to start at a mid setting (appx. 5 on the
control) and adjust the cooresponding effects send control to drive a healthy
signal to the input of effect. (The output of the effect will subsequently be
returned to the console using the effects return controls on the Effects Master
strip). So, any boosting or cutting of the effects control will now vary the
intensity of the signal to the effect.
Be sure not to drive the effects input too hard
with these controls as channel volume changes will affect the output levels preset
by these controls.

1-11
55
55))
))
CC
CChh
hhaa
aann
nnnn
nnee
eell
ll
PP
PPaa
aann
nn
&&
&&
AA
AAss
ssss
ssii
iigg
ggnn
nn
GG
GGrr
rroo
oouu
uupp
pp
* This section of the input channel is used to route the signals
appearing at the channels to the respective outputs of the console. The "Pan"
control is used as an odd/even control to route signals in paires to the outputs. For
example, if the (1-2) assignment switch is depressed and the "Pan" control is
panned fully to the left, the channel signal will appear only at output #1. If the
"Pan" control is panned tatally right the channel signal will appear only at
output #2 of the console. Plus, any variation of level between output channels #1
and #2 may be achieved by panning between these outputs. The channel
assignment switches and the pan control will allow you to route any channel to
any output of the console as well as directly to the 2-Track Master outputs (for
stereo mixdown). The Pan control is termed an "odd/even" control since panning
fully to the left will allow assignment of all the odd numbered output channels,
and panning fully to the right will yield all the even numbered output channels.
SS
SSEE
EECC
CCTT
TTII
IIOO
OONN
NN
##
##33
33--
--66
66
6) Channel Mute Switch
* The channel mute switch allows the operator to totally remove the
channel from the system including eliminating signals to the Cue and Effects, and
Direct Output sends. But, more often it is used to audition individual channels or
groups of channels including their respective effects levels (exactly as they
appear in the mix). It allows the operator to mix groups of channels and preview
them exactly as they appear in the mix by eliminating all channels the operator
does not want to hear. This allows the operator to listen to the relative stereo
positioning of different channels cot muted, amounts of reverb, delay or
additional effects, and add additional channels (by releasing their "mute"
switches) to the mix one at a time. It is a very useful tool for fine tuning and
auditioning prior to a performance or a mix. A green LED will light just above the
Mute switch when it is selected, indicating that the channel is muted.
77
77))
))
CC
CChh
hhaa
aann
nnnn
nnee
eell
ll
SS
SSoo
ooll
lloo
oo
SS
SSww
wwii
iitt
ttcc
cchh
hh
* The channel solo switch allows you to audition each channel in the
headphones or control room without affecting the main mix. What this means is
that by depressing this switch you will be able hear only that particular channel
in the control room monitors or headphones even though you may be using
several inputs on your console. This is an extremely useful feature allowing you
to fine tune your mix during a performance. By being able to listen to a particular
channel inpervious to the rest of the channels you are able to focus your
attection specifically to the details of that channel. You may depress one or more
solo switches in order to hear relative levels of different channels as well. This
allows you to listen to how well different channels are blending and make
adjustments to their relative levels during a mix. Regardless of what is selected at
the control room section of the console, when any solo switch is depressed only
the "soloed" signal will be heard in the control room monitors. Also, the solo
switch has a separate "Solo Level" control located on the System Master Strip of
the console. This will allow you to adjust the level of the "soloed" signal in the

1-12
control room monitors. Whenever a channel is "soloed" a green LED just above the
switch will light to indicate the solo switch has been depressed. Also, a green LED
will light at the System Master Srip "Control Room Group" to indicate that a soloed
channel is appearing at the control room group.
88
88))
))
PP
PPee
eeaa
aakk
kk
WW
WWaa
aarr
rrnn
nnii
iinn
nngg
gg
LL
LLii
iigg
gghh
hhtt
tt
* The channel "Peak LED" illuminates whenever signal peaks come
within 6dB of clipping any stage in the input channel. This light is used to warn
the operator whenever signals are becoming too strong and will distort within
the console. Whenever you see the Peak LED flashing you should rotate the input
gain control (See #2) counter-clockwise until the LED just stops flashing. The
Peak indicator will light when any level is too strong on the channel. Whether
the signal is too strong at the input, the output of the equalizer, or the ouptut of
the channel fader, It will indicate any overloads. This indicator along with the
Gain control work hand-in-hand as a first step in setting up the input gain of the
console for a mix . Proper use of the gain control and peak LED will deliver the
best overall quietness and performance from the console.
SS
SSEE
EECC
CCTT
TTII
IIOO
OONN
NN
##
##33
33--
--77
77
99
99))
))
CC
CChh
hhaa
aann
nnnn
nnee
eell
ll
FF
FFaa
aadd
ddee
eerr
rr
* The Channel Fader controls the volume of each channel. It provides
a smooth travel and dB calibrated attenuation of channel signals. A proper setting
of the channel fader would be between "-5" and "+8" on the calibrated fader
markings. This means that usually you will be operating your channel faders
quite high when compared to your Master Output Faders. Doing this will assure
you the most quiet performance and best overall sound from your console.
Although each channel fader incorporates integral dust & dirt seals, it is best to
try and keep them as clean as possible for highest reliability.
SS
SSEE
EECC
CCTT
TTII
IIOO
OONN
NN
##
##33
33--
--88
88
GG
GGEE
EETT
TTTT
TTII
IINN
NNGG
GG
TT
TTOO
OO
KK
KKNN
NNOO
OOWW
WW
TT
TTHH
HHEE
EE
FF
FFEE
EEAA
AATT
TTUU
UURR
RREE
EESS
SS
OO
OOFF
FF
TT
TTHH
HHEE
EE
MM
MMXX
XX22
2244
4488
8888
88
CC
CCOO
OONN
NNSS
SSOO
OOLL
LLEE
EE
FF
FFRR
RROO
OONN
NNTT
TT
PP
PPAA
AANN
NNEE
EELL
LL
CC
CCOO
OONN
NNTT
TTRR
RROO
OOLL
LLSS
SS
**
****
****
**EE
EEFF
FFFF
FFEE
EECC
CCTT
TTSS
SS
MM
MMAA
AASS
SSTT
TTEE
EERR
RR
SS
SSTT
TTRR
RRII
IIPP
PP**
****
****
**
1) Send Master Section
* After each of the MX2488's channel (Cue) and (Effects) controls have
been set, each of these signals are electronically summed. (i.e. All channel CUE #1
channel controls are summed together at the CUE #1 Master Output). The Send
Master controls then adjust the overall output level for these four signals. Each of
the channels "Cue" and "Effects" sends are adjusted relative to each other. This

1-13
allows individual channels to send more or less signal depending upon their "Cue"
or "Effects" settings (in relation to other channels). These "Relative" signals are
then electronically summed (maintaining their relative volume differences) at
the "Send Master" controls. The Send Master controls then adjust the overall
signal level to drive either a signal processing device or amplifier.
NN
NNoo
oott
ttee
ee::
::
Usually the send master controls will be set at around (5)
when setting up the Cue and Effects levels. This allows for
adequate signal levels to monitor your changes. More finite
chnanges for matching input signal levels to drive signal
processing devices or amplifiers may be made later.
2) Effects Return Groups
* "EFF RTN A" and "EFF RTN B" are identival. Each return group
provides for adjusting the volume level of an effecet as it is returned to the main
output, monitor, or (2) Track mix. The assignment switches allow the effect to be
routed toany output or combination of outputs as deemed necessary. Each Effects
Return group also provides a way to "Pan" a particular effect or combination of
effects within the stereo field of the (2) Track outputs, or any of the Main Outputs.
And, each return group may be "Soloed" in order to monitor the signal quality and
intensity of the effect signal as it relates to the mix.
The Effects Return groups are a versitile tool for returning effects signals.
For instance, if you are overdubbing vocals and wigh to record the vocal tracks
dry (without reverb), but the vocalist requires reverb in the headphone mix as a
reference, you would simply depress the "Cue" switch at the top of the stack of
switches, and adjust the volume leveland Pan the returned "reverb" effect as
desired in the headphone mix. This will leave the print (record) mix unaffected,
allowing you to adjust the amount and quality of reverb later during mixdown.
NN
NNoo
oott
ttee
ee::
::
If you have an effect that requires equalization, or if you
have more effects than the (2) Effects Returns can
accomidate, you may utilize an unused channel as an
effects return. Simply insert the output of your effect
into the "Line In" on the channel gyou will be returning your
effect to, adjust the proper input level using the "Gain"
control, and assign the effect to any of the outputs using the
channel assignment switches & Pan control. You may also
interconnect effects to the "Cue" busses by opening this
control. However, be careful not to return output signals
of an effect tto busses already dedicated to sending signal
to the effect. This could cause a "loop" resulting in
feedback or electronic ocillation!
33
33))
))
22
22
TT
TTrr
rraa
aacc
cckk
kk
MM
MMaa
aass
sstt
ttee
eerr
rr
FF
FFaa
aadd
ddee
eerr
rrss
ss
* These faders are close spaced to allow for easy operation of both
faders with one finger. They set the level of the 2-Track output signals. Usually
the best operating parameters for your "Master Controls" are from -20 to -3 on the
calibrated fader markings, (normally set lower than channel fader settings). This
will provide for the most quiet mix, minimizing background electronic hiss. The
2-Track Master outputs are an important and well used feature in any studio or
live performance situation. You will mainly be monitoring the 2-Track outputs in

1-14
the control room during a mix, (requiring the faders to be up). All the 2-Track
interconnects as well as all the channels are assignable to the 2-Track Master
Outputs, and the 2-Track Master outputs are usually normalized to your 2-track
tape deck for mixdown. In a live situation the 2-Track outputs may be used to drive
the main system. So, it is a good idea to experiment with the 2-Track Master Faders
to determine their best operating parameters for your application, getting a feel
for levels to your 2-track tape deck and control room.
SS
SSEE
EECC
CCTT
TTII
IIOO
OONN
NN
##
##33
33--
--11
1100
00
GG
GGEE
EETT
TTTT
TTII
IINN
NNGG
GG
TT
TTOO
OO
KK
KKNN
NNOO
OOWW
WW
TT
TTHH
HHEE
EE
FF
FFEE
EEAA
AATT
TTUU
UURR
RREE
EESS
SS
OO
OOFF
FF
TT
TTHH
HHEE
EE
MM
MMXX
XX22
2244
4488
8888
88
CC
CCOO
OONN
NNSS
SSOO
OOLL
LLEE
EE
FF
FFRR
RROO
OONN
NNTT
TT
PP
PPAA
AANN
NNEE
EELL
LL
CC
CCOO
OONN
NNTT
TTRR
RROO
OOLL
LLSS
SS
**
****
****
**SS
SSYY
YYSS
SSTT
TTEE
EEMM
MM
MM
MMAA
AASS
SSTT
TTEE
EERR
RR
SS
SSTT
TTRR
RRII
IIPP
PP**
****
****
**
11
11))
))
PP
PPhh
hhaa
aann
nntt
ttoo
oomm
mm
PP
PPoo
ooww
wwee
eerr
rr
SS
SSww
wwii
iitt
ttcc
cchh
hh
* The Phantom Power switch (when depressed) will provide +48V D.C.
voltage to pins #2 and #3 on the mic inputs of your console. This voltage is
required to operate condenser type microphones. Without Phantom Power you
simply would not be able to use these types of microphones with your console,
unless you purchased a special outside "Phantom" power supply.
NN
NNoo
oott
ttee
ee::
::
If most of your microphones are dynamic (not requiring
phantom power) and you are operating several condenser
type mics, you will need to depress the phantom power
switch. This will not affect the dynamic microphones
operation or reliability.
NN
NNoo
oott
ttee
ee::
::
Before using the Phantom Power switch with wireless
microphones, check to be sure your (reciever unit)
is tolerant of phantom power. It is best to consult
with the microphone's manufacturer to be absolutely
certain.
* Directly next the Phantom Power switch is a small BNC connector
labled (6 volt). This is a recepticle for a BNC style "Little Lite". This small 6 volt
light is used to provide some illumination to your console when it may be used in
the dark or dimly lit areas. It operated on 6 volts and provides an excellent source
of light. It may be positioned to see back panel connections or front panel
controls in dimly lit areas. The mini-light is offered by Carvin & may be
purchased for $25.00 dollars. (Model #G-12)
22
22))
))
MM
MMee
eett
ttee
eerr
rr
FF
FFuu
uunn
nncc
cctt
ttii
iioo
oonn
nn
SS
SSww
wwii
iitt
ttcc
cchh
hhee
eess
ss
* The eight VU meters on the MX2488 normally monitor the output
levels from the eight output channels of the console. By depressing the "Cue"
meter function switch, the VU meters (Assigned to output channels #5 & #6) will
meter the Cue #1 and #2 output signals. This will give you an instant ready
reference to the output lovels of your Cue sends. If you depress the (L-R) switch,

1-15
VU meters (#7 & #8) will indicate the output levels of the 2-Track Master Sends.
33
33))
))
SS
SStt
ttuu
uudd
ddii
iioo
oo
SS
SSee
eell
llee
eecc
cctt
tt
GG
GGrr
rroo
oouu
uupp
pp
* In addition to the Control Room, 2-Track, Main Output, Cue, and
Effects mixes, you also have a "Studio Mix." This is a Master output that may select
various signals (identical to the control room) to feed the studio. It is extrimely
useful for playing back a mix to the studio monitors. The Studio Sends are "Pre-
amp" sends normally connected to an amplifier dedicated to driving the studio
monitor speakers. For instance, you may wish to playvack a "Demo" tape to the
musicians in the studio (prior to recording) for a reminder or reference to tempo
and style of music to be recorded. The Studio feed may also be different than the
Control Room feed. So, you could be playing back a tape to the studio while
perfoming a mixdown in the control room. This saves time and greatly increases
the efficiency of the studio. The Studio Select Group will allow you to select 2-
Track Effects signals. In a production studio the "Studio Feed" is essensial and a
real time saver.
44
44))
))
TT
TTaa
aall
llkk
kkbb
bbaa
aacc
cckk
kk
SS
SSee
eecc
cctt
ttii
iioo
oonn
nn
* The talkback section of the MX2488 console will allow you to feed
talkback audio to the Cue Outputs, Studio Outputs, Effects Outputs, and Slate (all
Main Outputs). A built in condenser microphone & volume control will allow you
to speak directly to any one , or combination of each of the busses, and vary the
amount of signal sent to them. Whenever a talkback weitch is depressed the
volume in the control room monitors will drop. This eliminates feedback from the
talkback mic in the control room.
* The Cue talkback switch is very useful for speaking to performers
through their headphones. Usually Cue #1 and #2 sends will be dedicated to the
headphones. In a live situation, the Cue talkback switch will allow you to speak
through the stage monitors for cueing on stage performances.
* The studio talkback switch will allow you to cue musicians in the
studio through the studio speakers or monitors.
* The talkback select to the Effects sends may be used to verify signals
connected to various effects, or for slating recorded effects tracks.
* The "Slate" switch feeds a talkback signal to all of the Main Outputs of
the MX2488. This feature is usually used to Cue tapes or for audio labeling of each
recording.
55
55))
))
CC
CCoo
oonn
nntt
ttrr
rroo
ooll
ll
RR
RRoo
oooo
oomm
mm
GG
GGrr
rroo
oouu
uupp
pp
* At the top of this group you will find the Master Solo "Green" LED and
"Solo Level" control. (See Front Panel Controls - Input Channels - #7). Whenever
any solo switch on the mixing console is depressed the Master Solo LED will
illuminate to indicate that you are listening to a solo or group of solo signals. The
Solo Level control will allow you to adjust the level of soloed signals in the control
room monitors.

1-16
* The control room "select" switches directly below the Solo Level
control will allow you to access the signals appearing at the (2) Track Outputs, (2)
Track Playback (Inputs), Cue Outputs, and Effects Outputs connections at the rear
panel of the console. By depressing any of these switches, or groups of switches,
their signals will be fed to the control room outputs (after adjustment by the
Control Room Faders) for subsequent amplification to the control room monitors.
* The (Stereo/Mono) switch when depressed will change the control
room monitors from stereo to monaural operation. This allows for phase checks of
various multiple microphone mixes, or for monaural monitoring. This switch is
very useful in checking the phase coherency of a mix, or relative differences in
stereo placement as it relates to mono.
SS
SSEE
EECC
CCTT
TTII
IIOO
OONN
NN
##
##33
33--
--11
1122
22
66
66))
))
CC
CCoo
oonn
nntt
ttrr
rroo
ooll
ll
RR
RRoo
oooo
oomm
mm
FF
FFaa
aadd
ddee
eerr
rrss
ss
* The control room faders (like the 2-Track Master Faders) are a close
spaved pair for ease of simultaneous operation. After a particular output is
selected for auditioning in the control room monitors, the Control Room Faders
will adjust the overall volume level. So, if you were monitoring the 2-Track Master
Outputs, you would first adjust for nominal levels using the 2-Track Master faders.
Then you would depress the (2-TRK) switch in the control room group and raise
the Control Room Faders until the desired volume in the control room monitors is
achieved.
SS
SSEE
EECC
CCTT
TTII
IIOO
OONN
NN
##
##33
33--
--11
1133
33
GG
GGEE
EETT
TTTT
TTII
IINN
NNGG
GG
TT
TTOO
OO
KK
KKNN
NNOO
OOWW
WW
TT
TTHH
HHEE
EE
FF
FFEE
EEAA
AATT
TTUU
UURR
RREE
EESS
SS
OO
OOFF
FF
TT
TTHH
HHEE
EE
MM
MMXX
XX22
2244
4488
8888
88
CC
CCOO
OONN
NNSS
SSOO
OOLL
LLEE
EE
FF
FFRR
RROO
OONN
NNTT
TT
PP
PPAA
AANN
NNEE
EELL
LL
CC
CCOO
OONN
NNTT
TTRR
RROO
OOLL
LLSS
SS
**
****
****
**OO
OOUU
UUTT
TTPP
PPUU
UUTT
TT
CC
CCHH
HHAA
AANN
NNNN
NNEE
EELL
LL
((
((XX
XX88
88))
))**
****
****
**
11
11))
))
CC
CCuu
uuee
ee
aa
aann
nndd
dd
EE
EEff
ffff
ffee
eecc
cctt
ttss
ss
SS
SSee
eenn
nndd
ddss
ss
* The Cue and Effects sends on each of the output channels allow
signals to be sent to the four auxiliary mixes (Cue #1, Cue #2 Eff #1 & Eff #2) from
each of the output channels. Each pair of Cue and Effects sends also feature a
Pre/Post fader switch. This switch will select whether the output signal will be
picked up before or after the output channel fader.
NN
NNoo
oott
ttee
ee::
::
The "
Pre
-Fader" position selects the signal prior to
the output channel fader. When the switch is
selected to "
Post
-Fader" the signal is selected after
the output channel fader, but before the 2-Track
Level Monitor fader. This means that in order to
monitor playback signals from the multi-track
tape deck to the Cue & Effects busses you will have
to select the "Post-Fader" position on these switches.

1-17
The most common use of monitoring the busses with the
multi-track tape deck is playback with overdubbing. (See
"Overdubbing", Section #4).
There are several applications for using this "monitor" feature on the
MX2488. The following should help outline some of these uses;
* When the Cue or Effects busses are selected "Pre" fader they may be
used to send sub-grouped signals to on stage monitors or to headphone feeds. For
example, if you had a drum mix sub-grouped (mixed) to two output channels, you
could use the Cue outputs (Pre-Fader) to send the signal to the stage monitors, or to
a headphone mix during a recording. This greatly simplifys the monitor or
headphone "Cue" mix.
* When the Cue or Effects busses are selected "Post" fader they may be
used as effects sends for the output channels. If you had several channels sub-
grouped to one or two output channels you could use the output effects buss to
send that signal to an effect directly from the sub-group. Without this feature you
would have to adjust several "Effects" controls on several channels. This greatly
simplifys adding effects to sub-grouped mixes.
* Having this "monitor" capability from the output of the multi-track
playback allows you to interconnect the playback signals with the Cues for
overdubbing. It also allows for easy connection to add effects to multi-track
playback signals for rough mixes. (See section #4 "Overdubbing")
SS
SSEE
EECC
CCTT
TTII
IIOO
OONN
NN
##
##33
33--
--11
1144
44
22
22))
))
TT
TTaa
aapp
ppee
ee
SS
SSww
wwii
iitt
ttcc
cchh
hh
* Depressing this switch will route the multi-track tape playback's to
the 2-Track monitor section for rough mixes, quick playback of multi-track tapes,
and monitoring for overdubs. (See "Overdubbing" Section #4). Normally the
outputs of the multi-track tape deck will be connected to the "Line Inputs" of
channels #1 through #8. Depressing the "Tape" switches will access the multi-
track outputs for playback through the 2-Track Master Outputs. The (8) output VU
meters will accurately meter the outputs of your multi-track deck for level setting
during a rough mix. Depressing the "Tape" switch also causes the 2-Track fader,
Pan and VU meter to be fed from the tape playback source. Whenever the "Tape"
switch is depressed you will be making the tape playback signal available for all
functions at the 2-Track monitor section of the console. So, monitoring busses,
rough mixes to the 2-Track, and level settings to the 2-Track can be made with
ease.
NN
NNoo
oott
ttee
ee::
::
The tape switches will not affect the output channel
levels. So, your print mix levels (including channel
levels) should never have to be disturbed. This allows
you to fine tune a mix, accurately match overdub
levels, and do rough mixdowns without affecting
the overall print mix. They should save you a considerable
amoumt of time and will probably become a very often
used feature in your production studio.
33
33))
))
22
22--
--TT
TTrr
rraa
aacc
cckk
kk
MM
MMoo
oonn
nnii
iitt
ttoo
oorr
rr
PP
PPaa
aann
nn
aa
aann
nndd
dd
FF
FFaa
aadd
ddee
eerr
rr
* The 2-Track "Pan" and "Fader" controls make up an important part of

1-18
the control room monitor section of the MX2488 console. They provide a means of
routing the output channel signals to the 2-Track Master faders as well as
"Panning" the output channel signal within the stereo field of the 2-Track mix.
During a recording you will usually set up your print (record) levels to your tape
deck with the Output Channel Faders. After you have achieved proper levels to
your multi-track deck you should not need to adjust these controls any further. In
order to then monitor the signals in the control room, you will raise the 2-Track
Monitor faders to achieve the proper volume level (relative to the other signal
levels) in the contol room monitors. And, using the 2-Track Monitor "Pan" control
you will place the output signals within the proper stereo field of the 2-Track mix.
This allows you to perform a rough 2-Track mix for monitoring in the control
room.
* After recording the basic tracks, you will want to listen to them. So,
by depressing the "Tape" switches, the multi-track outputs are routed to the 2-
Track Monitor faders for subsequent listening and adjustments. The outputs of the
tape deck will match the recording levels. So, when the "Tape" switches are
depressed you will be listening to the exact rough 2-Track mix levels you
previously set-up during the recording of the basic tracks. You may make
alterations inthe levels, change the stereo fields, or even make a rough mixdown
using the 2-Track Monitor faders, without affecting your original print mix.
These controls will have no effect on signals going to tape exvept when doing 2-
Track "Rough" mixdowns.
NN
NNoo
oott
ttee
ee::
::
When doing final mixdowns you will probalbly route the
outputs of your multi-track tape deck through input channels
#1 through #8. This provides for additional equilization
of the playback signals as well as the ability to add
additional effects. These signals will then be routed
directly to the 2-Track Master Faders using the (L-R)
assignment switches, bypassing the 2-Track Monitor
faders.
SS
SSEE
EECC
CCTT
TTII
IIOO
OONN
NN
##
##33
33--
--11
1155
55
44
44))
))
SS
SSuu
uubb
bb
MM
MMuu
uutt
ttee
ee
SS
SSww
wwii
iitt
ttcc
cchh
hh
* When the Sub Mute switch is depressed the output channel is
removed entirely from the system. This includes any signals routed to the Cue and
Effects monitor. However, the "Tape" switch function is not affected by tfeh mute
switch. This switch allows you to completely mute an output channel and prevent
it from sending a signal to the multi-track tape deck. But, you may monitor the
outputs of the multi-track. So, if you have printed a particular track, you may
wish to mute the consoles output to that track in order to assure you do not print
over previously recorded material. The mute switch may also be used to listen to
selected sub-grouped mixes (prior to recording basic tracks) for properly
adjusting volume and effects levels.
55
55 ))
))
SS
SSuu
uubb
bb
SS
SSoo
ooll
lloo
oo
SS
SSww
wwii
iitt
ttcc
cchh
hh
* Depressing the output channel "Solo" switch output channel to be
soloed in the control room monitors. The solo switch allows you to solo the output
signals from the multi-track tape deck, or the output channel signals. It is an
excellent feature in identifying sub-group tracks and monitoring combinations
of sub-groups for fine tuning a mix. (See "Solo" function in section #3-Input
Channel).

1-19
66
66 ))
))
OO
OOuu
uutt
ttpp
ppuu
uutt
tt
CC
CChh
hhaa
aann
nnnn
nnee
eell
ll
FF
FFaa
aadd
ddee
eerr
rr
* The output channel fader is always fed from the channels regardless
of the position of the "Tape" switch. This fader is dedicated to adjusting the print
(record) levels to the multi-track recorder. The output of this fader also feeds the
2-Track monitor section of the console for rough control room 2-Track mixing.
This fader is usually operatedlower than the channel faders. The normal settings
are around -20 to -3 on the calibrated fader markings. Adjustments of this fader
are metered by the (8) main VU meters. It is also advisable to check the VU levels
on your tape deck to be sure they are properly calibrated, assuring that you are
not overdriving your multi-track tape deck.
SS
SSEE
EECC
CCTT
TTII
IIOO
OONN
NN
##
##33
33--
--11
1166
66
GG
GGEE
EETT
TTTT
TTII
IINN
NNGG
GG
TT
TTOO
OO
KK
KKNN
NNOO
OOWW
WW
TT
TTHH
HHEE
EE
FF
FFEE
EEAA
AATT
TTUU
UURR
RREE
EESS
SS
OO
OOFF
FF
TT
TTHH
HHEE
EE
MM
MMXX
XX22
2244
4488
8888
88
CC
CCOO
OONN
NNSS
SSOO
OOLL
LLEE
EE
**
****
****
**RR
RREE
EEAA
AARR
RR
PP
PPAA
AANN
NNEE
EELL
LL
CC
CCOO
OONN
NNNN
NNEE
EECC
CCTT
TTII
IIOO
OONN
NNSS
SS**
****
****
**
11
11))
))
LL
LLii
iinn
nnee
ee
II
IInn
nnpp
ppuu
uutt
tt
JJ
JJaa
aacc
cckk
kk
* This jack is a "Line Input" or pre-amp input connection. It is
designed to accept signals normally too strong for the mic input. (See Section #3-
Mic/Line Switch). Line lwvel (pre-amp) siganls are tupically from 200 millivolts
to 2 volts. These inputs will accept signals form any line level source including
tape deck outputs, signal processing devices, keyboard or instrument amplifier
outputs. The input utilizes a single ended 1/4" phone plug connection. Most
cassette tape decks and other line sources may use a DIN type RCA phono plug
connector. This may require the use of an adaptor or special wired cord to plug
the outputs of your tape deck into this input. However, this is perfectly
acceptable.
NN
NNoo
oott
ttee
ee::
::
"Line Inputs" of channnels #1 through #8 are internally
connected to the 2-Track Interconnect section at the output
channels of the console. These "Line Inputs" are normally
connected to the outputs of the multi-track tape deck for
quick playback, rough 2-Track mixing and overdubbing.
These inputs may be accessed for playback by depressing the
"Tape" seitches at the output section of the console. The
playback signals may be manipulated and rough mixed using
the 2-Track Level faders directly above the Output Channel
Faders. Depressing the Mic/Line switches on the channels will
direct the multi-track outputs through channel #1 through #8
input channels for final mixdowns.
SS
SSEE
EECC
CCTT
TTII
IIOO
OONN
NN
##
##33
33--
--11
1177
77
22
22))
))
MM
MMii
iicc
cc
II
IInn
nnpp
ppuu
uutt
tt
CC
CCoo
oonn
nnnn
nnee
eecc
cctt
ttoo
oorr
rr

1-20
* This is an input with far greater sensitivity than the "Line Input".
Line Inputs typically accomodate input voltages of 200 millivolts to 2 volts,
whereas Mic Inputs will accomodate input signals of 10 to 100 millivolts. This
input is sometimes called a "High gain" input, because It is designed to amplify
low level signals. There are two main differences between a Mic and Line input.
This is why this input connector (XLR type) looks much different than the Line
Input connection (1/4" phone plug type).
AA
AA ))
)) The "XLR" type input connection is designed for low impedance,
balanced signals. Low impedance simply means lower resistance to A.C. current
sent from the microphone. Low imimpedance mic's by definition offer very little
resistance to A.C. current allowing very long mic cables without significant
signal loss. The fact that low impedance cable runs produce very little line losses
makes this type of input especially well suited to long mic cable runs, snakes, or
mic cord extensions.
BB
BB ))
)) The input is "Balanced". This term works closely in hand with the
term "Common Mode Rejection" for the mic input of your console. As a low level
signal is transmitted down a wire to the Mic input of your console there is a good
chance that extraneous voltages such as 60Hz power line sources could be injected
into the cable, and later amplified by the console. What balancing does is
eliminate much of this "Stray field" by cancelling it at the input of the console.
This is called "Common Mode Rejection", and allows for long mic cable runs
without the risk of picking up significant hum or other extraneous signals.
Balanced cables feature (3) wires: a ground wire, in-phase wire, and out-of-phase
wire. When the in-phase and out-of-phase signals are summed at the input of the
console the extraneous noise is rejected, or cancelled. The amount of this rejection
is expressed as "Common Mode Rejection". So, balanced cables offer the lowest
possible hum and noise when running long cables.
* Microphone cables are always "Shielded". This means that the signal
wire within the mic cord is surrounded by tightly braided or solid "Ground" or
shield wire. This is done so that any potential injected signals (stray field) must
first pass through the ground wire prior to affecting the signal wire at the center
of the cable. Mic level and pre-amp level cables should always be shielded for the
lowest possible noise.
SS
SSEE
EECC
CCTT
TTII
IIOO
OONN
NN
##
##33
33--
--11
1188
88
* By this time you should be deducing that a "Balanced, Low
Impedance" mic is the best to use with this input. With a properly shielded cord, it
will provide the best overall performance and lowest possible noise.
33
33))
))
CC
CChh
hhaa
aann
nnnn
nnee
eell
ll
DD
DDii
iirr
rree
eecc
cctt
tt
OO
OOuu
uutt
ttpp
ppuu
uutt
tt
* This is a post fader direct output featured on each channel. It may be
used as a direct input to a multi-track tape recorder, Auxiliary Effects send, a Cue
send, etc. If you have assigned a channel to one of the output channels you may
still utilize the direct output. This allows the output to be used as an auxiliary send
controlled by the Channel Fader, because the channel will feed the Output
Channels and the Direct Output simultaneously. Another way to assign a channel
to the multi-track tape recorder would be to use the channel direct outputs. The
Other manuals for MX2488
1
Table of contents
Other CARVIN Music Mixer manuals

CARVIN
CARVIN C3248 User manual

CARVIN
CARVIN C3248 User manual

CARVIN
CARVIN XP650 User manual

CARVIN
CARVIN XP800L User manual

CARVIN
CARVIN CX1272 User manual

CARVIN
CARVIN M600 User manual

CARVIN
CARVIN PA410 User manual

CARVIN
CARVIN CX1252 User manual

CARVIN
CARVIN SL User manual

CARVIN
CARVIN DXMIXER User manual

CARVIN
CARVIN S16 User manual

CARVIN
CARVIN C1240 User manual

CARVIN
CARVIN C1644(P User manual

CARVIN
CARVIN C1648 User manual

CARVIN
CARVIN XP800L User manual

CARVIN
CARVIN C1600 User manual

CARVIN
CARVIN XP880 User manual

CARVIN
CARVIN STUDIO MATE SM162 User manual

CARVIN
CARVIN RX 1200 User manual

CARVIN
CARVIN XP1000L User manual