manuals.online logo
Brands
  1. Home
  2. •
  3. Brands
  4. •
  5. Casablanca
  6. •
  7. Fan
  8. •
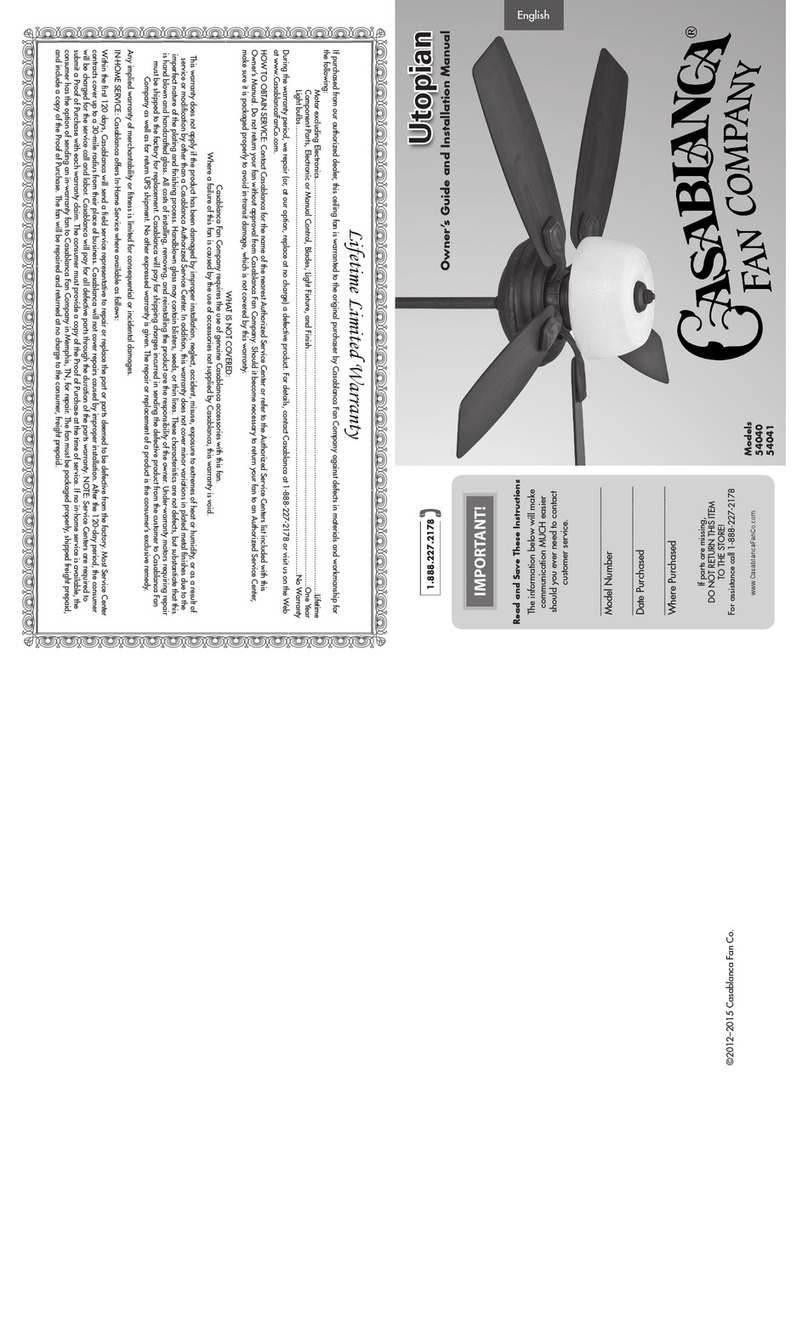
  9. Casablanca Expression User manual

Casablanca Expression User manual

Casablanca Fan Co. - Factory Service Department - Technical Library
VII - 7.30
1906730 Capacitor5uf250WVac X X
1906740 Capacitor1/2W330R5.5uf XXX X X
1906750 Capacitor4.5uf350V50/60h2 X X X
7801250 ReverseSlideSwitchAssy X X
1937210 3 SpeedPullChainSwitch X X
1937220 3 SpeedPullChainSwitchS.S. X X X
1937180 REVERSEPullChainSwitchS.S X X X
Utopian Estrada Lanai Expression Concentra
Part# PartDescription
Howdoyouchangethe PULLCHAIN SWITCHONLY? -This isaquestionthatweareasked over andoveragain,
the information in this section of the service manual will help you. Once you have the right pull chain switch,
changing it only takes a few minutes. First remove the switch housing cup or switch housing cap from the fan
shownin Figure#1.Now youwill needtolook atthe pullchainswitch youare replacing.Matchit upwith oneyou
are going to replace it with.
Ifthe wrongswitch is used,the fanwill not operateproperly.The problemwillbe thatyou willhaveTWO medium
speeds.If youhavethis problemafterchanging theswitch, most likelyyou haveinstalledthe wrongswitch.Most
fans with a spinner motor using this type of switch housing cup, use two capacitors together to get the second
speed.For moreinformation onhow pullchain switcheswork andhow the speeds are controlledin threespeed
fans,refertotechnicalbulletinTB-98-30(#1a)INTERCHANGEABLE-3 SpeedPC Boards andPullChainSwitch,
dated March 30, 1998. The following steps will show you how to change the pull chain switch.
How To Change The Electronic on:
Utopian Expression
Estrada Concentra
Lanai
Expression
Casablanca Fan Co. - Factory Service Department - Technical Library
VII - 7.31
Part # 7801250
ReverseSlideSwitchAssy
UsedIn: Expression
Concentra
Part # 1906730
Capacitor 5uf 250 W Vac
UsedIn: Utopian
Estrada
Part # 1937220
3-Speed Pull Chain
Switch S.S.
UsedIn: Utopian
Estrada
Lanai
Part # 1937210
3-SpeedPullChainSwitch
UsedIn: Expression
Concentra
Part # 1906740
Capacitor 1/2 330R 5.5uf
UsedIn: Utopian
Estrada
Lanai
Expression
Concentra
Part # 1937180
Reverse Pull Chain
Switch S.S.
UsedIn: Utopian
Estrada
Lanai
Part # 1906750
Capacitor 4.5uf 350V 50/60 h2
UsedIn: Lanai
Expression
Concentra
Casablanca Fan Co. - Factory Service Department - Technical Library
VII - 7.32
Wiring Diagram and Components
PULLCHAINSWITCHREPLACEMENT
SPEEDCONTROLRUNCAPACITORREPLACEMENT
START CAPACITOR REPLACEMENT
REVERSE SWITCH REPLACEMENT
MOTOR REPLACEMENT
LIGHT SWITCH REPLACEMENT
Casablanca Fan Co. - Factory Service Department - Technical Library
VII - 7.33
Casablanca Fan Co. - Factory Service Department - Technical Library
VII - 7.34
How do you change the PULL CHAIN
SWITCHONLY? -Thisis aquestion thatwe
are asked over and over again, the informa-
tion in this section of the service manual will
help you. Once you have the right pull chain
switch,changing itonlytakes afew minutes.
First remove or open up the switch housing
on the fan shown in Figure #1. Now you will
need to look at the pull chain switch you are
replacing.Match itup withone youare going
toreplace itwith.
Step #1
Removethe knurl nutfrom thepull chainswitch
shown in Figure #2. Pull the switch out of the switch
housing cup with wire attached, as shown in Figure
#2Aand removeit fromthe switchhousing cup.
(Figure #1)
(Figure #2)
(Figure#2A) Pull Chain Switch Replacement - CONTINUED
Casablanca Fan Co. - Factory Service Department - Technical Library
VII - 7.35
Step #2
Comparetheold switch youarereplacingand thenew
one. Make sure that they are the same. Compare the
letter and numbers on the switches as shown in Fig-
ure#3.
When changing the switch you do NOT need to cut
the wires. By using a large paper clip as a tool with
both the new and old switch side by side (shown in
Figure #3A), you will be removing ONE wire from the
old switch and inserting that same wire into the new
switch.Continuetoremovethewiresfromtheoldswitch
until all wires have been inserted in to the new. The
mostimportant thingin doingthis, ismatching thelet-
terandnumbers onthebackof theswitchesas shown
inFigure #3.
Step #3
Using the letter and number on the switch as a refer-
ence, insert the paper clip into the same hole that the
wireis in.This is easilydone by placingthe paper clip
along the side of the wire as shown in Figure #4 and
pushing the clip into the hole and pulling out the wire.
NOTE:It isveryimportantwhenremovingthewirefrom
the OLD switch has shown in Figure # 4 and and in-
serting the same wire into the New switch, it is done
one at a time. Make sure that the hole position mark-
ings match on the replacement switch as shown in
Figure # 3 at the top of this page.
(Figure #3)
(Figure#3A)
(Figure #4)
Pull Chain Switch Replacement - CONTINUED
Casablanca Fan Co. - Factory Service Department - Technical Library
VII - 7.36
Once the paper clip has been inserted into the hole with
the wire (shown in Figure #5), lift up or press down on the
clip and at the same time pull out the wire removing it
from the switch as shown. Now insert the wire you just
removed from the old switch into the hole marked the
same on the New switch (shown in Figure #6). When
inserting the wire into the switch you should hear a click,
at this time pull on the wire making sure that the wire is
held tightly in the switch (shown in Figure #6). Repeat
these steps until all wires have been removed from the
old switch and inserted into the new one.
Once all the wires have been attached on to the new
switch, push the switch back into the switch housing
cupshownin Figure#7.Screwthe knurlnutbackon to
thepull chainswitch. Reinstallthe switchhousing cap
on to the fan. Now you are ready to test the fan.
Testall three(3)speeds ofthe fan bymaking surethat
you have LOW, MEDIUM AND HIGH speeds. If you
have two speeds that are the same, most likely the
wrong switch has been installed.Again look at the old
switch you removed from the fan and compare it with
the new switch.
Step #4
Step #5
(Figure #5)
(Figure #6)
(Figure #7) Pull Chain Switch Replacement - END
Casablanca Fan Co. - Factory Service Department - Technical Library
VII - 7.37
(Figure #1)
The Run Capacitor Black Box has two capacitors
built into one block as shown in (figure #1). Match the
oldblockwiththenew, thecapacitorvaluesmustbea
perfect match. If not, the first and second speeds will
not be the same as before.
Onceyouhavefoundyourreplacementblock,youwill
needto look attheleads. Someofthe wiresleadsare
tinted and some are not as shown in (figure #2A and
2B). The wires that insert into the pull chain switch as
shownin(figure#3)mustbetintedforeasyinsertion.If
they are not they will need to be tinted, only tint the
wires that are being connected to the switch.
(Figure#2A)
(Figure #2B)
(Figure #3)
Run Capacitor Replacement - CONTINUED
Casablanca Fan Co. - Factory Service Department - Technical Library
VII - 7.38
First locate both the pole chain switch can
speed control capacitor block as shown in
(figure#4).
Step #1
(Figure #4)
(Figure #5)
Run Capacitor Replacement - CONTINUED
Remove the knurl nut from the pull chain
switch shown in (figure #5).
Step #2
Removethepullchainswitchandruncapacitor
blockfromtheswitchhousingasshown(figure
#6). The run capacitor block is held into the
switchhousingbytwosidedtape.
Step #3
(Figure #6)
Casablanca Fan Co. - Factory Service Department - Technical Library
VII - 7.39
Run Capacitor Replacement - END
Locatethesecondgraywireontheoldblockthat
isconnectedtothe pull chain switchasshownin
(figure#8A). Usingalargepaperclip asatoolas
shownin(figure#8B),removethegraywirefrom
the switch and replace the wire with the gray
tinted wire on the new block. Replace the green
and brown wires that are connected to the pull
chain switch and the old block with the wires on
thenewblock as shown in (figure #8C). Once all
wireshavebeenconnected,reinstallboththepull
chain switch and capacitor block back into the
switch housing and test.
Step #5
Step #4
(Figure #7)
(Figure#8A)
(Figure #8B) (Figure #8C)
Place your run capacitor block next to the
switchhousingasshownin(figure#7).Locate
thegraywirethatisontheoldblockthatiswire
nutted to the gray wire that is in the switch
housingasshown.Removethewirenut and
replacethegraywireitwiththeNOTTINTED
graywireonthenewblock.Thenwirenutthe
twowirestogetherasshown.
Casablanca Fan Co. - Factory Service Department - Technical Library
VII - 7.40
The Start Capacitor Black Box has one
capacitorsbuiltintoablockasshownin(figures
#1Aand1B).Matchtheoldboxwiththenew;
thecapacitorvaluesmustbeaperfectmatch.
Ifnot,this will causedamage to themotor by
overheating.
(Figure#1A)
(Figure #1B)
(Figure #2) Start Capacitor Replacement - CONTINUED
Firstlocatethestartcapacitorblockasshown
in(figure#2).
Step #1
Casablanca Fan Co. - Factory Service Department - Technical Library
VII - 7.41
Onceyouhavelocatedtheruncapacitorblock,
removeitfromtheswitchhousingandlocate
thetwowirenutsasshownin(figure#3).
Step #2
Start Capacitor Replacement - END
(Figure #4)
(Figure #3)
(Figure #5)
Placethenew capacitorblocknextto theold
oneasshownin(figure#4).Removethetwo
wirenutsoneatatimereplacingthewirewith
thewiresfromthenewstartcapacitorblockas
shown.
Step #3
Onceallwireshavebeenconnected,reinstall
start capacitor block back into the switch
housing(figure#5)andtest.
Step #4
Casablanca Fan Co. - Factory Service Department - Technical Library
VII - 7.42
(Figure #1)
Cutthepinkandyellowwiresasclosetoplug
asyoucanasshownin(figure#3A).Stripboth
thepinkand yellowwiresas shownin(figure
#3B)anddisregardthe plugandotherwires,
theywillnotbeneededduringthisinstallation.
Step #1
(Figure #2)
(Figure #3A) (Figure #3B)
Locate the reverse slide switch assembly as
shown in (figure #1). You will see that it is
attached with wire nuts to several wires and
may not have a plug attached as shown in
(figure#2).Thereverseslideswitchassembly
shownin(figure#2)istheuniversalpartthatis
used as the replacement for many different
modelfans.Insomecasestheplugwillneedto
beremoved.
Reverse Switch Replacement - CONTINUED
Casablanca Fan Co. - Factory Service Department - Technical Library
VII - 7.43
Locatethe reverseswitchas shownin (figure#3).
By pulling up on the reverse switch as shown in
(figure # 5) remove the reverse switch from the
switchhousingasshown.
Step #2
Reverse Switch Replacement - CONTINUED
(Figure #4)
(Figure #5)
(Figure #6) (Figure #7)
Locate the reverse switch and all of the wire nuts
attachingthereverseswitchtotheswitchhousing
asshownin(figure#6).Placethenewswitchnextto
the old switch as shown in (figure #7). Start by
findingboththepinkwiresontheoldandnewswitch
as shown, this is where will start the replacement
procedure.
Step #3
Casablanca Fan Co. - Factory Service Department - Technical Library
VII - 7.44
Reverse Switch Replacement - END
(Figure #10)
(Figure #9)
(Figure #8)
Onceyouhaveconnectedthepinkwiresofthe
new reverse switch to the pink wires in the
switchhousingasshownin(figure#8).Locate
boththeyellowwiresontheoldandnewswitch
and then replace them and wire nut them to-
getherasyoudidwiththepinkwiresasshown
in(figure#9).
Step #4
Dothesameforboththewhiteandgraywires,
until all the wires on the new reverse switch
have been reconnected to the wires in the
switchhousing.Checkyourwork;reinstallthe
reverse switch back into the switch housing.
Routthewiressothattheswitchhousingcap
or light kit can be easily installed on to the
switchhousing without pinchingthe wiresas
shownin(figure#10).Again,checkyourwork
andthentestthefan.
Step #5

This manual suits for next models

4

Other Casablanca Fan manuals

Casablanca Le Grande User manual

Casablanca

Casablanca Le Grande User manual

Casablanca Trident User manual

Casablanca

Casablanca Trident User manual

Casablanca bel-air User manual

Casablanca

Casablanca bel-air User manual

Casablanca M8501-01 User manual

Casablanca

Casablanca M8501-01 User manual

Casablanca Perseus Service manual

Casablanca

Casablanca Perseus Service manual

Casablanca Stealth dc C45GxxxB User manual

Casablanca

Casablanca Stealth dc C45GxxxB User manual

Casablanca 59021A Manual

Casablanca

Casablanca 59021A Manual

Casablanca 55035 Instruction manual

Casablanca

Casablanca 55035 Instruction manual

Casablanca Casablanca 19th Century User manual

Casablanca

Casablanca Casablanca 19th Century User manual

Casablanca 59360 Instruction manual

Casablanca

Casablanca 59360 Instruction manual

Casablanca WAILEA User manual

Casablanca

Casablanca WAILEA User manual

Casablanca AURORA II User manual

Casablanca

Casablanca AURORA II User manual

Casablanca FOUR SEASONS III User manual

Casablanca

Casablanca FOUR SEASONS III User manual

Casablanca Antion C39G199L User manual

Casablanca

Casablanca Antion C39G199L User manual

Casablanca Atria User manual

Casablanca

Casablanca Atria User manual

Casablanca Moderne User manual

Casablanca

Casablanca Moderne User manual

Casablanca Stealth User manual

Casablanca

Casablanca Stealth User manual

Casablanca Reverie User manual

Casablanca

Casablanca Reverie User manual

Casablanca Academy User manual

Casablanca

Casablanca Academy User manual

Casablanca New Orleans Centennial User manual

Casablanca

Casablanca New Orleans Centennial User manual

Casablanca Mission User manual

Casablanca

Casablanca Mission User manual

Casablanca Stealth Instruction manual

Casablanca

Casablanca Stealth Instruction manual

Casablanca MIDDLEBURY User manual

Casablanca

Casablanca MIDDLEBURY User manual

Casablanca M8513-01 User manual

Casablanca

Casablanca M8513-01 User manual

Popular Fan manuals by other brands

Hunter 20179 Parts guide

Hunter

Hunter 20179 Parts guide

Pelonis FZ10-19MB owner's manual

Pelonis

Pelonis FZ10-19MB owner's manual

Vortice MP Series Instruction booklet

Vortice

Vortice MP Series Instruction booklet

Rotel U753CH3 Instructions for use

Rotel

Rotel U753CH3 Instructions for use

Vent-Axia ATQ10012D Installation and wiring instructions

Vent-Axia

Vent-Axia ATQ10012D Installation and wiring instructions

Hunter Cosenza installation manual

Hunter

Hunter Cosenza installation manual

Tamarack Technologies HV1600 WR38 Companion manual

Tamarack Technologies

Tamarack Technologies HV1600 WR38 Companion manual

Airflow iCONstant T user manual

Airflow

Airflow iCONstant T user manual

Harbor Breeze 80209 installation guide

Harbor Breeze

Harbor Breeze 80209 installation guide

Holmes HTF38138 user manual

Holmes

Holmes HTF38138 user manual

Rotex RVLQ05CAV3 installation manual

Rotex

Rotex RVLQ05CAV3 installation manual

PAC PAC-350WM Installation, operation & maintenance instructions

PAC

PAC PAC-350WM Installation, operation & maintenance instructions

Emerson NORTHWIND CF705AB03 owner's manual

Emerson

Emerson NORTHWIND CF705AB03 owner's manual

Goldair PLATINUM GPPF220 operating instructions

Goldair

Goldair PLATINUM GPPF220 operating instructions

Pelonis FZ10-9HA owner's manual

Pelonis

Pelonis FZ10-9HA owner's manual

Harbor Breeze 317058 user manual

Harbor Breeze

Harbor Breeze 317058 user manual

Vent-Axia eMF Series Installation and wiring instructions

Vent-Axia

Vent-Axia eMF Series Installation and wiring instructions

Nordic Home FT-544 user manual

Nordic Home

Nordic Home FT-544 user manual

manuals.online logo
manuals.online logoBrands
  • About & Mission
  • Contact us
  • Privacy Policy
  • Terms and Conditions

Copyright 2025 Manuals.Online. All Rights Reserved.