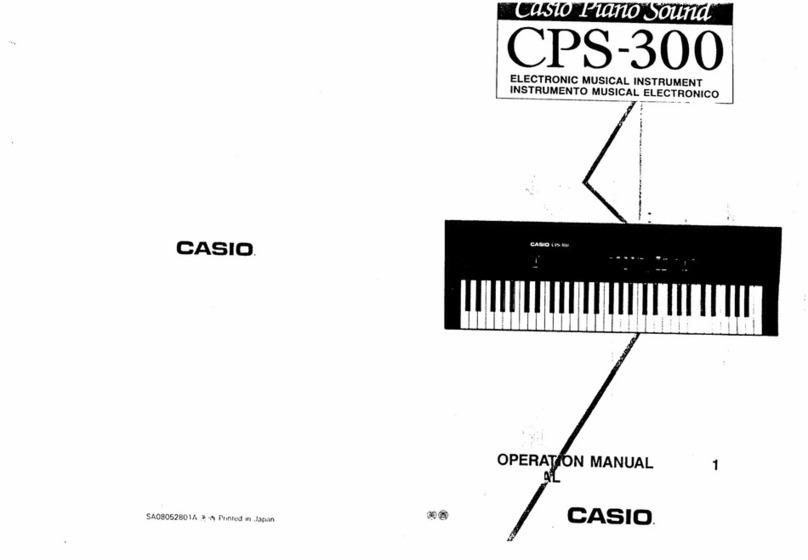
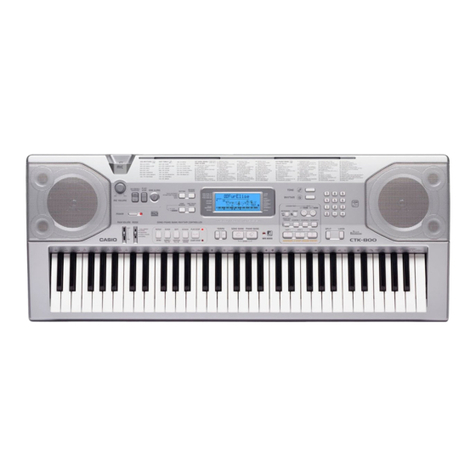
Casio MT-640 User manual

q
“y
1%
f
a
t
bs
A.
rq
.
5
2
#
.
~%
ny
Mh
3
DF
.
>»
i:
:
»
5
\\)
\
N..
cf
“5
0H1009084B
@
@
Printed
in
Japan
.
\"
a
|
“
ye
\)
»
wm
Ds
WO
\
yy
Wr
vom
KOON
\\
\\
Ce
Ww
\
~)
OPERATION
MANUAL
MANUAL
DE
OPERACION
SIS
SSooeSsog
=
is
a
:
ie
C)
C)
C)
bat
NY
cet
ges
ne
Re
Oe
=
ae
"2-9
-p-9-9%
PSSoohggasgans
-
asa
te
sig
ai
°
i
re
a
=!
om
°
co
e
:
SSP
O22
S50
&
&
-
Te
—
me
o
comes
te
WES
ae
xo
--
2
St
poe
a
Se
‘OOo
(Ee
Prone
Cane
Mitten
ON
Mary
peers
SOOt
a
he
OOo
Gomer)

CASIO.
M
1-640
ELECTRONIC
MUSICAL
INSTRUMENT
Introduction
|
Your
new
MT-640
keyboard
is
a
state-of-the-art
musical
in-
strument
which
incorporates
the
latest
electronics
tech-
nology
to
make
its
operation
as
easy
as
possible.
Exceptional
sound
quality
backed
up
by
a
host
of
sophisti-
cated
features
and
functions
makes
this
keyboard
a
joy
to
play
for
everyone.
In
order
to
enjoy
the
features
and
functions
of
this
unit
to
their
fullest,
be
sure
to
carefully
read
this
manual
and
follow
the
instructions
contained
herein.
i»
|
:
Ne
1
;
4
m,
te
5
ala
x6
ps
~
dep
abe
>
&
:
may
ie
ae
*
t
:
:
te
4
vs
i
es
4
ee
Ee
7
:
ap
=
;
,
1
aA
*
"
*
3
©
:
:
.
ior
a
‘
ie
M
‘
4
a
é
%
+
t
.
4
:
ry
*
‘
:
>
,
:
*
3
}
;
:
;
:
<
%
2
:
%
4
:
sf
4
oe
-
eg
et
a
eae
a
z
<
ad
~
oa
2
poe
fe
'
oe!
’
Rigel
lige
cor
:
es
‘,
fe
i
a,
ee
me
“a
:
:
Zs
ae
ff
ef
Nig
t
rn
"s
!
,
?
aaa
“he
wo
ag,
RON
:
ages
ae
‘te
ff
&2
3
ae
tpt
2
Ty
y
i
:
:
5
%
:
i
a
>
t
rae
3
ar
H
3
;
;
;
:
q
}
it
s
¢
:
<
S
A
;
+
4
;
a
a
dg
M
;
e:
s
‘
4
?
fa)
?
{
‘
jt
8
:
:
ig
Bay
‘ia
.
3
‘
b
.
A
.
ee
ge
v-
7
-
4
!
.
2
Oe
"
4
:
2
‘
P
a
e
*
.
.
,
A
&
Q
:
‘
¥
}
:
,
é
:
{
j
a
i
Bo
Se
wd
2
24
J
a
ee:
.
“oR:
,
i
Al
&
5
ts
‘
i
‘
é
;
:
:
ae
oe
*é, we,
4,
ow
ate
“Cyne
:
ey
fy
ray
emma
ney
Nar?
we
8
$s
vp
toy!
7
eee
2
‘1.
General
Guide
.
Heated
Wie
oie
cite
eee
ened
»
2.'
Power
Supply’:
..
Witenes
cara
dtd
aba
eo
tas
clavate
nie
vata
datb
é
Bi;
General
Operation..................
Ce
ee
etd
Dynamic.
Bass:System
Resear
ane
it
er
eer:
:
5.
Preset.
Tones
‘I...
.....0......,
Bie
Opeeet:
eee
es
ler
|
6...
Tone
!Bank
Sound
Combinations.
ny
ee
ve
om
4
bate
Ze.
‘Auto-rhythms
Pie
asa
nt
eens
eee
eee
ee
..14
‘9.
Percussion
Solo
Pads
.
...'.:).
¢.<..
eee
at
ee
7.19
10.
Performance
Memory
Function...
....::.5.......
:
.
20
De
IVT
8
sity
ceded.
na.
4
oeaecdicoel
watch
Adee
Aavie
ti
nas
22
12.
ee
ee
eee
ee
ee
ene
27

General
Guide
1.
General
Guide
[Rear
panel]
:
i
|
|
|
CASIO§mtT-s40
|
py
AMIC
©
even
ete
ste
tera
te
88%
8 8
8
en
ae
8
Ceks
—
ES
yt
ORG
rT]
ese
‘vest
eee
vue
Bot
ee
weet
enese
2.8.9.0
.0
6.0
08
w
8
oe
eos
oe
i
Saad
Ca
MRR
Eee
Bang
@
MIDI
terminals
(IN/OUT)
|
TTT
7
@
Headphone
jack
@
AC
adaptor
jack
~
©
®
|
[Bottom
panel]
@
GO00O0G8®
©
G&G
OO
®
@
@
;
f
ilt-i
lume
slider
Built-in
speakers
@
Rhythm
vo
:
Dynamic
bass
level
indicators
@
Chord/MIDI
selector
:
@®
Tuning
control
hro/fill-in
button
Adjusts
the
pitch
of
the
entire
keyboadh
within
+30
cents
and
allows
easy
©
Tone
selectors
@
Synchro
@
Rhythm
selectors
@®
Rhythm
start/stop
button
tuning
with
other
instruments.
ing
button
Tone
select
button
|
@®
Intro/ending
.
°
Rhythm
select
button
@
Tempo
control
buttons
Demonstration
Tune
0
eee
gia
a
©
ea
aie
button
This
unit
features
a
preset
demonstration
tune
which
has
been
eee
.
©
cies
sie
carefully
programmed
to
showcase
all
the
features
and
benefits
Ac
ag
—
lid
>
eee
button
of
this
unit.
Simply
press
the
Demo
button
@,
and
listen
to
the
@
Dynamic
bass
volume
slider
DEMO
|
i
MT-640
plays
itself!
@
Accomp
volume
slider
*
The
demonstration
tune
is
played
in
an
endless
loo
stop
the
tune.
*
The
keyboard
is
inoperable
while
playing
the
demonstration
tune.
p.
Press
the
Demo
button
again
to

2
Power
Supply
e
Dry
batteries
|
This
unit
can
be
powered
by
six
D
size
(SUM-1/R20P)
manganese
dry
cell
bat-
teries.
Weakened
batteries
will
result
in
lower
volume
or
poor
tonal
quality.
The
power
indicator
lamp
will
gradually
lose
its
brightness
when
battery
power
weakens.
At
this
time,
change
batteries
or
shift
to
one
of
the
alter-
nate
power
sources
mentioned
below.
|
Battery
replacement:
|
|
,
4
(@)
Open
the
battery
compartment
cover
on
the
bottom
of
the
unit
and
take
out
used
batteries.
|
|
ee
(2)
Load
new
batteries
taking
care
that
polarity
is
correct.
.
*
It
is
advisable
to
replace
all
six
batteries
at
the
same
time
for
longer
battery
life.
;
*
Standard
battery
life
is
approximately
6
hours.
|
¢
Car
battery
With
the
car
battery
adaptor
(CA-5,
optional),
DC
power
is
supplied
from
a
car
battery
through
the
cigarette
lighter
socket.
An
AC
adaptor
(AD-5,
optional)
is
required
when
using
household
current.
Use
only
a
genuine
CASIO
adaptor
with
the
same
voltage
rating
(100,
117,
220,
or
240)
as
the
power
supply
in
your
area
to
prevent
component
damage.
Plug
the
AC
adaptor
into
the
AC
outlet
and
the
cord
into
the
unit.
This
will
automatically
cut
off
the
battery
power
supplly.
°
:
Be
ag
3
|
Sag
AC
adaptor
AD-5
eg
“AC
outlet
-''
AC
adaptor
jack
Cigarette
lighter
socket
Car
battery
adaptor
CA-5
ae
oe
{
i
NORE
ARERR
CR
EO
te
4.
ee
eA
2.
Power
Supply
*
Auto
power
off
function
Power
is
automatically
cut
off
approximately
6
minutes
after
the
last
opera-
tion
of
the
unit.
Power
supply
can
be
restored
by
switching
power
OFF
and
then
ON
again.
co
oe
4
|
7
CAUTION
*
Use
only
genuine
CASIO
adaptors
to
avoid
risk
of
damage.
*
Remove
batteries
from
the
battery
compartment
when
the
unit
is
not
used
for
extended
periods.
(Battery
leakage
can
damage
electrical
parts.)
*
The
adaptor
may
become
warm
when
left
connected
to
an
outlet.
This
is
normal,
but
the
adaptor
should
be
disconnected
when
not
in
use.
“
THE
FOLLOWING
CONDITION
CAN
CAUSE,
BATTERIES
TO
BURST:
1.
Use
of
adaptors
other
than
genuine
CASIO
adaptors.
:
2.
Loading
batteries
with
polarities
reversed.'
=
General
Operation
*
Refer
to
the
general
guide
found
on
page
4-5
for
exact
locations
of
this
keyboard
controls
and
connections.
@)
Turn
the
power
switch
ON.
(2)
Adjust
the
volume
level.
get
sas
r
|
(3)
Select
one
of
20
preset
tones
(see
“Preset
Tones”,
page
9)
or
one
of
210
Tone
Bank
sounds
(see
“Tone
Bank
Sound
Combinations”,
page
12).
(4)
Now,
start
playing.
se

Dynamic
Bass
System
*
Refer
to
the
general
guide
found
on
page
4-5
for
exact
locations
of
this
keyboard
controls
and
connections.
The
MT-640
equipped
with
Casio's
innovative
“Dynamic
Bass
System”
for
rich,
powerful
bass
response.
In
addition
to
full-range
stereo
speakers
on
the
front
panel,
a
“super
woofer”
is
located
on
the
bottom
of
the
MT-640.
And
the
MT-640
body
is
designed
to
act
as
a
speaker
cabinet,
as
bass
sounds
are
channeled
through
internal
sound
ducts
and
output
through
twin
ports
as
well
as
from
the
bottom
of
the
unit.
This
results
in
dynamic,
multi-directional
bass
sounds.
+
¢
Dynamic
Bass
Volume
Slider
You
can
adjust
the
volume
of
the
“Dynamic
Bass”
sound
independently,
to
gain
just
the
right
effect
for
the
type
of
music
you're
playing.
|
¢
Dynamic
Bass
Level
Indicators
The
MT-640
features
a
linear
bar
indicator
located
on
the
front
panel,
which
shows
the
volume
level
of
the
dynamic
bass
sound.
Preset
Tones
"
Refer
to
the
general
guide
found
on
page
4-5
for
exact
locations
of
this
keyboard
controls
and
connections.
¢
To
select
a
preset
tone
@)
Specify
either
the
upper
or
lower
row
of
preset
tones
by
pressing
the
tone
select
button.
The
upper
or
lower
select
indicator
lights
to
show
the
active
row.
ae
ae
:
ae
|
|
(2)
Press
one
of
the
tone
selectors
to
choose
a
preset
tone.
*
“PIANO”
tone
is
automatically
selected
when
power
is
turned
ON.
¢
Percussion
1
and
Percussion
2
Tones
~
By
selecting
the
percussion
1
or
percussion
2
tones,
you
can
play
a
wide
variety
of
percussion
sounds
using
the
keyboard
keys.
<
Percussion
1
Sounds
>
“
“aa
ae
ee
-
—_
.,
EEe
@
Tom-toms;
1/2/3/4/5
@
Rim
shot
@
Ride
symbals;
1/2
@
Closed
hi-hats;
1/2
©
Synth
tom-toms;
Hi/Mid/Low
@®
Open
hi-hats;
1/2
©
Gongs;
1/2
@
Crash
cymbals;
1/2/3/Mixed
©
Synth
cymbals;
1/2/3
@®
Cow
bells;
Hi/Low
@
Triangle;
Open/Muted
@
Timbales;
Hi
mute/Hi/Low/Mixed
@
Synth
percussion;
1/2/3
@
Claves;
Hi/Low
Bass
drums;
1/2
®
Congas;
Hi
mute/Hi/Middle/Low/Mix
©
Snare
drums;
1/2
©
Agogos;
Hi/Low
@
Gated
snare
drum

5.
Preset
Tones
| ,
|
_
pee
eS
ae
5.
Preset
Tones
<
Percussion
2
Sounds
>
|
©
Wood
Bass/Piano
Tone
By
selecting
the
wood
bass/piano
tone,
you
can
play
a
wood
bass
sound
with
the
left
hand
and
play
piano
with
Hie
Hem
hand.
‘ci
ps
yn”
intima
mm bt
em
egret
FE
Vartey
e
sly
hae
(Section
|—Japanese
Sounds)
e
Flectric
Bass/Slap_
Bass
:
Set,
cand
@
Shouts;
L
Speaker/R
Speaker/Middle
1/Middle
2/Two
people
By
selecting
the
el
ree
@
Wood
blocks;
Left/Middle/Right
g
the
elec
bass/slap
bass
tone,
you
can
play
a
straight
electric
bass
Stand
drums:
Hilow:
* |
.
sound
wi
ie
ac
hand
and
Bey
a
slap
bass
sound
det
the
right
hand.
@
Wood
blocks
(L)/Hand
drum
(R)
|
@
Shout
(L)/Hand
drum
(R)
(Section
Il—Latin
Sounds)
|
*
|
Litt
©
Voices;
1/2/3/4/5
-
|
_
|
@
Quijadas;
Left/Middle/Right
|
©
Wind
chimes;
Lto
R
V/R
to
L1/L
to
R
2RtoL2
|
:
|
,
|}
tre
bass
(€2—
Ba
+
ter
bass
(C4—C
as
(Section
fil
Orcheetia:
Sounds)
4,
©
Orchestra
Hits;
1/2/3/4/5
@
Cymbals;
Left/Middle/Right
=.
°~
.
.
Ses
hy
@
Tympanis;
1/2/3/4
|
|
|
oe
—
.
(Section
IV—Daily
Life)
2.8
.
on
|
7
a
a
ee
eee
@
Telephone;
Left/Right
.
3 |
:
7
7
@®
Car
horns
in
distance;
1/2/3
.
@®
Typewriter;
Low
typing/Hi
iypingyBel
@®
Car
horns;
1/2/3/4/5
<{0=
A
Aes

Tone
Bank
Sound
Combinations
*
Refer
to
the
general
guide
found
on
page
4-5
for
exact
locations
of
this
keyboard
controls
and
connections.
|
é
This
keyboard
features
Casio's
innovative
“Tone
Bank”
feature,
which
lets
you
choose
from
an
amazing
total
of
210
different
sound
combinations.
To
create
these
layered
sounds,
the
Tone
Bank
function
actually
integrates
the
characteristics
of
the
20
preset
tones.
You
can
select
these
sound
combinations
through
the
following
procedure.
——
ae
©
To
select
Tone
Bank
Sound
Combinations.
@)
Select
any
of
the
20
preset
tones.
When
selecting
Tone
Bank
sound
com-
binations,
the
tone
initially
selected
is
used
as
a
base,
or
“Primary”
sound.
*
When
the
Primary
sound
is
selected,
the
keyboard
features
10-note
polyphdny.
(2)
Press
the
Tone
Bank
button.
This
activates
the
Tone
Bank
function,
allowing
you
to
choose
a
Secondary
3
sound
to
integrate
with
the
Primary
sound
you
just’selected.
*
After
the
Tone
Bank
button
is
pressed,
the
keyboard
changes
to
5-note
polyphony.
(3)
Select
any
other
of
the
20
preset
tones.
The
characteristics
of
this
“Secondary”
sound
is
automatically
integrated
with
those
of
the
“Primary”
sound
already
selected.
po
Le
5
=.
¢
To
select
a
different
secondary
sound
|
The
secondary
sound
can
be
changed
at
any
time,
as
long
as
the
Tone
Bank
function
is
selected.
Simply
select
a
different
preset
tone—the
primary
sound
remains
the
same.
|
‘
¢
To
select
a
different
primary
sound
:
The
primary
sound
can
be
changed
by
first
turning
the
Tone
Bank
function
OFF
(press
Tone
Bank
button
so
that
indicator
goes
out),
selecting
any
other
preset
tone,
and
finally
turning
the
Tone
Bank
function
back
ON.
The
secon-
dary
tone
remains
the
same
in
this
case.
ae
6.
Tone
Bank
Sound
Combinations
<
Example
of
Tone
Bank
Operation
>
(1)
Select
the
preset
ORGAN
tone
by
pressing
the
corresponding
tone
selector.
(This
is
the
“Primary”
sound.)
Initially,
the
ORGAN
tone
can
be
played
with
10-note
polyphony.
.
|
GC
tenie
8
|
(2)
Press
the
Tone
Bank
button.
ae
|
The
ORGAN
tone
can
now
be
played
with
5-note
polyphony.
*
Indicator
above
the
Tone
Bank
button
lights.
.
'
NOTE:
When
power
is
turned
ON,
the
PIANO
tone
is
automatically
selected
in
Tone
Bank
memory.
Because
of
this,
procedure
@)
above
causes
the
ORGAN
tone
to
be
integrated
with
the
PIANO
tone.
(3)
Select
the
preset
CHORUS
tone
by
pressing
the
corresponding
tone
selec-
tor.
(This
is
the
“Secondary”
sound.)
Now,’the
“ORGAN
+
CHORUS”
Integrated
Tone
Bank
combination
sound
can
be
played
with
5-note
polyphony.
Vie
|
(4)
Next,
try
changing
the
secondary
sound
by
selecting
the
preset
FLUTE
tone.
The
“ORGAN
+
FLUTE”
integrated
Tone
Bank
combination
sound
can
be
played
with
5-note
polyphony.
Ey
aa
a
7
ents
&
op
bie
Sn
ties
«Py
(6)
Next,
try
changing
the
Primary
sound
by
first
pressing
the
Tone
Bank
button
once
again
to
turn
the
Tone
Bank
function
OFF
temporarily.
The
preset
ORGAN
tone
can
once
again
be
played
with
10-note
polyphony.
(6)
Select
a
new
Primary
sound—the
STRINGS
tone
for
example,
and
turn
the
Tone
Bank
function
back
ON.
As
the
secondary
sound
(FLUTE)
does
not
change
in
this
case,
you
can
now
play
the;“STRINGS
+
FLUTE”
integrated
Tone
Bank
combination
sound
with
5-note
poly-phony.
=e
ee

Auto-rhythms
*
Refer
to
the
general
guide
found
on
page
4-5
for
exact
locations
of
this
keyboard
controls
and
connections.
¢
Playing
an
auto-rhythm
|
|
(1)
Press
the
rhythm
select
button
to
choose
the
upper
row
or
the
lower
row
of
auto-rhythms.
The
upper
or
lower
select
indicator
lights
to
show
the
active
row.
(2)
Press
one
of
the
rhythm
selectors.
(3)
Press
start/stop
button
to
start
the
rhythm.
—
-
ts
(4)
Adjust
the
tempo
of
the
rhythm
by
using
the
tempo
control
buttons.
Press-
ing
the
<A>
button
will
increase
tempo,
while
pressing
the
<W>
button
will
decrease
tempo.
'
*
Tempo
of
the
auto-rhythm
can
be
adjusted
between
40
and
256
beats
per
min
ute.
Pressing
both
tempo
keys
at
the
same
time
resets
the
tempo
to
132
beats
per
minute.
(S)
You
can
adjust
the
relative
volume
of
the
rhythm
by
using
the
rhythm
volume
slider.
.,
nS
|
|
-
(6)
Press
start/stop
button
once
again
to
stop
auto-rhythm
play.
¢
Using
Synchro/fill-in
button
Press
to
enter
synchro
start
standby.
Rhythm
starts
when
an
accompaniment
.
keyboard
key
(lower
1.5
octave,
C
through
F)
is
pressed.
(See
page
16
to
use
synchro
start
in
the
auto-accompaniment
performance.)
When
pressed
during
auto-rhythm
and
accompaniment
performance,
an
appropriate
fill-
in
is
inserted
in
the
rhythm
pattern.
If
the
button
is
held
down,
the
fill-in
pattern
is
repeated
until
the
end
of
the
measure
during
which
the
button
is
released.
|
a
:
|
ea
Ges
:
“
Using
Intro/ending
button
,
If
you
press
the
intro/ending
button
instead
of
pressing
the
start/stop
button
to
start
an
auto-rhythm,
the
selected
auto-rhythm
begins
after
a
one-measure
intro
pattern.
This
can
be
an
effective
way
to
lead
into
auto-rhythm
perfor-
mance.
If
pressed
during
auto-rhythm
and
accompaniment
performance,
the
rhythm
stops
after
an
appropriate
ending
pattern.
*
Using
synchro
start
with
an
intro
pattern
Press
the
synchro/fill-in
button
to
enter
synchro
start
standby,
and
sub-
sequently
press
the
Intro/ending
button.
Rhythm
starts
when
an
accompani-
ment
keyboard
key
is
pressed,
after
a
one-measure
intro
pattern.
—14—
Auto-accompaniment
*
Refer
to
the
general
guide
found
on
pa
ge
4-5
for
exact
locations
of
this
keyboard
controls
and
connections,
¢
Chord/MIDI
selector
_
Slide
to
select
one
of
the
Casio
Chord
functions
(or
MIDI
function).
—
Of
ee
eae
ee
For
normal
play
without
auto-accompaniment.
FINGERED
1
&
2
...For
auto-accompaniment
pressing
chords
as
usual.
ONG
isan
Sate
See
teoe
For.
auto-accompaniment
using
the
Casio
Chord
system.
Aang
7
MIDI
datas
eh
ites
OF
Set
to
use
the
MIDI
functions
(refer
to
“11.
MIDI”)
¢
Accomp
volume
slider
:
be
st
ai
Adjust
the
volume
of
the
auto-accompaniment.
NOTES:
-
°e
If
the
Chérd/MIDI
selector
is
set
to
“FINGERED.
(1
or
2)”
or
“ON”
the
lower
1.5
octave
of
the
keyboard
become
accompaniment.
keyboard
keys,
and
the
upper
part
of
the
keyboard
becomes
4-note
polyphonic.
i
Accompaniment
keyboard
>}
nto
keyboard
(4-note
Polrhonic)
————
°
During
auto-accompaniment
performance,
chord
played
on
the
accompani-
ment
keyboard
will
continue
to
sound
after
releasing
the
keys.
°
Auto-accompaniment
starts
with
rhythm,
the
moment
the
accompaniment
keyboard
key
is
pressed
if
synchro
start
is
in
standby
status.
2
ag
la
ds

8.
Auto-accompaniment
|
S
7
n
Casio
Chord
system
The
Casio
Chord
system
has
been
developed
so
you
can
play
the
four
main
types
of
chords
more
easily.
Playing
of
the
chords
is
simplified
as
shown
below:
4,
|
e
Pressing
one
of
the
accompaniment
keyboard
keys
produces
a
major
chord
corresponding
to
that
note.
¢
Simultaneously
pressing
any
key
to
the
right
(two
keys
at
the
same
time)
results
in
a
minor
chord.
¢
Similarly,
pressing
one
more
key
to
the
right
(three
keys
in
all)
produces
a
seventh
chord,
and
pressing
the
fourth
key
to
the
right
(four
keys
in
all)
creates
a
minor
seventh
chord.
<
Examples
>
~C
(C
major
chord)—Press
@.
Cm
(C
minor
chord)—Press
@,
@
together.
C7
(C
seventh
chord)—Press
@,
@,
©
together.
*
|
:
!
f
0000
7
Cm7
(C
minor
seventh
chord)—Press
@,
@,
86,0
Auto-accompaniment
-
|
keyboard
|
together.
|
i
fe
*
Not
only
@,
©,
and
@,
but
any
black
or
white
keys
can
be
used
as
long
as
they
are
to
the
right
of
@.
7
E
:
|
[1]
Auto-accompaniment
using
the
Casio
Chord
system
(One-finger
method)
@)
Set
the
Chord/MIDI
selector
to
“ON”
|
7
(2)
Select
one
of
the
auto-rhythms
and
press
the
synchro/fill-in
button.
*
Tempo
indicator
lights,
meaning
that
the
accompaniment
keyboard
keys
are
ready
for
play.
(3)
Play
on
the
accompaniment
keyboard
keys
according
to
the
Casio
Chord
system.
|
ss.
.
_
*
Adjust
the
tempo
and
accompaniment
volume
using
the
respective
controls.
[2]
Auto-accompaniment
play
using
standard
chord
fingering
(1)
Set
the
Chord/MIDI
selector
to
“FINGERED
1”
or
“FINGERED
2”
(2)
Select
one
of
the
auto-rhythms
and
press
the
synchro/fill-in
button.
*
Tempo
indicator
lights,
meaning
that
the
accompaniment
keyboard
keys
are
ready
for
play.
(3)
Play
a
chord
on
the
accompaniment
keyboard
keys.
*
Adjust
the
tempo
and
accompaniment
volume
using
the
respective
controls.
*
This
unit
is
capable
of
recognizing
the
following
chords;
<M,
m,
—5,
+5,
dim,
sus4,
7,
MZ,
m7,
mMZ
m5,
*Zus4,
9
mI>
51
6=
8.
Auto-accompaniment
a_i
<About
‘Fingered
1”
and
“Fingered
2’">
:
|
This
keyboard
features
two
different
types
of
fingered
accompaniment
patterns.
vou
can
select
which
type
you
want
by
selecting
either
the
Fingered
1
mode,
or
the
Fingered
2
mode.
Respective
accompaniment
patterns
and
characteris-
tics
are
as
listed
below.
(Fingered
1
Accompaniment)
Accompaniment
consists
of
a
single
bass
line
and
two
different
backing
chord
patterns.
The
pattern
does
not
change
until
you
play
a
chord
consisting
of
at
least
3
notes.
(Fingered
2
Accompaniment)
fa
7
|
:
Accompaniment
consists
of
a
single
bass
line
and
a
single
backing
chord
pat-
terns
In
addition,
you
can
add
notes
manually
in
two-note
polyphony
on
the
accompaniment
keyboard”
without
affecting
the
accompaniment
pattern.
The
pattern
doe’
not
change
until
you
play
a
chord
consisting
of
at
least
3
notes
Fingered
2
accompaniment
also
allows
you
to
choose
the
way
the
chord
will
play
rhythmically.
If
you
keep
repeating
your
chord
shape
in
any
rhythmic
pat-
tern
you
choose
(quarter-notes,
eight-note
triplets
or
any
syncopation)
this
key-
board
will
play
that
chord
pattern
rhythm,
allowing
for
more
flexibility
in
your
accompaniment
patterns.
:
*
.
.
Auto-accompaniment
tones
are
preset
in
correspondence
to
each
auto-rhythm
type.
A
list
of
auto-rhythms
and
corresponding
accompaniment
tones
is
provided
on
page
18.
|

8.
Auto-accompaniment
a
EE
LEI
TE
a
et
<
About
the
tones
used
in
the
auto-accompaniment
>
Each
auto-accompaniment
pattern
consists
of
one
bass
line
and
two
types
of
chord
lines
(chord
1
and
chord
2).
The
tones
of
these
elements
are
preset
corresponding
to
each
auto-rhythms
as
shown
below;
_
CHORD
1
TONES
CHORD
2
TONES
BASS
TONES
RHYTHMS
ROCK‘1
|
BRASS
ENS.
.
METALLIC
SOUND
-,
SLAP
BASS
ROCK
2
BRASS
SYNTH.
CLAVI
SLAP
BASS
8
BEAT
1
JAZZ
ORGAN
PIANO
SLAP
BASS
8
BEAT
2
METALLIC
SOUND
BRASS
ENS.
°::
SLAP
BASS
16
BEAT
1_
_
MARIMBA
ELEC.
PIANO
SLAP
BASS
16
BEAT
2.
SYNTH.
CLAVI
BRASS
ENS.
SLAP
BASS
|
DISCO
1
_
SYNTH.
CELESTA
BRASS
ENS.
SLAP
BASS
DISCO
2
HARP”
STRINGS
BRASS
ENS.
,
POPS
1°
JAZZ
ORGAN
PIANO
‘
WOOD
BASS
POPS2.
FLUTE:
BRASS
ENS.
...
SLAP
BASS
-
SLOW
ROCK
1...
PIANO.
;:.
.
VIBRAPHONE
..
WOOD
BASS
|,
SLOW
ROCK
2
PIANO...
HARP
WOOD
BASS
SWING
~~
PIANO)
.
_
BRASS
ENS.
WOOD
BASS
SAMBA
SYNTHE.
CLAVI
JAZZ
ORGAN
SLAP
BASS
BOSSA
NOVA
ELEC.
PIANO
STRINGS
*
WOOD
BASS
WALTZ
STRINGS
ORGAN
WOOD
BASS
REGGAE
JAZZ
ORGAN
FUNKY
CLAVI
SLAP
BASS
TANGO
ACCORDION
PIANO
WOOD
BASS
BEGUINE
PIANO
JAZZ
GUITAR
WOOD
BASS
MARCH
BRASS
ENS.
FLUTE
BRASS
ENS.
4,
tb
aes
Percussion
Solo
Pads:
*
Re
fer
to
the
general
guide
found
on
page
4-5
for
exact
locations
of
t
connections.
his
keyboard
controls
and
The
MT-640
features
a
total
of
10
percussion
solo
pads
that
let
you
add
Ria
das
and
accents
to
your
performance.
Preset
percussion
sounds
sens
eee
y
simply
tapping
the
pads
with
your
finger(s).
In
addition
to
ancard
percussion
pads,
the
MT-640
features
4
unique
“sound
effect”
cussion
pads,
including
Quijada,
Voice,
Wind
Chime,
and
Orchestra
Hit
SOU
aie
nds.
MID
TOM
H!
TOM
™
LOW
TOM
PERCUSSION
PAD
.
CRASH
CYMBAL
LOW
AGOGO
eS
~—
&
Pdi
ony
a
.
ily
'
+
QUIJADA'
''
VOICE
CHING:
shia
al
CH2
CH3
CH4
Pulse
Code
Modulation
NOTE:
=
=
Oe
4
of
the
percussion
ads
perform
Ly
ee
ee
aE
ae
eee
|
formance.
Pads
Perrorm
other
functions
when.
set
for
MIDI
per-
ae
Gs

Performance
Memory
Function
*
Refer
to
the
general
guide
found
on
page
4-5
for
exact
locations
of
this
keyboard
controls
and
connections.
é
The
MT-640’s
performance
memory
function
lets
you
record
an
entire
per-
.
J
‘formance
as
you
play
on
the
keyboard.
Up
to
1,250
notes
can
be
stored
in
memory
for
subsequent
playback.
What’s
more,
auto-rhythm
tracks
and
a
variety
of
keyboard
settings:
are
recorded
as
well
(see
list
below).
@)
Start
an
auto-rhythm
and
adjust
the
tempo
to
your
satisfaction.
(2)
Press
the
record
button
to
enter
the
recording
standby
mode
(LED
flashes).
*
Note
that
you
can
also
adjust
the
tempo
in
this
mode.
—
|
fi
(3)
Set
the
Chord/MIDI
selector
to
“FINGERED
1”,
“FINGERED
2”,
or
“ON”
if
you
want
to
use
auto-accompaniment
in
your
recording.
If
not,
set
this
selector
to
the
“OFF”
position..-
|
|
()
Select
one
of
the
auto-rhythms
you
like.
.
*
If
you
don’t
want
to
use
an
auto-rhythm
in
your
recording
(or
if
you
want
to
start
an
auto-rhythm
mid-way
during
recording),
press
the
rhythm
start/stop
button
at
this
point.
*
If
you
want
to
start
an
auto-rhythm
using
an
intro
pattern,
press
the
intro/ending
button
at
this
point.
|
*
If
you
want
to
start
an
auto-rhythm
using
synchro
start,
press
the
synchro/fill-in
button
at
this
point.
(6)
Press
the
recording
start/stop
button
to
start
recording.
Recording
starts
after
one
measure
of
audible
beat
count.
Lo
|
i
©
Begin
your
performance.
The
MT-640
records
your
entire
performance,
just
the
way
you
play
it.
7
Recorded
Operations:
:
In
addition
to
keyboard
play,
the
performance
memory
records
the
following
keyboard
settings
and
operations.
e
Preset
tones
e
Tone
bank
selection
e
Auto-rhythm
selection
e
Auto-rhythm
start/stop
e
Auto-rhythm
intro
start
e
Fill-in
patterns
e
Percussion
solo
pad
performance
e
Auto-rhythm
ending
pattern
@)
Press
the
recording
start/stop
button
again
to
stop
recording.
ey)
om
10.
Performance
Memory
Function
NOTES:
°
Memory
capacity
is
approximately
1,250
notes.
Operations
such
as
changes
in
rhythms
and
Tone
Bank
sound
selections
are
counted
as
half-notes.
*
Recording
automatically
ends
when
you
reach.
the
memory
capacity.
@)
Press
the
recording
start/stop
button’
to
The
start/stop
LED
flashes
and
playback,
begins.
play
back
your
performance.
¢
You
can
play
along
with
memory
playback,using
the
entire
keyboard,
2
ici
.
deers
has
been
done
_in
the
Casio
Chord
“OFF”
mode.
If
you
record-
'
€d
using
the
Casio
Chord
function,
only
the
melody
k
pin
agg
iy
E
me
ody
keyboard
(upper
keys)
°
In
this
playback
Status,
all
switches
and
buttons
except
the
volume
sliders
and
6
of
the
percussion
pads
(hi
tom,
mid-tom,
low
tom,
crash
symbal,
hi
agogo
and
low
agogo)
are
inoperative.
Tempo
of
playback
cannot
be
adjusted.
@)
Press
the
recording
starU/stop
button
again
to
stop
playback.
(oe

*
Refer
to
the
general
guide
found
on
page
4-5
for
exact
locations
of
this
keyboard
controls
and
connections.
9
The
MT-640
is
equipped
with
MIDI—the
Musical
Instrument
Digital
Inter-
6
face.
This
industry-standard
interface
allows
you
to
connect
the
ae
other
MIDI-equipped
electronic
musical
instruments,
drum
and
rhythm
machines,
sequencers
and
even
personal
computers.
MIDI
IN
terminal........
Receives
MIDI
signal
from
external
devices.
MIDI
OUT
terminal
......Sends
MIDI
signal
to
external
devices.
>
,
(a
é
11-1
Using
the
MT-640
as
a
MIDI
Master
keyboard
|
@)
Connect
devices
using
MIDI
‘cables.
|
MIDI
OUT
ees
:
ern
DI
IN
(2)
Set
the
Chord/MIDI
selector
to
“MIDI”
The
MIDI
basic
channel
is
auto-
matically
set
to
channel
1.
(3)
eee
ine
MIDI
basic
channel
you
want
to
use
(see
11-3
to
set
the
MIDI
basic
channel
on
the
MT-640).
Make
sure
the
basic
channel
is
the
same
for
the
slave.
_
*
When
basic
channels
1-3
are
selected,
note
on/off
messages
and
program
changes
a
g
(using
tone
selectors)
can
be
transmitted
on
the
selected
MIDI
channel.
In
addition,
MIDI
clock
messages
and
program
changes
messages
(using
rhythm
selectors)
can
be
transmitted
on
MIDI
channel
4.
*
When
channel
4
is
selected
as
the
MIDI
basic
channel,
note
on/off
messages
and
program
see
messages
(using
tone
selectors)
can
be
transmitted,
however,
MIDI
clock
messages
cannot
be
transmitted.
iD
ic
11.
MIDI
SSSA
11-2
Using
the
MT-640
as
a
MIDI
Slave
keyboard
@)
Connect
devices
using
MIDI
cables.
(2)
Set
the
Chord/MIDI
selector
to
“MIDI”
(3)
Choose
the
MIDI
basic
channel
you
want
to
use
on
the
master
device.
You
can
choose
channel
1
through
3
on
the
master
device.
Channel
4
is
also
avail-
able
when
this
channel
is
used
as
fourth
voice
on
the
MT-640
(refer
to
11-8).
*
When
using
the
MT-640
as
a
slave
keyboard,
the
polyphony
on
this
unit
is
limited
accor
to
the
MIDI
channel
(refer
to
“Multi-timbral
polyphony”
in
11-4).
"
Note
on/off
messages
and
program
change
messages
are
received
on
the
selected
channel.
ding
.
Program
change
messages
can
be
received
simultaneously
on
channel
4.
|
*
When
program
change
messages
are
received,
MT-640
preset
tone
selection
is
altered
in
correspondence
to
the
received
program
change
number.
When
received
on
channel
4,
the
MT-640
preset
auto-rhythm
changes
as
well,
providing
that
channel
4
is
used
as
the
clock
channel
1-3
To
set
the
MIDI
basic
channel
oe
ee
oe
a
To
set
the
MT-640’s
MIDI
basic.
channel,
make
sure
the
Chord/MIDI
selector
is
in
the
MIDI
position,
then
simply
press
one
of
the
channel
select
pads
(1-4,
normally
used
as
percussion
pads)
5
3
a
Se
Se
WO
t
AG
ie
4
4
abe
1
6
.?
et.
if
WIND
ORCHESTRA
|
sr
QUIMADA
VOICE
©
CHIME
|
T
i,
Qa
—
cn
1
———
cn
CH3
CH4
Channel
select
pads
NOTE:
While
MIDI
transmit
polyphony
for
each
channel
is
unlimited,
the
polyphony
played
on
the
keyboard
is
limited
according
to
the
selected
MIDI
basic
channel!
(1-4),
as
shown
in
“Multi-timbral
Polyphony”
(refer
to
11-4)
aay
oe

11.
MIDI
LLL
TL
NN
a
a
TET
a
a
I
aS
11-4
Using
the
MT-640
as
a
multi-timbral
sound
source
In
addition
to
single-keyboard
transmission/reception,
the
MT-640
can
be
set
to
receive
multiple
MIDI
messages,
assigning
different
voice
to
channels
1
through
3,
with
channel
4
used
as
either
a
fourth
voice
(see
11-8)
or
to
send
MIDI
clock
messages
(see
1).
<
Multi-timbral
Polyphony
>
CH-1:
6
notes
CH-2:
4
notes
CH-3:
2
notes
CH:
4:
4
notes
(when
cea
as
a
fourth
voice)
|
1
11-5
To
set
the
timbre
ee
tone)
of
each
MIDI
channel’
A
single
preset
tone
can
be
assigned
to
each
ae
channel
through
the
follow-
ing
procedures.
:
@)
Press
the
CH
1
pad
of
the
channel
select
pads
(2)
Select
the
desired
preset
tones
by
pressing
the
corresponding
tone
selec-
tor.
The
selected
tone
is
assigned
to
MIDI
channel
1.
(3)
Repeat
procedures
()
and
@),
pressing
the
CH
2
and
CH
3
pads
(and
CH
4,
if
desired).
NOTE:
The
voice
assigned
to
each
MIDI
channel
can
be
altered
when
the
MT-640
receives
program
change
messages
from
other
MIDI
keyboards
or
MIDI
devices.
11-6
Balancing
volume
levels
of
MIDI
channels
%é..
In
addition
to
altering
the
master
volume
level
in
the
MIDI
mode,
you
can
also
control
the
balance
of
MIDI
channels
2
and
4,
by
using
the
ACCOMP
VOLUME
(CH
2)
and
RHYTHM
VOLUME
(CH
4)
sliders..
The
level
of
channel
3
is
fixed.
é,
a)
:
11.
MIDI
11-7
Using
channel
4
as
the
MIDI
Clock
channel
-
You
can
use
channel
4
as
the
MIDI
clock
channel
to
transmit
MIDI
internal
clock
messages.
Channel
4
is
automatically
set.to
transmit
MIDI
clock
messages
w
the
Chord/MIDI
selector
is
set
to
MIDI.
:
°
(CH=1
~4)
CH=1
)
Freely
assigned
to
CH=2?
one
of
the
preset
tones
(CLOCK=EXT)
CH=3
|
on
each
channel
CH=4
Auto-rhythm
(CLOCK=INT)
11-8
Using
channel
4
as
the
fourth
voice.
If
you
want
to
use
channel
4
as
the
fourth
uaa
oice,
simpl
of
the
channel
select
pads.
ene
ae
ee
re
MIDI
OUT
MIDI
OUT.
CH=1
)
Freely
gecened
CH=2
{to
one
of
the.
CH=3
|
preset
tones
on
CH=4
)
each
channel
(Ge
1
~
4)
NOTE:
To
reset
channel
4
to
the
clock
mode,
simply
alter
the
Chord/MIDI
selector
set-
ting
and
then
reset
it
to
the
“MIDI”
position.
295

11.
MIDI
11-9
Using
the
MT-640
as
a
MIDI
percussion
sound
source
When
either
of
the
“Percussion”
tones
are
selected
as
a
MIDI
timbre,
you
can
use
the
MT-640
as
a
MIDI
percussion
sound
source.
(Refer
to
page
9-10
for
details
on
percussion
sound
key
assignments.)
When
channel
4
is
used
as
a
fourth
voice
instead
of
MIDI
clock
message
trans-
mission,
try
selecting
one
of
the
percussion
tones
for
this
channel.
In
this
way,
you
can
create
original
rhythm
patterns
using
a
sequencer.
*
When
you
select
Percussion
71
for
a
MIDI
timbre,
the
reception
of
the
note
number
85
through
90
causes
“opened
triangle”
to
sound.
*
When
you
select
Percussion
2
for
a
MIDI
timbre,
the
reception
of
the
note
number
85
through
90
causes
“typewriter
bell”
to
sound.
11-10
Using
Drum
Pads
in
the
MIDI
mode
;
When
the
Chord/MID!
selector
is
set
to
“MIDI”,
percussion
sounds
assigned
to
the
channel
select
pads
(Quijada,
Voice,
Wind
Chime,
Orchestra
Hit)
do
not
sound.
Other
percussion
pads
operate
normally,
however.
e
Percussion
Pad
MIDI
Transmission
When
the
MT-640
is
set
to
transmit,
the
percussion
pads
trigger
transmis-
sion
of
the
following
MIDI
note
numbers.
HI
TOM:
96
CRASH
SYMBAL:
93
MID
TOM:
95
HI
AGOGO:
92
;
LOW
TOM:
94
LOW
AGOGO:
91
.
e
Percussion
Pad
MID!
Reception
When
the
MT-640
is
set
to
receive,
pad
sounds
are
triggered
upon
reception
of
the
note
numbers
listed
above.
11-11
Additional
preset
tones
in
the
MIDI
mode
The
following
tones
can
be
utilized
when
receiving
MIDI
program
numbers
20
through
29.
Program
No.
Tones
Program
No.
Tones
20
Honky-tonk
piano
25
Synth
celesta
21
Marimba
26
Synth
clavi
22
Oboe
27
Metallic
sound
23
Synth
reed
28
Fantasy
24
Harp
29
Miracle
*
For
ou
malfunction,
always
check
patiery
condition
first.
(see
page
6)
a
alah
Q
Spoeiat
akg
aay
ite,
tues
bec
Tr
ouble’”
bi
Possible”
‘Cause?
h
No
‘sound,
even
if
keys.
are
pressed.
..
7
adi,
toisoq2an
Ww
anys
Arhols
4
ioe.
ti
down.
lifter
62
vils
ani
BS)
a.
aye
‘Tone.
bank
inoperative,
:
Record
button,
9
inoperative.
~
eae
:
4,
square.
percussion,
i;-,
-pads.
inoperativessni
ctsin
(do
not
Sound).
o
‘ag
ye
Pate
8
a
=
ig
ape
diatab
ve
a
ie
down.
down.
eSy
,
rl
TED
adi
A
Occasional
interference
FP
ee
Pea
oes
}
Ni
6d
3
id
aon
ara
aa
-
|
nadia
obs
ee
ue
net
wis
down.
cord.
Troubleshooting
.
Main
volume
turned
2.
Headphones
con-
nected.
:
3.
Auto
power
off
has
activated.
Chord/MIDI
selector
is
set
to
MIDI
position.
Rhythm
volume
tu
rned
Main
and
accompani-
|
ment
volume
turned
Refrigerators,
washing
machines
and
similar
|
electric
appliances.
1.
Main
volume
turned
2.
Defective
connection
a
ye
ry
sels
M204
Re
esterrpgest
ctbsied
2.
Replace
connection
WE
TOT
O¢
medy”
Ore
Od
.
Turn
up
main
volume.
2.
Disconnect
head-
phones.
3.
Turn
the
power
switch
off
and
then
on
again.
Change
setting
of
Chord/MIDI
selector.
Turn
up
rhythm
volume.
Turn
up
main
and
accompaniment
volume.
Use
outlet
as
far
away
as
possible
from
appli-
ance
thought
to
be
the
cause.
1.
Turn
up
main
volume,
—
cord.

ik}
Care
of
Your
Keyboard
1.
Avoid
heat,
humidity,
and
direct
sunlight.
Do
not
overexpose
the
unit
to
direct
sunlight,
place
it
near
a
heater,
or
in
any
area
subject
to
high
temperature.
2.
Avoid
severe
impacts
and
do
not
drop.
Severe
impacts
can
result
in
malfunction.
When
carrying
or
transportion
the
unit,
protect
the
keyboard
and
keys
by
packing
with
soft
cloth.
3.
Keep
the
unit
free
of
liquids,
dust,
particles,
etc.
Do
not
allow
foreign
matter
to
enter
between
the
keys.
Be
especially
careful
of
metallic
objects
such
as
hairpins,
sewing
needles
or
coins.
Also,
do
not
allow
the
unit
to
get
wet.
.
4.
Never
attempt
to
modify
any
part
of
the
unit.
|
Your
keyboard
is
a
precision
musical
instrument
made
up
of
sophisticated
electronic
parts.
Any
modification
of,
or
tampering
with
internal
components
can
cause
trouble
or
malfunction.
5.
Do
not
use
lacquer
thinner
or
similar
chemicals
for
cleaning.
Clean
the
keyboard
with
a
soft
cloth
dampened
with
a
mild
detergent
solu-
tion
and
squeeze
it
until
almost
dry.
6.
Remove
batteries
before
extended
storage.
Batteries
left
in
the
unit
for
long
periods
can
leak
and
cause
damage
to
elec-
tronic
circuitry.
|
zs
a
7.
In
case
of
malfunction...
Check
whether
buttons
and
connections
are
set
correctly
as
indicated
in
the
troubleshootiong
chart.
If.the
unit
still
does
not
work
properly,
contact
the
original
retailer
or
a
nearby
dealer.
Never
attempt
to
repair
the
unit
your-
self.
This
can
result
in
serious
damage
of
the
components.
—28—
Specifications
Model:
Number
of
keys:
MT-640
49
mini
keys
Polyphonic:
10-note
polyphonic
Preset
tones:
20;
-
Piano,
Harpsichord,
Vibraphone,
Jazz
organ,
Pipe
organ,
Brass
ens.,
Flute,
Bells,
Elec
piano,
Funky
clavi,
Jazz
guitar,
Organ,
Accordion,
Strings,
Chorus,
Synth-ens,
Wood
bass/Piano,
Elec
bass/Slap
bass,
Percussion
1,
Percussion
2
:
Tone
Bank
sounds:
210
:
ene
Auto-rhythms:
20;
|
Rock
1-2,
8
beat
1-2,
16
beat
1-2,
Disco
1-2,
Pops
1-2,
Slow
rock
1-2,
Swing,
Samba,
Bossa
nova,
Waltz,
Reggae,
Tango,
Beguin,
March
Rhythm
source:
49
PCM
rhythm
sources
Auto-accompaniment
function:
Casio
Chord
on/fingered
1/fingered
2
10;
So
_
Hi
tom,
Mid
tom,
Low
tom,
Crash
cymbal,
Hi
agogo,
|
ts
agogo,
Quijada,
Voice,
Wind
chime,
Orchestra
it
-
|
Stereo
delay,
Stereo
panning
—'
Up
to
1,250
notes
.
Output
jack
[output
impedance:
50
Q,
output
voltage:
2.5V
(RMS)
MAX],
MIDI
terminals
(IN/
OUT),
AC
adaptor
jack
(DC
9V).
|
A4=442
Hz
+30
cents
,
Percussion
pads:
Built-in
effects:
Real-time
memory:
Terminals:
Tuning
control:
Built-in
speakers:
—
10cm
diax2
+
10cm
woofer
Auto
power
off
function:
Approximately
6
minutes
after
the
last
operation

14.
Specifications
—
2
7
Rae
ee
a
ea
aD
a
a
METS
Ne
PT
OE
EE OS
3-way
AC/DC
power
source;
e
AC:
100,
117,
220,
240V
(+10V),
50/60
Hz,
with
optional
AD-5
AC
adaptor.
e
DC:
6
D
size
(SUM-1/R20P)
manganese
ayn
bat.
teries.
_
Battery
life:
Approximately
6
hours
e
Car
battery:
Requires
optional
CA-5
car
adaptor
Power
source:
Power
consumption:
=
9W
|
800(W).
x
277(D)
x
109(H)
mm
|
31
1/2”
(W)
x
10
7/8”
(D)
x
4
1/4”
(H)
=
4.6kg
(10.1
Ibs)
including
batteries
6
‘‘D”
size
dry
batteries,
score
stand
Dimensions:
Weight:
Standard
accessories:
*
Designs
and
specifications
are
subject
to
change
without
notice.
GUIDELINES
LAID
DOWN
BY
FCC
RULES
FOR
USE
OF
THE
UNIT
IN
THE
U.S.A.
(not
applicable
to
other
areas).
|
This
equipment
generates
and
uses
radio
frequency
energy
and
if-not
installed
and
used.
properly,
that
is,
in
strict
accordance
with
the
manufacturer's
instructions,
may
cause
interference
to
radio
and
television
reception.
It
has
been
type
tested
and
found
to
comply
with
the
limits
for
a
Class
B
computing
device
in
accordance
with
the
specifications
in
Subpart
J
of
Part
15
of
FCC
Rules,
which
are
designed
to
provide
reasonable
protection
against
such
interference
in
a
residential
installation.
However,
there
is
no
guarantee
that
interference
will
not
occur
in
a
particular
installation.
If
this
equipment
does
cause
interference
to
radio
ar
television
reception,
which
can
be
determined
by
turning
the
equipment
off
and
on,
the
user
is
encouraged
to
try
to
correct
the
interference
by
one
or
more
of
the
following
measures:
reorient
the
receiving
antenna
relocate
the
computer
with
respect
to
the
receiver
move
the
computer
away
from
the
receiver
plug
the
computer
into
a
different
outlet
so
that.
computer
id
receiver
are
on
different
branch
circuits.
If
necessary,
the
user
should
consult
the
dealer
or
an
experienced
radio/television
technician
for
additional
suggestions.
The
user
may
find
the
following
booklet
prepared
by
the
Federal
Communications
Commis-
sion
helpful:
‘‘How
to
Identify
and
Resolve
Radio-TV
Interference
Problems.”’
This
booklet
is
available
from
the
US
Government
Printing
Office,
Washington,
D.C.,
20402,
Stock
No.
004-000-00345-4,
—30—
een
eeeevee
eevee
avraua
peneenvnene
eoerteoovoees
CASIO.
MT-640
INSTRUMENTO
MUSICAL
ELECTRONICO
Introduccién
Su
nuevo
teclado
MT-640
es
un
instrumento
musical
de
avanzada.
que
incorpora
la
tecnologia
electronica
mas
moderna
para
que
su
manejo
sea
lo
mas
simple
posible.
Su
excepcional
sonido,
respaldado
por
una
gran
cantidad
de
caracteristicas
y
funciones
sofisticadas
hacen
que
este
teclado
sea
una
verdadera
fuente
de
diversién
para
todos.
Para
poder
disfrutar’
al
maximo
de
—
las
caracteristicas
y
funciones
de
esta
unidad,
le.
recomen-
damos
leer
detalladamente
este
manta
y
eeu
las
instrucciones
contenidas.
/
:
.
Indice’
1.
Guia
general
«0.2...
cece
eee.
tea:
32
2.
Fuente
de
alimentacién...............................
34
3.
Operacion
general
..........0
00000
0c
cece
eee.
35
4.
Sistema
de
bajo
dindmico.................0.0.0..0..05.
36
5.
Sonidos
programados......:..........................
37
6.
Combinaciones
de
sonido
del
banco
de
sonido
ncn
eesti
40
7
Ritmos
automaticos
...............0...
00
.0.00.0-00..
42
8
Acompanamiento
automatico..........................
43
9.
Parches
de
solo
de
percusion..........................
47
10.
Funcion
de
memoria
de
ejecucién
.....................
48
WN
eat
Gh
cee
doar
niie
oni
awe
tages
ea
ans
&
fehtciee
50
12.
Localizacién
de
averias
...............................
55
13.
Cuidado
de
su
teclado................................
56
14.
Especificaciones
............0000.0000
000
cee
eee,
57
Table of contents
Other Casio Musical Instrument manuals
Casio
Casio VA-10 User manual

Casio
Casio SA-20 User manual

Casio
Casio DG-20 Troubleshooting guide

Casio
Casio 575E1A User manual

Casio
Casio CDP-130 User manual

Casio
Casio Celviano AP-265 User manual
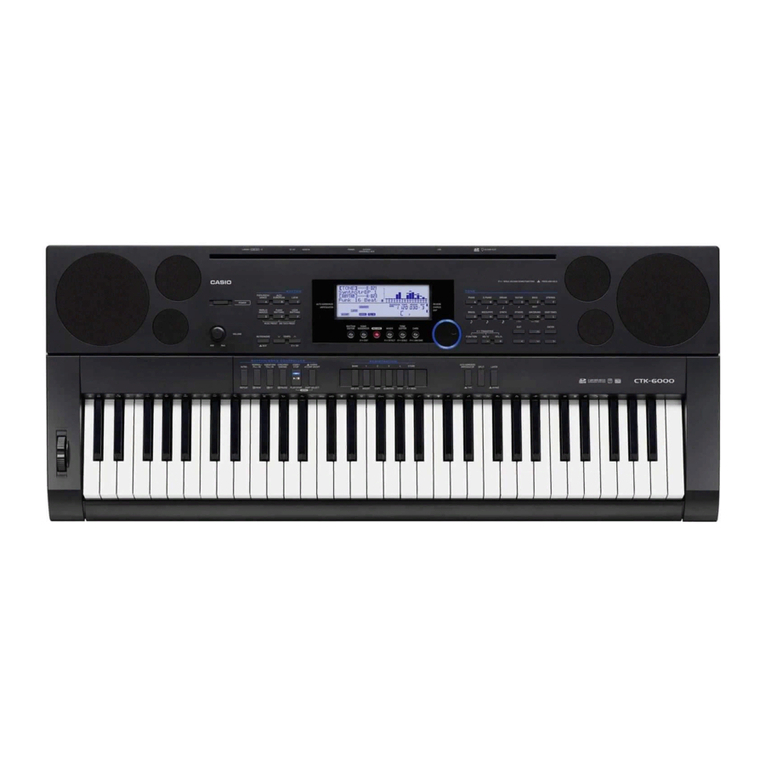
Casio
Casio PRIVIA PX-S1100WE User manual
Casio
Casio PRIVIA PX-3S User manual

Casio
Casio Privia PX-870 User manual

Casio
Casio CELVIANO PX-770 User manual

Casio
Casio CTK-520L User manual

Casio
Casio Privia PX-765 User manual

Casio
Casio Privia PX-850 User manual

Casio
Casio CTK-800 Troubleshooting guide

Casio
Casio CTK-710 User manual

Casio
Casio CDP-S90 User manual

Casio
Casio MZ-X300 User manual

Casio
Casio Privia PX-S7000 User manual

Casio
Casio Privia PX-720 User manual

Casio
Casio CDP-S160 User manual