manuals.online logo
Brands
  1. Home
  2. •
  3. Brands
  4. •
  5. Casio
  6. •
  7. PDA
  8. •
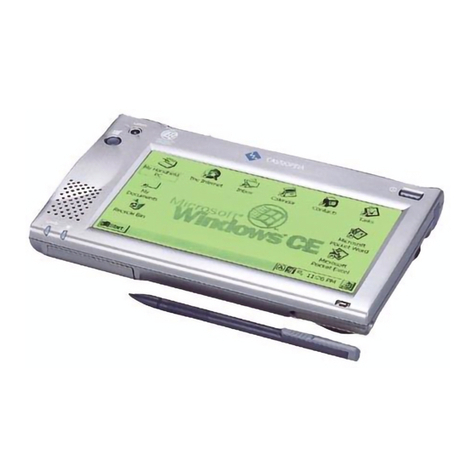
  9. Casio CASSIOPEIA E-11 User manual

Casio CASSIOPEIA E-11 User manual

Other Casio PDA manuals

Casio PV-750 Plus Use and care manual

Casio

Casio PV-750 Plus Use and care manual

Casio NX-4000 Troubleshooting guide

Casio

Casio NX-4000 Troubleshooting guide

Casio PV-100 User manual

Casio

Casio PV-100 User manual

Casio DC-7800RS Troubleshooting guide

Casio

Casio DC-7800RS Troubleshooting guide

Casio PV-750 Plus Instruction and safety manual

Casio

Casio PV-750 Plus Instruction and safety manual

Casio PV-100 User manual

Casio

Casio PV-100 User manual

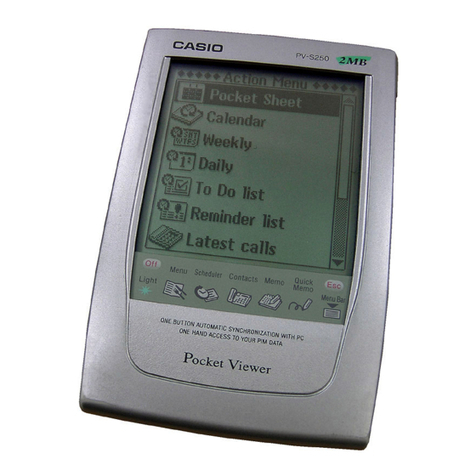
Casio PV-S250 User manual

Casio

Casio PV-S250 User manual

Casio PV-250X User manual

Casio

Casio PV-250X User manual

Casio PB-2000C User manual

Casio

Casio PB-2000C User manual

Casio PV-100 User manual

Casio

Casio PV-100 User manual

Casio IT-10 Series User manual

Casio

Casio IT-10 Series User manual

Casio PV-250X Technical document

Casio

Casio PV-250X Technical document

Casio PV-250X User manual

Casio

Casio PV-250X User manual

Casio Cassiopeia IT-2000 User manual

Casio

Casio Cassiopeia IT-2000 User manual

Casio PV-100 User manual

Casio

Casio PV-100 User manual

Casio IT-G400 Series User manual

Casio

Casio IT-G400 Series User manual

Casio IT-2000W Product manual

Casio

Casio IT-2000W Product manual

Casio PV-250X User manual

Casio

Casio PV-250X User manual

Casio DT-X30 R-50C User manual

Casio

Casio DT-X30 R-50C User manual

Casio Palm-size PC User manual

Casio

Casio Palm-size PC User manual

Casio PV-100 Instruction sheet

Casio

Casio PV-100 Instruction sheet

Casio PV-750 Plus User manual

Casio

Casio PV-750 Plus User manual

Casio Cassiopeia EM-500 User manual

Casio

Casio Cassiopeia EM-500 User manual

Casio PV-250X User manual

Casio

Casio PV-250X User manual

Popular PDA manuals by other brands

SmartOffice Mobile for Pocket PC user guide

SmartOffice

SmartOffice Mobile for Pocket PC user guide

Palm Tungsten T2 Software guide

Palm

Palm Tungsten T2 Software guide

HTC PHAR100 user manual

HTC

HTC PHAR100 user manual

Mindeo M40 Reference manual

Mindeo

Mindeo M40 Reference manual

SPOT SPOT user guide

SPOT

SPOT SPOT user guide

Palm handheld Getting started guide

Palm

Palm handheld Getting started guide

Winmate E500QK user guide

Winmate

Winmate E500QK user guide

Getac PS236 Specifications

Getac

Getac PS236 Specifications

Sharp CE-1600P Operation manual

Sharp

Sharp CE-1600P Operation manual

Audiovox Maestro Quick start card

Audiovox

Audiovox Maestro Quick start card

Acer n30 manual

Acer

Acer n30 manual

Unitech PT630 Programming reference guide

Unitech

Unitech PT630 Programming reference guide

Unova Intermec 700 Series user guide

Unova

Unova Intermec 700 Series user guide

Sharp Zaurus SL-5500 quick start guide

Sharp

Sharp Zaurus SL-5500 quick start guide

ASCOM 9D24 EX brochure

ASCOM

ASCOM 9D24 EX brochure

Asus P505 user guide

Asus

Asus P505 user guide

Sony CLIE PEG-N610C operating instructions

Sony

Sony CLIE PEG-N610C operating instructions

Unitech PA520BTNF user manual

Unitech

Unitech PA520BTNF user manual

manuals.online logo
manuals.online logoBrands
  • About & Mission
  • Contact us
  • Privacy Policy
  • Terms and Conditions

Copyright 2025 Manuals.Online. All Rights Reserved.

CASIO.
CASIO
COMPUTER
CO.,
LTD.
6-2,
Hon-machi
1-chome
Shibuya-ku,
Tokyo
151-8543,
Japan
PN410619-001
MOQ9808-021001A
Printed
in
Japan
on
snore
~
CASSIOPEIA
E11
Getting
Started
with
the
CASSIOPEIA
(Hardware
Manual)
User
documentation
consists
of
two
manuals:
Microsoft
User’s
Guide
and
this
|
booklet.
Be
sure
to
read
this
manual
first.
Be
sure
to
read
the
Safety
Precautions
contained
in
this
manual
to
ensure
proper
operation
of
this
product.
=~
Keep
this
manual
in
a
safe
place
for
future
reference.
CASIO.
nM
RE
Safety
Precautions
“F
Congratulations
upon
your
selection
of
the
CASSIOPEIA.
Be
sure
to
read
the
following
Safety
Precautions
before
trying
to
use
it
for
the
first
time.
Note
e
All
mentions
of
“the
unit”
in
the
following
precautions
refer
to
the
CASSIOPEIA
E-11
pe
ee
nn
name
INEPT
ATEN
RSL
Markings
and
Symbols
The
following
are
the
meanings
of
the
markings
and
‘symbols
used
in
these
Safety
Precautions.
scons
drtewenrsarendibaciniiomesia
Microsoft,
Windows,
and
Windows
NT
are
either
registered
trademarks
or
trademarks
of
Microsoft
Corporation
in
the
United
States
and/or
other
|
This
symbol
indicates
information
that,
if
ignored
A\
Warning
countries.
or
applied
incorrectly,
creates
the
possibility
2
e
Pentium
is
a
registered
trademark
of
Intel
Corporation.
|
death
or
serious
personal
injury.
CompactFlash
is
a
registered
trademark
of
SanDisk
Corporation.
|
All
other
product
and
company
names
mentioned
herein
may
be
the
j
This
symbol
indicates
information
that,
if
ignored
trademarks
of
their
respective
owners.
J\
Caution
or
applied
incorrectly,
creates
the
possibility
of
personal
injury
or
property
damage.
e
Data
can
be
uploaded
from
this
unit
to
a
personal
computer
for
storage
on
a
hard
disk,
floppy
diskette,
or
other
storage
medium.
Be
sure
to
make
multiple
copies
of
all
important
data
to
protect
against
its
accidental
loss.
¢
CASIO
COMPUTER
CO.,
LTD.
assumes
no
responsibility
for
any
®
damage
or
loss
resulting
from
the
use
of
this
manual.
e
CASIO
COMPUTER
CO.,
LTD.
assumes
no
responsibility
for
any
loss
|
or
claims
by
third
parties
which
may
arise
through
the
use
of
this
E:
°
A
black
circle
indicates
something
you
should
do.
The
symbol
product.
shown
here
indicates
you
should
unplug
the
unit
from
the
wall
e
CASIO
COMPUTER
CO.,
LTD.
assumes
no
responsibility
for
any
|
outlet.
damage
or
loss
caused
by
deletion
of
data
as
a
result
of
malfunction,
repairs,
or
battery
replacement.
Be
sure
to
back
up
all
important
data
on
other
media
to
protect
against
its
loss.
|
Health
Precautions
e
The
contents
of
this
manual
are
subject
to
change
without
notice.
a
=
ie
e
No
part
of
this
manual
may
be
reproduced
in
any
form
without
the
A
express
written
consent
of
the
manufacturer.
War
ning
e
A
diagonal
line
indicates
something.
you
should
not
do.
The
symbol
shown
here
indicates
you
should
not
try
to
take
the
unit
apart.
°
La
g
continuous
use
of
the
unit
when
you
are
tired
i
is
not
-
good
for
your
health,
and
should
be
avoided.
t
|
a
AX
(
Caution
°
Be:
sure
to
allow
for
adequate
rest
when
using
the
unit
Per
long
periods.
As
a
general
rule,
you
should
allow
for
10
to
15°
minutes
of
rest
per
hour.
CORBIS,
RUBE
SS
WBE
B
ERA
BA
VCCIORBCRO
<OFAB
ce
Spach
CORE.
RR
CEATSCLeEB
HEL
THIETD,
CORBPIVAPTVEY
3a
VS
BAICHEL
TE
FASNSOC,
age
ee
FCEPHBVET,
Bua
ICiE
CIELO
RU
ROSELL
TK
HEU
ron
aR
refer
rerenitmenin
ohm
erent
Retest
Ren
MRNA
onan
Precautions
During
Use
Ke
ig
0
®
@
Abnormal
Conditions
A\
Warning
©
Continued
use
of
the
unit
while
it
is
emitting
smoke
or
strange
odor
creates
the
danger
of
fire
and
electrical
shock.
Immediately
turn
off
power,
unplug
the
AC
adapter
from
the
wall
outlet,
remove
batteries,
and
contact
your
original
dealer
or
an
authorized
CASIO
service
provider
to
request
servicing.
Water
and
Foreign
Matter
*
Should
any
foreign
matter
(metal,
water
or
other
liquid)
ever
get
into
the
unit,
immediately
turn
off
power,
unplug
the
AC
adapter
from
the
wall
outlet,
remove
batteries,
and
contact
your
original
dealer
or
an
authorized
CASIO
service
provider
to
request
servicing.
Dropping
and
Damage
¢
Should
the
unit
ever
fall
or
otherwise
become
damaged,
unplug
the
AC
adapter
from
the
power
outlet,
remove
batteries,
and
contact
your
original
dealer
or
an
authorized
CASIO
service
provider.
Continued
use
creates
the
danger
of
fire
and
electrical
shock.
Disassembly
e
Never
try
to
take
the
unit
apart
or
modify
it
in
any
way.
Doing
so
creates
the
danger
of
fire
and
electrical
shock.
Magnetic
Force
e
If
you
are
fitted
with
a
pacemaker,
keep
the
CASSIOPEIA
away
from
your
chest
area.
In
particular,
do
not
carry
the
CASSIOPEIA
in
your
breast
pocket.
Magnetic
force
generated
by
the
speaker
built
into
the
CASSIOPEIA
could
possibly
affect
operation
of
a
pacemaker.
Should
you
ever
suspect
a
problem,
immediately
move
away
from
the
CASSIOPEIA
and
contact
your
physician.
we
A\
Caution
Memory
Protection
.
0
e
Be
sure
to
keep
separate
copies
of
all
important
data
by
saving
it
on
a
computer
disk
or
other
medium.
Note
that
all
data
stored
in
unit
memory
is
deleted
whenever
batteries
go
dead.
Memory
contents
can
also
become
lost
or
corrupted
due
to
malfunction
and
repair
of
the
unit.
Location
©
0
e
Do
not
locate
the
unit
in
an
area
subjected
to
large
amounts
of
humidity
or
dust.
Doing
so
can
create
the
danger
of
fire:
and
electrical
shock.
;
¢
Keep
the
unit
away
from
food
preparation
area,
stoves,
and
anywhere
else
it
might
be
expose
to
oil
smoke
or
steam.
Such
conditions
can
create
the
danger
of
fire
and
electrical
shock.
Avoid
unstable
surfaces.
|
OS
e
Never
place
the
unit
on
an
unstable
surface,
on
a
high
shelf,
or
in
any
other
unstable
location.
Doing
so
can
create
the
danger
of
the
unit
falling
and
causing
personal
injury.
Magnetic
Force
SO
¢
Keep
the
CASSIOPEIA
away
from
ATM
cards,
credit
cards,
and
any
other
magnetic
card
during
transport
and
storage.
|
Magnetic
force
generated
by
its
speaker
can
render
magnetic
cards
unusable.
;
¢
Keep
the
CASSIOPEIA
away
from
televisions
and
other
tadio
wave
receivers.
Magnetic
force
generated
by
its
speaker
can
cause
interference
with
radio
wave
reception.
-
Batteries
J\
Warning
Never
try
to
charge
batteries,
take
them
apart,
or
allow
them
to
become
shorted.
Do
not
apply
solder
to
batteries
or
expose
them
to
heat,
and
never
throw
batteries
into
fire
or
water.
While
the
lithium
battery
is
removed
from
the
unit,
take
care
|
to
keep
it
in
a
place
where
there
is
no
danger
of
it
being
accidentally
swallowed.
Be
especially
careful
around
young
children.
Keep
batteries
out
of
the
reach
of
young
children.
If
a
battery
is
accidentally
swallowed,
consult
a
physician
immediately.
Should
fluid
from
the
battery
pack
accidentally
get
into
your
eyes,
do
not
rub
them.
Rinse
your
eyes
with
water
and
then
consult
your
physician
immediately.
A\
Caution
Misuse
of
batteries
can
cause
them
to
leak,
which
damage
and
corrodes
the
area
around
the
battery
and
creates
the
danger
of
fire
and
personal
injury.
Be
sure
to
observe
the
following
precautions.
e
When
loading
batteries,
make
sure
their
positive
(+)
and
negative
(—)
poles
are
facing
correctly.
Remove
batteries
from
the
unit
if
you
do
not
plan
to
use
it
for
a
long
time.
:
Use
only
battery
types
that
are
specified
for
this
unit.
Never
mix
new
batteries
with
old
ones.
Never
mix
batteries
of
different
types.
Lay
AC
Adapter
Z\
Warning
OS
e
Never
use
a
voltage
that
is
different
from
that
for
which
the
AC
adapter
is
rated.
Also,
do
not
plug
the
unit
into
a
power
outlet
that
is
shared
by
other
devices.
Doing
so
creates
the
danger
of
fire
and
electrical
shock.
*
Never
modify
the
power
cord
or
excessively
bend,
twist,
or
pull
it.
Doing
so
creates
the
danger
of
fire
and
electrical
shock.
¢
Do
not
allow
the
power
cord
to
become
damaged.
Do
not
place
heavy
objects
on
the
power
cord
or
expose
it
to
heat.
A
damaged
power
cord
creates
the
danger
of
fire
and
electrical
shock.
oe
e
Never
touch
the
AC
adapter
while
your
hands
are
wet.
Doing
so
creates
the
danger
of
electrical
shock.
q
e
Should
the
power
cord
ever
become
seriously
damaged
(internal
wiring
exposed
or
shorted),
contact
your
original
dealer
or
an
authorized
CASIO
service
provider
to
request
servicing.
Continued
use
of
a
seriously
damaged
power
cord
creates
the
danger
of
fire
and
electrical
shock.
e
Use
only
the
AC
adapter
specified
for
this
unit.
Use
of
another
type
of
AC
adapter
creates
the
danger
of
fire,
and
personal
injury.
A\
Caution
Ez
Unplug
the
AC
adapter
from
the
wall
outlet
whenever
leaving
the
unit
unattended
for
long
periods.
|
¢
Be
sure
to
unplug
the
AC
adapter
from
the
wall
outlet
before
|
attempting
to
move
the
unit
to
another
location.
oO
e
Be
sure
to
grasp
the
AC
adapter
when
unplugging
it
from
a
wall
outlet.
Pulling
on
the
power
cord
can
damage
it,
and
create
the
danger
of
fire
and
electrical
shock.
¢
Keep
the
power
cord
away
from
stoves
and
other
sources
of.
heat.
Heat
can
melt
the
insulation
of
the
power
cord
and
create
the
danger
of
fire
and
electrical
shock.
Operating
Precautions
aS
ee
The
CASSIOPEIA
is
a
precision
digital
instrument.
Incorrect
operation
oye
tie
ceeslOP
and
damage
it
ee
en
and
rough
handling
can
cause
data
storage
problems
and
other
:
pees
and
contact
yeuy
original
dealer
nese:
enmionced
cAsl)
malfunction,
Be
sure
to
read
the
following
precautions
to
ensure
proper
service
provider.
Never
continue
using
a
damaged
pte
operation
i
e
Never
place
heavy
objects
on
top
of
the
CASSIOPEIA.
¢
Replace
batteries
as
soon
as
possible
when
they
start
to
become
weak.
Continued
use
while
batteries
are
low
can
lead
to
loss
of
memory
data.
e
Never
try
to
take
the
CASSIOPEIA
apart.
Doing
so
can
cause
malfunction.
®
Do
not
leave
dead
batteries
in
the
CASSIOPEIA
for
long
periods.
Doing
so
can
result
in
battery
leakage,
which
can
damage
the
CASSIOPEIA
and
cause
malfunction.
*
Use
the
CASSIOPEIA
under
the
conditions
listed
below.
*
Take
care
to
avoid
spilling
water
or
drinks
on
the
CASSIOPEIA.
®
Temperature:
(°C
to
40°C
(32°F
to
104°F)
G
=
D
®
No
condensation
KC
Conditions
other
than
those
above
can
cause
malfunction.
*
Avoid
using
the
CASSIOPEIA
in
areas
subjected
to
the
following
conditions,
®
Static
electricity
Use
only
the
stylus
that
comes
with
the
CASSIOPEIA
to
press
touch
screen
keys
and
the
RESET
button.
Never
use
any
object
other
than
the
stylus
that
comes
with
the
CASSIOPEIA.
Doing
so
can
scratch
the
touch
screen
and
cause
®
Sudden
temperature
changes
malfunction.
®
Extreme
heat
or
cold
®
High
humidity
*
Large
amounts
of
dust
Never
use
thinner,
benzene,
cosmetics,
or
other
volatile
agents
to
clean
fhe
exterior
of
the
CASSIOPEIA.
Use
only
a
dry
soft
cloth
or
a
Soft
cloth
moistened
with
a
weak
solution
of
water
and
mild
neutral
detergent.
Frequent
use
of
the
backlight
or
optionally
available
CompactFlash
cards
results
in
battery
life
shorter
than
that
indicated
in
the
specifications
of
this
manual.
Contents
ent
TN
OTE
AP
ne
STE
ESA
Safety
Precautions
........ccsessecssssssssescccsssssessesstsseecessecsesassecsssenss
Markings
and
Symbols
Health
Precautions
Precautions
During
Use
o...cccecccccccscsescsseseseteesreessvasesesees
2
Batteries
ss
cassava
ela
ek
deel
ode
nke
ar
wd
AG
Adapters;
ex2h
nisuicdeatshl
oi
elie
a
tinet
added:
5
Operating
Precautions...
sesssssesessssessscssstsssssecesessesecssereceess
6
Terms
and
Symbols
used
in
this
manual
..c.cccccccccceseeceseses
9
Getting
Ready
o....sscsscsscsssssccsssssscssesessscsevssessssnessessssucssssersetseeese
10
SOU
UN
Ss
secnettsbe
duces
cars
tush
Aim
ee
tsgs
ed
whteahtenteiuee
ce
10
Using
Built-in
Applications
w..c.ccccccccscesesseseccescescseeeceeees
I
Using
the
Documentation
oo...
cccccccsceseseesestesteateceeasesveese
Using
the
Touch
Screen
Sheet
OPCrATONS
sessseasssiedavesesccesadisd
edocs
cnsdesesnsdehonineedbisecdlasieceneslensasiees
General
Guide
Adjusting
Display
Contrast
....c.cccccceeeeeeees
wick
Turning
the
Mute
Option
On
and
Off
17
Using
the
Backlight
0.0.
cccccseccccscsesessssesessesseeesseeses
18
Using
the
Cradle
ooo.
cece
cccsesessessssesstssavesesestsees
wee
LD
Connecting
the
Cradle
to
a
Computer
20
Required
System
Configuration
......cccccccecsccsesesseseseeceees
21
Infrared
Communications
.......cccccccccsessesesseseseecsesteseeseeseses
23
Using
the
AC
Adapter
oo...
ccccccccccccsscescsessreetstsaveeseeseeees
24
CompactFlash
cards
o....0.cccecccsccessescstecleesseessstsessteseeseaves
25
Modem
isis
civiardine
ae
Mont
itsgiatededeedacen
eden
27
Software
Applications
0...
ccecceccesccccsecssesessessteseesesseeseees
27
User
Maintenance
........cccsssccsssssesssssesessscsssssessesssnecessnssacsnese
28
Replacing
Batteries
0...
eeccscccsssscesesesvesvsteetseeesateees
28
Replacing
the
Main
Batteries
.......
Replacing
the
Back-up
Battery
rm
re:
pee
Resetting
the
Unit
Performing
a
Reset
Memory
Error
Message
......cccccecseeee
added
ssevanddeesavades?
Full
Reset
(Memory
Initialize)
.o...cscecccsescecsesescsccseesccecees
Performing
a
Full
Reset.........
Errors
Following
a
Full
Reset
Troubleshooting
......cssssssescsssssesscsssssesssssscssessuecanesessnsesessoeseessnses
37
ADDOUGER
sscossssiccsiutecusccuissiseedussbareadscusscsseanuciasntisanieeeGcnscceesdeeccce
Button
Operations
Specifications
Regulatory
Information
Terms
and
Symbols
used
in
this
manual
°
The
term
“unit”
in
this
manual
refers
to
the
CASSIOPEIA
E-11.
e
The
symbol
“Important
AN”
indicates
important
information
about
a
procedure
that
can
result
in
problems
if
not
performed
correctly.
Be
sure
to
read
such
information
carefully.
t
Getting
Ready
Set
Up
Be
sure
to
perform
the
following
setup
procedure
before
using
the
unit
for
the
first
time.
¢
The
following
information
is
the
same
as
that
contained
on
the
Quick
Start
Guide
that
comes
packed
with
the
unit.
|.
Load
the
main
batteries
(page
30).
Be
sure
to
load
the
main
batteries
first.
The
unit
will
not
operate
correctly
if
you
load
the
back-up
battery
before
the
main
batteries.
2.
Load
the
back-up
battery
(page
31).
3.
After
about
five
seconds,
turn
on
the
unit.
4,
The
following
two
screens
appear
on
the
display
in
succession.
e
Startup
screen
©
Touch
screen
alignment
screen
5.
Follow
the
instructions
that
appear
on
the
screen
to
make
initial
settings.
*
Adjust
the
display
contrast
(page
17)
if
the
figures
on
the
screen
are
dim
and
difficult
to
see.
e
You
can
change
the
settings
you
make
here
later
if
you
want.
See
the
Microsoft
User’s
Guide
for
details.
Important
A\
*
If
nothing
happens
when
you
tap
the
screen,
or
if
the
display
does
not
show
anything,
first
try
performing
the
full
reset
(memory
initialize)
operation
(page
35).
Ifa
full
reset
does
not
correct
the
problem,
remove
the
main
batteries
and
the
back-up
battery
and
leave
them
out
for
about
five
minutes.
Next,
restart
the
setup
operation
from
step
[.
e
When
loading
batteries,
make
sure
their
positive
(+)
and
negative
(-)
poles.
are
facing
correctly.
*
You
should
also
perform
the
full
reset
(memory
initialize)
operation
(page
35)
whenever
the
message
“A
problem
with
memory
contents
has
been
found...”
appears
on
the
display.
ony
6.
The
desktop
appears
after
the
initial
setup
procedure
is
complete.
¢
The
unit
is
now
set
up
for
operation.
See'the
documentation-that
comes
with
the
unit
for
details
on
how
to
use
its
various
functions.
See
“Using
the
Documentation”
for
details
on
the
documentation
that
comes
with
the
unit.
e
After
you
are
finished,
press
the
[Power]
button
to
turn
off
power.
Using
Built-in
Applications
You
can
use
the
built-in
applications
as
soon
as
you
finish
the
setup
procedure.
See
the
Microsoft
User’s
Guide
for
details
on
how
to
use
the
built-in
applications.
Using
the
Documentation
The
documentation
for
this
unit
consists
of
this
Hardware
Manual
and
the
Microsoft
User’s
Guide.
Be
sure
to
read
this
Hardware
Manual
first.
The
following
items
point
you
in
the
right
direction
when
you
need
to
locate
further
information.
After
reading
the
Hardware
Manual
After
you
use
the
Hardware
Manual
to
get
the
unit
set
up
and
running,
see
the
Microsoft
User’s
Guide
for
details
on
operational
procedures.
Operational
problems
See
“Troubleshooting”
on
page
37
of
this
Hardware
Manual
and
the
Microsoft
User’s
Guide
when
the
unit
does
not
seem
to
be
responding
properly
even
though
you
are
performing
operational
procedures
as
directed.
Connecting
to
a
personal
computer
See
page
20
of
this
Hardware
Manual
for
information
on
compatible
personal
computers
and
details
on
how
to
actually
connect
to
a
PC.
See
the
Microsoft
User’s
Guide
for details
on
procedures
required
for
exchanging
data
between
this
unit
and
computer.
U1
sc
ONE
RATTAN
PFO
TTS
PU
ST
ESOP
HSRC
installing
applications
from
the
Bonus
CD-ROM
Using
the
Touch
Screen
Sheet
See
the
documentation
contained
on
the
CD-ROM
for
details
on
installing
applications.
The
touch
screen
sheet
that
comes
with
the
unit
protects
the
touch
screen
against
scratching
and
other
damage.
Use
the
following
procedure
to
affix
the
sheet
to
the
touch
screen.
Important
AN
e
When
setting
the
Touch
Screen
sheet
in
place,
take
care
not
to
press
down
on
the
Touch
Screen
too
hard.
Doing
so
can
damage
the
Touch
i
Screen.
1.
Make
sure
the
touch
screen
is
free
of
dust
and
dirt.
2.
Peel
the
green
film
from
the
back
of
the
touch
screen
sheet.
e
If
you
have
a
problem
peeling
off the
green
film,
try
using
cellophane
tape.
Hold
the
end
of
a
piece
of
tape
about
5
cm
long
between
your
thumb
and
forefinger,
adhesive
side
facing
down.
Affix
the
other
end
|
of
the
tape
to
one
of
the
corner
areas
the
green
film
and
then
pull
up.
The
tape
should
pull
up
the
green
film.
¢
Do
not
touch
the
surface
of
the
touch
screen
sheet
after
removing
the
|
film.
|
e
The
side
of
the
sheet
that
is
protected
by
the
film
is
the
surface
that
should
come
into
contact
with
the
touch
screen.
3.
Insert
the
top
and
bottom
edges
of
the
touch
screen
sheet
into
the
slits
between
the
touch
screen
and
the
unit’s
case.
Pay
some
*
Dust
or
dirt
between
the
sheet
and
the
touch
screen
can
scratch
the
touch
screen.
Take
care
to
make
sure
that
no
foreign
matter
gets
7
between
the
sheet
and
touch
screen
when
affixing
the
sheet.
Operations
General
Guide
¢*Card
Slot
Cover
(page
25)
*
Stylus
(page
16)
*
Infrared
Port
(page
23)
*
Indicator
Flashes
to
indicate
an
alarm
operation,
etc.
*
Earphone
Jack
For
connection
of
a
commercially
available
earphone
(9
3.5
mm).
Touch
Screen
Displays
information
and
provides
an
operation
screen
to
execute
functions
and
*
Exit
Button
input
data.
Similar
to
the
ESC
key.
*
Action
Control
See
“About
the
[Action]
Control”
on
the
next
page.
*
Application
Buttons
(Calendar,
Contacts,
Tasks)
Launch
the
applicable
applications.
Press
a
button
to
Jaunch
the
corresponding
application.
You
can
assign
the
applications
you
want
to
these
buttons.
*
Microphone
*
Power
Button
Turns
power
on
and
off.
Also
used
to
turn
on
backlight
(page
18).
*
Voice
Recorder
Button
Press
to
launch
the
Voice
Recorder
application.
Holding
down
this
button
starts
a
record
operation.
14
PA
*
Reset
Button
(page
33)
*
Main
Battery
Compartment
Cover
Release
(page
30)
¢
Main
Battery
Compartment
Cover
(page
30)
—
®
Speaker
*
Back-up
Battery
*
Serial
Connector
Compartment
For
connection
of
the
cradle
Cover
(page
19),
optional
modem
(page
31)
(page
27),
and
other
peripherals.
1
About
the
[Action]
Control
Operations
can
be
performed
by
pressing
and
rotating
the
[Action]
Control.
ae
oo
Rotating
the
[Action]
Pressing
the
[Action]
control
ra
control
performs
maa
|
performs
an
operation
similar
{
operations
similar
to
the
}
to
the
Enter
key
of
a
y
\/
up
and
down
arrow
keys
f
computer
keyboard.
f
of
acomputer
keyboard.
See
the
Microsoft
User’s
Guide
for
full
details
on
[Action]
control
operations
inside
of
specific
applications.
15
Using
the
Stylus
Data
input
and
virtually
all
other
operations
are
performed
using
a
stylus,
which
is
housed
inside
the
stylus
holder
in
the
higher
right
corner
of
the
unit.
The
following
defines
the
various
operations
that
you
can
perform
with
the
stylus.
TAP
ise
vencecle.
Tap
on
the
touch
screen
lightly
with
the
stylus.
Tapping
is
used
to
press
an
on-screen
button,
to
select
a
menu
item,
or
to
perform
other
similar
operations.
Double-tap
....
Tap
the
touch
screen
twice
in
quick
succession,
Some
applications
require
double-tapping
to
perform
certain
Operations.
DFAS
-schetiees
Keeping
the
stylus
pressed
lightly
against
the
screen,
move
the
stylus
to
another
location.
Important
AN
@
‘Take
care
that
you
do
not
misplace
or
otherwise
lose
the
stylus
by
always
storing
it
in
the
stylus
holder
when
you
are
not
using
it.
e
Take
care
to
avoid
breaking
the
tip
of
the
stylus.
@
Use
only
the
stylus
that
comes
with
the
unit
or
some
other
similar
object
to
perform
touch
screen
operations.
Never
use
a
pen,
pencil,
or
other
writing
implement.
16
Pay
Realigning
the
Touch
Screen
You
should
realign
the
touch
screen
whenever
touch
screen
response
is
bad,
or
when
the
operation
performed
is
different
from
the
operation
you
expected
when
tapping
on
the
touch
screen.
To
realign
the
touch
screen,
press
[Action]
while
holding
down
the
[Power]
button
(or
tap
Start,
tap
Settings
and
then
tap
Stylus).
Next,
follow
the
instructions
that
appear
on
the
screen.
Adjusting
Display
Contrast
Perform
the
following
operations
to
adjust
display
contrast
and
make
figures
on
the
display
darker
or
lighter.
°
Tap
the
Start
menu,
tap
Settings,
and
then
tap
Contrast
&
Mute.
Follow
the
instructions
on
your
screen
for
adjusting
the
contrast.
e
You
can
also
adjust
contrast
by
holding
down
[Exit]
and
rotate
the
[Action]
control
upward
to
increase
contrast,
and
downward
to
decrease
it.
Turning
the
Mute
Option
On
and
Off
Tap
the
Start
menu,
tap
Settings,
and
then
tap
Contrast
&
Mute.
Follow
the
instructions
on
your
screen
to
turn
the
mute
option
on
or
off.
Important
AN
*
Turning
on
the
mute
option
is
recommended
when
battery
power
is
low,
because
playing
sounds
and
recordings
requires
a
large
amount
of
power,
17