A
M
L
I
E
@
A
M
L
I
E
@
@
[Small-size Characters]
2-line display
@
[Large-size Characters]
1-line display
Display Contrast
Usethe following procedure to adjust the relative darknessofthe display figures.
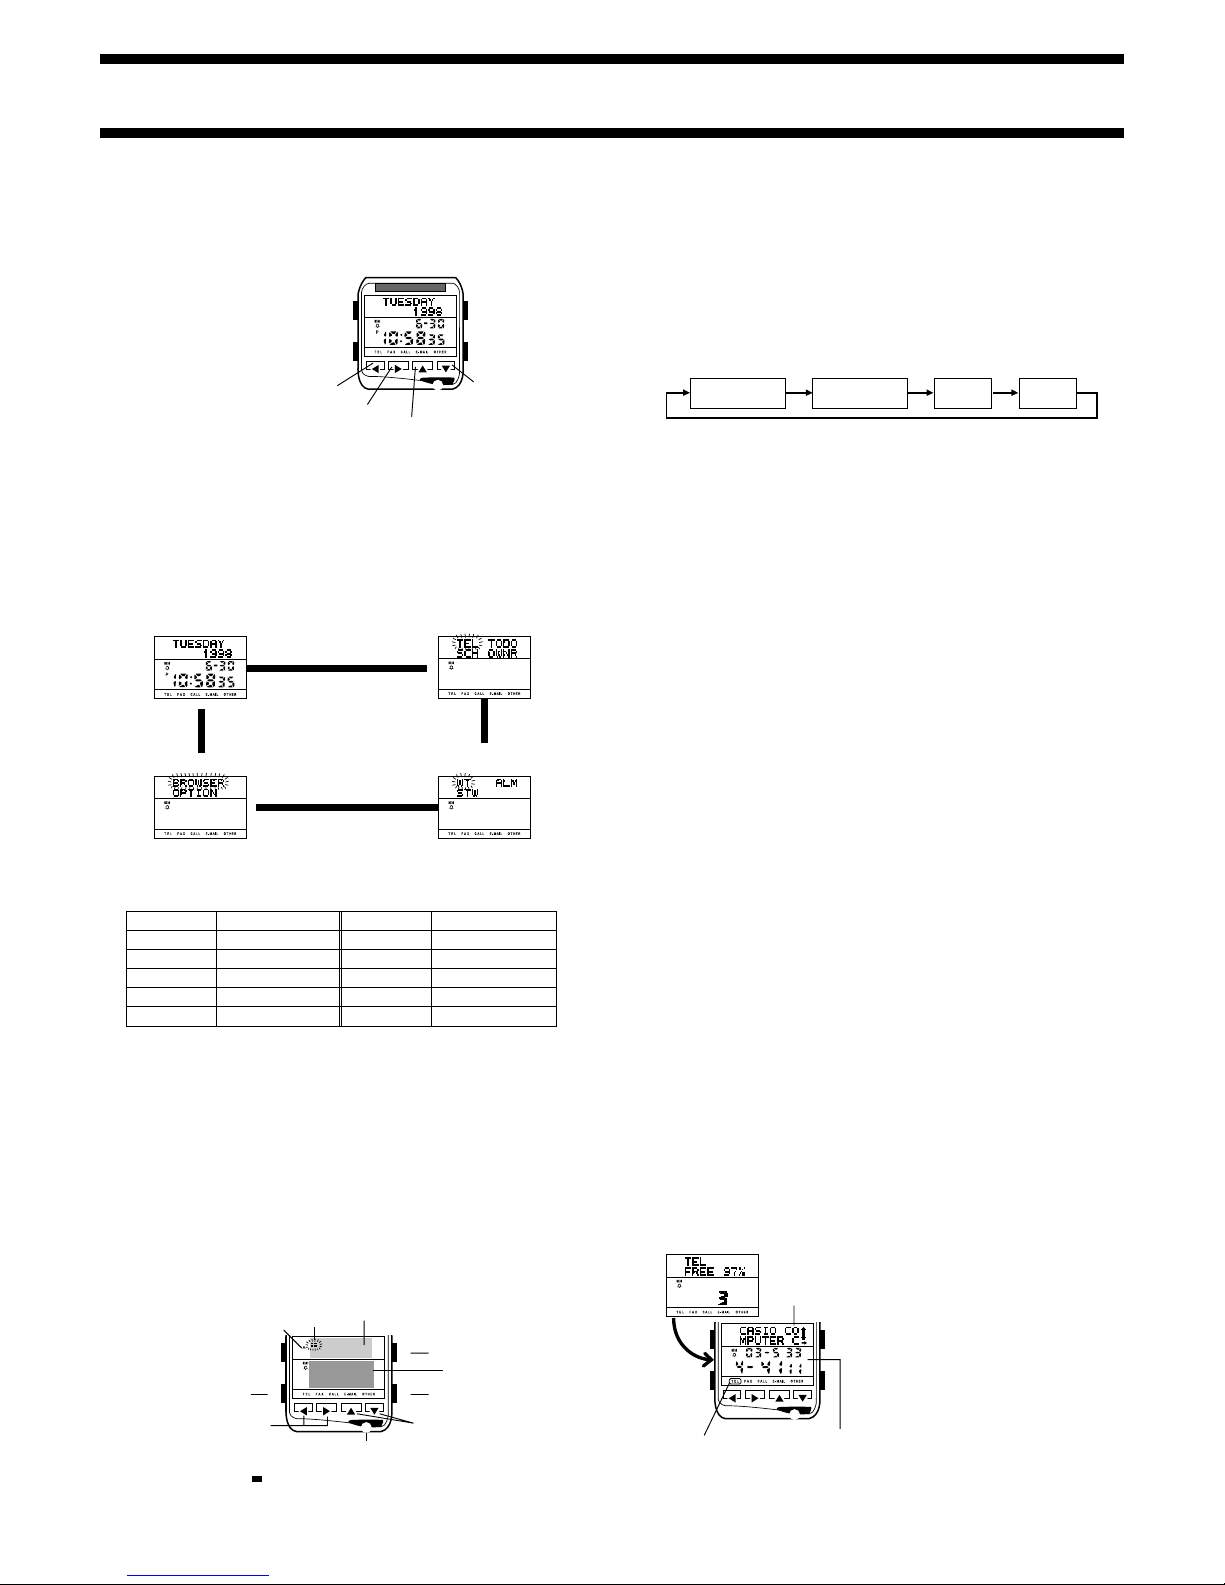
To adjust display contrast
1. In the Timekeeping Mode, press the M
button three times to display Menu Screen
3.
2. Press the Lbutton to move the flashing to
OPTION, and then press E.
3. Press the Lbutton to move the flashing to
CONTRAST.
4. While CONTRAST is flashing, press the Jbutton to make display
figures darker, and the Hbutton to make them lighter.
5. After you are finished making the setting you want, press the Mbutton to
return to the Timekeeping Mode.
Opening Screen The opening screen appears only after it has been
downloaded from the Watch Application. After an
opening screen has been downloaded, it appears
on the display of the watch for about one second
whenever you change from the Timekeeping Mode
to Menu Screen 1. See the documentation that
comes with the Watch Application for details.
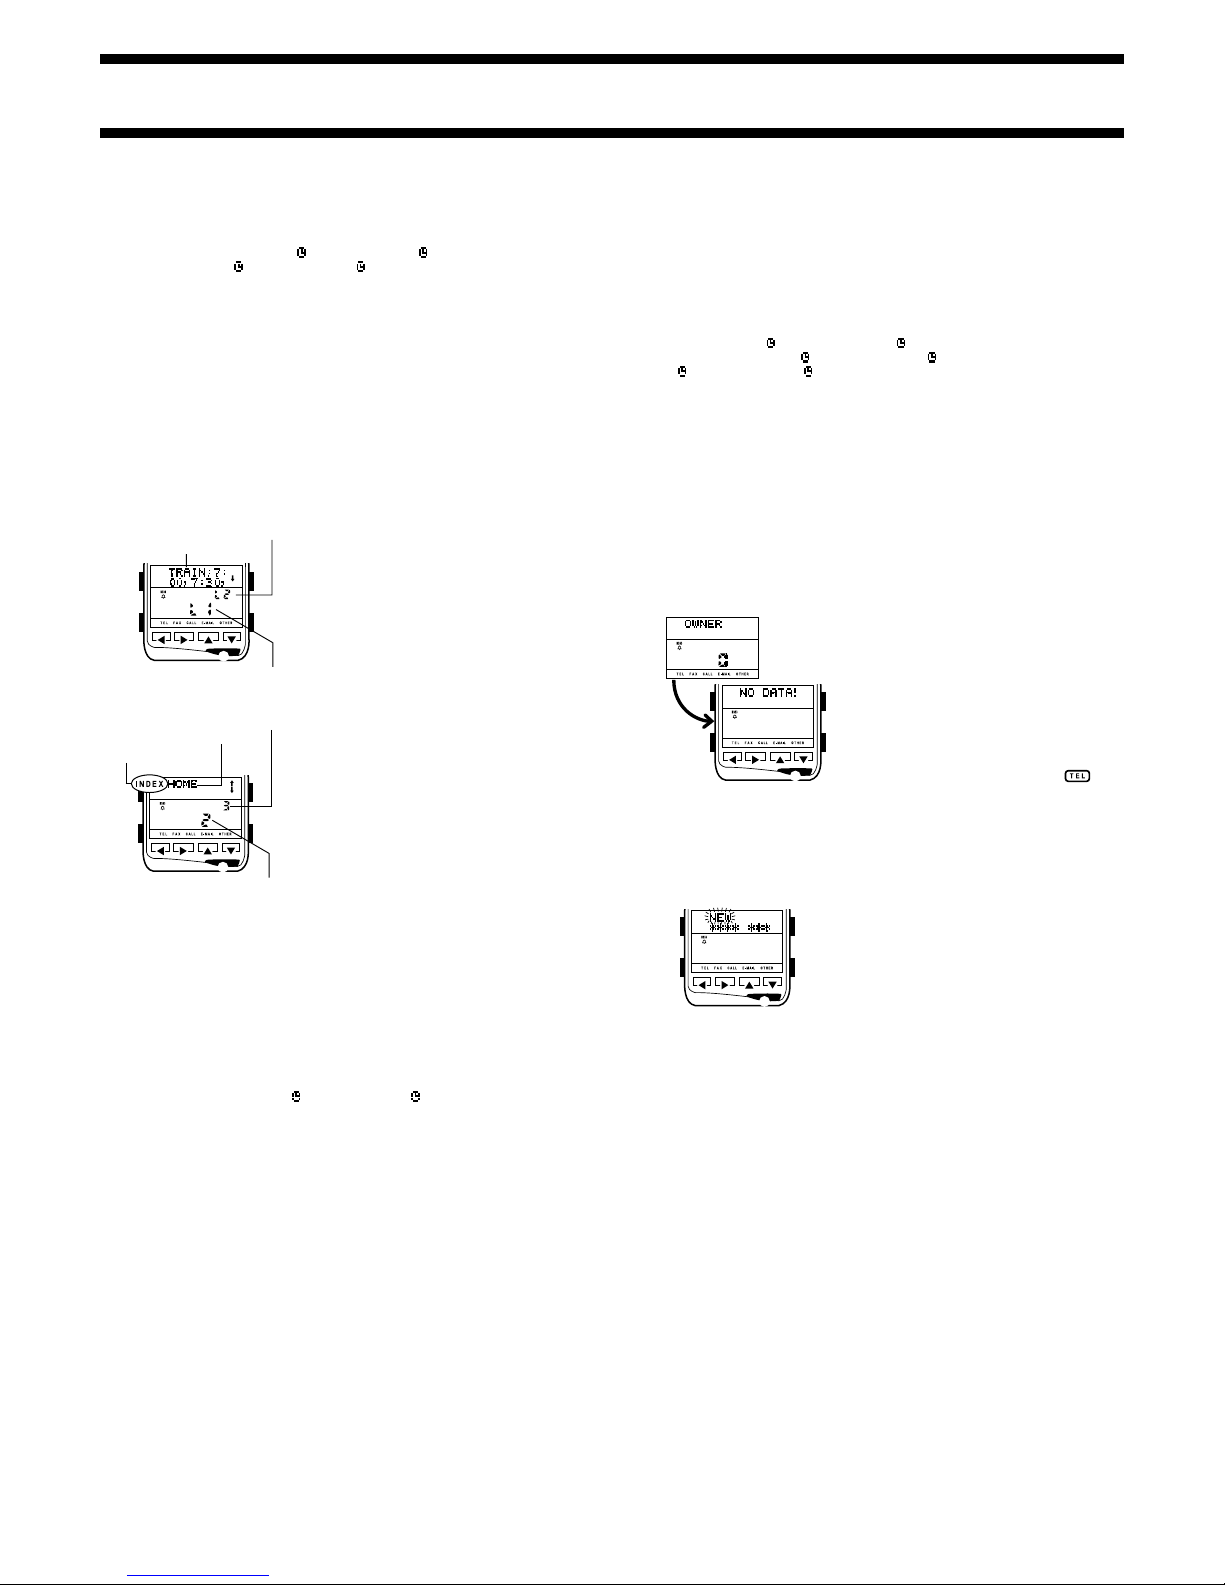
Indexes
Indexes can be used in the Telememo Mode to group records for easier
management, and in the Browser Mode to insert markers that act like titles
inside of a page.
Important!
In both the Telememo and Browser Mode, indexes can be created and edited
on a computer using the Watch Application only. You cannot create or edit an
index using the watch.
The following describes how indexes work in each mode.
Telememo Mode Indexes
•Indexes in the Telememo Mode serve to group records for quick and easy
reference. You can use the Watch Application to create your own user
indexes and move Telememo records into them on your computer. For
example, you could create indexes named FRIENDS, COMPANY, etc., and
moveTelememo recordsintotheir appropriateindex.Then youcandownload
Telememo records, with indexes, back to the watch.
•The Telememo Mode has a permanent built-in index named WATCH
INDEX . All Telememo Mode records you input using the procedure
under “To input a new Telememo record” are automatically stored under
the WATCH INDEX .
•Telememo records under each index is sorted according to the data in the
name field.
•Indexes do not normally appear on the watch display when recalling records.
However, you can use the procedure under “Telememo Index Search” to
jump to an index and then view the Telememo records stored under it.
•When you perform an index search, the WATCH INDEX is
always at the bottom of this list of available indexes.
Browser Mode Indexes
•Indexes in the Browser Mode act as section titles within a page of text. You
can use the Watch Application to insert indexes into Browser pages, and
then download the Browser text with indexes back to the watch.
•The Browser Mode has a permanent built-in index named WATCH
PAGE . All Browser Mode text you input using the procedure under “To input
new Browser text” is automatically stored under the WATCH PAGE .
•Indexes do not normally appear on the watch display during Browser text
recall. However, you can use the procedure under “To recall a Browser
page and search for an index” to jump to an index and then view the
Browser text stored under it.
•When you perform an index search, the WATCH PAGE is always
at the bottom of this list of available indexes.
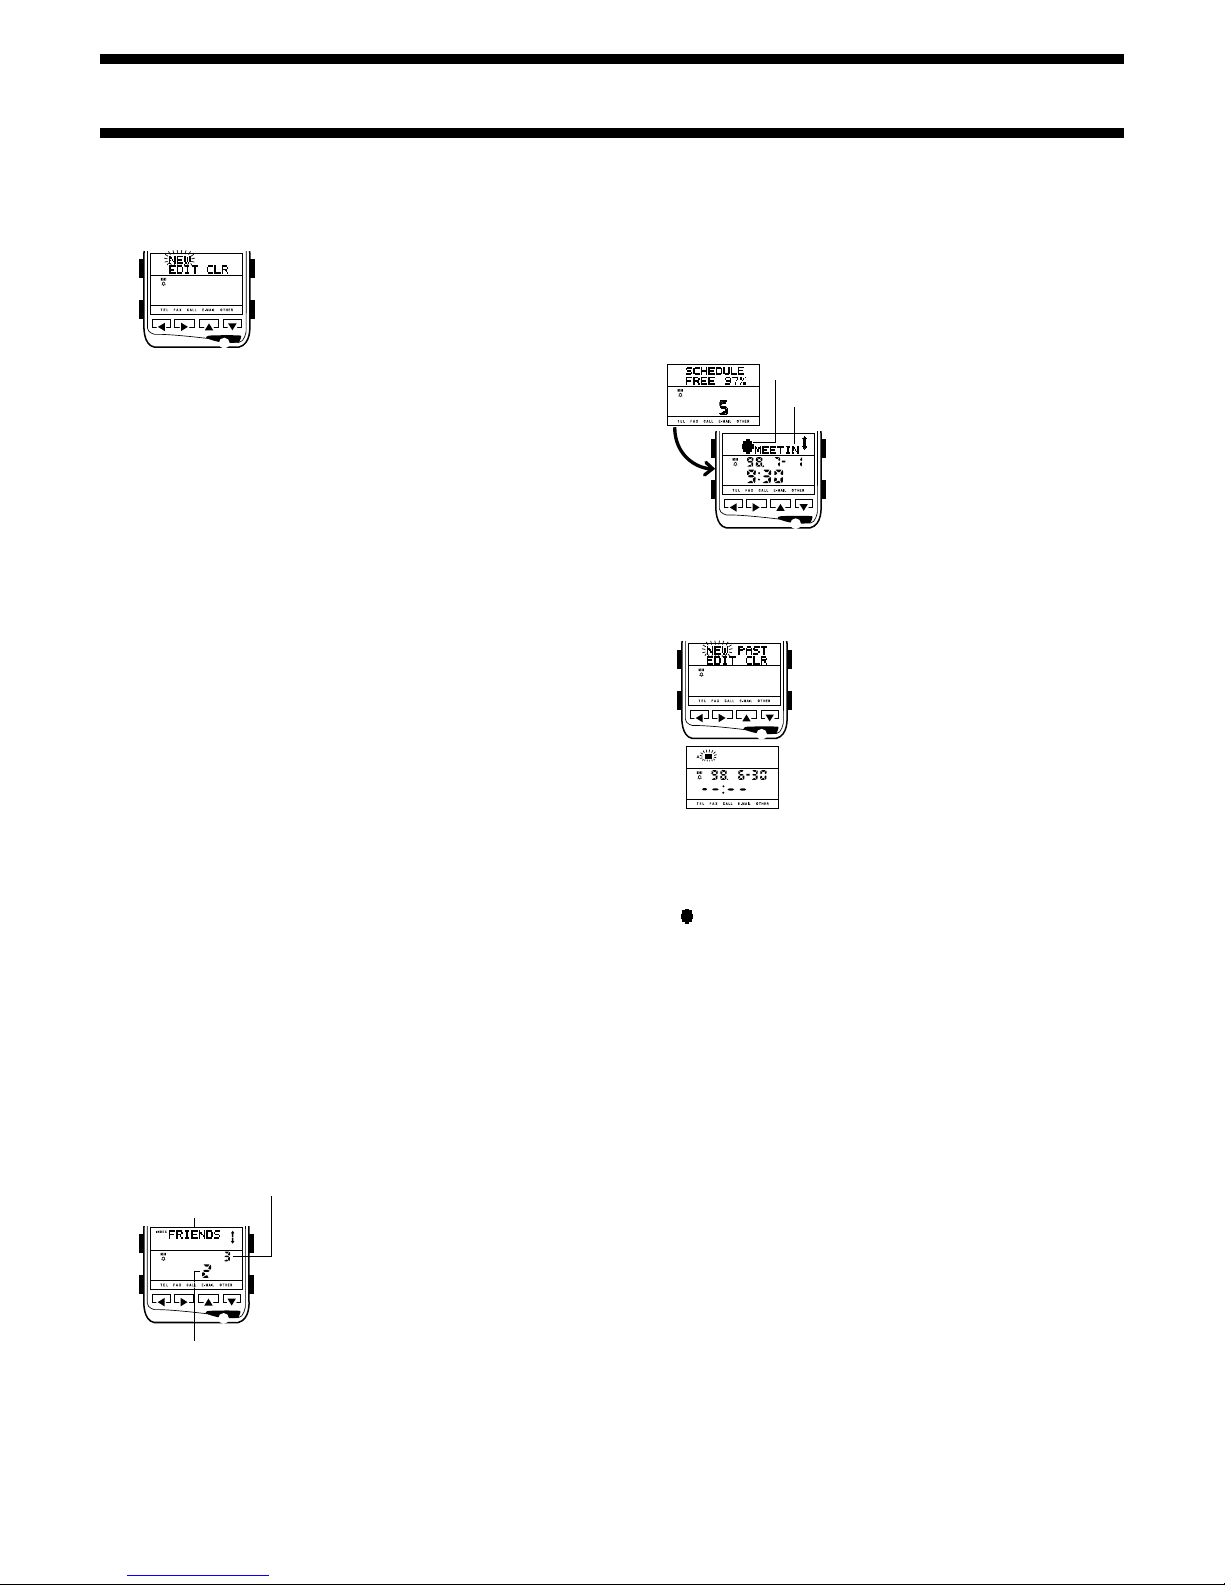
Category Icons
Your watch supports the use of category icons that show the record type. In
order to assign a category icon to a new Schedule or To Do record, you must
firstdownload the icons from the WatchApplication running on your computer.
•See the documentation that comes with “PCX/PC-UNITE Watch Software”
for details about downloading category icons to the watch.
•After downloading the category icons to the watch, the icon currently
assigned to a Schedule or To Do record flashes on the display whenever
you first display a new record input or record editing screen.
To select a category icon when inputting a new record
1. Enter the mode where you want to input the new record and display the
new record input screen.
•See “To input a new Schedule record” or “To input a new To Do record” for
details on displaying the new record input screen.
•When icons have been downloaded to the watch, the icon will be flashing
when you first display the new record input screen.
2. Use Kand Lto scroll through available icons, until the one you want is
on the display.
3. When the icon you want to select is on the display, press the Ebutton to
advance to description text input.
4. Proceed from step 3 under “To input a new Schedule record” or “To input
a new To Do record”.
To select a category icon when editing a record
1. Enter the mode that contains the record you want to edit, and recall the
record.
2. Display the record editing screen.
•See “Editing a Schedule Record” or “Editing a To Do Record” for details on
displaying the record editing screen.
•When icons have been downloaded to the watch, the icon will be flashing
when you first display the record editing screen.
3. Use Kand Lto scroll through available icons, until the one you want is
on the display.
4. When the icon you want to select is on the display, press the Ebutton to
advance to the description text.
5. Proceedfromstep 4 under “Editing a Schedule Record” or “Editing a To Do
Record”.
To toggle category icon display on and off
While recalling a Schedule or To Do record, press the Ebutton to toggle
category icon display on and off. The category display on/off setting you
make affects all To Do and Schedule records.
Display Text
Therearetwocharacter sizes used for display text: small-size characters and
large-size characters.
Small-size characters are the standard alpha characters, numbers, and
symbols that are built into the watch. Large-size characters, which include
accented characters (Latin1 font) and katakana characters (Japanese font)
are displayed only when they are downloaded from the Watch Application.
Once you download a large-size font, it is used for Telememo, Schedule, To
Do, Browser, and Owner Mode text data.
Notes
•Only one large-size font (Latin1 or Japanese) can be in watch memory at
one time.
•After you download the Latin1 or Japanese font from the Watch Application
to the watch, all alpha characters, numbers, and symbols appear as large-
size characters in the text area, except in the text input or editing screen.
•Thetext in a field thatcontainsany accented character, Japanesecharacter,
or special character from the Latin1 and/or Japanese font can be displayed
on the watch, but cannot be input or edited.
•See the “CHARACTER TABLE” for a list of characters that can be input and
displayed.
•Any character downloaded from your computer that is not supported by the
watch is replaced by .
Text Data Scrolling
Whenever text data is longer than 16 small-size characters or 8 large-size
characters, it scrolls across the display from right to left. You can press the
Abutton to stop the scrolling. Next, each press of Ascrolls to the next 16
(or 8) characters and stops. Text data scrolling resumes when you get to the
end of the text.
Data and Setting Scrolling
The H, J, K, and Lbuttons are used in various modes and screens to
scroll through data on the display. In most cases, holding down these buttons
during a scroll operation scrolls through the data at high speed.
Initial Displays
When you enter the Telememo, To Do, Owner, or World Time Mode, the data
you were viewing when you last exited the mode appears first.
•If there is no data stored in the Telememo, Schedule, To Do, Browser, or
Owner Mode, the message NO DATA! appears when you enter the
mode.
Auto Screen Operations
•The normal default mode for this watch is the Timekeeping Mode. If you
leavethe watch inany other modefor two orthree minutes withoutperforming
any operation, it automatically changes to the Timekeeping Mode.
•If you leave a data input or settings screen (a screen with a flashing cursor)
on the display for two or three minutes without performing any operation,
the watch automatically saves anything you have input up to that point and
exits the input or setting screen.
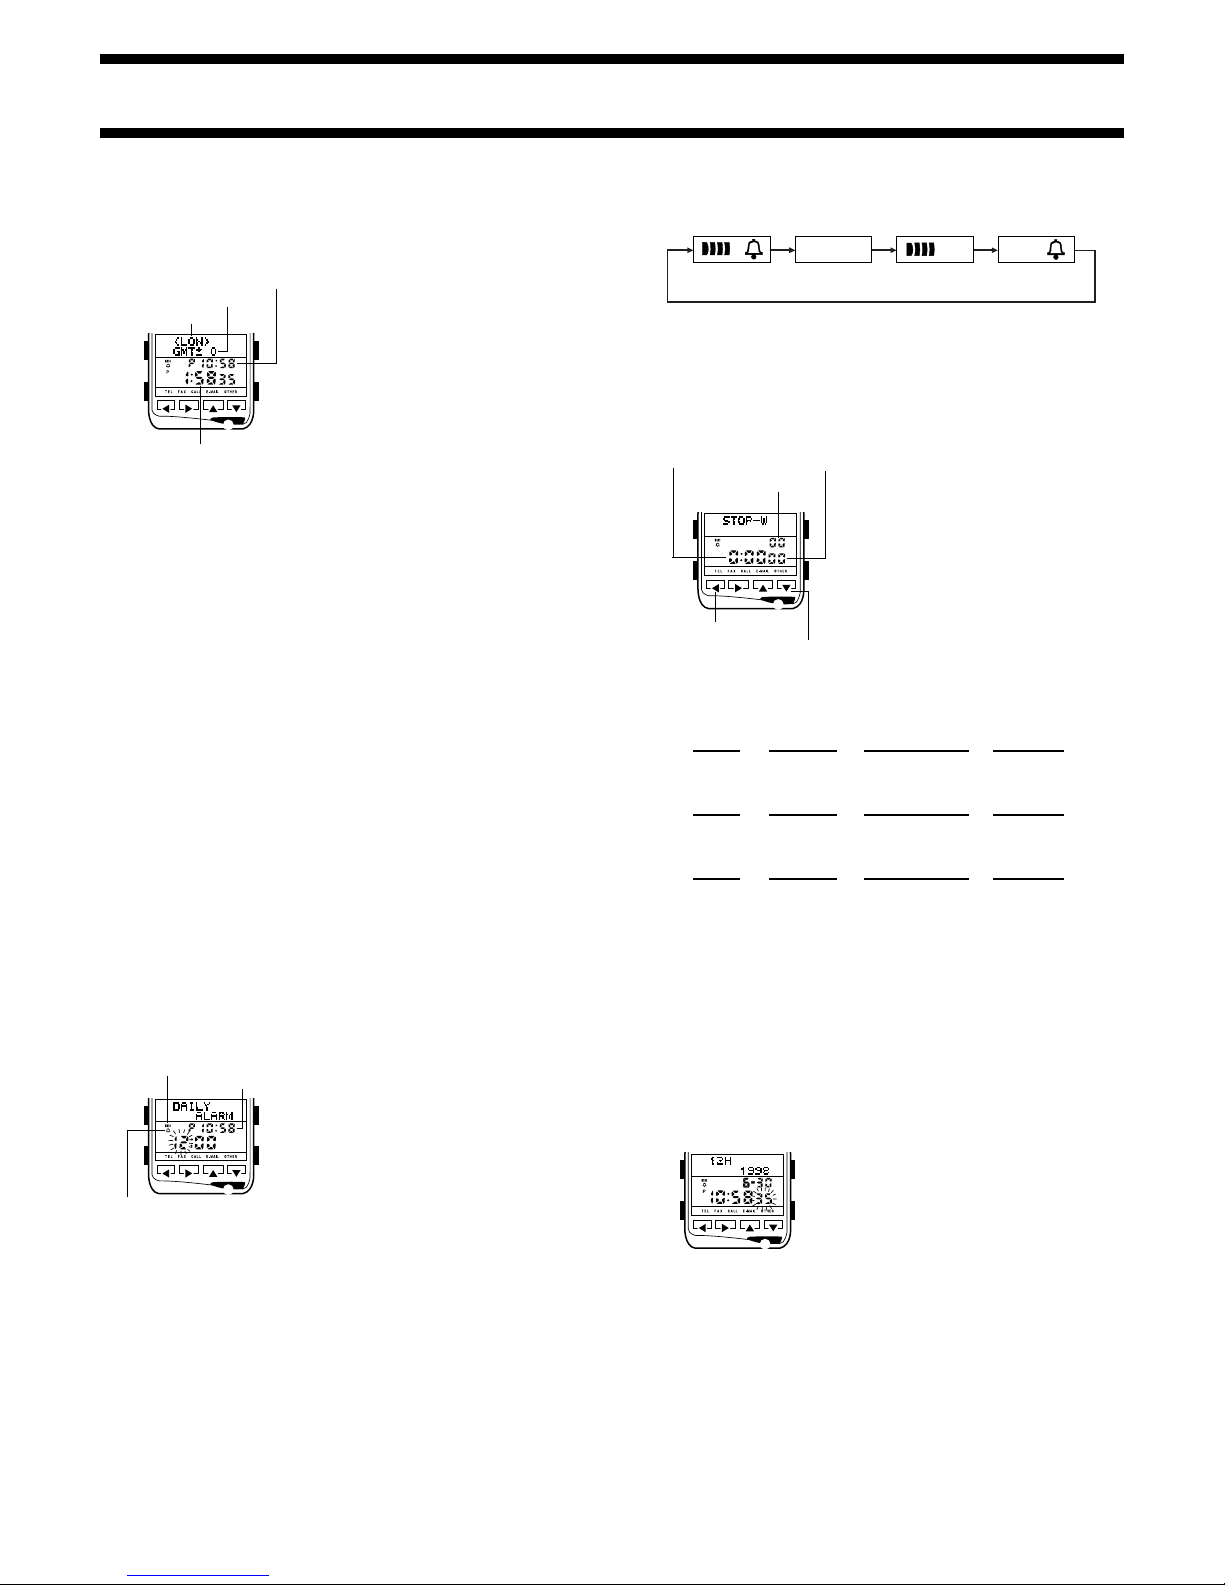
12-hour/24-hour Timekeeping Formats
The 12-hour/24-hour timekeeping format you select in the Timekeeping
Mode is also applied in the Schedule, To Do, World Time and Alarm Modes.
World Time Mode Timekeeping
The following points describe how time is kept in the World Time Mode.
•World Time Zone times are calculated in accordance with the GMT
(Greenwich Mean Time) differential for each zone, using the time set in the
Timekeeping Mode.
•The seconds count of the World Time is synchronized with the seconds
sound of the Timekeeping Mode.
•The GMT differentials used by this watch are based on Universal Time
Coordinated (UTC) data.
1510-7