Casio 2419 User manual

USER’S GUIDE 2419
1
General Guide
•Click ●to change from mode to mode.
•In any mode, press Lto illuminate the display.
•In all modes, the watch always shows the current Timekeeping Mode time in
the upper display area.
Timekeeping Mode e-DATA MEMORY Mode World Time Mode Stopwatch Mode Countdown Timer Mode Alarm Mode
Click ●.
Timekeeping
Use the Timekeeping Mode to set the current time and date.
To set the time and date
1. In the Timekeeping Mode, hold down Auntil the
second’s setting starts to flash, which indicates the
setting screen.
2. Click ●to move the flashing in the sequence
shown below to select other settings.
Minutes
Seconds Hour 12/24-Hour
Format
Month YearDay
3. When the setting you want to change is flashing, use ▼and ▲to change it
as described below.
To change this setting
Seconds
12/24-Hour Format
Hour, Minutes, Year,
Month, Day
Perform this button operation
Rock ▼to reset to 00.
Rock ▼to toggle between 12-hour (12H) and 24-hour (24H)
timekeeping.
Use ▼(+) and ▲(–) to change the setting.
•Rocking ▼while the second’s count is in the range of 30 to 59 resets the
seconds to 00 and adds 1 to the minutes. In the range of 00 to 29, the
minutes count is unchanged.
4. Press Ato exit the setting screen.
•The day of the week is automatically displayed in accordance with the date
(year, month, and day) settings.
•The year can be set in the range of 2000 to 2039.
Day of week Month – Day
Hour : Minutes
PM indicator Seconds
Year
•The watch’s built-in full automatic calendar automatically makes allowances
for different month lengths and leap years. Once you set the date, there
should be no reason to change it except after you have the watch’s battery
replaced.
To toggle between 12-hour and 24-hour timekeeping
In the Timekeeping Mode, press Bto toggle between 24-hour timekeeping
(indicated by 24 on the display), or 12-hour timekeeping.
•With the 12-hour format, the P (PM) indicator appears to the left of the hour
digits for times in the range of noon to 11:59 p.m. and no indicator appears to
the left of the hour digits for times in the range of midnight to 11:59 a.m.
•With the 24-hour format, times are displayed in the range of 0:00 to 23:59,
with 24 indicator.
•The 12-hour/24-hour timekeeping format you select in the Timekeeping Mode
is applied in all modes.
e-DATA MEMORY
e-DATA MEMORY lets you store log in codes and ID
codes used to access a bank account (from a mobile
phone, etc.), a securities account, and other secure
accounts. You can store up to 10 records (data
items), each with its own name. Each record has six
fields, called “ID codes,” each of which can contain a
separate entry. You can also limit access to e-DATA
MEMORY contents with a password.
•You can input alphabetic characters and numbers
for an e-DATA MEMORY record.
•You can input up to eight characters for each record
name and ID code.
•All of the operations in this section are performed in
the e-DATA MEMORY Mode, which you can enter
by clicking ●.
Name
Record
ID 6ID 1 ID 2
Record numbe
r
To create a new e-DATA MEMORY record
1.In the e-DATA MEMORY Mode, use ▼and ▲to
scroll through record names until one that does not
contain any data is on the display.
•Default record names are DATA 1through DATA 10.
You can leave these record names as they are, or
you can input other names, if you want. It is a
good idea to use names that describe the type of
data stored in a record.
2.Hold down Auntil the flashing cursor (_) appears
on the display, which indicates the setting screen.
3. Use ▼and ▲to change the character at the cursor position. The character
changes in the sequence shown below.
Rock ▼.Rock ▲.
(space)
to
(upper-case)
to
(lower-case)
to
(symbol)
to
(number)
•See the “Character List” at the back of this manual for information about
the characters you can input.
4. When the character you want is at the cursor position, click ●to move the
cursor to the right.
5. Repeat steps 3 and 4 until the record name is complete.
Record numbe
r
Cursor
6.After you are finished inputting the record name,
rock to change to the ID 1 code input screen.
•The ID code input screen shows a cursor and the
ID number (ID 1 through ID 6) of the currently
displayed ID code.
7. Repeat steps 3 and 4 until input of the ID 1 code is complete.
•If you do not want to input any more ID codes, skip step 8 after you
finished inputting the ID 1 code.
8. After inputting the ID 1 code, rock to change to the ID 2 code input screen,
and input the ID 2 code.
•Repeat steps 3 and 4 for the ID 2 code.
•After inputting an ID code, rock to advance to the next ID code input
screen. You can input up to six ID codes per record. Rocking after
inputting the sixth ID code returns to the record name input screen. Repeat
steps 3 and 4 to input data for each ID code.
•Rocking returns to the previous ID code. Rocking while the ID 1 code
input screen is on the display returns to the record name input screen.
9. Press Ato store your data and return to the e-DATA MEMORY record
screen (without the cursor).
ID number
About This Manual
•Button operations are indicated using the letters
shown in the illustration.
•The following shows how control button operations
are described in this manual.
(Light)
Control Button
When you see this:
Click ●.
Rock ▲.
Rock ▼.
Rock .
Rock .
You should do this:
Press straight down on the control
button.
Place your finger on the control
button and slide upwards.
Place your finger on the control
button and slide downwards.
Place your finger on the control
button and slide to the left.
Place your finger on the control
button and slide to the right.

USER’S GUIDE 2419
2
Using a Password to Protect e-DATA MEMORY Data
You can register a 4-digit password to keep e-DATA MEMORY data secure.
Important!
Use a 4-digit password that is easy for you to remember, but difficult for others
to decipher. If you forget the password, you will not be able to access the e-
DATA MEMORY data without having the watch initialized, which deletes all
data in its memory. To have the watch initialized, contact the store or dealer
where you purchased it, and ask to have the AC operation performed.
To register a new password
1.In the e-DATA MEMORY Mode, press B.
•This displays a screen that shows PASS****, with
the first asterisk flashing. This is the new
password setting screen.
2.Use ▲and ▼to scroll through numbers at the first
digit.
3.When the number you want in the first digit is
displayed, click ●to advance to the next digit.
•To exit the new password setting screen, press B.
4. Repeat steps 2 and 3 to input all four digits of the password you want.
5. After all four of the password digits are the way you want, click ●to register
the password.
•The e-DATA MEMORY record screen appears after you register a new
password. At this time, you can input, recall, edit and delete data, if you want.
After you exit the e-DATA MEMORY Mode, you will have to input your
password before you can enter it again.
To input the password
1.Enter the e-DATA MEMORY Mode.
2.On the password input screen (PASS****), input the
password.
•Use ▲and ▼to scroll through numbers at each
digit.
•Click ●to advance to the next digit.
3.After the password is the way you want, click ●.
•The e-DATA MEMORY record screen appears if the
password you input matches the one you
registered.
•The password input screen reappears if the
passwords do not match.
To change the password
1. Enter the e-DATA MEMORY Mode.
2. When the password input screen appears, press B.
•This displays OLD**** for input of the current password.
3. Input the current password.
•Use ▲and ▼to scroll through numbers at each digit.
•Click ●to advance to the next digit.
4. After the password is the way you want, click ●.
•If the password you input matches the current password, NEW**** appears
for input of the new password.
•The password input screen reappears if the passwords do not match.
5. Input the new password.
•Use ▲and ▼to scroll through numbers at each digit.
•Click ●to advance to the next digit.
6. After the new password is the way you want, click ●to register it and return
to the password input screen.
•While the OLD or NEW input screen is on the display, you can press Bto return
to the password input screen in step 2.
To delete the password
1. Enter the e-DATA MEMORY Mode.
2. When the password input screen appears, press B.
•This displays OLD**** for input of the current password.
3. Input the current password.
•Use ▲and ▼to scroll through numbers at each digit.
•Click ●to advance to the next digit.
World Time
World Time shows the current time in 40 cities (29
time zones) around the world.
•The time settings of the Timekeeping Mode and the
World Time Mode are independent from each other,
so you must make separate settings for each.
•Whenever you change the time setting for any city
in the World Time Mode, the settings of all other
cities are changed accordingly.
•For full information on city codes, see the “City
Code Table” at the back of this manual.
•The GMT differential indicates time difference
between the selected city and GMT (Greenwich
Mean Time).
•GMT differential is calculated by this watch based
on Universal Time Coordinated (UTC) data.
•All of the operations in this section are performed in
the World Time Mode, which you can enter by
clicking ●.
To set the World Time
1.In the World Time Mode, rock ▼to scroll through
cities to the east or ▲to scroll to the west, until the
one you want is on the display.
2.Hold down Auntil the hour setting of the world
time starts to flash, which indicates the setting
screen.
3.Click ●to move the flashing between the hour and
minutes.
4.While a setting is flashing, rock ▼(+) and ▲(–) to
change it.
•When setting the world time using the 12-hour
format, take care to set the time correctly as a.m.
(no indicator) or p.m. ( indicator).
5.Press Ato exit the setting screen.
GMT differential
Current time in the zone of
the selected city code
City code
To view the time in another city code
In the World Time Mode, rock ▼to scroll through cities to the east or ▲to
scroll to the west, until the one you want is on the display.
•When you scroll to another city, its GMT differential appears first, followed
later by the current time in that city.
Daylight Saving Time (DST)
Daylight Saving Time (summer time) advances the time setting by one hour
from Standard Time. Remember that not all countries or even local areas use
Daylight Saving Time.
To toggle a city code time between standard time and Daylight Saving Time
1.In the World Time Mode, rock ▼to scroll through
cities to the east or ▲to scroll to the west, until the
one you want is on the display.
2.Press Bto toggle between Daylight Saving Time
(DST indicator displayed) and Standard Time (DST
indicator not displayed).
•The DST indicator is on the display whenever you
display a city code for which Daylight Saving Time
is turned on.
•Note that the DST/Standard Time setting affects
only the currently displayed city code. Other city
codes are not affected.
•Note that you cannot switch between standard time
and Daylight SavingTime while GMTis selected as
the city code.
DST indicator
Stopwatch
The stopwatch lets you measure elapsed time, split
times, and two finishes.
•The display range of the stopwatch is 999 minutes,
59.99 seconds.
•The stopwatch continues to run, restarting from
zero after it reaches its limit, until you stop it.
•The stopwatch measurement operation continues
even if you exit the Stopwatch Mode.
•Exiting the Stopwatch Mode while a split time is
frozen on the display clears the split time and
returns to elapsed time measurement.
•All of the operations in this section are performed in
the Stopwatch Mode, which you can enter by
clicking ●.
To measure times with the stopwatch
Elapsed time
Start Stop Re-start Stop Clear
Start Split Split release Stop Clear
Start Split Stop Split release Clear
Split time
Two Finishes
First runner
finishes.
Display time of
first runner.
Second runner
finishes.
Display time of
second runner.
Seconds
1/100
second
Minutes
To recall e-DATA MEMORY records
1. In the e-DATA MEMORY Mode, rock ▼to scroll forward through e-DATA
MEMORY record names or ▲to scroll in reverse.
2. Rocking displays the contents of the ID 1 code whose name you displayed
in step 1 of this procedure.
•Each rock of scrolls ID codes in the sequence ID 2
➟
ID 3
➟
ID 4, and
so on. Rocking scrolls in reverse sequence.
Rock ▲to display the previous name.
Rock ▼to display the next name.
Rock to display
the next ID code.
Rock to display
the previous
ID code.
Name ID code
ID number
To edit an e-DATA MEMORY record
1. In the e-DATA MEMORY Mode display the data (record name or ID code)
you want to edit.
2. Hold down Auntil the flashing cursor appears on the display.
3. Click ●to move the flashing to the character you want to change.
4. Use ▲and ▼to change the character.
5. After making the changes you want, press Ato store them and return to the
e-DATA MEMORY record screen (without the cursor).
To delete an e-DATA MEMORY record
1. In the e-DATA MEMORY Mode, display the data you want to delete.
•If you want to delete an entire record, display the name of the record. If you
want to delete a single ID code, display the ID code.
2. Hold down Auntil the flashing cursor appears on the display.
3. Hold down Bfor about two seconds until the data disappears and the
cursor reappears on the display.
4. Input data or press Ato return to the e-DATA MEMORY record screen.
4. After the password is the way you want, click ●.
•If the password you input matches the current password, NEW****
appears for input of the new password.
•The password input screen reappears if the passwords do not match.
5. While NEW**** is on the display, hold down Auntil PASS CLR and
then the e-DATA MEMORY record screen appears. Keep Adepressed after
PASS CLR appears.

USER’S GUIDE 2419
3
Countdown Timer
The 60-minute countdown timer has five countdown
start time memories. You can set the minutes in 1-
minute increments and the seconds in 10-second
increments. The alarm sounds when the countdown
reaches zero.
•The starting times of the countdown timers are
preset to 1, 3, 5, 10 and 60 minutes when you
purchase the watch.You can use these settings as
they are, or you can change to different starting
times if you want.
•Countdown timer functions are available in the
Countdown Timer Mode, which you can enter by
clicking ●.
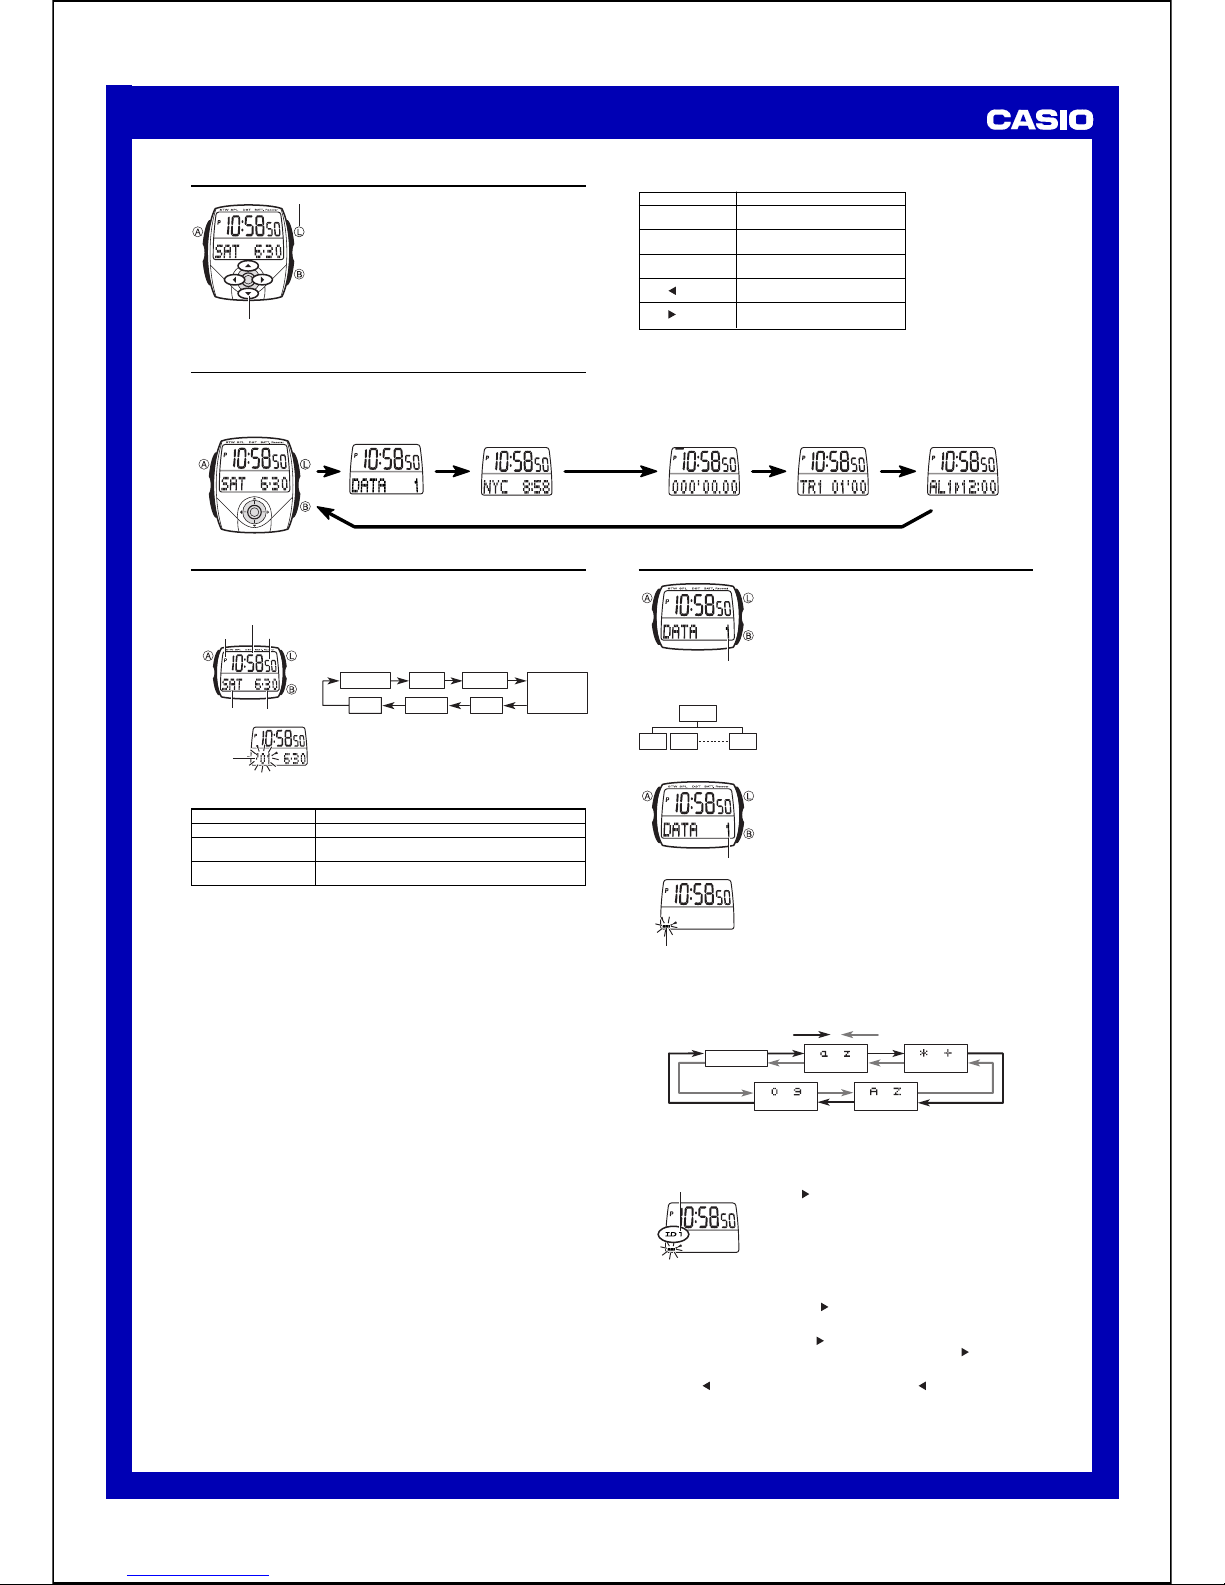
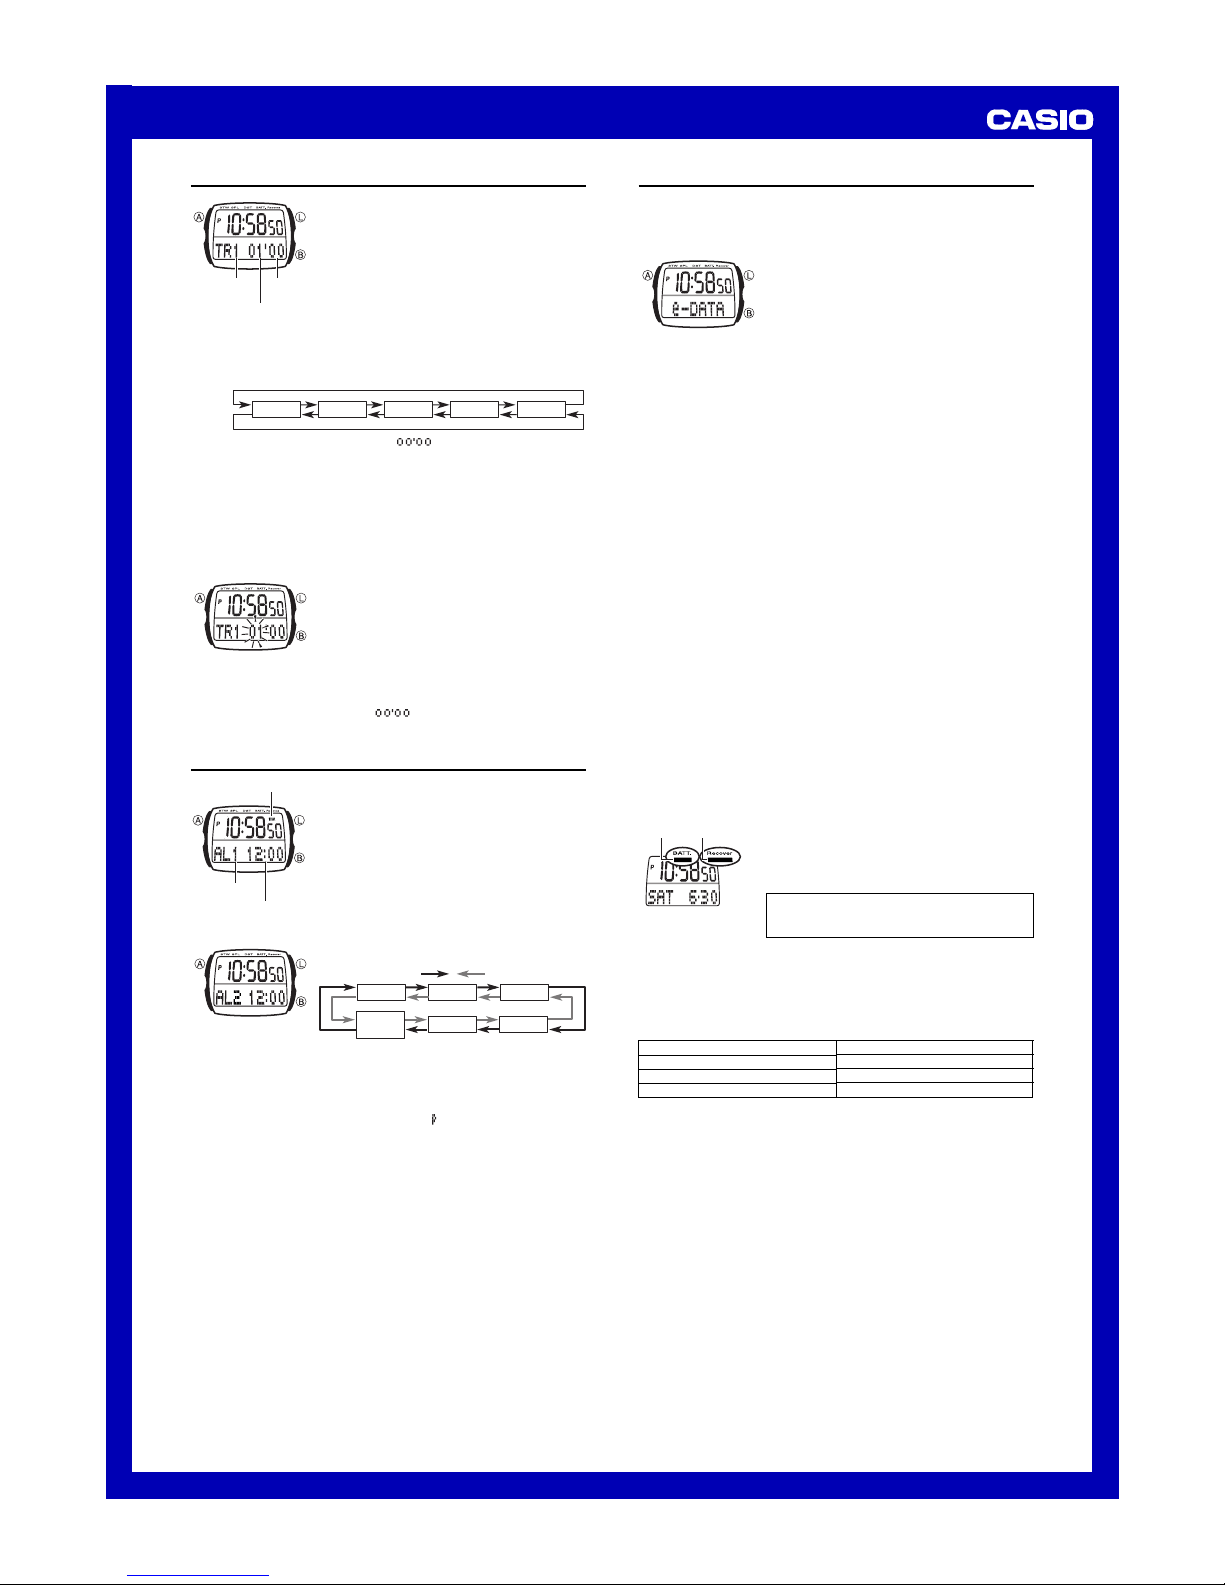
To use the countdown timer
1. In the Countdown Timer Mode, use ▼and ▲to select the start time you
want to use.
Rock ▼.
Rock ▲.
Time 1 Time 5
Time 2 Time 3 Time 4
•Though Time 5 shows a start time of , it counts down up to 60
minutes.
2. Press Bto start the countdown timer.
•When the end of the countdown is reached, the alarm sounds for 10 seconds
or until you stop it by pressing any button. The countdown time is
automatically reset to its starting value after the alarm stops.
•Press Bwhile a countdown operation is in progress to pause it. Press B
again to resume the countdown.
•To completely stop a countdown operation, first pause it (by pressing B),
and then press A. This returns the countdown time to its starting value.
Minutes
Seconds
Start time
number
To change a countdown start time
1. In the Countdown Timer Mode, use ▼and ▲to
select the start time you want to use.
2. Hold down Auntil the minutes setting of the
countdown start time starts to flash, which
indicates the setting screen.
3. Click ●to move the flashing between the minutes
and seconds.
4. While a setting is flashing, rock ▼(+) and ▲(–) to
change it.
•You can set the seconds in 10-second
increments.
•To perform a 60-minute countdown, set a start
time of .
5. Press Ato exit the setting screen.
Alarm
You can set five independent Daily Alarms. When an
alarm is turned on, the alarm tone sounds when the
time is reached. You can also turn on an Hourly Time
Signal that causes the watch to beep twice every
hour on the hour.
•The alarm time (hour and minutes) and alarm
number (AL1through AL5) indicate an alarm screen.
SIG is shown in place of the alarm number on the
Hourly Time Signal screen.
•Alarm settings (and Hourly Time Signal settings)
are available in the Alarm Mode, which you can
enter by clicking ●.
Alarm number
Alarm time (Hour : Minutes)
Alarm on indicator
To set an alarm time
1. In the Alarm Mode, use ▼and ▲to select the
alarm whose time you want to set.
Rock ▼. Rock ▲.
Alarm 1 Alarm 2 Alarm 3
Alarm 5 Alarm 4
Time
Signal
2. After you select an alarm, hold down Auntil the hour setting of the alarm
time starts to flash, which indicates the setting screen.
•This operation automatically turns on the alarm.
3. Click ●to move the flashing between the hour and minutes.
4. While a setting is flashing, rock ▼(+) and ▲(–) to change it.
•When setting the alarm time using the 12-hour format, take care to set the
time correctly as a.m. (no indicator) or p.m. ( indicator).
5. Press Ato exit the setting screen.
Daily Alarm Operation
The alarm sounds at the preset time each day for about 20 seconds, or until
you stop it by pressing any button.
To test the alarm
In the Alarm Mode, hold down Bto sound the alarm.
To turn an alarm and the Hourly Time Signal on and off
1. In the Alarm Mode, use ▼and ▲to select an alarm or the Hourly Time
Signal.
2. When the alarm or the Hourly Time Signal you want is selected, press Bto
turn it on and off.
xIndicates alarm is on.
yIndicates Hourly Time Signal is on.
•The alarm on indicator (x) and the Hourly Time Signal on indicator (y
) are
shown on the display in all modes while these functions are turned on.
•If any alarm is on, the alarm on indicator is shown on the display when you
change to another mode.
Reference
This section contains more detailed and technical information about watch
operation. It also contains important precautions and notes about the various
features and functions of this watch.
Auto Display
Auto Display continually changes the contents of the
digital display. Note that you cannot use any of the
watch’s other functions (except for the backlight)
while Auto Display is turned on.
To turn off Auto Display
Press Aor Bto turn off Auto Display. This returns
to the Timekeeping Mode.
To turn on Auto Display
In the Timekeeping Mode, hold down Bfor about one to two seconds until the
watch beeps.
Auto Return Features
•After you perform an operation in any mode, clicking ●returns to the
Timekeeping Mode.
•If you leave the watch in the e-DATA MEMORY Mode for two or three minutes
without performing any operation, it automatically changes to the
Timekeeping Mode.
•If you leave a screen with flashing digits on the display for two or three
minutes without performing any operation, the watch automatically saves any
settings you have made up to that point and exits the setting screen. If you
leave the e-DATA MEMORY Mode setting screen with the cursor flashing for
about two or three minutes, the watch automatically exits the setting screen
and switches to the Timekeeping Mode.
Data and Setting Scrolling
In various modes and setting screens, you rock ▲and ▼to scroll through data
on the display. In most cases, holding the control button in either direction
during a scroll operation scrolls through the data at high speed.
Initial Screens
When you enter the e-DATA MEMORY, World Time, Countdown Timer, or
Alarm Mode, the data you were viewing when you last exited the mode
appears first.
Backlight Precautions
In any mode, press Lto illuminate the display for about two seconds.
•The electro-luminescent panel that provides illumination loses power after
very long use.
•The illumination provided by the backlight may be hard to see when viewed
under direct sunlight.
•The watch may emit an audible sound whenever the display is illuminated.
This is due to vibration of the EL panel used for illumination, and does not
indicate malfunction.
•The backlight automatically turns off whenever an alarm sounds.
•Frequent use of the backlight shortens the battery life.
About the Battery
The BATT indicator appears on the display whenever
battery power is below a certain level. No alarms
sound and the backlight does not light while battery
power is low.
•Normal watch operation will return after the BATT
indicator disappears. If it does not disappear, have
the battery replaced.
ALWAYS LEAVE BATTERY REPLACEMENT UP TO THE
DEALER WHEREYOU PURCHASED THE WATCH OR
TO AN AUTHORIZED CASIO DISTRIBUTOR.
RECOVER Indicator
Certain functions consume large amounts of battery power, and using them too
much can cause a sudden momentary drop in battery power. The watch
monitors how much you use these high consumption functions, and displays
the RECOVER indicator whenever it determines you are using them too much.
•Backlight and alarm operations are disabled while the RECOVER indicator is
on the display.
BATT
indicator
RECOVER
indicator
•The following are the trigger values for functions that are monitored for battery usage.
High Power Consumption
Backlight
Alarm∗
Button Input Tone
Trigger Value
100 operations
200 operations
1,000 operations
∗
Daily alarm, hourly time signal, countdown alarm
•The RECOVER indicator appears whenever any of the above operations is
performed individually in succession for the number of times indicated by its
trigger value.
•The RECOVER indicator also appears when a combination of functions
reaches a trigger value.
Examples:50 backlight operations +100 alarm operations, 25 backlight
operations +30 alarm operations +600 button input tone
operations, etc.
•The RECOVER indicator disappears from the display after the battery
recovers its normal power level after it has a chance to “rest.”
Other Casio Watch manuals