Casio 3721 User manual

Operation Guide 3721
1
MA0410-EA
Each press of the BB
BB
Bbutton sounds a confirmation tone and cycles through available modes in the sequence shown below.
•The watch will revert to the Timekeeping Mode automatically if you leave it in any other mode without performing any operation for about two
or three minutes.
(Mode Change)
(Light)
Minute Hand
Second Hand
Hour Hand
Date
Timekeeping Mode
If the time setting is not correct...
Normally, you should never need to adjust the time setting of the watch as long as it is
able to receive a time calibration signal. If signal reception is impossible for some reason,
use the procedures under “Adjusting the Home Positions” to check the home positions of
the hands, and make adjustments as required.
Button
Button
Receive
Successful
OFF
ON
Receive Failed
Use this mode to adjust
the home positions of
the analog hands.
The home positions of the
hands are correct when
they point to 12 o’clock.
Use this mode to set the alarm time and to turn
the alarm on or off.
The second hand will move to either “ON” or “OFF”.
Use this mode to check if
signal reception is being
performed normally.
The second hand will move
to either “GET” or “NG”.
Receive Result Mode Alarm Mode
Home Position Adjustment Mode
Modes and Hand Movement
❚
Charging Precautions
Avoid charging the watch in the following locations, and anywhere
else where the watch may become very hot.
•On the dashboard of an automobile parked in the sun
•Very close to an incandescent light source or other sources of
heat
•In a location exposed to direct sunlight for long periods
Depending on the light source you are using, the
case of the watch may become quite hot during
charging. Take care to guard against burn injury
after charging.
❚
To charge the battery
Point the solar cell (face) of the watch at a light source to charge
the battery.
•Remember that even a partial blockage of the solar cell reduces
charging efficiency.
Example: Positioning the watch
Solar Cell
•The illustration shows the resin band model.
❚
Charging Guide
Starting from a full charge, the watch
should be able to continue operating
for about four months without further
charging under the conditions
described below.
Daily Use
•Illumination: 1.5 second
•Alarm: 10 seconds
•Signal reception: 1
Making sure the watch is regularly
exposed to light ensures stable
operation.
•Charge Times Required to Advance to a Higher Level
Exposure Level
(Brightness)
Outdoor Sunlight
(50,000 lux)
Sunlight Through a
Window (10,000 lux)
Daylight Through a Window on
an Overcast Day (5,000 lux)
Indoor Fluorescent
Lighting (500 lux)
Approximate Exposure Time
Timekeeping Restored
Full Charge
– – –
– – –
1 hour
2 hours
3 hours
30 hours
12 hours
61 hours
•Note that the above charging times are for reference only. Actual
charging time depends on a variety of environmental factors.
The power supply of this watch uses a solar cell to generate electrical power, which is stored by a rechargeable battery. Using or storing
the watch where it is not regularly exposed to light, or allowing it to be blocked from light by your sleeve for long periods as you are
wearing it can cause the power of the rechargeable battery to run down.
•A low battery can cause timekeeping to stop, and can also cause time and alarm settings to be lost.
•Face illumination or alarm operation can cause hand movement to stop due to the sudden temporary drop in battery power. This does not
indicate malfunction, and normal operation will resume when the watch is exposed to light. Though hand movement stops, timekeeping
continues internally, and the hands will be adjusted to the correct setting when normal operation returns.
❚
Checking the Battery Level
Low battery power is indicated when the the second hand starts to jump at two-second intervals.
Jumps two seconds1-second movement Indicates date home position.
Normal Low Power Alert Timekeeping Disabled
Battery level
drops due to
insufficient
charging.
Battery level
drops further
due to
insufficient
charging.
Hands
stop at 12
o’clock.
If 2-second hand movement is being performed when the current time reaches midnight, the date indicator will change to the home
position indicator ( ). If battery power drops to the next lower level, and the hands will stop at 12 o’clock.
•Even after the battery drops to the level that timekeeping becomes disabled, you will be able to resume normal operation by charging the
battery.
•After timekeeping becomes disabled, the hands will move to the current time after the battery is recharged sufficiently.
•Keep the watch exposed to light until normal operation returns.
Important!
The following
operations are disabled
during 2-second hand
movement.
•Auto and manual
calibration signal
reception
•Face illumination
•Alarm
Power Supply To ensure stable operation, be sure to allow the watch to be exposed to light as
much as possible.
Required Daily Charging Time
•
The following is the daily
amount of charging required
each day to support the
operations under “Daily Use”.
Exposure Level
(Brightness)
Outdoor Sunlight
(50,000 lux) 6 minutes
30 minutes
48 minutes
8 hours
Sunlight Through a
Window (10,000 lux)
Daylight Through
a Window on an
Overcast Day
(5,000 lux)
Indoor Fluorescent
Lighting (500 lux)
Approximate
Exposure
Time

Operation Guide 3721
2
Positioning Your Arm Correctly
•You should be wearing the watch on the outside of your wrist
when using the auto light switch.
•Make sure that the left (9 o’clock) and
right (3 o’clock) sides of the watch are
within ±15 degrees of being parallel
with the ground. The auto light switch
may not operate properly if the angle is
greater.
Important!
•The light may be difficult to see if you turn it on under bright
sunlight.
•If you press the Bbutton or if an alarm operation starts while the
face is illuminated, illumination will turn off.
Auto Light Precautions
•Frequent use of the auto light can run down the battery.
•The auto light switch may cause the face to illuminate when your
sleeve covers the face of the watch.
•The face may not illuminate immediately when you angle the
watch towards your face. This does not indicate malfunction.
•The face remains illuminated for 1.5 seconds only, even if you
leave the watch angled towards your face.
•The auto light switch is disabled automatically during 2-second
hand movement.
•The face may illuminate unintentionally when you wear the watch
on the inside of your wrist, when you shake your arm, or when
you raise your arm. Be sure to turn off the auto light switch
whenever you do not need face illumination.
•Keep the auto light switch turned off whenever you are wearing
the watch on the inside of your wrist.
•Electro-static charge and magnetism can interfere with auto light
operation and even make operation impossible. If this happens
lower your arm to the starting position and then raise it again. If
you still have trouble with illumination, try lowering your arm down
to your side and then raise it to your face for reading.
Rotate your arm so the watch
is angled at about 40 degrees,
so you can read its face.
With the watch on
your wrist, position it
level with the ground.
11
11
122
22
2
At least
40
degrees
An LED light is used to illuminate the face of the watch for easy
reading in the dark. An auto light switch automatically illuminates
the face when you angle the watch towards your eyes for reading.
❚
To illuminate the face manually
In the Timekeeping Mode,
press the AA
AA
Abutton.
•This illuminates the face for
about 1.5 seconds.
•Pressing the Abutton illuminates the display regardless of
whether the auto light switch is on or off.
You may hear a faint rattling sound when you move the watch
around. This sound is caused by the movement of a metal
bulb that controls operation of the auto light switch, and does
not indicate malfunction.
❚
To illuminate the face with the auto light
switch
The auto light switch automatically illuminates the face
whenever you angle the watch towards your eyes for reading,
but only when it is dark.
•The auto light switch does not illuminate the face when
surrounding light is bright.
The auto light switch will illuminate the face for about 1.5
seconds in any mode.
❚
To turn the auto light switch on and off
In the Receive Result Mode, hold down the Abutton for about
three seconds to toggle the auto light switch on and off.
Face Illumination
Location
Reception is difficult and may even be impossible in the locations
described below. Avoid such locations when performing signal
reception.
•You should think of your watch operating like a radio or TV when it
is receiving the calibration signal.
If you are experiencing problems with reception, move away
from the types of locations described above to a location with
better reception, and try again.
Reception Range
This watch is designed to receive either the Mt. Otakadoya signal
(40kHz) or the Mt. Hagane signal (60kHz), whichever is strongest.
1000km
Mt. Hagane
(60kHz)
Mt. Otakadoya
(40kHz)
500km
1000km
500km
Transmitter Locations
•Under optimum conditions, the calibration signal should be
receivable up to 1,000 kilometers from the transmitter. Note
that the wave is relatively weak at distances greater than
500km, so reception may be poor at long distances.
•Geographic contours, nearby buildings, seasonal conditions, the
time of day, can even make reception impossible even when you
are within the range of the transmitter.
•Reception is best at night.
What is a radio-controlled watch?
Your radio-controlled watch is designed to receive a time
calibration signal that contains standard time data, and adjust its
current time setting accordingly.
Signal data
Transmitter
Internally
Decode
Watch
Time data
Long-wave
time
calibration
signal
Cesium
atomic clock
Signal is received using
built-in antenna.
Watch decodes
received data
and converts it
to time data.
Time is adjusted
according to
time data.
After the watch receives the Standard Time signal, it performs
internal calculations to determine the current time. Because of
this, there may be an error of up to one second in the
displayed time.
Calibration Signal
•The Japanese calibration signal (Call Sign: JJY) is maintained by
the National Institute of Information and Communications
Technology (NICT). It is a long wave signal transmitted 24 hours a
day from the Mt. Otakadoya transmitter (40kHz) located in
Tamura-gun, Fukushima Prefecture, and from the Mt. Hagane
transmitter (60kHz) located on the border between Saga
Prefecture and Fukuoka Prefecture.
Note that transmission of the time calibration signal may be
interrupted occasionally due to maintenance, lightning, etc.
How a Radio-controlled Watch Works
Near high-voltage lines
Among or near buildings
Inside a vehicle
(automobile, train, plane, etc.)
In a location where there is
radio interference (construction
site, airport, etc.)
Next to a household
appliance or office equipment
(TV, speaker, fax, computer,
cell phone, etc.)
Near mountains

Operation Guide 3721
3
❚
To check the result of the last signal
receive operation
In the Timekeeping Mode, press the BB
BB
Bbutton. This enters
the Receive Result Mode.
•If the watch was able to perform a successful signal receive
operation since midnight, the second hand will move to GET. If
the watch has been unable to receive any signal successfully, the
second hand will move to NG.
•To return to the Timekeeping Mode, press the Bbutton three
times.
•The watch will also return to the Timekeeping Mode if you do not
perform any operation for about two or three minutes.
GET
NG
The current receive result is cleared each day at midnight.
This means GET indicates successful signal reception since
the start of the current day.
•GET continues to be indicated even if an attempt at manual
receive fails after auto receive is successful.
Calibration Signal Reception
Precautions
•Auto reception can be performed while the watch is in the
Timekeeping Mode only.
•If the hands become misaligned for some reason, they may not
indicate the correct time, even if the time calibration signal is
received normally. If this happens, use the procedure under
“Adjusting the Home Positions” to adjust the home positions of the
hands and the date.
•Pressing any button while auto reception is in progress will cause
the watch to beep and signal reception to stop.
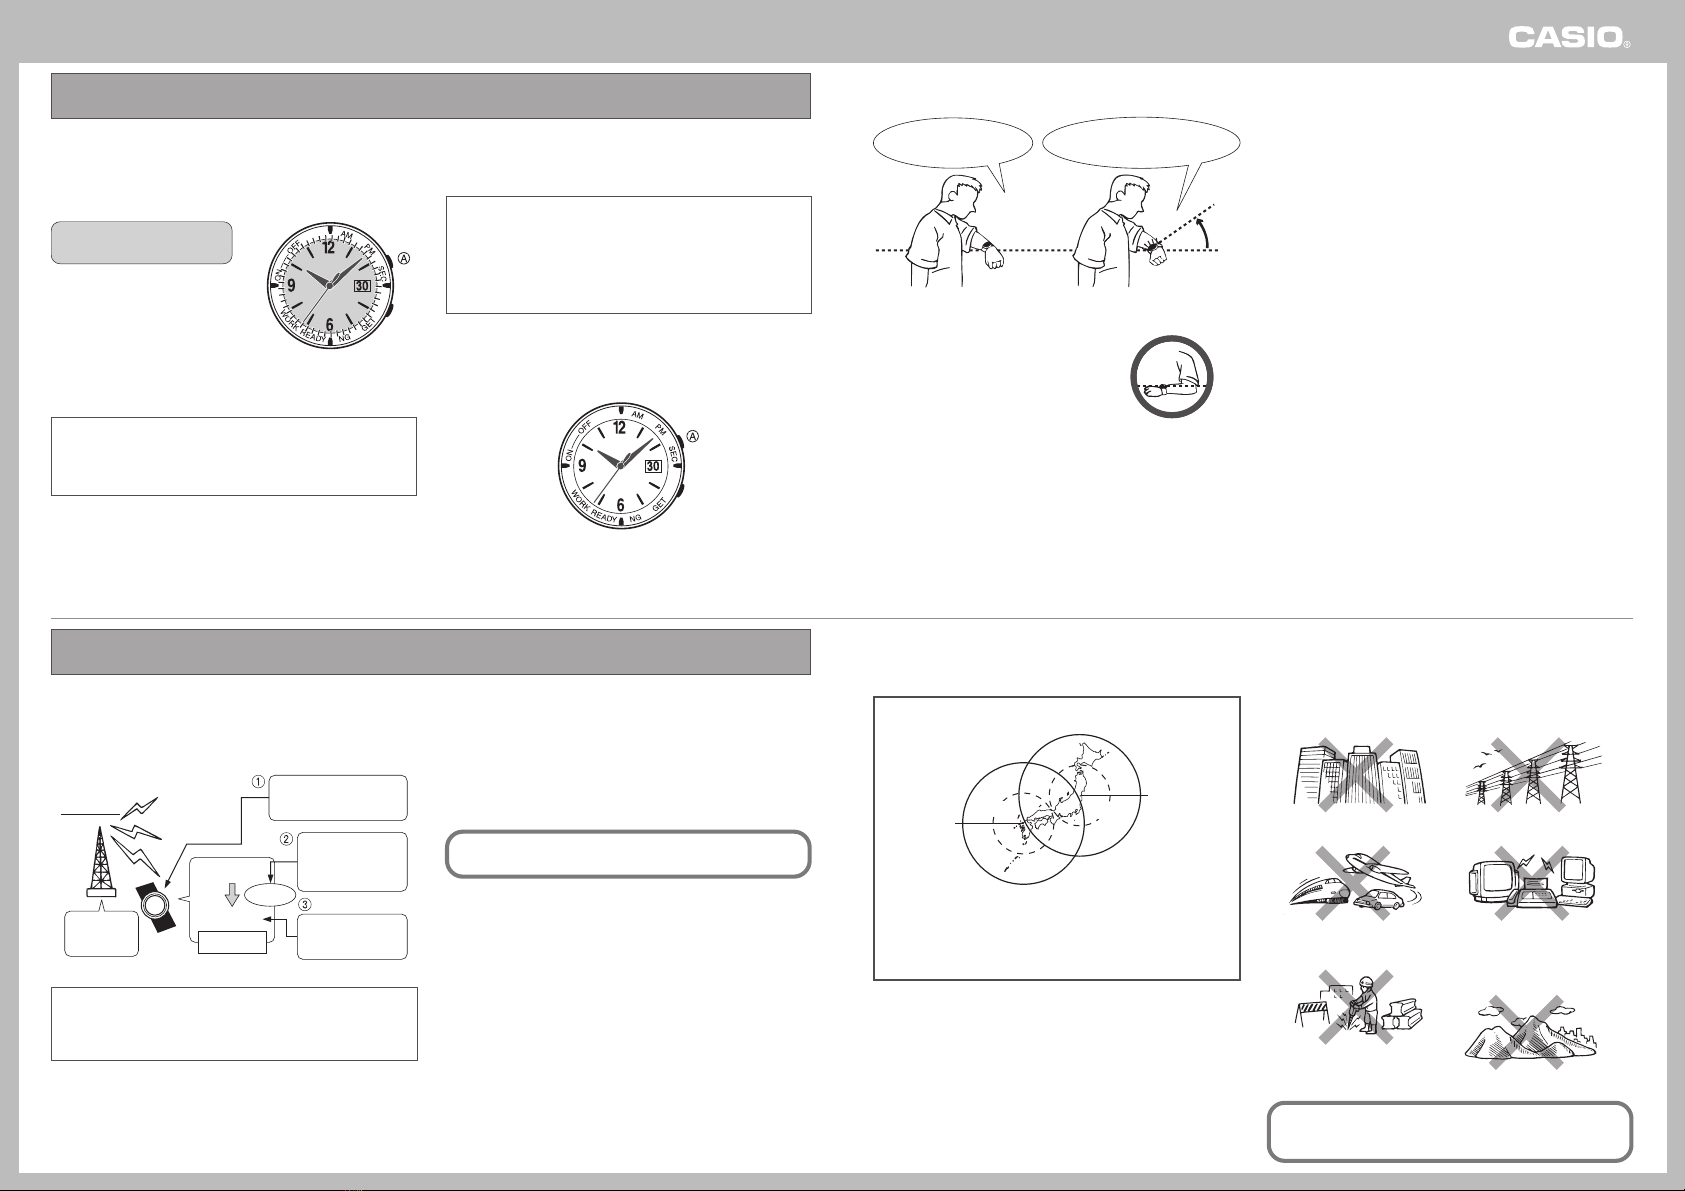
•Make sure you are within the range of the calibration signal
transmitter before performing the reception operation. Remember
that geographic contours, nearby buildings, seasonal conditions,
the time of day, can even make reception impossible even when
you are within range of the transmitter.
•Proper reception may be impossible if there is something blocking
the signal. If reception is unsuccessful, try again.
•This watch is designed to adjust its current time setting in
accordance with the calibration signal transmitted in Japan only. It
operates like a standard (non-radio controlled) watch outside of
the range of the receivable time calibration signal transmitters.
•When the watch is unable to receive the time calibration signal for
some reason, timekeeping accuracy is within ±20 seconds per
month.
•Strong electrostatic charge can cause timekeeping error.
•Signal reception is cancelled if the alarm starts to sound while it is
being performed.
•The watch’s calendar shows dates up to the year 2099.
Attempting a receive operation after that causes an error.
Receiving the Calibration Signal
There are two methods you can use to receive the time calibration
signal.
Auto receive (Reception is performed automatically at midnight,
1:00, 2:00, 3:00, 4:00 and 5:00 each morning.)
Manual receive (You initiate reception using a button operation.)
•When any auto receive is successful, further auto receive
operations for that day are not performed.
•Successful auto receive keeps timekeeping accurate.
❚
To position the watch for optimum
reception
Remove the watch from your wrist and place it somewhere so its
right side (9 o’clock side, where the antenna is located) is facing a
window.
9 o’clock
side
Or
•Do not move the watch while it is receiving the calibration signal.
❚
Time Required for Reception
A calibration signal receive operation takes anywhere from about
two to seven minutes.
❚
To perform manual receive
In the Timekeeping Mode, hold
down the BB
BB
Bbutton for about
two seconds.
•The watch will beep, and signal
reception will start.
❚
To interrupt reception
Press any button.
❚
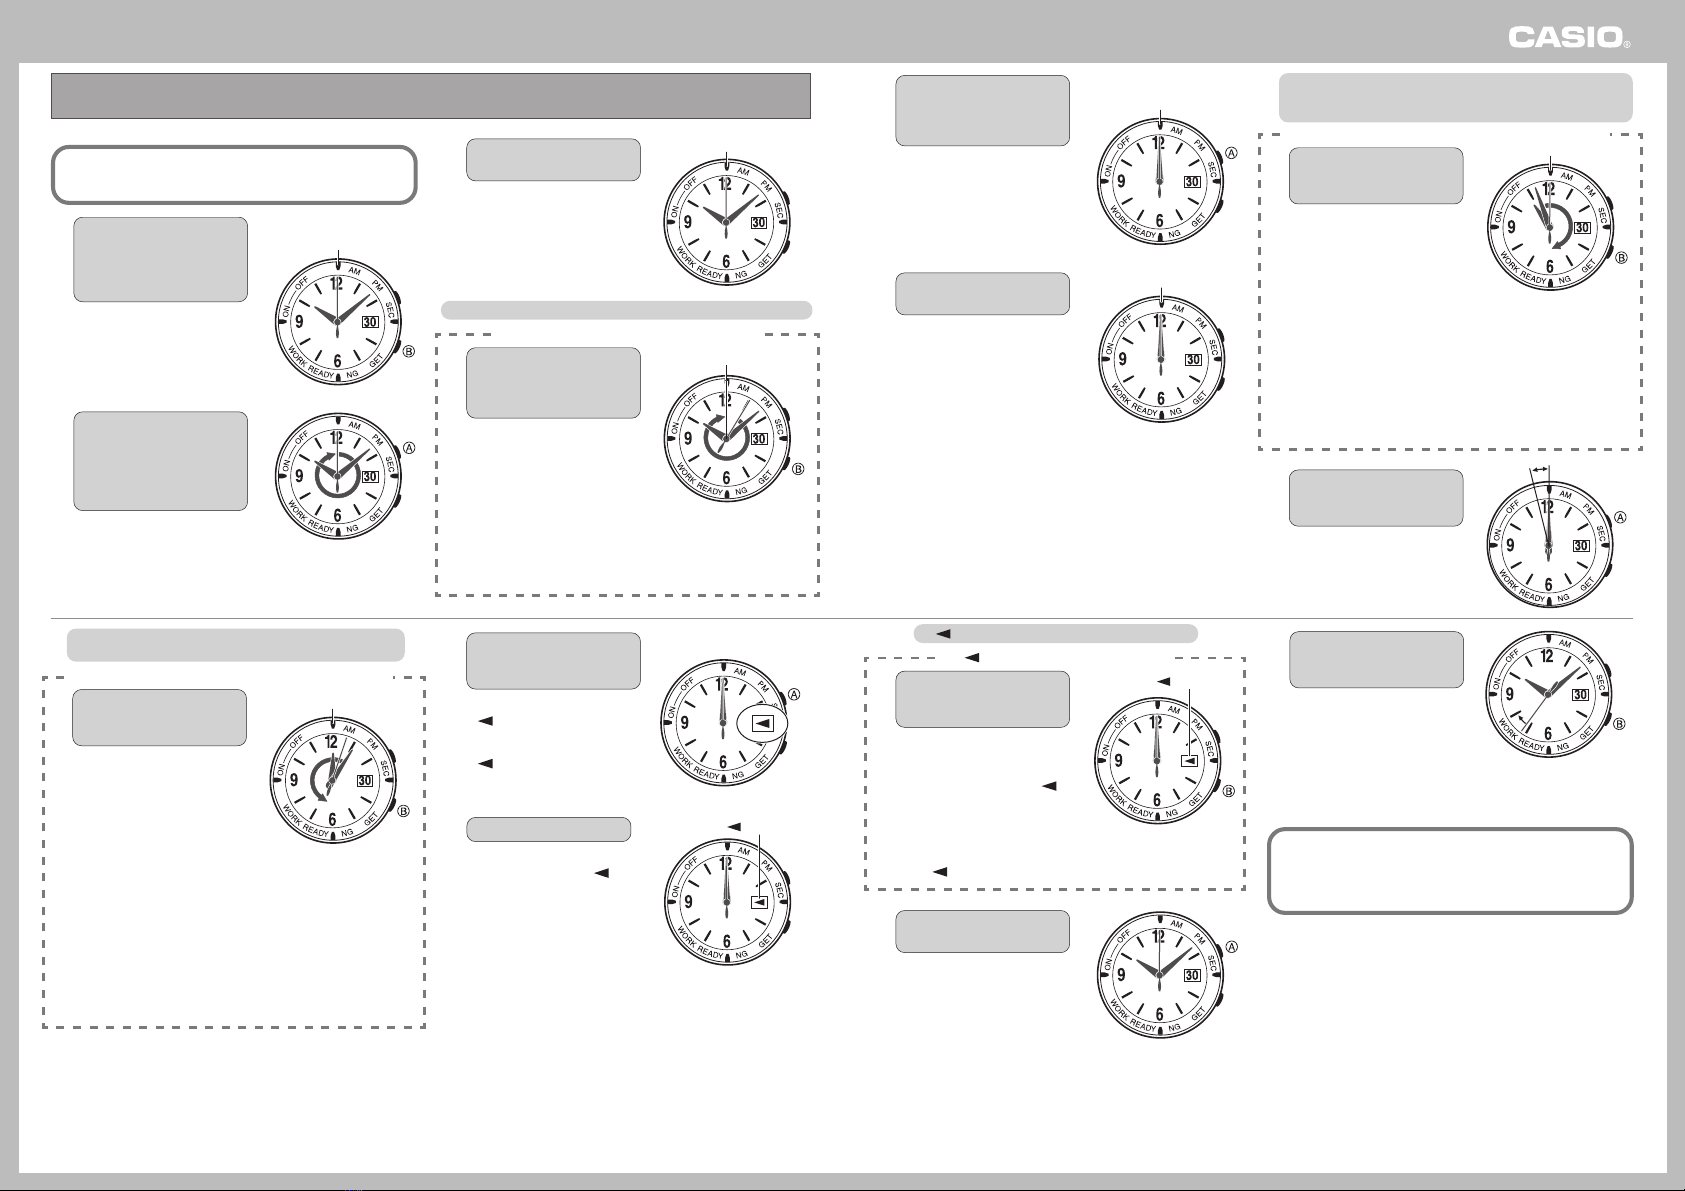
When reception starts
The second hand moves to READY.
•The hour and minute hands continue to keep time normally.
❚
During reception
The second hand moves to WORK.
•The hour and minute hands continue to keep time normally.
•
Do not move the watch until calibration signal reception is complete.
❚
After reception is complete
•If reception is successful, the second hand will move to GET. One
or two minutes later, the hands will move to the correct time.
•If reception is not successful, the second hand will move to NG
(No Good). One or two minutes later, the second hand will resume
normal operation, without any adjustment of the hand setting.
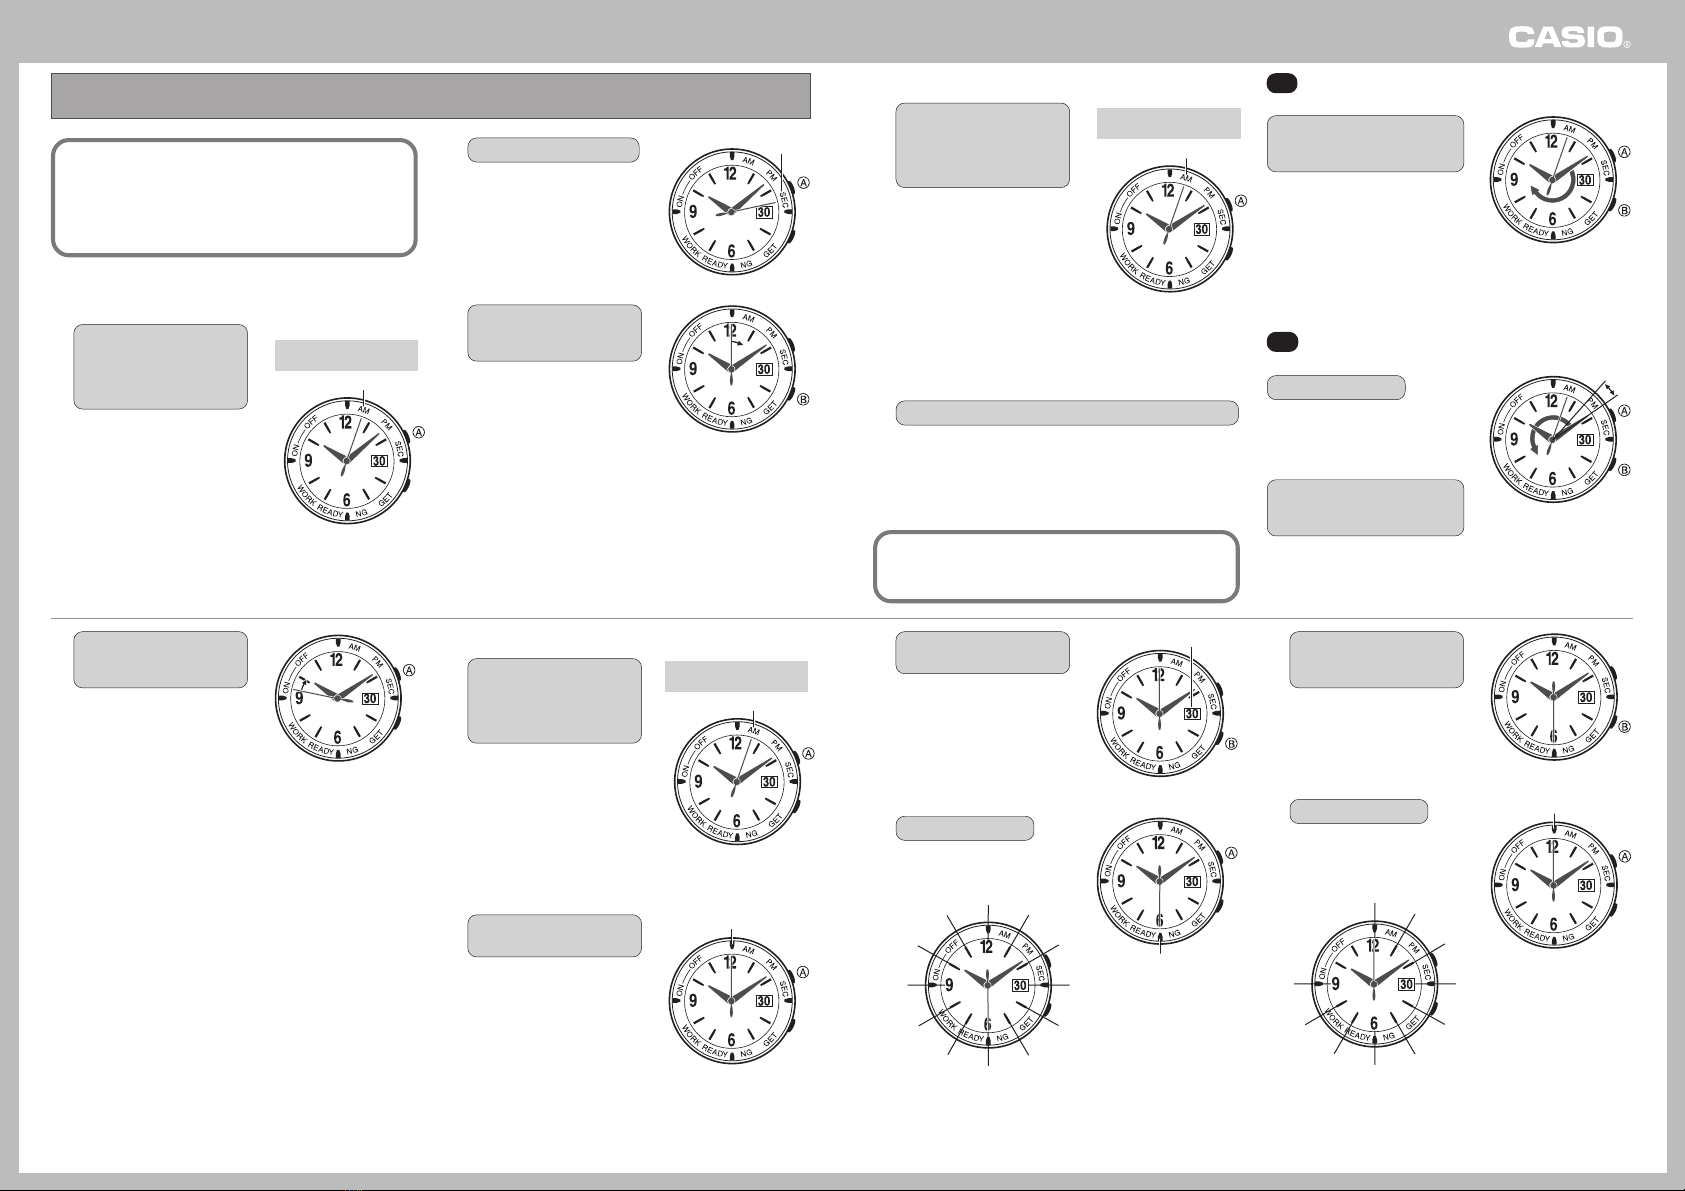
3-b To set the alarm time by moving the hands
counterclockwise
Press the AA
AA
Abutton.
•This will cause the minute hand
to move counterclockwise about
one or two minutes, and then
stop around 12 o’clock.
Press the BB
BB
Bbutton.
•Each press of the Bbutton
moves the setting
counterclockwise by one minute.
•Holding down the Bbutton for about two seconds moves the
hands counterclockwise at high speed. High-speed movement of
the hands will continue until it completes a 12-hour cycle, or until
you press any button to stop it.
4. When the setting is the
way you want, press the
AA
AA
Abutton.
•This will cause the hour and
minute hands to move to the
current time, and the second
hand to move to “ON” (alarm
on).
•Setting the alarm time causes
the alarm to turn on
automatically.
5. Press the BB
BB
Bbutton twice
to return to the
Timekeeping Mode.
•This causes the second hand
to move to the seconds count
of the current time and
resume normal movement.
•If you do not perform any button operation for about two or three
minutes, the watch will exit the setting mode and resume normal
hand movement.
❚
To turn the alarm on or off
In the Alarm Mode, press the
AA
AA
Abutton to toggle the alarm
on and off.
❚
To stop the alarm beeper
Pressing any button while the beeper is sounding stops it.
OFF
ON
You can set an alarm time in 1-minute units. The watch beeps for 10 seconds when the alarm time is reached.
3. Set the alarm time you want.
•If you want to set the alarm time by moving the hands
clockwise, go to step 3-a.
•If you want to set the alarm time by moving the hands
counterclockwise, go to step 3-b.
When setting the alarm time, take care to set AM and PM
correctly.
•The second hand will move between AM and PM any time
the hour hand moves past 12 o’clock while you are setting
the alarm time.
3-a To set the alarm time by moving the hands
clockwise
Press the BB
BB
Bbutton.
•Each press of the Bbutton
moves the setting clockwise by
one minute.
•
Holding down the Bbutton for
about two seconds moves the
hands clockwise at high speed.
High-speed movement of the
hands will continue until it
completes a 12-hour cycle, or until
you press any button to stop it.
•After the alarm time setting is the way you want, press the A
button to advance to step 4.
❚
To set an alarm time
1. In the Timekeeping Mode,
press the BB
BB
Bbutton twice
to enter the Alarm Mode.
•The second hand will move to
either “ON” (alarm on) or
“OFF” (alarm off).
2. Hold down the AA
AA
Abutton
for five seconds to display
the setting screen.
•The second hand will move to
“AM” or “PM”.
•Note that the hands do not
move while the alarm setting
screen is on the display.
OFF
ON
AM
PM
Example: Midnight
Using the Alarm

Operation Guide 3721
4
5. Press the AA
AA
Abutton to
advance to hour and
minute hand home
position adjustment.
•If current hour and minute
hand alignment is correct,
they will both move to
12 o’clock.
6. Check the position of the
hour and minute hands.
•If the hour and minute hands
are not pointing at 12 o’clock,
it means that their home
position is off.
12 o’clock
Correct Alignment
12 o’clock
12 o’clock
3. Check the position of the
second hand.
•If the second hand is not
pointing at 12 o’clock, it
means that its home position
is off.
If the second hand is pointing at 12 o’clock, advance to step 5.
If the second hand home position is off
4. Press the BB
BB
Bbutton to
move the second hand
clockwise, until it points at
12 o’clock.
•Each press of the Bbutton
advances the second hand by
one second.
•Holding down the Bbutton
for about two seconds
advances the second hand at
high speed. High-speed
movement of the second hand
will continue until it completes
a full revolution, or until you
press any button to stop it.
Use the following procedure to adjust the home positions of
the hands and the date when the time setting is wrong, even
after the time calibration signal is received normally.
1. In the Timekeeping Mode,
press the BB
BB
Bbutton three
times to enter the Home
Position Adjustment
Mode.
2. To adjust the second hand
home position, hold down
the AA
AA
Abutton until the
second hand performs a
full rotation and stops
(about five seconds).
•The analog hands do not
move during home position
adjustment.
Correct Alignment
12 o’clock
12 o’clock
12 o’clock
Adjusting the Home Positions
If appears for the date, advance to step 13.
If does not appear for the date
12.
Perform the following
steps to adjust the date
home position.
•Hold down the Bbutton for
about two seconds to start
automatic high-speed
scrolling of the date. The
is located between 31 and 1.
When the date gets close to
31, press the Bbutton again
to stop the scrolling. Press the
Bbutton to advance the date
until appears.
13.
Press the AA
AA
Abutton to exit
home position adjustment.
•This causes the date to
change to the current date,
and the hour and minute
hands to move to the current
time.
•Note that all button operations
are disabled while the date is
changing, and the hour and
minute hands are moving.
If the hour and minute hands are pointing at 12 o’clock,
advance to step 10.
If the hour and minute hand home position is off
9. Use the following steps to
move the hands
counterclockwise.
•Press the Bbutton to align
the hour and minute hands
with 12 o’clock.
•Each press of the Bbutton
moves the hand setting 10
seconds.
•Holding down the Bbutton
for about two seconds moves
the hands at high speed.
High-speed movement of the
hands will continue until it
completes a 12-hour cycle, or
until you press any button to
stop it.
•Move the hands at high speed until just before the setting you
want. Stop high-speed movement, and then press the B
button to move in 10-second increments to move the hands to
12 o’clock.
10.
Press the AA
AA
Abutton to
advance to date home
position adjustment.
•The date indicator will show
if the date home position
is correct. Note that it can
take up to 90 seconds before
appears.
11.
Check the date indicator.
•If the date indicator shows
something other than , it
means that the date home
position is off.
12 o’clock
Correct Alignment
indicator
indicator
14.
Press the BB
BB
Bbutton to
return to the Timekeeping
Mode.
•This causes the second hand
to move to the seconds count
of the current time, where it
starts normal movement.
The watch will return to the Timekeeping Mode automatically if you
leave it in the Home Position Adjustment Mode without performing
any button operation for two or three minutes.
After you complete the home position adjustment procedure,
place the watch in a location that allows good time calibration
signal reception, and then perform a manual receive
operation. See “To perform manual receive” for more
information.
If the hour and minute hands are pointing at 12 o’clock
and you want to set the hands by moving them
counterclockwise, advance to step 8.
If the hour and minute hand home position is off
7. Adjust the hour and
minute hand home
position.
Use the following steps to move
the hands clockwise.
•Press the Bbutton to align
the hour and minute hands
with 12 o’clock.
•Each press of the Bbutton
moves the hand setting
10 seconds.
•Holding down the Bbutton for about two seconds moves the
hands at high speed. High-speed movement of the hands will
continue until it completes a 12-hour cycle, or until you press
any button to stop it.
•Move the hands at high speed until just before the setting you
want. Stop high-speed movement, and then press the B
button to move in 10-second increments to move the hands to
12 o’clock.
8. To move the hands
counterclockwise, press
the AA
AA
Abutton.
•This will cause the minute
hand to move
counterclockwise about one
or two minutes, and then stop
around 12 o’clock.

Operation Guide 3721
5
❚
To manually set the hour and minute
1. In the Timekeeping Mode,
hold down the AA
AA
Abutton
for about five seconds
until the second hand
stops at AM or PM.
•Note that the hands of the
watch do not move in the
manual setting mode.
•If you do not perform any
button operation for about two
or three minutes, the watch
will exit the manual setting
mode and normal hand
movement will resume.
•Pressing the Abutton and the Bbutton at the same time in
the manual setting mode will cause the hands to move to the
original (unadjusted) time setting. Then the watch will return to
the Timekeeping Mode.
2. Use one of the operations described below set the hands.
❚
To move the hands clockwise
Advance to step 2-a.
❚
To move the hands counterclockwise
Advance to step 2-b.
When adjusting the hour and minute hands, make sure you
set a.m. and p.m. times correctly.
•Whenever the time setting passes 12 o’clock, the second
hand will switch between AM and PM.
AM
Example: Current time is
10:09 a.m.
2-a To set the alarm time by moving the hands
clockwise
Press the BB
BB
Bbutton to move
the hands clockwise by one
minute.
•Holding down the Bbutton for
about two seconds moves the
hands clockwise at high speed.
High-speed movement of the
hands will continue until it
completes a 12-hour cycle, or
until you press any button to stop
it.
•After setting the time you want, press the Abutton to advance to
step 3.
2-b To set the alarm time by moving the hands
counterclockwise
Press the AA
AA
Abutton.
•This will cause the minute hand
to move counterclockwise about
one or two minutes, and then
stop around 12 o’clock.
Press the BB
BB
Bbutton to move
the hands counterclockwise
by one minute.
•Holding down the Bbutton for about two seconds moves the
hands counterclockwise at high speed. High-speed movement of
the hands will continue until it completes a 12-hour cycle, or until
you press any button to stop it.
If you become confused and lose your way during the
following procedures, simply put the watch down and do not
perform any button operation for two or three minutes. This
will cause the watch to enter the Timekeeping Mode (indicated
by normal one-second movement of the second hand)
automatically. After that, you can try performing the manual
setting procedure again from the beginning.
❚
To manually reset the second hand to
the top of the minute
1. In the Timekeeping Mode,
hold down the AA
AA
Abutton
for about five seconds
until the second hand
stops at AM or PM.
•If you do not perform any
button operation for about two
or three minutes, the watch
will exit the manual setting
mode and normal hand
movement will resume.
2. Press the AA
AA
Abutton twice.
•This will cause the second
hand to move to SEC.
•Note that the hands of the
watch do not move in the
manual setting mode.
3. In accordance with a time
signal on the TV or radio,
press the BB
BB
Bbutton.
•This will increase the minute
setting by one and restart the
seconds count from 00.
•In Japan, you can obtain the
current time by dialing 117 on
the telephone.
AM
Example: Current time is
10:08 a.m.
SEC
Adjusting the Time Manually
You can perform the following procedures to adjust
the time and date when the watch is unable to
receive a time calibration signal for some reason.
3. Press the BB
BB
Bbutton to
advance the date by one.
•If the watch automatically
skips the end of the month
date (30 or 31) you are trying
to set, first perform the steps
below to change the month
setting and then come back to
adjust the date setting.
4. Press the AA
AA
Abutton.
•The second hand will move to
the current month setting.
Jan
Feb
Mar
Sep
Aug
Jul
Apr
Jun May
Nov Dec
Oct
Date
Current month
10’s digit of year setting
3. To return to the
Timekeeping Mode, press
the AA
AA
Abutton six times.
•This will cause the hands tο
move to the current time, and
resume normal movement.
❚
To adjust the date
1. In the Timekeeping Mode,
hold down the AA
AA
Abutton
for about five seconds
until the second hand
stops at AM or PM.
•Note that the hands of the
watch do not move in the
manual setting mode.
•If you do not perform any
button operation for about two
or three minutes, the watch
will exit the manual setting
mode and normal hand
movement will resume.
2. Press the AA
AA
Abutton three
times.
•The second hand will move to
12 o’clock.
AM
Example: Current time is
10:09 a.m.
12 o’clock
5. Press the BB
BB
Bbutton to
advance the month by
one.
6. Press the AA
AA
Abutton.
•The second hand will move to
the ten’s digit of the year
setting.
10
20
30
90
80
70
40
60 50
00

Operation Guide 3721
6
7. Press the BB
BB
Bbutton to
increase the ten’s digit
setting by one.
•You can set the year within
the range of 2000 to 2099.
8. Press the AA
AA
Abutton.
•The second hand will move to
the one’s digit of the year
setting.
1
2
3
9
8
7
4
65
0
9. Press the BB
BB
Bbutton to
increase the one’s digit
setting by one.
10.
Press the AA
AA
Abutton to
return to the Timekeeping
Mode.
•This will cause the hands to
move to the current time, and
resume normal movement.
•The watch automatically makes adjustments for leap years and
month lengths. The date will change automatically when the
current time reaches midnight. The date change at the end of the
month may take more time than normal.
Year (one's di
g
it)
Power Saving puts the watch into a sleep state, which will cause the second hand to stop moving whenever the watch is left in the dark.
•Note that hand movement may stop if the watch is blocked from light by your sleeve.
Power Saving
❚
How the sleep state works
Sleep Level 1
The second hand stops whenever the watch is left in the dark for
about one hour between the hours of 10:00 p.m. and 6:00 a.m.
•The hour and minute hand, and the date continue to operate
normally.
•The alarm operates normally.
Sleep Level 2
If the watch is left in the dark for an additional six or seven days,
the hour and minute hands, and the date indicator also stop.
•Auto time calibration is not performed.
•The alarm does not sound.
•Timekeeping continues internally even when the hands are
stopped.
❚
To recover from the sleep state
Move the watch to a brightly lit location, press any button, or raise
the watch to your eyes for viewing (see “To illuminate the face with
the auto light switch”). The hands will move to the current time
setting and resume timekeeping from there.
Table of contents
Other Casio Watch manuals

Casio
Casio ANA(6HST-B) User manual

Casio
Casio 3294 User manual

Casio
Casio 5596 User manual

Casio
Casio 2609 User manual

Casio
Casio 2318 Configuration guide

Casio
Casio RFT-100 Troubleshooting guide

Casio
Casio Wave Ceptor WV-58U-1AV User manual

Casio
Casio 4749 User manual

Casio
Casio WVA-300D Troubleshooting guide

Casio
Casio 5406 User manual

Casio
Casio QW-2269 Troubleshooting guide

Casio
Casio MO0602-EA User manual

Casio
Casio 5374 User manual

Casio
Casio GBD-H1000 Service manual

Casio
Casio 3732 User manual

Casio
Casio QW-930 Configuration guide

Casio
Casio F91W User manual

Casio
Casio G-Shock GG-B100 User manual

Casio
Casio 2550 User manual

Casio
Casio DBC310-1 - DataBank Men's Watch User manual