E-64
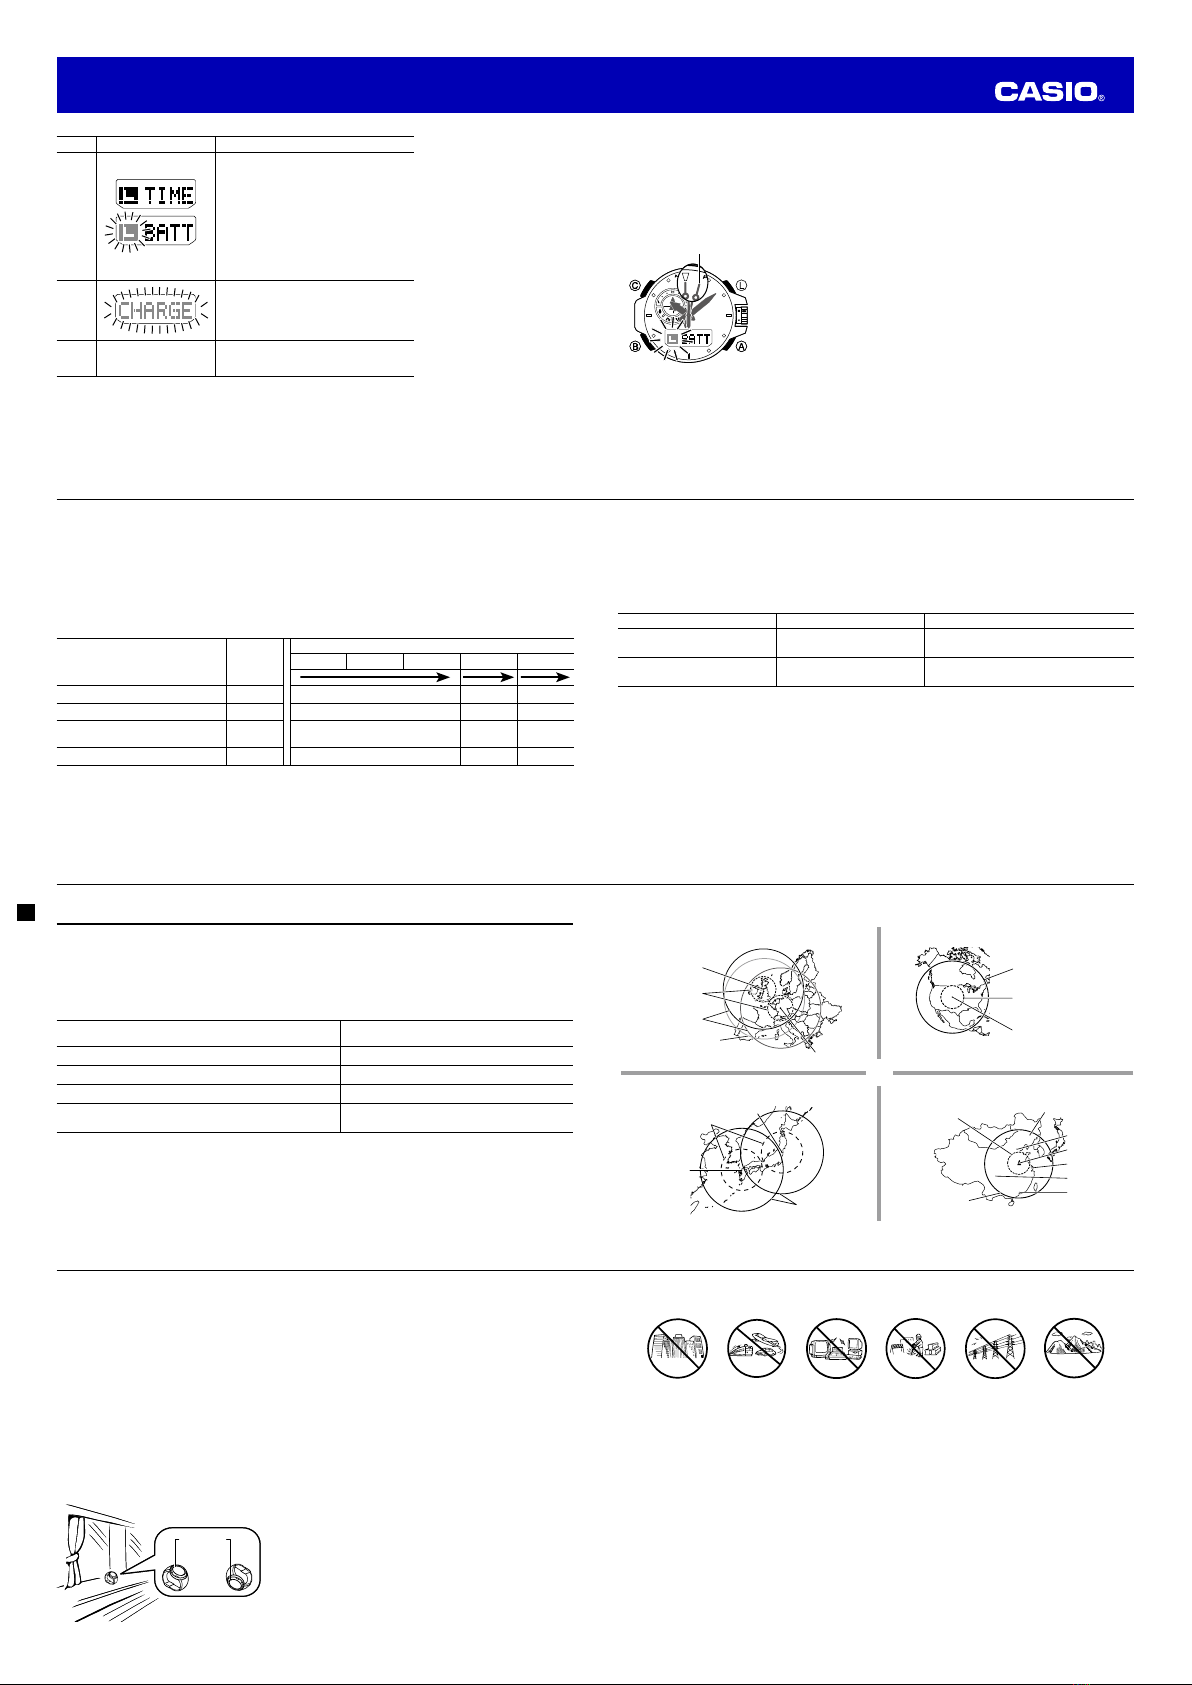
To take altitude readings
In the Timekeeping Mode or any sensor mode, press Aa number of
times until ALTI (Altimeter Mode) appears on the digital display.
•In a non-sensor mode, hold down Bfor about two seconds to enter
the Timekeeping Mode. Next, perform the above step.
•After you enter the Altimeter Mode (ALTI), the watch will start taking
altitude readings.
•The current altitude value is displayed in units of 1 meter (5 feet).
•For information about the measurement interval, see page E-62.
Note
•When you enter the Altimeter Mode, the second hand may indicate seconds (of the current time) or the
altitude differential (page E-67). The initial second hand function will be the same as what was selected
the last time you took an altitude reading. To toggle between the two second hand functions (indicating
seconds or indicating the altitude differential) press C.
•Pressing Cor L, or rotating the crown while a reading operation is in progress will extend the
operation for approximately one hour or 12 hours (depending on the current measurement time and
interval setting) from point the button was pressed or the crown was rotated.
•The watch will return to the Timekeeping Mode at the end of the applicable measurement time (one
hour or 12 hours).
•Pressing Bwhile a reading operation is in progress will stop the operation and return to the
Timekeeping Mode.
•The measurement range for altitude is –700 to 10,000 meters (–2,300 to 32,800 feet).
•The displayed altitude value changes to ----if an altitude reading falls outside the measurement
range. An altitude value will reappear as soon as the altitude reading is within the allowable range.
Altitude Tendency Graph
Altitude
Altitude Tendency Graph
Altitude
E-65
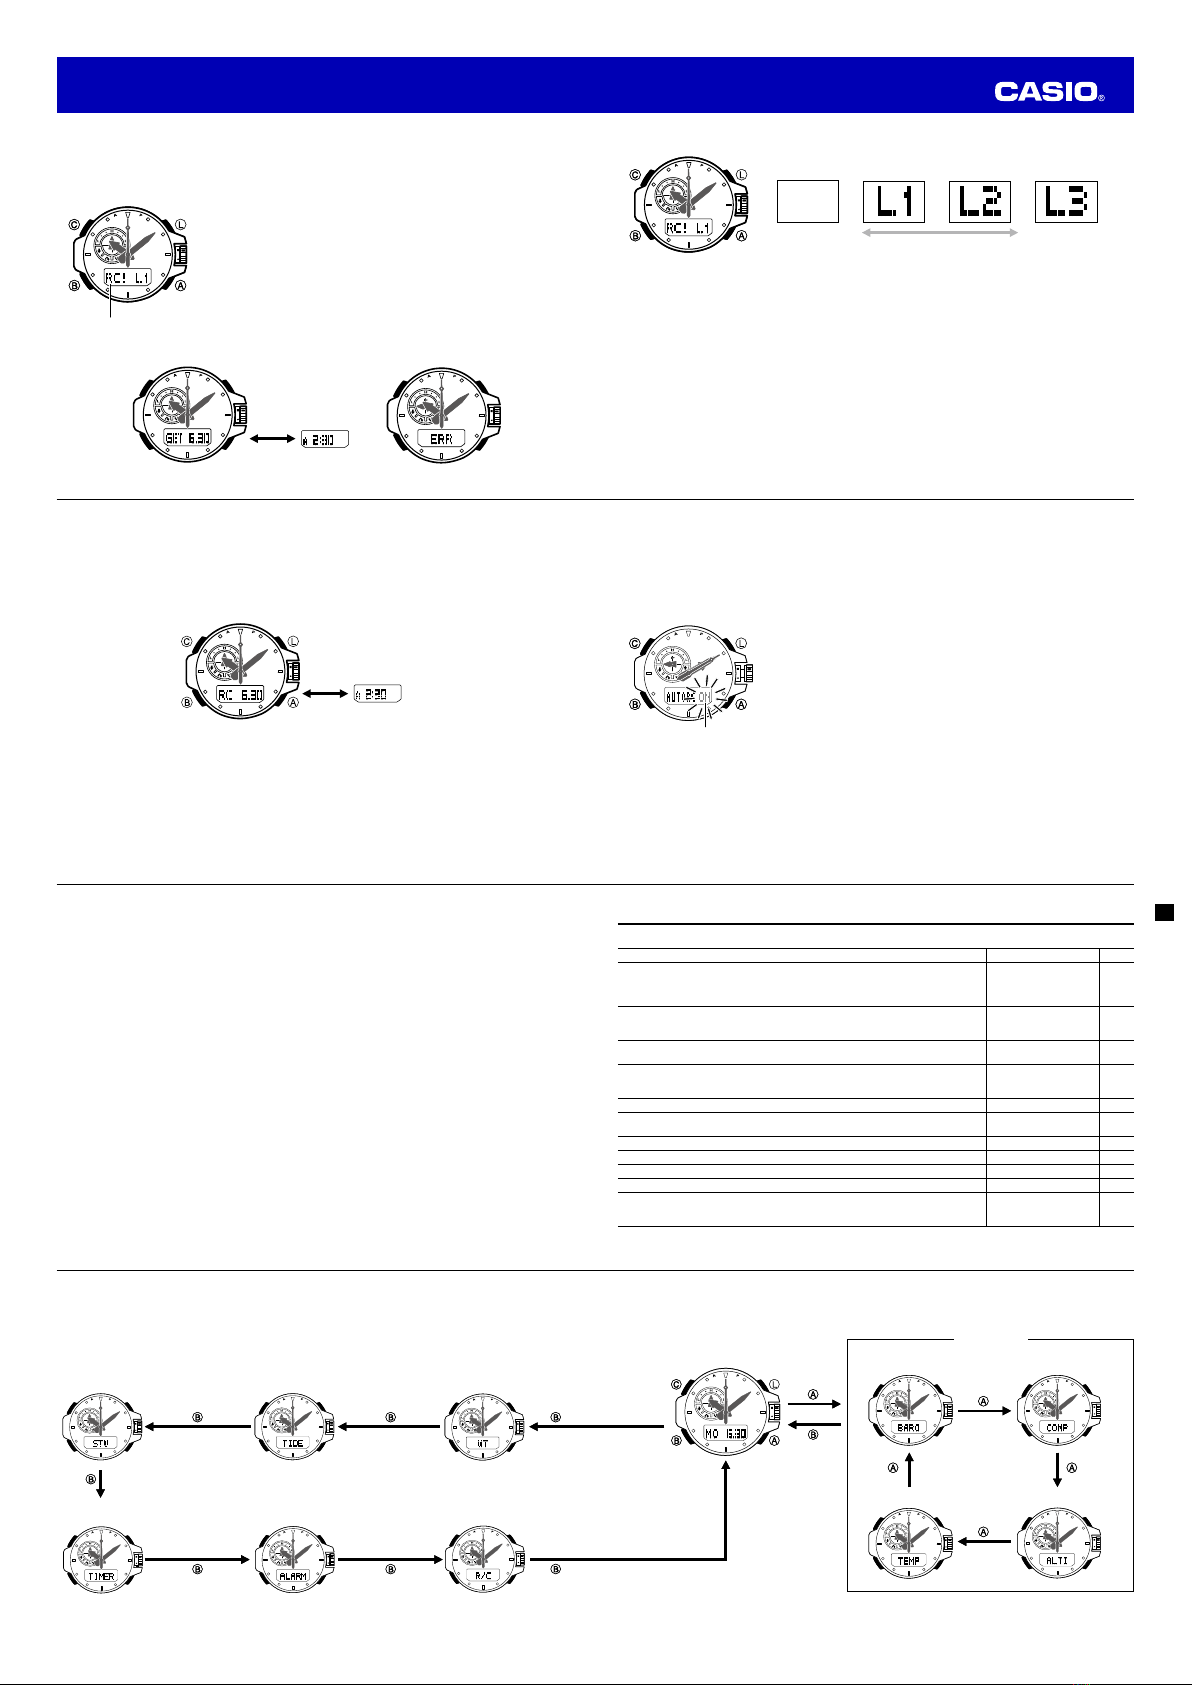
•You can change the unit for displayed altitude values to either meters (m) or feet (ft). See “To specify
altitude, barometric pressure, and temperature units” (page E-42).
•The altitude tendency graph shows changes in altitude over the past 6 readings while readings are
being taken.
50 meters
(10 meters for
each block )
6 readings
ago
Current
reading
Using Reference Altitude Values
To minimize the chance of reading error, you should update the reference altitude value before setting off
on a trek or any other activity where you plan to take altitude readings. While mountain climbing, it is
highly recommended that you check a map, local altitude indications, or some other source for your
current correct altitude and regularly update the reference altitude value with the latest information.
•Reading error can be caused by changes in barometric pressure, and by temperature changes due to
change in barometric pressure and/or elevation.
•Though altitude readings can be taken without setting a reference altitude, doing so may produce
readings that are very different from altitudes indicated by other altitude markers and indications.
•Before performing the procedure below, look up the altitude of your current location on a map, the
Internet, etc.
E-66
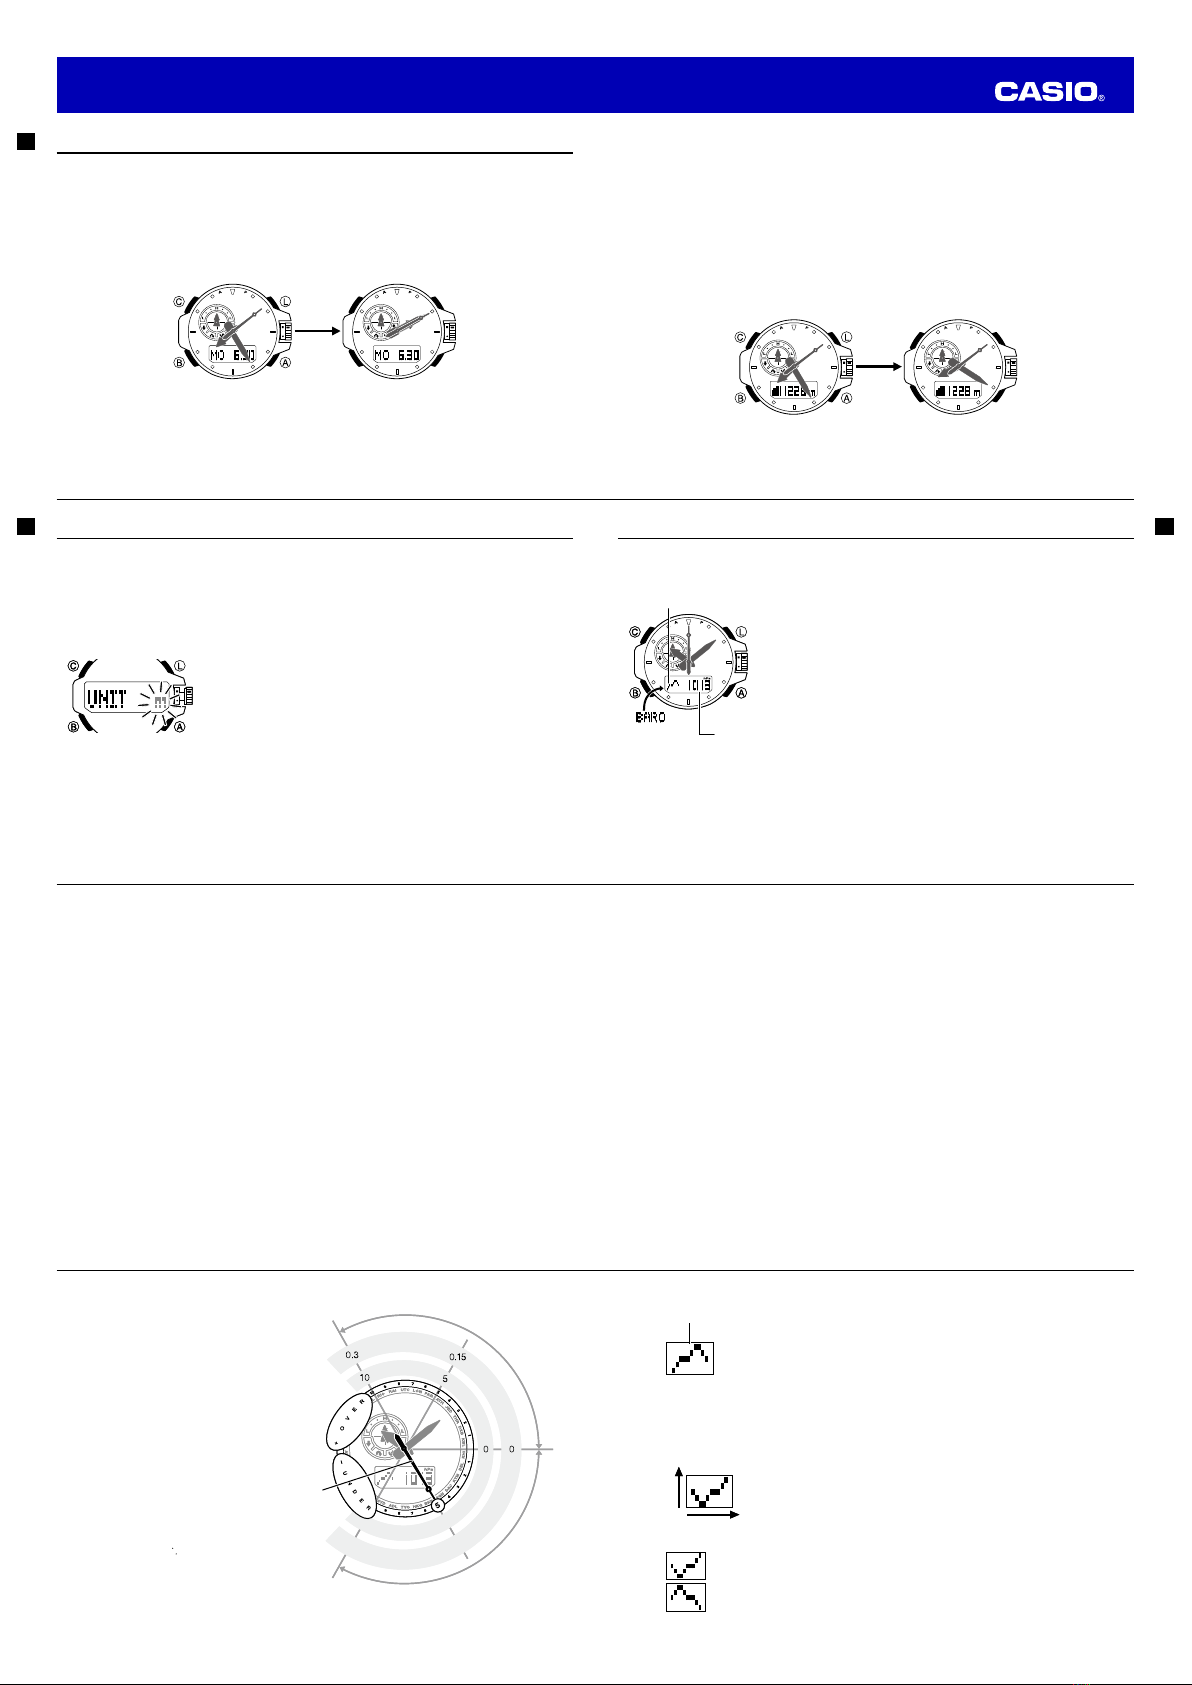
To specify a reference altitude value
1. In the Altimeter Mode, pull out the crown.
•This will cause the current altitude reading value to flash on the
digital display.
•The timekeeping (hour, minute, second) hands will move to 2
o’clock.
2. Rotate the crown to change the altitude value in one-meter (five-foot)
increments.
•You can also use HS1 high-speed movement (page E-6) to change
this setting.
•Change the reference altitude value to an accurate altitude reading
that you get from a map or other source.
•You can set the reference altitude value within the range of –3,000
to 10,000 meters (–9,840 to 32,800 feet).
•To return to the OFF setting so no reference altitude value is
applied to readings, press Aand Cat the same time.
3. After the setting is the way you want, push the crown back in to exit the
setting screen.
E-67
Advanced Altimeter Mode Operations
Use the information in this section to obtain more accurate altimeter readings, especially while mountain
climbing or trekking.
Using an Altitude Differential Value
If you specify an altitude differential start point, the second hand of the
watch will indicate the difference between the current altitude and the
altitude differential start point. The displayed altitude differential value is
updated each time the watch obtains a new altitude reading value.
•Depending on the currently selected display range, the allowable
range for the altitude differential value is 100 meters to –100 meters
(100 meters = 328 feet), or 1,000 meters to –1,000 meters (1,000
meters = 3,280 feet).
•If a reading value is outside the allowable range either + OVER or
– UNDER appears on the digital display (page E-70).
•The second hand will move to 9 o’clock if a sensor reading could not
be taken for some reason or if the reading is outside the allowable
range.
•See “Using the Altitude Differential Value While Mountain Climbing or
Hiking” (page E-68) for some real-life examples of how to use this
feature.
Altitude differentialAltitude differential
E-68
Specifying the Altitude Differential Measurement Range
You can use the procedure below to select either ±100 meters or ±1,000
meters as the altitude differential measurement range.
Relative Altitude Measurement Range Display Unit
±100 meters (±328 feet) 5 meters (16 feet)
±1,000 meters (±3,280 feet) 50 meters (164 feet)
To specify the altitude differential measurement range
1. In the Altimeter Mode, pull out the crown.
•This will cause the current altitude reading value to appear.
•The timekeeping (hour, minute, second) hands will move to 2
o’clock.
2. Press Btwice.
•This will cause DIFF to appear on the digital display, along with the
flashing current altitude differential measurement range setting.
3. Rotate the crown to select either 100 meters (100m) or 1,000 meters
(1000m) as the altitude differential measurement range.
4. After the setting is the way you want, push the crown back in to exit the
setting screen.
Using the Altitude Differential Value While Mountain Climbing or Hiking
After you specify the altitude differential start point while mountain climbing or hiking, you can easily
measure the change in the altitude between that point and other points along the way.
Altitude differential rangeAltitude differential range
E-69
To use the altitude differential value
1. Use the contour lines on your map to determine the difference in
altitude between your current location and your destination.
•Knowing the difference in altitude helps you determine your
current location and how much further you need to go to reach
your destination.
2. In the Altimeter Mode, hold down Cfor at least two seconds to specify
your current location as the altitude differential start point.
•DIFF RESET and then RESET will appear on the digital display,
and then the second hand will move to ±0 (±0m) to indicate the
altitude differential.
3. While comparing the altitude difference you determined on the map
and the watch’s altitude differential value, advance towards your
destination.
•If the map shows that the difference in altitude between your
location and your destination is +80 meters for example, you know
you will be nearing your destination when the displayed altitude
differential value shows +80 meters.
Current
location
Destination
altitude
Current
location
Destination
altitude
Altitude Differential (Reference
location, so ±0 m is indicated.)
Current altitude
Altitude Differential (Reference
location, so ±0 m is indicated.)
Current altitude
E-70
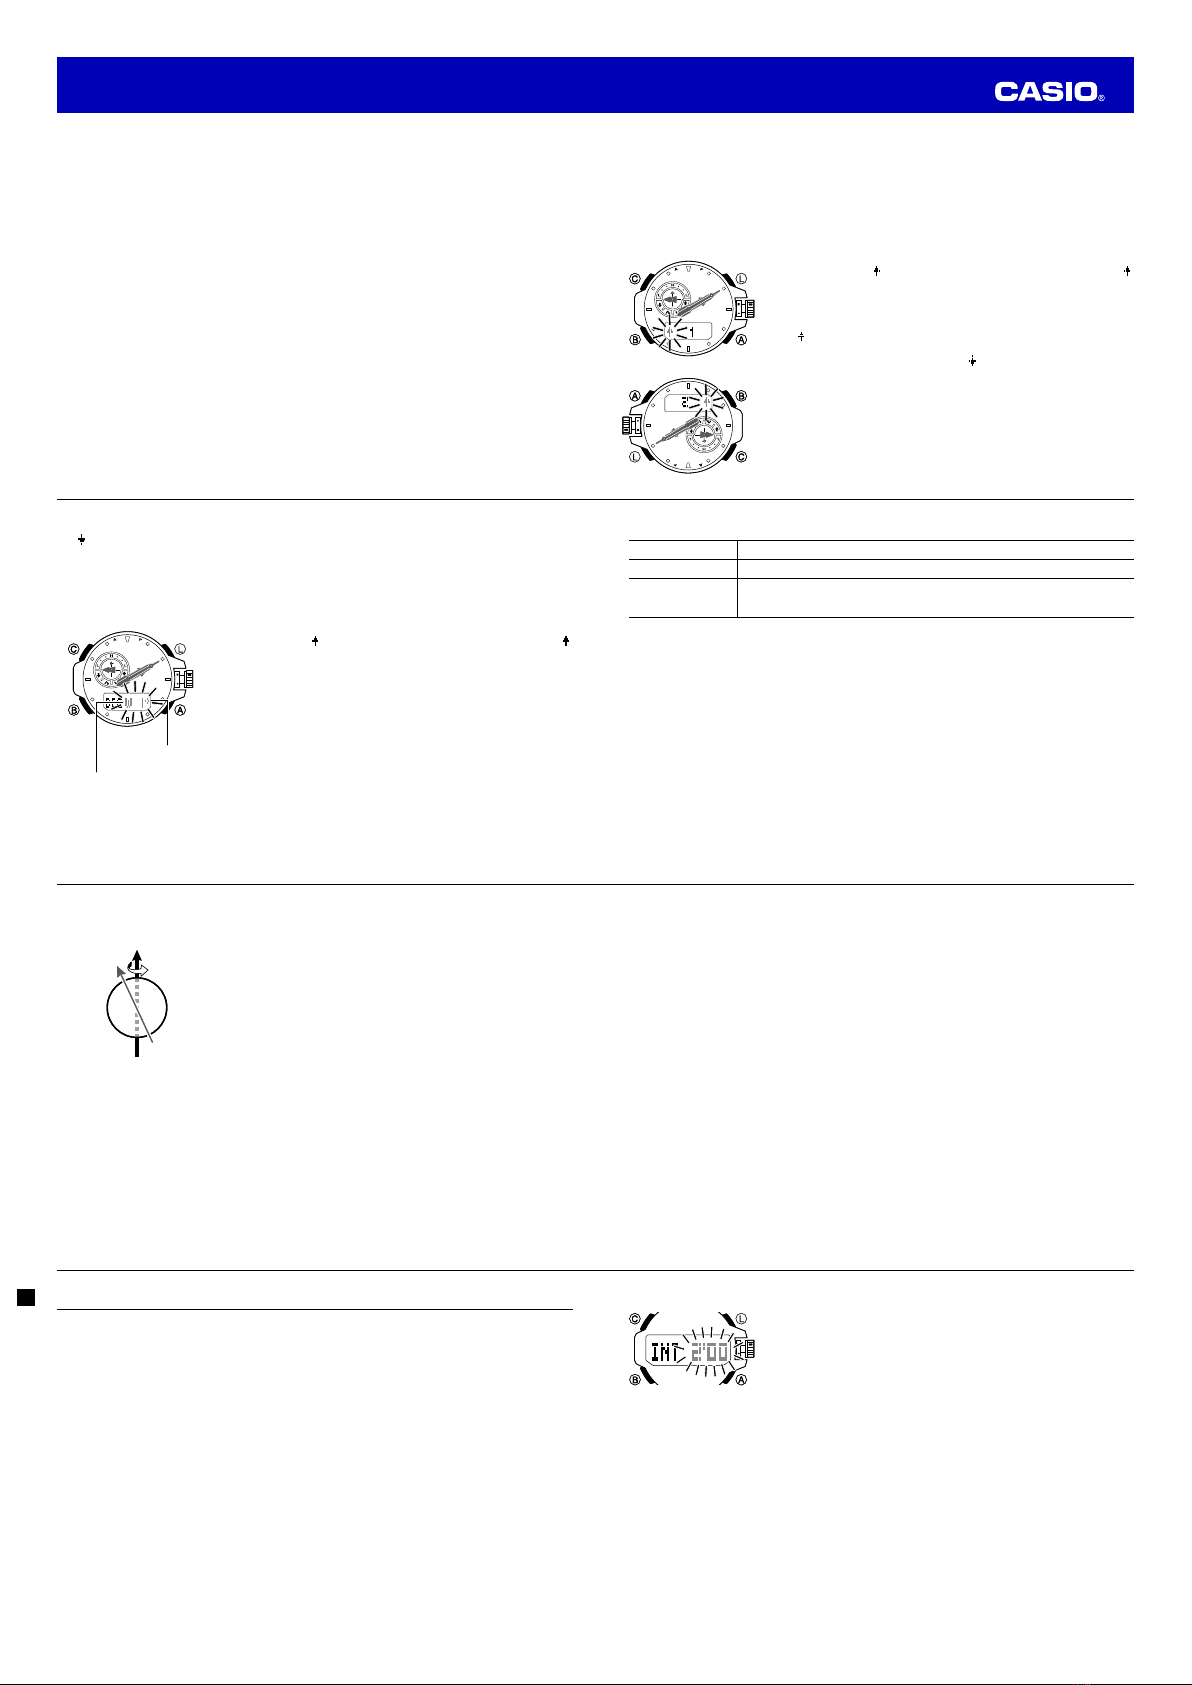
The altitude differential with the reference location is indicated by the second hand as shown in the nearby
illustration.
•When ±100m is selected for the altitude
differential measurement range, the
+ OVER indicator appears any time the
differential is greater than +100 meters
(+328 feet). The − UNDER indicator
appears any time the differential is
greater than −100 meters (−328 feet). If
either of these indicators appears,
change the range setting to ±1000m.
•When ±1000m is selected for the
altitude differential measurement range,
the + OVER indicator appears any time
the differential is greater than +1,000
meters (+3,280 feet). The − UNDER
indicator appears any time the
differential is greater than −1,000
meters (−3,280 feet).
•The second hand will move to 9 o’clock
if a reading is outside the altimeter
measurement range (−700 to +10,000
meters (–2,300 to 32,800 feet)), or if a
reading error occurs.
•To toggle between the altitude
differential and current time seconds
count on the digital display, press C.
Unit: 50m (164ft)
Unit:
Meters
Unit: 5m (16ft)
−500m (−1,640ft)
−50m (−164ft)
−100m (−328ft)
−1,000m (−3,280ft)
1,000m (3,280ft) 500m (1,640ft)
100m (328ft)
Example:
Altitude
differential
of −30
(300)
meters
Indication range:
±100 (1,000) meters
50m (164ft)
00
Unit: 50m (164ft)
Unit:
Meters
Unit: 5m (16ft)
−500m (−1,640ft)
−50m (−164ft)
−100m (−328ft)
−1,000m (−3,280ft)
1,000m (3,280ft) 500m (1,640ft)
100m (328ft)
Example:
Altitude
differential
of −30
(300)
meters
Indication range:
±100 (1,000) meters
50m (164ft)
00
E-71
How does the altimeter work?
Generally, air pressure decreases as altitude increases. This watch bases its altitude reading on
International Standard Atmosphere (ISA) values stipulated by the International Civil Aviation Organization
(ICAO). These values define relationships between altitude and air pressure.
•Note that the following conditions will prevent you from obtaining accurate readings:
When air pressure changes because of changes in the weather
Extreme temperature changes
When the watch itself is subjected to strong impact
There are two standard methods of expressing altitude: absolute altitude, which expresses an absolute
height above sea level, and relative altitude, which expresses the difference between the altitudes of two
different places. This watch expresses altitudes as relative altitude.
Height of building 130 m
(relative altitude)
Rooftop at an altitude of
230 m above sea level
(absolute altitude)
Sea Level
Regular calibration of the watch in accordance with values provided by local altitude (elevation) indications
is recommended before taking readings in order to maximize reading accuracy (page E-65).
Operation Guide 5371