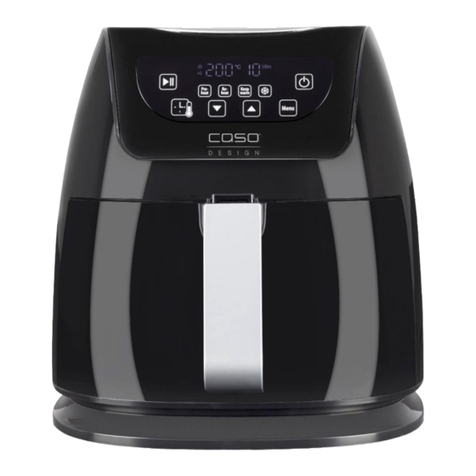
CASO DESIGN AF 300 User manual

Instruction Manual
Air Fryer
AF 300
Item No. 13172
4000186

2
USA Branch
CASO Design USA LLC
50 Mountain View Rd
Warren, NJ, 07059
Info@CasoDesignUSA.com
www.CasoDesignUSA.com
Document No.: 13172 2018-08-16
© 2018 CASO International GmbH

3
1. Instruction Manual...............................................................5
1.1 IMPORTANT SAFEGUARDS...........................................5
1.2 General.............................................................................6
1.3 Use of this manual..........................................................6
1.4 Warning notices ..............................................................6
Limitation of liability................................................................7
1.5 Copyright protection.......................................................7
2Safety.................................................................................8
2.1 Intended use....................................................................8
2.2 General safety information.............................................8
2.3 Sources of danger...........................................................9
2.3.1 Burn danger..................................................................9
2.3.2 Fire danger....................................................................9
2.3.3 Electrocution warning..................................................10
3Getting Started................................................................10
3.1 Safety information.........................................................10
3.2 What’s included.............................................................11
3.3 Unpacking......................................................................11
3.4 Disposal of the packaging............................................11
3.5 Setup..............................................................................11
3.5.1 Setup location requirements:......................................11
3.6 Electrical connection....................................................12
3.6.1 Extension cords ..........................................................13
3.6.2 Polarization instruction................................................13
4Complete Overview.........................................................13
4.1 Appliance diagram........................................................13
4.2 Control Panel.................................................................14
4.3 Rating plate....................................................................14
5Operation.........................................................................14
5.1 Prior to the first use......................................................14
5.2 Overheating safeguard.................................................15
5.3 Hotkey function.............................................................15
5.4 Boost..............................................................................15
5.5 Program settings...........................................................15
5.6 8 auto pre-set programs...............................................17
5.7 Use .................................................................................18
5.9 Storage...........................................................................19
4
6Cleaning and Maintenance.............................................19
6.1 Safety information.........................................................19
6.2 Cleaning.........................................................................20
7Troubleshooting..............................................................21
7.1 Safety notices................................................................21
8Disposal of the Old Appliance.......................................21
9Warranty..........................................................................21
10 Technical Data.................................................................22

5
1. Instruction Manual
1.1IMPORTANT SAFEGUARDS
1. Read all instructions before using.
2. This appliance generates heat. Do not touch hot
surfaces.
3. To protect against electrocution do not immerse any
part of the appliance in liquid.
4. Children must be closely supervised when near the
appliance. Do not let children operate appliance
without close supervision.
5. Unplug the appliance when not in use and before
cleaning. Allow appliance to cool down before
cleaning.
6. Inspect the appliance, its power cord and plug for any
damage before using. If there appears to be any
damage or if the appliance shows signs of
malfunctioning, do not use the appliance. Contact
Frieling USA, Inc. for inspection and repair.
7. Do not use outdoors.
8. Do not allow cord to touch hot surfaces or hang over
sharp edges such as those on countertops.
9. Do not place the appliance on or near a hot gas or
electric burner, or heated oven.
10. Do not carry the appliance around when it contains
hot food.
11. Always connect power cord to the appliance first,
then insert the plug into the electrical outlet. Before
unplugging, make sure the appliance is not in use,
then unplug.
12. Do not use this appliance for any unintended use.
13. SAVE THESE INSTRUCTIONS.

6
1.2General
Thank you for purchasing the AF300 Air Fryer. Please read this
manual carefully before using your new appliance to familiarize
yourself with all its features.In the following pages, you’ll learn
to properly care for and safely operate your appliance, helping it
to perform at peak efficiency for years to come. Please save
these instructions and read all instructions before using.
1.3Use of this manual
This manual provides important information on the initial setup,
safe operation, intended use, care and cleaning of the
appliance. It also includes a helpful troubleshooting section to
address common questions that may arise during operation.
The manual should be read by anyone planning to use the
appliance.
Please store this manual in a safe place near the appliance for
easy reference.
1.4Warning notices
Please pay special attention to the following alerts and notices
found throughout the manual:
DANGER
A warning notice of this level of danger indicates a
potentially dangerous situation.
If the dangerous situation is not averted, this can lead to death
or serious injuries.
►Observe the instructions in this warning notice in order to
avoid the danger of death or serious personal injuries.
WARNING
A warning notice of this level of danger indicates a
possible dangerous situation.
If the dangerous situation is not averted, this can lead to severe
injuries.
►Observe the instructions in this warning notice in order to
avoid the personal injuries.

7
ATTENTION
A warning notice of this level of danger indicates a
possible dangerous situation.
If the dangerous situation is not averted, this can lead to slight
or moderate injuries.
►Observe the instructions in this warning notice in order to
avoid the personal injuries.
PLEASE NOTE
A notice of this kind indicates additional information, which will
simplify the handling of the machine.
Limitation of liability
All the technical information, data and notices with regard to the
installation, operation and care are completely up-to-date at the
time of printing and are compiled to the best of our knowledge
and belief, taking our past experience and findings into
consideration.
No claims can be derived from the information provided, the
illustrations or descriptions in this manual.
The manufacturer does not assume any liability for damages
arising as a result of the following:
•Non-observance of the manual
•Uses for non-intended purposes
•Improper repairs
•Technical alterations
•Use of unauthorized spare parts
All translations are carried out to the best of our knowledge. We
do not assume any liability for translation errors, not even if the
translation was carried out by us on our behalf. The original
German text remains solely binding.
1.5Copyright protection
This document is copyright protected.
CASO International GmbH reserves all the rights, including
those for photomechanical reproduction, duplication and
distribution using special processes (e.g. data processing, data
carriers, data networks), even partially. Subject to content and
technical changes.
Subject to content and technical changes.

8
2 Safety
This chapter provides you with important safety notices when
handling the appliance.
The appliance corresponds with the required safety regulations.
Improper use can result in personal or property damages.
2.1Intended use
IMPORTANT: This appliance is intended for HOUSEHOLD
USE ONLY. It is designed for home use and is not suitable for
commercial application.
This appliance is only intended for use in households in
enclosed spaces for air-frying food.Uses for a different purpose
or for a purpose which exceed this description are considered
incompatible with the intended or designated use.
DANGER
Danger due to unintended use.
Failure to operate this appliance only as intended can be
dangerous.
►Use the appliance exclusively for its intended use.
►Follow all instructions in this instruction manual.
Claims of all kinds due to damages resulting from unintended
uses are excluded. The User bears the sole risk.
2.2General safety information
PLEASE NOTE
Examine the appliance for any visible damage prior to use. Do
not use the appliance if it appears damaged.
►If the power cord is damaged, do not use the appliance. You
will need to have it repaired by an authorized electrician.
►Persons who may not be able to safely operate the appliance
due to any physical, mental or motor disabilities may only
use the appliance under the direct supervision of a
responsible person.
►Do not permit children under the age of 8 to use the
appliance unless supervised. Children of all ages should be
supervised when they are anywhere near the appliance while
in use.
►Cleaning and maintenance must not be done by children
under the age of 8 and should be supervised.

9
PLEASE NOTE
►Keep the appliance and the cable out of reach of children
under 8 years.
►Do not leave the appliance unsupervised during operation.
►Only qualified electricians, who have been trained by the
manufacturer, may carry out any repairs on the appliance.
►Only customer service departments authorized by the
manufacturer may carry out repairs during the warranty
period, otherwise the warranty will be null and void in the
event of any subsequent damages.
►Defective components must always be replaced with original
replacement parts. Only such parts will guarantee that the
safety requirements are fulfilled.
►Do not immerse the appliance and its components in water
or other liquids, and do not put it in the dishwasher.
►Remove the plug from the wall socket by pulling the plug, not
the power cord.
►Do not place too much food in the frying basket at the same
time.
►Do not fill the appliance with food during pre-heating.
2.3Sources of danger
2.3.1 Burn danger
DANGER
Some of the appliance’s surfaces can become very hot.
Adhere to the following safety guidelines to reduce the risk of
burns:
►Never move the appliance when it is switched on or is still
hot. Turn off the appliance and wait until it has cooled down
before moving it.
2.3.2 Fire danger
DANGER
There is a danger of fire if the appliance isn’t used used
properly.
Observe the following safety notices:
►Do not set up the appliance near flammable materials.
►Keep this appliance away from all other sources of heat,
such as stovetops, ovens, etc.

10
2.3.3 Electrocution warning
DANGER
Due to the risk of electrocution, never attempt to touch or
repair live wires or subassemblies!
Observe the following safety guidelines to avoid dangers due to
electrical power:
►If the power cord connection to the main appliance is
damaged, you will need to have it repaired or replaced by an
authorized electrician.
►Do not operate the appliance if its power cord or plug
appears to be damaged, malfunctioning or if the appliance
has been dropped. If the power cord is damaged, you will
need to have it repaired or replaced by an authorized
electrician or the manufacturer to avoid risk of injury.
►Never attempt to open the appliance’s housing under any
circumstances. There is a danger of electrocution whenever
the housing is opened. In addition, the appliance will not
function properly if the housing is open.
►Never touch the appliance or its plug with wet hands.
►Switch off the appliance and remove the plug from the wall
socket in the event of a malfunction during use, and before
cleaning the appliance or storing the appliance after use.
►Do not pick up the appliance if it falls into water. Remove the
plug from the wall socket immediately. Do not use the
appliance any more.
3 Getting Started
This chapter will guide you through safely unpacking and
setting up your new Air Fryer AF 300.
3.1Safety information
DANGER
Packaging materials are not toys and should be disposed
of properly.
►Do not allow children to play with packaging materials due to
risk of suffocation.

11
3.2What’s included
The Air Fryer AF 300 includes the following components:
•Air Fryer AF 300
•Frying pot
•Frying basket
•Instruction manual
PLEASE NOTE
►Examine the shipment to ensure the appliance and manual
are included and inspect the appliance for any visible
damage.
►Immediately notify the carrier and/or the supplier about an
incomplete shipment or any damage as a result of
inadequate packaging or mishandling.
3.3Unpacking
Carefully remove the packaging material, display sticker and
appliance from the carton.
3.4Disposal of the packaging
The packaging protects the appliance against damages during
transit. The packaging materials are fully recyclable.
PLEASE NOTE
►If possible, keep the original packaging for the appliance for
the duration of the warranty period, so that the appliance can
be re-packaged properly in the event of a warranty claim.
3.5Setup
3.5.1 Setup location requirements:
In order to ensure the safe and trouble-free operation of the
appliance, the setup location must fulfill the following
prerequisites:
•The appliance must be set up on a solid, even, horizontal
surface capable of supporting the Air Fryer.
•Select a setup location where children cannot reach the
appliance.
•Do not set up the appliance in a hot or humid environment or
near flammable material.

12
•To operate correctly, the appliance requires sufficient air
flow. Leave at least 10 centimeters (4 inches) of space on all
sides when setting up the appliance.
•Do not move the Air Fryer when it is in operation.
•The electrical outlet must be easily accessible so that the
plug can be quickly disconnected in the case of an
emergency.
•The setup of this appliance in non-stationary locations (e.g.,
boats, airplanes, motor homes) must be carried out by a
qualified electrician, provided they guarantee the
prerequisites for the safe use of the appliance.
•The appliance is not suitable to be installed in an area where
water may spray.
3.6Electrical connection
In order to ensure the safe and trouble-free operation of the
appliance, the following instructions must be observed for the
electrical connection:
•Before plugging in the appliance, compare the voltage and
frequency data on the Air Fryer’s rating plate (found on the
bottom of the appliance) with that of your electrical network.
This data must be compatible. If in doubt consult a qualified
electrician.
•The use of a multi-plug outlet adapter is not recommended
due to fire danger.
•Inspect the power cord for damage and ensure it doesn’t run
under the appliance or over hot or sharp surfaces.
•The electrical safety of the appliance is only guaranteed if it
is connected to a properly installed protective conductor
system. Operations using an electrical outlet without a
protective conductor are prohibited. If in doubt, have the
house installation checked by a qualified electrician. The
manufacturer cannot be made responsible for damages that
are caused by a missing or damaged protective conductor.
•Make sure you always use a grounded wall socket to
connect the appliance.
•This appliance may not be used through an external timer or
by means of a remote control.

13
3.6.1 Extension cords
If an extension cord is used:
►The electrical rating of the extension cord should be at least as
great as the electrical rating of the appliance.
►The cord should be arranged so that it does not drape over a
countertop or tabletop where it can be pulled on by children or
tripped over.
►When using an extension lead always make sure that the entire
cable is unwound from the reel.
3.6.2 Polarization instruction
►To reduce the risk of electric shock, this product has a polarized
plug (one blade is wider than the other). This plug is intended to fit
in a polarized outlet only one way.
►If the plug does not fit fully in the outlet, reverse the plug and try
again.
►If it still does not fit properly, contact a qualified electrician to install
the proper outlet.
►Do not alter the plug in any way.
4 Complete Overview
This chapter provides you with an overview of your Air Fryer
and explains some of its key features.
4.1Appliance diagram
1. Main body
2. “Sensor touch control”
operating panel
3. Cord and plug
4. Frying basket
5. Release button & protect
cover
6. Handle
7. Handle slot
8. Frying pot

14
4.2Control Panel
10.Temperature control
11.On/off button
12.Start/pause button
13.Set temperature
14.Set time
15.Timer control
16.8 pre-set programs
17.Boost function
4.3Rating plate
The rating plate with the connection and performance data can
be found on the bottom of the appliance.
5 Operation
This chapter provides instructions for the proper operation of
your Air Fryer:
5.1Prior to the first use
1. Remove the appliance from the packaging.
2. Clean the appliance exterior thoroughly to remove any
manufacturing residues by using a damp cloth. Handwash
the removable frying pot and frying basket with warm water
and soap or place in the dishwasher. Do not use any
abrasive cleaners or scouring pads.

15
5.2Overheating safeguard
The Air Fryer has an overheating safeguard installed. The
safeguard is activated once the temperature reaches its
threshold. If this happens, let the appliance cool down by
following these steps:
1. Shut down the appliance by pressing the Off button.
2. Give the appliance ample time to cool down.
5.3Hotkey function
The Air Fryer has a default setting of 350 °F (175 °C) and 10
min.
1. Put the plug (3) into the socket. You will hear a beep and the
on/off button (11) appears.
2. Keep the on/off button pressed for 3 sec. The digital display
will switch on. In the display you will see “350 °F” (175 °C)
and “10 min”.
3. Press the blinking start/pause (12) button.
4. The Air Fryer will switch on and the time in the display will
run down. When the Air Fryer is done you will hear a beep.
The display will turn off and the hot Air Fryer will enter
standby mode.
5.4Boost
The Air Fryer is equipped with a “BOOST Function” button .
Through this function you can pre-heat the air fryer to 430℉(220°C) within 5 min. or use
as a broiling function. Recommended operation: 1. Use this function to preheat the
empty air fryer before cooking. 2. Use this function in form of broiling the food to achieve
the wanted level of browning/crusting. WARNING - Do not use this function continuously,
the Air Fryer may get hot and/or overheat.
Never fill the frying basket beyond the MAX-line indication.
5.5Program settings
The Air Fryer has a default setting of “350 °F” (175 °C) and “10
min”. You can adjust this manually.

16
Adjusting the temperature:
1. Put the plug (3) into the socket. You will hear a beep and the
on/off button (11) appears.
2. Keep the on/off button pressed for 3 sec. The digital display
will switch on.
3. Press UP (10a) to increase the temperature. The maximum
temperature is 400 °F (205 °C).
4. Press DOWN (10b) to decrease the temperature. The
minimum temperature is 140 °F (60 °C).
PLEASE NOTE
►The temperature is adjustable in 10 °F increments.
Adjusting time:
1. Press UP (15a) to increase the time. You can increase the
time UP to 60 min (the display will show 01.00). Press
DOWN (15b) to decrease the time DOWN to 1 min (the
display will show 00.01).
PLEASE NOTE
►The time is adjustable in increments of 1 min.
2. When you are done setting the temperature and time, press
the blinking start/pause button (12). The Air Fryer will switch
on and the time in the display will run down. When the Air
Fryer is done you will hear a beep.The display will turn off
and the Air Fryer will enter into standby mode.
PLEASE NOTE
►If you do not press the start button, the Air Fryer will switch to
its standby mode after +/- 1 min.
►After the Air Fryer has started its program you will still be
able to adjust the time and temperature at any moment by
pressing the appropriate buttons.

17
5.6 8 auto pre-set programs
The Air Fryer is equipped with 8 auto pre-set programs. With
these programs you can easily cook different foods by selecting
the right programs.
1. Put the plug (3) into the socket. You will hear a beep and the
on/off button (11) appears.
2. Keep the on/off button pressed for 3 seconds. The digital
display will switch on.
3. Press the menu button (16) again to select next programs.
4. When you are done sselecting the program, press the
blinking start/pause button (12). The Air Fryer will switch on
and the time in the display will run down.
Auto pre-set programs:
Program 1: PREHEAT 380 °F (190 °C) 3 min
Program 2: Frozen fries 400 °F (205 °C) 12 min
Program 3: Frozen cheesesticks 320 °F (160 °C) 10 min
Program 4: Frozen nuggets 350 °F (175 °C) 15 min
Program 5: Frozen chicken wings 350 °F (175 °C) 20 min
Program 6: Fresh home made fries 400 °F (205 °C) 25 min
Program 7: Fresh home made fried chicken 400 °F (205 °C)
38 min
Program 8: Defrost 140 °F (60 °C) 5 min
PLEASE NOTE
►If you do not press the start button, the Air Fryer will switch to
its standby mode after +/- 1 min.
►After the Air Fryer has started its program you will still be
able to adjust the time and temperature at any moment by
pressing the appropriate buttons.

18
5.7Use
This multi-function appliance can not only be used as an Air Fryer but as an oven as well,
so with its simple settings you can easily and endlessly vary. The baking time for oven
dishes is often much shorter as well, and pre-heating only takes 2-3 min.
1. Place the appliance on a stable, horizontal, flat surface.
2. Pull out the frying pot by using its handle and place it on a
stable, horizontal, flat surface. Press the release button and
take the frying basket out of the frying pot.
PLEASE NOTE
►Do not press the release button when removing the frying pot
from the appliance.
3. Place the food into the frying basket and insert it into the
frying pot until you hear a click.
PLEASE NOTE
►Never fill the frying basket and insert it into the frying pot until
you hear a click.
4. Enter the frying pot with the frying basket into the appliance
until you hear a click.
5. Set the desired time and temperature. See “Program
settings”.
PLEASE NOTE
►It’s recommended to pre-heat the appliance for 3 min without
any foods if the appliance is still cold.
►Half way (or several times, depending on total frying time)
through the frying process, it is recommended to take out the
frying basket and shake the food around a bit (or use tongs
to turn more delicate food) to make sure it gets properly
browned on all sides. The timer will not stop running if you do
this but the heating element will pause until the frying pot has
been inserted into the appliance again.
►Do not touch the frying pot and frying basket, they can
become very hot. Take precautions against burns. Always
place the hot frying pot onto a trivet or other heat resistant
surface.

19
6. When the program is done you will hear a beep. The
appliance will stop heating. Pull the frying pot from the
appliance by the handle and place it on a stable, horizontal,
flat, heat resistant surface.
PLEASE NOTE
►Do not press the release button when removing the frying pot
from the appliance.
►Do not touch the frying pot and the frying basket, they can
become very hot. Take precautions against burns. Always
place the hot frying pot onto a trivet or other heat resistant
surface.
7. Press the release button and lift out the frying basket from
the frying pot.
8. Place the foods on a dish or plate.
9. Switch off the appliance if you are done. Press the on/off
button (11). If you do nothing, the Air Fryer will switch to its
standby mode after +/- 1 min.
5.9Storage
Store the appliance in its upright position, out of the reach of
children.
PLEASE NOTE
►*Always unplug the appliance from its outlet immediately
after using and before cleaning.
6 Cleaning and Maintenance
This chapter provides you with important notices with regard to
cleaning and maintaining the appliance. Please observe the
notices to prevent damages
6.1Safety information
ATTENTION
Please observe the following safety notices, before you clean
the appliance:
►The appliance must be cleaned and food residues must be
removed regularly. If the appliance is not maintained, this will
have a negative effect on the service life of the appliance. It
can also result in the growth of fungus and bacteria.
►Switch the appliance off and unplug the plug from the wall
power outlet before cleaning.

20
ATTENTION
►Clean the appliance right after use after it has cooled down.
Extended waiting unnecessarily complicates cleaning and
can make it impossible in extreme cases. Excessive
accumulations of dirt can even damage the appliance under
certain circumstances.
►If water penetrates the appliance, this can damage the
electronic components.
►Do not dip the appliance into water or other liquids and do
not put it into the dishwasher.
►Do not use any aggressive or abrasive cleaning agents or
solvents.
►Do not use abrasive brushes for cleaning.
6.2Cleaning
Before cleaning
•Press the on/off button (11) and remove the plug from of the
socket.
•Let the appliance cool down.
•Remove the frying pot from the appliance.
•Press the release button and take the frying basket out of the
frying pot.
Appliance exterior
•Wipe with a damp cloth or sponge and mild dish soap.
•Dry it off thoroughly after cleaning.
Appliance interior
•Remove remaining food parts by wiping them off with
absorbent paper towels.
•Clean the frying pot and frying basket thoroughly with hot
water, dish-washing soap and a non-grating sponge.
•The frying pot and frying basket can also be cleaned in a
dishwasher. Dry them off thoroughly after cleaning.
PLEASE NOTE
►Clean the appliance and its loose parts thoroughly after each
use.
►Carefully return all removable parts to their original positions
to avoid air leakage or faulty operation.
►Do not clean the appliance by spraying water on it.
Table of contents
Other CASO DESIGN Fryer manuals

CASO DESIGN
CASO DESIGN AF 400 User manual

CASO DESIGN
CASO DESIGN AF100 Installation instructions

CASO DESIGN
CASO DESIGN AF 660 Duplex Installation instructions

CASO DESIGN
CASO DESIGN AF 250 User manual

CASO DESIGN
CASO DESIGN AF 600 XL User manual

CASO DESIGN
CASO DESIGN AF200 Installation instructions

CASO DESIGN
CASO DESIGN AF 350 Installation instructions

CASO DESIGN
CASO DESIGN AF150 Installation instructions

CASO DESIGN
CASO DESIGN AF255 Installation instructions