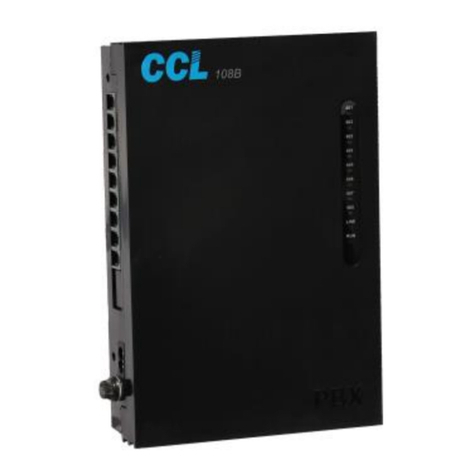
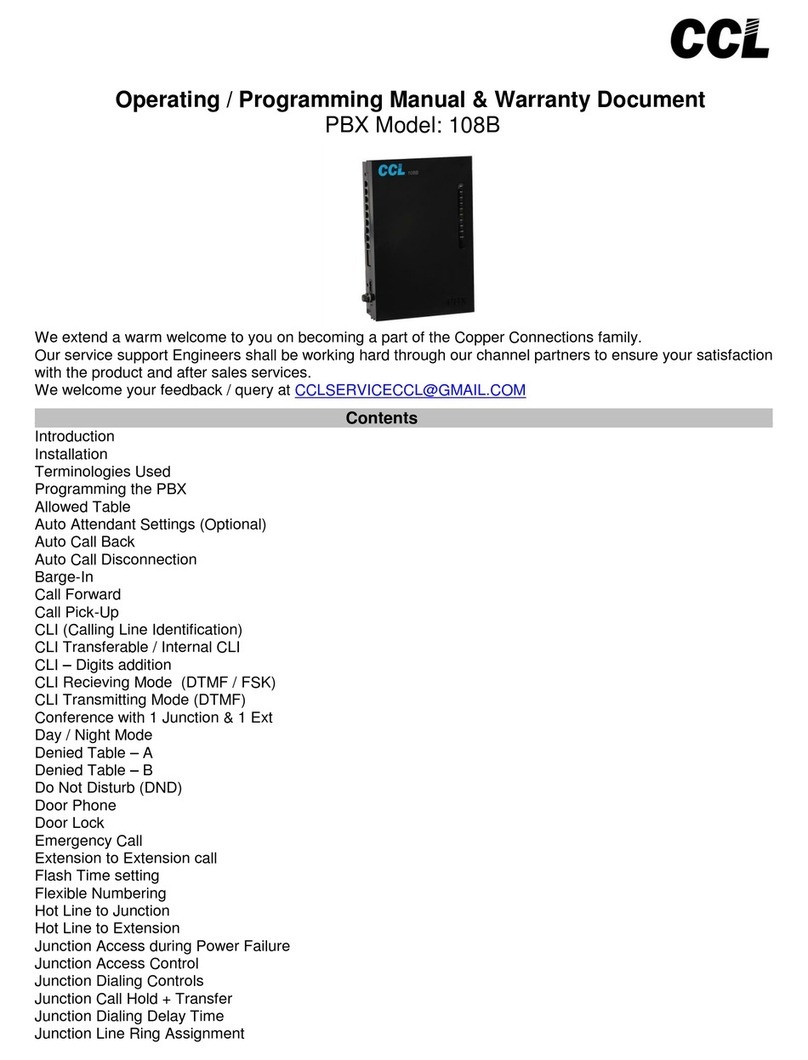
CCL 312B Owner's manual

. Contents .
Operating / Programming Manual & Warranty Document
PBX Model: 312B
We extend a warm welcome to you on becoming a part of the CCL Epabx family.
Our service support Engineers shall be working hard through our channel partners to ensure your satisfaction with
the product and after sales services.
We welcome your feedback / query at [email protected]
Introduction
Installation
Terminologies Used
Programming the PBX
Allowed Table
Auto Attendant Settings
Auto Call Back
Auto Call Disconnection
Barge-In
Call Forward
Call Pick-Up
CLI (Calling Line Identification) CLI
Transferable / Internal CLI
CLI –Digits addition
CLI Receiving Mode (DTMF / FSK) CLI
Transmitting Mode (DTMF) Conference
with 1 Junction & 1 Ext Conference with
2 Junctions
Day / Night Mode
Denied Table –A
Denied Table –B
Do Not Disturb (DND)
Door Phone
Extension to Extension call
Flash Time setting
Flexible Numbering Hot
Line to Junction Hot Line to
Extension
Junction Access during Power Failure
Junction Access Control
Junction Line Ring Assignment
Junction Line- Enable / Disable
Junction Grouping
Junction to Junction Forwarding
Memory Dialing

.
Introduction
.
.
Installation
.
Operator Extension Setting
Password
PBX Version
Redial
Resetting the PBX programming
Ring Time Settings
Troubleshooting
Technical Specifications
Warranty claim details
NOTE-
CCL Epabx
. reserves the right to alter equipment specifications and description contained herein and makes no
commitment to update or keep current the information herein. All information herein is subject to change
at any
time without notice. No part of this publication shall be deemed to be part of any contract or commitment
whatsoever.
- Product specifications and features are subject to changes without prior notice due to our constant endeavor to improve
the product.
-
All features mentioned in this manual are not part of standard systems. Some features needoptional
hardware/software up-gradation.
-
Not every feature in this manual is likely to have been installed in your system or extension.
All Junction lines of the PBX are Disabled in default. To enable them refer heading “Junction Line - Enable /
Disable“
Model
Junction Lines
Extensions
Door Phones
Door Locks
312B
Numbered as
1, 2, 3
-
Numbered as 601 to 612
-
602 is the Operator.
- Programming can be done from
601, 602
1
NA
Cabling
-
All cables of the EPABX should be at least 6” away from the electrical cables.
-
They should be at least 12” away from the area of high frequencies like tube light chokes, Electric Motors, etc. If it is not
possible to avoid, then use shielded cables and earth the shield.
- Maximum length of extension wires can be 400 mtr from PBX with 0.5mm Copper conductor cable.
Earthing
Earth connected to the EPABX should not have more than 5 volts on it.
3 PIN AC Plug GOOD EARTHING
BAD EARTHING
Voltmeter reading between N & E
must be more than 100mV and
less than 5V
If voltmeter reading between
N & E is more than 5V, do
not run the CCL Epabx
System on it.
Location
-
The PBX should be installed in a well ventilated area and at a place where there is no chance of liquid spilling over it
or moisture getting into it (Like in the Bathrooms etc).
-
Direct sun light should not fall on the PBX.
-
The PBX should be installed on the wall at a minimum of 2 ft height from the
floor. Note
:
The Company’s warrantee voids if the above points are not followed.
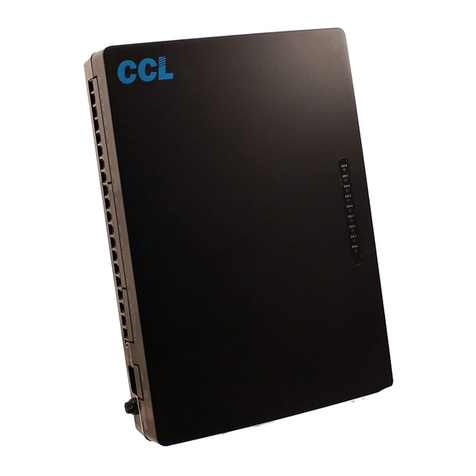
Front Panel Indications
Following is the descriptions of the LED indicators of the front panel of the PBX:
LED Name Description
POWER Blinking means PBX is working on Mains AC or Battery.
Connections
The PBX has the following connectors on its side panel:
Connectors Description
LINE 1 to LINE 3
Terminate the 1st Junction Line here through a RJ Connector.
EXT 601to EXT 612 Terminate the 1st to 12th Extension wires over here through a RJ Connector.
AC 220V Connect the 3 pin main lead here. Make sure that the EARTH wire connected to it is coming
directly from the point where EARTH is created.
Switch on the Side of PBX It is for switching the PBX ON / OFF.
Note
:
The PBX is supplied RJ Connectors with short leads for terminating the cables to RJ Sockets. It is recommended to
Crimp RJ connectors directly to the cables in order to maintain the aesthetics.
V
E.
N. L

. Terminologies Used .
. Programming the PBX .
. Allowed Table .
. Auto Attendant Operations .
Precautions:
-
The Mains AC socket from where the PBX is given 220 V AC, should be separately made by taking direct connections
from the MCB Box and no other Electrical appliance should be connected on this point.
JUNCTION LINES -
Telephone Lines provided by the Department of Telecom.
EXTENSION LINES - Extension Lines mean the EPABX extension lines.
To program most of the feature mentioned in this manual, programming Password is to be entered from any extensions
(601, 602) through the following command
:
#* 0000 (Here, 0000 is the default Password)
In case of any mistake while programming, keep the Handset down and pick up again.
Whenever a correct input is entered, PBX will give one single acceptance tone and when wrong input is given, it will give
three tones.
Numbers to be allowed to extensions whose L = 0, are to be defined in this table. For value of L refer “Junction Dialing
Controls”.
This table has 16 Locations.
Procedure: Dial #* 0000 + 43 QQ ABCD#
Where QQ= 01 to 16 (16 Locations of the Table)
ABCD= The starting 4 digits of the Tel numbers to be allowed to extension.
For less than 4 digits, dial # at the end of digits.
To clear this Table: Dial #* 0000 + 43 #
To clear a particular location of this table: Dial #* 0000 + 43 QQ #
When the PBX is operated in this mode, the Junction caller gets a welcome message.
Three types of messages can be recorded for the following 3 conditions:
Welcome Message (10 Seconds)
Busy Message (5 Seconds)
No Answer Message (5 Seconds)
Auto Attendant Enable/ Disable:
To set Junction in Auto Attendant mode:
Dial #*0000 + 10 J # where J= Junction Number 1, 2 or 3
To set Junction in Direct Ring mode:
Dial #*0000 + 11 J
Message Recording/ Listening:
To Record Auto Attendant Message:
Dial #*0000 + 12 M #
Where- M = 1 for Welcome Message (10 Secs)
= 2 for Busy Message (5 Secs)
= 3 for No Answer Message (5 Secs)
Recording starts after a confirmation beep. There will be a second beep for recording end
Listen Auto Attendant Message:
Dial #*0000 + 13M #
Where- M = 1 for Welcome Message (10 Secs)
= 2 for Busy Message (5 Secs)
= 3 for No Answer Message (5 Secs)
Busy Message ON/OFF:
The facility of playing Busy message can be turned ON or OFF.
To turn ON Busy Message: Dial #*0000 + 124 #
To turn OFF Busy Message: Dial #*0000 + 134#
Ring Time Setting:
This is the time for which call will ring on dialed extension.
Dial #*0000 + 496 TT # where TT is time duration in seconds (01-99)
Extension Number Dial Timeout:
After the welcome message is played, the user must dial an extension number within this time period.
If no extension number is dialed, then the message can either be repeated or call can be transferred to an extension.
Dial #*0000 + 160 TT # where TT is time duration in seconds (01-10)
Auto Attendant Mode Settings
1.
Options when caller doesn’t dial any number / dials a wrong number:

. Auto Call Back .
. Auto Call Disconnection .
.
Barge-In
.
. Call Forward .
a)
Disconnect Junction Line: # * 0000 160 #
b)
Transfer the call to Operator: # * 0000 161 #
If operator is busy, call will ring as per programmed junction landing in Simultaneous/ Round Robin.
c)
Transfer the call as defined in Junction Landing: # * 0000 1616 #
Default:
Call is transferred to Operator.
2. Options when called extension in busy or not answered:
a)
Disconnect Junction Line: # * 0000 166 #
b)
Transfer the call to Operator: # * 0000 1660 #
If operator is busy, call will ring as per programmed junction landing in Simultaneous/ Round Robin.
c)
Transfer the call as defined in Junction Landing: # * 0000 1666 #
d)
Play Welcome Message again: # * 0000 1665 #
Default: Call is transferred to Operator.
From Busy Junction Lines
To get a call back when any of the busy Junction lines get free, following is the procedure:
Dial 0
Get engaged tone
Dial #
Keep the handset down.
As soon as any one of the busy Junction lines gets free, the Extension will ring. It will ring once and the user can pick
Handset within 10 secs to get connected to the Junction line.
From Busy Extensions
To get a call back when any of the busy Extension gets free, following is the procedure:
Dial Extension Number
Get engaged tone
Dial # and Keep the handset down.
As soon as the busy Extension gets free, the called and calling Extensions will ring simultaneously. User can pick
handset within 10 secs to get connected to each other.
Selected extensions can be programmed to disconnect Out going Junction call after talking for a set time.
Procedure: Dial #* 0000 + 6 NN TT #
Where, N= Last two digits of the Extension Number.
TT= 01 to 99. Time in minutes after which the Junction call is to be disconnected.
Note: In default there is no restriction.
: This auto call disconnection is not applicable on incoming Junction calls.
To cancel this feature: Dial #* 0000 6 NN 00 #
Extension number 601 and 602 have the facility to barge into any Extension or Junction Line and overhear or talk in
conference.
To listen to a Junction line, dial # 7 J where J= Junction Number 1, 2 or 3
To listen to an Extension, dial # 77 Ext Number
There are two types of Call Forwarding:
Call Forward Always
Dial # 26 NN XXXX
Where, XXXX= Extension number where Calls are to be forwarded. Flexible number (2-4 digits long)
N= the last two digits of the original Extension.
Dial # 26 NN # (To clear the feature of N Extension)
Dial # 26 # (To clear the Call Forward Always feature of all the extensions. T)
Call Forward When Busy / No Answer (This can also be used as Round Robin feature - Refer “Junction Line Ring
Assignment”)
If calls are to be diverted only when the Extension is busy or is not answering, then:
Dial # 27 NN XXXX
Where, XXXX= Extension number where Calls are to be forwarded. If flexible numbering is done then
enter the Flexible number. If the Flexible number is say 26 then XXXX will be = 26 &
not 026.
N= The last two digits of the original Extension number (Not the flexible number)
Dial # 27 NN # (To clear the feature of NN Extension
: To cancel Call Forwarding Busy / No Answer of all the extensions:
Dial # 27 # from any of the programming Extensions.

. Call Pick-Up .
. CLI (Calling Line Identification) .
. CLI Transferable / Internal CLI .
. CLI –Digits addition .
. CLI Receiving Mode (DTMF / FSK ) .
Conference with 1 Junction & 1 Ext .
. Conference with 2 Junctions .
: To cancel all type of Call Forwarding of all the extensions:
Dial # 25 # from any of the programming Extensions.
:
To retain the Call Forwarding programming after the PBX is switched ON/OFF,
Dial #*0000 + 171 # (This is the default setting in the PBX)
:
To lose the Call Forwarding programming after the PBX is switched ON/OFF,
Dial #*0000 + 170 #
Ring Time change in Call Forward When Busy / No Answer
The ring time on extension, in case of Call Forward, can be changed using the following program:
Dial #*0000 + 184 TT #
Where, TT= 01 –99 Ring Time in seconds
Default value = 20 secs
Note: The time entered here, should be less than the Internal Call Ringing Time.
PBX has various codes for call pick up as detailed below:
Dial 5 or Dial # 9 - To pick up an incoming Junction call ringing on another extension,.
It will pick the calls in following priority
Junction Call being Transferred
Incoming Junction Call ringing
Junction Call on Hold
Door Phone Call
Internal Call
Note- Call Pick up by 5 will work only when there is no flexible numbering is starting by 5. If any flexible numbering is done
which is started with 5 then call Pick up by 5 gets automatically cancelled.
The incoming Junction call telephone number is displayed on the LCD of the CLI phone on which the defined Junction call
rings. This feature will work with Telephones having CLI feature.
When a Junction call is transferred from an extension to another extension, the external telephone number is displayed on
the LCD of the CLI phone. When an extension calls another extension, Extension number is displayed on the LCD of the CLI
phone.
Some CLI Telephones cannot display less than 4 digit numbers. In that case if the PBX extension numbers are less than 4
digits then additional dummy Zeros need to be added by the PBX.
Procedure:
To Enable, Dial #* 0000 + 180 1 #
To Disable, Dial #* 0000 + 180 0 #
Note- If CLI digit addition is enable then if extension is of 2 digits then 2 dummy zeros are added before extension number
and if the extension number is of 3 digits then a zero is added before the extension number.
Default: Disabled
The system senses CLI on Junction lines in DTMF mode or FSK mode.
Procedure: Dial #*0000 + 181 J 0 # for FSK mode
Dial #*0000 + 181 J 1 # for DTMF mode
where J= Junction Number 1, 2 or 3
Default: DTMF mode
. CLI Transmitting Mode (FSK)
.
The PBX generates CLI on Extensions in DTMF mode in default.
An extension user can establish a conference with an extension and a Junction line.
Process: During conversation with a Junction line, Hook-Flash to hold the line.
Then dial * Ext No.
An extension user can establish a conference with 2 Junction Lines
:
Process: During conversation with a Junction line - Hook-Flash - ## (To park the Call) –0 –Tel No (who is to
be included in conferencing) –Hook Flash - # * - Now all 3 party can talk to each other.
When Ext keeps the Handset down, the conference ends.

Denied Table –A .
. Denied Table –B .
. Do Not Disturb (DND) .
. Door Phone .
. Emergency Call .
. Extension to Extension call .
. Flash Time setting .
The PBX can be configured in 2 sets of programming. One for the day mode and one for the night mode.
To change the system to Day Mode, Dial # 20
To change the system to Night Mode, Dial # 21
Default: Day Mode.
.Numbers to be disallowed to extensions whose L = 4, are to be defined in this table. For value of L refer “Junction Dialing
Controls”.
This table has 16 Locations.
Procedure: Dial #* 0000 + 41 QQ ABCD#
Where QQ= 01 to 16 (16 Locations of the Table)
ABCD= The starting 4 digits of the Tel numbers to be denied to extension.
For less than 4 digits, dial # at the end of digits.
To clear this Table: Dial #* 0000 + 41 #
To clear a particular location of this table: Dial #* 0000 + 41 QQ #
Numbers to be disallowed to extensions whose L = 5, are to be defined in this table. For value of L refer “Junction Dialing
Controls”.
This table has 16 Locations.
Procedure: Dial #* 0000 + 42 QQ ABCD#
Where QQ= 01 to 16 (16 Locations of the Table)
ABCD= The starting 4 digits of the Tel numbers to be denied to extension.
For less than 4 digits, dial # at the end of digits.
To clear this Table: Dial #* 0000 + 42 #
To clear a particular location of this table: Dial #* 0000 + 42 QQ #
In DND mode, no one can call the DND extension
PROCEDURE: Dial # 83
To cancel DND, simply lift Handset.
One Door Phone can be connected to the PBX.
Open the back cover of the Door Phone and connect 2 wires on the Terminal block.
These 2 wires are to be connected to any of the Extension port (from 601 to 605) of the PBX.
To define the Extension as the first Door Phone extension, program as below:
Dial #0000 + 80 N#
Where, N = 1 - 5 (Representing the Extension numbers from 601 to 605)
To make the first Door Phone extension as a normal Extension, program as below:
Dial #0000 + 800 #
Door Phone ring assignment
Dial #0000 + 82 N # - To assign extensions to ring when Door Phone calls.
Where, N= 1 –5 (Representing the Extension numbers from 601 to 605)
Repeat the program for up to 3 Extensions maximum except door phone.
Dial #0000 + 82 # - To clear all programmed extensions for Door Phone calls.
When any extension dials # 88, all extensions start ringing. All extensions get connected to the extension who had dialed
the Emergency code. All can talk in conference.
Extension numbers in default are from 601 to 612 and can be changed to 1 digit / 2 digits / 3 digits or 4 digits numbering as
explained under the heading “Flexible Numbering”.
The Flash time of the PBX can be changed as described below:
Dial #* 0000 + Dial 00 L #
Here, L= 1 (for 0.8 secs)
2 (for 1.0 secs
. Day / Night Mode .

. Hot Line to Junction .
Hot Line to Extension .
. Junction Access During Power Failure .
. Junction Access Codes / Change .
Default: 0.4 Secs
3 (for 1.2 secs)
4 (for 1.5 secs)
5 (for 1.8 secs)
Extension numbers can be changed to a desired number of 2 digit, 3 digit or 4 digits from 11 –6999.
The numbering can either be 2digit, 3 digits or 4 digits in any combination.
The flexible number cannot begin with digits 0, 7, 8 and
9. Procedure
:
Dial #* 0000 + 9000 + # (This also resets all the flexible numbering of the
PBX) Dial #* 0000 + 9 NN ABCD #
Where, N = Last two digits of the original extension number (This original number always remains the one
that is printed on the MDF even if flexible numbering is
done).
ABCD = The new Extension number. For less than 4 digits, dial # at the end Of Extension
Number. If all the new numbers to be made in sequence then following programming can be done with single program.
This avoids lengthy programming:
Dial #* 0000 + 9000 L K #
Where, L = Length of new numbers –3 digits or 4 digits
K = First digit of the new numbering. If K=2 then the numbering will become 201 (or
2001) Onwards. Then all those Numbers can be changed through the following
programming.
Default: 601,602, to 612
Some or all extensions can be programmed to get Junction Line on lifting the Handset.
To dial internal numbers, dial * on lifting the Handset. You will get internal dial tone of the
PBX. To program an extension to get a free Junction line on lifting handset,
Dial #* 0000 + 20 NN#
Where, NN= last two digits of Extension numbers that is to be programmed for Direct Junction
Access. Dial #* 0000 + 20 # - To convert all Extensions in “Hot Line to Junction” mode
Dial #* 0000 + 21 NN # - To convert NN Extension in normal
mode. Dial #* 0000 + 21 # - To convert all Extensions in normal
mode.
Note: When all Extensions are converted to Hot Line then to get into the Programming mode, lift Handset –dial * # * 0000
+ Whatever Programming to be done.
Some or all extensions can be programmed to get connected to an Extension, on lifting the Handset.
To dial internal numbers, dial * on lifting the Handset. You will get internal dial tone of the
PBX. To program an extension in this mode,
Dial #* 0000 + 883 NN XXXX#
Where, NN= last digit of Original Extension numbers that is to be programmed for this feature.
XXXX = Extension number to which call will land in Hotline
feature.. Dial #* 0000 + 884 NN # - To convert N Extension in normal mode.
Note: When all Extensions are converted to Hot Line then to get into the Programming mode, lift Handset –dial * # * 0000
+ whatever Programming to be done.
Default: All extension is in Normal Mode.
When the system is switched OFF, the Junction lines get directly connected to following respective extensions.
Junction Number
Extension Number to which it gets connected
01
601
02
602
03
603
Junction lines can be accessed in rotation by dialing
0.
To access a particular junction line:
#11 - To access 1st Junction Line
#12 - To access 2nd Junction Line
#13 - To access 3rd Junction Line
The junction access code can be changed from 0 to 8. Refer heading ‘Junction Grouping’ for procedure.
. Flexible Numbering .

. Junction Access Control .
. Junction Dialing Controls .
Junction Call Hold + Transfer .
In case of dialing out on the Junction Lines, PBX can be configured to work in either of the following 2
modes: Mode Description
Circular When an extension dials 0, the PBX will allot Junction numbers 01.
Next time any Extension dial 0, Junction number 02 will be allotted. Then 03. Then 01.
Sequential When an extension dials 0, the PBX will allot Junction numbers 01.
Next time any Extension dial 0 and if Junction 01 is free then Junction 01 will be allotted.
Junction number 02 will be allotted only when Junction 01 is engaged.
Programming: To program in Circular mode, Dial #* 0000 + 0620 #
To program in Sequential mode, Dial #* 0000 + 0621 #
Every Extension can be programmed to access Junction Line.
The access to each Extension can be different in Day mode and Night
mode. Procedure:
Dial #* 0000 + 70 J NN X # (For Day Mode
access) Dial #* 0000 + 71 J NN X # (For Night
Mode access)
where J = Junction Number (1 to 3)
NN = Last two digits of Original Extension Number (01 to
12) X = 0 to allow Junction access
1 to Disallow Junction
access.
Dial #* 0000 + 70 J X # (To allow/disallow all extensions to access Junction in Day
Mode) Dial #* 0000 + 71 J X # (To allow/disallow all extensions to access Junction in
Night Mode)
Default: All extensions are allowed to access Junction Line in both Day and Night mode.
Junction dialing facility can be controlled Extension wise as below:
Dial #* 0000 + 40 NN L #
where, NN= Last two digits of Extension number.
L = 0 - The Extension can dial only the numbers starting with digits defined in “Allowed Table”
1
- The Extension can dial all numbers.
2
- The Extension can dial all numbers except for ISD numbers.
3
- The Extension can dial all numbers except for STD numbers.
4
- The Extension can dial all numbers except for the numbers starting with digits defined in “Denied
Table-A”
5
- The Extension can dial all numbers except for the numbers starting with digits defined in “Denied
Table-B”
6
- The Extension cannot dial out but can make internal calls.
To give all extensions the same L value: Dial #*0000 + 40 L
# Note: In default: all extensions are in L = 1 mode.
.
To transfer a Junction line to another extension, FLASH and dial the Extension number while talking on the junction line.
Now there can be following 4 conditions:
1. When called extension lifts, calling extension can converse and then keep the Handset down. The Junction call
will then get transferred.
2.
Called extension lifts but doesn’t want to talk then he may keep the Handset down.
The call will come back to the transferring extension.
3. The called extension is ringing but not lifting the Handset. Keep the Handset down.
The call will ring on the called extension for 25 secs and if not answered it will ring back on the transferring
extension. Now if the Transferring extension is busy, the Junction call will keep waiting for the Transferring
extension to get free.
4.
If the called Extension is engaged, the user will hear 2 tones. Now FLASH to get back to the Junction line. If FLASH
is not done within 10 secs, the Junction line will get connected. This is the default setting in the PBX.
Alternately the user can change to the following mode:
On dialing an engaged extension user would get engaged tone. During the engaged tone user can FLASH and
get connected to the Junction line.
Programming: Dial #* 0000 + 831 #
To shift back to the default setting: Dial #* 0000 + 830 #
. Junction Access in Circular / Sequential Mode .

Junction Line Ring Assignment .
. Junction Line - Enable / Disable .
Junction Grouping .
. Junction to Junction Forwarding .
This is the time after the last two digits dialed by an extension on Junction
Line. It is 7 secs in default.
The PBX assumes call maturity from after the lapse of this time.
The FLASH function to hold an Incoming Junction call starts working after the lapse of this time.
To change this delay time, Dial #* 0000 + 03 TT # Where, TT= 01 to 99 secs. Default value = 07 (7 secs)
Junction lines incoming ring can be set in the Direct ring modes:
Direct Ring Mode
(Calls land on Operator or defined extensions in Simultaneous Ring mode or Round Robin
Ring
mode)
Direct Ring Mode (Simultaneous / Round
Robin) Simultaneous Ring
In this mode, incoming Junction lines ring on one or more Extensions.
Incoming ring of Junction Lines can be programmed separately for Day and Night modes as described
below: Dial #* 0000 + 3 J M 0 + NN1 + NN2…..+NN12 #
J = Junction Number (1-3)
M = 0 for Day mode/ 1 for Night Mode
NN1- NN12= The last two digits of Original extension numbers (01-12) where ring is
required. (Not the flexible number)
Round Robin Ring
In this mode, the incoming Junction call lands on one extension. If that extension is busy or doesn’t respond within few rings then the
call shifts to another extension.
Programming:
Dial #* 0000 + 3 J M 1 + N1 + N2…..+N12 #
J = Junction Number (1-3)
M = 0 for Day mode/ 1 for Night Mode
N1- N12= The last two digits of Original extension numbers (1-12) where ring is
required. (Not the flexible number)
When all assigned extensions are busy
When the extensions assigned for the Junction incoming call are busy, The assigned extension when busy, will hear a
waiting call beep after every 5 seconds. On flashing ext will get connected to incoming junction call.
Default: All the Junction Lines land on Extension number 601 and 602 in Simultaneous Mode.
To Enable Junction Line, Dial #* 0000 + 060 J #
To Disable Junction Line, Dial #* 0000 + 061 J#
Where, J = Junction Number (1-3)
Note: In default Junction Lines are disable.
Two set of Junction groups can be made. One group can be accessed say by dialing 0 and the other group of Junction
lines by dialing 8.
To allot group 0 to a Junction= Dial #* 0000 + 50 J 0
# To allot group 8 to a Junction= Dial #* 0000 + 50 J
8 # Where, J = Junction Number (1-3)
.
There are 2 types of Junction to Junction Transfer:
1.
Incoming Junction Call on Ext to be transferred to another Tel Number/Cell number.
2.
Making 2 Junction lines talk to each other while Ext remains out of the conversation.
Incoming Junction Call on Ext to be transferred to another Tel Number/Cell number
Any of the Extension can feed in a Telephone Number or Cell number on its extension whereby the incoming calls on its
extension would get diverted to those numbers.
While talking a tone will be heard after 2 minutes and if is pressed then the call would get extended for another 2
minutes. Like this user can keep extending the talk time. If is not pressed then the calls will disconnect. If user wishes to
disconnect in between then # need to be pressed.
Programming:
Dial from your own Extension #84* Tel No (where calls are to be diverted to) #
Increasing or decreasing the Talk time in such forwarded calls:
#84TT
. Junction Dialing Delay Time .

Memory Dialing .
. Operator Extension Setting .
Password .
. Resetting the PBX programming .
. Ring Time Settings .
Where, TT= 01 to 99.
In default TT = 09 x 10 = 90 Secs (80 secs talk time and 10 secs Alert Time)
To cancel the feature, dial from your own Extension #84#
Making 2 Junction lines talk to each other while Ext remains out of the conversation.
Process: During conversation with a Junction line - Hook-Flash - #6 (To park the Call) –0 –Tel No (who is to
be connected to the previous Junction call) –Hook Flash - # - Now all 3 party can talk to each other.
but Ext can keep Handset down. The 2 Junction lines will hear a tone after 2 minutes and if any of them
presses * then they can talk for another 2 minutes. Like this they can keep extending the talk time. If * is
not pressed then the calls will disconnect. If they wish to disconnect in between then any of them need to
dial #.
The PBX has memory for 48 telephone number that can be dialed from an extension by dialing 2 digits codes. However,
if the ext is given only local dialing facility, then it cannot dial STD number of the memory.
Storing Telephone number in memory:
Dial #*0000 35 CC J NN#
Where CC= Memory location (01-48)
J= Junction Number (1-3) or Junction Group ‘0’ or Junction Group ‘8’
NN= Telephone number maximum 16 digits
Note: In case mobile numbers are not dialing properly each time, add 0 or 00 before the number while adding.
Deleting memory codes-
To delete a particular dialing code: Dial #*0000+ 35
CC# To delete all memory dialing code:
Dial #*0000+
36#
Memory Dialing Enable/Disable-
To Enable Dial #*0000 + 37
0# To Disable Dial #*0000 +
37 1# Default: Disabled
Note- If memory dialing is disabled then it will check the Junction dialing control for extension.
To dial a number from memory- Dial 7CC
In default Extension number 602 is defined as Operator and this extension can be changed if desired by the user.
To change the Operator Extension, Dial #* 0000 + 15NN#
Where, NN = Last two digits of Extension which is to be made the Operator.
Default: Operator Extension is 602
To call operator Dial 9
There is only one Password for the whole PBX programming and this Password can be changed by the user. The default
Password is 0000.
Process to change the Password: #* 0000 + 09 XXXX#
Here, 0000 = Default password
XXXX = New Password
To reset default Password: #*#*#*#
. PBX Version
To check the PBX Version Dial #64 from CLI Phone, PBX will give a beep tone after that put the handset
down. When Phone is ON Hook PBX version is displayed after a ring.
. Redial
In order to redial after getting an engaged tone on an outgoing call, follow below
procedure: Press ** on the SLT
Telephone set.
Alternately, press ‘Redial’ key on Telephone Set after getting engaged tone.
To reset all the program
of the PBX except Flexible numbering & Junction Enable/Disable to default values,
Dial #* 0000 + 0000 + #
To erase only flexible numbering of the PBX, Dial #* 0000 + 9000 + #
Two type of ringing time can be configured as explained below:
Junction Ring to be sensed as disconnected

. Troubleshooting .
. Technical Specifications .
. Warranty claim details .
The PBX senses the Junction line as disconnected after 7 secs of the last ring voltage. This time can be reduced
or increased by using the following program:
Dial #* 0000 + 182 TT #
Where, TT= 50 in default for 5 secs delay. Reducing this time could give problem in CLI
Internal Call Ringing Time
This is the time for which an extension keeps ringing when an Extension call another
Extension. Program
:
Dial #* 0000 + 494 TT #
Where, TT= 01-99 secs (Default Value = 99 secs)
Problem Solution
There is no ring on any extension Press RESET Switch (next to the relay) on the SMPS card of the PBX, twice.
The Power LED on the front panel Re-insert the connectors of the lead that connects
Is ON but there is no dial tone on the SMPS card to the main card of the PBX.
any extension. Re-insert the connectors at both ends of the lead.
Switching
Space Division Multiplexing
Power Supply
Transformer type
Input
AC 80V to 260V
Wattage at 220V
15 W
Extension Loop Resistance
Less than 600 Ohms
Ambient Temperature
+5C to +45C
Ambient Humidity
95% Maximum
Telephone Sets
Pulse or DTMF dialing Phones
Cabling
2 Core from every Telephone set to the PBX
This manual is also your Warranty document and should be preserved along with Invoice copy for claiming
warranty.
Model Number as per the Invoice: . . . . . . . . . . . . . . . . . . . . . . Product S.No.: . . . . . . . . . . . . . . . . . . . . . . . . . . . . . . . . . . . . . . . . . . . . .
Date of purchase: . . . . . . . . . . . . . . . . . . . . . . . . . . Purchaser Name: . . . . . . . . . . . . . . . . . . . . . . . . . . . . . . . . . ... . . . . . . ..
Purchaser’s Contact No: . . . . . . . . . . . . . . . . . . . . . . . . . . . . . Purchaser’s Address: . . . . . . . . . . . . . . . . . . . . . . . . . . . . . . . . . . . . . . . ..
. . . . . . . . . . . . . . . . . . . . . . . . . . . . . . . . ... . . . . . . . . . . . . . . . . . . . . . . . . . . . . . . . ... . . . . . . . . . . . . . . . . . . . . . . . . . . . . . .... . . . . .
CCL Epabx. warrants that this product is manufactured under stringent quality standards, making it free from defects inmaterial and
workmanship, as per the following terms and conditions:
1. The limited warranty for the system is valid for a period of twelve months from the date of purchase or fifteen months from the date
of manufacture whichever is earlier.
2. The limited warranty extends only to the original consumer/ purchaser of the product and is not assignable or transferable to any
subsequent purchaser/end user.
3. During the limited warranty period, CCL Epabx. or its authorized service network will repair or replace, at CCL Epabx. option, any
defective product or parts thereof with a new or factory rebuild replacement items and return the product to the consumer in working
conditions. No charge will be made to the consumer for either parts or labor in repairing or replacing the product. All replaced parts
shall become the property of CCL Epabx.
4. Repaired product will be warranted for a balance of original warranty period.
5. Upon request from CCL Epabx. or its authorized service center, the consumer must provide purchase receipt or other information to
prove the date and place of purchase.
6. The consumer shall have no benefit or coverage if any of the following conditions are applicable:
a)
The product has been subjected to abnormal use, abnormal condition, improper storage, exposure to moisture or dampness,
exposure to excessive temperature or fire etc., unauthorized modifications, unauthorized connections, unauthorized repairs
including but not limited to use of unauthorized spare parts in repairs, misuse, neglect, abuse, accident, alteration, improper
installation.
b)
CCL Epabx. was not notified by consumer of the alleged defect or malfunction of the product during the limitedwarranty period.
c)
The product was used with or connected to equipment not fit for use with CCL Epabx. system or used in other than its intended
use.
d)
THE SYSTEM IS NOT CONNECTED TO A PROPER EARTH OR INCASE HIGH VOLTAGES APPEAR ON EARTH.
e)
THE DAMAGE IS CAUSED BY LIGHTENING ON EXTENSIONS/ JUNCTION LINES/ OR SPIKES/ SURGES/ HIGH
VOLTAGES FROM AC MAIN SUPPLY.
7. The consumer may contact the authorized dealer to call the service personnel for carrying out repairs or maintenance and the same
would be attended within a reasonable response time assigned to the dealer.
8. The consumer will be billed for parts or labor charges not covered by this limited warranty.
9. If the product is brought to CCL Epabx. for repairs, after the warranty period CCL Epabx. normalservice policy shall apply and
customer shall be charged accordingly.

10. In no event shall CCL Epabx. or their authorized dealer be liable for special or consequential damages or any delay in the
performance of this warranty due to causes beyond their control. CCL Epabx. shall not be liable for incidental or consequential
damage or a loss of anticipated benefits or profits, loss or impairment of privacy of conversation, work stoppage or loss or
impairment of data arising out of the use or inability to use the product.
11. CCL Epabx. neither assumes nor authorizes any authorized service center or any person or entity to assume for it any other
obligation or liability beyond what is expressly provided by this limited warranty. All warranty information, product features and
specifications are subject to change without prior notice.
12. Any dispute arising out of this warranty shall be subjected to jurisdiction of the arbitrator within the city of Delhi.
13. The decision of CCL Epabx., on defects, damages etc shall be final and binding on the parties and no dispute regarding this, could
be agitated before any civil court.
14. If the product is purchased online through Amazon or other web portals, then in case of repair, the system is to be sent to the
mentioned company address in Delhi. One-way delivery charge will be borne by company, and one-way will have to be borne by the
user. Part no: 312B - 13
CCL Epabx
38/1286 DDA Flats, Near Sethi Dental Clinic, Madangir, Khanpur Delhi- 110062. Ph: +91 98995 17600
www.cclepabx.com
Table of contents
Other CCL PBX manuals
Popular PBX manuals by other brands

Panasonic
Panasonic KX-TEA308 installation manual

ATL
ATL Berkshire 10K ipPBX quick start guide

Panasonic
Panasonic KX-TDA600 - Hybrid IP PBX Control Unit Max. 1008... operating manual

Panasonic
Panasonic KX-NCP500 Pc programming manual

Yeastar Technology
Yeastar Technology MyPBX U300 Administrator's guide

Alcatel
Alcatel OmniPCX 4400 user guide