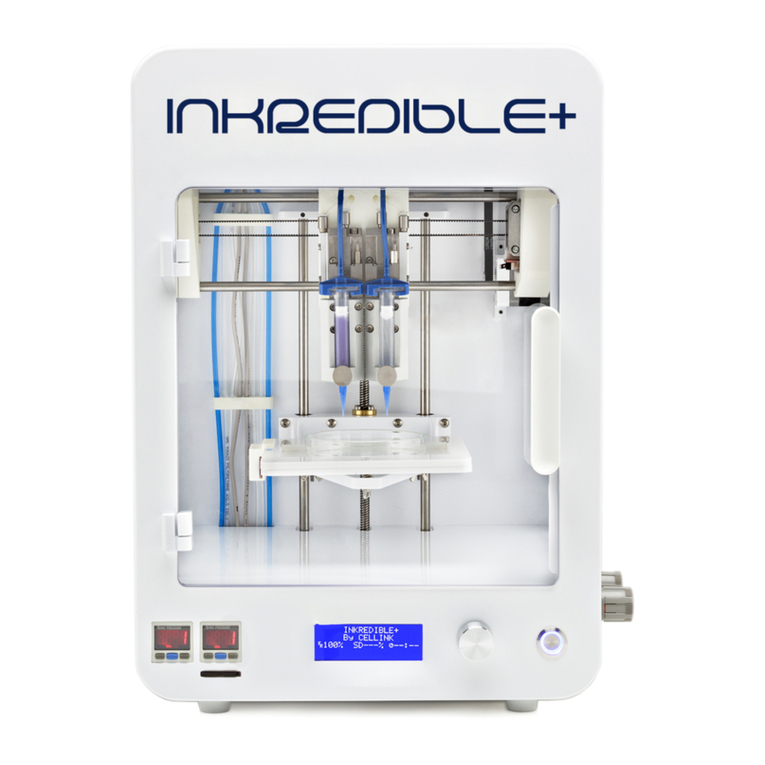
Cellink BIO X 3D Bioprinter User manual

User Manual
BIO X 3D Bioprinter

Welcome to the world of bioprinng!
Not too long ago, the idea of creang living human ssue was
no more than a dream. Not anymore. The technology in front of
you is the next step on the path of regenerave medicine. BIO X
is designed with your research in mind. By simplifying the 3D
bioprinng process, you can focus on your research and dream
bigger than ever before. Only your imaginaon limits what you
can do!
Featuring unrivalled usability and versality, BIO X will help in
taking your research to the next level. With features such as
interchangeable intelligent printheads, clean chamber technology,
printchamber sterilizaon, temperature controlled printbed, and
a user friendly interface second to none, BIO X is ready for the
most complex 3D bioprinng challenges.
This manual will serve as your guide to geng started with 3D
bioprinng with BIO X. Make sure you take me to review the
enre manual before using the product for the rst me.
Let your dreams be dreams no longer, make them reality.
Welcome to the future of regenerave medicine!

Contents
1. Safety informaon 5
1.1 General safety informaon 6
1.2 Unpacking, liing and carrying 7
1.3 Electrical informaon 7
1.4 Protecve equipment 7
1.5 Hazardous materials 8
1.6 Compliance 8
2. Specicaons 10
2.1 Product map 11
2.2 Technical specicaons 13
3. Geng started! 15
3.1 Unpacking BIO X 16
3.2 Contents of the box 17
3.3 Seng up BIO X 19
3.4 Starng BIO X for the rst me 20
4. Bioprinng with BIO X 22
4.1 Sterilizing using UV-light 23
4.2 Bioprinng from a 3D model 24
4.3 Bioprinng droplets 38
4.4 Ulies 43
5. Maintenance 49
5.1 Changing the HEPA lter 50
5.2 Manual cleaning or sterilizaon 51
6. Terms and Condions 53
6.1 General Terms and Condions 54
6.2 End User Licence Agreement (EULA) 61
6.3 Warranty 68
7. Printhead manuals 72
7.1 CELLINK pneumac-based printhead 73

ISO 9001


6
1. Safety informaon
Before you start using BIO X, please take time to review the entire manual and the
manuals for any accessories. Mishandling of BIO X can lead to severe and irreversible
injuries if the safety instructions are not followed. Throughout the manual we will
use the following symbols to indicate if there is risk of personal injury or equipment
damage:
CELLINK AB
Arvid Wallgrens Backe 20
Gothenburg, SE 41346
SWEDEN
1.1 General safety informaon
In order to respond to BIO X and its relevant security requirements, all personnel using
BIO X must have read through the entire manual. Should anything appear out of order
or a situation occur that is not described in the manual, contact CELLINK before using
the instrument any further!
Use the instrument only for its intended purpose as described in the documentation. Do
not modify the instrument, sub-components or accessories. Do not open or disassemble
BIO X or attempt any service beyond the maintenance instructions provided in the
manual. BIO X and the CELLINK intelligent printheads are only to be used with each
other, not with other equipment.
This symbol indicates that there is risk of personal injury or equipment
damage due to harmful UV radiation in BIO X. Always keep the door
of BIO X closed and wear proper safety equipment when using the UV
sterilization or UV curing systems. This symbol will also be visible on BIO
X’s touch screen at any time a UV LED is active.
Caution! Never reach into the instrument until all components have come
to a complete stop. Moving parts can cause injury.
This symbol indicates that there is a general risk of personal injury or
equipment damage due to reasons not related to UV radiation or heated
surfaces.
Caution! Before cleaning or servicing BIO X, turn off the power and
disconnect the instrument from any power sources and external air pressure
sources.
This symbol indicates that there are surfaces in BIO X that are heated and
might cause personal injury or material damage if not handled with care.
Beyond the manual, the physical surface with a heating function will be
marked with this symbol in BIO X. This symbol will also be visible on BIO X’s
touch screen at any time a surface in the printchamber is heated.
Manufacturer

7
Caution! BIO X contains UV lamps for sterilizing and curing purposes.
Never look directly at the UV lamps. Never reach into BIO X while the UV
lamps are on. Doing so risks causing personal injury!
1.1 General safety informaon
Caution! BIO X contains surfaces which can reach temperatures of up to
250° C. Never touch the printheads or printbed if the heating function
is engaged. Let the printheads and printbed cool before handling if the
heating function has been used.
Caution! Improperly mounted equipment such as the printbed, printheads,
or cartridges can be dangerous. Improperly mounted cables, liquid spouts,
and air spouts can also be dangerous. Verify that all connections are properly
connected and all components are specied for the intended pressure, UV and
temperature conditions. Should BIO X be damaged in any way, turn off and
unplug BIO X, and contact CELLINK before further use of the equipment.
1.2 Unpacking, liing and carrying
Caution! BIO X is a heavy instrument. Always have a minimum of two
people when unpacking or moving BIO X. Always lift and carry the
instrument in the manner described in the manual.
Please read through the instructions on how to safely unpack and set up BIO X in
Chapter 3: Getting started.
1.4 Protecve equipment
1.3 Electrical informaon
Caution! Always wear protective goggles and gloves, and secure the
environment around the instrument from other personnel while operating
BIO X. All safety equipment, including UV protective safety goggles, must
be used when operating the UV curing system or the UV sterilization system.
Caution! Always wear protective goggles and gloves while handling
hazardous materials that can be absorbed by skin or which are toxic, strike-
attractive, corrosive, allergenic, carcinogenic, reproduction-endangering, or
mutagenic to humans.
Caution! Always read the material safety data sheets, packing labels,
manufacturer or dealer’s catalogue rst, and use adequate safety equipment.
Always connect BIO X to a grounded socket and always use the voltage
provided in the specications. Not doing this can cause personal injury and
damage BIO X!

8
1.5 Hazardous materials
1.6 Compliance
Caution! Before starting to work with hazardous dispensing materials, such
as ammable and corrosive materials, the operator must be informed about
the characteristics of the material and its compatibility with the dispensing
unit. The information can be found in the material safety data sheets,
packaging labels, manufacturer or dealer catalogues. Always use adequate
safety equipment. If unsure about if a material is compatible with BIO X,
contact CELLINK before using that material!
Caution! When using ethanol to clean BIO X, wait at least 60 seconds before
starting a bioprinting procedure to ensure that all ammable vapours are
ventilated out of the instrument.
By using BIO X and accepting the terms of use you agree to the terms stated here
in and in the warranty information (see chapter 6. Warranty information). Except
for the express warranty set forth in the warranty information (and in our software
license terms as applicable), the solution as well as all equipment and software provided
hereunder are provided “as is” and CELLINK makes no warranty as to its use or
performance. Except for any warranty, condition, representation or term the extent
to which cannot be excluded or limited by applicable law, CELLINK and its suppliers
make no warranty, condition, representation, or term (express or implied, whether by
statute, common law, custom, usage or otherwise) as to any matter including, without
limitation, noninfringement of third party rights, merchantability, integration, or tness
for a particular purpose. You assume responsibility for selecting the solution to achieve
your intended results, and for the installation of, use of, and results obtained from the
equipment and software. Without limiting the foregoing provisions, CELLINK makes
no warranty that the equipment or software will be error-free or free from interruptions
or other failures or that the software or equipment will meet your requirements. Under
no circumstances and under no legal theory, whether in tort, contract, or otherwise,
shall CELLINK or its suppliers be liable to purchaser or to any other person for
loss of prots, loss of goodwill, or any indirect, special, incidental, or consequential
damages, or damages for gross negligence of any character. Under no circumstances
can CELLINK be responsible for consequences of misuse of the instrument or for
use of the instrument outside the use specied in this user manual, be they material or
personal.

9

Specifications

11
2. Specicaons
2.1 Product map
3a 3b
1
6
7
3c
4a 5
4b
2a 2b
1. Clean Chamber (tm) unit
2a. UV sterilizaon LED 1
2b. UV sterilizaon LED 2
3a. Printhead mount 1
3b. Printhead mount 2
3c. Printhead mount 3
4a. Photo curing module mount 1
4b. Photo curing module mount 2
5. Printbed
6. 7’’ touch screen
7. USB port
8. Protecve door
8

12
2.1 Product map
5 6 7
2
1a 1b
3
4
1a.
1b.
2.
3.
4.
5.
6.
7.
Heat vent from the printbed.
Power switch
Fuse
Power socket
USB port
Ethernet port
Pneumac port

13
2.2 Technical specicaons
Power input: 100-240 VAC, 50-60 Hz, 600 W
Fuse: 250V T8A
Air pressure input: 0-700 kPa
Weight: 17 kg
Height: 500 mm
Width: 360 mm
Depth: 450 mm
Filter class: HEPA 14

14

Getting started!

16
3. Geng started!
3.1 Unpacking BIO X
To unpack BIO X, follow the simple steps below.
Caution! To avoid injury to personnel and to avoid damaging BIO X during
the unpacking process, follow the instructions provided bellow. DO NOT
attempt to unpack BIO X in any other way than the one instructed.
Caution! BIO X is a heavy instrument. Always have a minimum of two
people when unpacking or moving BIO X. Always lift and carry the
instrument in the manner described in the manual.
1. Clear a steady table and a oor space of at least 3 x 2 meters.
2. Place the box containing BIO X on its side in accordance to the arrows
on the side of the box.
3. Carefully remove the tape on the top of the box.
4. Using the handles in the packaging, pull the contents of the box out
onto the oor.
5. Carefully turn BIO X the right way up by liing in the packaging.
6. Remove the top piece of the packaging, and by grabbing it at the boom
edge, li BIO X out of the boom piece of the packaging onto the table.
7. Remove any remaining packaging material from BIO X.
8. Remove the remaining contents of the box and check that you have
received all equipment on the list below.
This side up during transport

17
3.2 Contents of the box
[1x] BIO X 3D printer..................................................................................................
[3x] Pneumac-based printheads.............................................................................
[3x] Pneumac adapter for 3cc cartridge...............................................................
[1x] 365 nm UV module.............................................................................................
[1x] 405 nm UV module.............................................................................................
[1x] Power cord............................................................................................................
[1x] USB Memory drive..............................................................................................
[1x] Surface probe adapter........................................................................................
[1x] Petri Dish Holder kit...........................................................................................
Bioink consumables box containing:
[2x] 3mL CELLINK bioink (sterile)............................................................................
[1x] Material safety data sheet and Applicaon note...............................
[5x] 3mL CELLINK GelMa bioink (sterile)...............................................................
[1x] Material safety data sheet and Applicaon note...............................
[2x] 3mL CELLINK START bioink (sterile)...............................................................
[1x] Material safety data sheet and Applicaon note...............................
[1x] CELLINK START kit.............................................................................................
[2x] 50mL of CELLINK Start..........................................................................
[5x] Female to female luer lock adapters....................................................
[20x] 3mL empty cartridge with piston and end caps..............................
[2x] STARTINK-kit (sterile), each containing:.........................................................
[1x] Cell syringe................................................................................................
[1x] Syringe with 3 mL of CELLINK Bioink.................................................
[1x] Dispensing unit.........................................................................................
[1x] Mixing unit.................................................................................................
[1x] Filling cartridge.........................................................................................
[2x] Crosslinking soluon...............................................................................
Applicaon note...............................................................................................

18
3.2 Contents of the box
Nozzles and consumables box containing:
[1x] Empty 12mL syringe...........................................................................................
[1x] Sterile nozzle kit...................................................................................................
[1x] Sterile high precision conical nozzles, 50 pcs (Blue, GA 22)......................
[1x] Sterile high precision conical nozzles, 50 pcs (Red, GA 25).......................
[1x] Sterile high precision conical nozzles, 50 pcs (Clear, GA 27).....................
[1x] Sterile blunt needles 20G, 50 pcs...................................................................
[1x] Sterile blunt needles 22G, 50 pcs...................................................................
[1x] Sterile blunt needles 25G, 50 pcs...................................................................
[1x] Sterile blunt needles 27G, 50 pcs...................................................................
[2x] Glass petri dish....................................................................................................

19
3.3 Seng up BIO X
When BIO X is unpacked, it is time to set up. Before connecting BIO X to a wall
socket, ensure that the socket is grounded. Next, connect BIO X to the power outlet
(see 2.1 Product map) and the grounded wall socket with the included power cable.
BIO X has an internal air supply capable of supplying 200 kPa to the printheads. If you
wish to use a higher pressure than this, connect an external air supply to the back of
BIO X (see 2.1 Product map).
Next switch on the instrument using the power switch on the back (see 2.1 Product
map) and you are ready to go!
Caution! Ensure that the external air supply does not exceed the pneumatic
specications (see 2.2 Technical spesication)! Not complying with these
specications could cause personal injury or damage to BIO X!
Caution! Connecting BIO X to a non-grounded socket could cause personal
injury or damage to BIO X!

20
The rst time you start BIO X you will be required to accept a licence agreement. After
accepting the licence agreement, you will be taken to the home screen and BIO X is
ready for use.
3.4 Starng BIO X for the rst me
1. Standby – Tap to put BIO X in standby mode. To start BIO X from standby
mode, turn o the power using the power switch on the back, wait 30
seconds and turn it back on.
2. Status bar – Symbols in this area will alert you of potenal hazards such
as hot surfaces or acve UV lights (see the symbols below). Use cauon
when these symbols are displayed.
3. Bioprint - Tap to start a 3D Bioprinng process
4. Droplet Print - Tap to use the droplet menu. It allows the user to print
droplets only by selecng the wellplate -used.
5. Clean chamber - Tap to toggle sengs related to CELLINK’s clean
chamber technology or to inialize an UV sterilizaon procedure.
6. Ulies – Tap to open the ulies menu. The ulies menu
contains advanced sengs and funcons for troubleshoong.
3
1
6
2
5
4
Table of contents
Other Cellink Medical Equipment manuals
Popular Medical Equipment manuals by other brands

Gima
Gima 4 Use and maintenance book

Flaem
Flaem Suction Pump Instructions for use manual

B.A. International
B.A. International BA ULTIMATE POWER+ Series operating instructions

Chison
Chison SonoEye P5 user manual

Orthomobility
Orthomobility VGK-Go! instruction manual

Monaghan
Monaghan TRUZONE quick start guide

Porter
Porter DIGITAL MDM Operation and installation manual

uneeg MEDICAL
uneeg MEDICAL 24/7 EEG SUBQ user manual

Berlin Heart
Berlin Heart EXCOR Series Instructions for Clinical Use

Siemens
Siemens MTCO 1324 operating instructions

Arthrex
Arthrex Synergy ID System Quick setup guide

Integra
Integra CUSA Clarity Service and maintenance manual