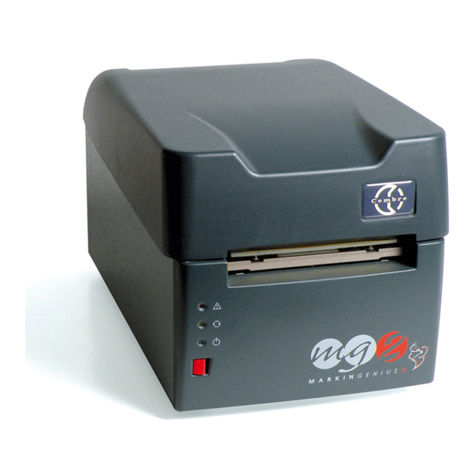
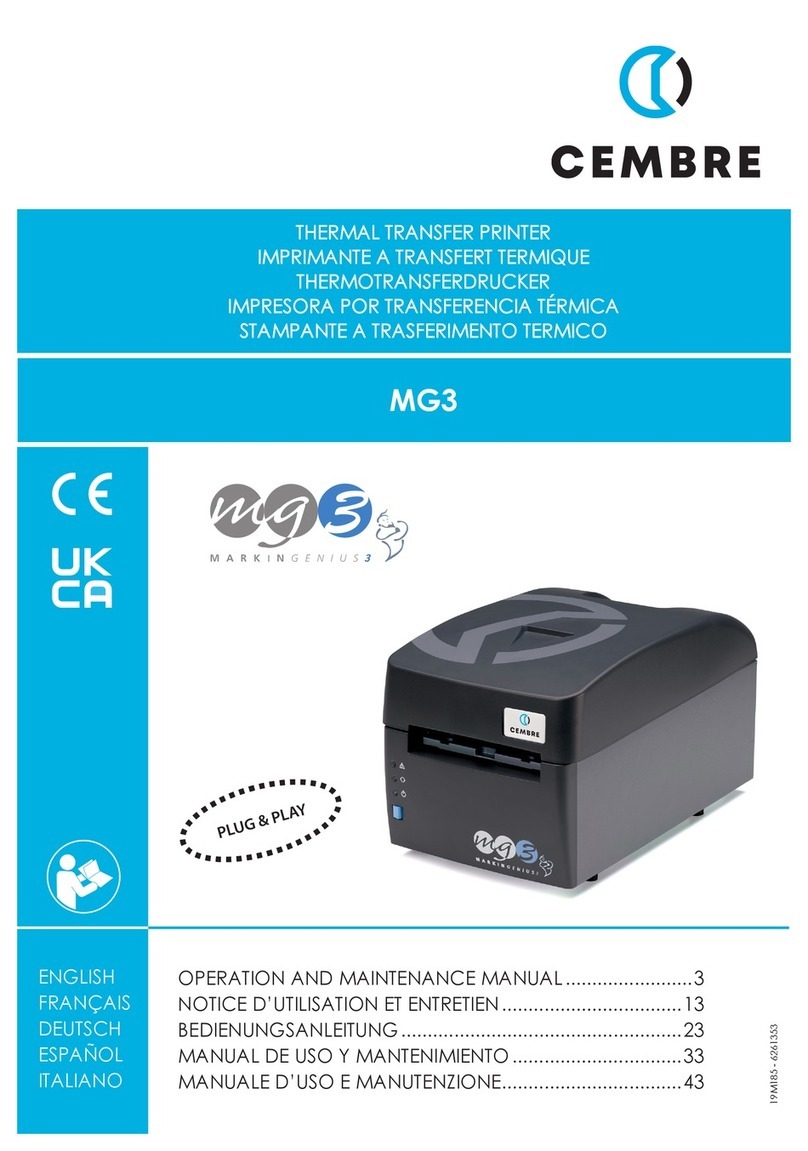
Cembre Markingenius MG3 User manual

. 1 .
PLUG & PLAY
PLUG & P
LA
A
Y
ENGLISH
FRANÇAIS
DEUTSCH
ESPAÑOL
ITALIANO
OPERATION AND MAINTENANCE MANUAL.............................................3
NOTICE D’UTILISATION ET ENTRETIEN.................................................... 13
BEDIENUNGSANLEITUNG............................................................................ 23
MANUAL DE USO Y MANTENIMIENTO.................................................... 33
MANUALE D’USO E MANUTENZIONE...................................................... 43
18 M 046
MG3

. 2 .
FIG. 1 / BILD 1

. 3 .
ENGLISH
WARNINGS
• Read this manual carefully before using MG3.
• Do not operate MG3 without the lid in place.
• Keep hands away from moving parts during operation.
• Disconnect MG3 from the power supply prior to maintenance operations.
• Use MG3 on a stable surface.
• As much as possible, avoid the ingress of environmental contamination, eg dust, into MG3.
• Always fit the protective cover when MG3 is not in use, particularly in a dusty environment.
•
Do not insert sharp, hard or pointed objects (e.g. screwdrivers, rulers or knives) into the front aperture of MG3
, otherwise the
print head may be irrevocably damaged.
• Ensure all parts of the support templates are undamaged and kept clean and free of print and other residue.
• Ensure the carriage is kept clean and closed when MG3 is not in use.
•
Do not attempt to change the composition, height or thickness of the support templates as this may block MG3 or Irrevoca
bly
damage the print head.
• Prior to printing, ensure the appropriate template is being used and the material is located correctly so that it does not
hinder the operation of MG3.
• Handle sheets of media with care and avoid touching the printable surface with the fingers.
• Before printing, check the printable surface is free of contamination, eg dirt, dust or grease and if necessary
clean
using a
soft cloth.
• Keep unused or partially used sheets of media in the original packaging and in a dry, clean place.
• When printing partially used sheets, ensure there are no protruding sprues, burrs along the sheared edges or tags bent up-
wards, which may damage the print head.
• Whenprintingpartiallyusedsheets,ensuretheJumpfunctionisusedcorrectlytoavoidprintingnon-existent media,contami-
nating the support template and possibly causing irrevocable damage to the print head.
• Use only genuine Cembre media, printer ribbons, spare parts and cleaning kits with MG3.
• We recommend cleaning the print head at each ribbon replacement, using only the genuine Cembre CLEANING KIT.
This equipment has been tested and found to comply with the limits for a Class B digital device, pursuant to part 15 of the FCC
Rules. These limits are designed to provide reasonable protection against harmful interference in a residential installation.
This equipment generates, uses, and can radiate radio frequency energy and, if not installed and used in accordance with
the instructions, may cause harmful interference to radio communications. However, there is no guarantee that interference
will not occur in a particular installation. If this equipment does cause harmful interference to radio or television reception,
which can be determined by turning the equipment off and on, the user is encouraged to try to correct the interference by
one or more of the following measures:
Reorient or relocate the receiving antenna.
Increase the separation between the equipment and receiver.
Connect the equipment into an outlet on a circuit different from that to which the receiver is connected.
Consult the dealer or an experienced radio/TV technician for help.
Modifications not expressly approved by the manufacturer could void the user’s authority to operate the equipment under
FCC rules.

. 4 .
Markingenius MG3 has been exclusively designed by
Cembre
for the identification of conductors and electrical components.
Markingenius MG3 is a high resolution printer based on thermal transfer technology, capable of producing markers for cables and
terminal blocks, legends for pushbuttons and all electrical panel components. All
Cembre
MG media can be printed with Win-
dows True Type fonts in black or colours at high speed. Markingenius MG3 will also reproduce Clipart images, drawings, barcodes
and bitmaps down to very small sizes. Compact, ergonomic, clean and quiet Markingenius MG3 may be conveniently located in
an office, like any other peripheral.
Each monochrome ribbon can print more than 300.000 MG-TPMF 4x10 mm cable tags with full printable surface coverage, while
printing times, costs and ribbon life may be further improved due to the ribbon optimisation system, depending on the type of
material being printed. Carriage loading and unloading operations are rapid; support templates are easily interchanged and as the
pigment deposited from the ribbon dries instantaneously, printed sheets are immediately ready to use.
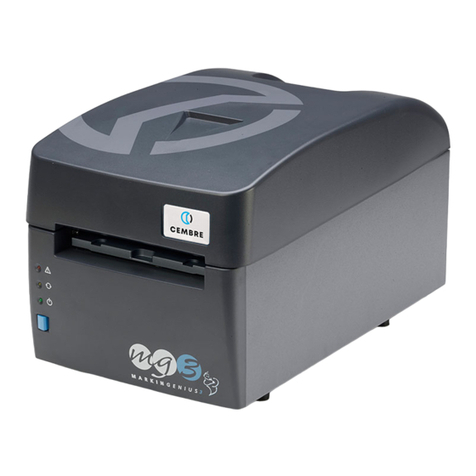
Markingenius “MG3” package comprises (See FIG. 1 page 2):
– MG3
Plug & Play
thermal transfer printer.
– Power supply cable.
– USB cable.
– GENIUSPRO operating software on “FD-GENIUSPRO”
USB flash drive
.
– MG2-PWC 991000 support template for MG-TPM cable tags.
– MG2-QTB 991011 support template only for MG-CPM-01, -02, -03, -04, -07 and -11 terminal block markers.
(support template to print MG-CPM-03, -05, -06, -9, -10, -12 and -13 terminal block markers, available separately).
– MG2-PLT 991002 support template for flat media.
– MG2-ETR 991600 black printer ribbon.
– MG2-CRB 991654 ribbon take up spool.
– MG2-COV 991680 protective cover.
– Operation and maintenance manual + guarantee certificate.
– Printing mode: thermal transfer
– Supply voltage: 100 - 240 V 50-60 Hz
– Operating current: 1.6 A
– Printing speed: 9 seconds per full sheet
– Maximum resolution: 300x600 DPI
– Connection: USB 1.1
– Operating temperature: + 15° to + 35° C
– Relative humidity: 30% to 80% without condensation
– Size: length 382 mm, width 230 mm, height 221 mm
– Weight: 7,4 kg
– Printable surface: maximum width 110 mm - maximum length 140 mm
– Minimum system requirements:
PC with
Intel® CoreTM i3
processor or equivalent
4 Gb RAM memory
2 Gb of available space on the hard disc
1280x1024 SVGA monitor resolution.
Windows
®
7 and 8 operating systems.
– Printer ribbon: Internal diameter 28 mm - External diameter 53 mm - Width 120 mm
1. GENERAL CHARACTERISTICS
2. TECHNICAL SPECIFICATION

. 5 .
Dimensioni 90 x 60 mm
NOTA:
Nel campo S/N devono essere stampati numeri di matricola progressivi
Nel campo YEAR deve essere stampato l’annorichiesto
TG.1043 MG3 T
con testina Toshiba.
3
2
1
4
5
6
8
9
10
7
FRONT SIDE REAR
3. DESCRIPTION
1 - GREEN LED : power on.
2 - YELLOW LED : printing cycle.
3 - ORANGE LED : error signal (see section 7).
4 - BLUE button: opening/closing carriage.
5 - Carriage.
6 - Lid.
7 - USB socket (type B).
8 - Power supply socket.
9 - Power ON/OFF switch.
10 - Compartment with 2A phase and neutral protection fuses.
Carry out the following procedure step by step:
4.1) Connect the cables
– Connect the USB cable between the PC and the USB socket (7) on the rear of MG3.
– Check the supply voltage is correct then connect the power supply cable between socket (8) on the rear of MG3.
• Must be an EARTHED mains power supply.
• The electrical socket of power supply cable must be easily accessible.
4.2) Switch the machine ON
– Operate the ON/OFF switch (9) on the rear of MG3 to commence the start-up cycle.
When the GREEN LED (1) lights up, MG3 is ready for use.
• Do not press the BLUE button (4) before the GREEN LED lights up. If this happens restart MG3 (See section 7).
4.3) Install the GENIUSPRO operating software
– The USB flash drive (FD-GENIUSPRO) contains the operating software “GENIUSPRO” and drivers necessary for the operation of the printer.
Facilitytoreceivesoftwareupdatesfromtheinternet(www.cembre.com)bydirectconnectionorvianetworkorportable
memory device.
– Insert the USB flash drive into the USB port of the computer and proceed with the installation of “GENIUSPRO” through the SETUP file.
4.4) Open/close the carriage
– Press the BLUE button (4) on the front of MG3 to open the carriage.
Press the button again to close the carriage.
• Ensure there is sufficient space in front of MG3 to allow the carriage to open completely.
• Do not interfere with the carriage during opening and closing operations.
4. INITIAL SET UP
LAYOUT:

. 6 .
4.5) Install the printer ribbon
Remove the lid, then:
1 Rotate the media guide completely downwards.
2Extract both feed (rear) and take up (front) spindles by carefully pulling them upwards.
3Fit the printer ribbon on to the feed spindle (rear), locating the slot in the ribbon spool fully on to the key on the spindle.
When viewed from the front of MG3, the key should be on the right hand side with the lead of the ribbon underneath, facing
forward.
4Relocate the loaded feed spindle firmly into its seatings in MG3. Unroll sufficient ribbon to pass under the rear guide bar under
the sensor card and over the template.
5Continue unrolling the ribbon until it has passed under the front lower guide bar and is protruding through the carriage
aperture.
6Fit the ribbon take up spool provided with MG3 onto the take up spindle (front), locating the slot in the spool fully on to the
key on the spindle.
7Using the carriage/template as a convenient base, position the take up spool at the end of the protruding printer ribbon such
that the white cog is on the left hand side (viewed from the front). Ensure the ribbon is square to the spool and attach the
end of it to the spool with adhesive tape.
• Carefully and accurately wind a few turns of ribbon around the spool.
8While carefully pulling ribbon through MG3, relocate the loaded take up spindle into its seatings in MG3. Ensure the ribbon
is correctly aligned on the front guide bars, without, tears, folds or creases.
9IMPORTANT: Rotate the media guide completely upwards, then replace the lid.
Do not operate MG3 without the lid in place.
• We recommend cleaning the print head at each ribbon replacement, using only the genuine Cembre MG2-CKP 991670
CLEANING KIT following the procedure in section 5.1.
Spool slot
Spindle key
Media guide
sensor card
Rear guide
bar
Ribbon
Adhesive
tape
Cog
Guide bar
Cog
Spindle
Ribbon
Spool slot
Spindle key
Media guide
1

. 7 .
4.6) Load media sheets for printing
A sheet of media comprises a number of identical moulded or die-cut blanks. Available in a variety of sizes, materials and colours to
suit all applications, the range of media is shown in the
Cembre
“IDENTIFICATION AND LABELLING SYSTEMS”catalogue.
Proceed to positioning the media sheet on the specific
support template (See section 4.7).
4.7) Mount the support templates
Different templates are supplied with MG3 to suit the range of printable
media sheets
.
Proceed as follows:
– Select the support template appropriate to the
media sheet
to be printed according to the table.
– Press the BLUE button (4) to open the carriage.
– Carefully position the template on the carriage, locating it correctly on the pins provided.
Positioning is identical for all versions of template (See FIG. A)
– Correctly locate on the template, a sheet of the medium to be printed (See sections 4.7.1 and 4.7.2).
PRINTABLE MEDIA:
MG2-PWC
MG2-PLT MG2-QTB MG2-PTD MG2-PTM MG2-WTB MG2-STB MG2-CTB MG2-MTB MG2-LTB MG2-ETB MG2-PSP
MG-TPMF cable tags for holders (serie FLAT) •
MG-TPM cable tags for holders •
MG-TDM cable tags without holders
4x12mm 4x16mm
MG2-TDMO
cable tags without holders •
MG-ETF cable & conduit tags •
MG-KMP wraparound cable markers •
MG-CPM terminal block markers • ••••••
MG-CPMF terminal block marker strips •
MG-VYB terminal block marker labels •
MG-SPM component markers, push in •• •
MG-TAP legends precut •
MG-PTS push button legends •
MG-TAPW legends 9 mm precut •
MG-TAR legends precut •
MG-DOG dog tags precut •
MG-TAA self adhesive precut legends •
MG-VYT self adhesive precut labels •
MG-VCT self adhesive precut labels •
MG-PYT self adhesive precut labels •
MG-SAT security labels •
MG-PLC PLC legends •
MG-17.5 modular legends •
MG-VRT panel plates •
MG-SIGNS panel legends •
Supplied Support templates available separately
Template
MG2-PLT
Locating pins corresponding to
apertures in the underside
of templates
Carriage fully open
Support templates each have a protective PET blank on their upper side.
If this needs to be replaced due to contamination, damage or wear, use only genuine Cembre spare parts.
Do not use a template without its protective blank.
Template
MG2-PWC
FIG. A
4
Templates
MG2-QTB
MG2-LTB
MG2-WTB
MG2-STB
MG2-CTB
MG2-MTB
MG2-PTD
MG2-ETB
MG2-PSP
1
2
3

. 8 .
4.7.1) Position media sheets on the MG2-PLT support template
All die-cut sheets of flat media are printed on the MG2-PLT template and have two holes to locate on pins mounted on the template:
– Press the BLUE button (4) to open the carriage already fitted with the template (See section 4.7).
– Position the sheet by hand, fitting its holes fully over the corresponding locating pins on the template; the side to be printed
must face upwards (See FIGS. B and C).
Once loaded, the sheet must be flat, square, clean and without protrusions, bends or kinks; this allows correct positioning
of the print head during the printing cycle.
4.7.2) Position media sheets on the other support templates
To position media sheets proceed as follows:
– Press the BLUE button (4) to open the carriage already equipped with the template (See section 4.7).
– Position the sheet by hand such that the open‘first’ row of tags/markers is nearest to MG3 with the locating lugs on the
underside of the sheet inserted fully into the corresponding holes in the template (See FIGS. B and C).
Once loaded, the sheet must be flat, square, clean and without protrusions, lifted or bent components; this allows correct
positioning of the print head during the printing cycle.
4
Template
MG2-PLT
Template
MG2-PWC
Templates
MG2-QTB
MG2-LTB
MG2-WTB
MG2-STB
MG2-CTB
MG2-MTB
MG2-PTD
MG2-ETB
MG2-PSP
Open‘first’row of tags/
markers should be nea-
rest to MG3
Open‘first’row of tags/
markers should be nea-
rest to MG3
FIG. B
FIG. C
4

. 9 .
MGTAPW LEGENDS
High quality thermal transfer
printing typically allows more
characters to be accommo-
dated than ink based systems.
Reference data may also be
printed on the stems and sprues
to assist installation.
Individual tags or strips of printed
tags are easily removed from the
sheet for immediate use.
Transparent PM tag holders may
be pre-fitted before removing
the tags from the sheet.
Example of an MG-TPM tagin
a PM holder mounted on a
single core cable.
The long life print is perfectly
protected against chemical and
atmospheric degradation.
MGCPM TERMINAL BLOCK MARKERS
Single
Modular
A stem of printed markers is re
moved,
complete, from the sheet, and the
markers fitted onto the terminal blocks
without removal from the stem
.
The stem is carefully detached from
the mounted markers.
T
he group of terminal blocks is
quickly and easily marked.
A strip of printed, joined markers is
removed from the sheet. The strip is fitted onto the termi-
nal blocks. The group of terminal blocks is
quickly and easily marked.
High quality printing of fonts and
graphics suit a wide range of ap-
plications including component
identification, rating plates and
signage. Reference data may
also be printed on the counter-
foil to assist installation.
Alternatively, fully printed sheets
are easily divided into strips.
Individual MG-TAPW legends are
simply and precisely remo-
ved from partially printed sheets
for immediate use, leaving no ob-
structions to prevent the remain-
der of the sheet being printed.
Example of an MG-TAPW legend
mounted on RTR-TAPW rail with a
transparent RT-CCWS cover.
MGTPM CABLE TAGS
4.8) Printing cycle
Ensure there is a genuine printable medium correctly positioned on the template then:
– Set the data in the program, proceed via Print Setup to Print Preview (Consult user manual) then press F6 to start the
printing cycle; the carriage will close then gradually open again automatically, until it stops fully open at the end of the
cycle, with the sheet printed.
– Remove printed sheet and continue loading/print preview/printing cycle.
4.9) MARKINGENIUS media - examples of applications.

. 10 .
5.1) Clean the print head (recommended at each ribbon replacement)
Using only a genuine MG2-CKP 991670 CLEANING KIT, proceed as follows:
– Close the MARKINGENIUS program.
– Switch MG3 OFF.
– Switch MG3 ON and press the BLUE button (4) for less than 6 seconds until the YELLOW LED (2) starts blinking.
– Release the BLUE button. The YELLOW and ORANGE LEDs blink while the green LED remains lit and the carriage (5)
remains open. MG3 is then in‘Cleaning mode’.
– Remove the current printing template.
– Attach a new cleaning pad to the cleaning template and spray cleaning fluid across its full width.
Correctly locate the template on the carriage.
– Press the BLUE button to start the cleaning cycle.
– At the completion of the cleaning cycle the carriage will stay open and MG3 in ‘Cleaning mode’ should it be necessary to
repeat the cleaning cycle.
– To exit from‘Cleaning mode’, switch MG3 OFF, then ON again after a few seconds.
Remove the cleaning template, detach and discard the used cleaning pad then store the components of the cleaning kit
in their original packaging in a dust free, dry environment.
Do not re-use cleaning pads, sets of 5 spare pads are available, order part code MG2-CNP 992150.
WARNING: Use only genuine Cembre cleaning materials and methods with MG3. The use of any other materials or methods may
cause irrevocable damage to the print head and/or void any remaining warranty.
5.2) Routine cleaning
Keep internal and particularly moving parts free from dust by wiping with a
soft cloth.
To remove stains or residue from external metal and plastic parts, use a soft cloth
just dampened with a neutral detergent.
Remove grease, print and adhesive residue from templates with alcohol cleaner
and a clean, soft cloth.
Do not allow fluids to come into contact with electrical parts or the ribbon or to
remain on moving parts.
Wipe up all spills.
As much as possible, avoid the ingress of environmental contamination, eg dust,
into MG3. Fit the protective cover when not in use.
5.3) Replace fuses
MG3s electrical circuits are protected against overcurrent by two 2A 250 V
phase and neutral fuses in compartment (10) located at the back of MG3.
Replacement fuses must have exactly the same characteristics as the ones replaced.
– Disconnect MG3 from the mains supply before opening fuse compartment (10).
Ensure fuses and compartment are correctly relocated before reconnecting the mains supply.
Markingenius MG3 is guaranteed for one year against inherent faults and defects.
The print head is classed as a consumable and not covered by the guarantee.
The guarantee is void if parts used are not
Cembre
original ones.
5. MAINTENANCE
6. WARRANTY
For the best printing results, we recommend:
• Using only genuine Cembre materials (media, printer ribbons, spares and cleaning kits).
• Handling blank media sheets carefully to avoid touching the print surface with the fingers.
• Before printing, always check the cleanliness of the sheets. If necessary wipe the surface with a soft cloth.
• Keeping new or partially used sheets clean and dry, eg in their original packaging.
• When printing partially used sheets, ensure there are no protruding sprues, burrs along the sheared edges or
tags bent upwards which may damage the print head.
• When printing partially used sheets, ensure the Jump function is used correctly to avoid printing non-existent
media, contaminating the support template and possibly causing irrevocable damage to the print head.
Protective cover
MG2-COV 991680
. 11 .
7. TROUBLESHOOTING
MG3 is equipped with self-diagnostics which notify the user in the event of certain ‘fault’ situations by means of a combination of
flashing LEDs and an audible alarm.
Alarm indications
GREEN LED (1): remains lit when MG3 is ON and ready for use.
This LED blinks when the print head malfunctions or is disconnected or damaged.
YELLOW LED (2): blinks during the print cycle process with the relative movement of the carriage.
ORANGE LED (3): mainly signals MG3 errors or failures, the nature of which are identified by the number of LED
blinks and audible beeps, as follows:
N° OF
BLINKS / BEEPS FAULT DESCRIPTION POSSIBLE SOLUTION
1Printer ribbon not present
Check condition of the ribbon and that it threaded
correctly.
Switch MG3 OFF and then ON again after a few
seconds.
3Print head not lowered
Switch MG3 OFF and then ON again after a few seconds.
Press the BLUE button (4) to move the carriage and ensure it
is operating correctly.
4Print head not raised
Switch MG3 OFF and then ON again after a few seconds.
Press the BLUE button (4) to move the carriage and ensure
it
is operating correctly.
5Carriage not in correct starting position or
out of position
Switch MG3 OFF and then ON again after a few seconds.
Press the BLUE button (4) to move the carriage and ensure
it is
operating correctly.
Remove any obstacles preventing full movement of the
carriage.
6Carriage not moving correctly or in wrong
position
Switch MG3 OFF and then ON again after a few seconds.
Press the BLUE button (4) to move the carriage and ensure it
is operating correctly.
8...11 System software or printer driver
malfunction
Check the printer driver and system default settings are cor-
rect. Switch MG3 OFF and then ON again after a few seconds
12..... MG3 electronic controller malfunction
Switch MG3 OFF and then ON again after a few seconds
If the problem persists please contact Cembre,
see section 7
BLUE BUTTON (4): authorised user only TEST mode, accessed by pressing BLUE BUTTON (4) for more than 6 seconds during the
initial start up cycle, is indicated by the YELLOW and ORANGE LEDs blinking simultaneously.
Inadvertent access may be cancelled by switching MG3 OFF and then ON again after a few seconds.

. 12 .
In the case of a breakdown contact our Area Agent who will advise you on the problem and give you the necessary instructions on
how to dispatch the tool to our nearest service Centre; if possible, attach a copy of theTest Certificate supplied by Cembretogether
with the tool or fill in and attach the form available in the “ASSISTANCE”section of the Cembre website.
8. RETURN TO Cembre FOR OVERHAUL
PRINTER RIBBONS monochrome
MG2-ETR monochrome ribbons are formulated to produce high quality print on a variety of materials while providing high resi-
stance to abrasion, chemicals (eg Petrol, Ethyl Alcohol) and atmospheric agents (eg UV, humidity).
Ribbon length 200m, width 120 mm, internal diameter 28 mm.
Ref.
Description
MG2-PTD
991007 Support template for markers tags MG-TDM (4x12 mm)
MG2-PTM
991010 Support template for markers tags MG-TDM (4x16 mm) and MG-TDMO
MG2-MTB
991008 Support template for terminal block markers MG-CPM-01 (5x7 mm)
MG2-WTB
991004 Support template for terminal block markers MG-CPM-05, -12, MG-SPM-09
MG2-STB
991005 Support template for terminal block markers MG-CPM-06
MG2-LTB
991013 Support template for terminal block markers MG-CPM-09
MG2-CTB
991006 Support template for terminal block markers MG-CPM-10
MG2-ETB
991016 Support template for terminal block markers MG-CPM-13
MG2-PSP
991018 Support template for component markers MG-SPM-02
MG2-TWC
991502 PET blank for template MG2-PWC
MG2-TTB
991512 PET blank for template MG2-ETB
MG2-TLT
991522 PET blank for template MG2-PLT
MG2-TTD
991563 PET blank for template MG2-PTD
MG2-TMT
991513 PET blank for template MG2-MTB
MG2-TGT
991532 PET blank for template MG2-GTB
MG2-TWT
991542 PET blank for template MG2-WTB
MG2-TST
991552 PET blank for template MG2-STB
MG2-TCT
991562 PET blank for template MG2-CTB
MG2-CKP
991670 Print head cleaning kit
MG2-CNP
992150 Replacement pads for MG2-CKP (5 pieces)
MG2-CHS
991671 Replacement spray for MG2-CKP
VAL MG
Transportation case for MG3
9. MG3 ACCESSORIES AVAILABLE SEPARATELY
Ref.
Colour
MG2ETR 991600
black
MG2ETR 991601
blue
MG2ETR 991602
red
MG2ETR 991603
green
MG2ETR 991607
silver
MG2ETR 991606
white
Other manuals for Markingenius MG3
2
Table of contents
Other Cembre Printer manuals

Cembre
Cembre Rolly TR1 User manual

Cembre
Cembre MarkinGenius 2 User manual

Cembre
Cembre Markingenius MG3 User manual

Cembre
Cembre Rolly 1000 User manual

Cembre
Cembre MG4 User manual

Cembre
Cembre ROLLY 3000 User manual

Cembre
Cembre MG3A User manual

Cembre
Cembre ROLLY 2000 User manual

Cembre
Cembre Rolly 1000 User manual

Cembre
Cembre Markin Genius2 User manual
Popular Printer manuals by other brands

BIXOLON
BIXOLON Bixolon SRP-270 manual

Lexmark
Lexmark E250D - E B/W Laser Printer Service manual

Intermec
Intermec PF8D user guide

Universal Laser Systems
Universal Laser Systems ULS 1720C Operation and maintenance manual

Matica Technologies
Matica Technologies EDISECURE XID 8300 instructions

Canon
Canon SELPHY CP1500 manual