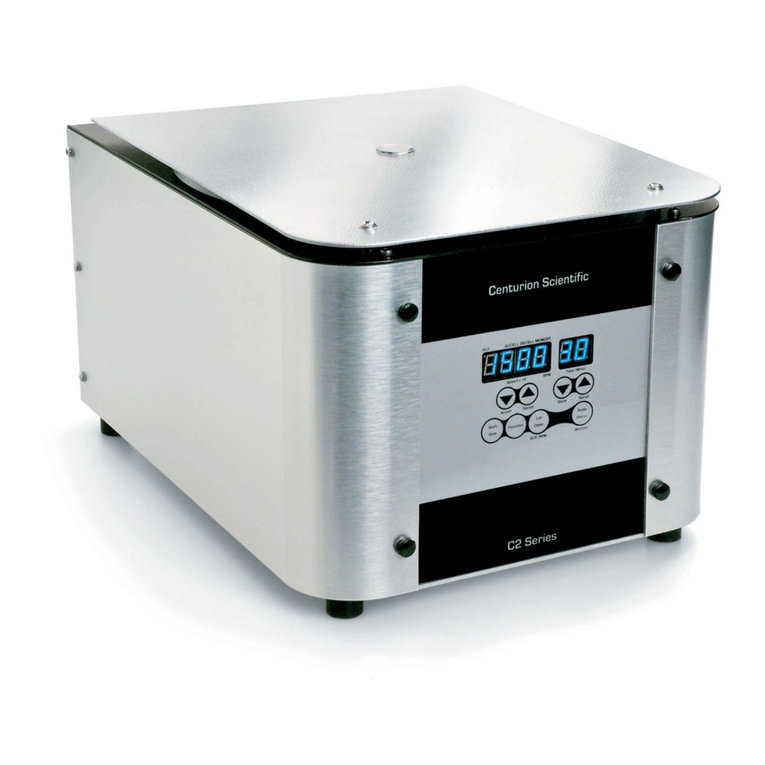
Centurion Scientific PrO-Eazy User manual

3
3U2(D]\
Scientific Limited
3
3&96HUXP)DHFHV
6SHUP&\WRORJ\
DGLYLVLRQRI
Instruction manual

IMPORTANT Read before using
Location
The Centrifuge should only be operated indoors.
The set up location must fulfil the following requirements
• Check the Centrifuge and the Packaging for any shipping damage.
Inform the shipping company and Centurion Scientific immediately
•Check the order for completeness, if not contact Centurion Scientific
• A safety zone of at least 30Cm must be maintained around the Centrifuge
• People and hazardous substances must be kept out of this zone
during centrifugation
• The bench or supporting structure must be stable and free from resonance
• The Bench or supporting structure must be suitable for horizontal use of the
centrifuge
•The Centrifuge should Not be exposed to heat or strong sunlight
•Ultra violet rays can damage the stability of plastics and coatings
• Do not subject the Polypropylene, Delrin rotors or accessories to direct
sunlight
•The Zone location must be well ventilated at all times
Transporting the Centrifuge
•Always remove the Rotor before transportation
•Due to its weight the Centrifuge should be carried by several people
•Transport the Centrifuge upright and if possible in its packaging
•Always lift the centrifuge at both sides (see below). NOT front to rear.
• Store the original packaging, Keep this for future service to base , if required.
2

Fixing of rotor
Fixing for Swing out rotors.
BRK5508, BRK5506, BRK1001, BRK3000, BRK5540, BRK5740.
Locate 3 pins of fixing, into 3 holes at the top of the rotor
Push down firmly into holes.
Lift and fit rotor onto the motor shaft. M
Fit the Screw and spring washer, screw down tight with
the supplied tool.
Check tightness regularly.
Fixing for micro and fixed angle rotors
BRK5401. BRK54XXseries. BRK53XX series. BRK52XX series
Lift and fit rotor onto the motor shaft.M
Fit the Screw and spring washer, screw down tight with the
supplied tool.
Check tightness regularly
Motor shaft
M
3

Rotor balancing. Very Important
Swing out rotor, buckets. Balancing
Balancing of tubes for Micro and Fixed angle rotors
Tare (zero) your scales first
Weigh a tube , note its
weight Weigh another and
match its weight to within 0.1
gram
Place all your required tubes in all 4 buckets.
Equal amount per bucket.
Weigh each bucket containing tubes
Match other 3 buckets, with tubes to within 1
gram of each other
4
For BRK5506 rotor use the adaptor

Tube placement micro rotors
Haematocrit Rotor
ALWAYS load your tubes opposite to each other
ALWAYS weigh samples to within0.1 Gram. For best separations. (see page 4)
ALWAYS fit the lid supplied
CHECK the Rim seal gasket and replace every 2 months (Part number 8011)
CHECK the rotor screw fixing tightness regularly
✔ ✘ ✘
Micro tube Rotor
ALWAYS load your tubes opposite to each other
ALWAYS weigh samples to within0.1 Gram For best separations. (seep page 4)
ALWAYS fit the lid supplied
CHECK the two top seals and replace regularly (Part number 8044)
CHECK the rotor screw fixing tightness regularly
✔ ✘ ✘
Always fit the lid supplied, as shown to the left
...........................................................................................................................................................................
5

Tube placement Fixed angle rotors
ALWAYS load your tubes opposite to each other
ALWAYS weigh samples to within 0.1Gram. For best separations. (see page 4)
CHECK The rotor screw fixing tightness regularly
✔ ✘ ✘
Large fixed angle Rotors
ALWAYS load your tubes opposite to each other
ALWAYS weigh samples to within 0.1Gram. For best separations. (see page 4)
CHECK The rotor screw fixing tightness regularly
✔
✔ ✘
✘
✘
✘
...................................................................................................................................................................................
Small fixed angle Rotors
Always fit the lid supplied, as shown to the left
6

Tube & bucket placements Swing out rotors
Medium – Large Swing out Rotors
ALWAYS load your tubes opposite to each other
ALWAYS weigh samples to within 0.1Gram. For best separations
ALWAYS fit ALL the Tube Holders and any supports
CHECK The rotor screw fixing tightness regularly
ALWAYS load your tubes opposite to each other
ALWAYS Weigh Bucket and all samples within to 1.0 Gram
ALWAYS fit ALL 4 Buckets and 4 Adaptors supplied
CHECK the rotor screw fixing tightness regularly
✔ ✘ ✘
✔ ✘ ✘
✘
Microtitor Rotor
ALWAYS load your plates opposite to each other
ALWAYS weigh samples to within 1.0 Grams. For best separations
ALWAYS fit both Buckets supplied (2)
CHECK the rotor screw fixing tightness regularly
✔
.................................................................................................................................................................................
.................................................................................................................................................................................
Small Swing out rotor
7

This is not balanced!
Even though there are two samples in two buckets opposite to each other it is not balanced.
NEVER run swing out rotors with only two buckets
All four buckets must beusedat alltimes
Wrong
Wrong
Tube placements Swing out rotor
Always use the same size tubes as in A
per bucket.
NEVER use different size tubes as in B
per bucket
Check they fit and do not hit the
centre as shown in C
A B
C
8

Tube placement Cytology & Cell wash rotors
Cytology Rotors
Manual Cell W ashing Rotor
ALWAYS load your holders opposite to each other
ALWAYS weigh samples to within 0.5 Gram. For best separations
ALWAYS fit the lid supplied
Check the two top Gaskets and replace regularly (Part Number 8055)
CHECK the rotor screw fixing tightness regularly
ALWAYS load your tubes opposite to each other
ALWAYS weigh samples to within 0.2 Gram. For best separations Regularly smear a small amount of Silicon grease over the O rings
Check the inner and outer O rings and replace regularly (Part Number 8066)
CHECK the rotor screw fixing tightness regularly
✔
✔ ✘
✘
✘
✘
................................................................................................................................................................................
Always fit the lid supplied, as shown below
9

Index. Instruction manuals for.
EZ913 Haematocrit Centrifuge. Complete with BRK5401 rotor
24 x Capillary tubes & 12 x 2ml tubes
EZ904 Swing out Rotor Centrifuge. Complete with BRK5508S rotor
8 x 5ml Blood tubes
Micro tube Centrifuge. Complete with BRK5424 (A), BRK5436 (B),
BRK5448 (C), BRK5494 (D)
EZ 906 Fixed angle rotor Centrifuge.
Complete with BRK5408 (A), BRK5404 (B)
EZ704 Swing out rotor Centrifuge. Complete with BRK5506 rotor
EZ506 Fixed angle rotor Centrifuge. Complete with BRK5324 (A), BRK5308 (B)
EZ504 Swing out rotor Centrifuge. Complete with BRK1001 rotor & B5250 Bckts
EZ706 Fixed angle rotor Centrifuge. Complete with BRK5412 (A), BRK5406 (B) rotor
..........................................................................................................................................................
EZ915
...........................................................................................................................................................
Micro's
Small to .5Litre
Medium to 1Litre

Program Fault
1Lid open
2Imbalance
3None revolve
4Inverter
................................................................................................................................................................................
Program See following pages for analysis methods per model
1By pressing Function button you select any
One of four programs, each light up accordingly
2Actual details are shown in this manual per model
3
4
Once your program has been selected, load your tubes,
evenly and same weight, close the lid and press start.
Selected program light will Flash whilst running, when
finished Abuzzer will sound (can beswitched off)
Press retrieve your samples.
Start.
Stop Lid openFunction
Function
Start.
Stop
Lid open
Instructions of use
Once running, your selected program will flash
When the run is finished it will flash faster

How to turn the Buzzer off.
Press Function and Start stop.
Top Fault LID will flash when Buzzer is enabled
Bottom fault LID will flash when disabled
Fault Codes. Orange coloured displays
Fault
Lid open. Close lidfirmly (check that nothing is fouling closure)
If problem persists contact Service
Imbalance An imbalance has occurred, load samples opposite and evenly
Weigh your samples to match, clean your rotor.
If problem persists contact Service
None revolve Rotor will not turn, open lid, check if it turns freely, are your tubes
too tall?
If problem persists contact Service
Inverter A fault has occurred. Turn off your Centrifuge wait 3 minutes
Turn on again.
If problem persists contact Service
Fault codes

Rotor. BRK5401 Haematocrit/ 12 x 2ml
PCV Serum 1 Serum 2 Urine
13,000 6,000 5,000 2,100
300 240 300 600
9 8 8 8
EZ913
Program
Speed (Rpm)
Time (Seconds)
Accelleration
Deceleration9 8 8 8
Rotor. BRK5508S 8x 5ml Swing out
Serum 1Serum 2Urine Sperm
4,000 4,000 2,100 3,300
420 600 600 900
9 8 8 8
9 8 8 8
Rotor.BRK5424 (A), BRK5436 (B), BRK5448 (C), BRK5494 (D)
15 mins 10 mins 5 mins Pellet
15,000 15,000 15,000 15,000
900 600 300 30
9 8 8 9
9 8 8 9
Rotor. BRK5408 (A), BRK5404 (B)
Serum Faeces Urine Sperm
6,000 1,780 2,080 3,250
300 300 600 900
9 8 8 8
9 8 8 8
Programs per Model. Micro's
Rcf (g) 15,870 3380 2348 414
1520 1520 419 1034
EZ915
Program
Speed(Rpm)
Time (Seconds)
Accelleration
Deceleration
Rcf (g) 22,000 22,000 22,000 22,000
Program
Time (seconds)
Accelleration
Deceleration
Speed(Rpm)
Rcf(g) 3421 301 411 1004
1 2 3 4
1 2 3 4
1 2 3 4
EZ904
Program
Speed (Rpm)
Time (Seconds)
Accelleration
Deceleration
Rcf (g)
EZ906

Rotor BRK5506 & 1 set of adaptors
Serum fast Faeces Urine Sperm
4,000 1480 1700 2700
300 300 600 900
9 8 8 8
9 8 8 8
Serum 1Faeces Urine Sperm
6,000 1700 1950 3100
300 300 600 900
9 8 8 8
9 8 8 8
Programs per Model Small
EZ704
ProgramSpeed
(Rpm)Time
(Seconds)
Accelleration
Deceleration
Rcf(g) 2235 314 404 1020
1 2 3 4
1 2 3 4
EZ706
Program
Speed (Rpm)
Time (Seconds)
Accelleration
Deceleration
Rcf(g) 3820 310 400 1020
Rotor BRK5412 (A), BRK5406 (B)

Rotor BRK1001, B5250 buckets & 1 set of adaptors
Serum Faeces Urine Sperm
4,000 1400 16002,500
300 600 300 900
9 8 8 8
9 8 8 8
Rotor BRK5324, (A) BRK5308 (B).rotor
Serum Faeces Urine Sperm
5,000 1,500 1,750 2,750
240 600 300 900
9 8 8 8
9 8 8 8
Programs per Model Medium
EZ504
Program
Speed(Rpm)
Time (Seconds)
Accelleration
Deceleration
Rcf (g) 2611 320 4201020
Program
Time (seconds)
Accelleration
Deceleration
Speed(Rpm)
Rcf(g) 3350 301 411 1010
1 2 3 4
1 2 3 4
EZ506

Prime and Dual models only. Ambient
Fault codes
Fault codes are shown in the Speed section of the LED display (shown on previous page
The following List show what each Code means and what to do.
F A 5 0 Inverter Drive
F A 2 1 Inverter error
Look at the Obround viewing port (Rear)
Note the Code shown in the inverter display. *
Turn off the power at the wall mains switch only.
WAIT 3 minutes, Turn on again and Run. If problem persists
Contact our Service Department.
As above.
*
Speed will not go beyond 2000 Rpm.
. The Electronics have set the Speed to safe mode
. Check the rotor bottom has magnets fitted
. Check correct rotor is in use against program chosen
. If not then Contact our Service Department
Noisy
. Unbalanced tubes, see Rotor pages
. Lid seal needs replacing
. Rotor Lid not fitted
Lid support fail
. Spring has failed. Contact our Service Department
Obround viewing port shown. *
Non Fault Codes

Emergency Lid release
Mechanical Emergency Door release
During a power failure, you will not be able to open the Centrifuge lid via the Display button
Mechanical override is provided to allow sample recovery
However this is for Emergency use only
This should Not be used for normal use.
Warning
Therotorcanstillbespinningatahighspeed,iftoucheditcancauseseriousinjuries.
Alwayswaittilltherotorhasstopped.
Proceedasfollows
•Make sure the Rotor has stopped (view via the port in the Lid)
•Once stopped turn off the power via the inlet Switch
•Pull the Centrifuge slightly over the bench (as shown in (a)
•You will notice one (b) or some models two plastic plug (c). Plug *
•Pop open with a screwdriver (tool) and pull downwards .
•The lid will pop open You can now retrieve your samples
AfterreplacethePlasticplugsbackintotheiroriginalposition.
Reconnectthecentrifugepowerlineoncethemainspowerhasbeenrestored.
Checkallisworkingcorrectlybyclosingthelid,wait5secondsthenpresslidopen.
If not working refit or Contact your Distributor
a
b
cc
16

Care & maintenance. Centrifuge
Always keep your Centrifuge clean and free from moisture at all
times, this will help prevent corrosion.
It is recommended that your centrifuge is switched off and the lid left
open overnight to ensure that any moisture build up can evaporate.
Always ensure that lids and accessories are correctly tightened
before running the unit.
Keep a 30Cm distance around your Centrifuge.
Do not site the unit in sunlight
Do not use any kind of scourers or abrasive material to clean the
Centrifuge and ensure that a pH neutral cleaner is always used.
Use only official Centurion Scientific Ltd accessories with your centrifuge.
It is recommended that regular maintenance and cleaning of the unit and
accessories is carried out.
!!
!
!
!
!
!
!
!Yearly servicing is required to validate your warranty and increase the life
of your Centrifuge and accessories. See PrO-Care pages
10

Care & maintenance. Rotor
Always check rotors for cracks and damage, if found replace
your rotor. DO NOT USE as dangerous
Autoclave for the maximum number of times shown in the
sales literature. In brackets( 20)
Rotors have a Seven year lifespan and must be replaced .
DO NOT USE beyond their Lifespan
Ensure that all buckets are present in the rotor when running your
centrifuge, as using the unit with an unbalanced rotor can cause distortion
and excessive wear. Read tube placements section in the previous section
Do not use any kind of scourers or abrasive material to clean the buckets
and ensure that a pH neutral cleaner is always used.
Aluminium buckets should be kept clean and moisture free to keep them in a
good, safe operating condition.
It is recommended that regular maintenance and cleaning of the rotor and
accessories is carried out.
!!
!
!
!
!
!
!
!Yearly servicing is required to validate your warranty and increase the life
of your rotor and accessories
11

Research & service
The Old equine Barn
Church Farm
Stoughton Chichester
PO18 9JL. UK
Ambient
manufacturing
The Old Grain Barn
Church Farm
Stoughton Chichester
PO18 9JL. UK
Refrigeration
Manufacturing
The Old Drier Barn
Church Farm
Stoughton
Chichester
PO18 9JL. UK
Sales
The Old Stables Church
Farm Stoughton
Chichester
www.Centurionscientificglobal.com Switchboard. 0044 (0) 2392 631225
The lifespan of a centrifuge depends
upon how well it is looked after and
maintained.
Many of our centrifuges have lived a life
of over 15 years.
This is not only due to our stringent manufacturing process
and high quality components but also to a yearly servicing
package. Making them a cost effective solution of centrifugation.
Whilst our centrifuges come with a confidence giving
warranty, yearly services are imperative to ensure your warranty
is valid, this also ensures your machine is working to
its best ability and lengthens its life span. Also as centrifuges
are a dangerous machine, safety checks are required too.
For UK customers we offer a back to base service package
including carriage to us and return all within 48 hours. Centrifuge
seals , fuses & other parts are replaced,
adjustments made, rotor checked for stress cracks, seals changed
if necessary (extra charge) PAT (portable appliance test) is
included Obligatory in UK.
For worldwide customers we offer a full parts package per model.
The designated country distributor services the units accordingly.
Call our Office to discuss or visit our Service website
WWW.ServicePrO-Care.com
PrO-Care
Service, Warranty & Maintenance pakages
Table of contents
Other Centurion Scientific Laboratory Equipment manuals
Popular Laboratory Equipment manuals by other brands

Belden
Belden HIRSCHMANN RPI-P1-4PoE installation manual

Koehler
Koehler K1223 Series Operation and instruction manual

Globe Scientific
Globe Scientific GCM-12 quick start guide

Getinge
Getinge 86 SERIES Technical manual

CORNING
CORNING Everon 6000 user manual

Biocomp
Biocomp GRADIENT MASTER 108 operating manual