CERNO Valeo User manual
Valeo
Assembly instructions
General Product information
This product is suitable for indoor dry locations only.
This product can be dimmed with most standard dimmers.
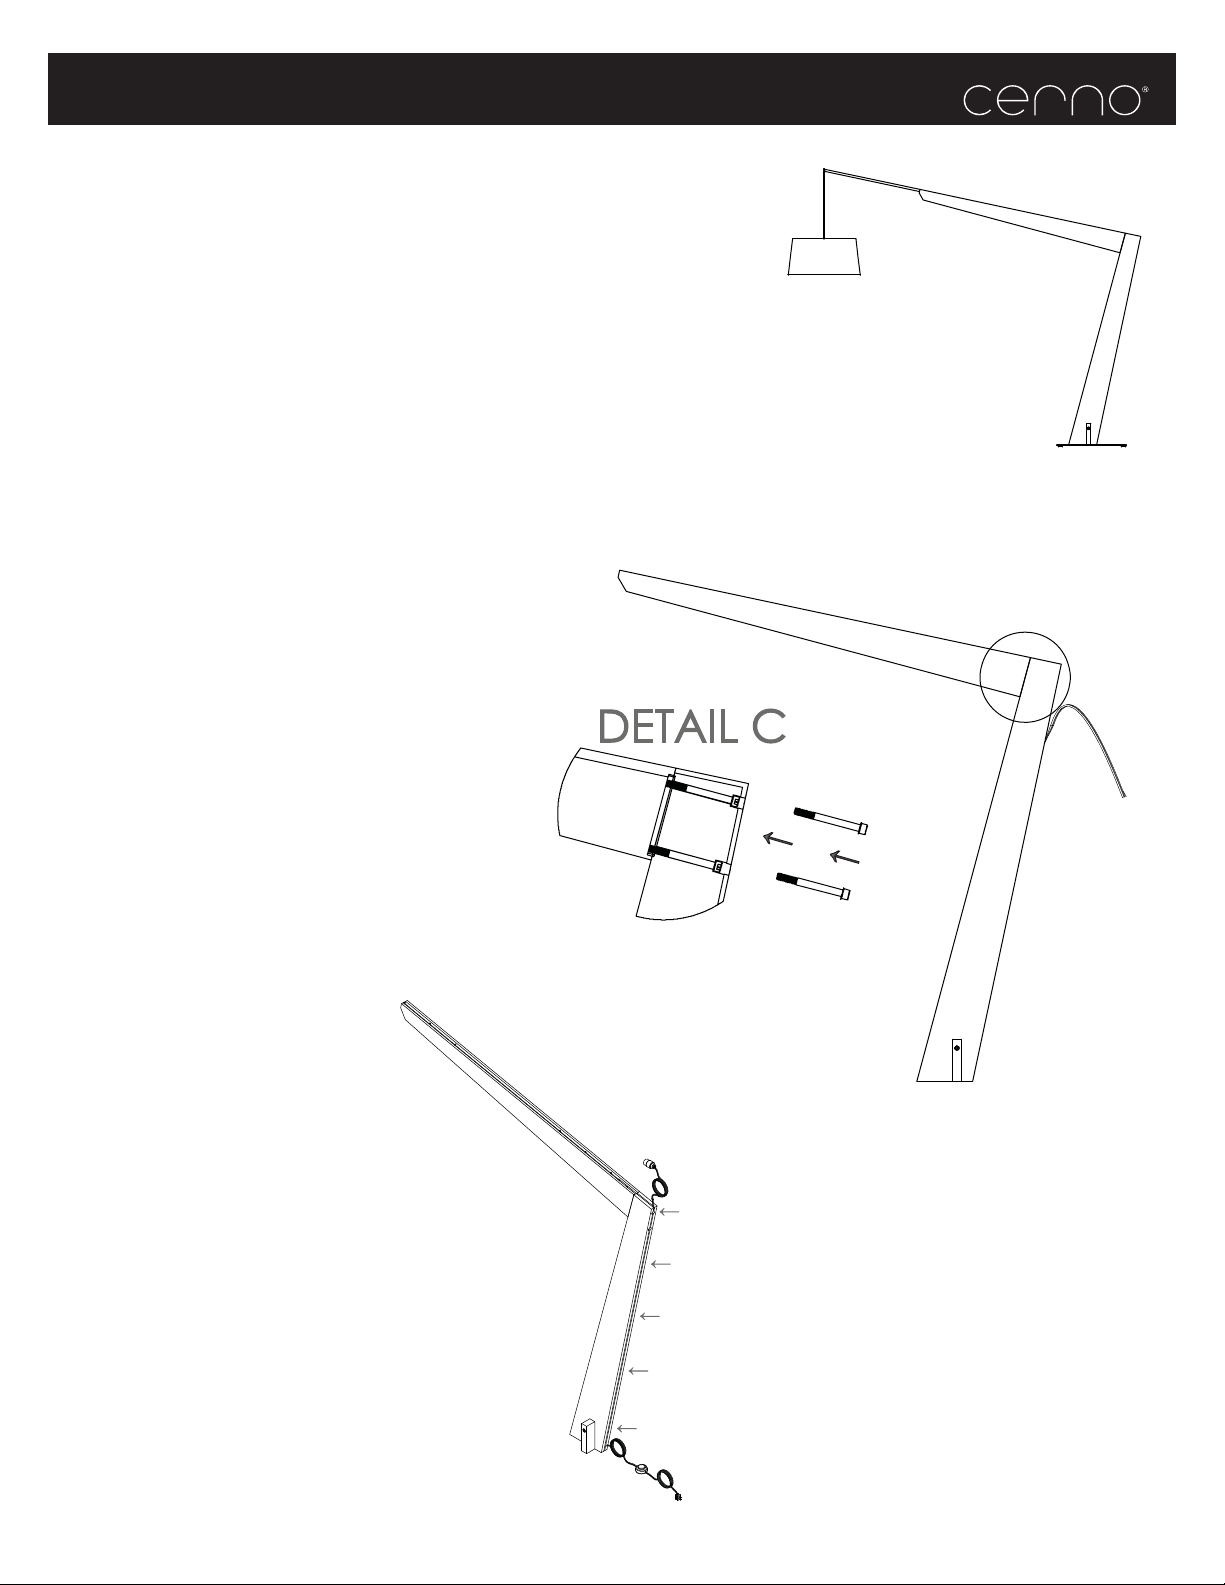
Assembling the body
1. Place the two wood components of the body on an ele-
vated at surface such as a table. Remove the cord from the
rear of the verticle body then align the two wood compo-
nents of the body as pictured on the right, making sure to
align the holes for the fasteners.
2. With the components aligned, insert the two 5” long
1/2-13 socket head cap screws into the holes and slowly
tighten both screws using a 3/8”hex key. Assure that the
joint closes evenly.
3. Once the joint has closed evenly, tighten the screws.
4. With the body components now securely fastened,
press the wire and cord stock into the groove covering the
joint.
CERNOGROUP.COM T_949.715.1534
1751 MCGAW AVE, IRVINE, CA 92614
COPYRIGHT 2015 CERNO LLC.
C

Valeo
Assembly instructions
Attaching the Base
This next step should be performed by two people due to the weight of the
base. One person should hold it in position while the other inserts the fasten-
ers.
5. Once the base is in position, insert the two 1/2-13 at
head socket screws and tighten using a 5/16”hex key.
6. Following the installation of the fasteners in step 6,
insert the two wood screws and tighten them.
CERNOGROUP.COM T_949.715.1534
1751 MCGAW AVE, IRVINE, CA 92614
COPYRIGHT 2015 CERNO LLC.

Valeo
Assembly instructions
Attaching the Boom
7. Stand the assemled body up and place the aluminum
boom into the slot located on the top rear of the body
(located by the arrows to the right).
8. With the boom now located in the slot, adjust the
boom extension length as desired by sliding the boom
inside the groove.
9. With the boom now set to the desired length, attach it
using the two #8 wood screws.
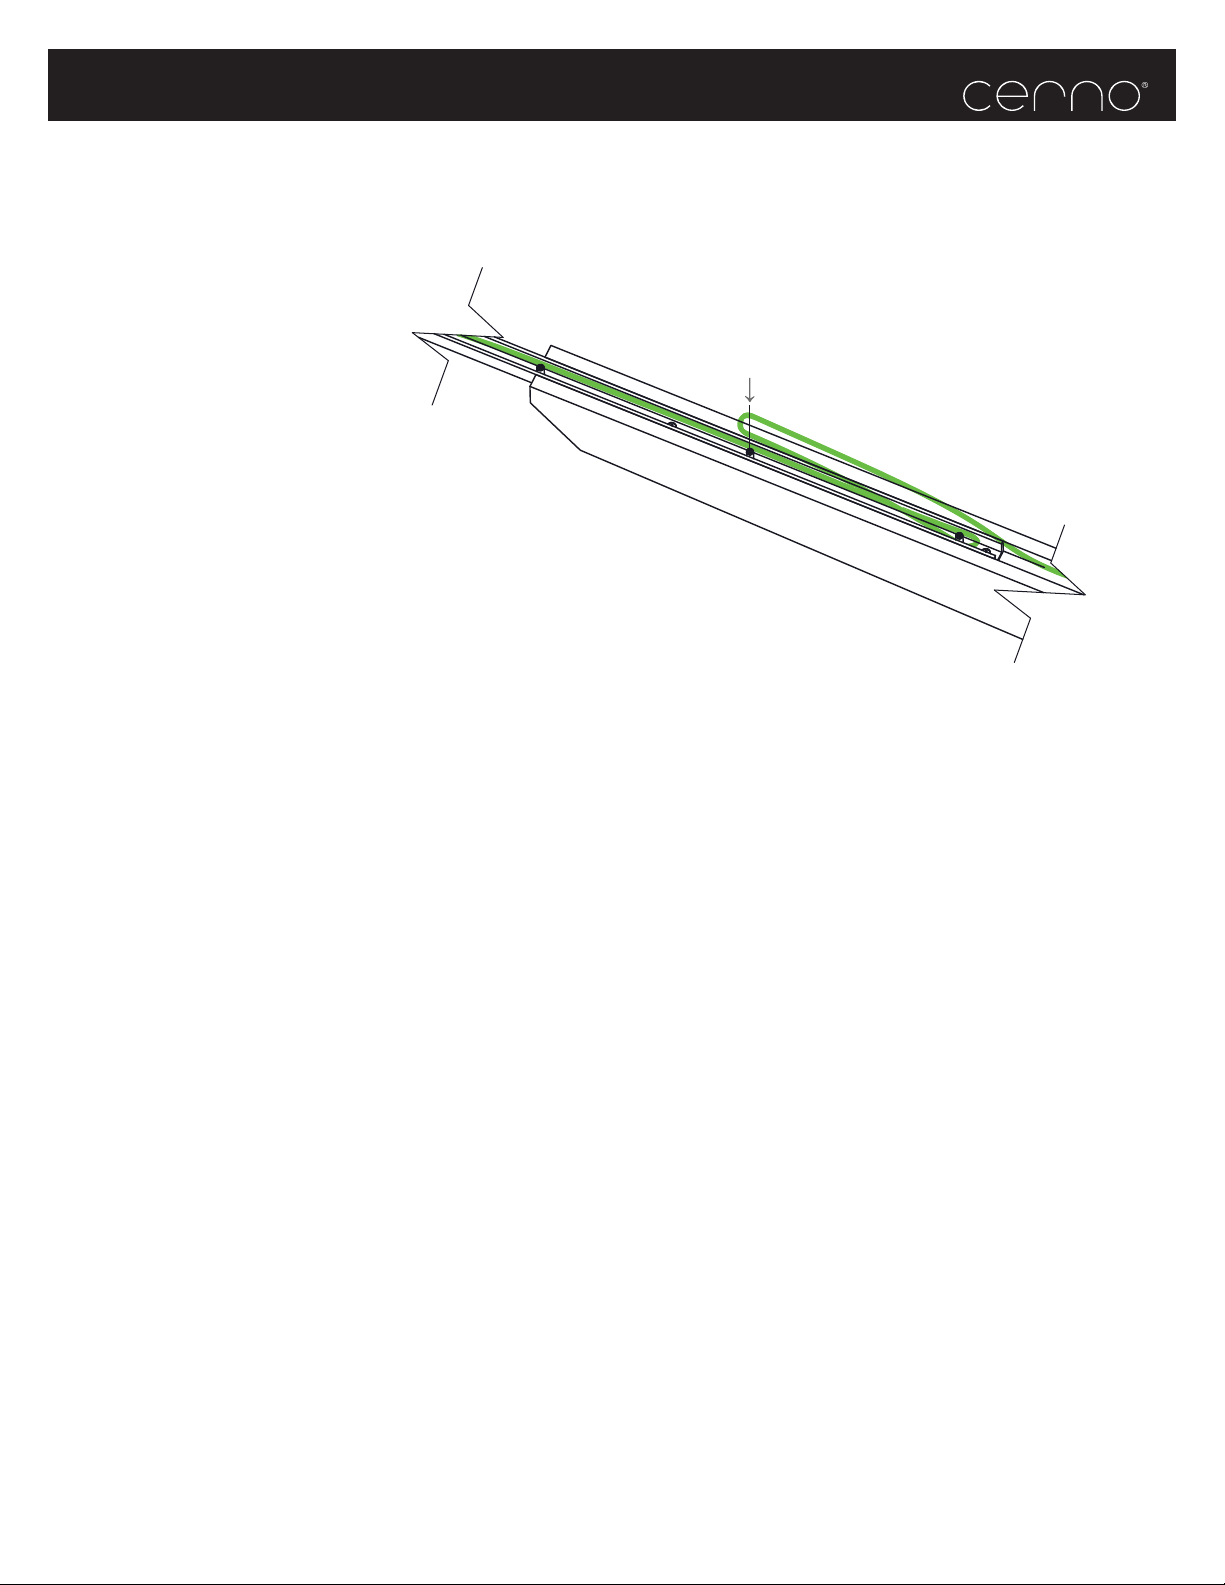
10. With the boom now fully assembled drape the cord
over the roller at the end of boom arm
CERNOGROUP.COM T_949.715.1534
1751 MCGAW AVE, IRVINE, CA 92614
COPYRIGHT 2015 CERNO LLC.
Valeo
Assembly instructions
11. Adjust the height that the shade hangs by winding
the cord around the studs in the groove in the top of the
body.
12. By wrapping the cord around dierent studs, the
height of the shade at can be adjusted in 8 inch incre-
ments.
CERNOGROUP.COM T_949.715.1534
1751 MCGAW AVE, IRVINE, CA 92614
COPYRIGHT 2015 CERNO LLC.

CERNOGROUP.COM T_949.715.1534
1751 MCGAW AVE, IRVINE, CA 92614
COPYRIGHT 2015 CERNO LLC.
Optional Lower Diuser Installation.
To install the lower diuser, carefully bend lower diuser along its edges, then place into shade assembly, unbend diuser and sit on top of the
shade assembly lower ring.
Following shade and top diuser installation, install the bulb into the socket
Optional Top DIuser Installation: Prior to installation of bulb and lower diuser.
Note! Top Diuser is included by custom request only.
Feed the socket through the hole in top diuser, align socket with shade spider and place socket into slot
located at the center of the shade spider. With the shade spider in position tighten the nut on the top end of
the socket to hold the shade in place. Lower the top diuser down onto the shade spider.
Valeo
Assembly instructions
NOTE: For uninstallation of lower diuser gently lift up one edge of the lower diuser and
carefully bend the diuser until it can be removed from the bottom of the shade
assembly.

Cerno’s mission since the company's inception has been to fuse quality, performance and resource eciency with contemporary design.
Producing environmentally responsible products involves far more details than merely guaranteeing your products energy ecient performance and maintaining
eco conscious manufacturing practices. We live in a consumer age characterized by excess and waste, where nearly everything we posses is viewed as disposable,
from the cars we drive to the bottle of water you are drinking right now.
At Cerno we aim to provide our customers an opportunity to purchase objects of value to enhance their built environment. We construct our products with integri-
ty that will pass the test of time with the goal of evading a premature trip to the local landll. All the products are assembled by human hands and endure rigorous
testing to assure that our exceptionally high standards of quality are always satised.
Warranty
In addition to our two year product defect warranty, Cerno oers a repair service for the life of your product. Every Cerno product is designed and manufactured
in the United States which facilitates excellent quality control and easy access to our engineers and service technicians. At Cerno we pride ourselves on delivering
products executed with an unparalleled level of craftsmanship. For any reason should our customers have an issue with their orders upon delivery we will repair or
replace the item.
In addition to our warranty and quality guarantees, Cerno welcomes customer feedback so please e-mail all comments to info@cernogroup.com
Care, maintenance instructions
Regularly maintaining your Cerno® product is easy and will help keep it looking beautiful. Scratches can be bued out in minutes. Wood surfaces
will be revitalized with minimal eort every few years.
Your xture may include materials listed below. Please use these tips to keep your product looking its best.
Oiled Walnut: Wood surfaces should be dusted and cleaned with a damp cloth. Every 1 - 3 years, re-oil and wax wood surfaces to maintain the
rich wood sheen. Remember to wipe with the wood grain, and remove any excess oil or wax when nished.
Dark Stained Walnut: Wood surfaces should be dusted and cleaned with a damp cloth. Wax every 1 - 3 years, taking care to wipe with the grain.
Remove any excess wax when nished.
Brushed Aluminum: Everyday cleaning of metal surfaces can be done with a damp cloth. Repair: To remove scratches from brushed aluminum,
use Scotch-Brite (Gray or Maroon) to bu the scratched area. In a pinch, you can use the rough side of your kitchen sponge.
Black Anodized Aluminum: Everyday cleaning of metal surfaces can be done with a damp cloth.
Polymer: To clean polymer surfaces, use a damp cloth with soap and water or typical cleaners. Avoid heavy-duty cleaners (i.e. anything sol-
vent-based), as they can damage the material. Repair: Scratches can be bued out of polymer surfaces using 200 - 300 grit sandpaper.
Shade Material: Ebony and Birch veneer - When cleaning veneer, take care not to peel the edge as it can de-laminate the veneer.
Wax every 1 - 3 years. Remove any excess wax when nished.
IMPORTANT SAFETY INSTRUCTIONS
This portable luminaire has a polarized plug (one blade is wider than the other) as a feature to reduce the risk of electric shock.
This plug will t in a polarized outlet only one way. If the plug does not t fully in the outlet, reverse the plug. If it still does not t,
contact a qualied electrician. Never use with an extension cord unless plug can be fully inserted. Do not alter the plug.
CERNOGROUP.COM T_949.715.1534
1751 MCGAW AVE, IRVINE, CA 92614
COPYRIGHT 2015 CERNO LLC.
Table of contents
Other CERNO Outdoor Light manuals


Popular Outdoor Light manuals by other brands


NewGarden
NewGarden PEPITA SOBREMURO quick start guide

TECHLIGHTING
TECHLIGHTING Vex Outdoor Wall installation instructions

LIVARNO LUX
LIVARNO LUX 110450 Operation and safety notes

Forms + Surfaces
Forms + Surfaces LIGHTHOUSE Series installation instructions

North Light
North Light 5751-SOLAR quick start guide

superbrightleds
superbrightleds PLLD-T Series user manual