Chase Bliss Audio Generation Loss MKII User manual


Table of Contents
2
4
6
16
18
20
24
28
32
34
36
38
40
42
44
46
Overview
Getting Started
Controls
Wow
Flutter
Models
Saturate
Failure
Aux
Classic Mode
Customize
Ramping
Ideas
External Control
Signal Flow
Bye
6
10
12
14
Knobs
Toggles
Footswitches
Hidden Options
Power req: 9VDC Center Negative ~250 mA

Overview
You can think of Gen Loss as a VCR deconstructed.
It takes each of the oddities and artifacts tape
machines impart on your sound and gives them
an independent control.
So you can choose.
Maybe wow isn’t for you – that’s fine, turn it off.
Have one part of your tape machine horribly
broken, while the rest is pristine and perfect.
Within Gen Loss are all the parts you need to
faithfully recreate a whole library of tape
machines, or you can ditch that idea and build
something new. A magnetically saturated
chorus, or a randomized stereo splitter, or a
versatile EQ.
Or all of the above, saved to different presets.
03
02
Within Generation Loss MKII are two different
approaches to the same challenge:
To recreate the nostalgic sounds of tape,
specifically VHS.
One built through
imagination and intuition (Classic).
One built through
study and analysis (MKII).
This manual will focus on the new MKII features.
Also, we’re going to call it Gen Loss from now on
because it’s easier.
We are here to show you how.
VOLUME
SATURATE
MODEL
FAILURE
WOW
DRY NOISEAUX
FLUTTER
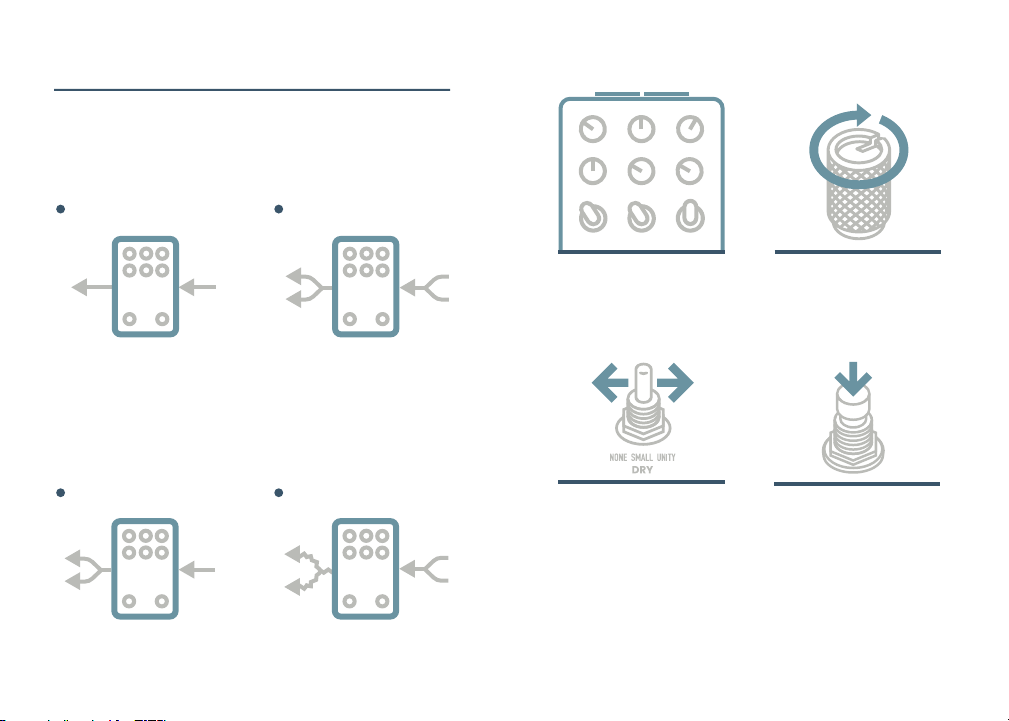
Getting Started
The first thing to do is acclimate Gen Loss
to your setup. This will only take a moment.
The default setting will work for most:
Mono in, mono out. Stereo in, stereo out.
Whatever goes in comes out. Simple.
05
04
Almost every setting will conjure up a tape
machine of some kind. Let’s go a little further and
look at it piece by piece.
After controls, of course.
Try maxing out each
knob, one by one,
while leaving the
others as pictured.
Explore how mixing in
some dry signal can
expand your sound.
Now try this.
Nice and wistful.
Try out the different
AUX functions.
If you have a mono
input, but want to split
it to stereo output:
Turn on MISO.
And if you want unique
stereo processing:
Turn on SPREAD.
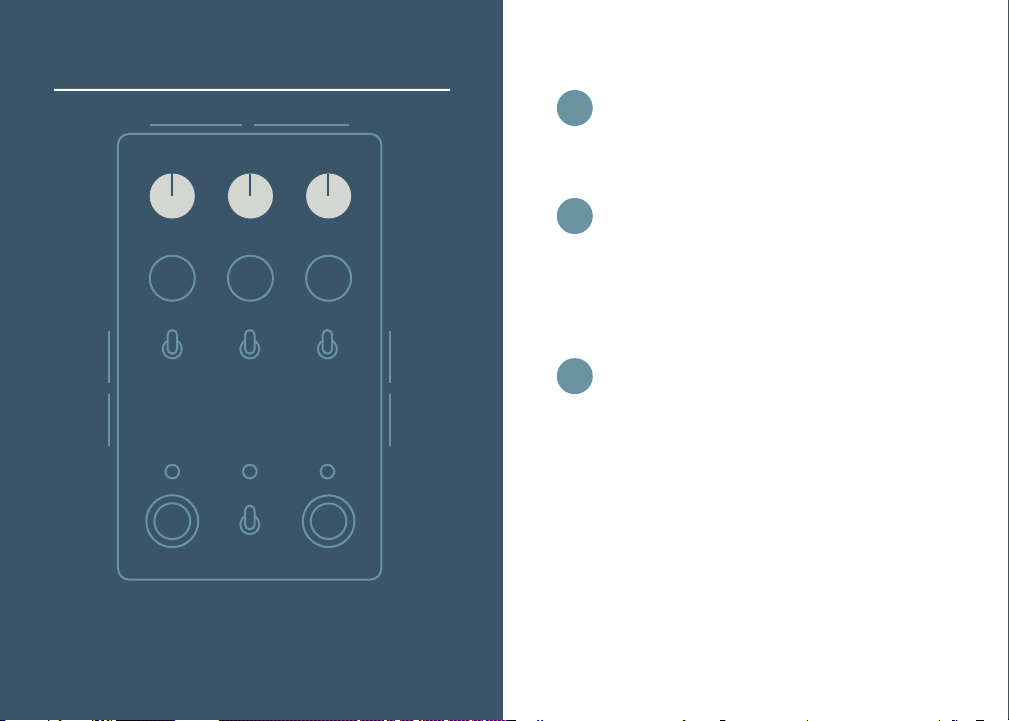
Sets the depth of slow, smooth, random
pitch modulation. Your classic tape-style
motion, like unpredictable vibrato.
WOW
A
WOW MODELVOLUME
A B C
Wobble, boost, filter.
BVOLUME
Sets the output level of the wet signal.
Noon is unity, max is boosted by 2x. If
ramping is engaged (pg. 38), the function
of this knob will change. The volume
setting will be remembered, but it now
controls the speed of the movement.
CMODEL
Steps through a library of tape machine
models, each with its own unique EQ
profile. VCRs, cassette decks, camcorders
and more, each one designed through
frequency-analysis of physical hardware.
LP (CLASSIC MODE) Sets the cutoff frequency
of a resonant low-pass filter. Roll counter-
clockwise to remove high frequencies.
Controls - Knobs
07
06
Other Chase Bliss Audio Music Pedal manuals

Chase Bliss Audio
Chase Bliss Audio MOOD MKII User manual

Chase Bliss Audio
Chase Bliss Audio Blooper User manual

Chase Bliss Audio
Chase Bliss Audio Mood User manual

Chase Bliss Audio
Chase Bliss Audio Brothers User manual

Chase Bliss Audio
Chase Bliss Audio Cooper FX Generation Loss User manual

Chase Bliss Audio
Chase Bliss Audio Blooper User manual

Chase Bliss Audio
Chase Bliss Audio Lossy User manual

Chase Bliss Audio
Chase Bliss Audio MOOD MKII User manual

Chase Bliss Audio
Chase Bliss Audio Thermae User manual

Chase Bliss Audio
Chase Bliss Audio Reverse Mode C User manual


