IWM-202
Desktop battery charger HC-10
1
2
3
4
5
6
7
8
9
1.Power on / off switch.
2.Threaded 3.5mm mini-jack for secure
connection of lavalier or headset
microphone.
3.Charging input Via cable to charger HC-10.
4.Bi-color Power ON / Low battery LED
changes color to indicate low batteries.
5. Input audio level control serves as remote
volume control.
6. Multiple emitter array of high efficiency
Infrared LEDs for optimum IR
transmission.
7. Belt clip.
8. HI / LO power switch.
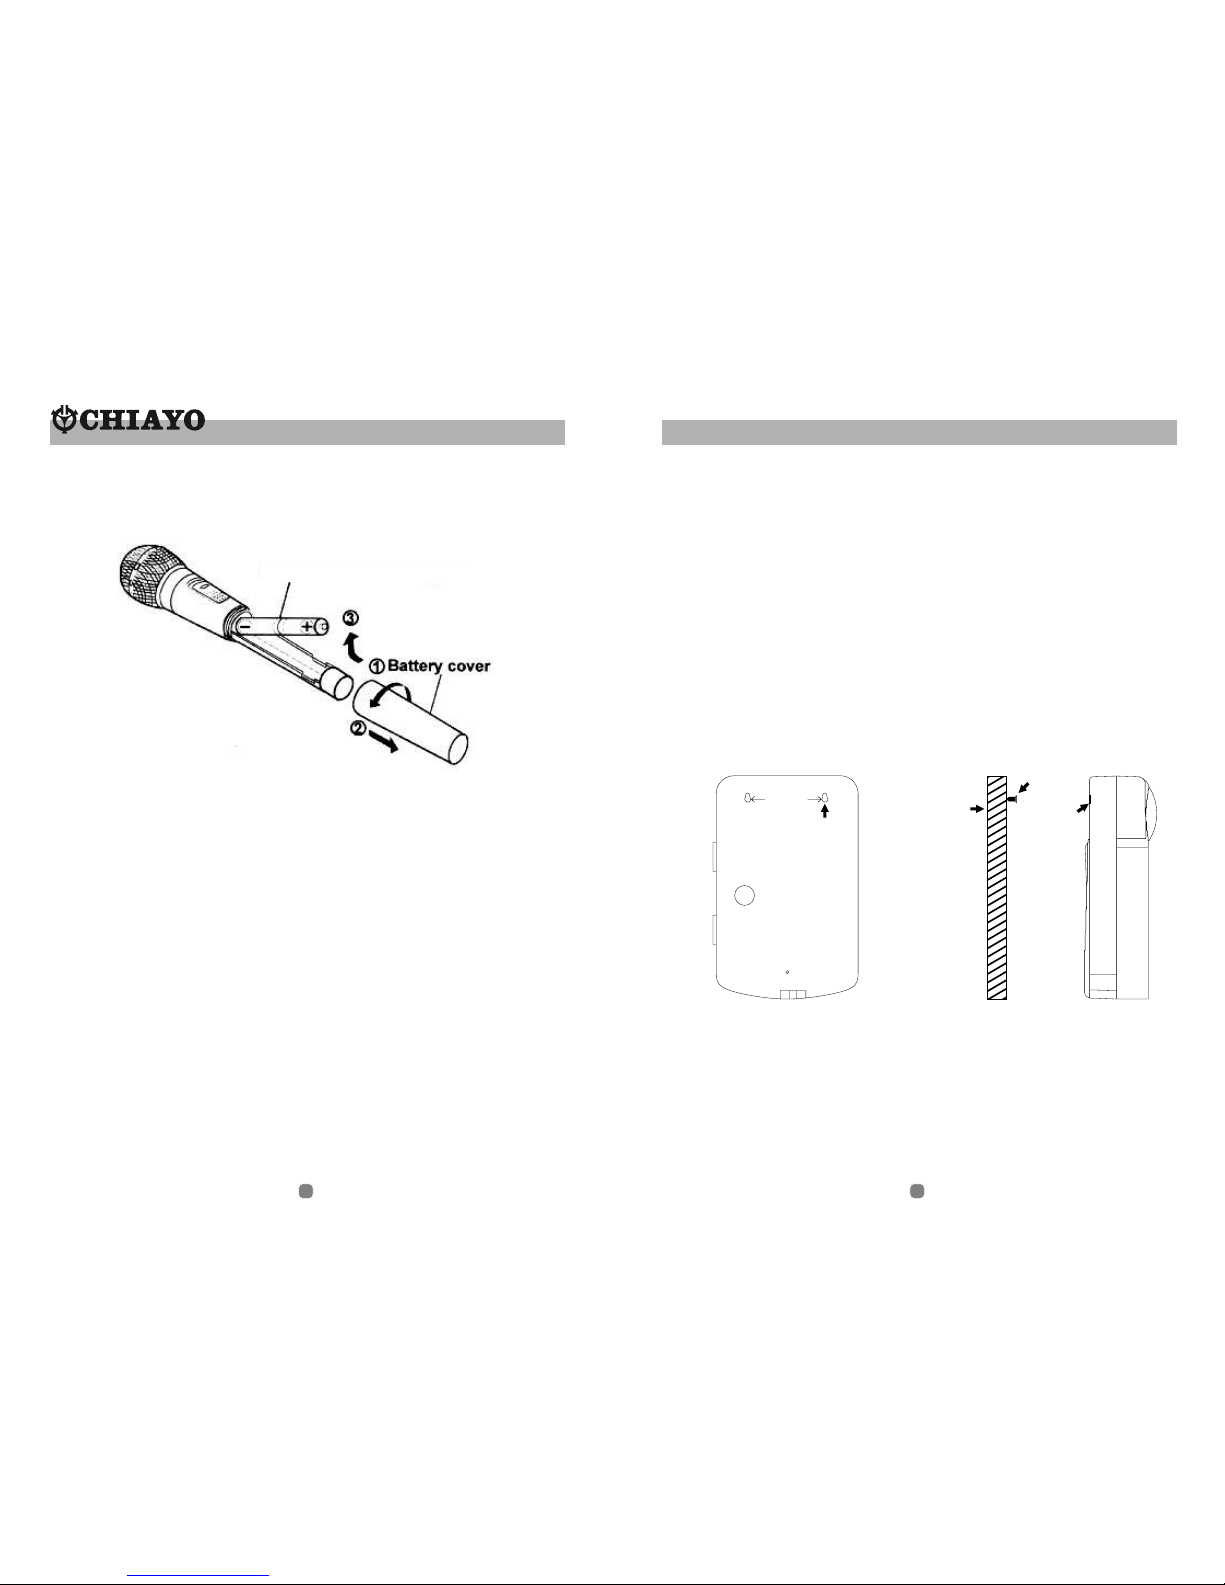
9. Battery compartment cover.
The battery compartment is at the rear side of
the transmitter. To open / close the
compartment, just slide it down / up as shown.
When inserting new battery, please align it
according to the correct polarity as marked.
Battery used are 2 pieces of NiMH 1.2V /
2100 mAH type.
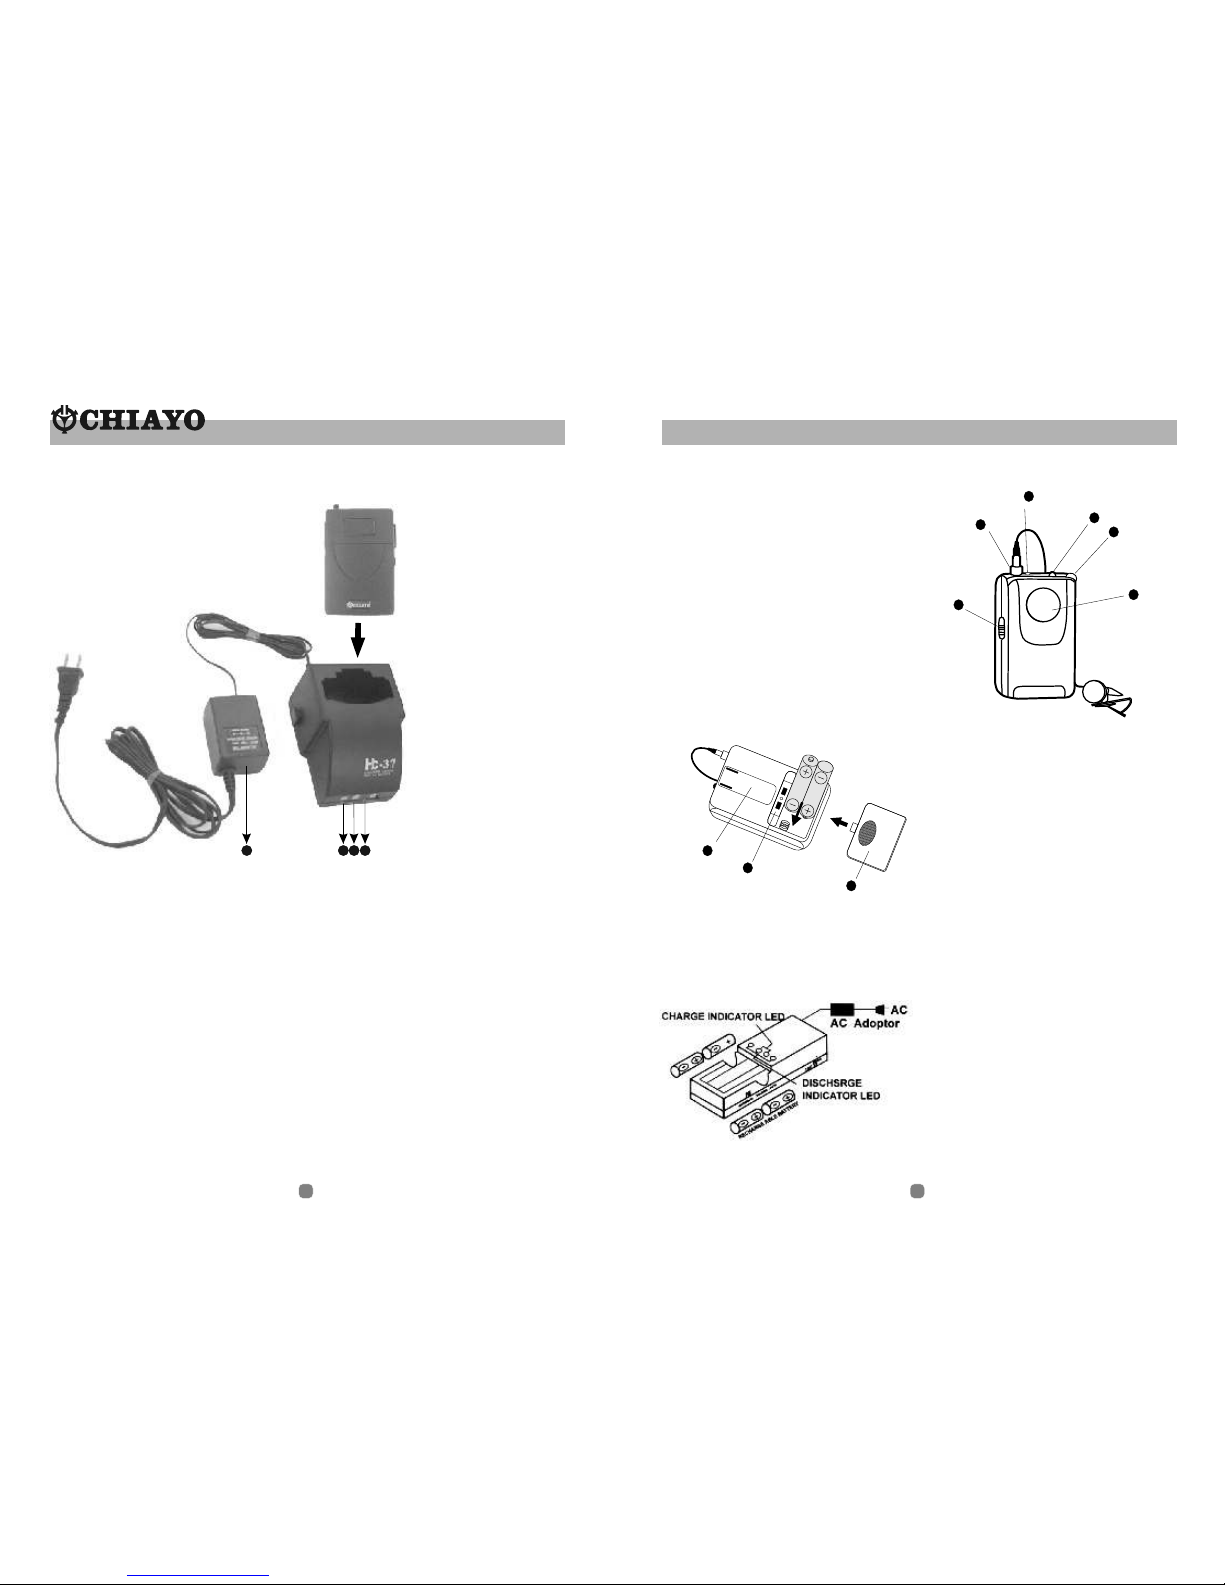
Operation:
1.Connect the AC plug of the adaptor to the wall
socket and DC plug to the DC IN of the
charger.
2.Insert the battery to be charged according to
its correct polarity.
3.When charging start, LED will turn RED.
4.Press charge / discharge button to discharge
battery. LED will turn YELLOW while
discharging and press again will return it to
charging (Red).
5.When battery is fully charged , indicator will
turn GREEN and buzzer will sound .
6.Plug out of HC-10 to charge in ( 3 ) of
bodypack IWM-202 via a charging cable.
Charging the batteries of IWM-302:
When IWM-302 is turned on, the LED glows Green to indicate enough power. If
red or not lighting up, the batteries are weak or wrongly installed. Please check to
see if the batteries are installed according correct polarity.
IWM-302 can be recharged by HC37.To charge IWM-302, first turn it off , connect
the Adapter to a wall outlet and then plug the joint to DC-in socket of HC37. Thus
use can place IWM302 to HC37. During the charging process, the Red LED will
keep flashing until the Green LED lights up to indicate batteries are already full.
Note: If you want to discharge the residual electricity of the batteries, you can
press "COND" button and its designated Yellow LED will light up. Till the batteries
have been completely discharged, the Yellow LED will be off and Red LED will
light up to begin charging the batteries.
Be sure to use specified battery only. You can not charge other types of battery.
Do not use any battery and charger other than specified.
E DG F
D. COND
E. Charging indicator
F. Bat.full indicator
G. A daptor
8
5